In this topic we will cover the following:
- The iterative process
- Low-fidelity prototypes (paper and clickable wireframes)
- High-fidelity prototypes (digital and native)
- User testing.
The topic ends with an opportunity to create your own prototypes and share them in the forum.
Definitions
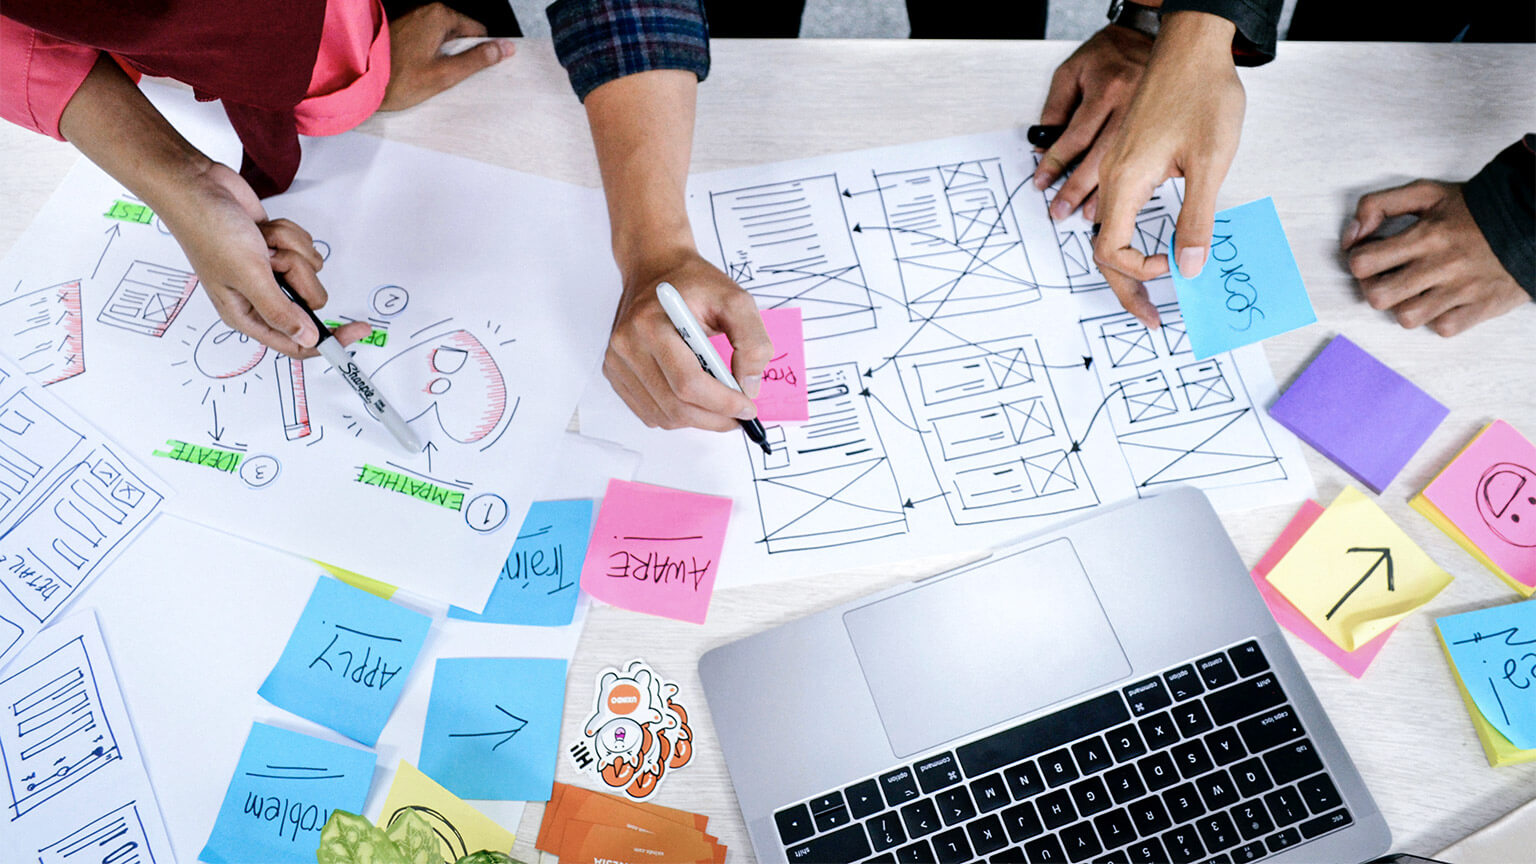
Creating flow diagrams and wireframes are the first steps of an iterative prototyping process. By the end of the process, you will have developed several iterations of prototypes and have a product ready to launch. Before we dive into the iterative process, let us breakdown a few terms we will be using throughout this topic.
A prototype is ‘a simulation of the final product. [it is...] an interactive mockup that can have any degree of fidelity. The main purpose of building prototypes is to test whether or not the flow of the product is smooth and consistent’ (Banerjee 2014). Prototyping is the iterative process of producing prototypes.
The prototyping process starts with user or task flows, sketching, and creating wireframes to generate ideas and test layout and navigation. As the design process progresses, you build prototypes that are more detailed with every iteration and have a greater level of fidelity. Each prototype moves you closer to the final product.
Fidelity is the level of design and functionality of a prototype. Prototypes can be low-fidelity (lo-fi) such as hand-drawn sketches and paper prototypes or high-fidelity (hi-fi) rendered and polished layouts and mockups on software.

Iteration
‘Where failure is inevitable, prototyping allows us to fail faster. When combined with an effective feedback and collaboration workflow, it provides the additional eyes that help identify flaws and turn them into improvement opportunities... Prototyping is a preventative workflow that reminds us that ideas are disposable. It saves us a ton of time in long run, and helps us fix issues before they become too expensive. We shouldn’t think of prototyping as a waste of time, but rather a method of identifying and discarding the ideas that simply aren’t going to work’ (InVision n.d.)

Prototyping is an iterative process. Iteration is when a process is repeated, inching closer and closer to the end-goal. The end point of each step is the start of the next step.
Prototyping in an iterative manner is beneficial because:
- It is far more affordable to redesign prototypes compared to the cost (and time) associated with redevelopment of a launched UI.
- Prototypes are effective tools to communicate ideas between designers, developers, users, and other stakeholders in the first stages of the user-centered design process.
- Prototypes can be used to complete user testing. Designers can observe the human interaction with user interfaces even before these interfaces are designed and developed. This ensures you launch a successful product, rather than a bug-riddled one that deters potential users.
In theory, you could start prototyping at any level of fidelity and iterate from that point. However, due to the costs – both monetary and time – associated with prototyping, it is recommended to start with lo-fi prototypes and progress through to medium fidelity clickable wireframes, and finally to hi-fi digital prototypes. At each stage, there should be testing and redesign to ensure concepts are valuable and improved.
Prototyping in an iterative manner allows you to test design ideas before creating more detailed prototypes and finally launching a product. It is essential that thorough testing happens throughout the prototyping process and at each iteration. Discard ideas that are not working and improve the design as you observe and learn more about how the user interacts with the design. User testing is the best way to find out if the users’ needs will be met. There is a significant difference between having a good idea and having a product that users actually want to use.
Static images including sketches, wireframes, and flow diagrams are great for idea generation and initial testing. They are an important part of the prototyping process. However, they lack interactivity so can only take us so far in the process. Once you have completed user or task flows and wireframing, you can begin building low-fidelity (lo-fi) prototypes to really get a sense of how an interface and the user experience works.
Lo-fi prototypes usually resemble wireframes but with an added interactive component. The focus still tends to be on general layout and navigation without much consideration given to graphical design elements.
Lo-fi prototypes share the following characteristics:
- Minimal visual design.
- Content is not included in entirety, only the bare minimum to convey meaning.
- Interactivity can be simulated by a real person “playing” the computer or by connected wireframes using tools such as Adobe XD.
The most common examples of lo-fi prototypes are paper prototypes and clickable wireframes.
Paper prototypes
Paper prototypes are created using paper, pens/markers, scissors, tape, glue, post-it notes, and the like. A person plays the role of the computer, switching the sketches depending on what the test user selects. State changes of buttons, icons, keyboards, pop-up boxes, and input fields can all be represented with paper cutouts that the human “computer” places on the paper interface. Watch the following two videos to see paper prototypes in action.

In this first video, the paper prototype has a paper device with a cutout screen. The pages that a user goes through to complete the task are drawn on one long piece of paper that is pulled through the screen from right to left. Additional pieces of paper are used to show overlays such as the keyboard.
In this second video, the group have used colour and small pieces of paper to represent different elements of the interface. A person plays the computer and adds different elements depending on what the tester does. The human computer is able to mimick interactivity and functionality.
Benefits
Benefits of paper prototypes include:
| Speed | Quick to produce and change. This allows for rapid iteration, experimentation, and problem solving. It is quick and easy to cut out (or erase and redraw) elements and move them around. |
| Cost | Paper prototypes are cheap to produce. |
| Creativity | Ideas are not constrained by a platform’s limitations or rules. Due to low investment of time and money in producing the prototype, there is less attachment and bad ideas are more readily dismissed. Ideas are more important than the tools used to create them. |
| Collaboration | The physical nature of paper prototyping lends itself to a collaborative environment. Anyone can contribute ideas as a lesser skill set is required than when creating a hi-fi prototype. |
| Feedback | Feedback focuses on ideas and functionality instead of product aesthetics. |
| Documentation | Paper prototypes can be used as reference material with notes and revisions written on the prototype or attached. |
Disadvantages
Paper prototypes can be unrealistic and require test users and stakeholders to imagine how the paper prototype represents a final digital product. It can be hard, or impossible, to convey complex animations and transitions. These two factors mean that testing can be inaccurate.
Depending on the complexity of the paper prototype, it may take a longer time to create than a simple clickable wireframe in dedicated prototyping tools. It is also necessary to have more people involved in testing: someone to play the computer, a facilitator, an observer, and the test user.
With all the above in mind, it is recommended to only use paper prototyping in the early stages of design.
The people factor
As a tool for testing with actual users and getting user feedback, lo-fi paper prototypes give us lots of actionable feedback.
We get to observe the way users work through our product. When we test using paper prototypes, we create realistic and clear scenarios or tasks for users to perform. We set a brief outline of what they need to do but they need to do their own problem solving in order to indicate to us whether it is usable or not. If they keep making mistakes that tells us that our interface is not learnable or intuitive.
When preparing to present or test paper prototypes, rehearse thoroughly so you know what every click and swipe does. While a human is playing the computer, you still want to try to give a smooth user experience.
Since these prototypes are lo-fi outputs, our testers are more likely to give us critical feedback on our product as they are not concerned that designers are hugely invested in the design.
Clickable wireframes
Clickable wireframes have higher fidelity than paper prototyping but still less than digital. Often, they are classified as medium fidelity and bridge the two.
Static wireframes are linked together by creating triggers. When a user interacts with a trigger, the next wireframe appears mimicking the expected flow. They generally have limited interactivity depending on which program is used to create it.

Clickable wireframes do not often look like finished products. They lack content and graphic design elements. However, they remove the requirement to have people play the computer and facilitate which means the test user can interact more freely with the prototype. There is also the benefit that you likely already have digital wireframes created by this stage, which you can use to make the process more efficient.
The following video demonstrates a clickable wireframe prototype.
Once you have completed testing using low or medium fidelity prototypes, and are confident in your design, you can begin building high-fidelity (hi-fi) prototypes. Hi-fi prototypes are more costly and take longer to create than lo-fi prototypes but offer a better representation of the final product.
Hi-fi prototypes bear a close resemblance to the final product with functionality, graphic design, and content included. Hi-fi prototypes are often used in testing with real users or to get final stakeholder approval. High functionality and visual design of hi-fi prototypes give stakeholders an accurate representation of the final product and get them excited about the product.
Hi-fi prototypes include digital prototypes created using prototyping tools such as Adobe XD and InVision, as well as native prototypes.
Hi-fi prototypes share the following characteristics:
- Detailed visual design which looks like a real website or app.
- Content is the same (or similar to) how it will be in the final design.
- Highly realistic interactions and functionality.
Digital prototypes
The most common type of hi-fi prototyping is creating digital prototypes. Digital prototypes are created in prototyping tools such as Adobe XD, UXPin, and InVision. There are a huge number of prototyping tools on the market and this number is growing all the time. Read Medium’s articles on the 10 Best Prototyping Tools For UI/US Designers – How to Choose The Right One? for an overview of the most popular tools on the market today.
Digital prototypes are realistic enough to accurately test most interface elements and to present to stakeholders for design approval.
Benefits
Prototyping tools allow designers to create responsive prototypes that work on a variety of devices.
Often you can build wireframes and lo-fi prototypes in the same prototyping tools that you use for digital prototypes. This makes it easy to progress with efficiency through the prototyping process.
User testing is easier and more accurate because:
- It is not necessary to explain the prototype so the designer can focus on observation.
- Realistic interactions and functionality so the prototype is more comparable to the final product than earlier prototypes.
- The user requires fewer explanations, is interrupted less, and behaves more naturally.
If you want a hi-fi, computerised interface, digital prototypes are faster than native prototyping which may require code. Speed varies between prototyping tools, but most have user-friendly interfaces and features like interactive elements or drag-and-drop.
Watch the following videos for a brief introduction to digital prototyping tools.
In this first video, you can see how you can use Adobe XD to design, prototype, preview, and share.
In this second video, you can see how you can create prototypes in InVision including preview and collaboration tools.
Native or coded prototypes
Designers that are confident coders may create hi-fi prototypes using code. These prototypes are fairly close to what would be released as the final product, for example, a fully functioning sandbox.

Native prototypes force designers to work within the confines of the system the final product will be released in. This may limit creativity, but it does produce a realistic build. The code may provide a good foundation for the final product, saving time and money later, but it is still likely to be only to a prototype standard. The goal should not be to create reusable code. You can learn more about native coding in the following video.
User testing is an investigation of your prototype or product either face-to-face or remotely. The only way to ensure a high-quality user experience is to start user testing early in the design process and to test at every step of the way. In prototyping that means testing each iteration of the design, including lo-fi and hi-fi prototypes.
What to test
It is unlikely that you will be able to test everything due to time, budget, and resource constraints. Therefore, it is recommended to consider test priorities. Think about the following questions to help determine test priorities.
- Can we change it? If you cannot change it, do not test it.
- What is the risk of not testing?
- What is the impact on the business or user?
Why and how to test
In the following video, Jakob Nielsen explains why user testing is important and how to do it.
To recap, user testing is important because you are not the user. You are too close to the product and your technical ability is likely greater than the user’s ability. How you interact with your prototype is different from how a user will interact with it. User testing can also be relatively cheap and quick as you only need a small sample size of users. Finally, user testing is convincing. When you observe a user struggling with a prototype, you know you need to go back to the drawing board and improve the design.
There are many different methods for user testing, but the overall process is always the same.
- Get representative users. If your users are not representative of your target audience, your testing has no validity.
- Provide users with realistic tasks to complete.
- Be quiet. Let the users talk and listen to them. How do real people react to your design?
Users might not really know what they want or how to articulate it. But they do know what they do not want. During testing, you should observe and coax the answers out of users. Are users satisfied or frustrated? Do they enjoy interacting with the interface? Did they achieve their intended tasks (goals)?
Moderated testing
Moderated testing requires a moderator to facilitate the testing. The moderator guides the test user through the interface. They must be extremely familiar and confident with the interface so they can help users if needed and encourage users to expand on observations or questions.
Moderated testing can be conducted face-to-face or virtually. Although virtual (or remote) moderated testing requires substantial preparation including setting up share screen and video conferencing technologies.
Moderated testing allows you to support and guide the test users. This is particularly useful with early prototypes. A good moderator builds rapport with test users, motivating them, keeping them engaged, and gathering detailed, qualitative feedback with probing questions.
However, moderated testing is expensive. You must employ experienced moderators, pay for a venue or in the case of remote testing, video conferencing technology, and compensate test users for their time. It also requires significant preparation and scheduling.
Paper prototypes
Paper prototypes are typically tested using moderated testing. There are a few things to be mindful of when conducting moderated testing on paper prototypes.
- Wireframe each screen. Include elements like buttons and switches. Remember to include the action that the button prompts such as menus and keyboards.
- Create a scenario. Create a realistic task list for users to complete. When we are testing with users, we set a brief outline of what they need to do but they need to do their own problem-solving in order to indicate to us whether the interface is usable or not.
- Rehearse. Run through each scenario so you know what happens with every click, so you are not called out.
Unmoderated testing
Unmoderated testing does not require a moderator, and in fact test users can complete unmoderated testing in their own environment asynchronously.
Unmoderated testing is best suited to capture quantitative data. It should be used later in the prototyping process, when a prototype has a reasonably high level of fidelity so the user can use the interface without assistance. Unmoderated testing is cheaper than moderated testing as it is not necessary to employ a moderator or physical venue. There is also reduced bias in an unmoderated test as test users act more naturally when not observed.
Unlike moderated testing, there is no opportunity to clarify behaviour, or ask probing questions in unmoderated testing. This means you are unlikely to get valuable insights into why something is successful or not.
A/B testing (aka split testing)
A/B testing is when you split your users into two groups. Group A are the control group and interact with the standard interface. Group B interact with an interface that is modified. It is best practice to only alter one thing between the two groups, otherwise it is not possible to determine which difference impacted users. If you make many differences and still want to be able to correlate a change in metrics to a design change, you will need to split users into even more groups. This is known as a multivariant test and is trickier to achieve as you need more users.
A/B testing is great for testing new ideas and rapid iteration. You use actual site visitors so testing can be relatively cheap provided you have sufficient site traffic. On the other hand, if you do not have sufficient visitors, you may need to run A/B testing for a long period of time to achieve an appropriate sample size. Site visitors do not know they are part of a test which means the data will be unbiased and more realistic.
A/B testing requires specific design hypotheses, but this does produce goal orientated results and data-driven decision making. A/B testing allows designers to learn what works to increase revenue and conversions.
Part one: Create two prototypes
It is now time to create lo-fi and hi-fi prototypes for a mobile app you are familiar with.
Your task is to create two iterations of prototypes for the app. The prototype should allow a user to complete a task. Select two prototypes from the list below.
- Paper prototype
- Clickable wireframe prototype
- Digital prototype.
Paper prototypes may be produced by hand. Clickable wireframes and digital prototypes should be produced by Adobe XD or a comparable program. If you create a paper prototype, you will need to document it using a series of photos or a video.
Part two: Discussion
Reflect on the prototypes you have created. Did any strengths or weaknesses of the app become apparent?
Share your prototypes in the forum. Discuss any strengths and weaknesses of the interface you noticed while producing the prototypes.
Prototyping is an iterative process. That means each prototype improves in fidelity and design as you move from low-fidelity (lo-fi) to high-fidelity (hi-fi) prototypes. Iterative prototyping is beneficial because:
- It is more affordable to redesign prototypes than redevelop a poorly designed and launched product.
- It is an effective communication tool.
- Designers can observe how test users interact with a prototype during user testing to validate the design.
Lo-fi prototypes include paper prototypes and clickable wireframes. Hi-fi prototypes include digital and native prototypes. Lo-fi prototypes share the following characteristics:
- Minimal visual design.
- Content is not included in its entirety, only the bare minimum to convey meaning.
- Interactivity can be simulated by a real person “playing” the computer or by connected wireframes using tools such as Adobe XD.
Hi-fi prototypes share the following characteristics:
- Detailed visual design which looks like a real website or app.
- Content is the same (or similar to) how it will be in the final design.
- Highly realistic interactions and functionality.
Prototypes of any fidelity level should be tested to validate the design before moving to the next iteration. User testing can be moderated or unmoderated. A/B testing (split testing) and multivariant testing can be used to measure how specific design decisions impact user behaviour.
Check your knowledge of prototyping by answering the following questions.
Additional resources
Here are some links to help you learn more about this topic.
It is expected that you should complete 12 hours (FT) or 6 hours (PT) of student-directed learning each week. These resources will make up part of your own student-directed learning hours.
- Lo-fi Wireframes
- 40 inspiring web and mobile wireframe and prototype examples
- CASE STUDY Wireframe & Usability Testing
- A/B Testing
- Some cool UX/UI inspiration
- Usability heuristics explained
- Repertory grid
- How to run an Heuristic Evaluation
- 5 users
- Testing questions & tasks
- User scenarios
- Become a stickynote ninja
- UX/UI Inspiration
- UX/UI Inspiration
- Process Example of App Design & Testing
- Usability Testing
- Interesting read about "Millers Law" and grouping menu info
- WATCH Inspiration: Creative App design
- Communicating Findings
- Prototype testing