According to careers.govt.nz, a systems administrator develops, maintains and administers computer operating systems, database management systems, and security policies and procedures. But how?
Troubleshooting methodology
Often, computer technicians spend a large percentage of their time troubleshooting the various software and hardware components used in computers, networks and printers. Before you can even begin to troubleshoot a physical problem with a piece of hardware or diagnose an error thrown up by a software program, you need to understand the basics of troubleshooting and some common best practices.
The most elaborate toolkit and expensive diagnostic software can be useless if you do not have a consistent plan for solving problems. Even experienced technicians can sometimes overlook obvious problems or solutions. Troubleshooting can be extremely challenging, but if you follow basic best practices and conventional troubleshooting procedures, you will often be able to determine the specific cause of a problem, as well as possible solutions to the problem.

To some extent, being an effective troubleshooter simply involves having a detailed knowledge of how something is supposed to work and of the sort of things that typically go wrong. However, the more complex a system is, the less likely it is that this sort of information will be at hand, so it is important to develop general troubleshooting skills to approach new and unexpected situations confidently. Troubleshooting is a process of problem-solving. It is important to realise that problems have causes, symptoms and consequences.
Consider:
- A computer system has a fault in the hard disk drive (cause).
- Because the disk drive is faulty, the computer is displaying a 'blue screen' (symptom).
- Because of the fault, the user cannot do any work (consequence).
From a business point of view, resolving the consequences of the problem is more important than solving the original cause. For example, the most effective solution might be to provide the user with another workstation, then get the drive replaced.
It is also important to realise that the cause of a specific problem might be the symptom of a larger problem. This is particularly true if the same problem recurs. For example, you might ask why the disk drive is faulty--is it a one-off error or are there problems in the environment, supply chain and so on?
Problem management
Any organisation that has to deal with more than a few problems every week will have a system in place for problem management. The basis of problem management is the identification, prioritisation and ownership of incidents.
The process of problem management is:
- A user contacts the help desk, perhaps by phone or email. An operator (or technician) is assigned to the incident and a job ticket is generated.
- The user describes the problem to the operator, who may ask clarifying questions. The operator categorises the problem, assesses how urgent it is, and how long it will take to fix.
- The operator may take the user through initial troubleshooting steps. If these do not work, the job may be escalated to deskside support or a senior technician.
- Troubleshooting continues until the problem is resolved. At that point, the user is contacted to confirm that the problem has been fixed. The job ticket is updated with details of the problem and how it was resolved. The ticket is then considered closed.
At each stage, the problem management system can track the ownership of the problem (who is dealing with it) and its status (what has been done). Each of these stages needs to consider and be guided by corporate policies, procedures and impacts before making changes. An enterprise network is, by definition, highly interconnected. Even small changes can have major, unintended impacts, so it is imperative that you follow established change management procedures and know when to seek authority to make a change.
Developing a troubleshooting mindset
Troubleshooting is not just the application of technical knowledge and expertise; the approach you choose to take is equally important.
Be calm: If you are calm, it instills confidence in the customer and will also prevent you from making rash decisions.
Take breaks: Troubleshooting requires a great deal of concentration. After a long period of working on the same task, the mind can become fatigued and concentration is reduced. Consider taking breaks or leaving the problem for a while to refresh your mind.
Challenge assumptions: A problem may be reported that is similar to one that you have experienced before, but you should not assume that the problem is identical. Although the symptoms may be similar, the problem and its solution could be completely different. Always treat each problem as a new challenge. Be prepared to try something different. If you have decided what the problem is, but cannot seem to solve it, it may be that you are incorrect. Be prepared to start again from the beginning with an open mind.
Assess costs and impacts: Remember, you must account for corporate policies and evaluate the impact of a problem. A particular problem might be a stimulating challenge, but if resolving it is not the highest priority in terms of business needs, you need to give up on finding The Answer and use a shortcut to get to a solution. When assessing whether to repair a part, consider the cost of the part and the cost of your time to perform the repair. In many circumstances, replacement is the most effective option.
Know when to give up! You will not always be able to fix the problem yourself. Be prepared to pass the problem on rather than wasting the user's time!
'Pseudocode' is a concept that is frequently used in programming and algorithmic domains. It is an informal programming description concept that does not require any strict programming language syntax; i.e. a simple version of programming code in plain English before programmers implement a specific programming language.
Algorithms are frequently represented using pseudocode because programmers can comprehend them regardless of their programming background or knowledge.
Pseudocode uses an algorithm that is a logically structured sequence of actions or approaches to a specific problem. To solve a problem, a programmer implements an algorithm. Natural language, yet slightly technical comments, are used to express algorithms.
Pseudocode is merely an algorithm's implementation in annotations and explanatory language written in plain English. It lacks grammar, as do all programming languages, and cannot be compiled or understood by a machine.
Why use pseudocode?
Using pseudocode serves as a link between the software and the algorithm (or flowchart). It also serves as rough documentation, allowing a single developer's software to be easily understood when pseudocode is printed out. The approach of documentation is critical in industries--and this is when pseudocode comes in handy.
The main goal of pseudocode is to explain what exactly each line of a program should do, hence making the code construction phase easier for the programmer.
Other benefits to using pseudocode
- It is understood by programmers of all types.
- Makes reviews easier--you can review detailed designs without examining source code.
- Allows the programmer to concentrate on the algorithm part of code development.
- Makes low-level design reviews easier and reduces the need to review the code itself.
- Supports the idea of iterative refinement.
- Minimises commenting effort--often, students write the code and add comments afterwards.
- Is easier to maintain than other forms of design documentation.

How to write pseudocode
Now that we have established what pseudocode is and why it’s used, let's focus on the steps needed to correctly help programmers use this design tool.
Below is the expanded process used to correctly write pseudocode:
- Use
Use a plain text editor - Start by
Start by writing a statement that identifies the main purpose and intent - Write
Write only one statement per line - Use
Use white space and indentation effectively - Capitalise
Capitalise key commands if necessary - Write
Write using simple terminology - Keep
Keep your pseudocode in the proper order - Use
Use standard programming structures - Organise
Organise your pseudocode sections - Double-check
Double-check your pseudocode for readability and clarity.
Example conversions from Pseudocode to JavaScript
There's a lot more to JavaScript (especially 'built-in') than what's covered here. The general approach would be to write your Pseudocode and personally test it to ensure that it produces the intended results.
The following examples identify how to convert each pseudocode segment to its JavaScript equivalent.
| Pseudocode | JavaScript |
|---|---|
procedure countCoins(amount, denomination) currentAmount ← amount coinCount ← 0 while (currentAmount ≥ denomination) (coinCount ← coinCount + 1 currentAmount ← currentAmount - denomination) return coinCount procedure makeChange(amount) currentAmount ← amount quarters ← countCoins(currentAmount, 25) currentAmount ← currentAmount - (25 × quarters) dimes ← countCoins(currentAmount, 10) currentAmount ← currentAmount - (10 × dimes) nickels ← countCoins(currentAmount, 5) currentAmount ← currentAmount - (5 × nickels) pennies ← countCoins(currentAmount, 1) return [quarters, dimes, nickels, pennies] |
var countCoins = function(amount, denomination) { var currentAmount = amount; var coinCount = 0; while (currentAmount >= denomination) { coinCount = coinCount + 1; currentAmount = currentAmount - denomination; } return coinCount; } var makeChange = function(amount) { var currentAmount = amount var quarters = countCoins(currentAmount, 25); currentAmount = currentAmount - (25 * quarters); var dimes = countCoins(currentAmount, 10); currentAmount = currentAmount - (10 * dimes); var nickels = countCoins(currentAmount, 5); currentAmount = currentAmount - (5 * nickels); var pennies = countCoins(currentAmount, 1); return [quarters, dimes, nickels, pennies]; } |
procedure listRPM(factor1, factor2) if (factor1 > factor2) then (term1 ← factor2 term2 ← factor1) else (term1 ← factor1 term2 ← factor2) addendList ← [] while (term1 > 0) (if (term1 is odd) then (add term2 to addendList) term1 ← halveWithoutRemainder(term1) term2 ← double(term2)) product ← 0 for each (number in addendList) (product ← product + number) return product } |
var listRPM = function(factor1, factor2) { var term1 = factor1; var term2 = factor2; if (factor1 > factor2) { term1 = factor2; term2 = factor1; } var addendList = []; while (term1 > 0) { if ((term1 % 2) == 1) { addendList.push(term2); } term1 = parseInt(term1 / 2); term2 = term2 * 2; } var product = 0; for (var index = 0; index < addendList.length; index += 1) { product = product + addendList[index]; } return product; } |

Being able to view and visualise the diagnostic information of computer systems is of particular importance to systems administrators. Luckily, all modern operating systems make this information relatively easy to access.
Here are a couple of easily accessible tools to visualise diagnostic information in Windows.
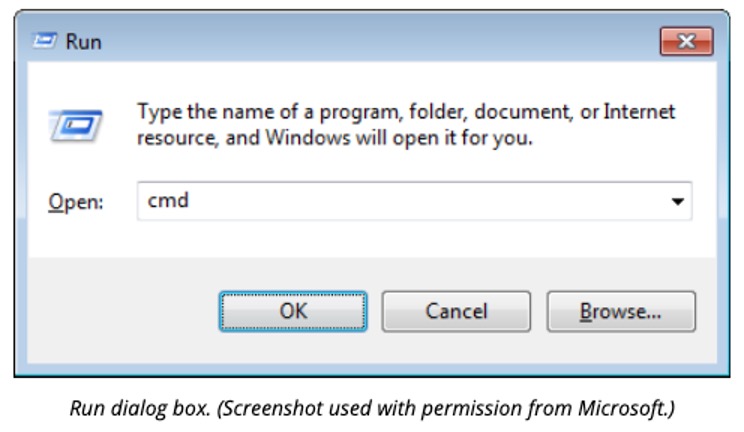
Instant Search box and Run Command
The Instant Search box on the Start Menu/Start screen will execute programs and configuration options using simple names. You can open any file or program by pressing the Windows key then typing the path to the file. In the case of registered programs and utilities, you simply need to type the program file name or utility name. Alternatively, you can access the Run dialog box using Windows+R or entering 'run' into the search box.
.MSC extensions and the Run line
There are several management consoles that you can access via the Run line via the .MSC extension. For example:
- devmgmt.msc opens the Device Manager console
- diskmgmt.msc opens the Disk Management console
- compmgmt.msc opens the Computer Management console.
Command line tools
Most configurations of Windows can be done via convenient GUI tools, such as the management consoles and Control Panel. In some circumstances, though, it is necessary to use a command prompt to configure or troubleshoot a system. As you learn the commands, you may also find it quicker to use the command shell for actions (such as file management).
Learning commands is also valuable if you have to write scripts to automate Windows.
Command Prompt
You can run any command from the Run dialog box. However, to input a series of commands or to view output from commands, you need to use the command shell (cmd.exe). To open the prompt, type 'cmd' in the Run dialog box or Instant Search box.
You may need to run the command prompt with elevated privileges in order to execute a command. If a command cannot be run, the error message 'The requested operation requires elevation' is displayed.
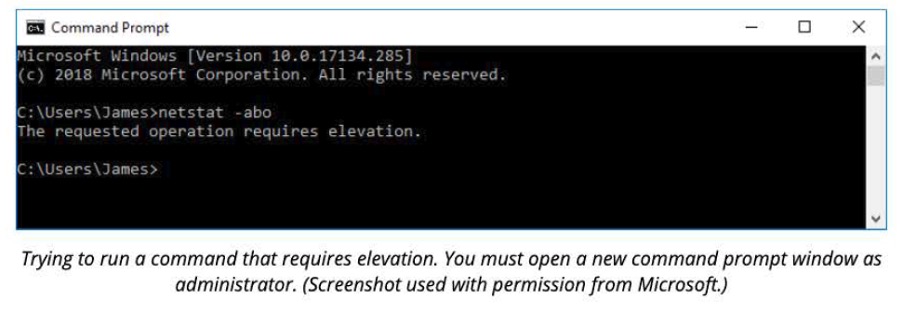
You cannot continue within the same window. You need to open a new command prompt as administrator. Right-click the command prompt shortcut and select Run as administrator then confirm the UAC prompt. Alternatively, type 'cmd' in the Instant Search box then press Ctrl + Shift + Enter.
Windows PowerShell enables you to perform management and administrative tasks in Windows 7 and later. It is fully integrated with the operating system and supports both remote execution and scripting. To help create and manage your Windows PowerShell scripts, Microsoft provides the Windows PowerShell Integrated Scripting Environment (ISE).
Useful commands
Navigating and viewing files and directories
Windows PowerShell uses the noun 'Location' to refer to the working directory and implements a family of cmdlets (lightweight commands) to examine and manipulate your location.
To determine the path of your current directory location, enter the command:
Get-Location

# Output
C:\Documents and Settings\PowerUser
The Get-Location command is used with the Set-Location command. The Set-Location command allows you to specify your current directory location.
Set-Location -Path C:\Windows
After you enter the command, you will notice that you do not receive any direct feedback about the effect of the command. Most Windows PowerShell commands that perform an action produce little or no output because the output is not always useful. To verify that a successful directory change has occurred when you enter the Set-Location command, include the -PassThru parameter when you enter the command:
Set-Location -Path C:\Windows -PassThru

# Output
C:\WINDOWS
The -PassThru parameter can be used with many Set- commands in Windows PowerShell to return information about the result in cases in which there is no default output.
You can specify paths relative to your current location in the same way as you would in most UNIX and Windows command shells. In standard notation for relative paths, a period (.) represents your current folder, and a doubled period (..) represents the parent directory of your current location.
For example, if you are in the C:\Windows folder, a period (.) represents C:\Windows and double periods (..) represents C:. You can change from your current location to the root of the C: drive by typing:
Set-Location -Path .. -PassThru

# Output
C:\
The same technique works on Windows PowerShell drives that are not file system drives, such as HKLM:. You can set your location to the HKLM\\Software key in the registry by typing:
Set-Location -Path HKLM:\SOFTWARE -PassThru

# Output
HKLM:\SOFTWARE
You can then change the directory location to the parent directory, which is the root of the Windows PowerShell HKLM: drive, by using a relative path:
Set-Location -Path .. -PassThru

# Output
HKLM:\
You can type Set-Location or use any of the built-in Windows PowerShell aliases for Set-Location (cd, chdir, sl). For example:
cd -Path C:\Windows
chdir -Path .. -PassThru
sl -Path HKLM:\SOFTWARE -PassThru
When changing locations, it is helpful to keep track of where you have been and to be able to return to your previous location. The Push-Location cmdlet in Windows PowerShell creates an ordered history (a 'stack') of directory paths where you have been, and you can step back through the history of directory paths by using the complementary Pop-Location cmdlet.
For example, Windows PowerShell typically starts in the user's home directory.
Get-Location

# Output
C:\Documents and Settings\PowerUser
The word stack has a special meaning in many programming settings, including .NET Framework. Like a physical stack of items, the last item you put onto the stack is the first item that you can pull off the stack. Adding an item to a stack is colloquially known as 'pushing' the item onto the stack. Pulling an item off the stack is colloquially known as 'popping' the item off the stack.
To push the current location onto the stack, and then move to the Local Settings folder, type:
Push-Location -Path "Local Settings"
You can then push the Local Settings location onto the stack and move to the Temp folder by typing:
Push-Location -Path Temp
You can verify that you changed directories by entering the Get-Location command:
Get-Location

# Output
C:\Documents and Settings\PowerUser\Local Settings\Temp
You can then pop back into the most recently visited directory by entering the Pop-Location command, and verify the change by entering the Get-Location command:
Pop-Location
Get-Location

# Output
C:\Documents and Settings\me\Local Settings
Just as with the Set-Location cmdlet, you can include the PassThru parameter when you enter the Pop-Location cmdlet to display the directory that you entered:
Pop-Location -PassThru

# Output
C:\Documents and Settings\PowerUser
You can also use the Location cmdlets with network paths. If you have a server named FS01 with a share named Public, you can change your location by typing:
Set-Location \\FS01\Public
or
Push-Location \\FS01\Public
You can use the Push-Location and Set-Location commands to change the location to any available drive. For example, if you have a local CD-ROM drive with drive letter D that contains a data CD, you can change the location to the CD drive by entering the Set-Location D: command.
If the drive is empty, you will get the following error message:
Set-Location D:

# Output
Set-Location : Cannot find path 'D:\' because it does not exist.
When you are using a command-line interface, it is not convenient to use File Explorer to examine the available physical drives. Further, File Explorer would not show you all of the Windows PowerShell drives. (Windows PowerShell provides a set of commands for manipulating Windows PowerShell drives, and we will talk about these after you have watched the video below.)
Working with files and directories
Navigating through Windows PowerShell drives and manipulating the items on them is similar to manipulating files and folders on Windows physical disk drives. This section discusses how to deal with specific file and folder manipulation tasks using PowerShell.
You can get all items directly within a folder by using Get-ChildItem. Add the optional Force parameter to display hidden or system items. For example, this command displays the direct contents of Windows PowerShell Drive C (which is the same as the Windows physical drive C):
Get-ChildItem -Path C:\ -Force
The command lists only the directly contained items, much like using Cmd.exe's DIR command or ls in a UNIX shell. In order to show contained items, you need to specify the -Recurse parameter as well. (This can take an extremely long time to complete.) To list everything on the C drive:
Get-ChildItem -Path C:\ -Force -Recurse
Get-ChildItem can filter items with its Path, Filter, Include and Exclude parameters, but those are typically based only on name. You can perform complex filtering based on other properties of items by using Where-Object.
The following command finds all executables within the Program Files folder that were last modified after 1 October 2005 and which are neither smaller than 1 megabyte nor larger than 10 megabytes:
Get-ChildItem -Path $env:ProgramFiles -Recurse -Include *.exe | Where-Object -FilterScript {($_.LastWriteTime -gt '2005-10-01') -and ($_.Length -ge 1mb) -and ($_.Length -le 10mb)}
Copying files and folders
Copying is done with Copy-Item. The following command backs up C:\boot.ini to C:\boot.bak:
Copy-Item -Path C:\boot.ini -Destination C:\boot.bak
If the destination file already exists, the copy attempt fails. To overwrite a pre-existing destination, use the Force parameter:
Copy-Item -Path C:\boot.ini -Destination C:\boot.bak -Force
This command works even when the destination is 'read-only'.
Folder copying works the same way. This command copies the folder C:\temp\test1 to the new folder C:\temp\DeleteMe recursively (repeatedly):
Copy-Item C:\temp\test1 -Recurse C:\temp\DeleteMe
You can also copy a selection of items. The following command copies all .txt files contained anywhere in C:\data to C:\temp\text:
Copy-Item -Filter *.txt -Path c:\data -Recurse -Destination C:\temp\text
You can still use other tools to perform file system copies. XCOPY, ROBOCOPY and COM objects (such as the Scripting.FileSystemObject) all work in Windows PowerShell. For example, you can use the Windows Script Host Scripting.FileSystem COM class to backup.
C:\boot.ini to C:\boot.bak:
(New-Object -ComObject Scripting.FileSystemObject).CopyFile('C:\boot.ini', 'C:\boot.bak')
Creating files and folders
Creating new items works the same on all Windows PowerShell providers. If a Windows PowerShell provider has more than one type of item (e.g. the FileSystem Windows PowerShell provider distinguishes between directories and files) you need to specify the item type.
This command creates a new folder C:\temp\New Folder:
New-Item -Path 'C:\temp\New Folder' -ItemType Directory
This command creates a new empty file C:\temp\New Folder\file.txt
New-Item -Path 'C:\temp\New Folder\file.txt' -ItemType File
Important: When using the Force switch with the New-Item command to create a folder, and the folder already exists, it won't overwrite or replace the folder. It will simply return the existing folder object. However, if you use New-Item -Force on a file that already exists, the file will be completely overwritten.
Removing all files and folders within a folder
You can remove contained items using Remove-Item, but you will be prompted to confirm the removal if the item contains anything else. For example, if you attempt to delete the folder C:\temp\DeleteMe that contains other items, Windows PowerShell prompts you for confirmation before deleting the folder:
Remove-Item -Path C:\temp\DeleteMe
Confirm
The item at C:\temp\DeleteMe has children and the Recurse parameter was not
specified. If you continue, all children will be removed with the item. Are you
sure you want to continue?
[Y] Yes  [A] Yes to All  [N] No  [L] No to All  [S] Suspend  [?] Help
(default is "Y"):
If you do not want to be prompted for each contained item, specify the Recurse parameter:
Remove-Item -Path C:\temp\DeleteMe -Recurse
Mapping a local folder as a drive
You can also map a local folder, using the New-PSDrive command. The following command creates a local drive P: rooted in the local Program Files directory, visible only from the PowerShell session:
New-PSDrive -Name P -Root $env:ProgramFiles -PSProvider FileSystem
Just as with network drives, drives mapped within Windows PowerShell are immediately visible to the Windows PowerShell shell. In order to create a mapped drive visible from File Explorer, the parameter -Persist is needed. However, only remote paths can be used with Persist.
Reading a text file into an array
One of the more common storage formats for text data is in a file with separate lines treated as distinct data elements. The Get-Content cmdlet can be used to read an entire file in one step, as shown here:
PS> Get-Content -Path C:\boot.ini
[boot loader]
timeout=5
default=multi(0)disk(0)rdisk(0)partition(1)\WINDOWS
[operating systems]
multi(0)disk(0)rdisk(0)partition(1)\WINDOWS="Microsoft Windows XP Professional"
/noexecute=AlwaysOff /fastdetect
multi(0)disk(0)rdisk(0)partition(1)\WINDOWS=" Microsoft Windows XP Professional
with Data Execution Prevention" /noexecute=optin /fastdetect
Get-Content already treats the data read from the file as an array, with 1 element per line of file content. You can confirm this by checking the Length of the returned content:
PS> (Get-Content -Path C:\boot.ini).Length
This command is most useful for getting lists of information into Windows PowerShell directly. For example, you might store a list of computer names or IP addresses in a file C:\temp\domainMembers.txt, with 1 name on each line of the file. You can use Get-Content to retrieve the file contents and put them in the variable $Computers:
$Computers = Get-Content -Path C:\temp\DomainMembers.txt
$Computers is now an array containing a computer name in each element.
Check your knowledge
Answer these three questions about programming and scripting.
PowerShell script exercises
Instructions
Watch the following video and trial a few of the scripts to test out some basic PowerShell scripts.
Share a screen capture of your attempts in the forum.