In this topic, we will cover:
- Types of events
- Connecting code to events
- Standard event model
- Writing cross-browser code
- Video player
- Regular expressions
- Forms
- Building UI controls.
'Events' are actions or occurrences in the system you are developing and are reported to you so that your code can react. If a user clicks a button on a webpage, for example, you might wish to respond by presenting an information box.
Until now, our code has been running when the page hits the <script> element. It runs while the page is loading. We often do not want our JavaScript code to run until some particular thing happens. Some examples of (DOM) events are:
- the page finishes loading
- a button is clicked
- a key on the keyboard is pressed
- the mouse moves into an element
- some time passes.
We want to know when certain events occur to certain elements, and when they do, we want a part of our code to start running. To do this, we must find the element we are interested in, then register a function as an 'event listener'.
Main events
There are many useful events to listen for. Here are the most common events and when they fire.
Mouse events:
| Event | Description |
|---|---|
"click" |
When the mouse clicks on an element (touchscreen devices generate it on a tap). |
"change" |
When an input, text area, or select element value is committed (usually when the element loses keyboard focus, and its value has changed since it gained focus). |
"contextmenu" |
When the mouse right-clicks on an element. |
"mouseover" |
When the mouse cursor comes over an element. |
"mouseout" |
When the mouse cursor leaves an element. |
"mousedown" |
When the mouse button is pressed. |
"mouseup" |
When the mouse button is released over an element. |
"mousemove" |
When the mouse is moved. |
"mouseleave" |
When the mouse moves out of an element. |
"mousemove" |
When the mouse moves while inside an element. |
Keyboard events:
| Event | Description |
|---|---|
"keydown" |
When a keyboard key is pressed. |
"keyup" |
When a keyboard key is released. |
Form element events:
| Event | Description |
|---|---|
"blur" |
When the element loses keyboard focus. |
"focus" |
When the visitor focuses on an element; e.g. on an <input>. |
"submit" |
When the visitor submits a form. |
Document events:
| Event | Description |
|---|---|
"DOMContentLoaded" |
Fires when the elements inside the element being listened to have all been downloaded and put on the page. This triggers before all the resources are downloaded. |
"load" |
When the element, such as an image or more commonly the entire document and its resources, has finished downloading. |
"dblclick" |
When the element is double-clicked. |
"input" |
When an input or text area element is changed as each character changes the element's value. |
Watch the following video to see how you can add the events to JavaScript.
Event information
Some of the above events provide extra information. Every event listener function is given an Event object as the first parameter.
An Event object has several properties and methods that are very useful.
Event.type
The Event interface's type read-only property returns a string containing the event's type. It is the name frequently used to refer to the specific event (such as click, load, or error) and is set when the event is formed. You can have one function triggered by several event listeners. To find out what event occurred, look at the type property (in the example given below).
var firstNameField = document.querySelector("#first-name");

firstNameField.addEventListener("focus", firstNameFieldEvent);
firstNameField.addEventListener("blur", firstNameFieldEvent);

function firstNameFieldEvent(evt) {
  console.log("First name field: " + evt.type);
}
Event.target
The example below illustrates how you can have several elements trigger the same function.
var firstNameField = document.querySelector("#first-name");
var lastNameField = document.querySelector("#last-name");

firstNameField.addEventListener("focus", nameFieldEvent);
lastNameField.addEventListener("focus", nameFieldEvent);

function nameFieldEvent(evt) {
  console.log(evt.target.id + " received: " + evt.type);
}
For some events, you can also find out what modifier keys were being held down while the event occurred. You can find out the position of the mouse, what keys were pressed, and many other things. Be sure to look at the JavaScript documentation to learn more.

Event handlers
We can assign a handler to react to events—a function that executes when an event occurs.
'Handlers' allow you to run JavaScript code in response to user input. A handler can be assigned in a variety of ways. Let us take a look at them one by one, starting with the most basic.
Via HTML attributes
'JavaScript's interaction with HTML is handled through events that occur when the user or the browser manipulates a page. We can write our event handlers in JavaScript or VBScript and can specify these event handlers as a value of the event tag attribute.
'A handler can be set in HTML with an attribute named on <event>.
'For instance, to assign a click handler for an input, we can use onclick, like here:
<input onclick="alert('Click!')" type="button" value="Click me">
'On mouse click, the code inside onclick runs.
'Please note that inside onclick we use single quotes, because the attribute itself is in double quotes. If we forget that the code is inside the attribute and use double quotes like this: onclick="alert("Click!")", then it will not work correctly.
'An HTML attribute is not a convenient place to write a lot of code, so we would better create a JavaScript function and call it there.
'The HTML 4.01 specification defines 19 event attributes as listed below:
<body> and <frameset> Level Events
'There are only two attributes that can be used to trigger any JavaScript or VBScript code when there is any event that occurs on document level.
| Attribute | Value | Description |
|---|---|---|
onload |
script | Script runs when an HTML document loads |
onunload |
script | Script runs when an HTML document unloads |
<form> Level Events
There are the following six attributes which can be used to trigger any JavaScript or VBScript code when any event occurs on form level.
| Attribute | Value | Description |
|---|---|---|
onchange |
script | Script runs when the element changes |
onsubmit |
script | Script runs when the form is submitted |
onreset |
script | Script runs when the form is reset |
onselect |
script | Script runs when the element is selected |
onblur |
script | Script runs when the element loses focus |
onfocus |
script | Script runs when the element gets focus |
Keyboard Events
There are the following three events which are generated by the keyboard. These events are not valid in base, bdo, br, frame, frameset, head, html, iframe, meta, param, script, style, and title elements.
| Attribute | Value | Description |
|---|---|---|
onkeydown |
script | Script runs when key is pressed |
onkeypress |
script | Script runs when key is pressed and released |
onkeyup |
script | Script runs when key is released |
Other Events
There are the following 7 other events which are generated by mouse when it comes in contact with any HTML tag. These events are not valid in base, bdo, br, frame, frameset, head, html, iframe, meta, param, script, style, title elements.'23
| Attribute | Value | Description |
|---|---|---|
onclick |
script | Script runs when a mouse clicks |
ondblclick |
script | Script runs when a mouse double-clicks |
onmousedown |
script | Script runs when mouse button is pressed |
onmousemove |
script | Script runs when mouse pointer moves |
onmouseout |
script | Script runs when mouse pointer moves out of an element |
onmouseover |
script | Script runs when mouse pointer moves over an element |
onmouseup |
script | Script runs when mouse button is released |
Via object properties
We want to understand more about what occurred to properly manage the event. What were the pointer coordinates, other than a "click" or a "keydown"? What key did you use?
When an event occurs, the browser constructs an event object, fills it with data, and provides it to the handler as an argument.
'Here is an example of getting pointer coordinates from the event object:
<input id="elem" type="button" value="Click me">
<script>
  elem.onclick = function(event) {
    // Show event type, element and coordinates of the click.
    alert(event.type + " at " + event.currentTarget);
    alert("Coordinates: " + event.clientX + ":" + event.clientY);
  };
</script>
'Some properties of event object:
event.type;
'Event type here it is "click".
event.currentTarget;
'Element that handled the event.
'That is exactly the same as this, unless the handler is an arrow function, or its this is bound to something else, then we can get the element from event.currentTarget.
event.clientX;
event.clientY;
'Window-relative coordinates of the cursor, for pointer events.
'There are more properties. Many of them depend on the event type: keyboard events have one set of properties, pointer events–another one, we will study them later when we come to different events in details.'23
If we assign a handler in HTML, we can also use the event object, like this:
<input onclick="alert(event.type)" type="button" value="Event type">
That is possible because when the browser reads the attribute, it creates a handler like this:
function(event) {
  alert(event.type);
}
That is: its first argument is called "event", and the body is taken from the attribute.
The Standard Event Model is the result of DOM Level 2 standardising the event model. We can register 2 or more event handlers using the DOM Level 2 Event Model.
The addEventListener() function in the DOM Level 2 Event Model is used to add multiple event handlers. In the standard event model, 2 events can be registered as follows:
The event name without the 'on' prefix is accepted as the first parameter of addEventListener(). An event handler is accepted as the second parameter.
In the example, this is used to retrieve the element which triggers the event. The currentTarget property of an event instance is used in the specification to return the element that is presently triggering the event.
The majority of users use popular browsers like Google Chrome, Safari, Firefox and Opera.
There are, however, a lot more possibilities than you would think. As each browser is created differently, your website can run fine in Chrome but will have problems in Safari.
How do you write code for browser compatibility?
The following tips can help ensure your code works perfectly on most browsers.
- Keep your code simple: Think quality over quantity.
- Use Frameworks: CSS frameworks will give you style-code that makes cross-compatibility easier.
- Set a ‘Doctype’ for your HTML files: When a browser loads your website, it has to figure out what version of HTML you are using.
- Use the CSS Reset Rule: A CSS reset style sheet makes sure your browsers follow the same style.
- Validate: Validate the HTML and CSS to prevent problems.
- Cross-browser testing.

Common JavaScript browser compatibility issues
There are 3 compatibility issues that you might come across. Let us explore these issues.
- Using modern JavaScript features on older browsers
When website developers try to use current JavaScript features that are not supported by older browsers or browser versions, issues in JavaScript browser compatibility appear. - Browser Sniffing
'Browser sniffing' is the process of determining which browser is being used to view a website, then running the necessary code to make the site compliant with that browser. This is accomplished by detecting the browser's unique user-agent string. It worked when everyone on the internet used Netscape or Internet Explorer; however, this strategy is flawed with more current browsers. To begin with, the code is prone to errors. It is a good idea to examine the code on different versions of genuine Chrome browsers on a regular basis. Check websites on various actual browsers (especially the big providers like Chrome, Safari, Firefox and Edge) to keep ahead of the game. To remain relevant, a browser sniffer code must be updated on a regular basis. - Using libraries
For abstracted browser-based differences linked to JS code, libraries like jQuery are essential. Examine a library's offerings in terms of browser and feature support before employing it. Examine its development history to verify that it is updated on a regular basis to keep up with technological improvements.
Cross-browser testing tools
The goal of cross-browser testing is to create a uniform user experience across devices and platforms. Although one can instantly test JavaScript using tools like CodePen and Chrome Dev Tools, one cannot analyse the behaviour of these scripts across different desktop and mobile browsers.
Chrome DevTools
Chrome DevTools is a set of web developer tools that comes pre-installed in Google Chrome.
DevTools allows you to change pages on the fly and diagnose problems rapidly to create better websites faster.
For better understanding, watch the following video that demonstrates how DevTools can improve your productivity.
CodePen
CodePen is an online platform for testing HTML, CSS and JavaScript code snippets, also known as 'Pens'. When in this editor, you can begin scripting and immediately test the code for desired results.
CodePen also serves as a social community and an online learning environment, allowing aspiring developers to showcase their work.
Websites and online businesses have embraced video as a vital component. This is primarily due to the availability of faster internet data plans on mobile devices. Another factor is that video material has a higher level of interaction—people are more likely to recall and watch an engaging, well-produced video than they are to read a large amount of text.

To listen to music, see home videos, and watch documentaries, we do not need to start from the beginning and learn about the HTML tag <video> and how to:
- change it with JavaScript
- deal with compatibility issues and such
- use a plugin to save time.
jPlayer and video.js are 2 of the most important media player plug-ins that are available on the web. Click on the links below to learn more about these plug-ins.
jPlayer is a JavaScript media library that is totally free and open source. jPlayer is a jQuery plug-in that lets you quickly weave cross-platform audio and video into your webpages.
video.js is an HTML5 video player that was designed from the ground up. HTML5 and Flash video, as well as YouTube and Vimeo, are all supported (through plug-ins).
As most video players use HTML5 video tag, here is a sample code that you can use to work with when embedding plug-ins from libraries like JPlayer and video.js.
The regular expressions section is advanced and should be considered as an opportunity for an optional extension of your learning.
'Regular expressions' (RegExp or RegEx)are patterns used to match character combinations in strings. In JavaScript, regular expressions are also 'objects'. These patterns are used with the exec() and test() methods of RegEx, and with the match(), matchAll(), replace(), replaceAll(), search() and split() methods of String.
Some people, when confronted with a problem, think "I know, I'll use regular expressions". Now they have two problems.Jamie Zawinski, 1997
A regular expression is a way to describe sets of character strings using a token-based language, or syntax. We can use them to test strings to see if they match the pattern, find where patterns begin, and even search and replace parts of matching strings with other strings.
Learning regular expressions
Pick up some extra tips by watching this video.
Learning to read and write RegEx is a journey of its own.
This RegEx /cat/ matches any string that contains this pattern:
the character "c" followed directly by the character "a" followed directly by the character "t".
RegExes can do much more than this. You can check for any character (/.at/ // => "cat", "hat", "bat", "mat"), one character of a set (/[chb]at/ // => "cat", "hat", "bat"), optional characters (/c?at/ // => "cat", "at") and much more.
Simple regular expressions are easy to understand, but complex regular expressions look like character 'soup', until you realise that you do not read them in words, but character-by-character.
This regular expression matches strings that are valid URLs:
/^(https?:\/\/)?([\da-z\.-]+)\.([a-z\.]{2,})([\/\w/ .-]*)*\/?$/
We can visualise regular expressions as 'railroad' diagrams.
To be able to understand how regular expressions are interpreted by the computer, here is a RegEx visualiser to show a RegEx as a railroad diagram.
Declaring regular expressions
var catPattern = /cat/;
Regular expressions are JavaScript objects. They can be created literally by including your RegEx pattern inside a pair of forward slashes /. You can also declare them with new RegExp("cat"), but there are sometimes problems encoding regular expression patterns as strings. You get the same thing either way.
Testing for a match
Definition and usage
- The
indexOf()method returns the position of the first occurrence of a value in a string - The
indexOf()method returns-1if the value is not found - The
indexOf()method is case-sensitive.
Example:
Search a string for "welcome":
var text = "Hello world, welcome to the universe.";
var result = text.indexOf("welcome");
Search a string for "Welcome":
var text = "Hello world, welcome to the universe.";
var result = text.indexOf("Welcome");
Find the first occurrence of "e":
var text = "Hello world, welcome to the universe.";
var result = text.indexOf("e");
Searching for a match
String.search(inputRegExp);
This method lives on string values, not regular expressions. The search method will search for matches of the input RegEx pattern within the string. It will return the index of the first occurrence of a match, or -1 if there is no match.
var ourPattern = /our/;

console.log("hour".search(ourPattern)); // => 1
console.log("armoured".search(ourPattern)); // => 4
console.log("our search".search(ourPattern)); // => 0
console.log("banana".search(ourPattern)); // => false
Replacing matches with new values
String.replace(inputRegExp, newString);
This string method will search for a match and replace it with the new string.
console.log("recieve".replace(/ie/, "ei")); // => "receive"
console.log("recieve recieve".replace(/ie/, "ei")); // => "receive recieve" -- Only the first is replaced.
console.log("recieve recieve".replace(/ie/g, "ei")); // => "receive receive" -- The g flag will replace "globally".
replace() can also make use of subexpressions within regular expressions:
var simpleEmailPattern = /^.*(@.*)$/; // A whole string with any number of any characters.
console.log("bob@example.com".replace(simpleEmailPattern, "brett$1")); // => "brett@example.com"
There is a lot the replace method can do.
The replace() method
The replace() method returns a new string containing a replacement for some or all of the pattern's matches. The replacement can be a string or a function that is called for each match, and the pattern can be a string or a RegEx. Only the first occurrence of the pattern will be substituted if it is a string.
The original string is left unchanged.
var p = "The quick brown fox jumps over the lazy dog. If the dog reacted, was it really lazy?";

console.log(p.replace("dog", "monkey"));
// Expected output: "The quick brown fox jumps over the lazy monkey. If the dog reacted, was it really lazy?"

var regex = /Dog/i;

console.log(p.replace(regex, "ferret"));
// Expected output: "The quick brown fox jumps over the lazy ferret. If the dog reacted, was it really lazy?"
Must-know regular expressions
Here are several regular expressions you'll find useful.
/^[a-z0-9_-]{3,16}$/– Match a Username between 3 and 16 chars long/^.{6,}$/– Match a password/^#?([a-f0-9]{6}|[a-f0-9]{3})$/– Match a hexadecimal CSS colour code/^[a-z0-9-]+$/– Match a slug: a pretty fragment of a URL/([^\s]+(\.(jpg|png|gif|bmp))$)/– Match a filename based on extension/^([a-z0-9_.\-+]+)@([\da-z.-]+)(\.([a-z]{2,}))+$/– Match an email address/(1[012]|[0-9]):[0-5][0-9](\\s)?(?i)(am|pm)/– Match a 12-hour time/([01]?[0-9]|2[0-3]):[0-5][0-9]/– Match a 24-hour time/(0?[1-9]|[12][0-9]|3[01])/(0?[1-9]|1[012])/((19|20)\d\d)/– Match a date in dd/mm/yyyy format/^(https?:\/\/)?([\da-z\.-]+)\.([a-z\.]{2,})([\/\w \.-]*)*\/?$/– Match a URL, excluding query strings and anchors/^(?:(?:25[0-5]|2[0-4][0-9]|[01]?[0-9][0-9]?)\.){3}(:?25[0-5]|2[0-4][0-9]|[01]?[0-9][0-9]?)$/– Match an IPv4 Address
Using JavaScript's decision-making capabilities will make your HTML pages 'smarter'. JavaScript can also be used to enhance HTML forms.
Here is an example of how the form will look.
Form validation
We will build a script to validate a simple contact form. Once our script is validating one form, we will extend it so we can use it to validate almost any form.
HTML5 validation is pretty good, but is not perfect (e.g. some email addresses are 'valid' when they should not be and customising the style of the error messages is possible but not consistent across browsers) so we will disable HTML5 validation and substitute our own.
Form validator requirements
Here are a few useful tips to keep in mind during the validation process:
- allow submission of form to its destination only if all the fields in the form are valid
- provide helpful error messages next to each field
- validate a field when it loses focus (is blurred)
- check if a field:
- is required (cannot be blank, unchecked or unselected)
- contains a valid email address
- contains a minimum or maximum length of characters.
Finished product
Take a look at the following examples of how the finished product will work, and what the finished JavaScript will look like.
Simple form
Let us start with a simple form. For brevity, we will show only the form fragment.
<form action="success.html" id="contact-form" method="POST">
  <div class="form-group">
    <label for="firstname">First Name</label>
    <input id="firstname" name="firstname" required type="text">
    <span id="firstname-error"></span>
  </div>
  <div class="form-group">
    <button type="submit">Submit</button>
  </div>
</form>
Inclusions are:
- a first name field only, but the field is required
- the label element is linked to the input field via the id field, making our form more accessible
- we also have a span with the field's id followed by
"-error". This span will be where we output any errors related to the field.
Getting started
What we want our form validation to do right now is:
// Find the form
// Disable HTML5 validation
// When the form is submitted:
// Check every field in this form is filled
// If a field is blank:
// Give the field an error class
// Give the error span a class and the error message.
// If any field is found with an error:
// Prevent the form from submitting.
We will make form-validation.js and add it to our form with a <script> element, just before the </body> tag.
// When the page loads:
document.addEventListener("DOMContentLoaded", function() {
  // Find the form.
  var theForm = document.querySelector("#contact-form");
  // Disable HTML5 validation.
  theForm.noValidate = true;

  // When the form is submitted:
  // Check every field in this form is filled
  // If a field is blank:
  // Give the field an error class
  // Give the error span a class and the error message.
  // If any field is found with an error:
  // Prevent the form from submitting.
});
By setting the noValidate property to true, we prevent the browser from using HTML5 style validation on this form. We could also put the noValidate attribute directly on the form element, but this could be omitted. We will leave nothing to chance.
Form submissions
Forms can be submitted in more than one way:
- clicking the Submit button
- pressing 'Return' (or 'Enter') in a field.
Either of these would trigger their own click or keypress event, but once those are resolved, it further triggers the Submit event on their parent <form> element. Listening for this event is the most reliable method we have here.
document.addEventListener("DOMContentLoaded", function() {
  var theForm = document.querySelector("#contact-form");

  theForm.noValidate = true;

  // When the form is submitted:
  theForm.addEventListener("submit", function(evt) {
    // Check every field in this form is filled
    // If a field is blank:
    // Give the field an error class
    // Give the error span a class and the error message.
    // If any field is found with an error:
    // Prevent the form from submitting.
  });
});
Preventing submissions
We will be looking for an error on each field. To keep track of this, we start by assuming there are no errors, and if we find one, we will prevent the form from submitting.
document.addEventListener("DOMContentLoaded", function() {
  var theForm = document.querySelector("#contact-form");

  theForm.noValidate = true;

  theForm.addEventListener("submit", function(evt) {
    // Assume there are no errors.
    var isError = false;

    // Check every field in this form is filled
    // If a field is blank:
    // Give the field an error class
    // Give the error span a class and the error message.

    // If any field is found with an error:
    if (isError) {
      // Prevent the form from submitting.
      evt.preventDefault();
    }
  });
});
Checking all the form's fields
Now we need to find each field and check it.
document.addEventListener("DOMContentLoaded", function() {
  var theForm = document.querySelector("#contact-form");

  theForm.noValidate = true;

  theForm.addEventListener("submit", function(evt) {
    var isError = false;

    // Check every field in this form is filled
    var elements = this.elements;

    for (var i = 0; i < elements.length; i += 1) {
      console.log(elements[i]);

      // If a field is blank:
      // Give the field an error class
      // Give the error span a class and the error message.
    }

    if (isError) {
      evt.preventDefault();
    }
  });
});
When submitting, the log shows: input#firstname button.
What is 'this' within the submit event listener? It is the form#contact-form element. The elements property of the form is a collection of all the form elements. Right now, elements.length is 2: the <input> and the <button>.
Checking the field
Now let us actually check the fields.
document.addEventListener("DOMContentLoaded", function() {
  var theForm = document.querySelector("#contact-form");

  theForm.noValidate = true;

  theForm.addEventListener("submit", function(evt) {
    var isError = false;
    var elements = this.elements;

    for (var i = 0; i < elements.length; i += 1) {
      // Get the field.
      var field = elements[i];

      // If a field is blank:
      if (field.value.trim() === "") {
        // There is an error.
        isError = true;
        // Give the field an error class
        field.classList.add("invalid");
        // Give the error span a class and the error message.
        var errorSpan = document.querySelector("#" + field.id + "-error");

        errorSpan.classList.add("danger");
        errorSpan.innerHTML = "This field is required.";
      }
    }

    if (isError) {
      evt.preventDefault();
    }
  });
});
Here, we check the field's value property. If, after trimming it of leading and trailing spaces, it matches an empty string, the field is invalid. We set isError to true and add the invalid class to the field.
We also find the error span for the element, set its class and output the error.
The classList object works in everything except IE9, at the time of writing. There are polyfills to make it work there.
Refactor: Extract function
The submit event listener is getting quite long. Let us 'refactor' it: we will extract the field checking code into its own function. We want a function to tell us if a field is valid or not.
document.addEventListener("DOMContentLoaded", function() {
  var theForm = document.querySelector("#contact-form");

  theForm.noValidate = true;

  theForm.addEventListener("submit", function(evt) {
    var isError = false;
    var elements = this.elements;

    for (var i = 0; i < elements.length; i += 1) {
      if (!isFieldValid(elements[i])) {
        isError = true;
      }
    }

    if (isError) {
      evt.preventDefault();
    }
  });
});

function isFieldValue(field) {
  if (field.value.trim() === "") {
    field.classList.add("invalid");

    var errorSpan = document.querySelector("#" + field.id + "-error");

    errorSpan.classList.add("danger");
    errorSpan.innerHTML = "This field is required.";

    return false;
  }

  return true;
}
Fields that are always valid
If we use the debugger, we will discover our code works for our first name field, but it will not work for the button, as the button does not have an ID or an error span.
A button element is always valid. There are several elements that we can assume are always valid: submit, reset, button, hidden, fieldset
Let us write a function to check if the field needs to be checked:
document.addEventListener("DOMContentLoaded", function() {
  var theForm = document.querySelector("#contact-form");

  theForm.noValidate = true;

  theForm.addEventListener("submit", function(evt) {
    var isError = false;
    var elements = this.elements;

    for (var i = 0; i < elements.length; i += 1) {
      if (!isFieldValid(elements[i])) {
        isError = true;
      }
    }

    if (isError) {
      evt.preventDefault();
    }
  });
});

function isFieldValue(field) {
  if (!needsToBeValidated(field)) {
    return true;
  }

  if (field.value.trim() === "") {
    field.classList.add("invalid");

    var errorSpan = document.querySelector("#" + field.id + "-error");

    errorSpan.classList.add("danger");
    errorSpan.innerHTML = "This field is required.";

    return false;
  }

  return true;
}

function needsToBeValidated(field) {
  return [
    "submit", "reset", "button", "hidden", "fieldset"
  ].indexOf(field.type) === -1;
}
Before we check for the error, we pass the field through to needsToBeValidated(). This function will return true if the field needs to be validated. The way it does this is by checking an array of all the automatically valid types to see if it contains the field's type. If the field has type 'text', indexOf() returns -1, and -1 === -1 is true, so returns true.
If the field does not need to be validated, we return true as this field is as valid as it will get.
Only Required fields
Right now, every field is being treated as Required. We only want to check fields that have the Required attribute. Let us add that in.
document.addEventListener("DOMContentLoaded", function() {
  var theForm = document.querySelector("#contact-form");

  theForm.noValidate = true;

  theForm.addEventListener("submit", function(evt) {
    var isError = false;
    var elements = this.elements;

    for (var i = 0; i < elements.length; i += 1) {
      if (!isFieldValid(elements[i])) {
        isError = true;
      }
    }

    if (isError) {
      evt.preventDefault();
    }
  });
});

function isFieldValue(field) {
  if (!needsToBeValidated(field)) {
    return true;
  }

  if (field.required && field.value.trim() === "") {
    field.classList.add("invalid");

    var errorSpan = document.querySelector("#" + field.id + "-error");

    errorSpan.classList.add("danger");
    errorSpan.innerHTML = "This field is required.";

    return false;
  }

  return true;
}

function needsToBeValidated(field) {
  return [
    "submit", "reset", "button", "hidden", "fieldset"
  ].indexOf(field.type) === -1;
}
Add another field
At this point, the script works if we try to submit the blank form, and if we correct the form, the form will submit.
Let us add the last name field.
<form action="success.html" id="contact-form" method="POST">
  <div class="form-group">
    <label for="firstname">First Name</label>
    <input id="firstname" name="firstname" required type="text">
    <span id="firstname-error"></span>
  </div>
  <div class="form-group">
    <label for="lastname">Last Name</label>
    <input id="lastname" name="lastname" required type="text">
    <span id="lastname-error"></span>
  </div>
  <div class="form-group">
    <button type="submit">Submit</button>
  </div>
</form>
Now, if we validate this form with both fields blank, both fields will get errors. If we then fix both, the form will submit successfully. However, if we only fix one of the fields, that field's error messages do not go away.
We need to reset the error message and classes before we validate the form again.
document.addEventListener("DOMContentLoaded", function() {
  var theForm = document.querySelector("#contact-form");

  theForm.noValidate = true;

  theForm.addEventListener("submit", function(evt) {
    var isError = false;
    var elements = this.elements;

    for (var i = 0; i < elements.length; i += 1) {
      if (!isFieldValid(elements[i])) {
        isError = true;
      }
    }

    if (isError) {
      evt.preventDefault();
    }
  });
});

function isFieldValue(field) {
  if (!needsToBeValidated(field)) {
    return true;
  }

  field.classList.remove("invalid");

  var errorSpan = document.querySelector("#" + field.id + "-error");

  errorSpan.classList.remove("danger");
  errorSpan.innerHTML = "";

  if (field.required && field.value.trim() === "") {
    field.classList.add("invalid");

    errorSpan.classList.add("danger");
    errorSpan.innerHTML = "This field is required.";

    return false;
  }

  return true;
}

function needsToBeValidated(field) {
  return [
    "submit", "reset", "button", "hidden", "fieldset"
  ].indexOf(field.type) === -1;
}
Portability
We want this script to be portable: it should work for any form we point at it. Let us turn our code into a function that we can point at any form.
Now move the DOMContentLoaded event listener into the HTML where we will find the form element we want to validate and pass that element into a function. That function will set that element up for form validation.
<script src="form-validation.js"></script>
<script>
  document.addEventListener("DOMContentLoaded", function() {
    addFormValidation(document.querySelector("#contact-form"));
  }
</script>

function addFormValidation(theForm) {
  theForm.noValidate = true;

  theForm.addEventListener("submit", function(evt) {
    var isError = false;
    var elements = this.elements;

    for (var i = 0; i < elements.length; i += 1) {
      if (!isFieldValid(elements[i])) {
        isError = true;
      }
    }

    if (isError) {
      evt.preventDefault();
    }
  });

  function isFieldValue(field) {
    if (!needsToBeValidated(field)) {
      return true;
    }

    field.classList.remove("invalid");

    var errorSpan = document.querySelector("#" + field.id + "-error");

    errorSpan.classList.remove("danger");
    errorSpan.innerHTML = "";

    if (field.required && field.value.trim() === "") {
      field.classList.add("invalid");

      errorSpan.classList.add("danger");
      errorSpan.innerHTML = "This field is required.";

      return false;
    }

    return true;
  }

  function needsToBeValidated(field) {
    return [
      "submit", "reset", "button", "hidden", "fieldset"
    ].indexOf(field.type) === -1;
  }
}
Preventing developer errors
Humans are forgetful creatures. How can we protect our developers from using the script incorrectly? What assumptions do we make?
We assume they will pass a <form> element into addFormValidation(). What if they do not? Our script will not function.
We can communicate that to our developer by throwing an 'exception'.
function addFormValidation(theForm) {
  if (formElement === null || formElement.tagName.toUpperCase() !== "FORM") {
    throw new Error("expected first parameter to addFormValidation to be a FORM.");
  }
  // addFormValidation continues, including everything else in the file…
}
This way, if addFormValidation() is passed an element that it cannot use, it will die loudly on the console:
Uncaught Error: expected first parameter to addFormValidation() to be a FORM.
addFormValidation @ form-validation.js:4
(anonymous function) @ form.html:37
We also assume they have given fields id attributes and made matching error spans. If they have not, when we try to find it, errorSpan will be set to null, and will get the error on the next line:
Uncaught TypeError: Cannot read property 'classList' of null
To solve this, when isFieldValid is passed, we will add some more exceptions:
function isFieldValid(field) {
  if (!needsToBeValidated(field)) {
    return true;
  }

  if (field.id.length === 0 || field.name.length === 0) {
    console.error("error: ", field);
    throw new Error(
      "found a field that is missing an id and/or name attribute. name should be there. id is required for determining the field's error message element."
    );
  }

  field.classList.remove("invalid");

  var errorSpan = document.querySelector("#" + field.id + "-error");

  if (errorSpan === null) {
    console.error("error: ", null);

    throw new Error(
      "could not find the '#" +
      field.id +
      "-error' element. It is needed for error messages if #" +
      field.id +
      " is ever invalid."
    );
  }

  errorSpan.classList.remove("danger");
  errorSpan.innerHTML = "";

  // isFieldValid() continues…
}
Email field
Next, we'll add an Email field:
<div class="form-group">
  <label for="email">Email Address</label>
  <input id="email" name="email" required type="email">
  <span id="email-error"></span>
</div>
To validate an Email field better than HTML5, we will need a way to test for a valid email address. Put this below needsToBeValidated(), making sure it is still inside addFormValidation():
function isEmail(input) {
  return input.match(/^([a-z0-9_.\-+]+)@([\da-z.\-]+)\.([a-z\.]{2,})$/);
}
Let us add the following above the required test in isFieldValid:
if (field.type === "email" && !isEmail(field.value)) {
  field.classList.add("invalid");

  errorSpan.classList.add("danger");
  errorSpan.innerHTML = "This field is required.";

  return false;
}

if (field.required && field.value.trim() === "") {
  field.classList.add("invalid");

  errorSpan.classList.add("danger");
  errorSpan.innerHTML = "This field is required.";

  return false;
}
Refactor: Reduce duplication of code (make it DRY)
This is working, but we have some duplication between the email and the required checks. We should reduce duplication to make our code more DRY.
function isFieldValid(field) {
  var errorMessage = "";

  if (!needsToBeValidated(field)) {
    return true;
  }

  if (field.id.length === 0 || field.name.length === 0) {
    console.log("error: ", field);

    throw new Error(
      "found a field that is missing an id and/or name attribute. name should be there. id is required for determining the field's error message element."
    );
  }

  field.classList.remove("invalid");

  var errorSpan = document.querySelector("#" + field.id + "-error");

  if (errorSpan === null) {
    console.error("error: ", field);

    throw new Error(
      "could not find the '#" +
      field.id +
      "-error' element. It is needed for error messages if #" +
      field.id +
      " is ever invalid."
    );
  }

  errorSpan.classList.remove("danger");
  errorSpan.innerHTML = "";

  if (field.type === "email" && !isEmail(field.value)) {
    errorMessage = "This should be a valid email address.";
  }

  if (field.required && field.value.trim() === "") {
    errorMessage = "This field is required.";
  }

  if (errorMessage !== "") {
    field.classList.add("invalid");

    errorSpan.classList.add("danger");
    errorSpan.innerHTML = errorMessage;

    return false;
  }

  return true;
}
Here, we add an errorMessage variable at the top to store our error message. Our Email and Required checks now just set that variable to the error. At the end, if that variable is not a blank string, we put that error message in the error span, and add the error classes.
Minimum length
Now, say that our name fields are still Required but must be 2 or more characters long.
<form action="success.html" id="contact-form" method="POST">
  <div class="form-group">
    <label for="firstname">First Name</label>
    <input id="firstname" name="firstname" required type="text">
    <span id="firstname-error"></span>
  </div>
  <div class="form-group">
    <label for="lastname">Last Name</label>
    <input id="lastname" name="lastname" required type="text">
    <span id="lastname-error"></span>
  </div>
  <div class="form-group">
    <label for="email">Email Address</label>
    <input id="email" name="email" required type="email">
    <span id="email-error"></span>
  </div>
  <div class="form-group">
    <button type="submit">Submit</button>
  </div>
</form>
The shortest names (in English) are 2 characters minimum. This also prevents people from just filling the name field with one character.
So, let us add another check. We will put this above the email check:
if (field.minLength > 0 && field.value.length < field.minLength) {
  errorMessage = "Must be " + field.minLength + " or more characters long.";
}
It is that simple! To add support for maxlength, we do something similar:
if (field.maxLength > -1 && field.value.length > field.maxLength) {
  errorMessage = "Must be " + field.maxLength + " characters or less.";
}
That should do it for our form.
Listed below are some bonuses we get for free.
- If Required is on a checkbox, it will be invalid if it is not checked.
- If Required is on a select box, it will be invalid if set to an option with
value="". - If you need to validate a radio box, make one of them checked by default.
If you still feel unsure about how to create a form, watch the following tutorial for step-by-step instructions.
The parts we use to create apps or websites are known as User Interface (UI) elements. UI elements provide touchpoints for the user as they navigate their way across a user interface; think buttons, scrollbars, menu items and checkboxes.
UI elements include, but are not limited to:
- input controls: checkboxes, radio buttons, dropdown lists, list boxes, buttons, toggles, text fields, date field
- navigational components: breadcrumb, slider, search field, pagination, slider, tags, icons
- informational components: tooltips, icons, progress bar, notifications, message boxes, modal windows
- containers: accordion.
In order to add custom UI elements (such as controls) to your online application, you would create a placeholder on your panel using the Placeholder HTML Container.
You can configure the element's dimensions and other parameters using the placeholder, which works for both flexible and absolute layouts.
How to create a UI element
- Open or create a JSLI and add the JavaScript function you want to call from your web application.
- Add the parameters with one input having a data type of JS Reference.
- In order to directly access your HTML element, your function must have an input with a matching data type of JS Reference. You can also include an array of JS references.
- Open or create a WebVI (.gviweb) and on the panel, select Decorations » Placeholder HTML Container and place it on the panel.
- Use the Configuration pane or property nodes to configure the HTML container instead of injecting HTML to configure the placement and sizing.
- The container is empty by default and you can populate it with a control at runtime. If you use the Configuration pane to add a placeholder image, the placeholder image is visible in the container at edit time. Select Image visible at runtime to make the placeholder image also visible at runtime until the contents of the container are available.
- With the HTML Container selected, click Create reference in the Configuration pane.
- The HTML Container does not have a terminal, so you must create a reference to interact with it on the diagram.
Let us have a look at a few different UI elements and how to create them.
Modal pop-ups
A 'pop-up' (also known as a 'modal') is a small user interface element that appears in the forefront of a website, usually as a prompt for the user to do something:
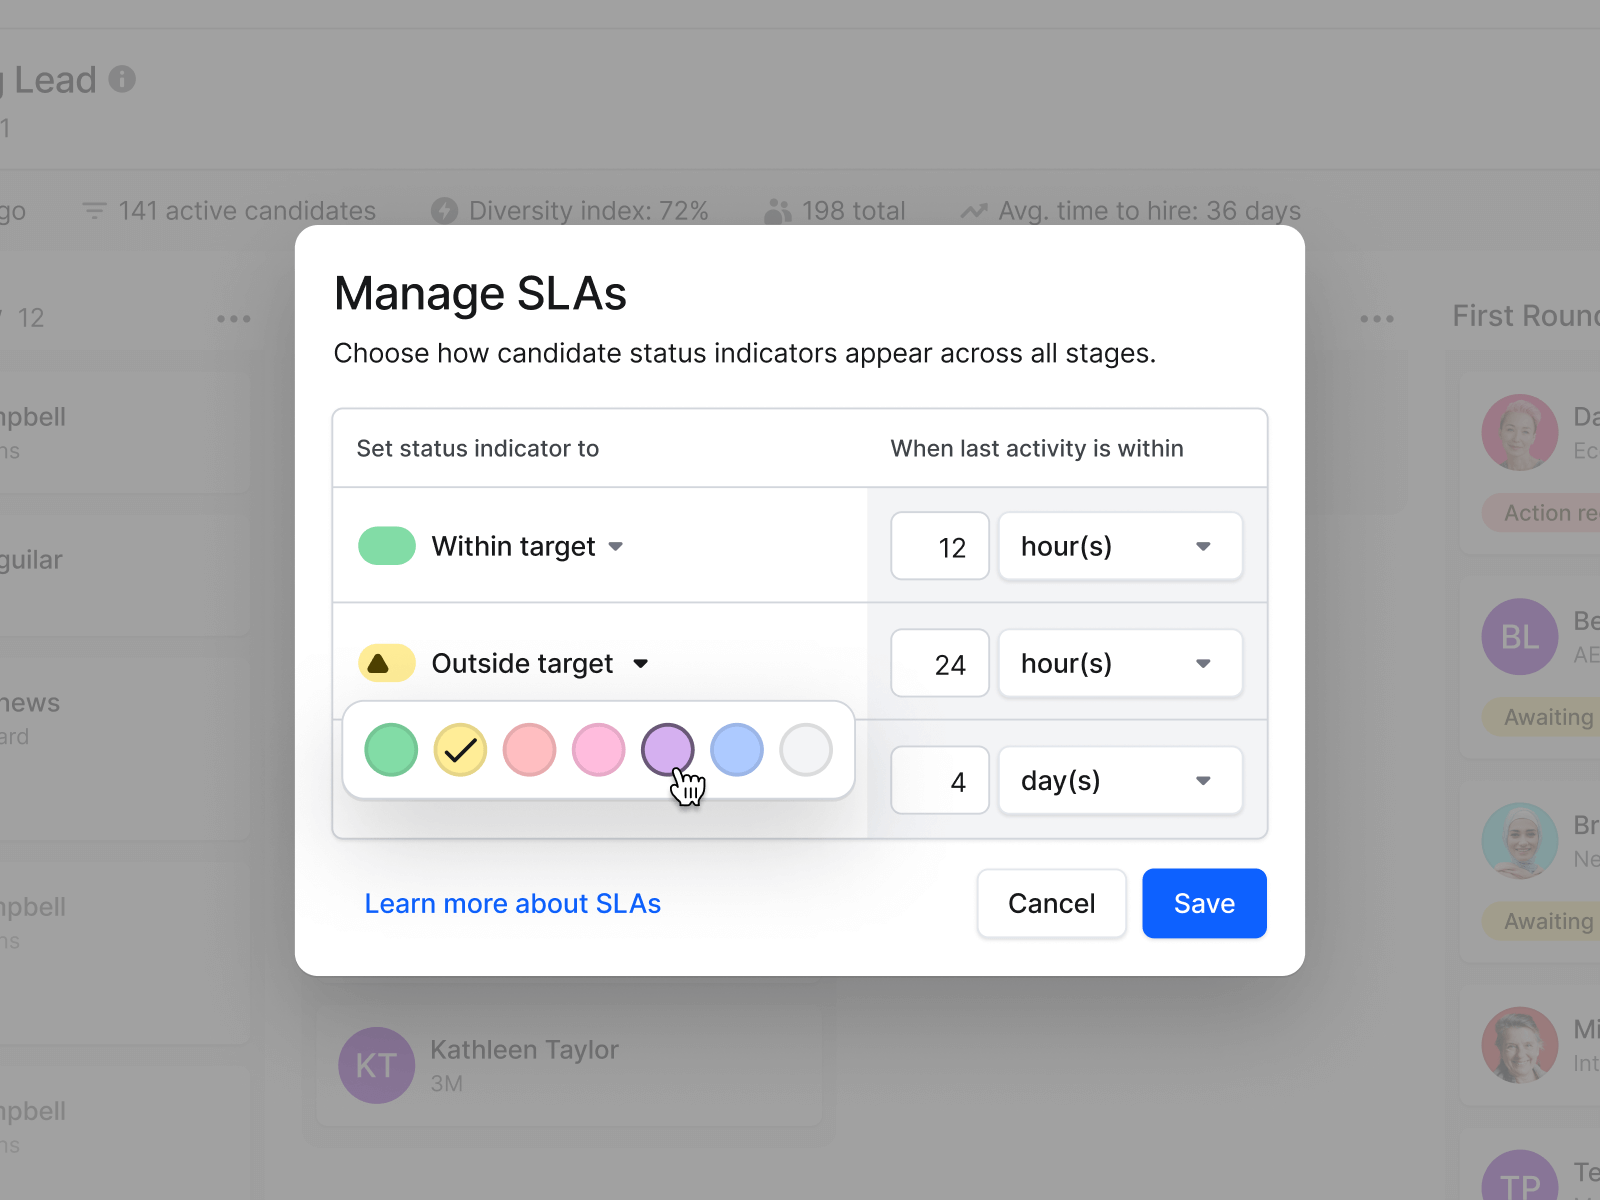
Image carousel
In terms of site and app design graphics, photos are the gold standard. Pictures grab attention, set the mood, show how things work, and accomplish a variety of other important goals.
An image carousel is a container (slideshow) containing photos or information that viewers may choose from by clicking a button that advances or reverses the slideshow.
Image carousels improve user experience on websites by making them more dynamic.

Check out the following tutorial on how to create an image carousel for a more interactive user experience.
Checkbox
A 'checkbox' is a small square box on the screen that the user can check or uncheck, as the name suggests.
Checkboxes allow users to choose from a list of numerous alternatives, with each checkbox acting independently. When a checkbox is clicked, or checked, by a user it is marked with a small tick (see the image below).
Forms and databases are 2 prominent use cases for this element.
Take a look at the following video to see how you can build a checkbox.
Knowledge check
Form validation
Create a form that has inputs for the first name, last name, email address, telephone number and website URL.
The first name, last name and email address fields are Required fields so the user should be shown a message if one of these fields is empty.
The application will also check the email address, telephone number and website URL fields for correct format, and show a meaningful message if the input doesn't follow this format.