The Purchases area in MYOB is where you'll record the purchases you make from your suppliers. When you make a payment, you can match it directly to the original purchase, making it easy to keep on top of what you're spending.
Businesses purchase items for several reasons:
- build or assemble for resale
- stock items for resale
- run the operations of the business, such as office supplies and vehicles.
Procurement policies set specific guidance, standards and procedures for the business's purchasing needs. The business should introduce these policies during induction to staff authorised to make purchases. A robust policy helps to put everyone on the same page and leaves no room for confusion around procuring items for manufacturing, resale, and operations.
Download this Purchasing and Procurement Policy from Camden Council. It is highly detailed and will give you a good overview of what makes up a robust procurement policy

Inventory can be managed with two different systems:
- Periodic Inventory is a system of inventory in which updates are made periodically. This means that at least once a year, all stock items are counted and journaled into the accounting system. Inventory is not tracked.
- Perpetual Inventory is where updates are made as sales and purchases of inventory occur. A business using the perpetual inventory system will also use itemised invoices so that all sales and purchases of inventory are tracked. Stocktake still happens to ensure that any stock losses are recorded.
Some businesses will choose to use a mixture of perpetual and periodic inventory depending on the stock mix.
MYOB can be used for either system. The difference is in the setup of the items and the choice made by management to track all inventory items coming and going from the business using itemised invoicing.
Entering Inventory Items
Although MYOB can't yet manage your inventory stock levels, you can set up items to make it quicker to include what you're buying and selling on your bills and invoices.
Items are the goods that your business may buy, sell, hire, lease or otherwise trade. An item can be:
- a stock item—an item that you buy or sell which is measured in quantities, such as a hammer or box of nails
- a service item—an item that you buy or sell which is measured in hours, such as a $50 service fee
You can enter items in three different ways.
- Importing your items list
- Select your business name, and then select Import and Export Data
- Select Items from the drop-down menu for Data Type and complete the rest of the fields required, then select Record.

- Creating items on the fly when entering an invoice or bill by selecting the Item ID drop-down list and selecting the first item, +Create Item.

- Entering them one at a time on the Items page
- Go to Sales or Purchases on the main menu, then select Items from the drop-down menu.
- Select the Create item green button on the right to enter a single new item.

The items page provides the most functionality around your inventory list. More information about working with Items is provided in the Sales subtopic.
From here, you can:
- view
- create
- edit
- delete
- deactivate items.
To delete items, use the delete button at the bottom of the item entry screen, though we recommend deactivating them instead:

To deactivate them, use the checkbox in the first set of fields:

Activity: Enter items
- Enter the following stock items into MYOB for North Park Stationery Supplies.
* You purchase the pallets of paper for printing invitations and do not sell directly to customers.Item Name Description Item # Price $ Cost $ 50 Pack AS Clear Book 20 Leaf A4 Clear Plastic 20-page sleeves A4C50 85 50 Pallet A3 Recycled White Standard Pallet of Standard A3 White Paper PA3500 160 103 50 Pack Tech Inc, USB Flash Drive 50 Pack Tech Inc USB Flash Drive USB12850 230 150 25 Pack 4 colour Whiteboard markers 25x packs of 4 Whiteboard markers in 4 colours WBFineS25 189 125 *Pallet Ivory A4 111lb 111lb weight ivory cardboard stock PAIA4-111 * 112
- When you have entered all of the items above, your Items List should look like the following:

MYOB provides the ability to create a purchase order for goods or services you need from a supplier. Your purchase order will detail your requirements, the agreed prices, GST, shipping address, and any deposit paid. You can then send the purchase order to the supplier to prepare your order.
Once you receive the supplier's bill for the items or services you have ordered, with one click, you can convert the purchase order into a bill. This saves you from having to re-enter the details of the order into a bill.
Creating a purchase order

-
Go to the Purchases menu and choose Create purchase order.
-
Choose the Supplier you're ordering from.
- If the order will result in a reportable payment, select the option Report to ATO via TPAR. We'll provide more detail about this in the Reporting area, but you can learn which industries are required to report TPAR payments on the ATO website.
- Confirm the Shipping address where you want the order delivered.
- If necessary, change the Purchase order number. This number is automatically generated based on the last number used. For example: If you change the purchase order number from 1015 to 2000, the next time you create a purchase order, the default number will be 2001.
- If you have a Supplier invoice number or Promised date from the supplier, enter these.
- Select whether the amounts in the order are Tax inclusive or Tax exclusive.
- Click the Field layout icon (wheel cog) and select the applicable option based on what you're ordering — Services or Services and items
- Enter details of the items and/or services you're ordering.
- If you're paying a deposit on this order, enter it in the Amount paid field near the bottom.
- If you want to apply a payment to a purchase order, you'll need to specify a linked account for tracking supplier deposits (Accounting menu > Manage linked accounts > Purchases tab > I track deposits paid to suppliers).
- This is considered a deposit, which is a payment for goods or services that you haven't been billed for yet.
- Once a purchase order is converted to a bill, you can apply a regular supplier payment. (Supplier payments are covered in the next section.)
- Learn more about Supplier Deposits at the MYOB Help Centre.
- Enter any charges for Freight, and if required, change the Tax/GST code.
- If you can't enter freight, you'll be prompted to specify a linked account for freight.
- The following totals are automatically calculated:
- Subtotal—the total for the items added to the purchase order
- Tax—the amount of tax applied to the purchase order
- Total—the subtotal amount plus the tax amount
- Balance due— the amount owing.
- Complete the order with the functions at the bottom of the page.
- Notes: If you want to -
- Print or Save a PDF copy: Click View PDF and choose the template to generate the PDF (currently, only invoice templates can be used), then click Export. The order appears as a PDF in a new tab where you can print or save it.
- Email the order: Click Email purchase order, enter or check the details of the email and click Send purchase order. Remember, you can change the default purchase order email template by clicking your business name > Purchases settings (Be sure to SAVE before moving away from the screen.)
- Notes: If you want to -
- Once the supplier invoices you for what you've ordered, you can convert the order to a bill.
Here is an example of a Purchase order with a supplier deposit of $850.00 against a total amount of $3891.00

Finding Purchase Orders
Go to the Purchases menu and choose Purchase orders. You can filter the list of displayed purchase orders using the filters across the top, then click a purchase order number in the list below it to view its details.
The image here shows only the navigation across the top of the Find Purchase orders screen. Note that it shows the total amount for all purchases and how much of that is still owing to the supplier.

Once a purchase order is converted to a bill, it won't show in this list. Instead, you'll see it in your bills list (Purchases menu > Bills).
Changing and deleting purchase orders
You can simply find and open the order, then make and save your changes. You can change anything except the Supplier or the Amount paid value.
If it's easier, you can delete the order and start again.
You can delete a purchase order from the Purchase orders page (Purchases > Purchase orders).
Notes:
If a purchase order has a payment (deposit) applied to it, you'll first need to "undo" the payment before you can delete the purchase order (see the next task).
If the purchase order has been converted to a bill, you'll need to delete the bill instead.
- From the Purchases menu, choose Purchase orders.
- Click the purchase order you want to delete. If needed, use the filters at the top to help find the order.
- Click Delete at the bottom of the page.
-
At the confirmation message, click Delete.
The Bills page is used to manage your business's purchases.
In MYOB, bills are payments related to a supplier—for example, purchases made, bills or invoices you have received from a supplier. You won't always need to create a bill — to pay a telephone bill, for example. You can simply enter these as Spend Money transactions, which we will cover in the Banking section of this module.
When you receive a bill from a supplier for a purchase you have made, you first need to enter the purchase as a bill in MYOB. Then, you can pay the bill.
To speed things up, MYOB has a feature called In Tray, where you can upload supplier invoices and let MYOB help create the bill for you.

To use this feature:
- Click In tray then click Upload documents.
- Choose a document stored on your computer. You can add documents up to 10MB in size, in these formats: PDF, JPG, JPEG, TIFF, TIF, and PNG.
-
Click Open. The document is now in your In tray.
Turn a document into a transaction
Once you have uploaded a document to the In tray, you can use the smarts in MYOB to do some of the data entry for you.
Click the ellipsis button for the document you just uploaded and choose one of these options:

Link to existing bill - Attach the document to a bill you've already recorded in MYOB.
Create bill - Record a new bill from one of your suppliers based on the uploaded document.
Create spend money transaction - Record a new spend money transaction based on the uploaded document, e.g. for goods or services that are not from one of your regular suppliers, such as a telephone bill, bank charge or charity donation.
When using an uploaded document to create a new transaction, MYOB scans what's in the document and pre-fills as many details as possible, saving you some keystrokes.
For example, click Create bill. MYOB creates a bill and automatically fills it in with information from the document.

Setting up suppliers and items in MYOB
It is recommended that you set up your Suppliers and Items before creating bills to enhance efficiency. You can do this using the Contacts menu for suppliers, or Items links in the Purchases and Sales drop-down menus for the services and/or items. Of course, you can also do this on the fly when creating the bill if you have not set up the required suppliers and items yet, with the +Create items at the top of the drop-down menu for Supplier and Items on the Create Bill screen.
If you have already created a purchase order, then you can simply open the purchase order and convert it to a bill. There are two options to do this from the Purchase Order, shown in the screenshot below.

Create a bill in MYOB
If you don't have a purchase order and you are not using the In Tray feature, then you can create one from scratch.
To do this:
- Go to the Purchases menu and choose Create bill. The Create bill page appears.
- You can save time by accessing the In Tray feature (as noted above) from the text link at the top: Prefill from a source document
- In the Supplier field, enter the supplier’s name, or click the drop-down arrow and choose the supplier from the list.
- To update details to an existing supplier without leaving this screen, first, select the supplier from the Supplier drop-down list, then click +Create supplier, which will bring up the Supplier detail fields (such as ABN, Billing address, Shipping info, etc.) for you to update and Save.
- The status of the ABN you've entered in the supplier's record will be checked, and the status shown. Click the status to see more details.
- If the bill is a reportable payment, select the option Report to ATO via TPAR. More information will be provided about this in the Reporting section.
- If necessary, change the Bill number. This number is automatically generated based on the last number used.
- As with purchase orders, if you change the bill number, you’ll change the automatic numbering. For example, if you change the number from 1500 to 000001, the next time you create a bill, the new bill number will be 000002.
- If you have one, enter the Supplier invoice number.
- Check the date in the Issue date field.
- Choose the Due date for the bill (when the bill needs to be paid).
- Select whether the amounts in your bill are Tax inclusive or Tax exclusive.
- Click the Field layout wheel cog icon and select the applicable option based on what you're being billed for — Services or Services and items.
- If you're being billed for items:
- In the Item ID column, enter the number of the item you’re being billed for, or choose it from the list.
- Enter the number of units of this item you're being billed for.
- If required, enter or update the Unit price. The calculated Amount is displayed.
- Note: There's a built-in calculator in the No of units, Unit price, Discount and Amount fields. Just enter a calculation in the field and tab out of it:
- If required, change the Tax code.
- Repeat step 1 for each item on the bill.
- If you are being billed for services:
- In the Description column, enter a description of the service you're providing.
- Choose the Account the expense from this service will be allocated from. If you're not sure, check with your accounting advisor.
- Enter the Amount of this service.
- If required, change the Tax code. If you're not sure, check with your accounting advisor.
- Repeat step 1 for additional services. If you need to delete a line from your bill, click the delete icon to the right of the item line.
- If you want, enter a note to appear on the bill.
- If you're making a payment against the bill, enter it in the Amount paid field.
- Enter any charges for Freight, and if required, change the default Tax/GST code. If you can't enter Freight, you'll be prompted to specify a linked account for freight.
The following totals are automatically calculated:- Subtotal—the total for the items added to the bill
- Tax—the amount of tax applied to the bill
- Total—the subtotal amount plus the tax amount
- Amount paid—the dollar amount that's already been paid to the bill.
- Balance due— the amount owing.
- (Optional) Choose a Job if the line item relates to a specific job. The Jobs function provides an additional level of tracking so you can track expenses and income by Job. Learn more at the MYOB Help Centre.
- Check that all the information in the bill is correct.
- When you're done, use the buttons across the bottom of the page to choose an action.
Note:- To Print or Save a PDF copy: Click View PDF. The bill appears as a PDF in a new tab where you can print or save it.
- To Save it as a recurring bill: Click Save as recurring. Enter the recurring transaction Schedule name and choose the Frequency, such as Daily, Weekly or Monthly. There will be more information about recurring transactions in the Banking section of this course.
- To Prefill the bill from a recurring transaction: Click Prefill from recurring. Select a recurring transaction and click Prefill. The bill is updated with information from the recurring transaction.
Here is an example of the Bill Creation screen:

Helpful tip: If you want to keep track of cash purchases, set up a contact called "Cash Purchases" and choose this contact when entering a cash purchase.

You can make a payment when recording a supplier's bill or any time afterwards. If you'd like to pay multiple bills, you can do it on the Record payment to supplier page in the Purchases menu > Create supplier payment.
Payments can be full or partial, and if you need to make any changes, you can always edit or delete the payment.
Supplier Payments
Regardless of how you choose to pay your suppliers, you will need to account for the payment in MYOB. You may use BPAY®, credit card, EFT or even petty cash to pay someone. Accounting for it in MYOB is handled via spend money or supplier payments. Using Bank Feeds from bank and credit card suppliers will speed up the data entry and reduce the risk of errors.
Supplier deposits
As noted previously, supplier deposits are simply payments made for purchases of services and/or items to which you don't have a bill to attach to. This means payments against purchase orders are considered deposits. After the PO has been converted to a bill, it is handled via regular supplier payments.
Setting up MYOB to track deposits
If you want to apply deposits to purchase orders, you'll need to activate an MYOB preference. You'll also need to specify the asset account you want to use to track supplier deposits.
From an accounting perspective, deposits differ from other supplier payments because you haven't been billed for the goods or services you've ordered. To account for this in MYOB, supplier deposits are posted to an asset account. When you're billed for the things you've ordered, and you convert the purchase order into a bill, the deposit is transferred to your trade creditors account.
Activating the supplier deposit preference and specifying the linked asset account ensures this process happens behind the scenes.
- Go to the Accounting menu and choose Manage linked accounts.
- Click the Purchases tab.
- Select the option I track deposits paid to suppliers.
- Choose the Asset account for supplier deposits. If needed, you can create a new account for this purpose.
- Click Save

To add additional payments before it is converted to a bill:
- Go to the Purchases menu and choose Create supplier payment.
- Select the option Show purchase orders.
- Enter the deposit amount against the applicable purchase order.

For additional information about supplier deposits, such as how to delete them (hint: in most cases, you can't), please review deleting the deposit and the other FAQ on the Supplier Deposits page at the MYOB Help Centre.
Paying suppliers and employees using Electronic Payments (EPs)
After recording a payment to a supplier or paying an employee in MYOB, you can choose to make the payment via bank transfer and then deposit the funds into their account. This is called an 'electronic payment'.
You may choose to use EPs because:
- they are more secure - no cash or cheques to lose or monitor
- cash and cheque payments are becoming obsolete - cashless payment has become the expectation
- using a computerised accounting system like MYOB, and paying from that software links some of the activities involved, saves time, reduces human error and is easier to monitor as it creates an audit trail.
Permission to create EPs is tied to the User Role
For security reasons, permission must be granted for certain types of user roles to prepare electronic payments. The following users are the only ones that MYOB allows access via permission granted when setting up the role. If you want a user to have that permission, assign them one of the following roles:
- Administrator
- Accountant/Bookkeeper
- Banking
- Payroll role

There are two ways to make electronic payment:
- Pay via bank file - create a bank file (ABA) from MYOB, then upload it to the bank for processing
- Pay via direct payments - using MYOB to generate everything you need to get suppliers and employees paid quickly with less work.
Here are the differences between them
| Bank file direct | Direct payments |
|---|---|
|
|
*Direct payments availability Only Australian businesses registered as Sole Traders and/or Private Companies with the Australian Business Registry are eligible to apply.
Setting up Electronic Payments
Setting up for either method of payment requires a few tasks, including making sure a specific account is set up in MYOB (an electronic clearing account). This account works behind the scenes to handle your electronic payments. You'll also enter the bank account details from where your electronic payments will come and the bank account details for your suppliers and employees.
These three tasks will get you ready to pay via EP
1. Check your electronic clearing account
When you record a payment in MYOB that's going to be paid electronically, the payment is posted to a temporary holding account in MYOB. This type of account is called a clearing account or a suspense account. The payments you make in MYOB that are to be paid electronically sit in this account until you're ready to process the electronic payment. Once the payment is processed, either one payment or several at the same time, called a batch, the payment amount is removed from the clearing account.
There should be a default electronic clearing account in your accounts list. You can check via the Accounting menu > Chart of accounts. This snippet from the Chart of Accounts illustrates this:

If you don't have this in your Chart of Accounts, go ahead and add it as a Bank account with the tax code N-T.
You'll also need to check that your Electronic Clearing Account is set as the linked account for electronic payments (Accounting menu > Manage linked accounts > Accounts & Banking tab). This ensures that your electronic payments work correctly behind the scenes in MYOB.

2. Enter your suppliers' and employees' bank account details
Supplier
To pay funds into a supplier's or employee's bank account, you'll need to record their account details in MYOB:
- Go to the Contacts menu and choose All contacts.
- Choose Supplier in the Contact type list.
- Click a supplier's name to open their details.
- Remember that you can use +Create supplier in the supplier drop-down to add one on the fly.
- In the Payment details section, enter the supplier's banking details, such as their BSB number, Bank account number, Bank account name and Remittance advice email address.
- Enter the Statement text to appear on the supplier's bank statement for the electronic payments you make to them.
- Click Save.
- Repeat for each supplier you want to pay electronically.
Employee
You can enter bank account details when you add the employee into MYOB. Otherwise:
- From the Payroll menu, choose Employees.
- Click the employee's name to open their details.
- Click the Payment details tab.
- For the Payment method, choose Electronic.
- In the Split net pay between field, choose how many bank accounts you're paying into for this employee. If it's more than one, enter the details of each.
- Enter the Bank statement text to appear on the employee's bank statement for the electronic payments you make to them.
- Enter the employee's banking details.
- Click Save.
- Repeat for each employee you'll be paying electronically
3. Set up for bank (ABA) files or direct payments
If you're setting up for bank file payments (known as ABA files in Australia), you'll need to record the details of the bank account that your electronic payments will be paid from. But if you're in Australia and you're setting up for direct electronic payments, you'll go through a signup process.
3. Set up the bank and direct payment details
Set up for bank (ABA) files
Start by entering the banking details for the account your electronic payments will come from. You'll be able to get these details from the account's bank statement or your bank.
- Go to the Accounting menu and choose Chart of Accounts.
- Click the account your electronic payments will come from. (It must be a bank account type.)
- Enter the banking details for the account. If unsure about any of these details, check with your bank.
- Enter your Company trading name. If your trading name is too long, enter as many letters as possible or shorten it.
- Enter your bank account name and number.
- Select the option I create ABA bank files for this account.
- Type the three-letter Bank code that identifies your bank, for example, NAB, ANZ, CBA or WBC. Check with your bank if unsure.
- Type the Direct entry user ID (sometimes called the APCA ID). This ID is assigned by your bank when you registered with them to process direct credits. Check with your bank if you're unsure about this.
- If your bank file requires a self‑balancing transaction, select the option Include a self-balancing transaction.
- Click Save.
4. Set up for direct payments
Note: Only Australian businesses registered as Sole Traders and/or Private Companies with the Australian Business Registry will be eligible able to apply.
To sign up for direct payments, you'll need:
- to have an Administrator role on the account, with the user type of online admin in your MYOB business. This is usually the business owner or administrator.
- your business' ABN
- a debit or credit card (the card your electronic payments will be paid from)
- a mobile phone (to authorise electronic payments)
- a government-issued identification (Sole Traders only)
- to be either a Director OR an Ultimate Beneficial Owner (UBO), who is someone who owns 25% or more of the business (Private Australian Companies only)
- a government-issued identification for all UBOs and at least one Director, including yourself. If you are not an owner or director, then you'll need to upload a proof of authority. You can use the template available at sign up.
Once all of that is sorted, you can get started.
- Go to the Banking menu and choose Prepare electronic payments.
- Click Manage direct payments. If you don't see this link, your business isn't eligible for direct payments (only Australian businesses registered as Sole Traders and/or Private Companies with the Australian Business Registry are currently eligible).
- If prompted, sign in to your MYOB account.
- Click the business you're setting up for direct payments.
- Follow the onscreen prompts to complete the application.
- When all steps are complete, click Submit application.
Once all of this is set up, you can tick the checkmark next to Electronic Payment when recording a payment to a supplier or employee.
Paying the supplier's bill
If you're recording a bill in MYOB or you've already recorded it, here's how to apply a payment.
- With the bill you want to pay on your screen, click Record payment at the bottom.
- Select the option Electronic payment (to pay electronically)
- If you want to record more than one payment at a time, select Multiple payments at the bottom left of the screen.

You can also make a payment against a bill via Purchases > Create supplier payment. Take note that MYOB makes every effort to help you avoid time-costly errors. In this case, an electronic payment is being set up, but the bank account details of the supplier have not yet been entered.

You can also pay a supplier when they haven't issued you a bill by recording a spend money transaction. With that option, simply choose your electronic clearing account as the Bank account and the supplier as the Contact to indicate you'll process the payment later electronically.

Paying Employees into their bank accounts
While MYOB Payroll will be covered separately in another module, we will touch on the process of paying employees here.
Paying your employees straight into their bank accounts is a fast, secure and accurate way to pay your wages. Once the setup tasks shown above are complete, you are ready to start paying employees electronically.
After you finish a pay run, you'll then be able to pay your employees via electronic payments (or you can go to Banking > Prepare electronic payments).

Processing the electronic payment
Once you've recorded the payment transaction in MYOB, you need to deposit the actual payments into your suppliers' and employees' bank accounts. Depending on the electronic payment method you've set up, you can either:
- make a direct payment (remember, this is only available for Australian businesses registered as Sole Traders and/or Private Companies with the Australian Business Registry), or
- download a bank file for your bank to process.
To process the payment:
- Go to the Banking menu and choose Prepare electronic payments. All the payments you've recorded in MYOB that you've chosen to pay electronically will be listed.
- Optional:
- Choose a Payment type if you'd like to group the electronic payment by payment type—for example, to pay bills or employees only.
- Use the Transactions from and Transactions to fields to show transactions for a specific date range.
-
Choose the Account your payments will be paid from.
-
If any details are missing from the chosen account:
- Click Account details missing > Edit account details to see what's missing.
- Add the missing details and click Save.
- Enter a Description of transaction. This is just the description of the transaction as it'll appear in MYOB, not on any bank statements.
- Confirm the Reference number is correct. If not, enter a new number.
- If you change the reference number, you’ll change the automatic numbering. For example, if you change the number from 2008 to 12008, the next time you create a bank file, the new reference number will be 12009.
- Enter the Date of payment.
- Bank files only: If you'll be downloading a bank file to make your payment, you can future date the Date of payment, providing it's within the current financial year. This is the date you want your bank to process the payment, but not all banks adhere to future dating bank files. Check with your bank for clarification. If you'll be making a direct payment, the payment will be processed based on when it's authorised.
- Confirm the Description and change if required. This is the description that'll appear on your bank statement.
- Select the payments you want to pay electronically.
- Choose how you want to process the electronic payment — direct payment or bank file.
- Direct payment: Click Direct payment
- At the confirmation, click Record and submit
- The payments will now need to be authorised before they can be paid into your suppliers' and employees' bank accounts.
- When you set up direct payments, you'll have set up a mobile phone to allow payments to be authorised securely—either via the MYOB Secure app or via SMS. Have this phone handy to authorise your payments.
- Go to the Banking menu and choose Prepare electronic payments.
- Click the text link Manage direct payments in the top right corner
- If prompted, sign in to your MYOB account.
- Click the business you're setting up for direct payments.
- The payment portal appears. Payments to be authorised appear on the Batch payments tab with a status of Needs authorisation. The screenshot below is for Widget Co's payment dashboard as an example:

- Click Authorise. You'll need the mobile phone that you specified when you signed up for direct payments.
- If you're using the MYOB Secure app, open the app and tap Allow to authorise the payment.
- If you're set up for SMS authorisation, you'll receive a code via SMS. Enter this code into the payments portal when prompted.
- In the payments portal, your payment appears with a status of Processing. Once it's been processed, its status will change to Processed.
For further detail about seeing the status of the payment, how to change an authoriser, and other FAQs, visit MYOB's Help Centre about Authorising and reviewing direct payments.
When you pay a supplier bill, let your supplier know you have paid it with a remittance advice. This saves you from being hassled by suppliers about payments you have already made.
If you send a remittance advice from MYOB, there is no need to send it through your email software, you can do it right off the bill payment. The email subject and message are prefilled, saving you having to key them in (you can change them if you want).
If you do want to send a remittance advice from your email software as an attachment, or you just want to keep a copy of the remittance advice for your records, you can download it as a PDF.
As long as you have the email address of the supplier in the remittance advice email field on the supplier details screen, you can send the remittance at the time you record the supplier payment or, you can download or email remittance advices later, in a batch.
To send a remittance advice at the time you make the payment:
- Enter a payment to a supplier. The options, Send remittance advice and Send now, will be selected by default. You can see them at the bottom left of your screen.
- Click Save to record the payment and open the remittance advice.

- If you want to download the PDF, select the option to do so and the file will download immediately.
- If you want to email the remittance advice, you can:
- change the existing email address in the To field
- click Add another email if you want to send the remittance advice to an additional email address
- cc (copy) the email to another email address
- click Email me a copy to email a copy of the remittance advice to the email address recorded in your Business settings.
- Review the default email subject and message and change them if you want.
- Click Send remittance advice to email the remittance advice.
To send a remittance advice later, or in a batch
- When you enter a payment to a supplier the option, Send remittance advice, will be selected by default.
- Click Send later
- When later comes, go to the Purchases menu > Remittance advice.
- To view the remittance advices you haven't yet emailed or downloaded, choose To do in the Status field. If you wish to send a remittance advice again, choose Done in the Status field instead.
- Choose a Supplier and a date range.
- To open, select one or more remittance advices by selecting the Purchase Number(s).
- If you want to download a PDF of the remittance advice:
- Click Download as PDF.
- Select Use default template to use the default remittance advice template.
- Click Download PDF. The PDF file is downloaded to your computer in a zip file — just double-click the file to open it. The remittance advice is removed from the To do view of the Remittance advice page. You can still view, download or email the remittance advice again by choosing Done in the Status field.
- If you want to email the remittance advice, you can:
- Review the default email subject and message and change them if you want.
- Click Send remittance advice to email the remittance advice.
Change your remittance advice settings

- Click your business name and choose Purchases settings
- Click the Templates tab.
- Click Download preview (PDF) to see a preview of your default remittance advice.
- Click Email defaults and edit your Default Remittance advice email subject and message.
- Click Save. Any changes you've made will be applied every time you send a remittance advice.
You can remove remittance advices from the To Do list by selecting them in the list and clicking the Mark as done button.
Activities:
1) Use MYOB Business to complete the following tasks
Log purchases, log payments for purchases and account for depreciation
North Park Stationery purchased two new pieces of office equipment — a printer and a trimmer — using funds from the business bank account. Download both invoices below and enter the new equipment into the Asset Registry.
Take note of the purchase dates (so you can account for depreciation for the correct amount of months.
- View the invoice for 1 Canon Wide Format Printer with 36" Scanner.
Additional information: Cost $21,974.00 Cost less GST $19,976.36 Year 1 depreciation (Diminishing value 40%) $7,990.55 4 days 26 June 2022 through 30 June 2022 $87.57 WDV* 30 June 2022
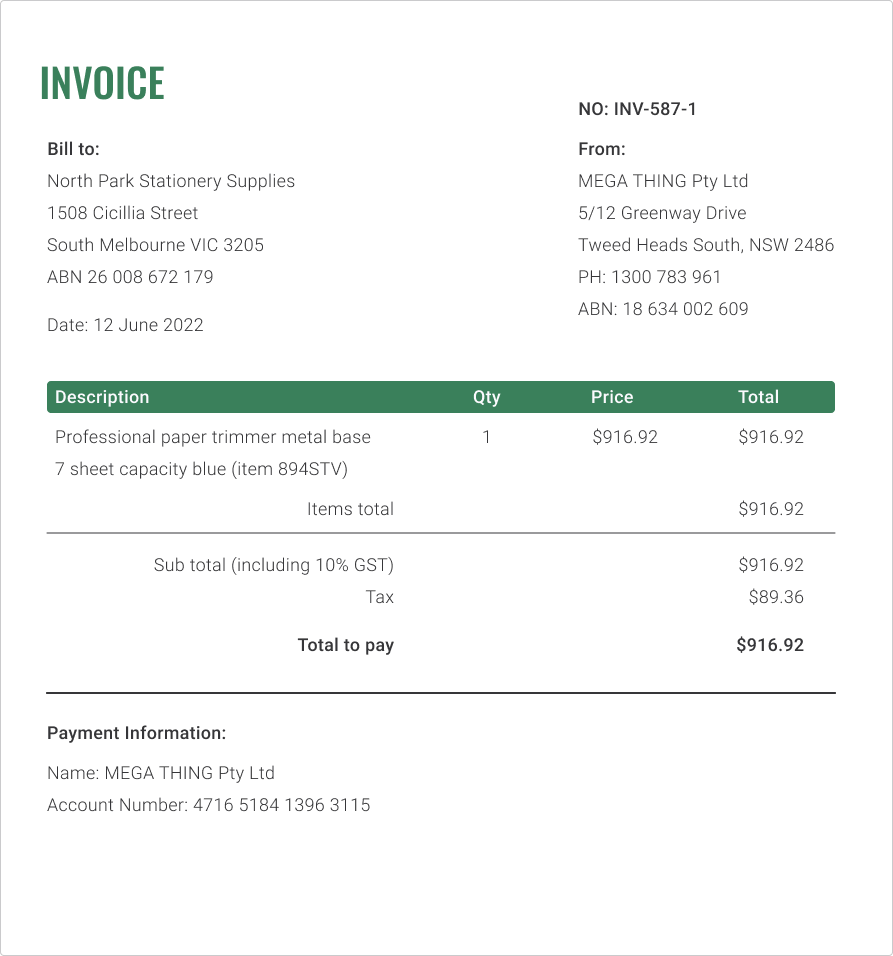
*Written down value$19,888.80 - View the invoice for 1 Commercial Paper Trimmer.
Additional information: Cost $916.92 Cost less GST $833.56 Scrap value $150.00 Year 1 depreciation (Straight line over 5 years) $136.71 18 days 12 June 2022 through 30 June 2022 $6.74 WDV* 30 June 2022
*Written down value$826.82
Tasks
- Create bills for the purchases individually. Add new contacts from the details on the invoices.
- Record the supplier payments.
- Open the bills you just entered, record the full payment against them and send a remittance advice to the supplier.
- Imagine that it's 30 June 2023 and create the General Journal entries for the depreciation in MYOB.
- Identify the written down value of the assets in the balance sheet.
Notes:
- Depreciate printer using the diminishing value, over five years at 40%
- Depreciate Trimmer using the straight line method, over five years at 20%, scrap value is $150.00
- Bonus question: One of the invoices provided does not meet the minimum requirements as a tax invoice. It's a common error. Can you guess what it was?
- Invoice 1: The depreciation entry as at 30 June 2023 is $7,955.90 and the written down value will be: $11,932.90.
- Invoice 2: The depreciation entry as at 30 June 2023 is $136.71 and the written down value will be: $690.11.
- It's missing the word "Tax". It should say "Tax invoice".
2.) Check your knowledge of MYOB Payments
3.) Check your knowledge of Inventory management
MYOB Help pages accessed in this topic: