Our online campus will provide the knowledge you need to grow plants successfully, and your garden will be your field campus, where you can get stuck in and give your garden a go!
We'll start by learning the main things that plants need to grow and what healthy plants look like. Then you’ll explore the site, finding information that will help you work out what types of plants will grow well. After that, you’ll dig over the soil and get it ready to be planted in. And then you’ll plant seeds or seedlings and look after them as they grow while you learn how to care for them!
Your field campus
Select a site to use for this programme. It could be:
- a garden at your house
- a garden belonging to someone in your whānau or a friend
- a community garden
- an existing horticulture operation, if you already work there.
Your assessments are a combination of weekly journal posts to assess your growing practical skills, and theoretical understanding.
You are expected to post at least one journal post each week, but more may be necessary to capture changes in your plants.
Take a moment right now and scroll down to the first two Assessments in Module 1: Horticulture Basics: Let's Get Started! These are your assignments for the duration of the first module.

Your journal is evidence of your hard work in the garden.
- Your journal is an important part of your learning. It provides insight to the course tutor about whether you are catching onto the ideas and instructions.
- Your journal posts are also part of your assessments and must be done weekly in order to gain credit for the course.
- Share your journal posts and respond to others’ thoughts, insights, successes, etc.
Example weekly journal post
The three screenshots below provide an example of what is expected of you.
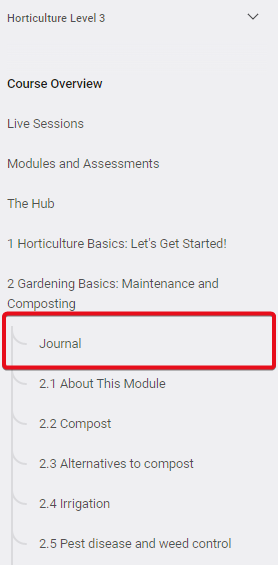
1. You can access the journal at the top of each module in the left-hand navigation column as shown here:
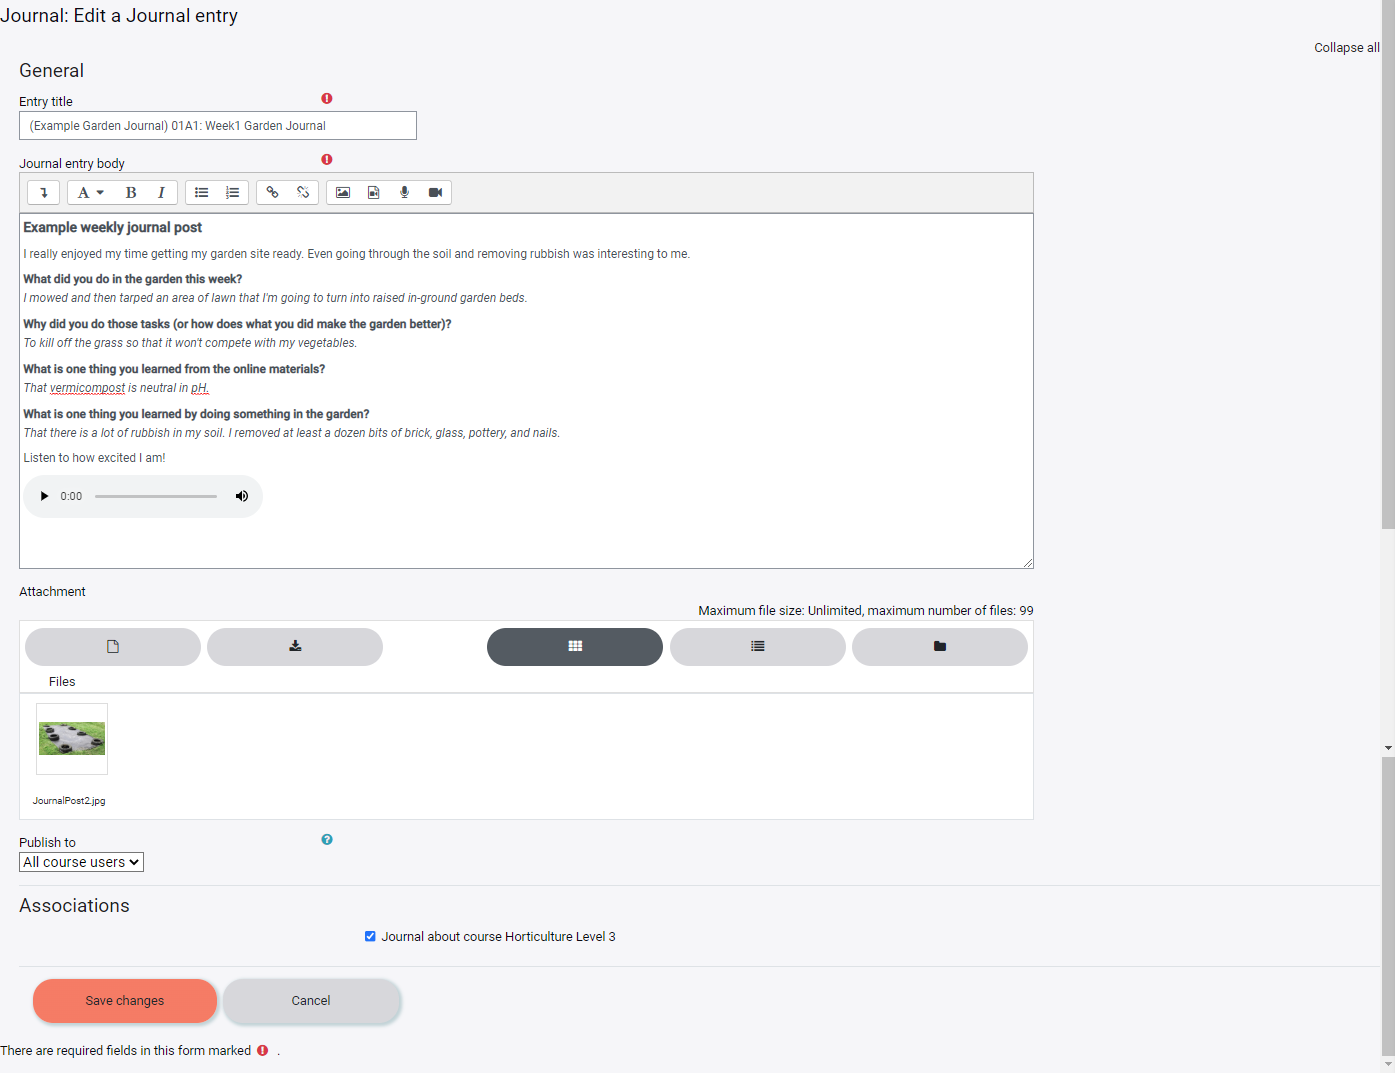
2. When you are there, enter the prompts (questions) into the Journal entry body from the relevant assessment. Please write one to three sentences for each prompt. You may add video, audio, and photos if you like. This one has text, audio and a photo.
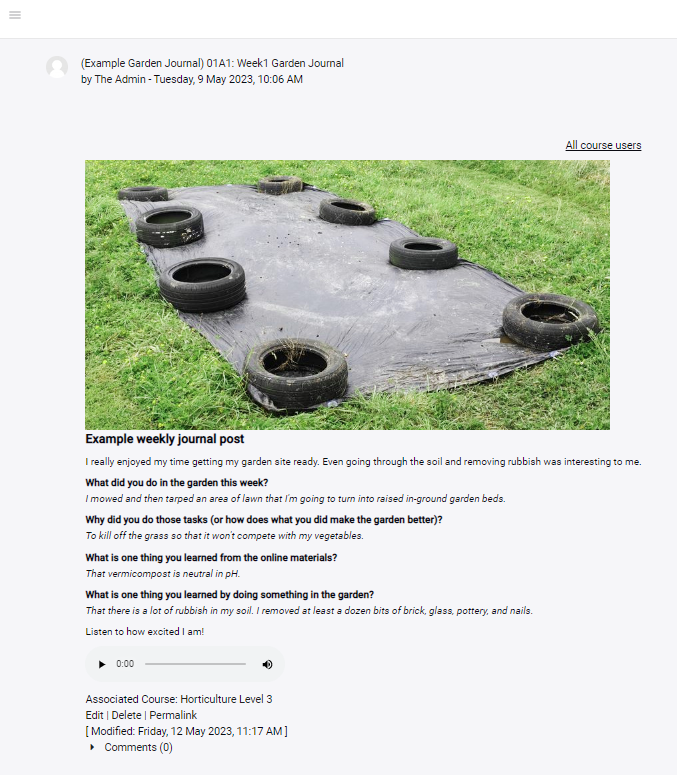
3. After you click "Save changes" it will look like this:
To compose and submit a journal post
1. Select Journal in the content menu on the left at the top of each module.
2. Select the text link near the top of the page as shown here:

3. Create your post.
Use the Entry title to indicate the Assessment code (ie 01A1).
Please also include the topic of the journal in your entry title.
For example:
Assessment 1
- 01A1: Week1 Garden Journal
- 01A1: Week 2 Garden Journal
Assessment 2
- 02A1: My compost heap
- 02A1: My seedling progress
4. You can add to your journal in different ways:
- Write journal entries and format text using the text editor icons in the toolbar.
- Click on the down arrow button to access more editing features such as:
- Underline
- Calculations
- Alignment
- HTML and more.
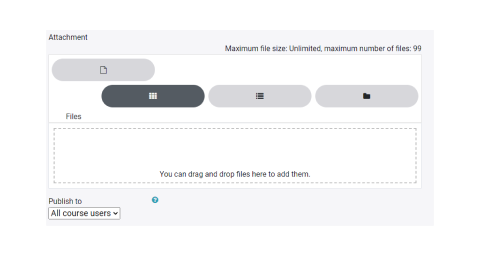
- Upload a document by using the drag-and-drop feature in the file upload tool.
- Upload an image by selecting the image icon on the toolbar and using the file picker tool.
- Upload or embed a video by using the video file icon on the toolbar, linking the URL of the video, or uploading a file.
- Record audio entries directly from the toolbar by selecting the microphone icon on the toolbar, then clicking on start recording.
- Record video entries directly from the toolbar by selecting the camera icon, then click on 'start recording'.
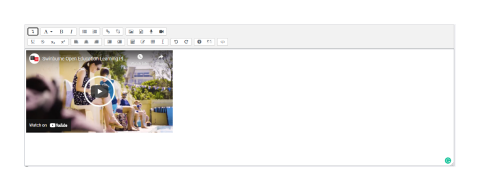
- Embed streaming videos into the Journal by clicking on the down arrow button and then choosing the [<>] button.
- This will open the HTML code.
- Copy the embed code from the video streaming site such as YouTube and paste this into the HTML.
- Click on the parenthesis button again to return to the normal editor.
- At this point you will see the video appearing in the entry.


- Comment on other people's entries that have been shared with you by selecting 'comment' below their post.
- Insert a link to a website or URL address by choosing the chain icon on the toolbar and pasting the URL.

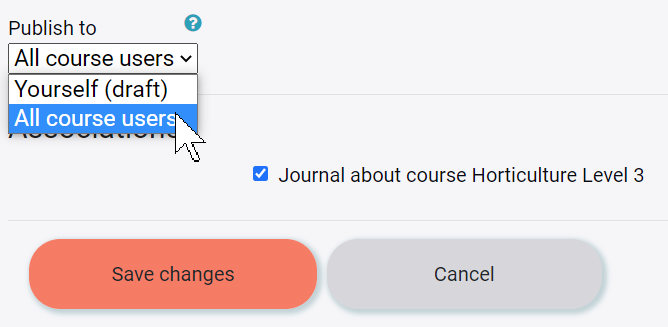
5. When you are ready to publish, click on the Save changes button located at the bottom of the page and choose to Publish to All course users
At the end of the module, you must submit a list of links that go directly to your Journal entries. To get the link to each post, after it is submitted, select Permalink next to the Edit | Delete links as shown here.
That will reload the journal post in the same browser window. You can now find the website address for your journal post in the location bar of your browser.
The permalink to the example garden journal post is: uponline.education/blog/index.php?entryid=352
6. As you submit your journal posts each week, paste the links into a document for easy access when you are submitting your assessment. Here is an MS Word Permalinks template in case you would like to use it. Save it somewhere you can easily find it again.
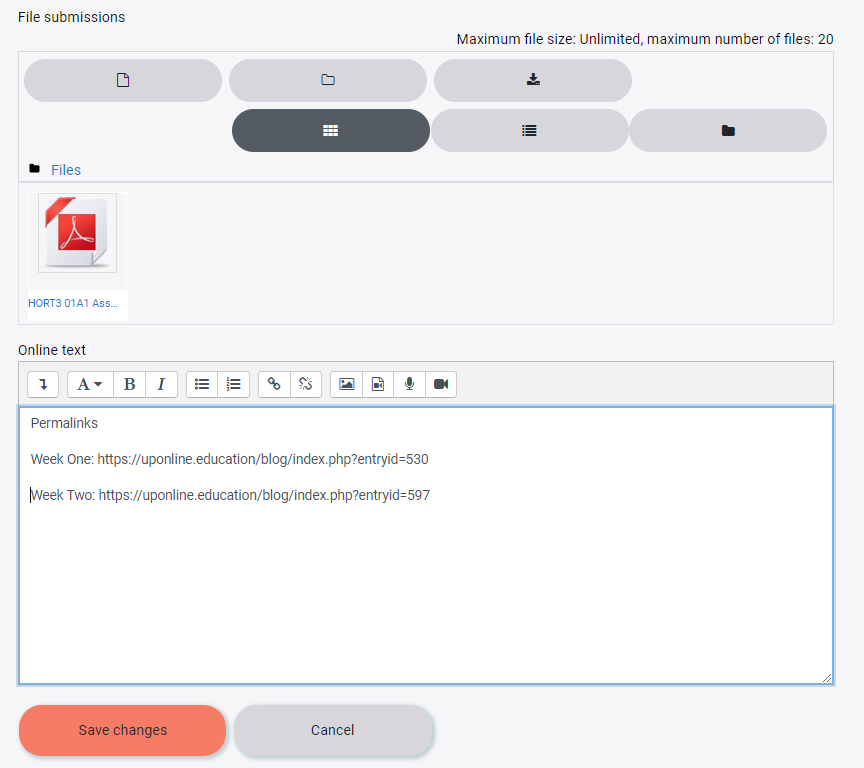
7. When it comes time to submit your assessment, provide the relevant permalinks in the text entry box on your assessment so your tutor can go directly to your Garden Journal posts as shown here under "Online text".
We'll start by showing you how to copy/paste the journal post permalinks:
- Open the document containing the list of permalinks to journal posts.
- Copy the links to posts you want to submit as evidence.
- Paste them into the text-entry box on your assessment page.
- Put each one on a new line by tapping the ‘Enter’ key on your keyboard after each link.
Here is an example of the submission portion of the Assessment screen. Notice two permalinks and the Assessment document have been added.
Watch this video for a walk-through of submitting your journal posts for your assessments.
Have fun with your practical learning exercises. Hopefully, your plants will grow well and healthy, but remember that we learn as much from failures in the garden as we do from success.
