For our NZMA Online Campus, the way we approach communication with our learners is quite different to our physical campuses, and we have different tools to support us in achieving this.
We may never see or have any communication or interaction from some of our learners, as they work asynchronously, but we still engage with them via forums such as Live Sessions, discussion boards, etc.
NZMA Online has a built-in feature of group messaging, which allows all students enrolled in a particular intake to communicate to all students in the same intake as well as any tutors allocated to that intake. The feature allows real-time responses to quick and simple questions. We let our students know that their tutors are available during normal campus hours, Monday – Friday, 8am – 5pm so it is important that we respect that boundary and avoid responding on weekends.
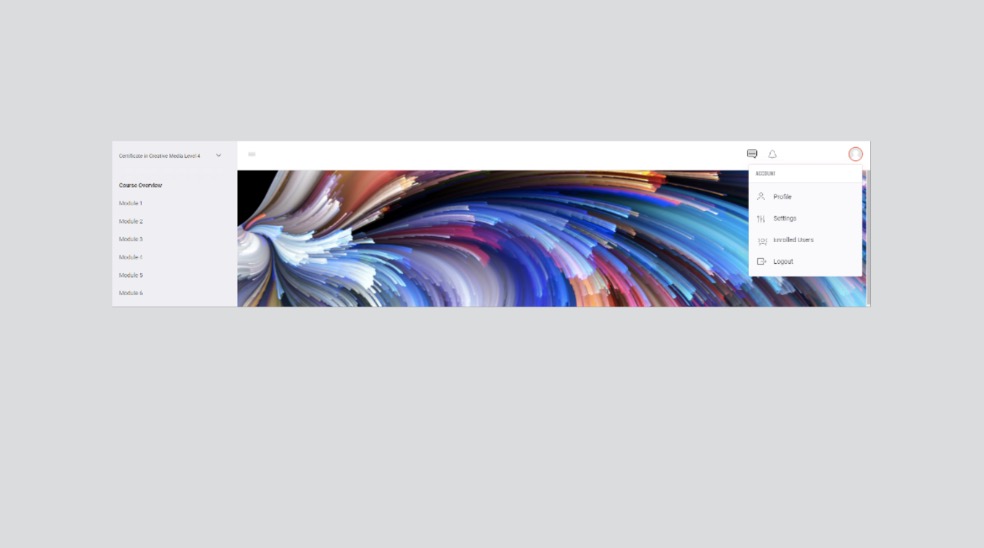
When you log in to NZMA Online, you will see in the top right a message icon. Click on this message icon, and the platform message centre will appear on the right side of your screen:
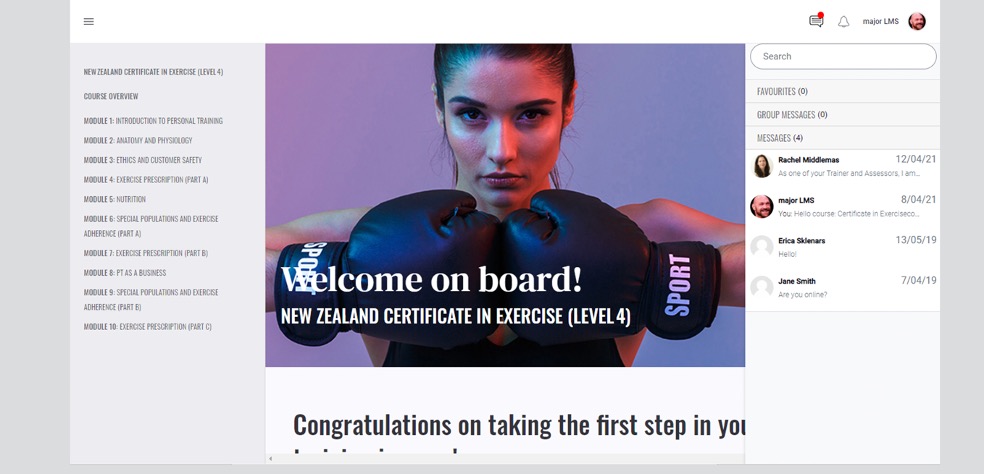
You will see in the message centre there are three distinct folders;
- Favourites
- Group Messages
- Messages
Messages Inbox
This folder acts as your inbox, and you will see chats in progress as well as any new messages.
When clicking on one of the messages in your inbox, it will open the chat history and will allow you to read the previous messages, the status of the person you are chatting with (online or offline) and the ability to chat through the message box.
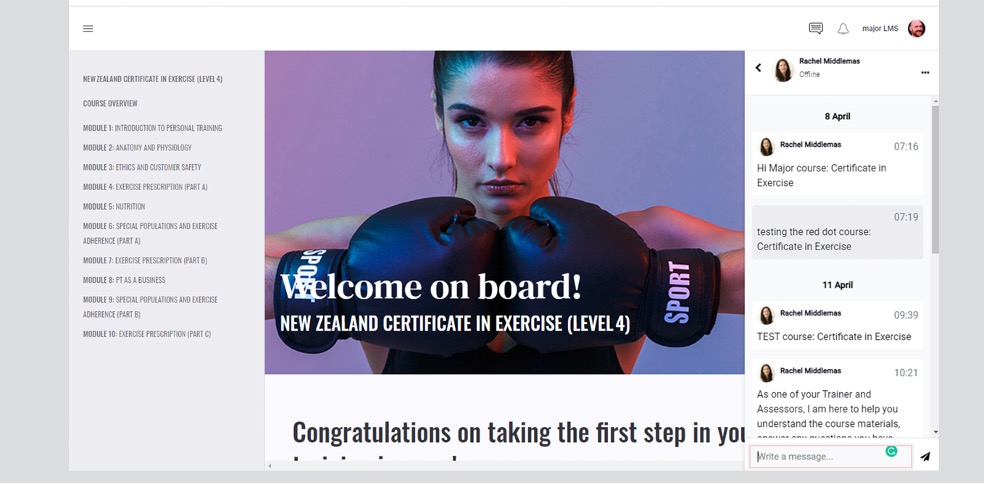
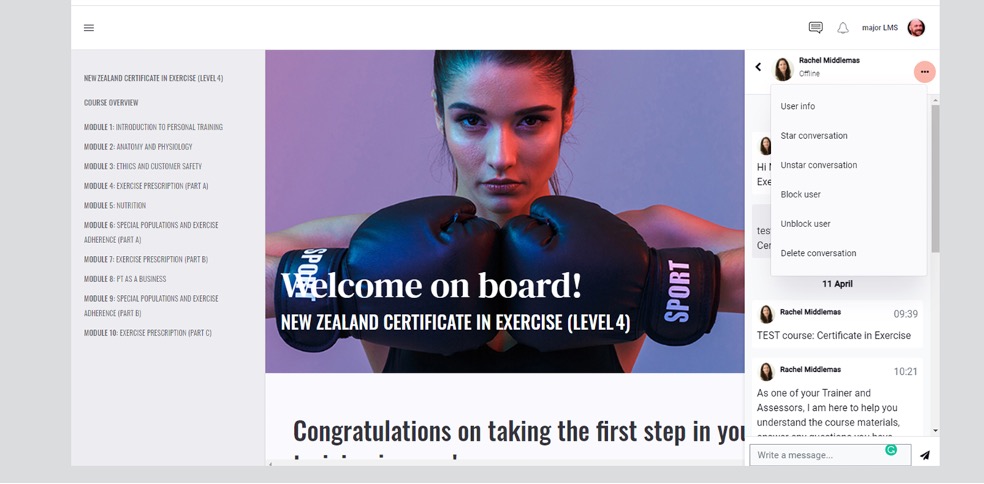
Next to the name of the person in the message, there are three small dot icons. By selecting this, you can star a conversation that shifts the chat from the standard inbox to your favourites (i.e. you contact them regularly or want to access the conversation quickly).
Sending messages/ Individual / All students or group
All intakes will have a Group attached that enables us to quickly filter by a particular cohort for assessment grading, engagement checking, etc. They also have a group message function attached, and your Team Leader will ensure you are included in any cohorts so you are able to Group Message, all students.
To send a message to a group of students – but not the entire intake – follow the below steps.
Note: This will send the same message directly to multiple students but will not create a group message.
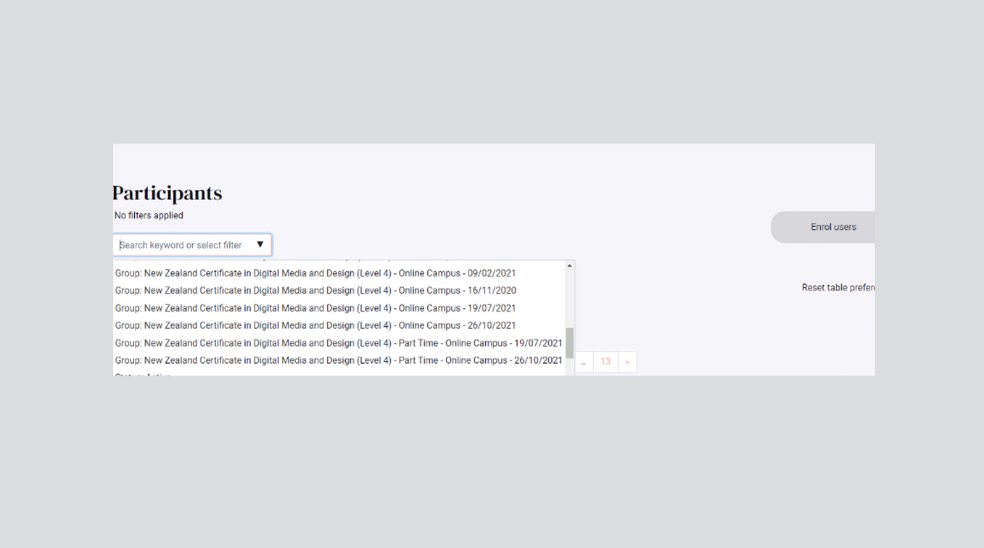
Step 1: The tutor will click on their profile name in the top right of the platform and choose ‘Enrolled Users”.
Step 2: Select the intake the message is for.
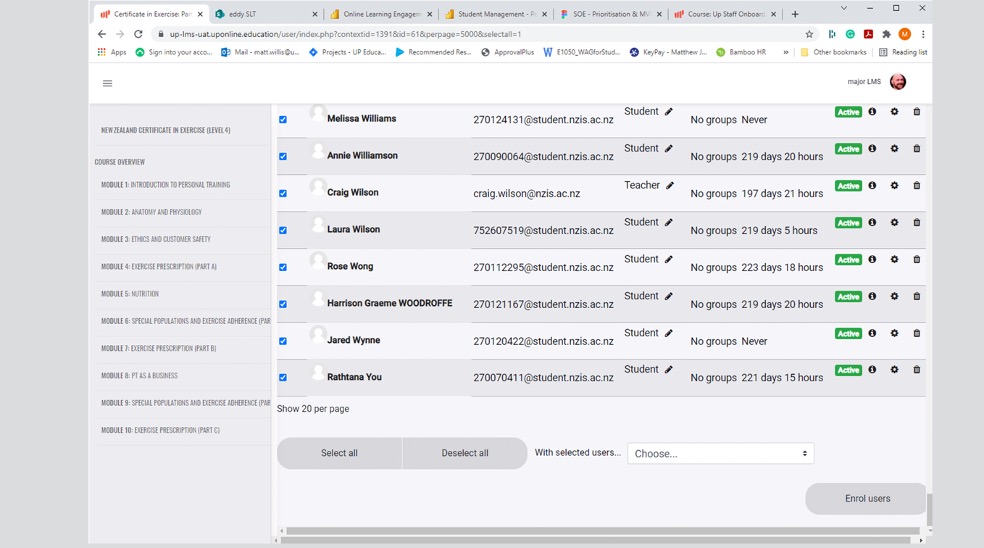
Step 3: Select the students you want to create a group chat with by ticking the box next to the names of the students you want in the group.
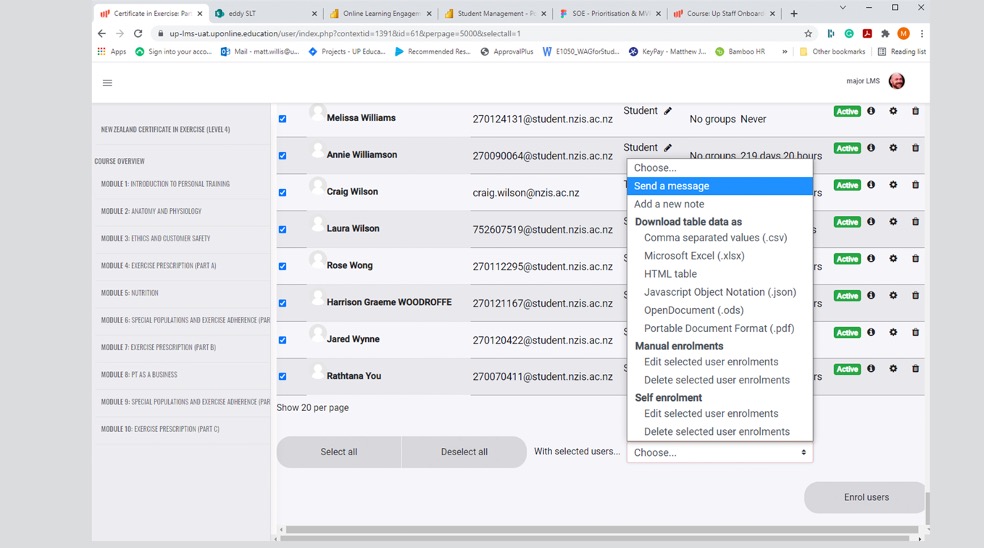
Step 4: Once you have selected all of the students you want to send a group message to, click on the drop-down at the bottom of the screen next to “With selected users…” and choose “Send a message”.
Step 5: You can then type your message in the comment box (tip: you can stretch the comment box by grabbing the bottom right corner of the message to create more space for the message).
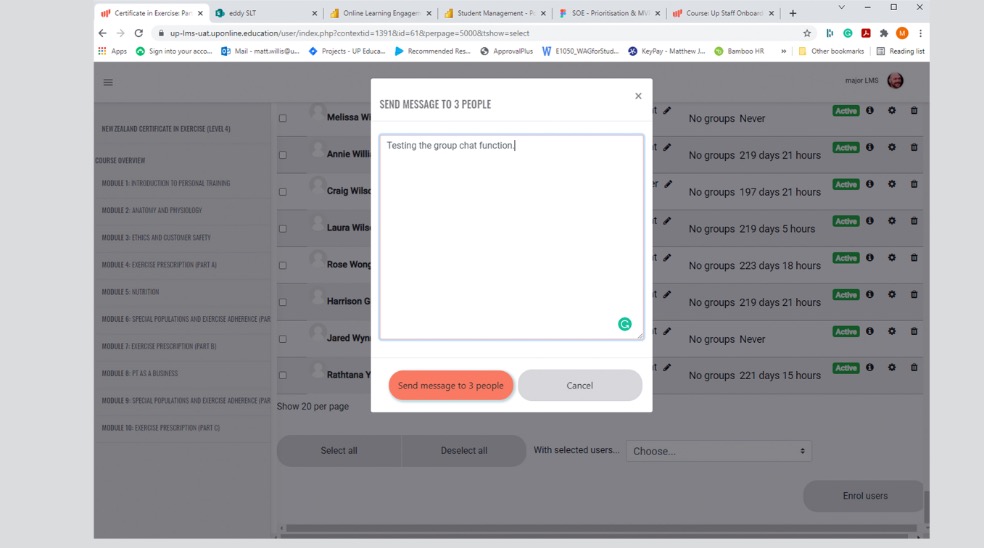
Step 6: Once you have finished typing your message, click on Send Message. Once done, the message box will disappear, and you will receive a confirmation at the top of your screen that your message has been sent.
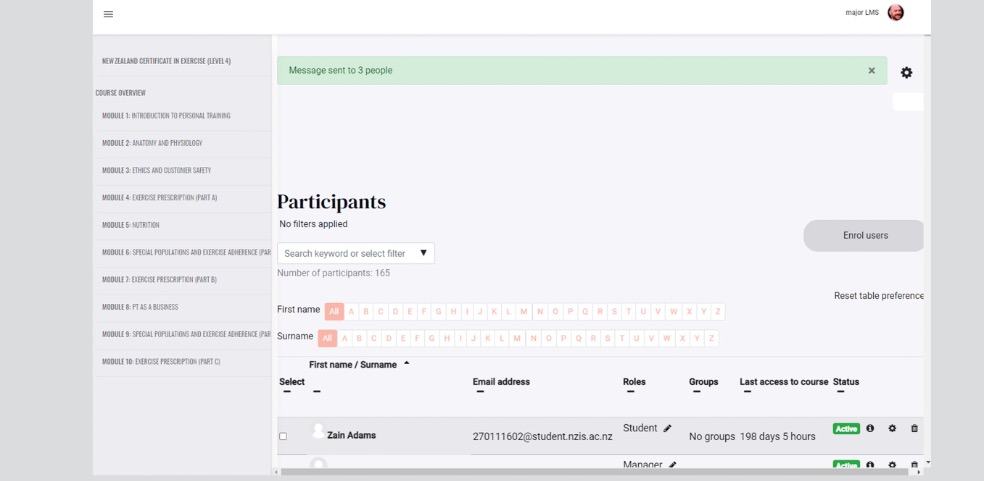
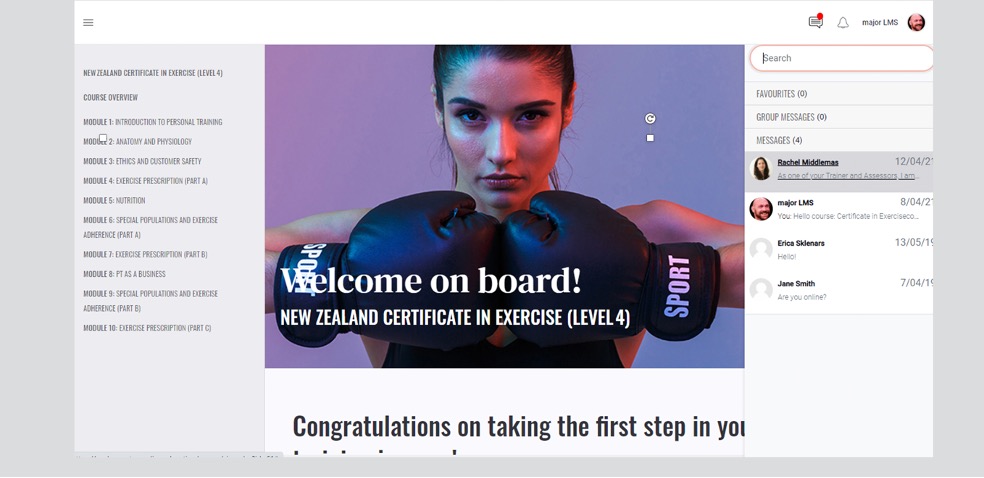
Students will then receive a notification that they have received a new message through the red dot on the message icon in their LMS, as seen below. When a student responds, you will also see a red notification for you to view/respond.
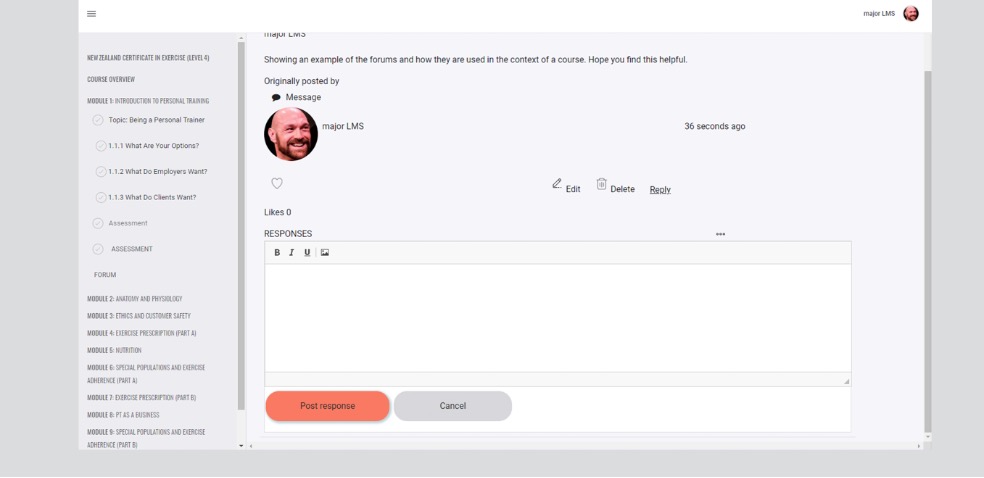
Forums in NZMA Online are like a noticeboard and are used by the tutor and students to discuss, share, show, tell, inquire, etc. Forums form an important part of the engagement plan with students. Forum (thread) posts can be related to the module subject, tutor/school announcements, creating connections (forming groups for assessments) and creating social connections (getting to know you).
The tutor creates forum threads for students to engage with.
Important
Tutors should not create forums that relate to learning activities embedded in the LMS. All forums in NZMA Online are already set up for each intake by Team Leaders.
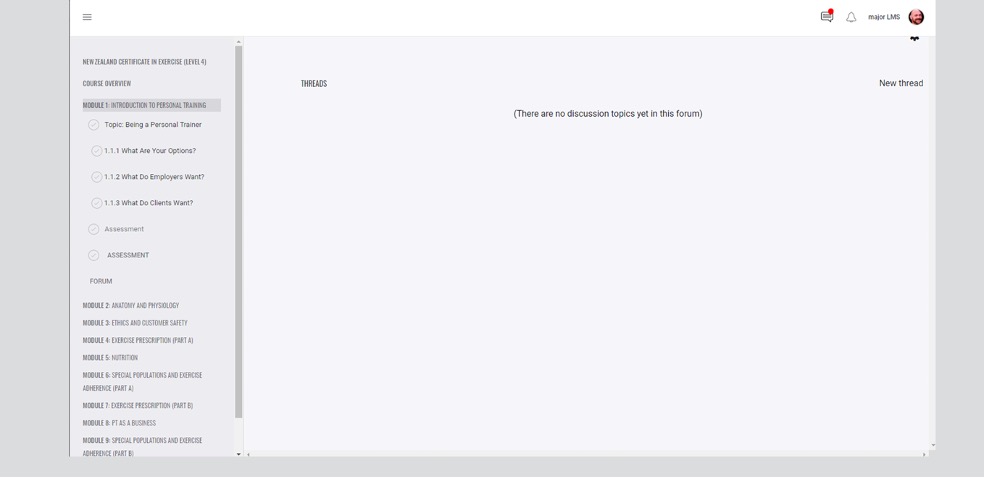
Most modules have a Forum at the start of each module. When you click on Forum, you will see the Threads.
Only tutors can create a forum thread. Students can post once the thread has been created.
To Create a Forum Thread
At the bottom (or top, depending on your programme) of the Module in the navigation menu, there is a section named ‘Forum.’
Step 1: Click on Forum to take you to the Forum Page (note: if there are no threads created in the Forum, this will not be visible to students).
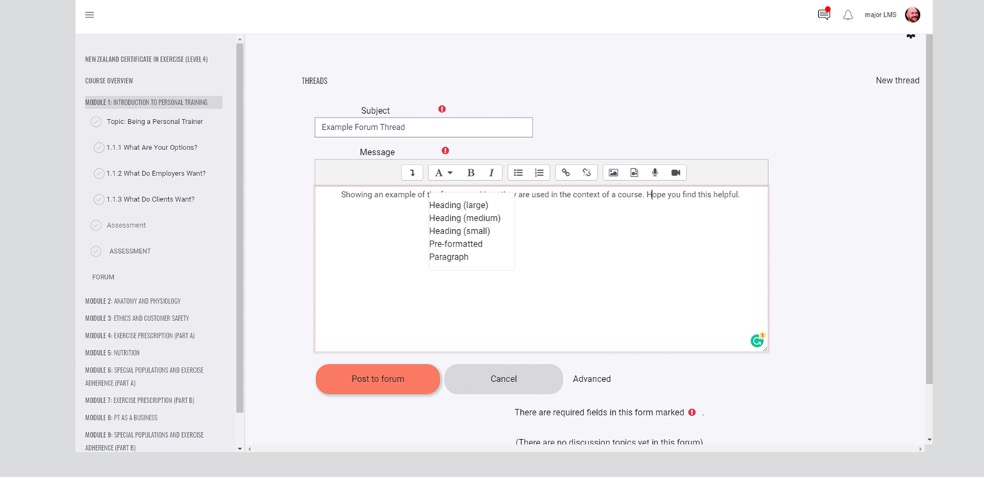
Step 2: To create a thread, click on ‘New thread’ on the top right of the page. This will open a dialogue box, giving you the Subject field to name the thread and the comment box to add the first post.
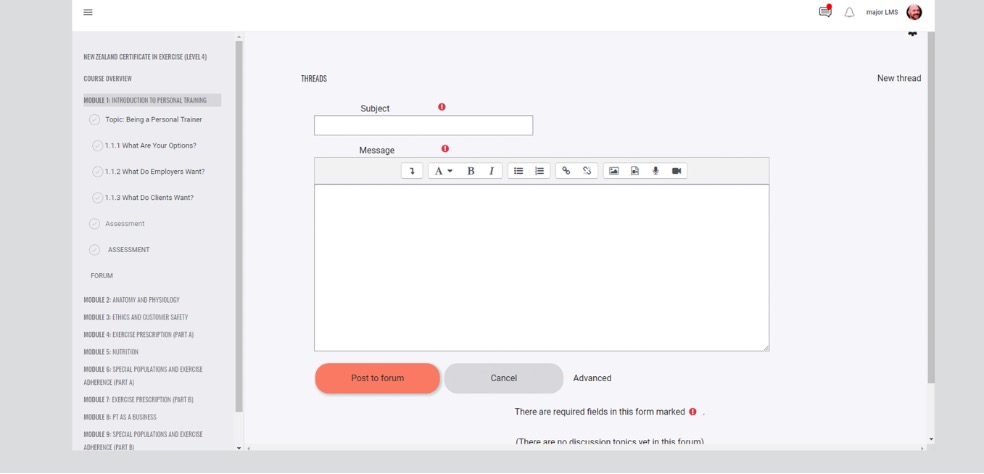
- You can enter your text and use the different type headings as required.
- Ensure you select the Group that you are posting the forum to. If you are posting to more than one intake, you will need to do this for each group.
Do not use All participants unless it is a post that will always be relevant to all students (i.e. Counselling info).
If you do not select the correct group, all students will see the forum post, which is confusing for them (and messy!).
Step 3: Once completed, you can simply click ‘Post to forum.’ This will then enable the students to access the Forum and see the thread.
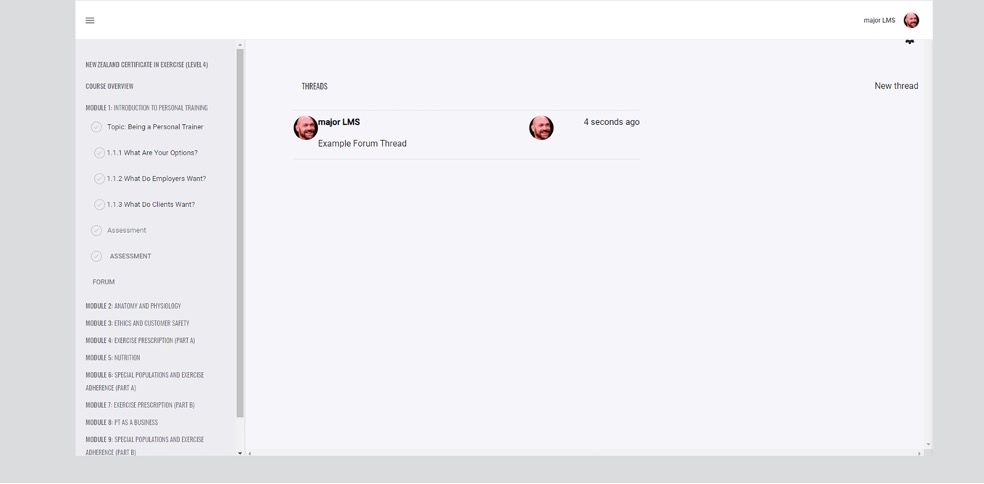
Step 4: Select the thread to view.
What goes in which forum?
There are a few different forums in NZMA Online.
1. The Hub > Announcements / Discussion Board.
Announcements are used for any information that the entire cohort needs to see:
- Welcome message
- Programme Info Sheet
- Literacy and numeracy testing (applicable for Level 3 courses only)
- Reminder to students when assessment due dates are coming up/when holiday breaks are approaching/when the end of their programme is approaching, etc.
- Any NZMA/NZIS announcements
- Career information
- Student survey information
- And more...
Discussion Board is used for:
- General Q + A discussions:
In this thread, you can ask and answer general questions about your studies and the course.
This can also be used as a general Q&A regarding the industry of study, e.g. questions about plants, pets, etc - Study Group Requests:
In this thread, you can connect with other students to create study groups - Group Fitness / Gym Buddy Meetup:
In this thread, you can connect with other students to organise group fitness meetups or find a gym buddy. Arrange to meet in a public place, like a gym or park. Or do a digital session with one person leading the workout.
2. Module > Forum (situated at the top of each module).
These Forums will have threads created that relate to that module of learning. Students are asked to post in threads at various stages as they work through the module.
Only students in that module can see these posts.
How do students see a new forum post?
If there is an unread message or comment in a forum, students will see a numbered notification beside it. They can click through to view.
Students can then Like or Reply to that thread.
Forum Naming Guidelines
To ensure we have clear and consistent communication with our students, please follow the below guidelines and tips.
- Use the correct terminology – forum < thread < post.
- Label the threads very clearly so students can find them later if they need to reference them again.
- Clearly signpost where things are within NZIS Online/NZMA Online, e.g., in X forum, the Y thread.
Think about a naming system for your forum posts:
This will make it easier for students to find once there is a list of them for each intake.
i.e. HOW TO CONTACT YOUR TUTOR | APRIL 2023 | Full time
Don’t forget to check your spelling and grammar in a forum post, and keep your language kind, professional and upbeat.
Forum Sign off
To ensure all students know how to contact their tutor at all times: please use the following system for signing off each Announcement forum post.
CONNECT WITH ME
For any questions, comments or you just want to chat!
Here are the ways you can reach me:
💬 Online Chat (click on the chat icon in the top right-hand corner by your name)
📧 Email: Tutor.Name@nzma.ac.nz (email me)
📅 Calendly: https://calendly.com/tutor-name/30min (book a one-on-one meeting)
🎥 Live Session: Join our live session—to join, go to Live Sessions in the main menu.
Also, add the below. Please choose the correct school for your programme.
CONNECT WITH US
Want to know what's happening across NZIS? Follow us!
🔴 Instagram: https://www.instagram.com/nzinstituteofsport/
🔵 Facebook: https://www.facebook.com/nzisport/
CONNECT WITH US
Want to know what's happening across NZMA? Follow us!
🔴 Instagram: https://www.instagram.com/studynzma/
🔵 Facebook: https://www.facebook.com/studynzma
Template found here: __Forum post tutor sign offs.docx
Calendly is an app that Online tutors use to schedule one-on-ones with students. It is a booking system that, once you have set up your availability and hours, students can easily book in a time with you.
Tutors can set the time limit for each one-on-one session and create different options for students to book. For example, 30-minute Q&A sessions, 15-minute wellness catchup sessions, etc.
How do tutors set this up?
To activate your Calendly account, your manager must email a Helpdesk request. Once you receive the email with access, you can set up your particular information.
For more information, check the Calendly folder found in the HOW TO'S folder in the Online Tutor Info Hub.
How do students book a session?
Students need to know each tutor’s particular Calendly link (this is visible once the Calendly account has been set). This link should be given to students in the Welcome forum post and frequently during their programme.
Create a tutor signature
Every time a tutor writes a forum post and emails a student, the Calendly link should be a part of their signature, as you can see above in the forum post sign-off.
It will look similar to this:
Calendly: https://calendly.com/jane-smith/catch-up-session (book a one-on-one meeting)
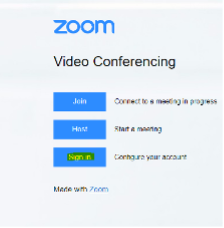
Live Sessions are a feature of NZMA Online that allows students to attend video meetings with their tutor and other students via Zoom.
The tutor will schedule Live Sessions regularly for each programme, a minimum of once per week. These sessions might include information about assessments, Q and A sessions, a guest speaker, an area of learning that students may find challenging, a masterclass that expands students' knowledge in a topic or careers team, etc.
Tutors can post a notice of a scheduled live session in the Announcements Forum or Group Message to students. Students can check in the Live Sessions calendar and register for Live Sessions as they choose.
All Live Sessions are recorded so students can watch back in their own time.
How do Live Sessions work?
Live sessions are run through Zoom, so it is important you have your work Zoom account up and running.
Please check the Live Sessions folder found in the HOW TO'S folder in the Online Tutor Info Hub folder.
Accessing Zoom
Zoom: https://up-education.zoom.us/
Click “Sign in” to automatically log in with your staff accounts.
How do I upload the recording of the Live Session? Using Panopto
After the Live Session is complete, the recording must be uploaded to NZIS Online/NZMA Online via Panopto and saved to the Live Sessions Recordings forum in The Hub
For step by step guide, check out the Online Tutor Info Hub
Access to Panopto
Panopto: https://eddy.au.panopto.com/
The tutors will need to be logged into their LMS accounts and then open the Panopto URL to access it.
How often should a tutor run a Live Session?
Live sessions should be held at least once a week. These sessions are an important part of the student engagement plan.
Sessions could cover such topics as:
- General Q&As about a Module
- Introducing an assessment
- Explaining an area of learning that students might find challenging
- A Masterclass that expands students' knowledge of a topic
- A guest speaker: the Careers team, a professional from a related industry, etc.
How do students attend a Live Session?
- Students must register for a Live Session prior to it starting and have their Zoom accounts organised.
- All information for students on this is found in Ready, Set, Go!: 4.4.2
Where do I find a NZIS/NZMA Live Session background?
When you are hosting a Live Session, it is important that the background looks professional. This means ensuing you have an NZIS/NZMA branded background to your video.
Upload any of these NZIS / NZMA backgrounds from the Live Sessions Video Backgrounds folder in the Online Tutor Info Hub folder.
_Live Session video backgrounds

We all know that when we speak; the words we use, our body language and facial expressions as well as our tone of voice can affect how people respond to what we are saying. For our students to have the best possible experience at NZMA and to be successful in their learning, we need to ensure all our communication is highly effective.
This is especially important in an online environment, where most of our communication is written and, therefore, easy to mistake the tone and the intent of the message.
Below are some guidelines and tips on how to best represent the tone of NZMA and best get across your messages:
- Remember that students are humans first students second, life issues sometimes take priority, and that is ok. Be kind and empathetic in your communications.
- Be proactive, and ask questions.
- When asking questions, you are required to listen - practice active listening LINK.
- Ask open-ended questions. Open-ended questions are questions that can’t be answered by a ‘yes’ or ‘no’ answer,; they require the respondents to give more information. This will then help you understand the problem or issue.
- Always check your spelling and punctuation. Format into manageable chunks.
- Check pronouns. Names may cross genders, i.e. Cameron, Alex, Sam, and students may identify as gender M, F and X.
- Never write anything you would not say in person. Be careful in your communication. Always be kind and polite.
- Always be positive and solutions-focused.
- For video calls/meetings: Check your background. Do you need to blur it out or use the NZMA Background templates? Check the angle your camera is set to - is this the best view for a student to see? Run a test prior to the start of the call to ensure your microphone and video are working.
