Welcome to Animate - we hope this section feels like it flies by!
To bring your character creations to life, we'll use Adobe's Animate. By the end of this topic, you will have worked in Adobe Animate to practise drawing skills and better understand character expressions. You will output some simple frame-by-frame animations and do some simple tween-based work.
Important
Now that you have been introduced to Photoshop and Illustrator, it's time to bring in Adobe Animate and bring flat designs into motion.
Go through all of the tutorials and activities in: Design Principles and Tools > Animate Tutorials.
When you are done, return here and start learning about how to make characters come to life!
What is Character Animation?
Within the production pipeline, character animation is a specialised field.
Character animation is the process of bringing characters to life, whether they be human, animal, alien, robot or whatever your imagination creates.
There is a specific skill to character animation: 50% actor, 50% technician.
Why? Because as a character animator, you are not only using the technical sides of software to bring a character to life, you are envisioning how they act, how they move and how they flow.
'Force' does not exist in animation. It is implied through posture, path of action, balance, timing, arcs, successive breaking of joints, etc. This is expressed through what the character does; therefore, deciding why a character moves will reveal how it moves.
Motion
A key focus of character animation is motion. Motion is what brings character animation to life.
The Encyclopaedia Britannica's definition of motion is:
Motion, in physics, changes with time of the position or orientation of a body. Motion along a line or a curve is called translation. Motion that changes the orientation of a body is called rotation. In both cases, all points in the body have the same velocity (directed speed) and the same acceleration (time rate of change of velocity). The most general kind of motion combines both translation and rotation.
Becoming a Pro Tip! A great tip to master motion is to record yourself performing different movements and actions and then recreate them with your animated character!
Timing and weight
'Timing' and 'weight' are a coupled pair. Why? Because to animate realistically, there is a timing to the weight of the character. For example, if you had a little mouse, you would create quick movements. For a bigger character like an elephant, the movements would be slower and more 'weighted'. We want to believe that the character moved, not that someone moved the character.
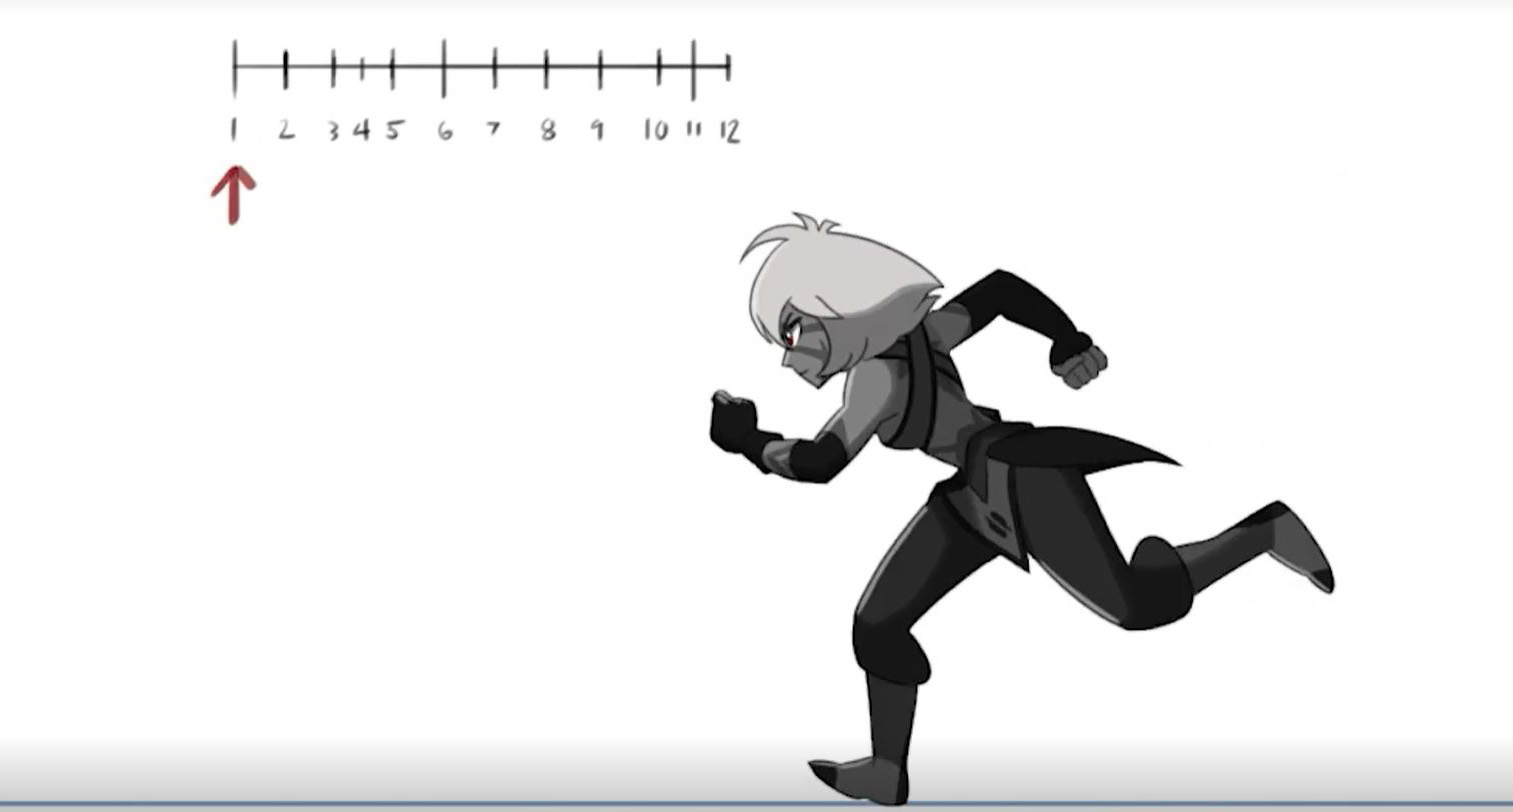
To effectively show the weight of a character, pay attention to the ‘impact’. The impact shows how much effort it takes to stop the body weight from its downward motion, and the impact coming out describes how much effort is needed to raise the body weight. Move through these slides with the arrows underneath them.
In the next subtopics, we'll provide specific techniques that enable you to master the skills you need to animate your characters.
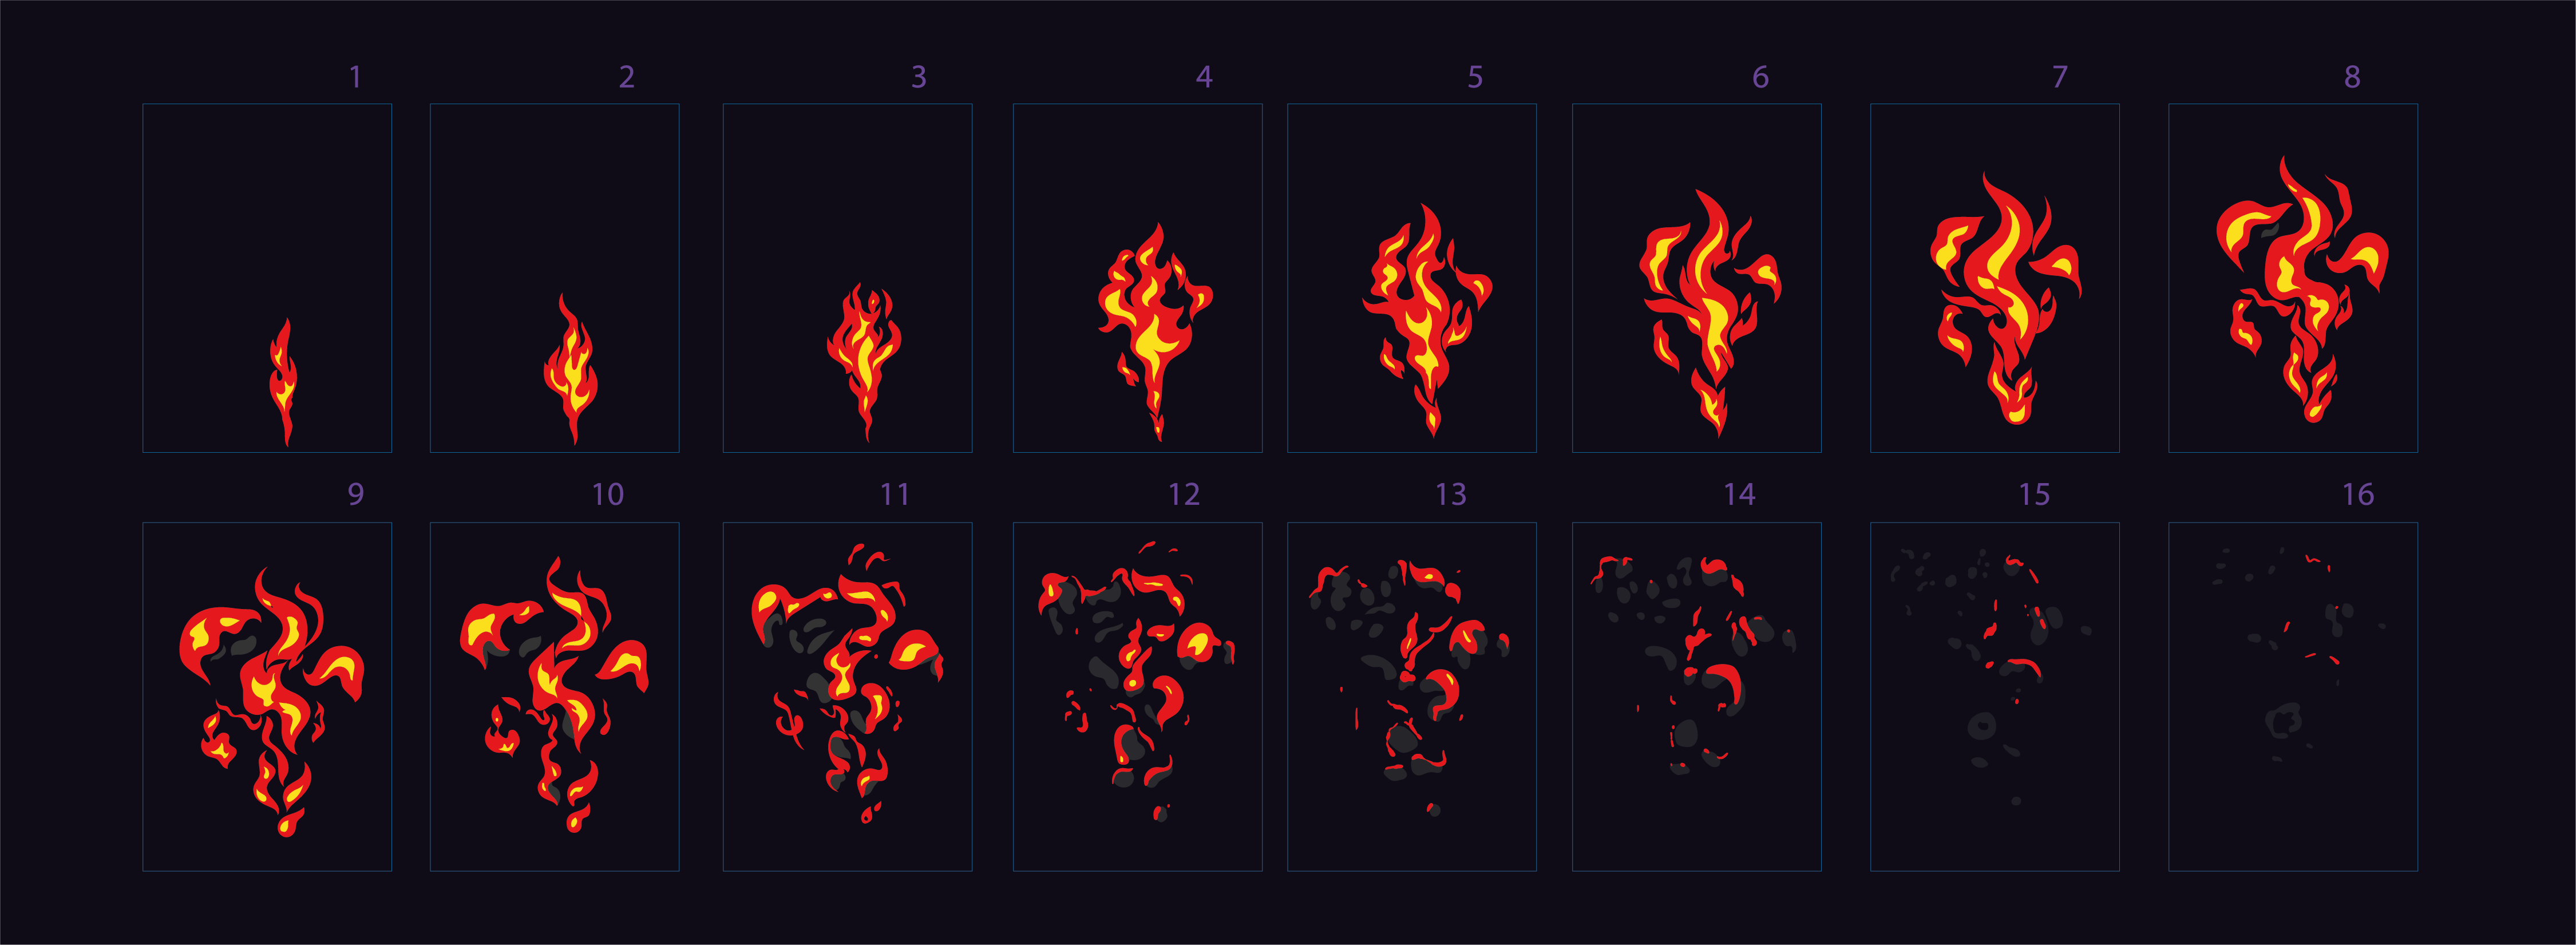
Frame-by-frame animation is a technique that involves creating a series of images, each slightly different from the previous one, and then displaying them in rapid succession to create the illusion of movement. You can see the entire progression of what this fireball animation would look like if stitched together.
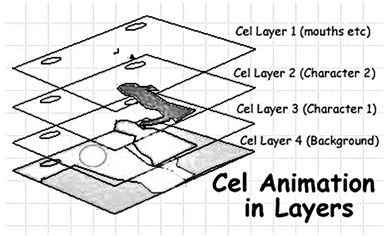
Frame-by-frame animation is also known as traditional animation and classical animation because it was originally done by drawing each frame on paper or transparent celluloid pages (cels) and then photographing them.
Frame-by-frame animation is still widely used today, especially for artistic or expressive purposes, because it allows the animator to have full control over the style and timing of the animation. Frame-by-frame animation can be done with various tools, such as pencils, pens, brushes, or digital software.
The main challenge of frame-by-frame animation is that it requires a lot of time and skill to create smooth and realistic motion. Frame-by-frame animation has its own advantages and disadvantages, depending on the desired effect and the available resources.
Newbie Activity — Bouncing Balls
🕔 About an hour
We will start with a classic piece of frame-by-frame motion, the bouncing ball. Previously, you analysed this animation, and now you'll get a chance to make your own.
Open Adobe Animate to get started.
|
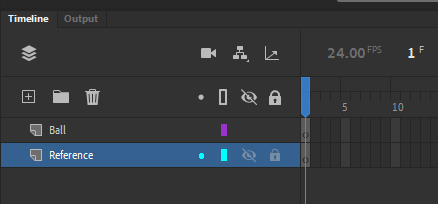
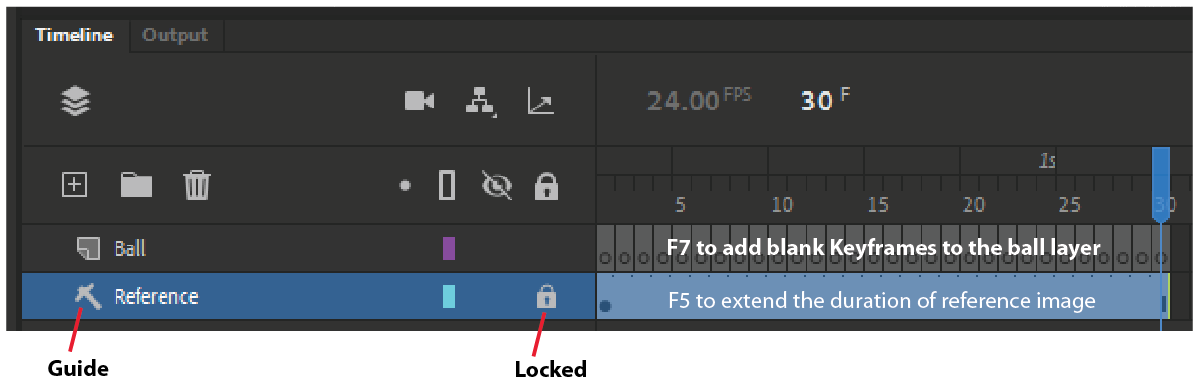
1. Start a new project, and on the timeline, add a new layer. 2. Rename the layers. One for the ball and one for a reference image. |
 |
|
This will not output as a visible layer. |
|
Use this reference image below: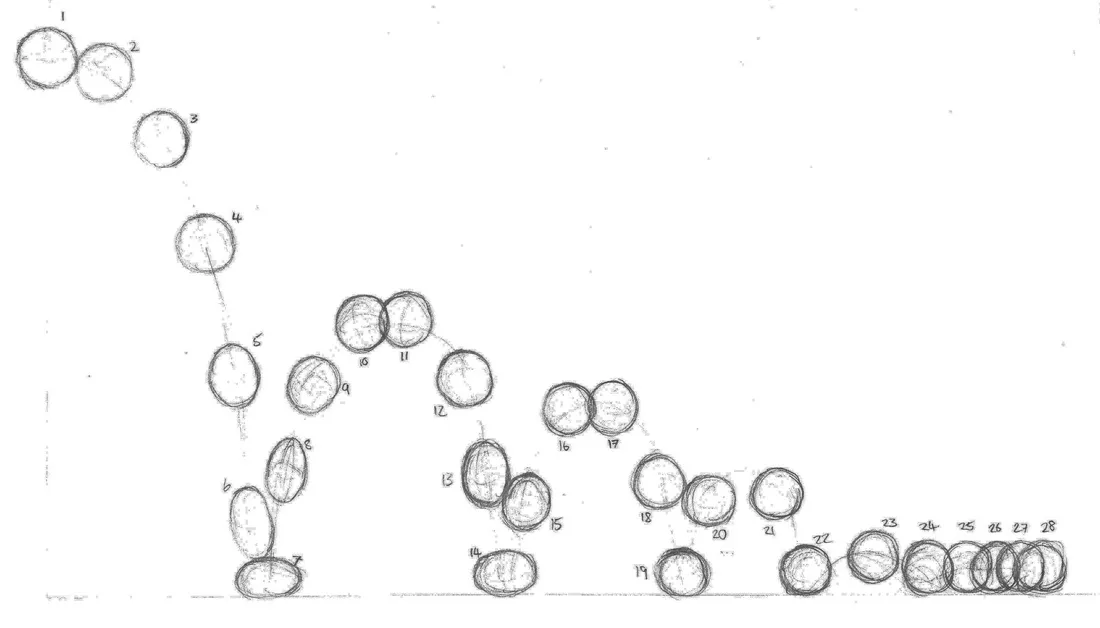
4. On the reference layer, paste your reference image.
5. Resize the image to fit the "Stage" and lock the layer.
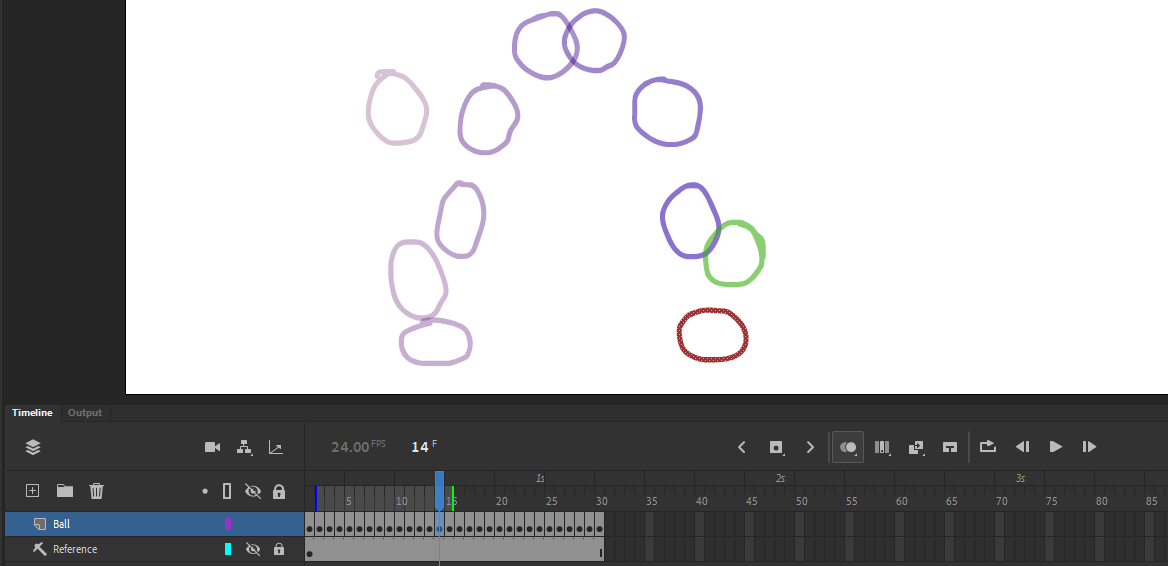
6. On the ball layer, make a series of Blank keyframes to draw in.
7. Use the Classic Brush Tool to manually draw a different image of the ball on each frame.
8. Add another layer, draw in a background and develop the ball further by having it move with an emotional style, i.e., happy, sad, angry, excited...
And here it is again:
More playing with balls. These we exploded. What can you do to have fun with the balls you are working with?

Newbie Activity — Walk Cycle
🕔 1 - 2 hours
This activity explores another classic animation sequence, the walk cycle.
It will introduce the use of symbols for animation.
The symbol is an element that can hold its own nested/embedded timeline separate from the main stage.
If you had to animate a character walking, it could take a very long time to produce. Using a symbol allows a single span of action to be looped and repeated. You can create a single step-and-pass sequence that can be used again and again.
Continue using the same project from the bouncing ball activity or start a new file with the same specs.
Getting started
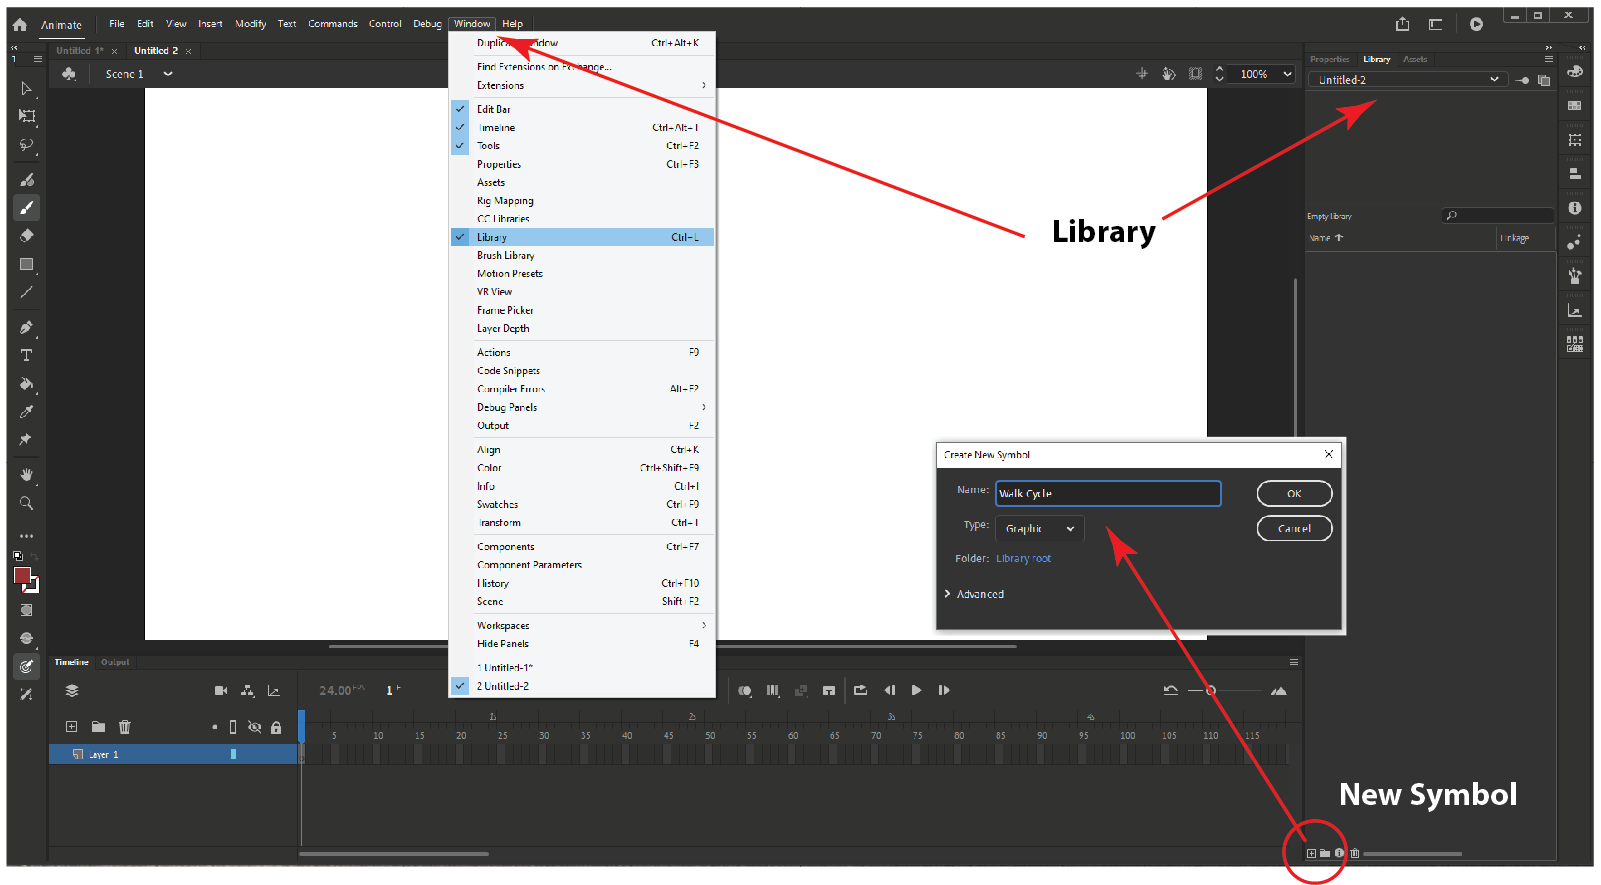
1. In the Library, make a 'new symbol'. Call it something like "walk cycle".
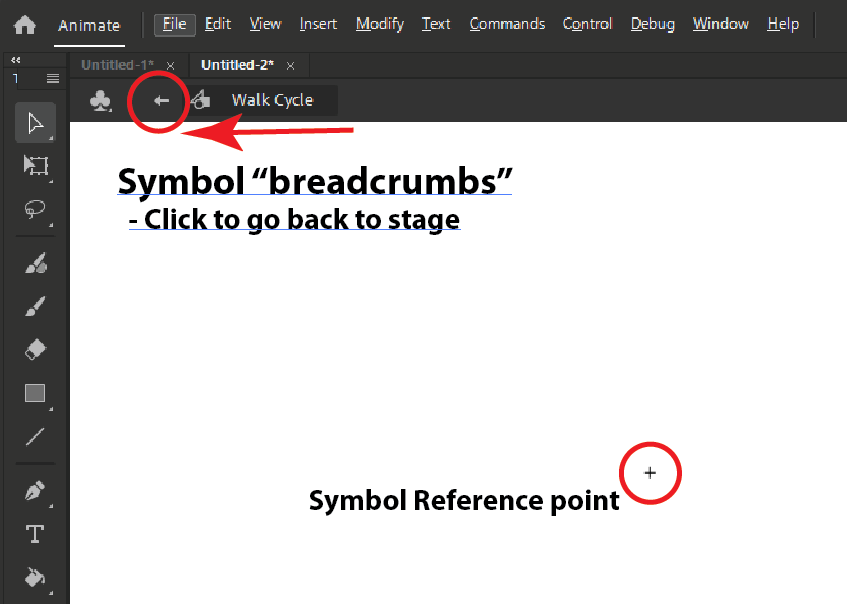
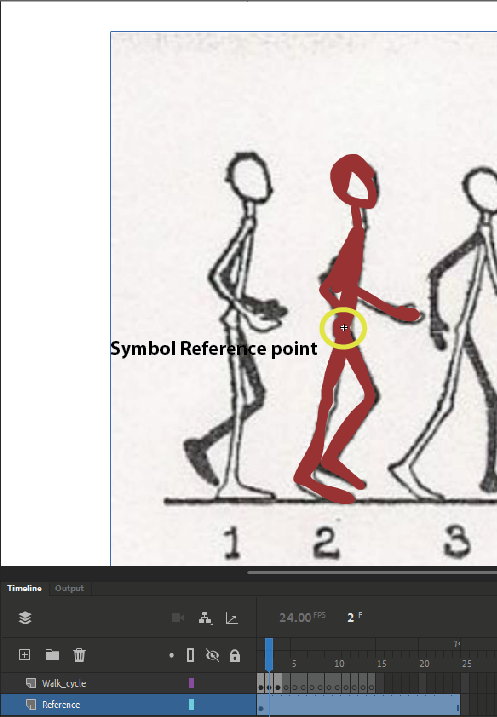
You will now be in the symbol.
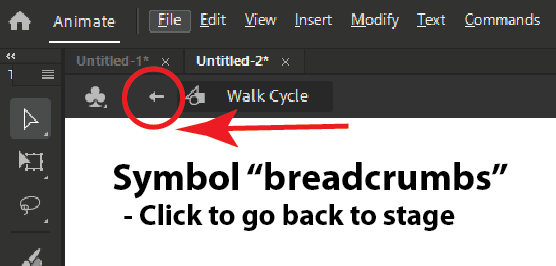
Notice that the stage edges are gone, and the reference point is visible. Also, note that you are in a different timeline from the main stage. Later when you are finished with a symbol, you can use the breadcrumbs to return to the stage. If you want to go inside a symbol, just double-click to return. For now, let us not go back to the main stage as we will draw our walking character inside the symbol we just created called "Walk Cycle".
2. Now we are inside the symbol we just created. As in the earlier activity, make another layer and rename them. One for the reference/guide and one for the walk-cycle.
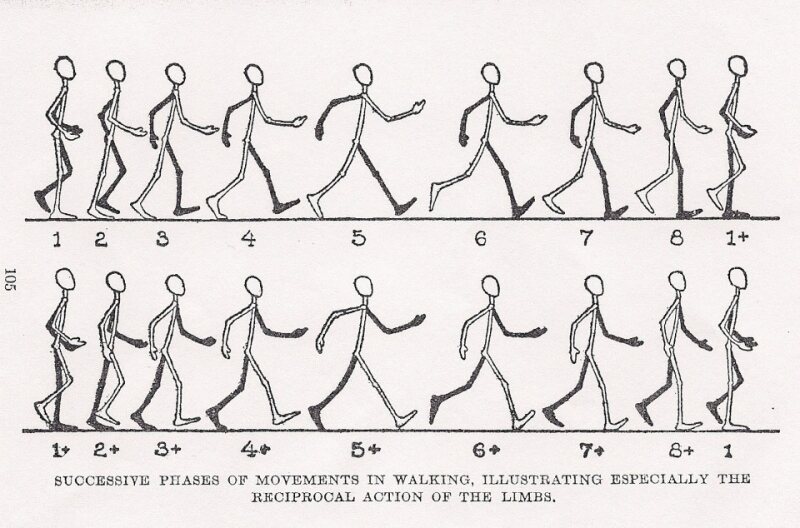
3. Add blank keyframes and draw each pose for the walk-cycle layer. (Use a reference image to make it simpler.)
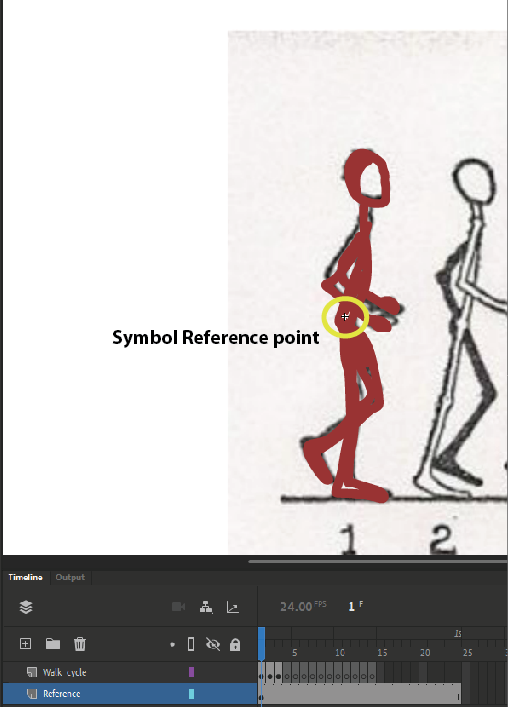
Frame 1
4. Move the reference image so that the hip/pelvis of pose 1 is on the reference point. (Any point is okay as long as it remains consistent.)
5. With the classic brush, draw your line on the walk cycle layer. Depending on your drawing style, you will need to allow for the arms and legs to be in either the front or back.
Frame 2 and beyond
6. Shift the reference image into the same point relative to the reference point.
7. Draw the lines again to follow the pose. Make sure that the first frame and the last frame are the same.
8. Once all the steps in the walk cycle have been completed, you can hide the reference image, exit the symbol
and return to the main stage.
9. Back out on the main stage, create a new layer and give it a relevant name.
From the library, drag the walk cycle symbol onto the stage/layer. (You may need to resize the symbol to fit the stage better.)
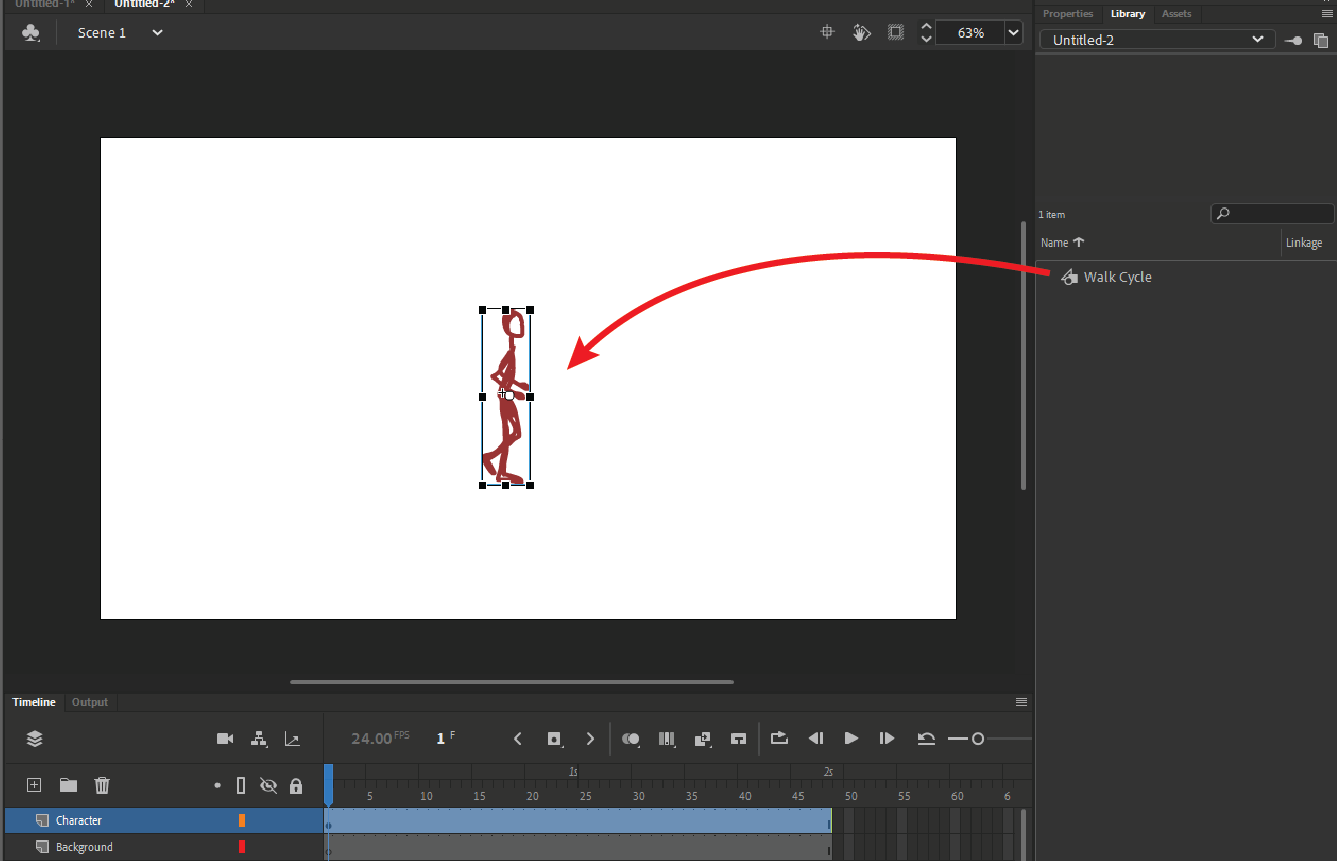
10. Give the symbol an appropriate amount of time and then hit the Play button. You will now see the character go through its animation sequence. The symbol sequence will loop when it is put onto the main stage if there is enough time.

Note: This symbol will be used in a future activity. Make sure to save your progress! (Keyboard shortcuts: Ctrl+S, CMD+S).
Tweening
Tween" is short for "In between". It's an alternative method for animation and uses the computer to do a lot of the work so the animator can focus on more important things, like what's happening in the keyframes.
Watch this Adobe Animate tutorial about the types of tweens and how to use them.
As pointed out in the video, there are three types of tweens:
• Shape Tween
• Classic Tween
• Motion Tween
In this activity, we will use symbols again and work with Motion Tweens.
Newbie Activity - Motion Tweens
🕔 About an hour
1. Start another Animate project using the same settings from the bouncing ball exercise or reopen the Walk Cycle activity. If you don't see your symbol, drag it onto the artboard.
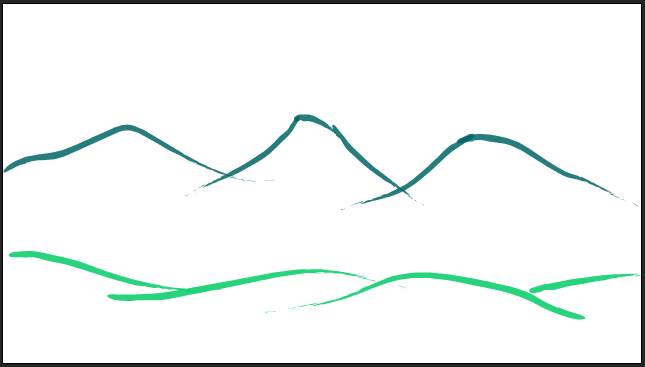
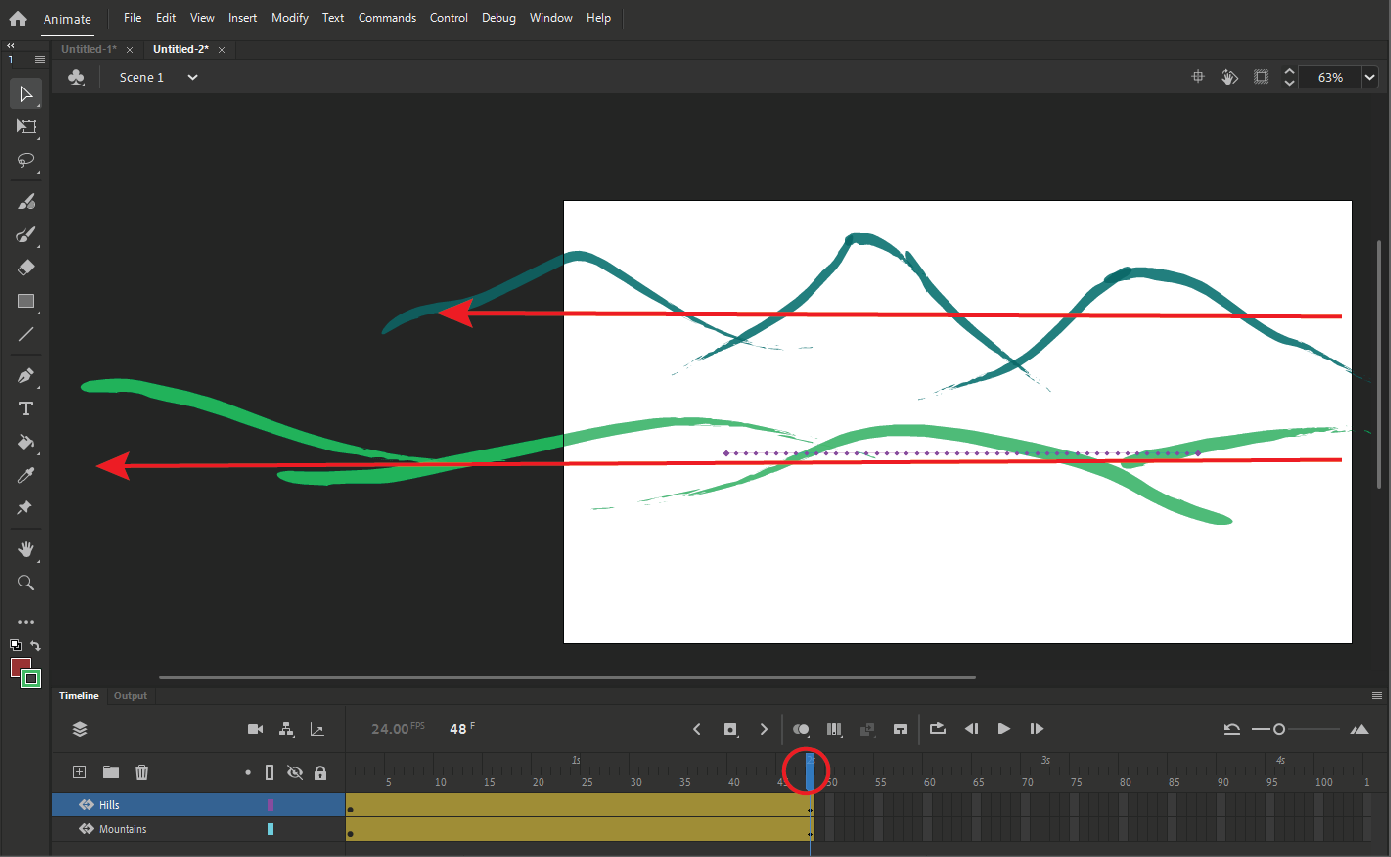
2. On one layer, draw a few lines to look like mountains. The Paintbrush Tool was used in the image below to get more interesting brush strokes.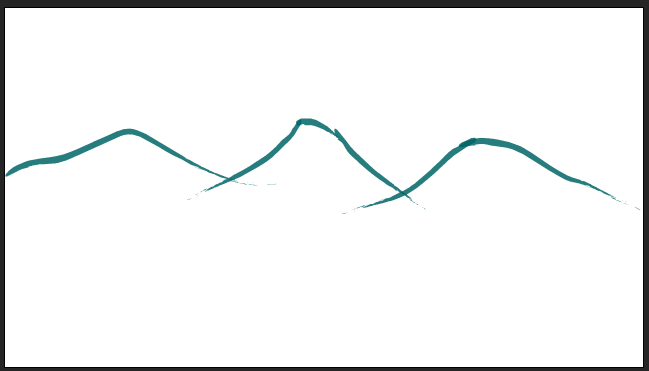

3. Add another layer and draw a few lines that look like hills.
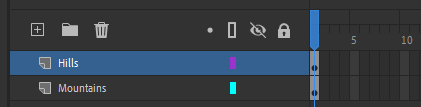
Each layer contains multiple lines/shapes, which will be difficult to manage separately. To make it easier, we will convert the graphics to a Symbol.
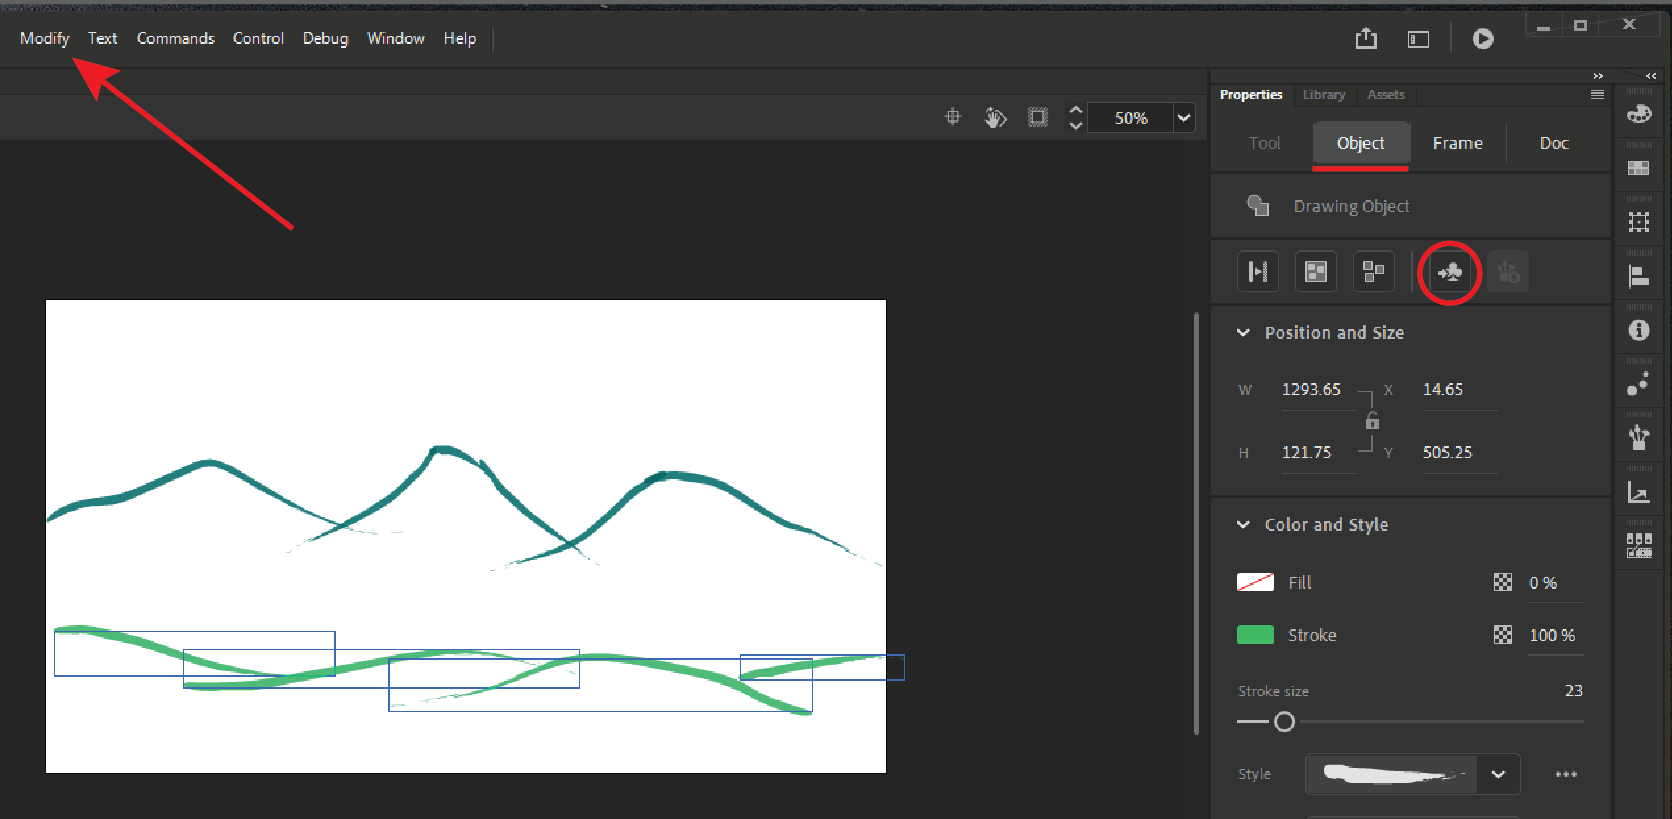
4. Select everything on one layer and Convert to Symbol (F8), use the convert to symbol button, or find it in the Modify Menu. You will need to do this for each separate layer.
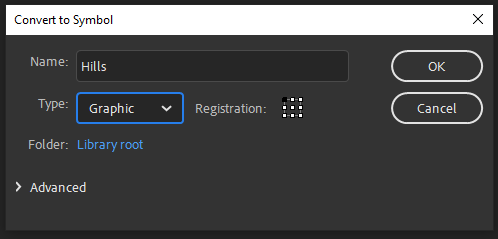
5. Name the symbols and make sure to set the "Type:" to Graphic.
Now that the layers contain symbols, you will be able to change the layer settings to allow tweening.
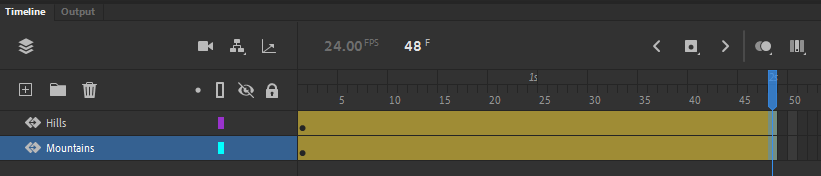
6. First, add some time to the project by moving the playhead up to the 2s point and pressing (F5) to add frames.

7. With both layers selected, open the "Insert" menu and select "Create Motion Tween". The layers will change to a yellow colour.
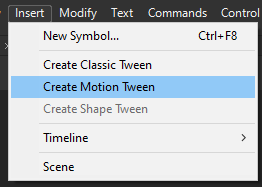 |
 |
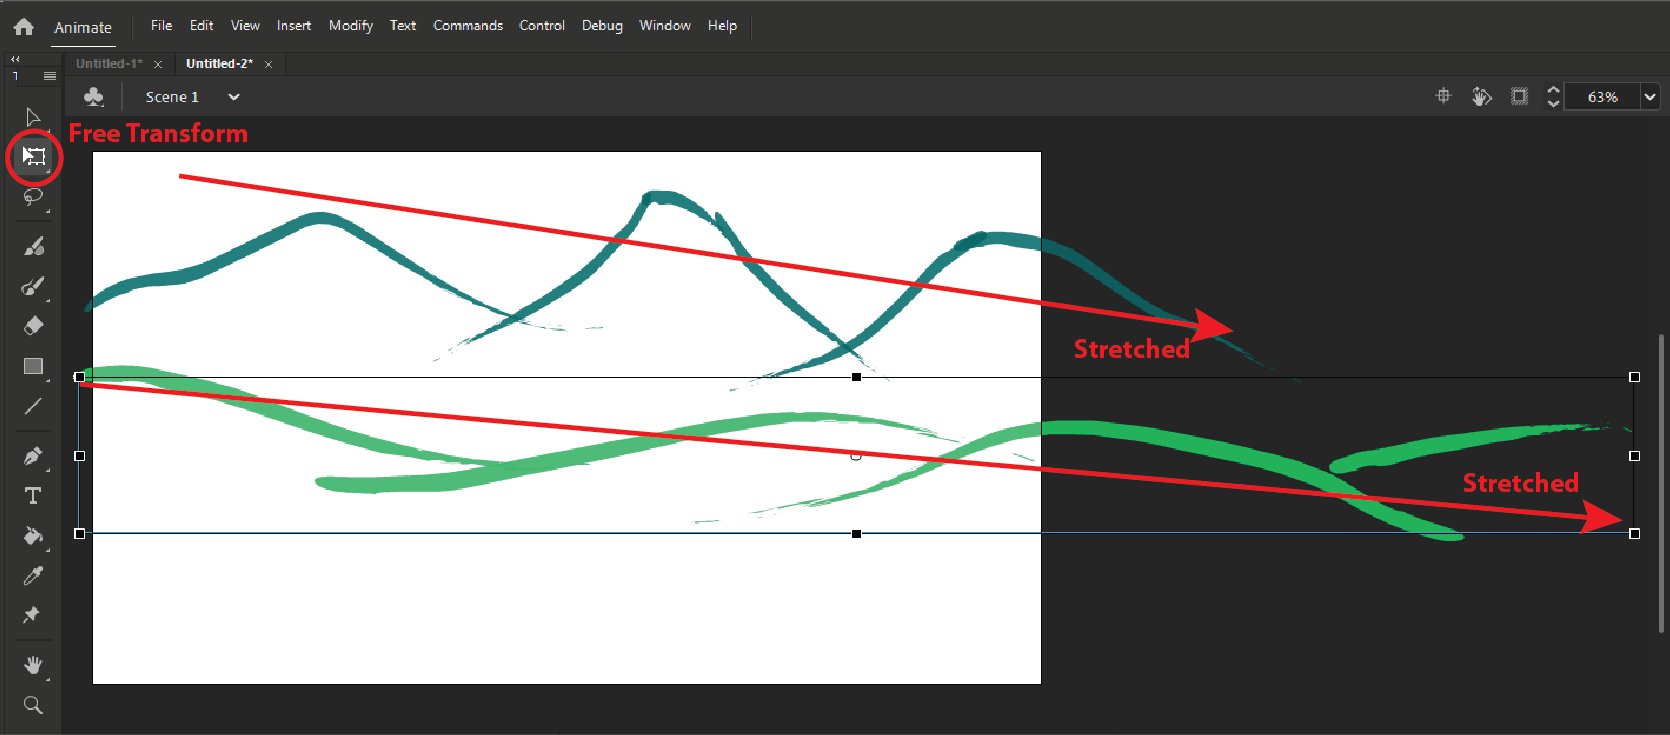
8. Use the Free Transform Tool (Q) to change the size of each symbol. Stretch the symbols to be wider than the stage to allow for it to move sideways. Objects closer to the viewer will appear to move further, so will need to be stretched further.
9. Check the playhead is at the beginning of the timeline and position the symbols so they sit on the left edge of the stage. 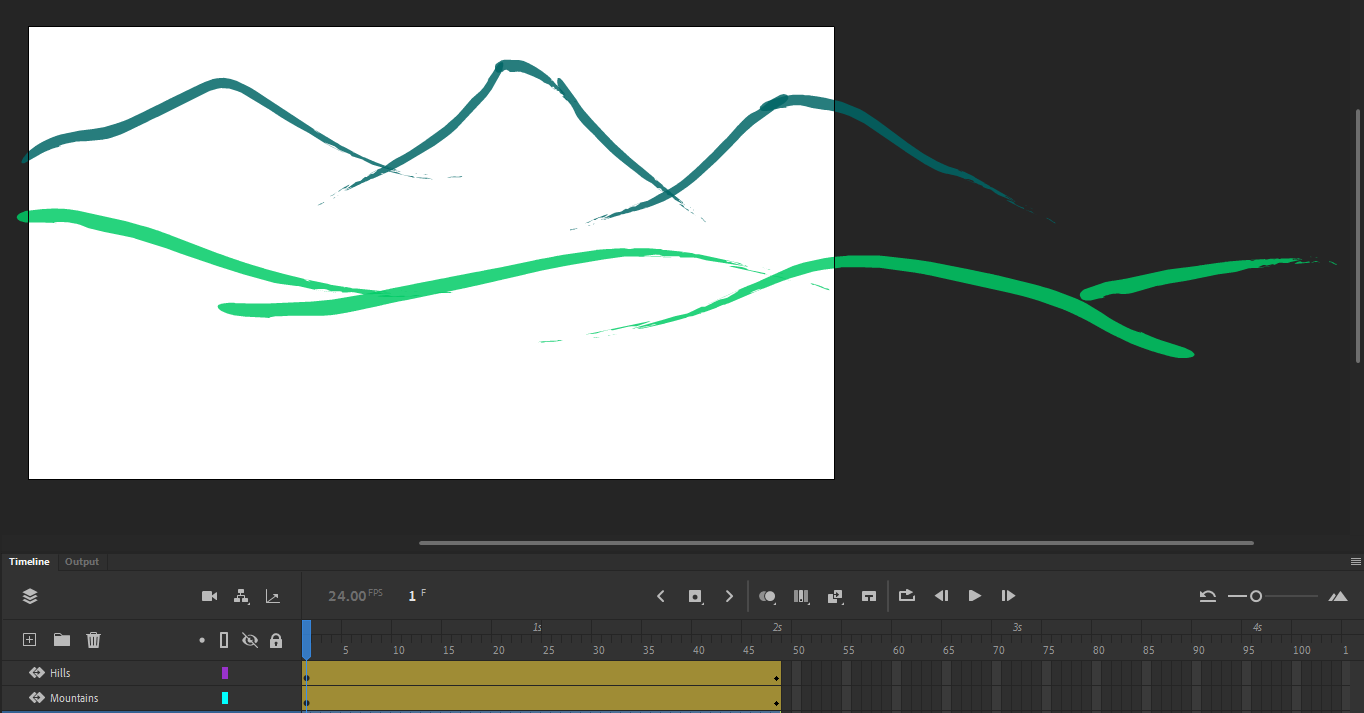
10. Move the playhead to the end of the timeline and slide the symbols off the left side of the stage.
You can now play the animation or scrub the playhead to see the action take place. Having simple symbols move across a stage is only the beginning. We will now add a character to the stage to complete the scene.
11. Add one more layer to the project and give it a relevant name.
12. Copy and paste the "walk cycle" symbol from the Frame-by-Frame activity onto the new layer.
There are two ways this animation can be implemented:
1. Fixed Camera
To accomplish this, remove the Motion Tween from the background layers so they are stationary and add a motion tween to the character symbol. On the first frame, put the character to the left of stage and on the last frame, put the character to the right of stage to show it moving across the screen.
2. Side-scrolling camera
To accomplish this, the symbol needs to remain in the middle of the stage, and the background layers must be moved across.
Practising Activity – The energised bunny
🕔 1 - 2 hours
Start by opening Animate and create a new Full HD Stage with 24fps. Then we're going to import the bunny you created earlier so we can make it jump.
Importing Illustrator files into Animate
- Select Import to Stage… from File in the menu bar.
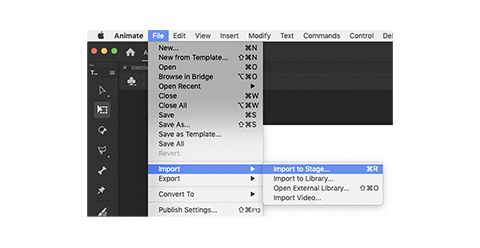
- Navigate to your saved character and click Open.
- Convert layer to Animate layers and click Import.
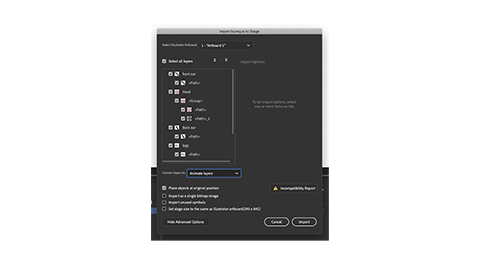
- Your character will appear on the stage, and each of the Illustrator layers will be a layer in Animate.
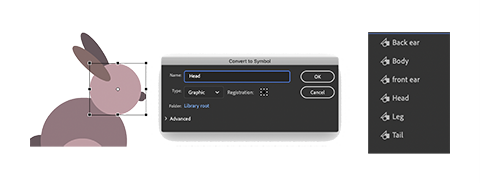
- We want to use tweening, so our first step is to make each element a symbol by selecting it and clicking the Convert to Symbol button in the Properties panel.
- Convert each element into a named symbol.
- Currently, each element/layer is completely independent. If we wanted to animate our rabbit doing a hop, we’d need to move every element. It would be better if one of the elements was the main one and everything else followed.
- We can do this using layer parenting. Watch the videos below for more tips.
- We can do this using layer parenting. Watch the videos below for more tips.
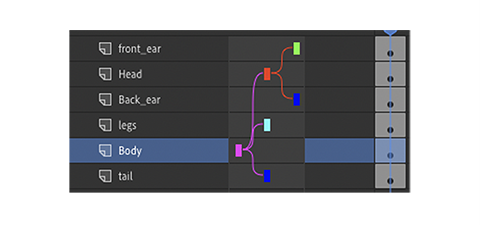
- We can show layer parenting by clicking the
 icon as seen in the image below. In this example, the body is going to be the main element we move, so the other elements will be the 'children' of the body.
- Click and drag a line from the legs layer to the body layer in the timeline.
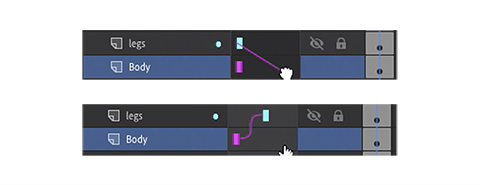
- Repeat for the tail and head.
- Each of the ears will be a 'child' of the head. Now, if we move the body, the whole rabbit will move. If we move the head, the ears will move, too.
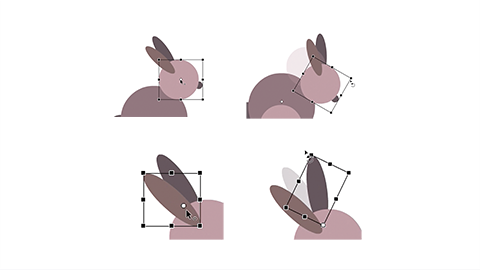
- Change the centre point for each element to a point where you want the rotation to happen. With the rabbit, the ears will rotate from where they meet the head at the base of the ear. The head will rotate from the centre of the body, as will the tail. The leg will rotate from the centre of the back part of the leg.
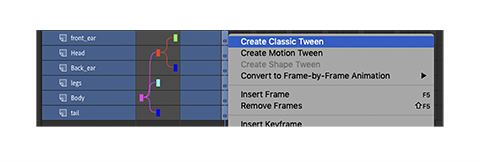
- To start animating, select all the first frames in the layer panel, right-clicking and selecting Create Classic Tween.
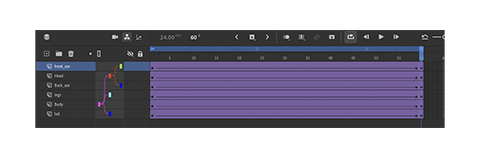
- With the ends of all the tweens selected, drag the last frame to frame 60. (We’ll leave the first 18 frames to build some anticipation.)
- Add a keyframe to the body layer at frames 19, 36 and 52.
- Select the keyframe at 36, then move the body of the rabbit up on the stage. If you preview the animation now, the motion will be very linear.
- Apply Ease In and Ease Out to the tweens before and after the jump keyframe. If the jump takes too long, try a different Ease Curve or move the keyframes closer together. Let’s add a bit of anticipation by lowering the rabbit's head before the jump.
- Add a keyframe to frames 16 and 20 on the head layer.
- On frame 16, rotate the head down.
- Apply Ease In Out to the tween before the head lowers. Experiment with the rest of the layers to finish the animation. Try to make the legs point and the ears flop during the jump.


Exporting the bunny
Once your animation is finished, you’ll probably want to share it with your friends and family as well as post it to the forum so your tutor and peers can see your work.
Animate has several great formats to export under File/Export in the menu bar.
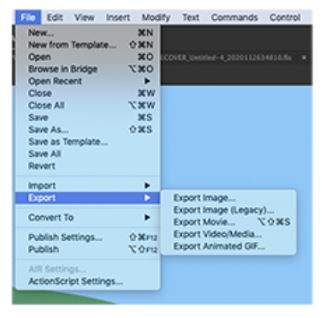
- Export Image… Will let you export the frame you’re currently viewing in an image format. You can choose GIF, JPEG or PNG.
- Export Video/Media...Will enable you to export your entire animation as a video file.
- Export Animated GIF… Lets you export an animated GIF that you could use in an email or on social media. It’s just like the sticker you see on Facebook Messenger. If you’re exporting a GIF, it’s a good idea to think about the size of your animation. You may want to change the size to something a bit smaller.
- Once you choose the format, there are many presets for different outputs, like YouTube and Vimeo.
Finally, choose an output destination and click Export.
Post it to the forum
Share your work in this Forum. As usual, please include your thoughts and reflections and take some time to view and comment on the work of your peers.
Talking
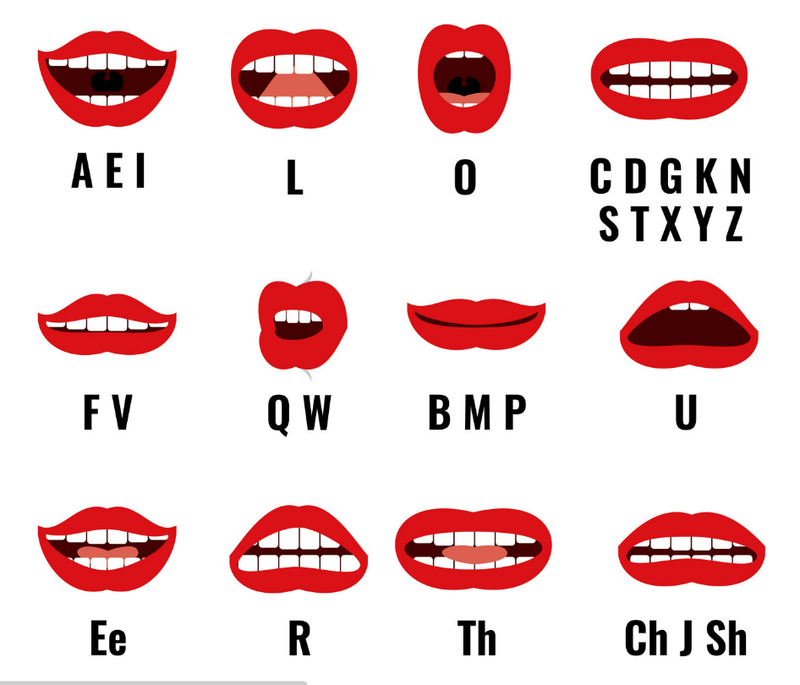
No conversation about animating characters can be complete without talking about talking. However, making characters' mouths match their words can be quite tricky to get right and will be covered by a more advanced course than this introductory level. That said, we couldn't leave you speechless!
This skill will not be assessed for this course, but if you are keen, watch this video by Adobe to learn how to marry mouth shapes to letters to give your characters the gift of speech.
Watch: Animate characters with Auto Lip-Sync
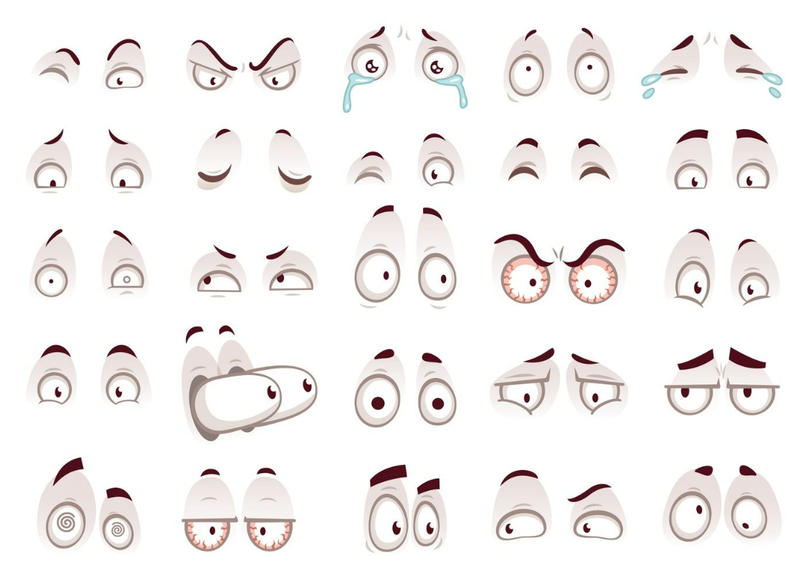
Often, eye expressions mirror talking expressions to help get a point across. The images below can be sliced up to give you assets that can be used to enable a character to speak and emote with their eyes and eyebrows along with their lips, tongue, and teeth.
 |
 |
Practising Activity - Say Hello!
🕔 1 - 2 hours
Open this file in Animate to have a play on your own!
Once you have done yours, see what ours looks like! We have made an animated GIF of Pop! Dan saying "Hello".

Adobe.comSkeletal animation (bones) and rigging are two terms that generally describe the same thing - and bring the characters you create through computer animation to life. They are a technique for manipulating 2D and 3D models to add movement - whether you’re making a film, advert, game or project for fun. Discover everything you need to know about what rigging is in animation and how to get started, with this guide.
The idea of working in this way is described in the following video, 'Robotrig'. Please note that the video author may be using an earlier version of Adobe Animate, and your interface might appear different.
Newbie Activity - Robot Rig
🕔 1 - 2 hours
Now you get to animate your own robot rig character!
- Start by downloading this file — an Illustrator file which contains the Robot character.
- The Robot Rig will appear on the stage, and each controller (the red circle symbols) will be a named layer, for example, BackArm, BackLeg, and FrontArm.
- To start, you must place the joint chain. This preferably goes to where the object rotates from.
- Select the main rotation below the hip.
- Using the Bone tool in the Tools pane, hold down Shift and click and drag to draw a line through the hip, torso, bottom of the neck and bottom of the head to the controller at the top of the head.
- To test that you have drawn the line correctly, select the controller at the top of the head and move it to wiggle the entire upper body!
- Repeat this step for each arm. Hold down Shift to draw a line from the collarbone through to the top of the arm, elbow, hand and controller.
- Repeat this step for each leg. Hold down Shift to draw a line from the hip, connecting to the leg, back of the foot and tip of the toe.
- Now it's time to move the legs, arms and head into position.
- Select the Transform tool in the Tools pane and select the object you wish to move.
- Use the arrow keys to move it into place.
- Repeat this step for each body part.
- Finally, you must arrange the arms and legs so they are on the correct side of the robot's body.
- For the front leg and arm, right-click and select Arrange > Bring to Front (Ctrl+Shift+Up) or Bring Forward (Ctrl+Up).
- For the back leg and arm, right-click and select Arrange > Send to Back (Ctrl+Shift+Down) or Send Backward (Ctrl+Down).
- Note: You may need to play with this until they're in the correct place.
- Now, you're ready to animate. Away you go!
Tip
At the moment, all the controllers are red, making it easy to get mixed up. To help you know exactly what you're picking, you can change the colours of the controllers. This will help you visualise what each controller is controlling! For example, you could organise the controllers so that they are green for the back of the body, red for the front of the body, purple for the back arm, blue for the front arm and so on.
Showing off Activity - Fun with Funko!
🕔 4 - 6 hours
Now that you have the basic tools and techniques of simple animation apply those same things to your Funko POP! character. Ensure you have applied the techniques used in your bunny, but also use at least 4 of the principles of animation we learned. Feel free to use more — the more, the better!
To do this, you'll need to decide what your character is going to do with their head, eyes, nose, hair, mouth, and any other attributes you have to work with. Feel free to give your head a body and animate that. Just have fun!
Use bones and rigging, tweening and symbols to show off your skills! Move parts of the head or face to give the character more relatability and realism. Maybe the head nods or turns slightly. Can the eyebrows move? What would you have to do first to animate the eyebrows?
Collaboration Challenge (optional)
We hope you are proud of your work! Being proud of your output is one thing — sharing it with others in person might feel daunting. We want to encourage you to collaborate in person for this course, though it's not required.
If you want to practice collaboration, show your work to at least three people in your life.
- You can do that in a group or just one at a time.
- If you can, do this in person, as the design process often involves in-person collaboration.
- If you don't want to do that or it's impossible, consider setting up a video conference using your usual social media tools — most provide a screen-sharing function.
- Consider requesting a peer and/or tutor review at a Live Session.
When to reach out and ask for a review
For this activity, if you are doing the collaboration challenge, you'll want to complete the design to the point you think it's done and then seek feedback. However, a professional creative team may request feedback at various points in the development process, as well as on the final design. We'll cover the Design Process later in the course.
Forum post
When you are done, export your work as a .gif and upload it to this Forum, along with a description of the techniques you used and why you chose them. Share your reflections about working on this activity. Check out the work of your peers. Can you leave them supportive feedback?
Tau kē . Fantastic work. After sharing your activity on the forum, you can head over and tackle your first assessment for this programme. Have fun and good luck!