Walt DisneyWhen we consider a new project, we really study it…not just the surface idea, but everything about it.
Animation is everywhere, and though people seem to enjoy the feel and emotion it attracts, they do not realise the work it entails and how animators can creatively achieve this by breathing life onto a blank canvas.
'Animation' can be defined as 'the rapid display of a sequence of images to create an illusion of movement'. The most common method of presenting animation is as a motion picture or video.
Everyone is exposed to animation through multiple avenues: entertainment, education, advertisement, scientific models and studies, creative arts, gaming, and so much more.
Think of your favourite animated movie. How do the creators of the movie make us believe that the objects and characters they have created are alive?
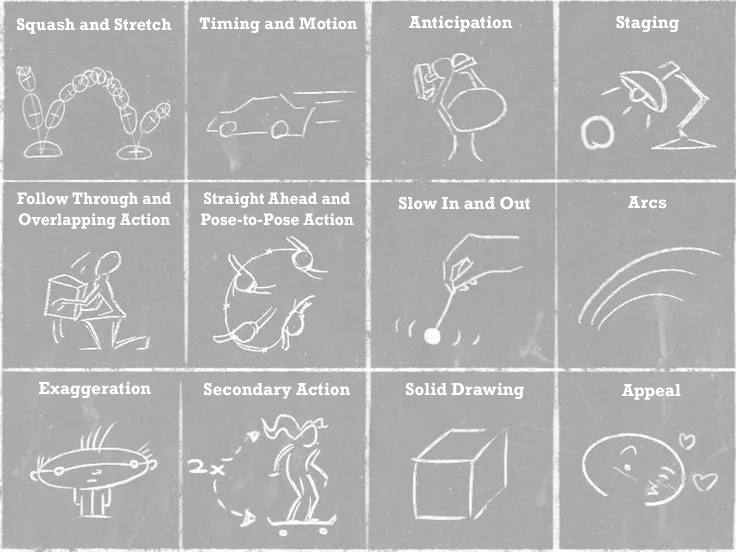
Simple. It comes down to the 12 principles of animation that were first introduced by Disney animators Ollie Johnston and Frank Thomas in their book The Illusion of Life: Disney Animation, which was originally released in 1981.
Upon retirement, Frank and Ollie began to piece together a book about their experience as animators for the Walt Disney Studio. They provide guidelines for animating an action or shot, as well as a set of principles to follow when attempting to bring drawings to life.
The principles form the basis of all animation work. While created for hand-drawn animation, they still also apply to digital animation today.
They are relevant for many different fields, with the most obvious use being for animating a character design.
We'll start the 12 subtopics below with a video demonstrating each of these principles by Alan Becker. He created a series of videos called 12 Principles of Animation, which are an excellent resource. He explains the video was "presented as described by Frank Thomas and Ollie Johnston's" book, The Illusion of Life: Disney Animation.
He is known for his viral animations called "Animator vs. Animation". Watch his clever, interesting, creative work below. Take these two minutes for pure enjoyment, but the ideas and techniques may also inspire you to think out of the box for your own work.
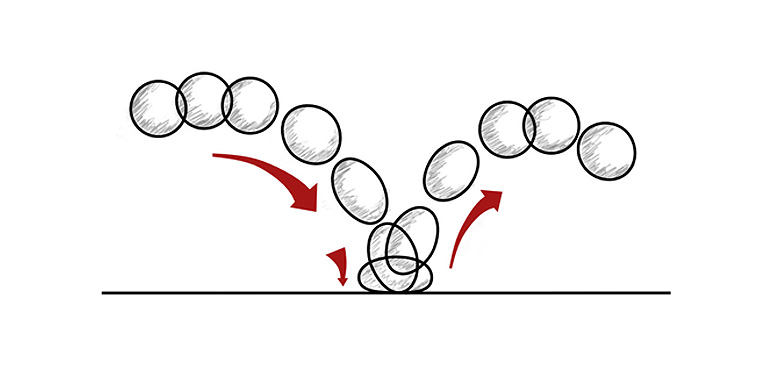
Squash is what happens at the time of impact, while stretch occurs before and after the impact.
It can also be used as a quick movement to get the character from one position to another, helping you to create a sense of volume for your object or character (as well as providing the sense of a cartoon-like appeal).
The general rule is that the FASTER and LONGER the fall, the BIGGER the squash and stretch.
Squash and stretch can act as a tool to emphasise speed, momentum, weight and mass. The more squash and stretch, the softer the object. The less squash and stretch, the stiffer the object.
You can also use squash and stretch to exaggerate facial expressions in a character to give interest to regular emotions that can sometimes be boring and uninteresting. An example may include a character being anxious by biting their nails furiously and looking anxiously with their eyes to the left and right. In an everyday situation, that does not happen when we are feeling anxious; however, this technique is used to engage the audience.
Anticipation is the lead-up to an action, taking the audience through a planned sequence of actions that will lead them clearly from one activity to the next.
This usually occurs in three parts:

This supports the audience to become prepared for the next movement as they expect it before it occurs (yes, think: anticipation).
This is achieved by preceding each major action with a specific movement. It can be as small as a change of facial expression or as big as a physical action. Consider a character running and slipping on a banana peel — it is through anticipation that the audience will be able to see the character running, as well as anticipate the slip.
Another example is a ball falling off a ledge. If the audience did not witness the ball rolling, they would not be able to anticipate that it would fall, therefore making this movement feel unrealistic.
If we do not have anticipation, the audience will not process what is going on, and the action will be complete before they even realise it.
Anticipation is important to animators as it provides their animation with a sense of realism, as well as helps the audience predict what is to come. This is needed when evoking emotion as well as telling a story.
How many anticipated moments do you experience when you watch the following clips?
Staging is the presentation of animation so that the messages and ideas being portrayed are completely and unmistakably clear to the audience.
Animators ensure staging is effective through the use of timing, camera angles, shot types, positioning and characters. They work to make sure all are balanced, with clear intentions being set for the viewers.
To stage an idea clearly, the audience's eye must be led to exactly where it needs to be at the right moment.
Picture a character crossing the road. The animators will lead your eye over to the character, followed by the road, then draw you over to the car that may be driving past, and then finally back to the character crossing the road.
Ultimately, they want to say, 'Look at this... Now, look at this...' If characters have to compete for stage presence, this will take the attention away from the main point as well as confuse the viewers by not knowing where they need to look.
You want to control where the audience is looking and the path you wish them to follow through with.
An action is staged so that it is understood; a personality so that it is recognisable; an expression so that it can be seen; and a mood so that it will affect the audience.
Animators use two main approaches to draw out key poses that they would like their character to take.
Using the approach straight ahead, the animator will begin with the first drawing and continue to the next, progressing in chronological order — hence the name 'straight ahead'.
However, when using pose-to-pose animation, the animator will draw out the key poses in an animated scene — the beginning and end — and once those are complete, the animator will go back to fill in the in-between drawings.
Animators can use whichever technique suits them, or they may alternate between both, depending on the scene or animated action shot.
Pose-to-pose is usually more effective when creating action scenes, as having created the first and last shots, the animator then works backward. This method gives them the control to decide where the character will end up, ensuring consistency in size, position, etc. If they were to make a mistake, they could work within the middle shots without impacting the whole animation. However, if they choose to use the straight-ahead technique, they may be forced to change the whole drawing.

Straight ahead, on the other hand, is more effective for unpredictable animation - think of fires, water, clouds and explosions. This is due to their nature of being natural and unconfined.

We have previously investigated the principle of anticipation and how it prepares the audience for an action being delivered by the character.
Anticipation is before the action is completed, while follow-through occurs once the action has been completed. Specific parts of the character continue moving even after the character has stopped.
We introduced this concept previously with character development, so you should already be familiar with how it will impact the way the audience sees and connects with the character.
Just as a character needs to anticipate a jump, they need to follow through with the landing. This is the term for animation that is applied to items that are attached to a character but that do not move independently. If a character is running, it would look unnatural if their clothing and hair remained stiff. The follow-through will ensure a secondary action is in place to make the movement natural. This will mean that the hair will continue to move even after the character has stopped running.
See an example below of the character Mulan. Turning her head is the primary action. Notice that her hair is still in motion — that's secondary action/follow-through.
Follow Through
Follow-through refers to parts of the character moving after the character has stopped.
Overlapping
The action is the delayed offset from the character (like it is trying to catch up with it).
When used correctly, overlapping action ensures that there is a continuous flow between each action. This helps make each movement seem more natural, as an action should never be brought to a complete stop before starting another action. Overlapping is effective as it maintains a continual flow between all sequences of actions.
Slow in/Slow out is also known as Ease in/Ease out. This is used when the animator creates any action that needs time to speed up and slow down.
Consider a car, for example. It does not start and stop at the same speed. You will need to create and animate the car to gradually accelerate to reach the speed you want, as well as slow down to a halt.
This is one of the most important principles designed to add realism to the movement of characters; otherwise, movements will look mechanical and robotic.
To achieve life-like motion, animators will draw more frames at the start of the action, fewer frames in the middle, and more frames again at the end of the action to create the slow-in/slow-out effect.
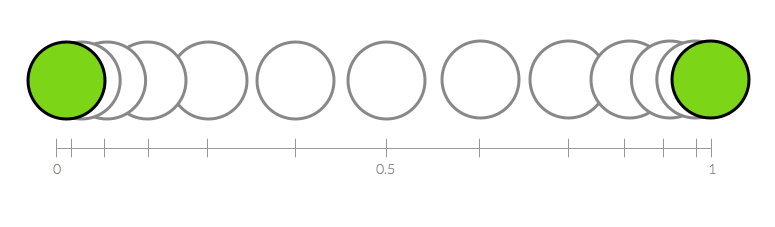
These effects also focus on the feeling of the animation. Think about how it feels to be on a rollercoaster. As the ride reaches the crest of a hill, the cars slow down for effect before dropping into the next plunge.
- Ease in/slow in: used at the start, it is slowed down by having more frames closer together.
- Ease out/slow out: used at the end, it is slowed down by having more frames closer together.
Most things flow in a natural and circular curve motion unless you are a robot, of course. Using the principle of arcs helps animators achieve a natural movement and direction for characters and objects. Consider when a head turns or an arm moves. Rarely will they thrust straight in and straight out. Natural movement will often have a slight curve to it.
A great example is a character lifting an object — you can usually determine whether the object is light or heavy depending on the character's body language. When lifting a lighter object, the animator will have the object sit outwards of the character's body. The heavier the object becomes, they may place it closer to the lifter's body and create an arc to show the impact.
This way, the audience gets a sense of the object/action simply by recognising its arc (as illustrated below).

Watch the following video to see how the principle of arcs is effectively used in this animation.
Secondary action is an action that results directly from the previous action. Secondary actions are important when heightening the interest of viewers and creating a real complexity to the animations and storyline.
This principle deals with actions that happen in addition to the character's primary action, reinforcing and adding more of a dimension to the main action.
As you can see below, the leaf begins to move as the frog jumps off. The leaf moving is the secondary action that results from the frog's primary action.

Another example is a character walking down the street. The action of walking would be primary. If that same character raises an arm to wave at someone while they are walking, the arm movement and wave is the secondary action. The secondary action usually always works to support the primary action.
Timing within animation refers to the number of frames for any action used by the animator. This helps create the illusion that an action abides by the laws of physics. Adjusting the timing of a scene enables animators to make that scene look slower and smoother (with more frames) or faster and crisper (with fewer frames).
If you have many drawings that are very close together, the action of the drawing will be very slow. On the other hand, if you have fewer drawings further apart, the action of your character will be fast.

Timing is an important principle in animation as it provides meaning to movement. The speed of an action will define how the audience interprets the emotion behind the action. It plays an essential role when illustrating the emotional state of the character. The animator can establish this through varying the movements to show the character's mood, emotion, personality and reaction.
Exaggeration is an important principle used in animation as it allows animators to increase the level of impact that is presented to the viewers through every action or pose.
It is all about overstating specific movements in a way that helps evoke a point but doesn’t ruin the believability of the scene.
The aim is to make the character's expressions more apparent — pushing them to the next level for clarity of the story through ensuring the expression or action of the character is clear to the audience and they are aware of what is going on.
This is used instead of sticking to realism, which can sometimes lack engagement with the audience and may cause confusion. Exaggeration helps viewers understand the essence behind each idea. This is evident in many animated films.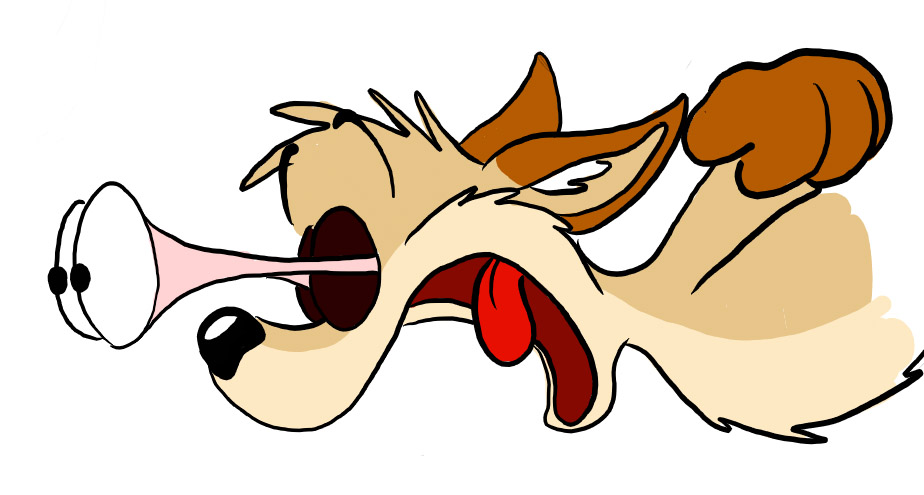
Solid drawing is about animators understanding, drawing, and creating visuals that become 3-dimensional on a 2-dimensional surface while creating storylines with their characters.
Drawing characters that have a sense of volume, weight, and balance is what animators aim to achieve when creating a solid drawing.
Drawing the form of the character or object whilst thinking about staging, animators need to ask themselves if the silhouette makes sense for the action and whether it is believable as a solid object.

The concept behind the appeal principle is simply that characters that you animate should be somewhat appealing to look at. This does not mean they need to be beautiful or handsome. It simply means they need to have an aspect to them that is charismatic, charming, mysterious, funny or magnetic. This will help give a sense of likeability for each character — both the hero and villain.
Have you ever watched a movie and found yourself rooting for the villain? This is due to the principle of appeal. All characters are made to seem appealing to the audience in one way or another, which helps them stick around for the remainder of the story!
To create appeal, it is recommended you follow these steps.

- Keep each character simple. Do not overcrowd the appearance of each character. Sometimes, when this is done, it can overwhelm the audience. This, however, does not mean that drawings should be weak - a balance needs to be considered to enhance appeal.
- Play with propositions. Magnifying specific features in characters helps them to stand out. Animators often use this by enlarging the head, the eyes or even the nose.
- Variety of shapes for each character. By creating various shapes for each character, animators can make them unique and eye-catching to the audience.
These are examples of characters that have enjoyed broad appeal.


This subtopic will be a review of the 12 principles. We'll look at them objectively with a short quiz. Then we'll give you an opportunity to analyse these 12 principles in action — will you be able to spot them? Lastly, you'll find out what Dan has to say about his own work, giving you a peek into a professional creative's ability to analyse their designs and how a colleague might provide feedback.
How much do you remember?
Use the '+' symbol to enlarge the images in the following three-question quiz.
Novice Activity – Be the reviewer
Task 1: Discussion Forum post
Let's review this short video clip so we can analyse it to see what principles it exemplifies and how it might be reviewed both by Dan, the author, and someone tasked with providing feedback.
Imagine that you have been asked to provide feedback to Dan, the author of the following short video. Take notes while watching it to see if/how he applied any of these principles.
With your notes, head over to this Forum and post your feedback there. Remember to be supportive, helpful, and respectful to Dan.
Task 2: Read Dan's self-review
Open the label below to see how Dan self-critiques his work. What did he think he could have done differently to enhance the project?
I think that this has embodied these principles well in general, but once I expanded the project by adding the background and the Sun, it became too complicated. With more assets, I needed to consider "staging", but I didn't. This leaves the viewer a bit confused about what they should be looking at at any given moment.
Task 3: Read a colleague's review of Dan's work
Open the label below to see how one of Dan's colleagues provides feedback that is supportive (what is good already), useful (what could be better or didn't work well), and respectful (the tone and choice of language.)
Ka pai, Dan! Great work. I enjoyed watching the video and think it did a great job of showing the principles of:
- Timing
- Spacing
- Squash and Stretch
- Ease in/Out
- Arcs
However, I did notice that once all the balls entered the 'stage', I wasn't clear about where my attention should be focused. Perhaps one of the balls could have been bigger or closer to the 'viewer' so it's clear where their attention is meant to be placed at all points of the animation.