Welcome to Adobe Illustrator Tutorials
This is another core piece of software in the Adobe suite. Artists use Illustrator to create both simple and complex compositions in a vector format. You can turn shapes into logos and icons as well as create different typography styles or even give drawing freehand a try once you become confident.
Adobe Illustrator is a graphics software that allows designers to create things such as:
- logos
- icons
- illustrations
- packaging
- billboards
- web designs and more.
Feel free to go at your own pace, pausing the videos when you need to and then trying out your newly learned skill on your own.
Illustrator is vector-based, which ensures your artwork stays clear even when you scale it up or down.
To remind yourself of the difference between vector and raster graphics, watch this video:
The main concepts that will be covered include:
- vector images
- shapes, line tools, selection tools, colour fills, strokes, colour swatches and gradients
- text and text manipulation and illustration
- pen tool (which will cover an overlap of both Photoshop and Illustrator)
- pathfinder tool.
Take a tour that will guide you through the Illustrator workspace and learn how you can open and save your images.
If you are super keen to get to know Illustrator on your own learning track, you can jump into the tutorials Adobe offers for Illustrator. Just be careful not to bite off more than you can chew. Give yourself time to absorb the material and try it out before moving on.
Ready?! Tau kē. Head over to Adobe Illustrator Tutorials for their full complement of options, then return here to continue your learning.
Tutorial Activities
🕔 3 - 4 hours total
Once you have familiarised yourself with the basics using the tutorial linked above, move on to the following activities. Complete all of the learning activities in the following sections.
In this section, we'll give you a chance to use the following tools:
- Shapes
- Line tools
- Selection tools
- Colour fills
- Strokes
- Colour swatches
- Gradients.
Activity - Selection, shapes, strokes and pathfinder
Let's create a character step-by-step.
Illustrator shapes can be drawn using the click-and-drag technique or by single-clicking an artboard and defining its exact dimensions.
The option you see will vary depending on the shape you have selected to make.

Each shape will have these basic properties.

There are two basic selection tools in Illustrator:
- Selection – for selecting, moving and manipulating whole shapes or objects
- Direct Selection – for selecting a single anchor point, line or subset of a shape.
- Start by downloading the Illustrator activity file.
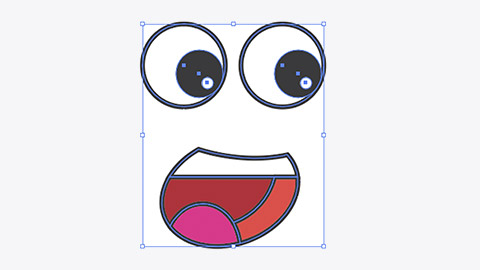
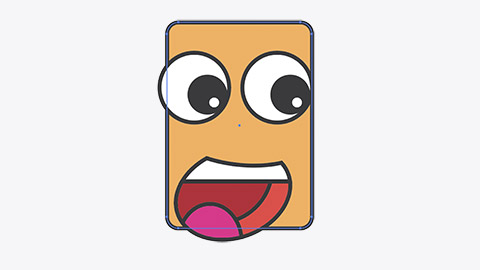
- You'll notice a mouth positioned on the page. This is the first element of the character you will create.
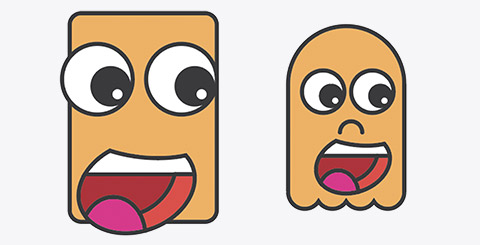
- Try to keep to the same basic look, but feel free to put your own spin on it. In the design examples we provide below, note that each one has slightly different aspects to give you some visual inspiration to start thinking about your own style as you are learning these tools.
- Try to draw an eye like the one shown below. It is made of three circles:
- The large outer circle has a white fill and a thick dark stroke.
- The middle circle has a dark fill and no stroke.
- The small circle has a white fill and no stroke.
- Position the circles so the eyes are looking in the same direction.
- Use the selection tool to select the circles you’ve just made and group them by going to Object/Group in the menu bar.
Grouped objects will select and move together when dragged when using the selection tool. - Select both eyes and position them above the mouth.
- Use the rectangle to draw a box over the mouth and eyes that will become the image body or face.
The box will appear on top of the eyes and mouth.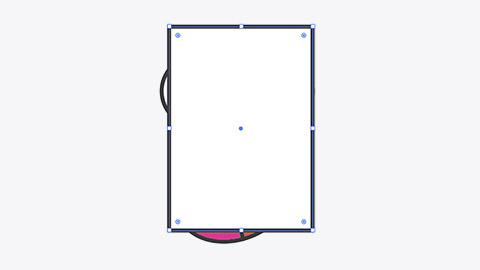
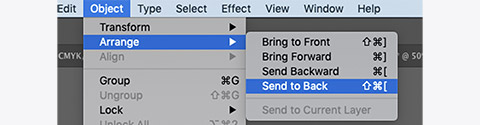
- Move the box to the bottom of the object stack by going to Object/Arrange/Send to Back.
- With the box selected, give it a warm fill colour and use the corner radius point to round the corners.
Looking good? Now, let’s give it a nose.
- Draw a small circle between the eyes and the mouth.
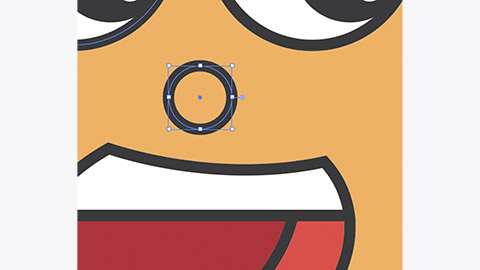
- With the circle selected, use the scissor tool and single-click the anchor points on the left and then on the right. Press delete twice to remove the bottom half of the circle.
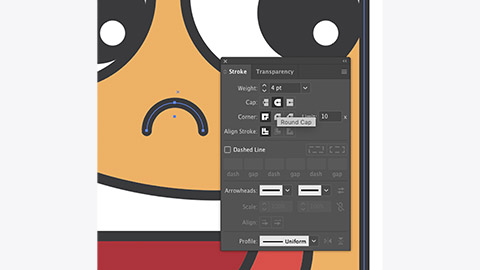
The blunt ends of the stroke look a little harsh. We can soften them by adding rounded end caps.
- Open the Stroke panel and select Show Options from the panel menu.
- With the nose stroke selected, click Round Cap from the Stroke panel.


Let’s make a more interesting body by combining some shapes.
- Start by doing a single click with the Ellipse tool to create a circle that is 12mm x 12mm.

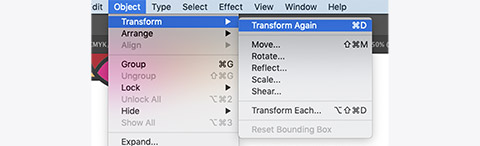
- With the circle selected, go to Object/Transform/Transform Each.
- Set Move/Horizontal to 10mm and click Copy.
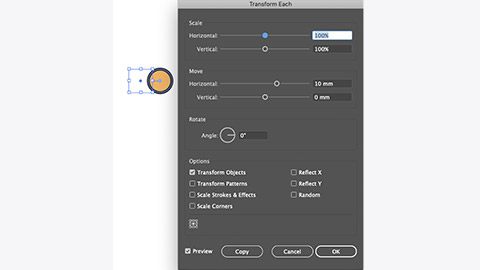
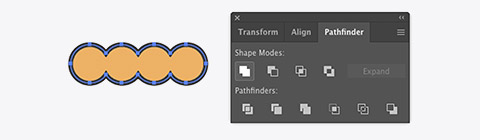
- Select Object/Transform/Transform Again to repeat the copy. Repeat until you have four overlapping circles.
- Open the Pathfinder panel, and with all the circles selected, click the Unite button.
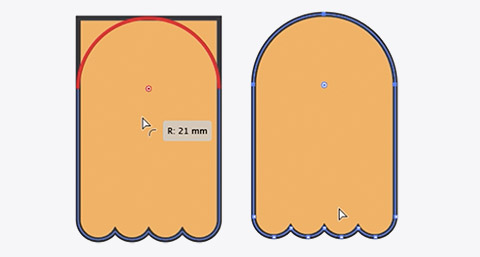
- Deselect the circles and use the rectangle tool to draw a rectangle starting from the left anchor point of the circle and extending up about 60mm.

- Use Pathfinder again to join the two shapes together.
- Use Direct selection to select the top 2 points of the new shape.

- Use the corner radius to round the top fully.
- Use the selection tool while holding Option to drag a copy to the mouth to the new body.
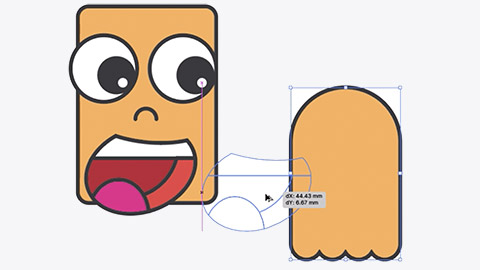
- You’ll have to use Object/Arrange from the menu bar to bring the mouth to the front. Repeat for the eyes and nose. Resize the element to fit the body.


Ka pai tō mahi! Great work getting to this point.
Activity - Colour, swatches, and gradients
The Swatches panel lets us save and use colours. The Color panel lets us create new colours. The Color Guide panel gives us access to tints, shades and other complementary, analogous or colours from another harmony rule.

Gradients
Sometimes, our 2D artwork can look a little flat. Gradients help give a design depth by allowing two or more colours to flow into each other.
- Create a simple box, and give it a fill colour.
- Open the swatches and gradient panels. The default gradient is a white-to-black gradient.
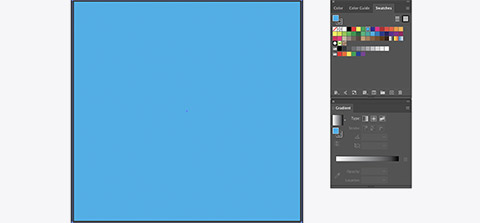
- Apply the default gradient by selecting the box and then clicking the gradient thumbnail in the gradient panel.
- Change the colours in the gradient by double-clicking the colour point on the gradient slider.
- You can select colours from swatches, mix a new colour, or sample a colour using the eyedropper.
- You can add more colour to the gradient by clicking just below the gradient slider or by dragging colours from the swatch panel onto the gradient slider.

- The Edit Gradient button allows you to move, redraw and rotate your gradient inside the box.
- There are three types of gradients available in the panel, which include
- linear
- radial (similar to linear except it’s circular)
- freeform.
- With the box selected, click the Freeform button.
- You can change the colour and move any of the four corner points to create any space gradient you like. You can add points by clicking and deleting points by selecting them and pressing delete.
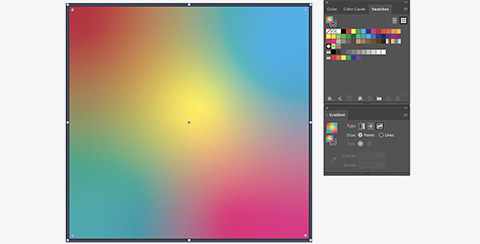
- Use gradients to make the image provided more interesting.


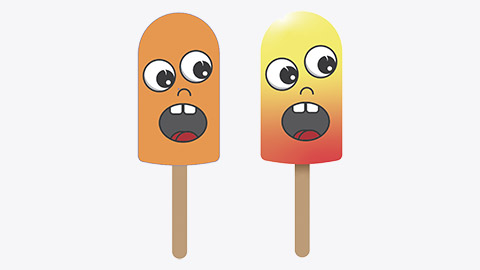

Tino pai! Good job completing this character - we hope you had fun with it.
Activity - Pen tool
The pen tool is used to create lines and shapes using straight lines and bezier curves. A bezier curve has at least two points and at least one handle that indicates the direction and amount of curvature between the points.
Note that points with no handles will start or finish with a straight line.
- Select the pen tool and set the fill colour to none and the stroke to black, 2pts.
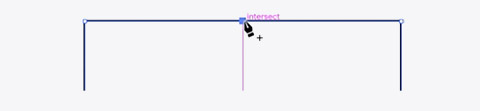
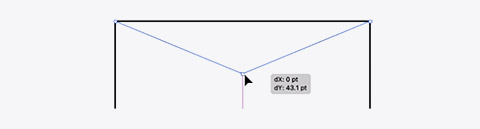
- Make a single click on the top point at the boot end of the car. Then, move the cursor towards the point to the right.

- Complete the first line by single-clicking the point that meets the curved line.

- Now, hold option to temporarily enable the Anchor Point tool, and you can click and drag a handle straight up. Release the mouse button, then the option key.
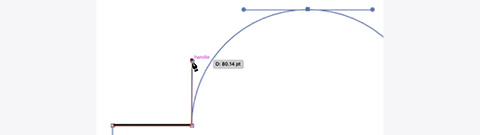
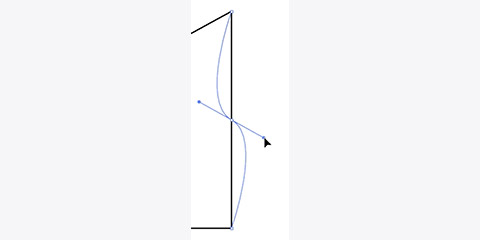
- Move the cursor to the point at the apex of the curve. This time, click and drag to the right to make an anchor point and two parallel handles. Parallel handles make smooth transitions between points.
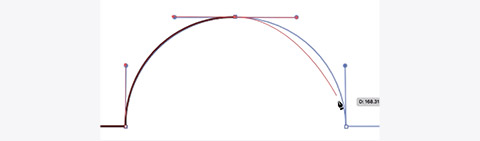
- Repeat the previous step by clicking and dragging down on the next point. You will notice that if you move the cursor towards the next point, the curve is pulling down when we really want it to be straight.

- Hold option and single-click the previous point to remove the bottom handle before clicking the next point.

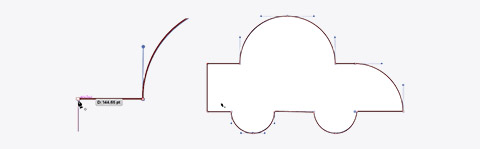
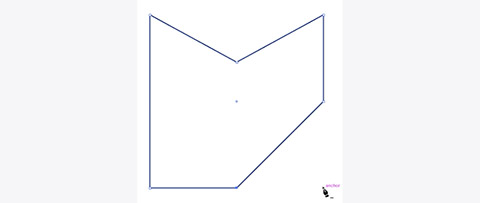
- Keep going until the whole car has been completed.
- Click on the starting point to create a closed shape.


Add points and manipulate other shapes
- With any shape or path selected, single click with the pen tool on the path to add a new anchor point.
- Hold Command to click and drag a point into a new position.
- Hold Option to create handles.
- Click an existing anchor point to remove it.
- Option-clicking an existing anchor point will remove its handles.
 6. You can use the pen tool to create interesting shapes for type on a path (see the next section for more about that.)
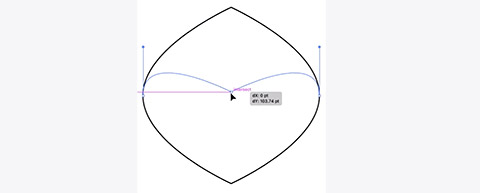


One of the reasons artists turn to Illustrator's vector-based graphics is to create unique logos and styled text.
The type tool includes:
- Type Tool (horizontal and vertical): Start learning about using Adobe's type tools with this tutorial: Add text to your designs
- Type on a Path Tool:
Forum post — Novice and Newbie activities - Illustrator (Pen tool)
As with the Photoshop section, these activities are designed to teach you how to use the tools, so your focus should be on learning the technique rather than spending time perfecting the design. However, if you want to share your work, please head to the forum and upload jpegs of your work. Describe any of your thoughts and reflections about completing these activities.
Whakamanahau. Great work to get through all of these tutorials and learning activities! Illustrator is a challenging tool to learn. Ka pai!