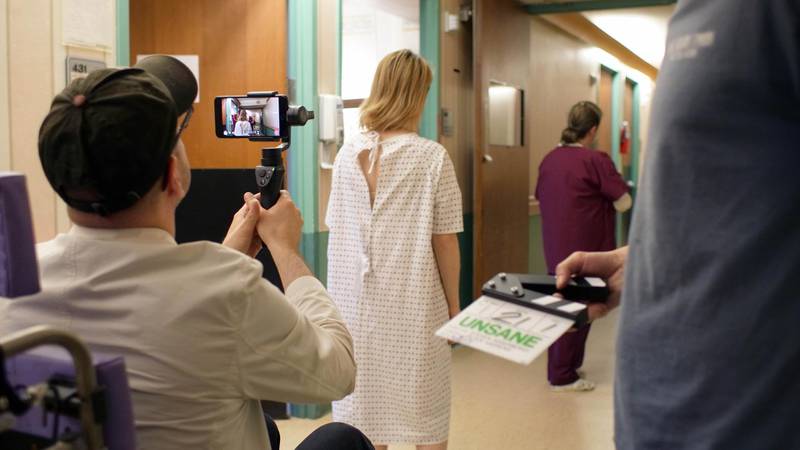
Effective planning is crucial to get a film made on time and under budget. Setting up a shoot on location and organising logistics, the cast, and the crew can take a lot of time and effort.
Often, multiple scenes are filmed at the same location though they may not be in the order of the story. Even though one scene might appear at the start of the movie, and another might be the final scene of the movie, they could both be filmed on the same day. The director's team will break the film sequence into individual shots to make the most of the camera set-up and talent availability.
Even in a small-scale production, you will want to spend some time thinking about the best order to film in.
The types of shots used in a film make cinema entertaining and are also a tool for the filmmaker to communicate to the audience. They are pieced together so the story unfolds before your eyes, revealing information to tell a tale that makes an impact.
There are several terms for different shots and as most movies are based around people, shots of people are fundamentally the building blocks to create a story and tell a tale.
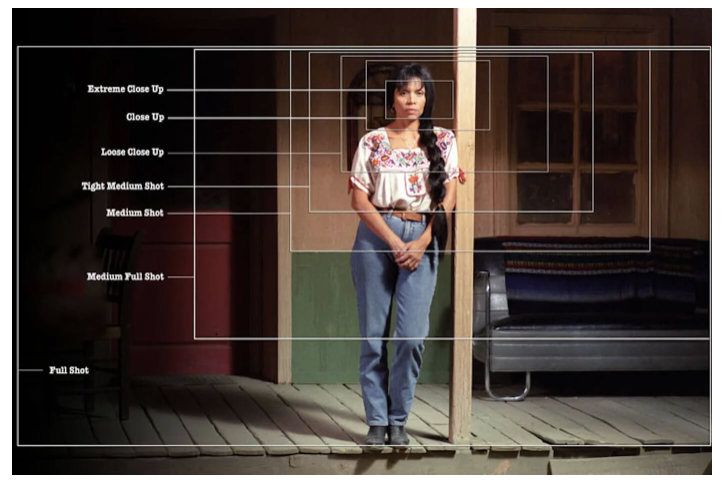
Shots frame your character or subject, from seeing their entire body to only their eyes.
Generally speaking, we can break this down into three main shot sizes: Long, Medium, and Close. Use the arrows below the following images to view the three of them.
Let’s delve deeper into the variety of shot types and then revisit how they work in storyboarding later on.
The numerous types of shots include:

Extreme wide shot

The extreme wide shot is also referred to as the 'establishing shot'. It is the first shot of the scene, which is designed to show the audience where the action is taking place. You will see the large landscapes in the frame, whether the film is shown during a war period or in the inner city. This gives the audience a better feel for the time and surroundings and will introduce them to the feel of what the storyline might be.
The wide shot
A wide shot shows the characters in the film with their surroundings. This is different from the extreme wide shot as it focuses on the character or subject from top to bottom; however, the shot still tends to be dominated by the scenery.

The full shot
A full shot frames the character from head to toe. It tends to push the focus on action shots.

The medium shot
The medium shot is closer than a full shot. These can be seen in scenes where people are, say, sitting in a car or entering a grocery store. It shows the character from the waist up to emphasise their emotions and expressions and details of how they may be dressed. This supports the viewers in becoming more involved.

The close-up shot
The close-up shot is one of the most commonly used shots as it is intended to show the viewer a close-up of the character. It allows the audience to witness the character's emotion up close, as well as signalling and directing the audience to an important part of the scene.

The extreme close-up shot
The extreme close-up shot is to be used selectivity as it focuses on a specific portion of the character or subject. It helps the viewers observe a small detail on their face that will evoke emotions or provide crucial information in order to feel what the character is conveying. These can be used in emotional and drama-filled films.

Download and use this Shot Types document as a useful resource.
If you are interested in learning more, check out the following video (where every shot is explained).
Blade Runner is a movie that uses many powerful shot types. Watch the next video and identify how many camera angles and shot types were used within the opening scene.
Having watched the video (above), reflect on the camera angles and shot types used to identify the purpose and intention behind these scenes.
Shot types with angles and camera movement
In addition to the size of the shot (how much of the subject is captured), the angle and movement also have a huge impact. Industry professionals tend to refer to all three camera filming techniques as shot types, but really, they are different. You can combine them, such as a drone might do, set to a wide-angle shot that pans along a mountainside from a bird's eye view. There are many other examples.
This next example video is not of people; rather, small forest creatures are the stars of this show. While watching the video, notice the following:
- At the start, we learn the filmmaker is holding the camera very low to the ground but not tilted upwards. This changes perspective from our usual perch about 2.5 meters up from that view of the world. It means we see these tiny animals as normal-sized — affecting our ability to perceive the scale of the subject.
- We then see the camera tracking the movement of the animal.
- Some of the photographs were taken from a slightly elevated angle — notice the subtle differences between the shots starting about 1:34m that are angled slightly downward as opposed to straight on.
- Some shots are close-ups, and other shots are full, for example, while the little guy is nibbling a dandelion flower. Think about sound now for a moment. Did you believe the tiny microphone was working? Maybe the filmmaker put the sound effects in post-production?
- What else can you pick up?
This video and photography was created by Julian Rad. Follow him on Instagram and/or Facebook to see his innovative use of camera techniques with wildlife.
Source: Facebook/Roar Wildlife News
Grab out your Shot Types document and answer these questions about the shot types and angles to learn how they are frequently used.
Source: Studiobinder.com, Wikipedia Contributors.
You are able to depict varying emotions by using the various shot types. So, how do directors prepare for these shots? How is it all organised to make sure no important scene is forgotten? Shot lists are also important, which are covered in the next section. The worst thing that can happen to a director is to think of amazing shot types and then, on the day, forget to shoot those scenes. This is why preparation is key.
A 'shot list' is a simple list of the shots the director wants for each scene that they plan to shoot that day. It maps out everything that will happen, and it serves to ensure that no scenes or shots are missed.
There is so much that goes into making a movie; it is extremely demanding, and the best way to ensure all moving parts are included is to organise a shot list that documents which shot demands what equipment, how long they need to be set up for, what actors need to be involved in specific scenes; as well as the camera movement, lighting and how staging will need to be organised.
If anything is missed, it can cause delays, budget concerns and overall frustration for the film crew and actors.
In summary, the important components that need to be included in a shot list are:
- the location
- the list should be organised by location to ensure shots at the same location are shot at the same time
- a brief description of the shot types involved in each shot
- a brief description of the characters, the action they will take, and any props needed in the scene
- the scene number and shot number
- a brief description of the camera angles and framing
- a brief description of the camera movement
- any additional technical equipment, if needed
- the plan and equipment to provide sound.
Important
To prepare you for working with footage, head over to Design Principles and Tools > Premiere Pro Tutorials, and learn about (or refresh your learning if necessary) Transitions and Colour Grading.
When you are done, return here and jump into this activity, where you will plan, shoot, and edit footage!
Practising Activity - The Handover
🕔 1 - 2 hours
For this activity, we supply you with footage. From that footage, you'll need to make sub-clips from the main clips.
Notice different "takes" in each clip show different facial expressions and reactions. You will use these to create a narrative.
Getting started
- Download the activity file, Handover Footage
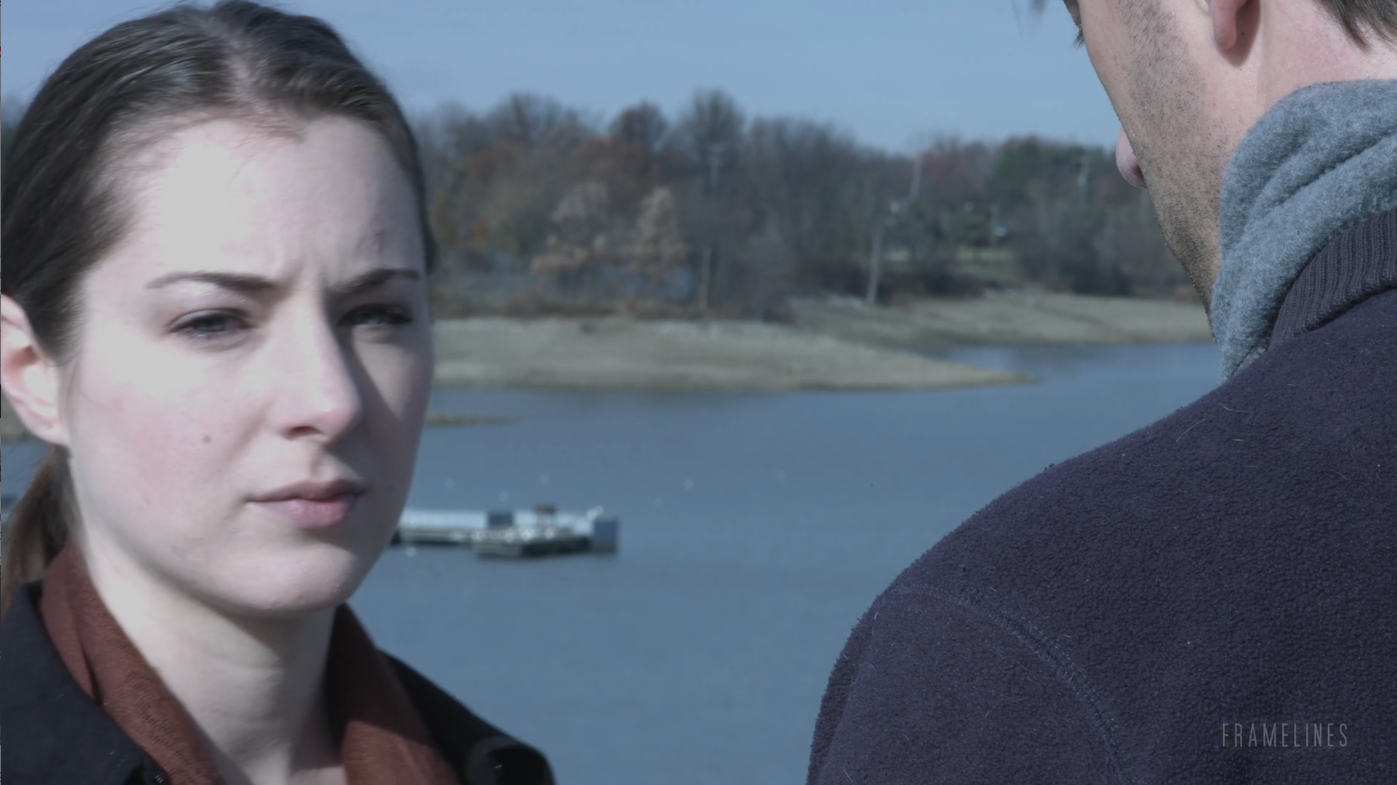
- Take note of the shot types from the filenames and additional ones within. For example, can you spot the over-the-shoulder shot? Expand the label below to see if you caught it.
- Edit a 30-second sequence together that shows a beginning, middle, and end. (The time must be exact — not shorter or longer!).
- Add a text layer for a title.
- You can do this over the footage or on a coloured slate.
- If you were having difficulty with playback, you may have rendered the file before you finished, but if you haven't, then do so now. (For a reminder of how to do this, check out the section about exporting in Design Principles and Tools > Premiere Pro > Exporting).
- With your project rendered, the exporting (encoding and saving) will go faster. You can skip rendering, which will happen automatically as part of exporting.
- To submit your work, it must be no larger than 950MB.
Here is an example of two versions of the completed activity:
Did you notice any other changes between the two versions? Watch it again, and try and spot a subtle change that contributes to the change in tone. When you think you know, check your answer by expanding the label below:
Health and Safety
To help learn how to evaluate and mitigate risk, pretend you are planning to shoot this footage. Make an assessment of the possible health and safety issues at the location and use the health and safety worksheet to document your findings.
Forum Post
Upload (1) your exported sequence and (2) the Safety Worksheet to this Forum.
Answer these questions:
- What did you learn by doing this activity?
- What did you feel confident doing?
- Was there anything you need more time studying? Do you know where to find resources to learn more?
- How do you feel about your output?
- Would you do anything differently next time?
To get ready for the next activity, let's get you thinking about matching shot types to scripted scenarios. Think like the director of these script snippets and pick the best shot type for the description. While there can be many ways to tell a story, in each of these questions, one of the shot types would be more commonly used to convey the script's intentions.
Note:
- INT = The shot is internal (inside).
- EXT = The shot is external (outdoors).
Showing off Activity - Environmental montage
🕔 2 - 4 hours

For this activity, you're going to head outside and capture what's around you to create a video montage of your environment set to classical music. You'll need to pair visuals with audio.
You have a choice to make about this activity. Do you want the visual to drive the audio, or use the audio to drive the visual? Decide which way you want to go, and then modify the activity below appropriately. Determine if you shoot first and then find audio to support and extend or if you attach yourself to the music first and then shoot footage that you feel confident you can match to the music you selected.
There isn't a right or wrong way to complete this activity. We are just asking you to reflect on which method you gravitate towards.
Getting Started
Task 1: Plan your outing. Where will you go? Can you find a location that has lots of interesting things to shoot nearby? Can you find ways to make the mundane interesting?
Task 2: Design your montage in terms of what you might like to say so that you can plan the shots that will enable you to communicate your message. Create a list of shots required to achieve your montage. You don't need to use all of the shots. Just be sure you can explain your choices.
Task 3: Using the Safety Worksheet, make a risk management plan for your shoot based on your location.
Task 4: Go forth and shoot! Be safe, have fun. Be considerate of others.
Task 5: Using Premiere Pro, edit your montage together using the following considerations:
- 40-60-second duration
- Add in a musical score that supports the message and activity onscreen
- You may like to use music from this YouTube channel, Classical Music Copyright free
- To get you started, listen to:
- Blue Danube - Strauss
- Ave Maria - Schubert
- Waltz of the Flowers - Tchaikovski
- The Moldau - Smetana
- To get you started, listen to:
- You may like to use music from this YouTube channel, Classical Music Copyright free
- Use effects controls.
- If you haven't yet, go over to the course Design Principles and Tools > Premiere Pro > Effects and watch the tutorial on How to use the EFFECT CONTROLS in Adobe Premiere Pro.
- Export your movie as an .mp4
- You can decide if you want to render it first or allow rendering to happen automatically. For more information about rendering and exporting, watch the videos in the Exporting section from the course referenced in point 3 above.
Task 6: Ka Pai for completing your project!
Forum Post
Create a Forum post and attach your exported movie (.MP4) along with your answers to these reflective questions about your work.
- What did you learn by doing this activity?
- What are you most pleased with about your output?
- Were you able to accomplish the styles and techniques you had designed?
- What would you do differently?
Look at the work of your peers. Leave feedback for at least three people in your programme. Remember to be helpful and respectful.
Review and Revise
Let at least one week go by. Look up your Forum post. Have you received feedback yet? If not, wait another week. When you have, revise your movie! Make at least three changes as a result of feedback you have heard from the forum posts or from friends, family, or your own reflections.
Update your Forum post to add your new movie and describe the changes you made and why. As part of your summative assessment, you must be able to take on feedback and revise your work, so this prepares you for that assignment.
Whakamihi. Congratulations on completing this activity! It combined a lot of the work you have been learning up to this point. Tau kē. Fantastic.