The world of design is filled with colour, texture, and lines. Take note of various design techniques in the media around you and see if you can determine the method involved in creating it.
In this section, we'll provide an opportunity for you to develop your own stylised illustration in a step-by-step process that starts with a hand-drawn sketch.
Before we start, think about successful artists whose works hang in museums. Many of the artists will have a recognisable style through their use of colours, subjects, light treatments, textures, shapes, lines, and treatment, etc.
In the art world, there is a saying that goes something like this:
First, you research and learn, then you copy and emulate. Only then can you develop your own style.
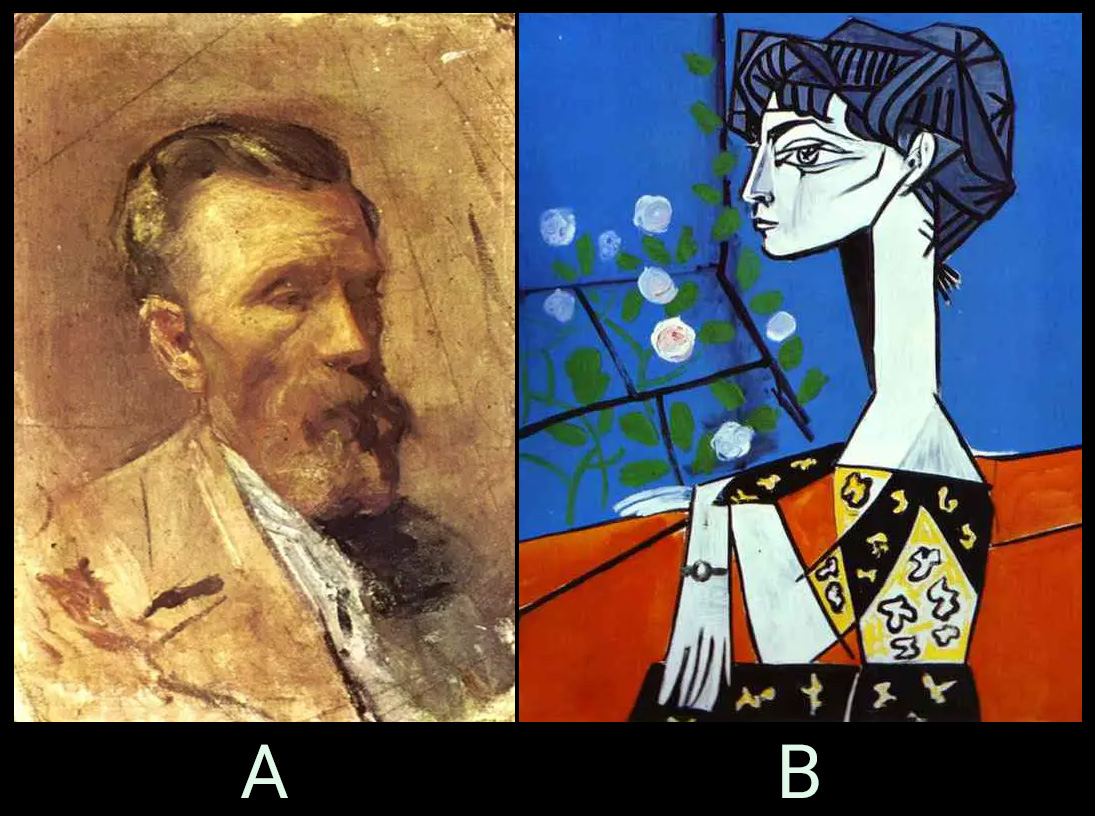
The illustrations that follow are both created by Pablo Picasso. Look at each of the images and then guess the answer to the following question.
Novice Activity - Sketch from memory
🕔 Less than an hour
You may not plan to become an illustrator, but as a designer, you need to know how to sketch out drawings that are representational in order to establish placement, as a proof of concept, or as the first step to making a representational object more abstract and stylised, as we will do now.
Getting started
Task 1: Grab some drawing tools and sketch the Eiffel Tower from memory onto paper. Don't remind yourself what it looks like. Just do the best you can from memory and get something on the page. Take two or three minutes only for this.
Are you done? After you draw yours, expand the labels below to see the two example sketches for context and then the real thing in a photograph.
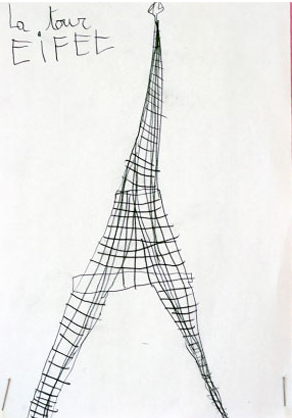
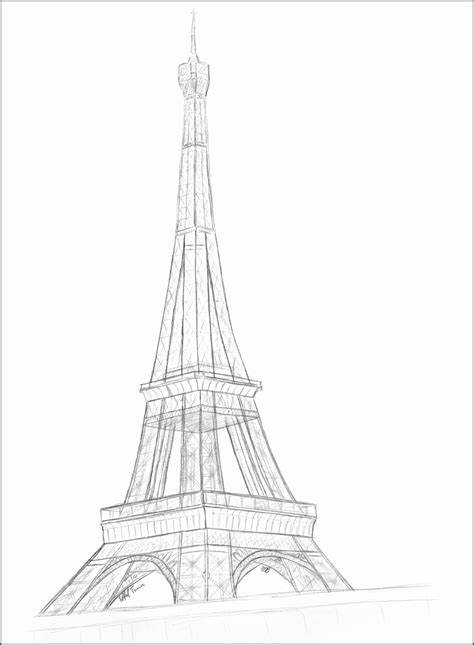
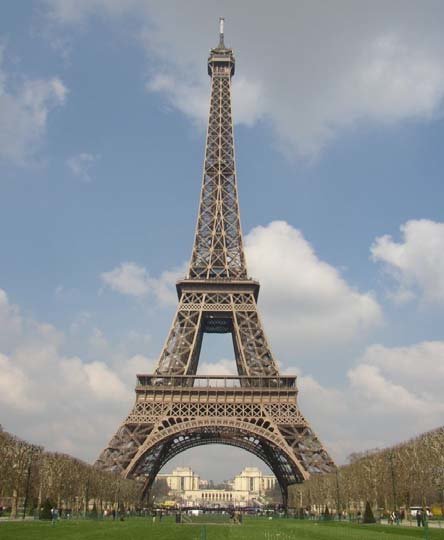
How did you do? It doesn't matter if your sketch is closer to Example 1 or Example 2 because you are developing your own style. Compare the key elements in the design of the real tower with your own sketch.
Task 2: Do the same thing, only this time draw a bicycle from memory.

How does yours compare to this? You'll notice that yours probably also has wheels, a seat, handlebars, and maybe pedals. Don't worry about details like the fact that the chain looks a bit odd and the pedals don't actually power the wheels in this sketch.
Task 3: Look up an image of a landmark, such as the Beehive in Wellington:

Spend 10 minutes trying to copy the image as a hand-drawn sketch. Trace your subject if you want or need to. The important thing is to use a pencil and paper to get a drawing on the page.
Task 4: Draw your landmark image again, only this time, spend just 5 minutes to get down what you can.
Task 5: Draw your landmark image again, only this time, spend just 4 minutes to get down what you can.
Task 6: Draw your landmark image again, only this time, spend just 3 minutes to get down what you can.
Task 7: Draw your landmark image again, only this time, spend just 2 minutes to get down what you can.
Task 8: Draw your landmark image again, only this time, spend just 1 minute to get down what you can.
Task 9: Draw your landmark image again, only this time, spend just 30 seconds to get down what you can.
Task 9: Compare the details between each sketch as your time to work was reduced. You likely were able to get an abstract drawing of your subject as compared to the first one, which would be closer to representational.
You will find that when the time is heavily reduced, you will only be able to draw the absolute basics. Looking over all the sketches, you will see some specific lines (keystrokes) that make the subject identifiable.
Task 10: Take some more time to refine and stylise a simple and identifiable version on paper.
Task 11: Look at these stylised Eiffel Towers for inspiration:

Task 11: Recreate your landmark sketch in Illustrator.
Forum Post
Upload your sketch to the Forum and share your reflections about this assignment.
To help ensure that your target audience is attracted to your design, you'll want to appeal to them strategically.
Consider that each of your designs tells your target audience a story. Tap into an age-old understanding of the persuasive tactics of storytelling and communication to engage them in your design's message — its story. Like a lot of modern social conventions, the ancient Greeks formulated a system of persuasive conversation called rhetoric.
Modes of persuasion
Fully understanding modes of persuasion would take years. However, learning the framework will provide enough information for you to consider during the design process. It gives you a basic introduction to design psychology.
Reading
Read these two articles. When you are done, answer the questions that follow to confirm your understanding.
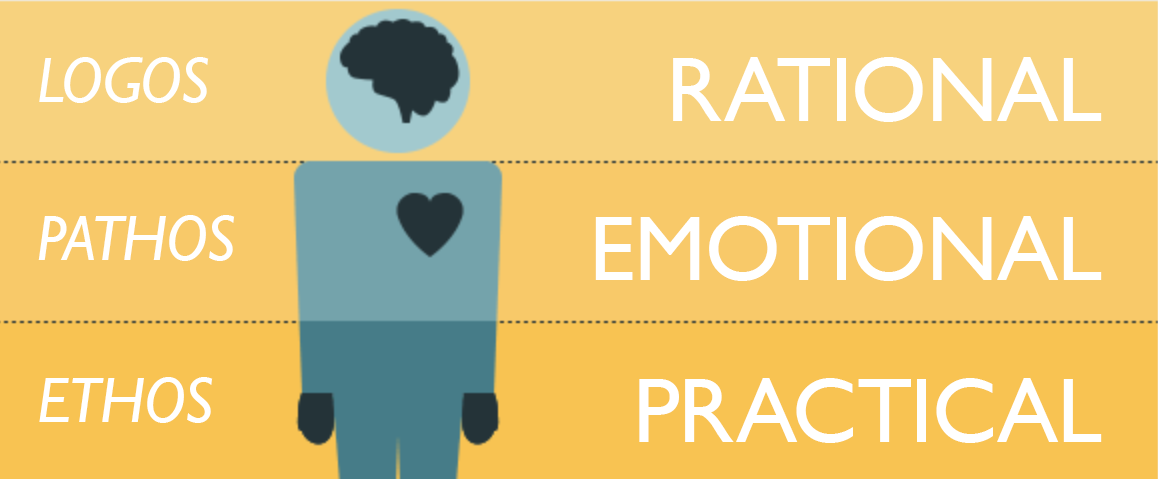
- Modes of Persuasion | Logos/Pathos/Ethos
- The 3H Model | Head/Heart/Hands
This activity has three questions that will progress automatically, and you will learn immediately if you are correct.
Showing off Activity — Graphic poster design
🕔 2 or 3 days in 3-4 hour sessions per day
This activity allows you to step into life working for a design studio. In this section, we'll ask you to take on the role of designer, marketer, and project manager. You'll be more successful if your career path leads you to do something you love doing. Take the opportunity to consider how you feel while you are wearing those three different hats. Do you find that you are super engaged while scheduling? Or identifying a target audience? Maybe you love project management or marketing — you may not know until you try.
Enjoy the chance to flex different muscles that work in tandem with designers to provide efficient, targeted, professional designs on time and on budget.
The following activity requires you to think about two different graphic design tasks. Both are posters, but the look, feel, purpose, and techniques that need to be used differ.
Read through the entire activity before getting started. Karawhiua. Give it all you've got.
Scenario:
You are working for Rimu Design Studio, a small design studio with an extensive client list. One of its clients, LairB&B, has just signed a contract for two very different poster designs.
The Brief for Poster 1: travel destination
Subject: A travel poster that promotes travel to: ___________.
(Note: Select a travel destination of your choice.)
Audience: Adults 29-45, New Zealanders who want to travel abroad.
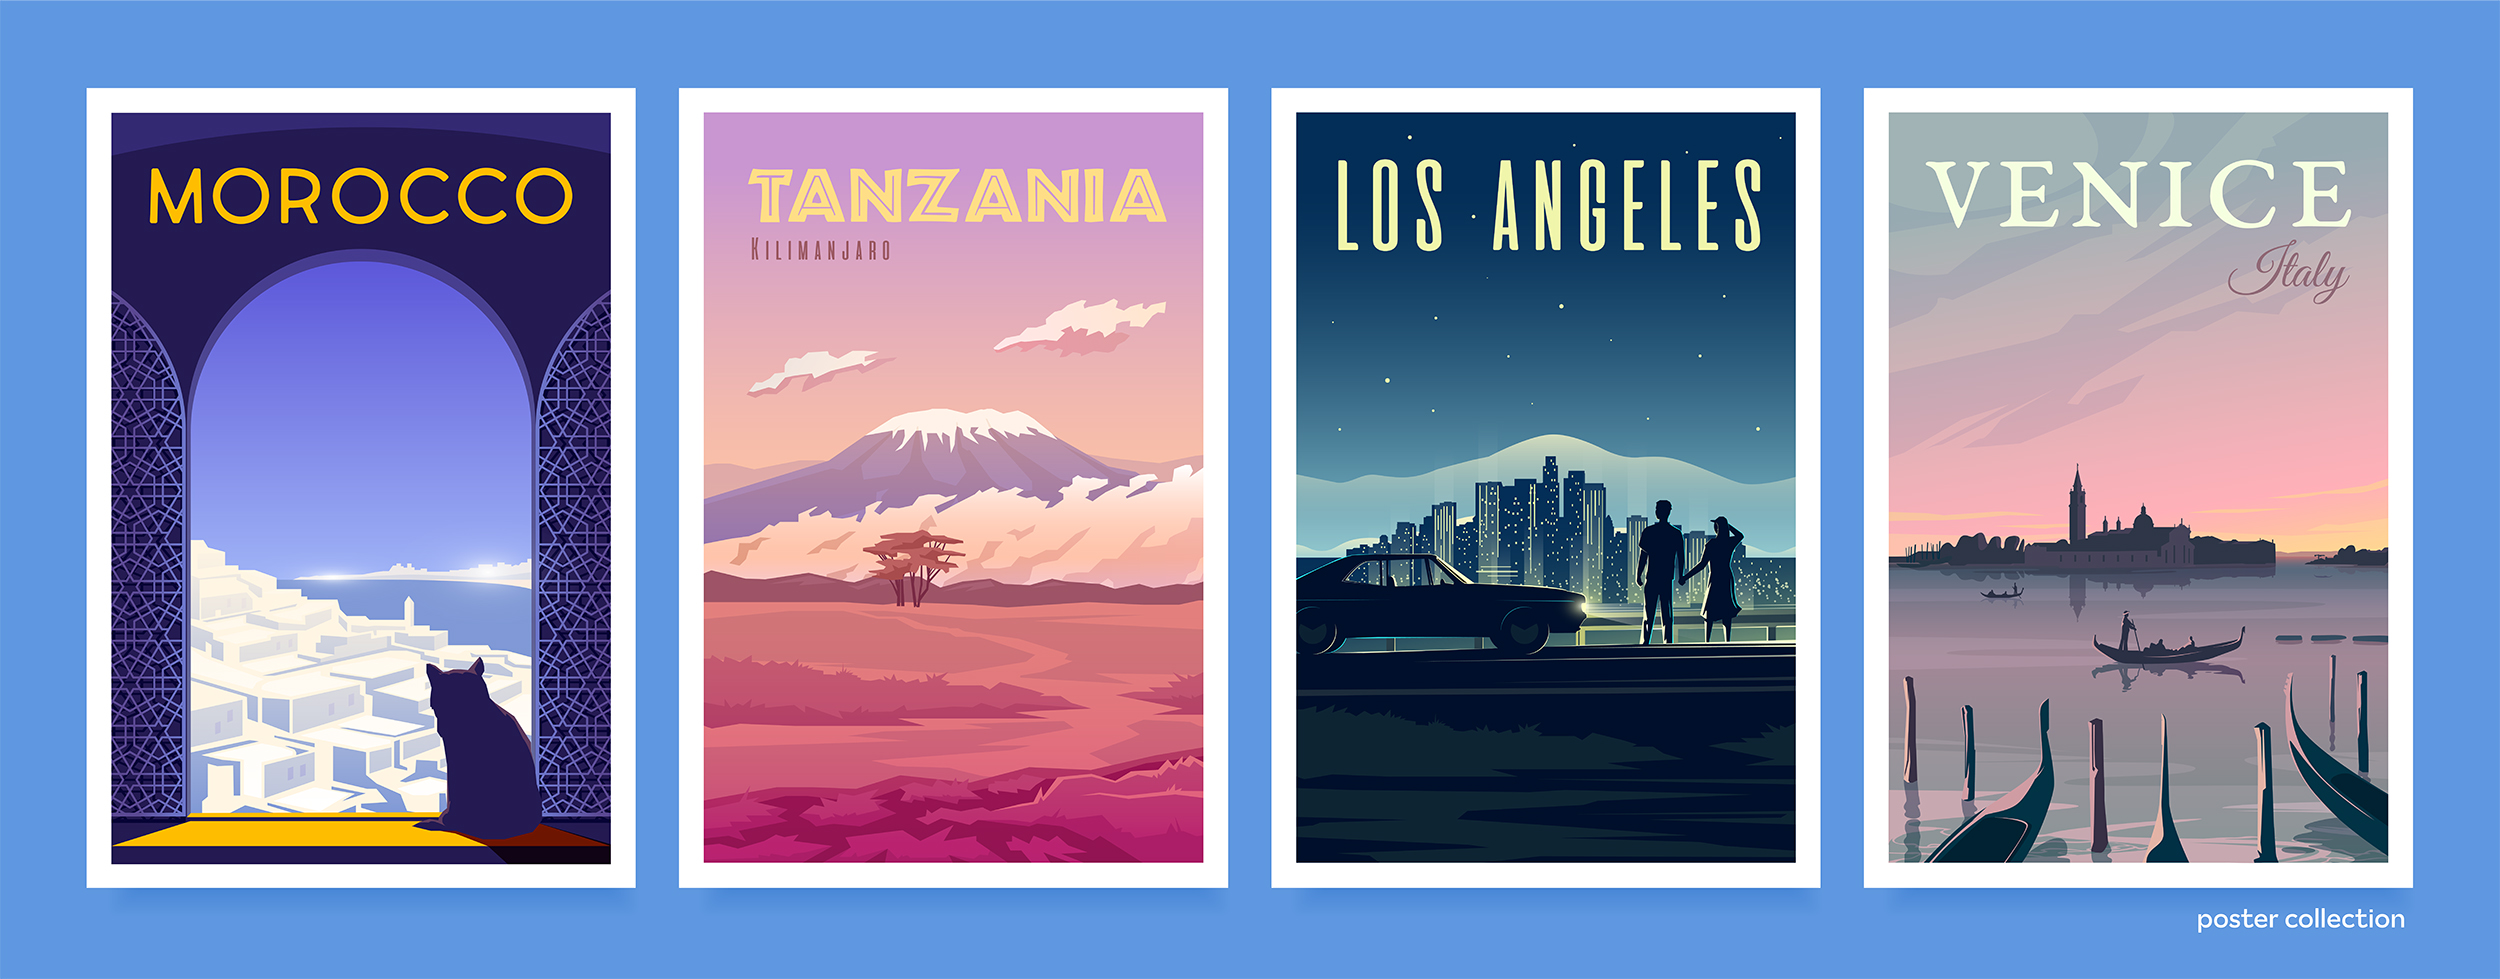
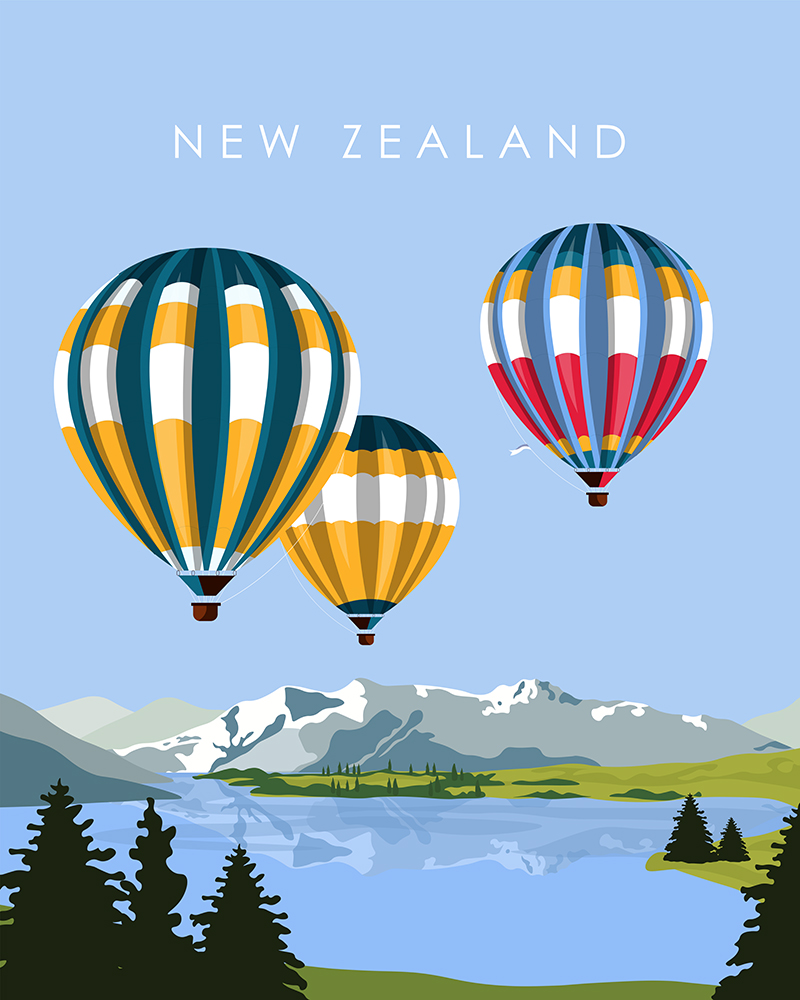
Tone: Travel posters from the late 19th century to the 1970s fulfilled a specific communication task. Back in the “Golden Age” of travel, they were used by rail, airlines, passenger ships, hotels, and travel companies, both nationally and internationally. LairB&B has requested the posters evoke a similar feeling to the posters of the past in terms of tone and artistic style.
The look and feel need to be illustrative. Here are four examples of New Zealand as a travel destination:
 |
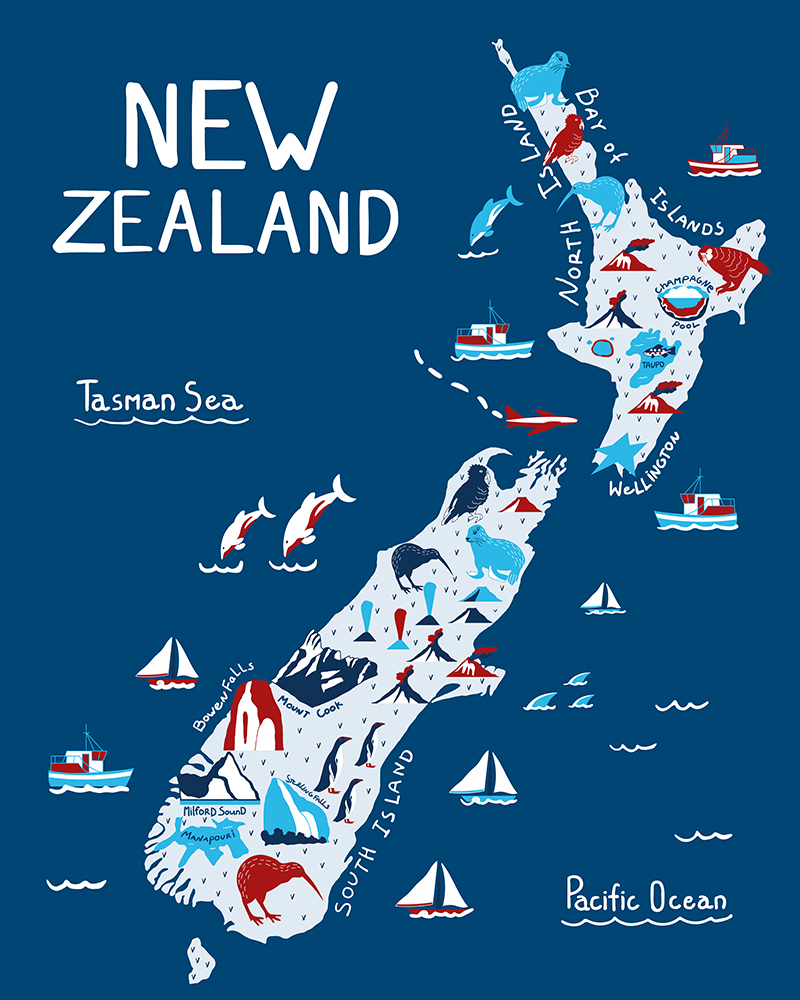 |
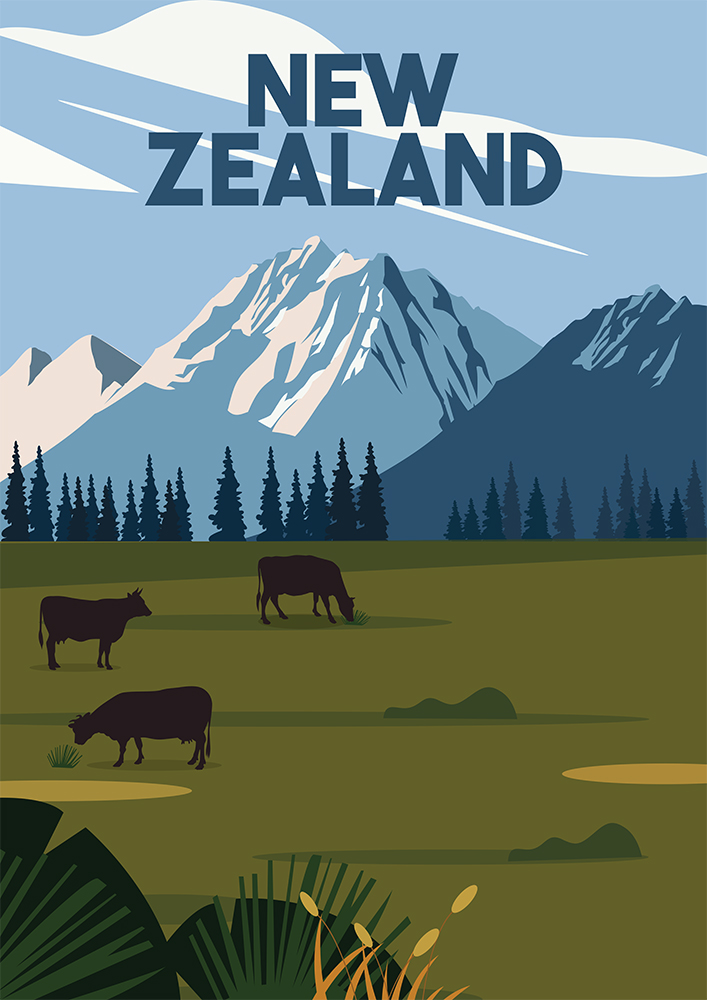 |
 |
The Brief for Poster 2: Edu-graphic poster
Because information can often be communicated more simply through a diagram or graphic, LairB&B would like to provide visitors planning to visit Aotearoa with the following information to help them. They have asked that you review best practices for Information Design to ensure you are providing a high-quality design. Head over to Wikipedia to learn more.
Subject: (Choose ONE:)
- Best times to visit New Zealand and why
Select six locations throughout NZ and provide data on the best time to visit each and why. Provide at least one landmark or attraction for each one. - Wildlife in New Zealand
Show images and information of your choosing to prepare a visitor excited to learn about New Zealand's wild animals. - Modes of transportation
Create a poster that shows transportation options within New Zealand for travellers (such as rental cars, trains, buses, private touring buses, etc.). Include options, destinations, costs, and pros & cons for each mode of transportation. - Population demographics in New Zealand
Create a graphic that shows the gender, ethnic, religious, geographic, and economic backgrounds of people who call New Zealand home.
Audience: Adults 49-69, potential visitors to New Zealand. LairB&B have indicated that they want edu-graphic material to appeal to an older population that might be more encouraged to visit New Zealand by being presented with information and data.
Tone: Informational, clear, using design principles and elements to communicate a feeling in addition to the data.
Examples of edu-graphic images. (Note these both use "Lorem ipsum..." as text placeholders instead of short phrases and scribbled lines.)
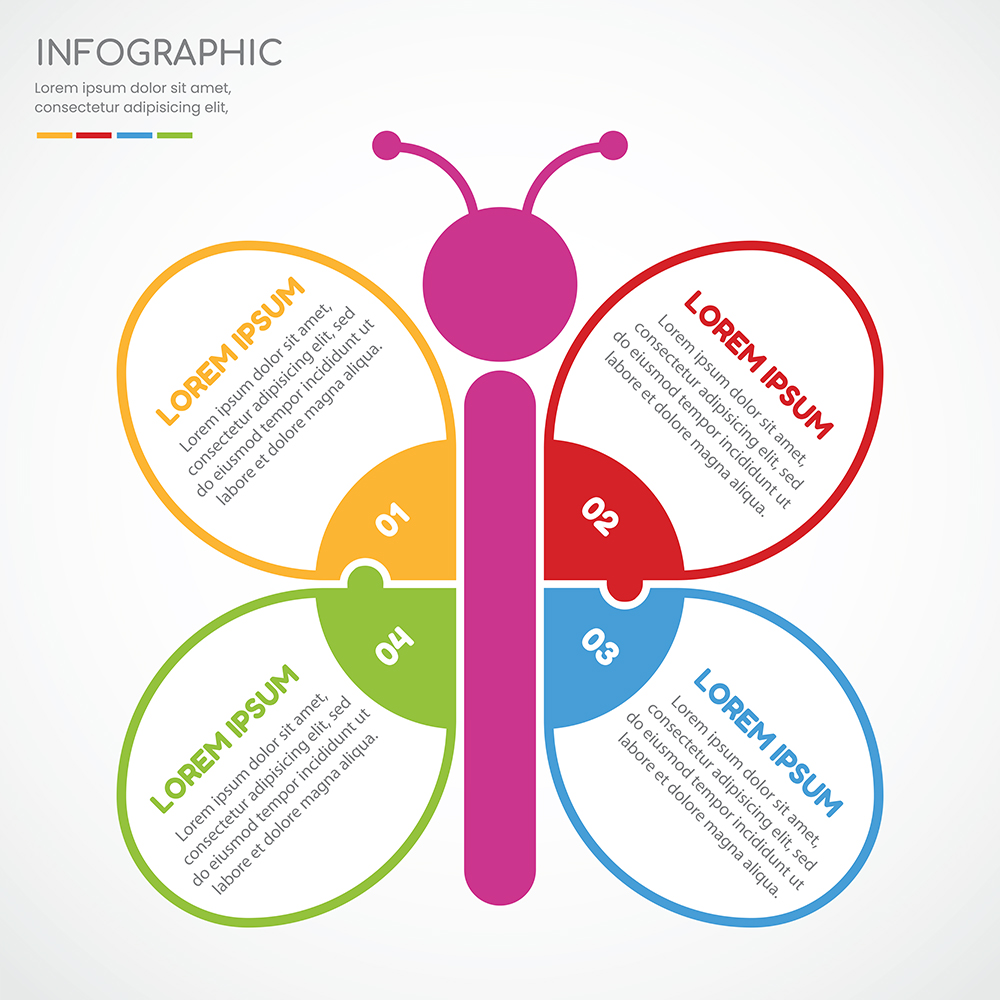 |
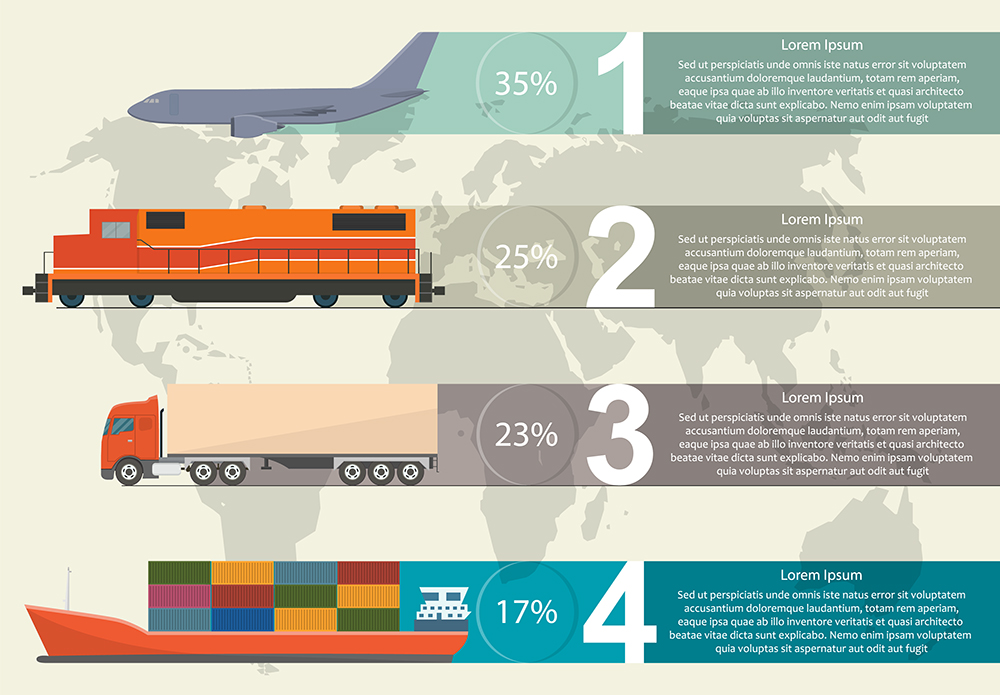 |
Task 1: Take on the role of Project Manager
A) Create a GANTT chart showing both projects happening simultaneously. You can use this InDesign template to get started (you'll need to unzip it first). Your production cycle requires that your client have three to five days to provide feedback. Give LairB&B time to review your work while you carry on with the next poster so you use your time efficiently.
For example, plan to provide the client with two sketches of the travel poster to review. While they review those, you can plan to research the edu-graphic poster needs.
Use any Gantt tool you like. You may download the InDesign template we've supplied above, or here is one you can use with Excel from Team Gantt. Use different colours to show the different posters.
(Note: You don't need to complete the Gantt chart, but it needs to show that you have an understanding of how to show:
- prioritisation of tasks
- length of tasks
- milestones
- dependencies
- start/finish dates that show where they overlap.)
B) (Note: Create your own timeline to complete this activity using a timeline management system of your choice. Plan to spend between 30-60 minutes for this planning. If you find Gantt useful, then use it. Otherwise, just be sure you have a time plan to complete this activity. It's complicated, and you will want to ensure you provide ample planning to get the most out of your time working on it.)
Task 2: Take on the role of Marketing Manager
A) Research the target audience and create a persona for each by adding additional details. (Note: currently, all you know is their age and whether they live in New Zealand.)
- Create a PDF document (note: use Word, Excel, Google Docs, etc.) defining a persona for each poster. Keep in mind that you are preparing the document for the designer to execute.
- (Note: Spend about 30-60 minutes on this; no more unless you are enjoying this part of the process and want to dive in deeper.)
Task 3: Take on the role of Lead Designer
(Note: Hopefully, you created a time plan with your Project Management hat on. You'll want to stick to that for these tasks so you stay on track.)
Research:
Travel: Research old travel posters to better understand illustration techniques, use of colour palette, typographic styling, and composition. Determine what copy/text you will add. Research any landmarks or iconic places you might like to present.
Edu-graphic: Research infographic styles and techniques. Also, research your subject so you can present accurate information. Determine what copy/text will need to be shown.
DESIGN:
Start with sketching the posters. The final version of each will need to be an A3 poster.
A) Using your research and the target audience personas, design two concept sketches for the travel poster and two sketches for the edu-graphic poster for LairB&B to review and critique for a total of four sketches. Create/ideate them on paper first or trace/sketch them in Photoshop or Illustrator so you can present digital design concepts for this step in the process, or sketches on paper - or both!
You'll want to consider the design principles and elements at the concept stages, particularly when it comes to the placement of words in relation to graphics.
Hint: To hit the tone, you will likely want to use an illustrated look for the travel poster and a digital design for the edu-graphic. Spend about 20 minutes on each sketch. Keep your sketches to keystrokes, composition, and colour suggestions only. Don't spend time fleshing out details at this point. Use select short phrases or scribbled lines to represent text. Otherwise, the client gets sidetracked by the text when they need to be looking at the composition, colours, and tone.
Feedback
B) Reach out to someone you know who can pretend to be the client for you. Show your four sketches to a parent, friend, neighbour, in person, or someone online and schedule an online meeting where you can share screens. Share the brief with them as well. Ask questions in your feedback meeting to draw out their opinions and feelings.
Refine and Review
C) Based on that feedback (from your pretend client), select one poster for travel and one for the edu-graphic. Make notes and cues about what you need to change, but don't do it yet. For now, just mark up one design for each poster so you have a clear idea of how to turn them from sketches into designs.
D) As often happens on corporate projects, the deadline has moved up! LairB&B now wants both final versions earlier! (Note: in real life, the project manager would note the change to the schedule.) One of your designs is now going to another designer to complete, and you are left with just one poster to complete. (Note: Pick one of the posters to complete.)
- Create a new Illustrator file to create the poster and set it up as an A3 portrait.
- Remember to:
- name your layers
- organise layer groups
- convert text into outlines.
- Remember to:
Forum Post for Task 3
E) Upload all of your work to this Forum post.
- Plan to upload the:
- GANTT chart from the Project Manager,
- personas from the Marketing Manager
- final design poster from the Designer.
Review the work of others and download a new persona
F) Scroll through the Forum and review the work of your peers. Compare how they interpreted the instructions with how you did.
G) Select and download one of the persona documents from one of your peers.
complete the other poster
H) Things change in a corporate setting all the time! Imagine that the other designer wasn't able to do the design well enough, and it's come back to you. Review the persona you chose to download and apply persuasive design tactics to target the new persona to the OTHER poster you have not done yet.
Add your new poster to your previous forum post
I) Add a Reply to the Forum post you originally created to add this new poster and your reasons for your design choices based on the downloaded persona.
Did you notice?