Important
Before continuing with this topic, be sure you have read and done the activities in Design Principles and Tools > Composition, which provides an overview of composition broken into individual design disciplines.One common way for an artist to achieve a successful composition is to crop an existing photograph into a better compositional makeup than how it was initially shot.
Let's return to Adobe Photoshop for the following activity.
Novice Activity - Cropping tool composition guides
🕔 About 30 minutes
Task 1: Open any image file in Photoshop.
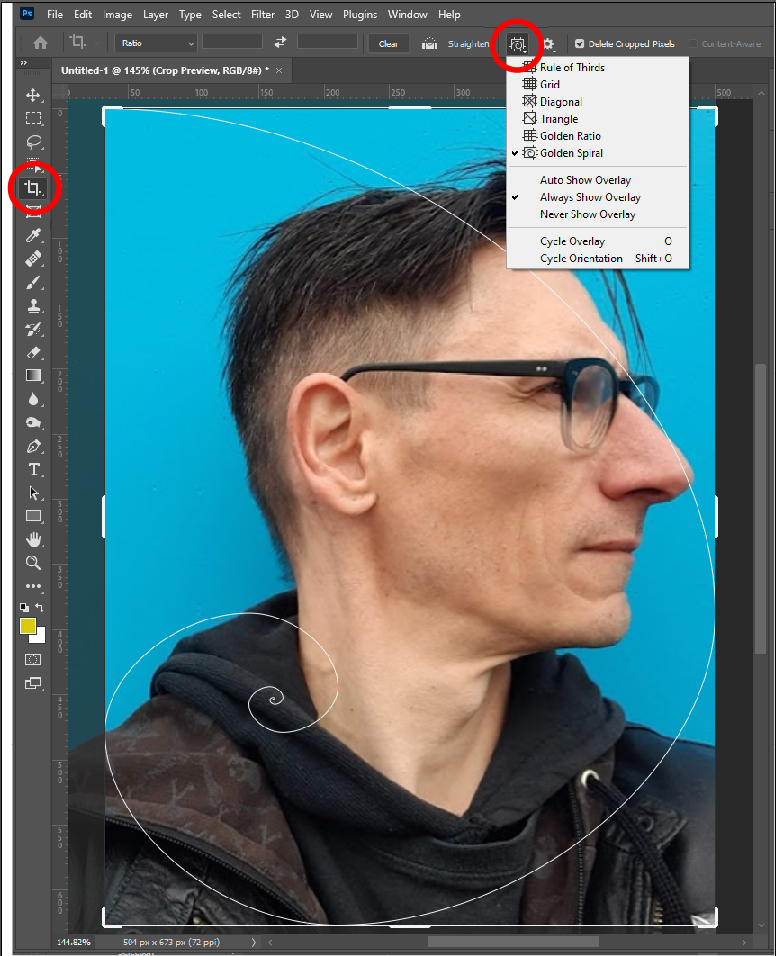
Task 2: Click the cropping tool and then hover over the composition icon. Notice the tooltip "Set the overlay options for the crop tool", as shown in the image below.
Task 3: Click the composition icon and notice the list of guideline styles in the drop-down menu, as shown in the image below. Select a style (Golden Spiral is ticked in the image below), then click your image to see the overlaid guidelines. Select a few options and note the different overlays.
Task 4: With one of the styles selected, click "Cycle Orientation [Shift+O]" in the same drop-down menu and notice the guidelines rotate. Keep clicking to see additional rotations for the same style. Now click other compositions (such as Triangle or Rule of Thirds) and see how you can change the orientation for each.
Task 5: Have a play with these compositional suggestions. Move your image around to align the focal points of your image to the guidelines, especially where they intersect. Take a moment and reflect on how each compositional choice impacts your design. When you like the look of something, export it. (File > Export... > Quick export as a jpg.) Keep trying out new compositions.
Check out Dan's image here after he has done Tasks 1, 2, and 3. As you can see, he has selected the Golden Spiral, and Photoshop has placed guidelines so Dan can design accordingly.
Use the navigation beneath these images to see a few more examples.
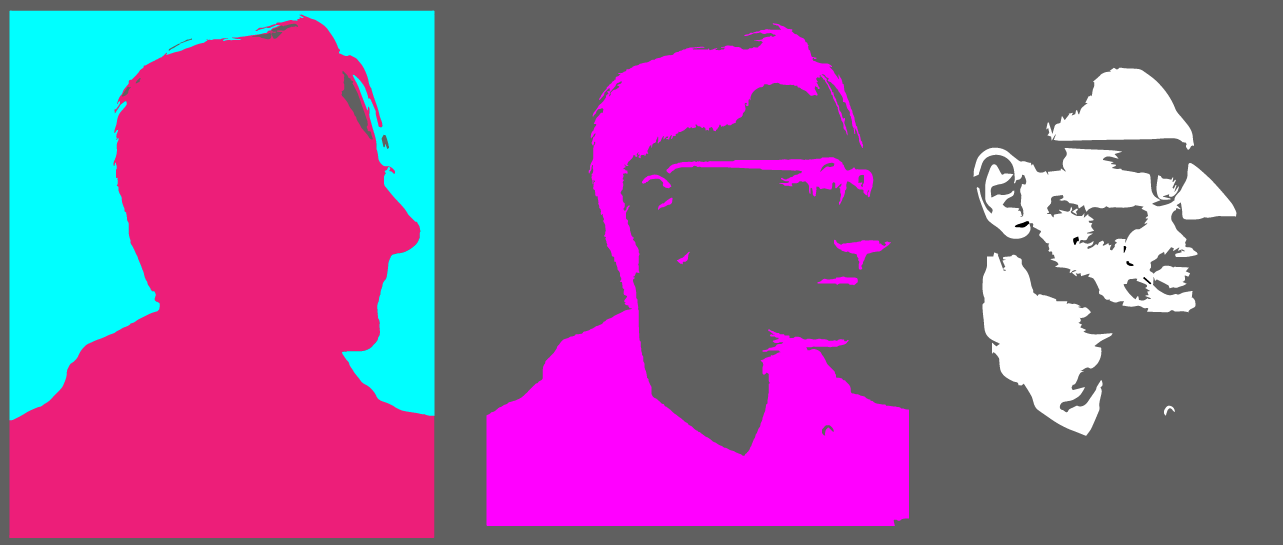
Photoshop – Threshold Image Adjustment
Colour composition plays a factor in the story of an image. Photoshop provides a feature that allows you to determine and adjust the treatment of light and dark in an image.
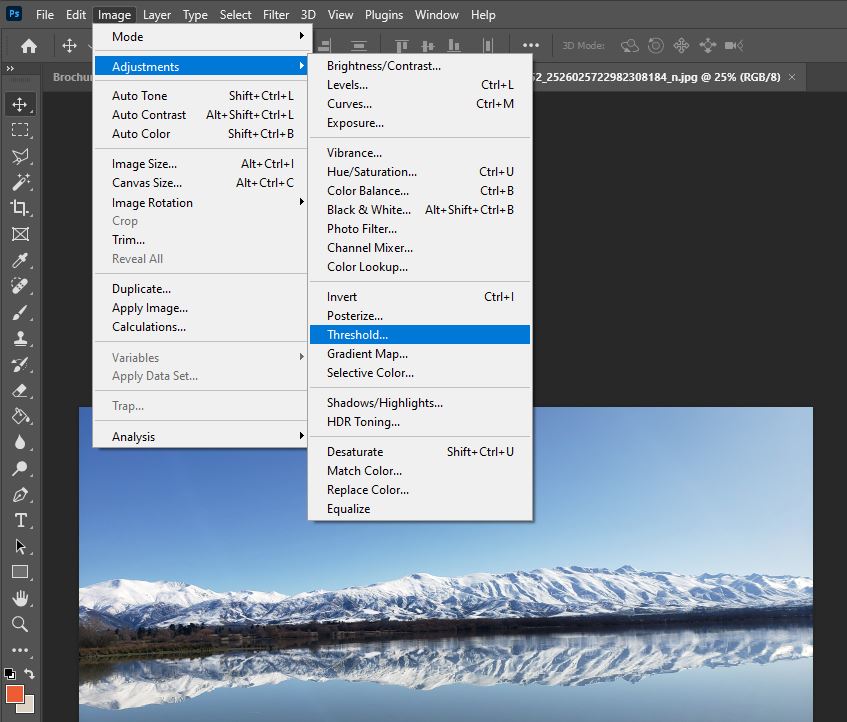
In the Design Principles and Tools section on Photoshop > Image adjustments, you had a play with brightness, contrast, and colour values. Now, we are going to build on that knowledge and look at Image > Adjustments > Threshold... in two different ways.
- A permanent change to the current image layer
- It affects the current and any layers below that and can more easily be edited and hidden.
Newbie Activity - Threshold value
🕔 About 30 minutes
Go back to the image you used for the previous activity, or choose a new one and open it in Photoshop.
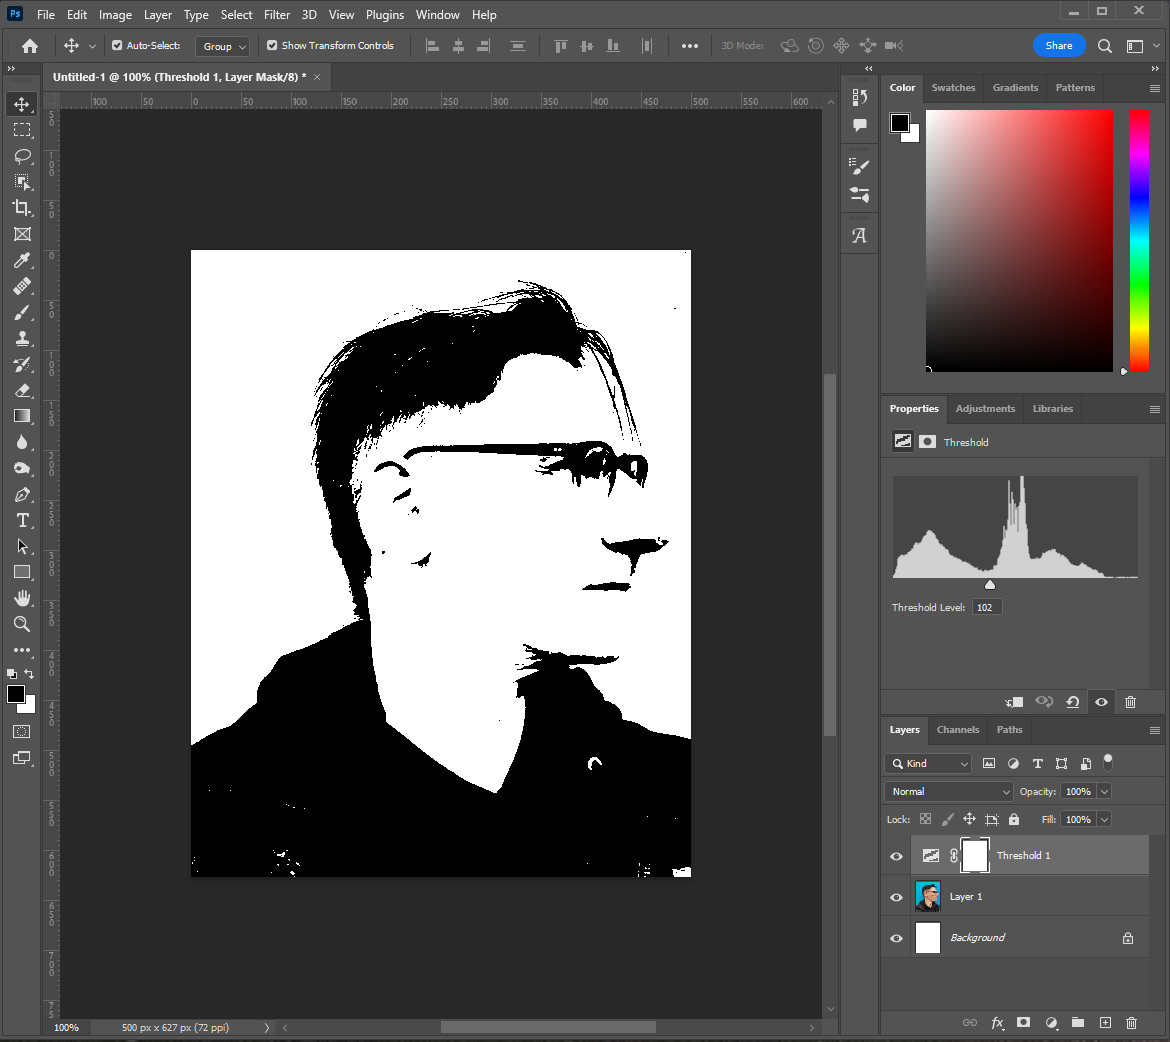
Task 1 – a permanent change:
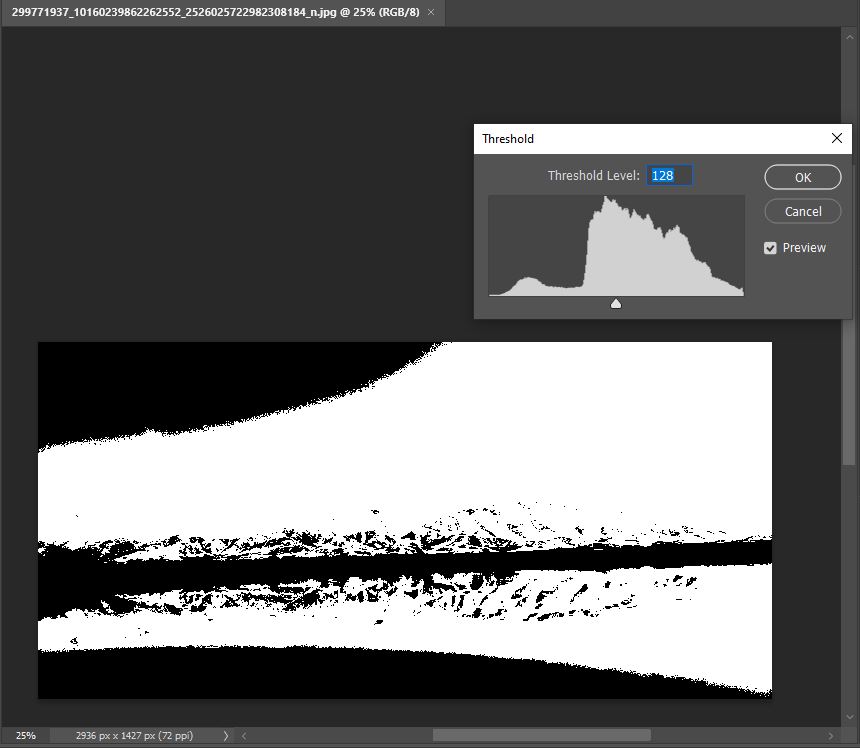
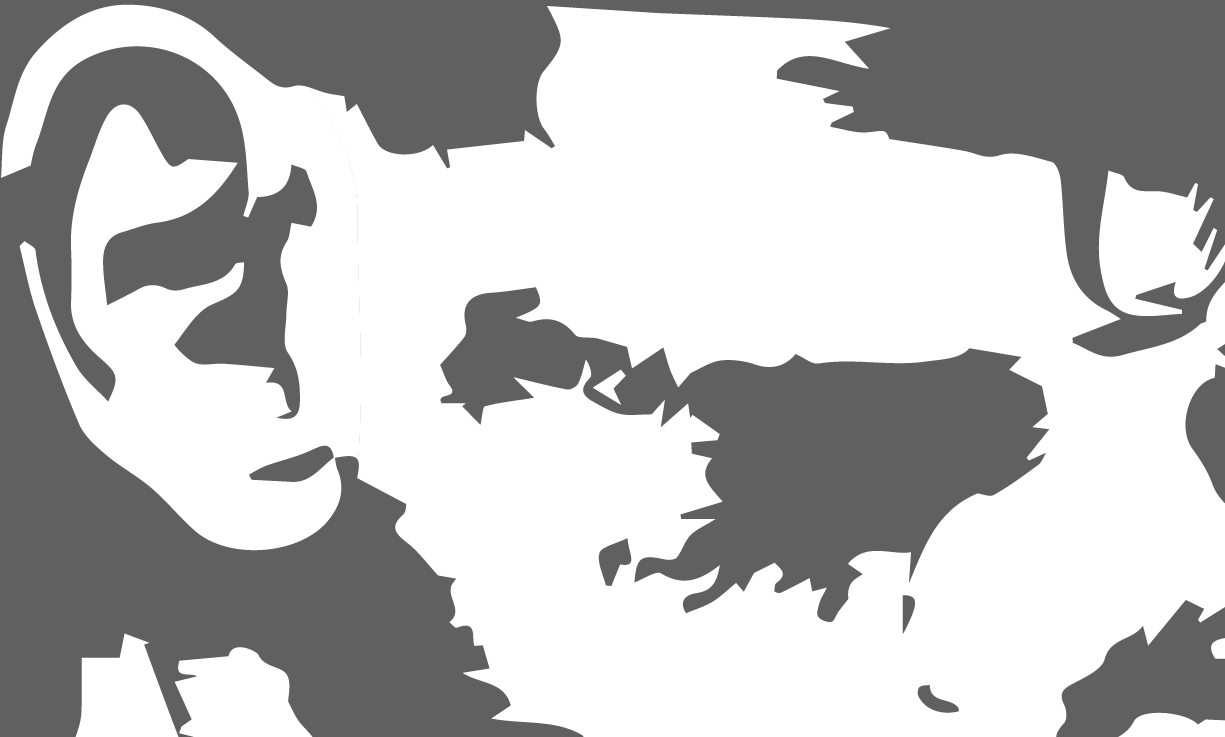
As shown below, select Image > Adjustments > Threshold... and experiment with the value for the threshold level to alter the point at which black and white change. The effects will be immediately apparent. After selecting a few numbers to type in, use the slider.
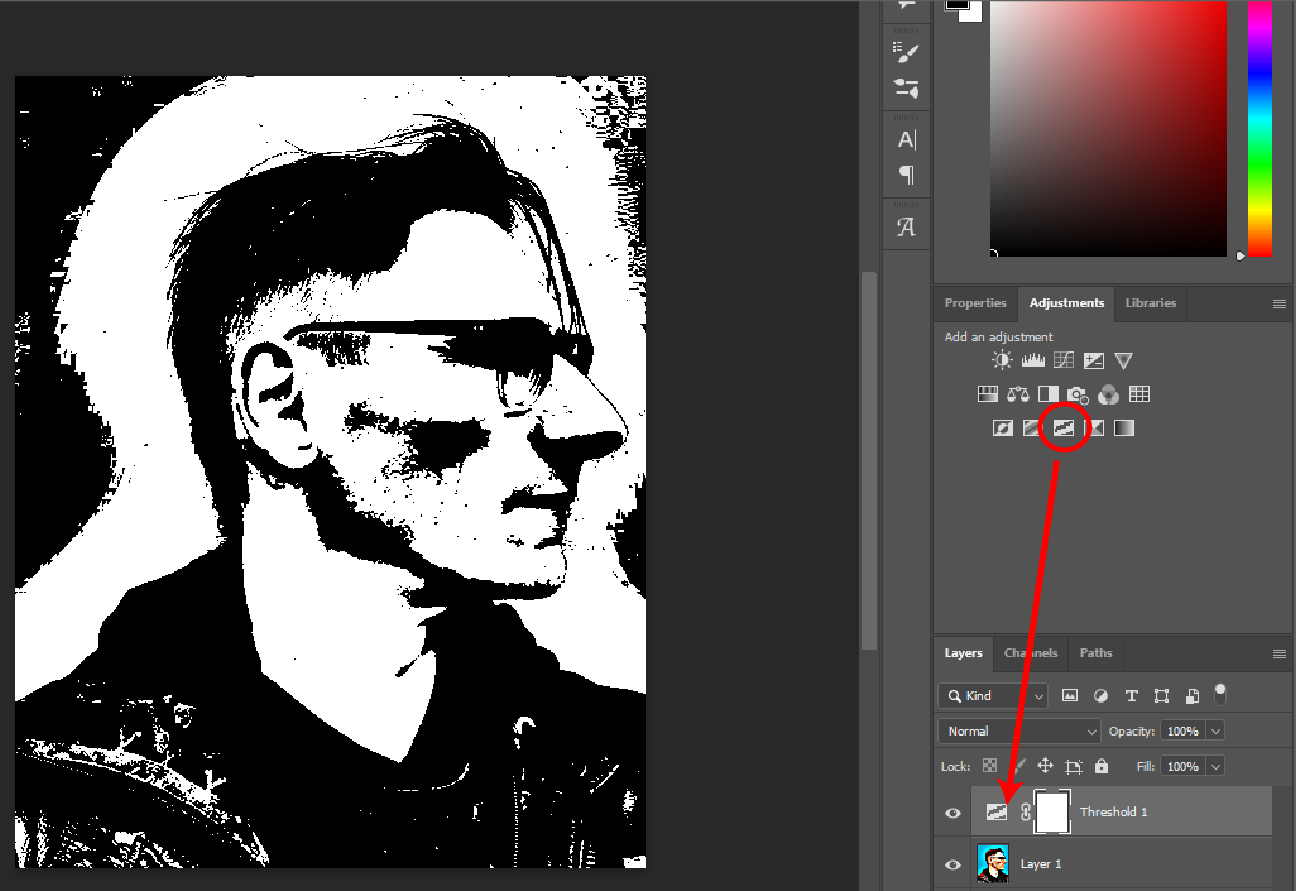
Task 2 – Adjustments tab:
To affect the current layer and any layers below it, we'll use the Adjustments tab to select the threshold adjustment layer icon as shown here:
Try to find a few different lighting stages that could be used for separate colours.
 |
 |
Illustrator – Image Trace
🕔 About 30 minutes
Starting a project in Photoshop and then vectorising and refining it in Illustrator is a typical workflow for creative development.
Watch this video to learn how to start with a raster image, end up with a vector, and work with colours to get some interesting effects.
Newbie Activity - Image trace options
Copy the image you worked with in the previous activity from Photoshop, then paste it into Illustrator.
Getting Started
With the image selected, you will see the 'Image Trace' options in the 'Control' bar or the 'Properties' panel.
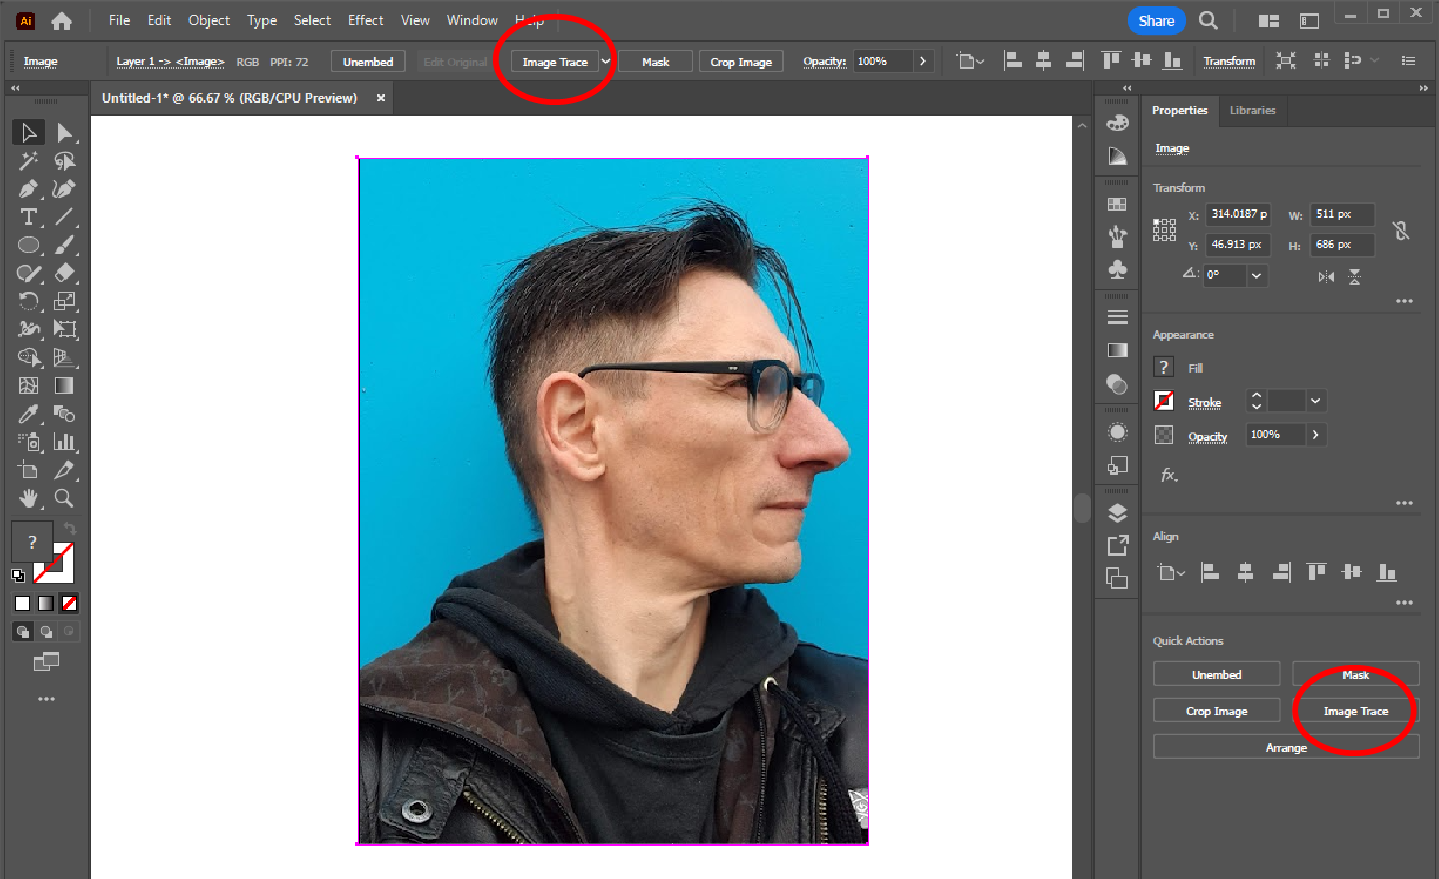
Task 1: Experiment with the Image Trace tool and stop when you have an interesting result you like.
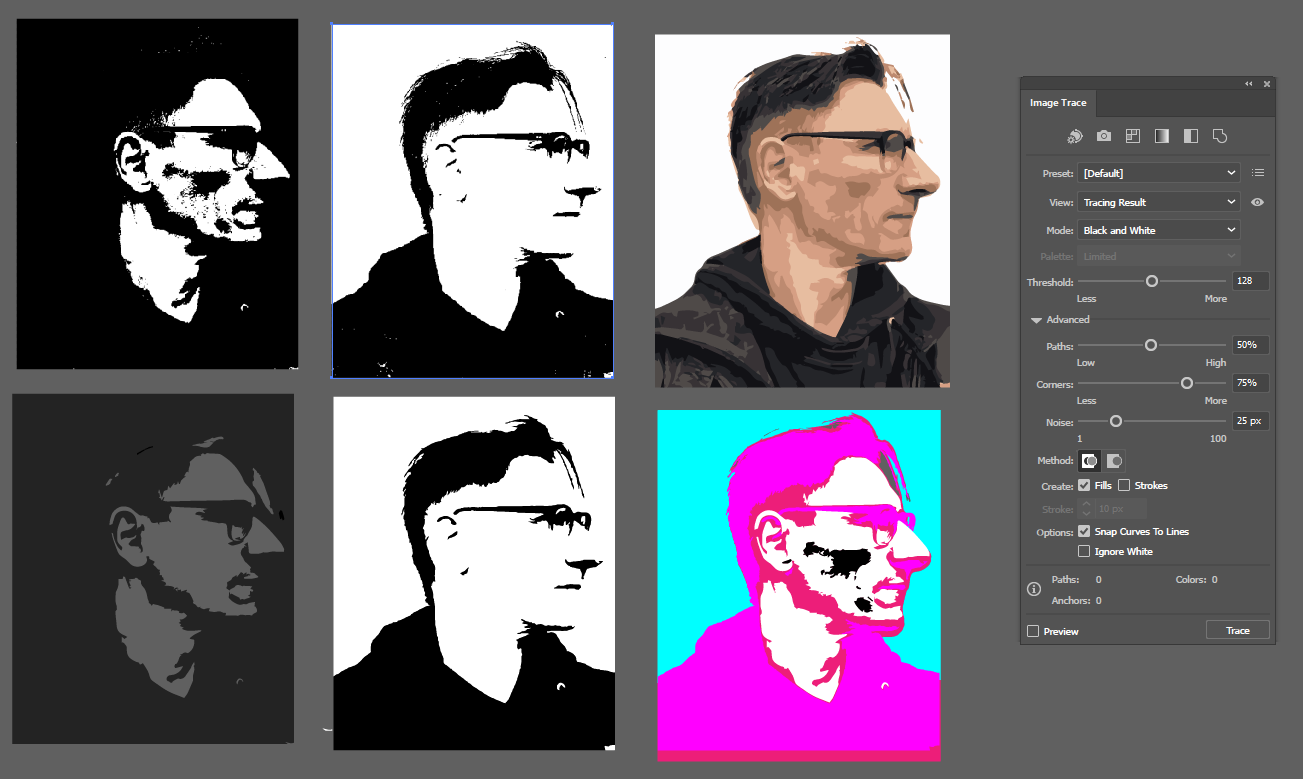
Task 2: Click "Expand" to see the layers and paths, which can now be separated, recoloured, and rearranged.
Notice that up close, some of the paths will be very rough. You may want to refine the paths for a smoother finish.
Use the pen tool to redraw rough areas.

Practising Activity - Illustrated, vectorised portrait
🕔 2 - 4 hours or more if you are having fun
Simplification and stylisation are essential graphic techniques.
Create a vectorised portrait of yourself with no more than two colours (including black).
Task 1: Upload a photograph of yourself into Photoshop to be used as the base image. Edit the Image Adjustment Threshold until you are pleased with the image for this purpose. Set up image layers as you go.
Task 2: Place the photo into Illustrator.
Task 3: Use Image Trace to create a vector and modify the tool's options to change the colour composition of your photo. Keep experimenting until you get a result you like. This will give you the vector paths since your image has been converted from a raster to a vector image.
Task 4: Save your file as a .svg
Forum Post
Share the work you have done with your tutor and peers in this Forum post. Have some fun getting reacquainted with your peers by viewing vector images they created. As usual, please include any reflections you would like to share about your creation process.
Things to remember:
- Shadows and highlights
- Colour blending
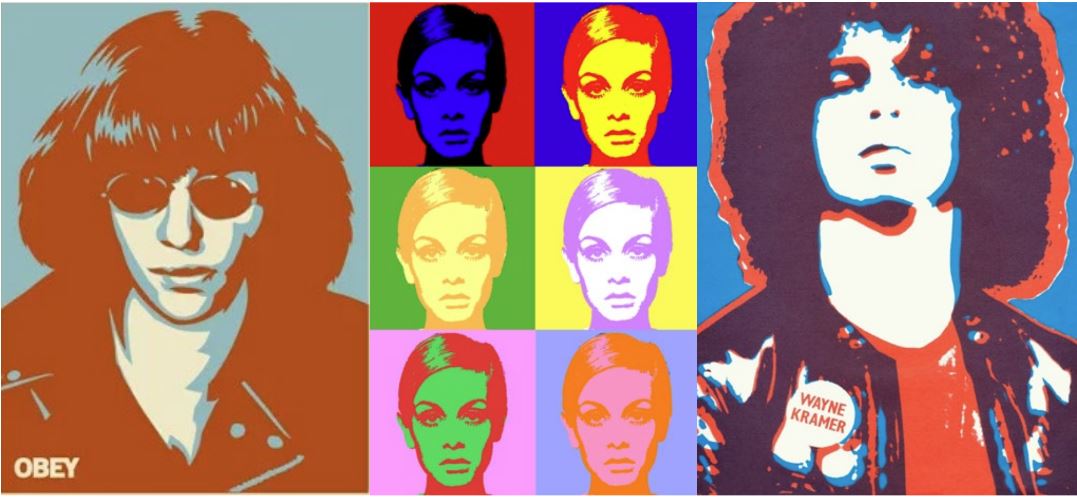
Image sources: Obey Giant , Pinterest , Eil.com