Before you explore the complexities of Digital Production, familiarise yourself with the various terms you need to know to help you progress through this module.
Maya's polygon toolset has evolved over the past several versions to include numerous approaches for creating organic and hard surface objects. This module takes you through the process of creating low poly assets. There are many ways to accomplish this in Maya, and you will be guided through some general best practices for poly modelling techniques.
The strategy behind this method is to create as many of the basic forms of the object as possible with as little geometry as necessary. Be cheap with your geometry; only add faces through edge looping and extruding when you absolutely must. This will make modelling less frustrating and more pleasant.
The completed low poly version of the model serves as a base mesh, which can be subdivided and textured. Details are created by adding materials and sculpting, moving around the vertices of the base mesh and creasing to create harder edges where necessary.
To do all this, you need to know the terminology connected with Maya, specifically modelling and texturing terms.
Subtopics that you can explore
This Maya terminology topic features two key subtopics:
- Modelling Terminology
- Texturing Terminology
Learning tasks that will help you develop and practise animation skills
Practice
Build your knowledge
There are two opportunities in this topic to test your knowledge of Maya terminology.
Look out for this PRACTICE box throughout this topic to identify the knowledge checks, letting you know exactly what to do. The information below outlines what learning tasks to expect in Maya Terminology and how much time you should allocate to each one.
| # | Learning Task Name | Duration (Hours) | |
|---|---|---|---|
| 1 | Check your knowledge - modelling terminology | 0.5 | |
| 2 | Check your knowledge - texturing terminology | 0.5 |
Feedback and support are woven through the learning tasks as you complete them. Reach out if you have any questions about what to do!
The following are common modelling terms that you should become familiar with.
Polygon geometry
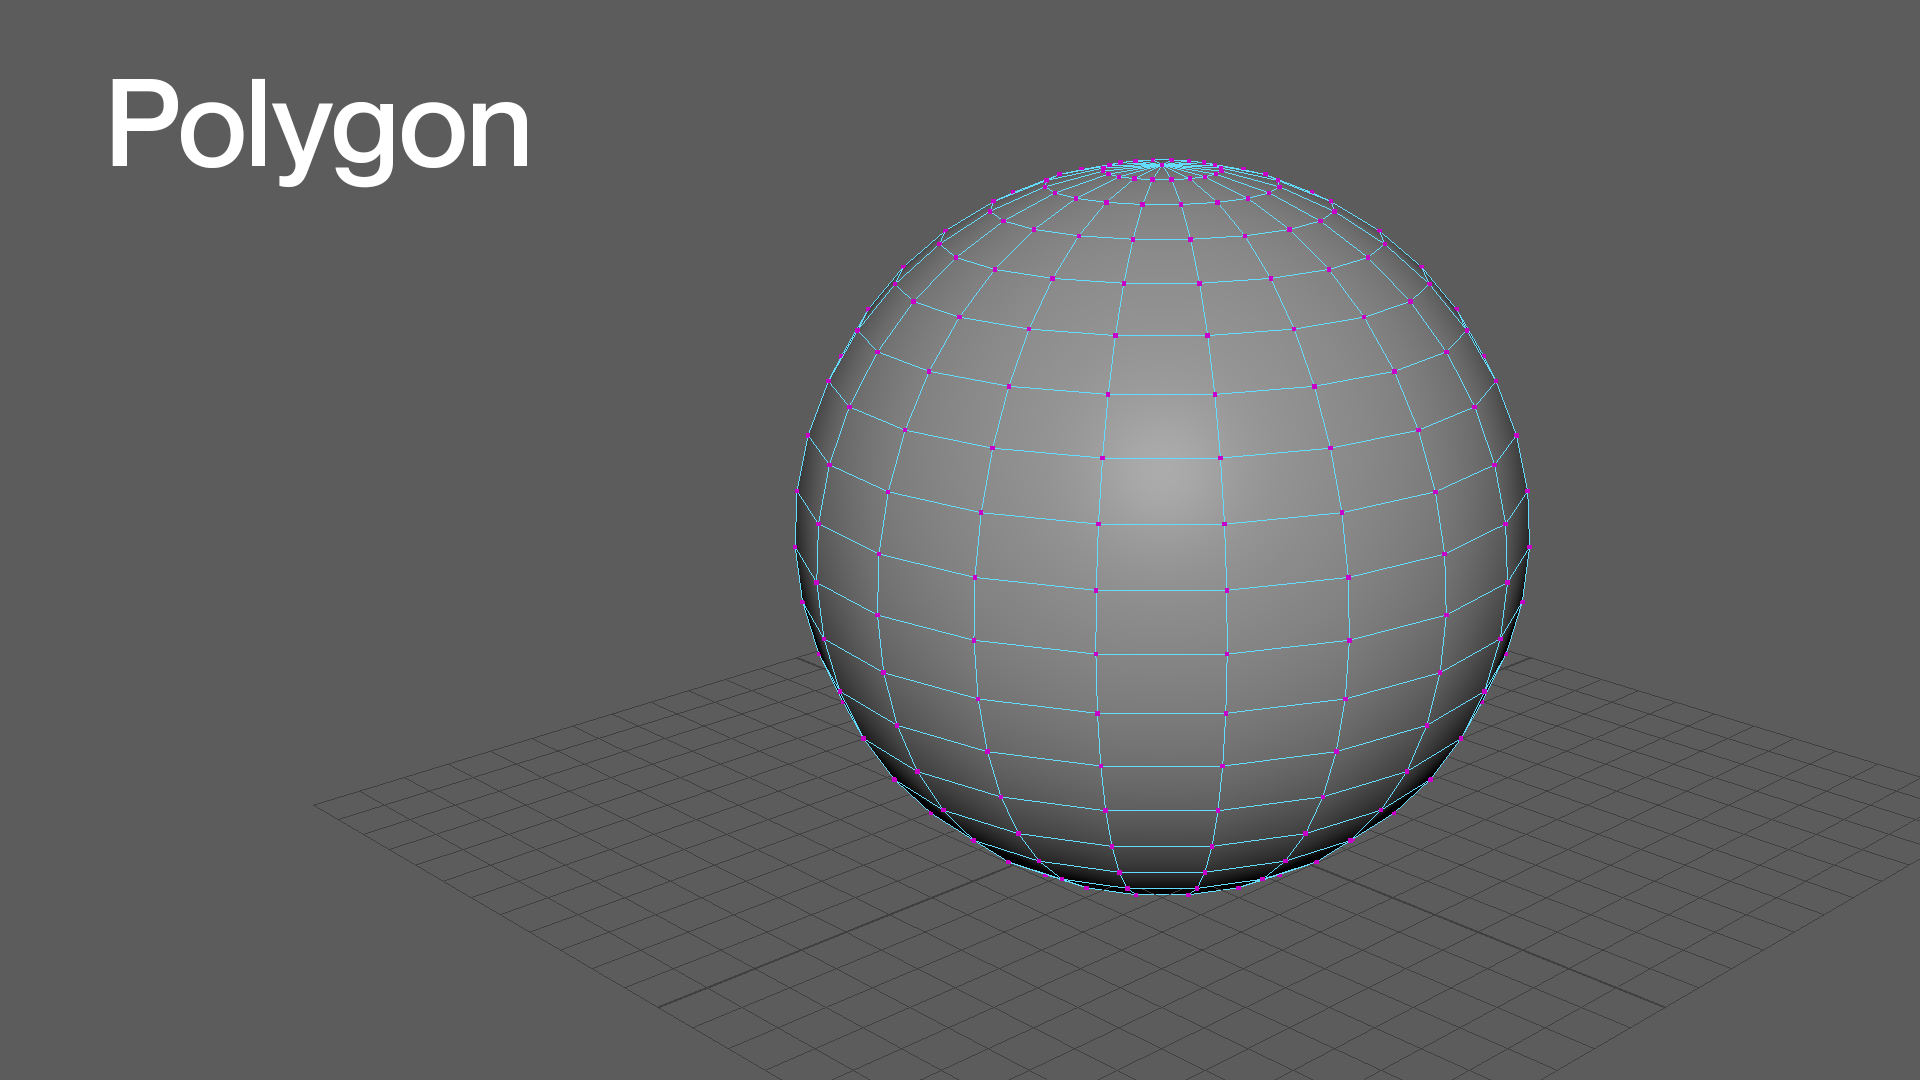
Polygons are the most used geometry type in 3D. While polygons are commonly used for all types of objects, creating very smooth surfaces with polygons means that you would need to add a lot more geometry than you would with NURBS or subdivision surfaces.
NURBS surfaces
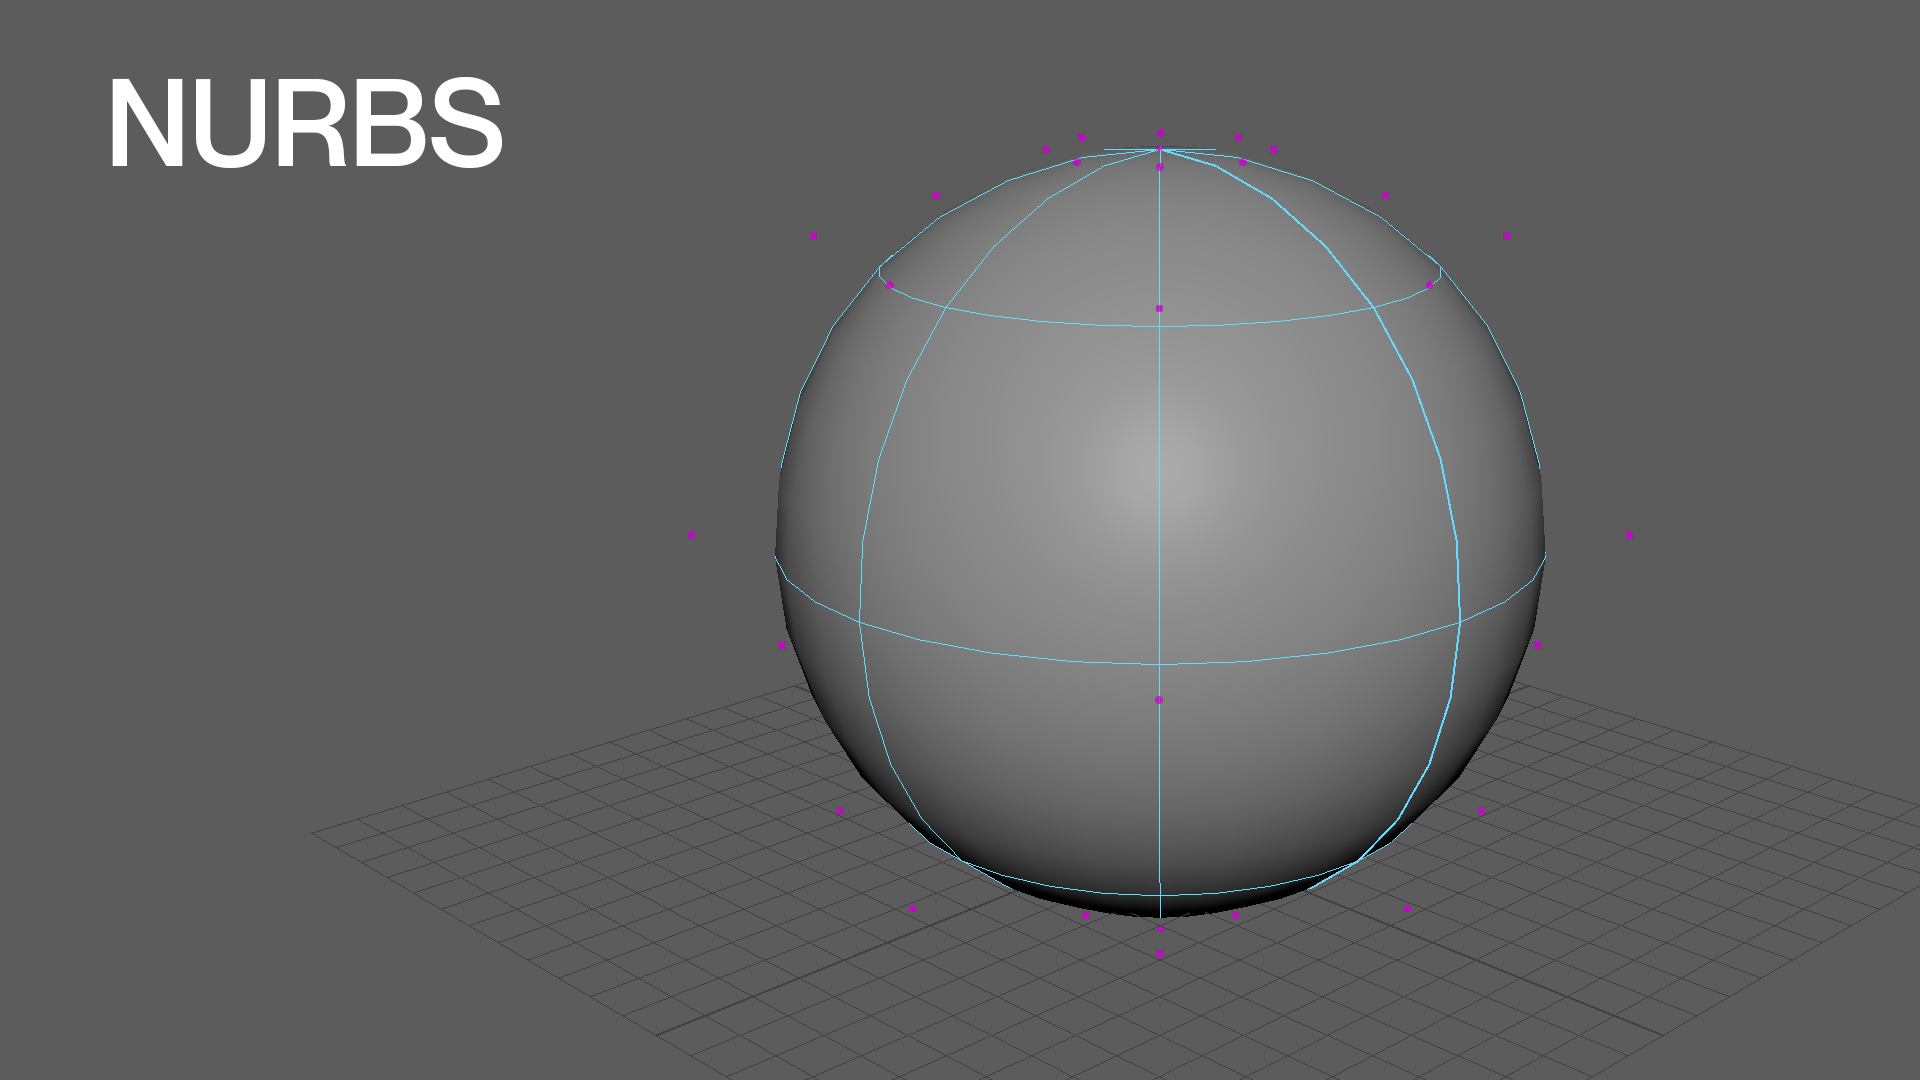
NURBS stands for non-uniform rational b-spline. NURBS are commonly used for very smooth objects because they don't require as many points to create the same look as polygon geometry. A NURBS surface always has four sides that are defined by control points.
Faces
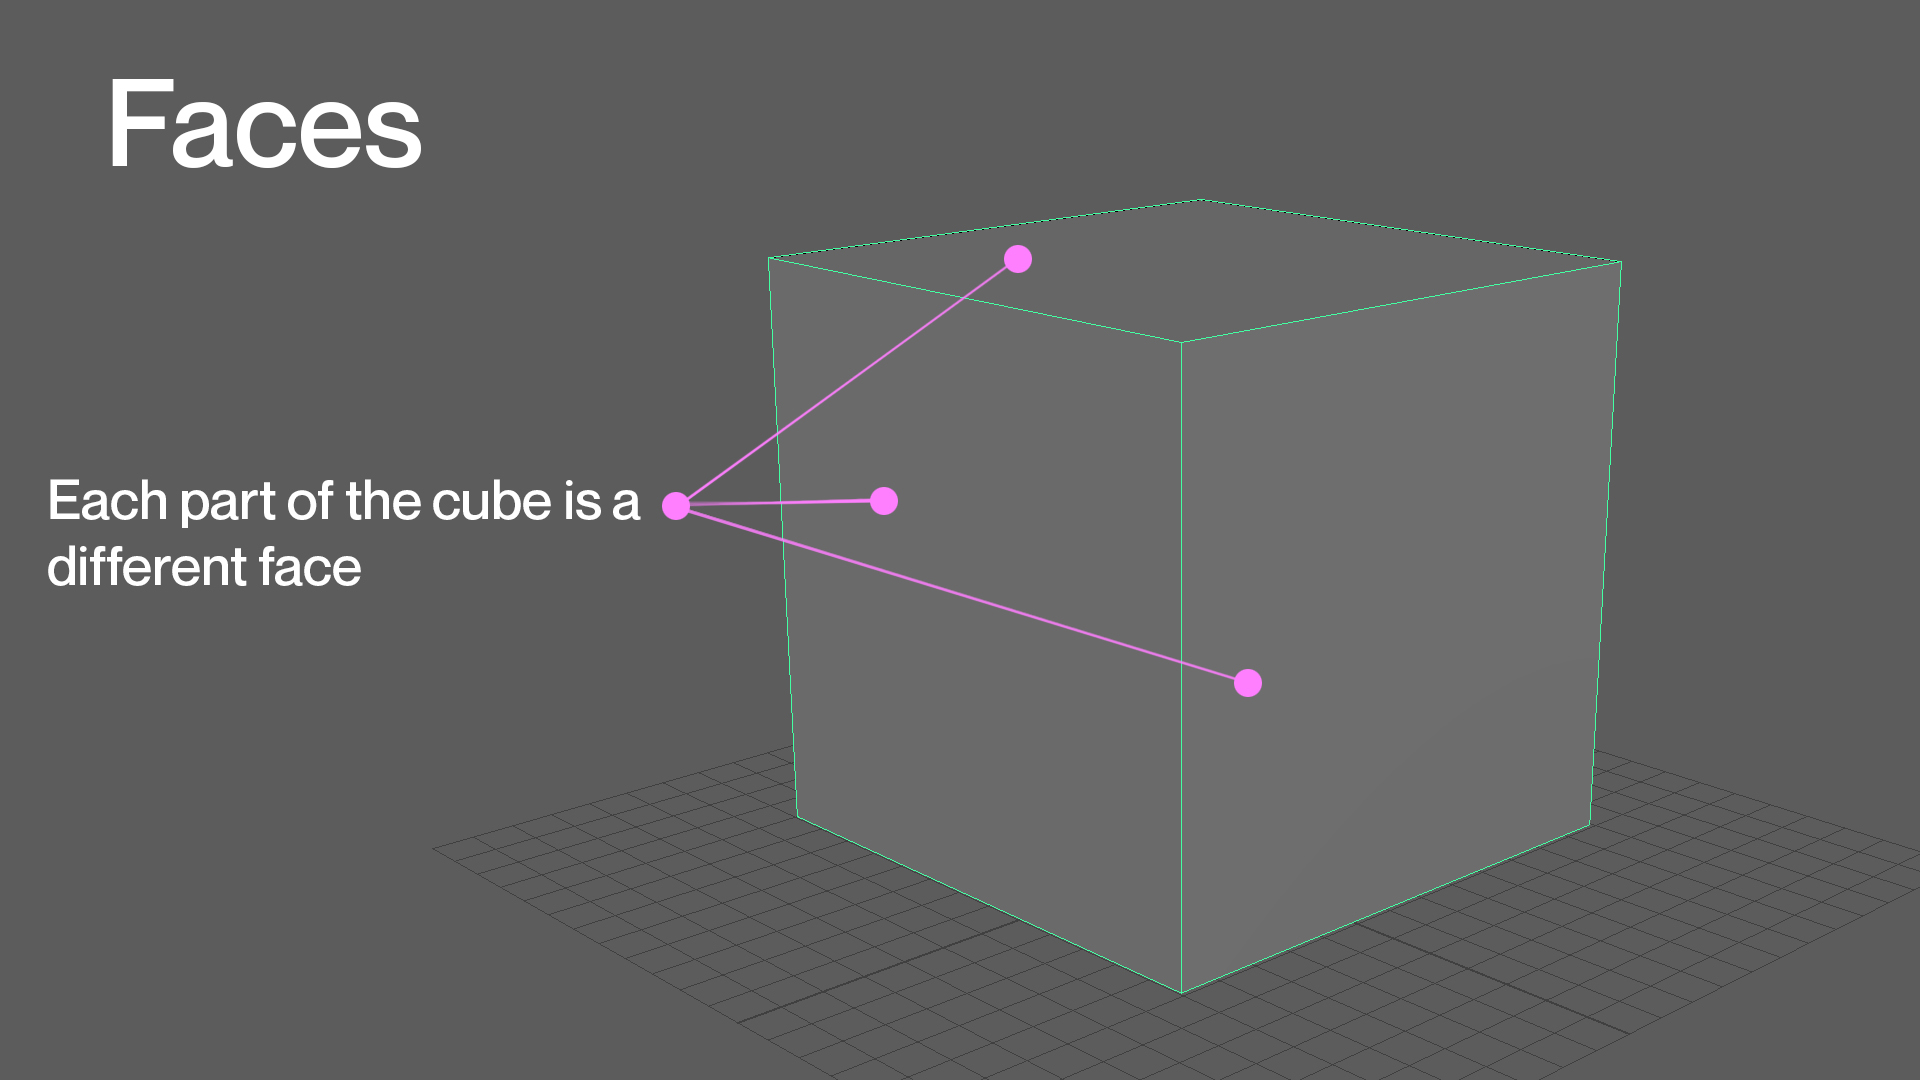
A face is the most basic part of a 3D polygon. When three or more edges are connected, the face fills in the empty space between the edges and makes up what is visible on a polygon mesh. Faces are the areas on your model that have shading material applied.
Vertex
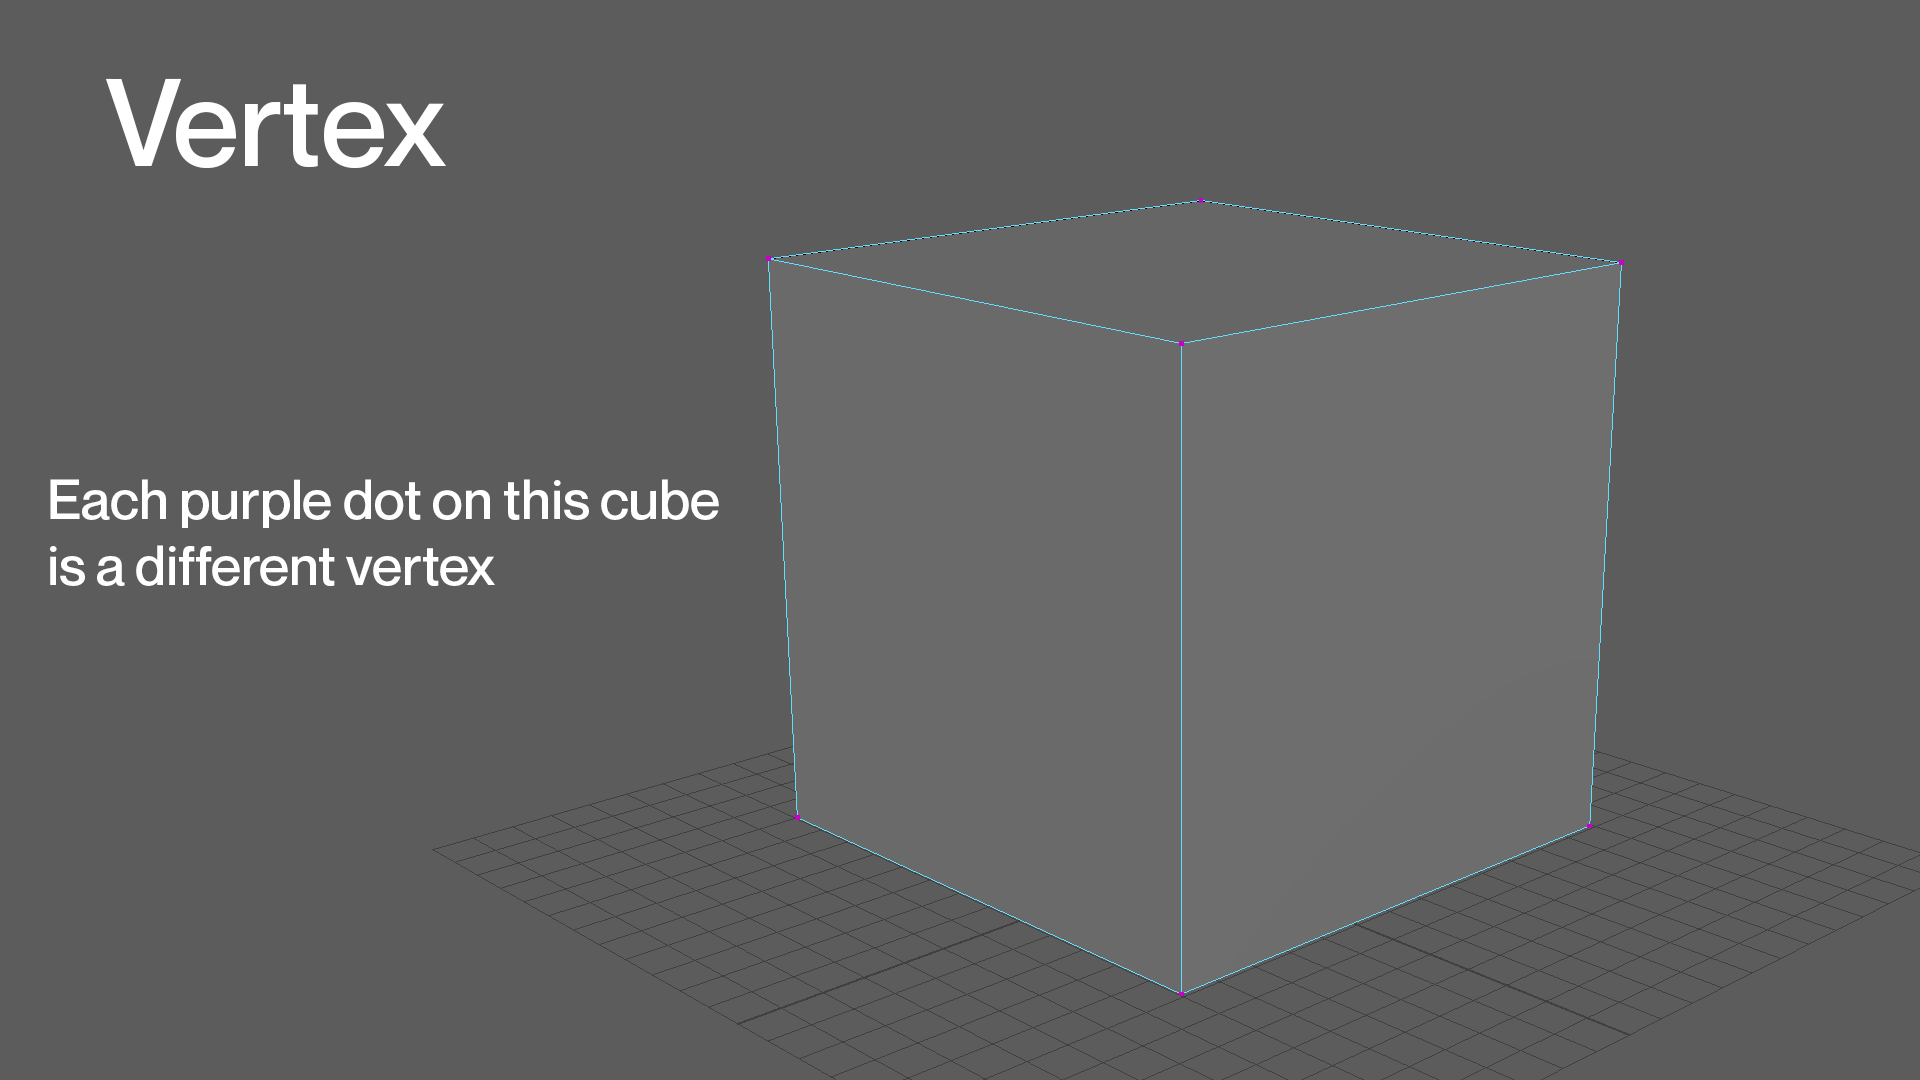
A vertex is the smallest component of a polygon model. It is simply a point in 3D space. You can create a polygon model by connecting multiple vertices ('vertices' is the plural of a single 'vertex'). These points can be manipulated to create the desired shape.
Edges
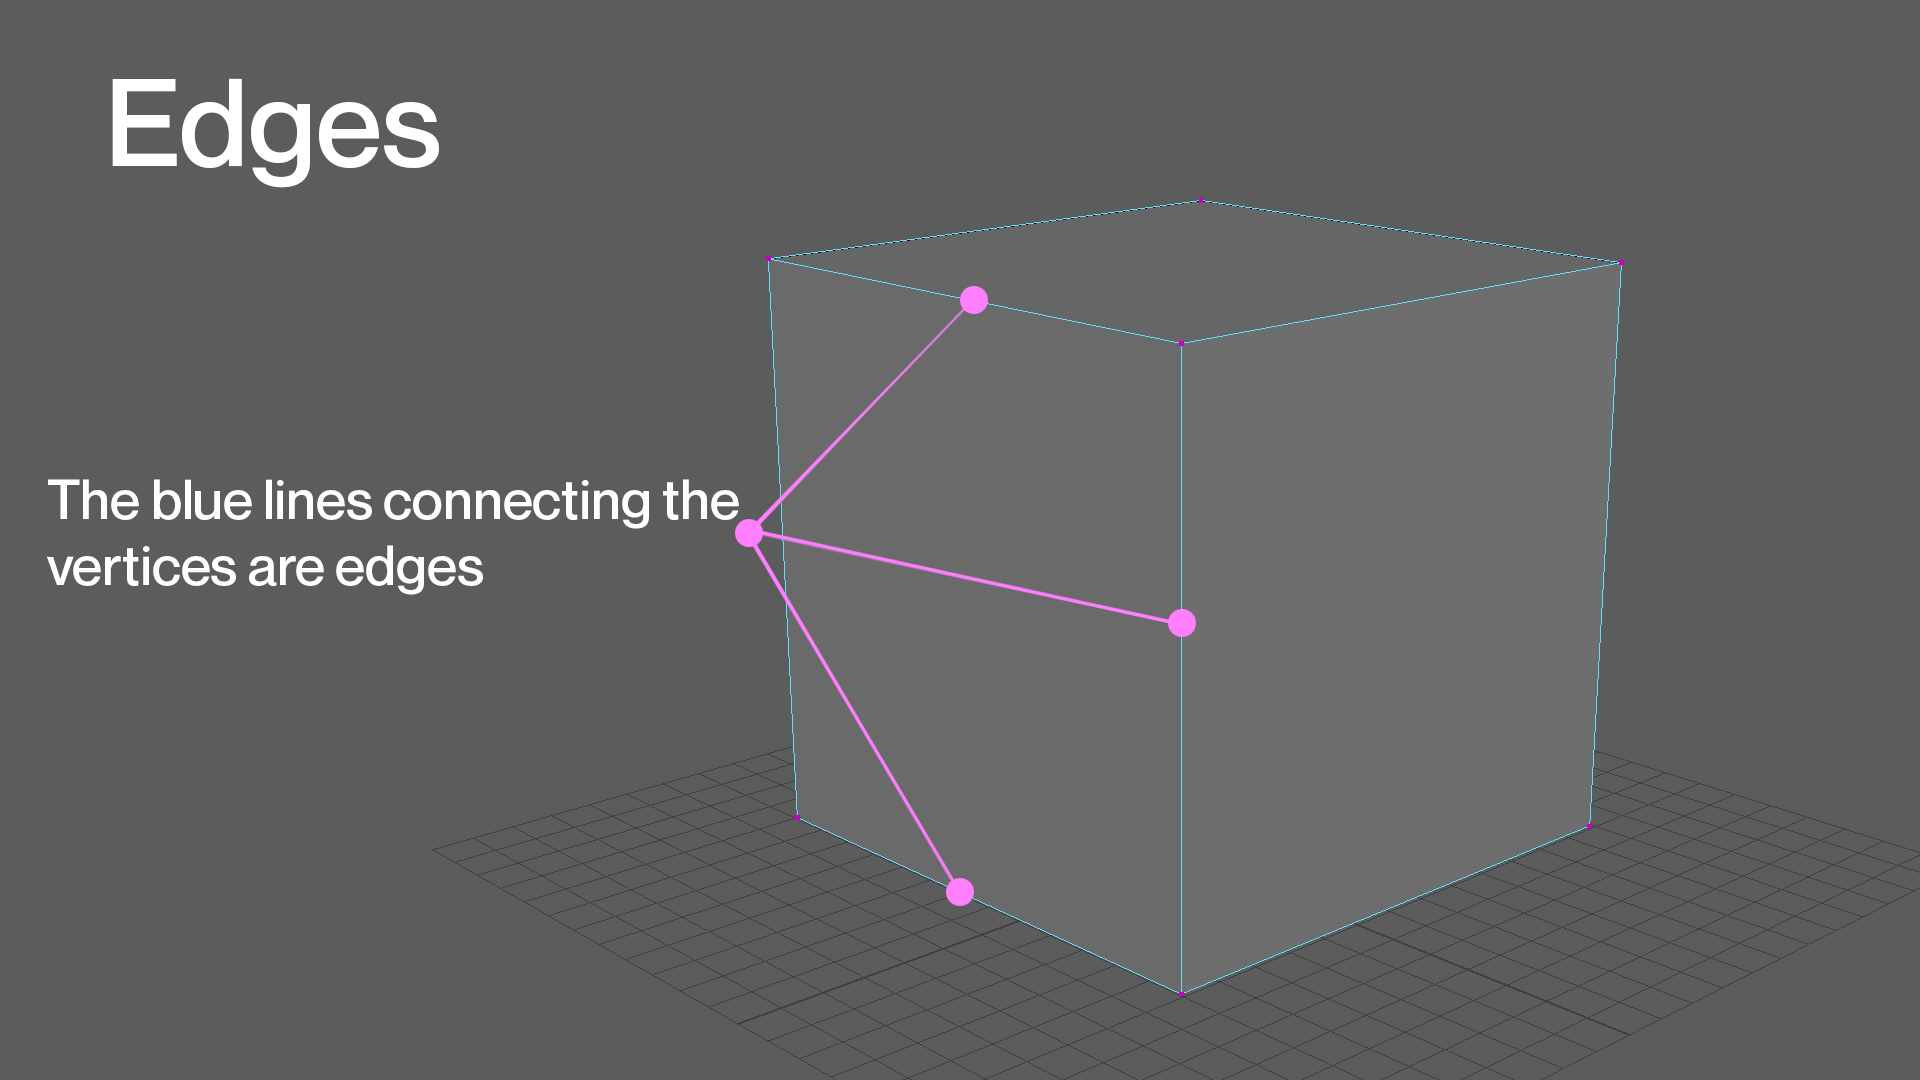
An edge is another component of a polygon. Edges help define the shape of the models, but they can also be used to transform them. An edge is defined by two vertices at their endpoints. Together, vertices, edges and faces are the components that help define the shape of a polygonal object.
Topology
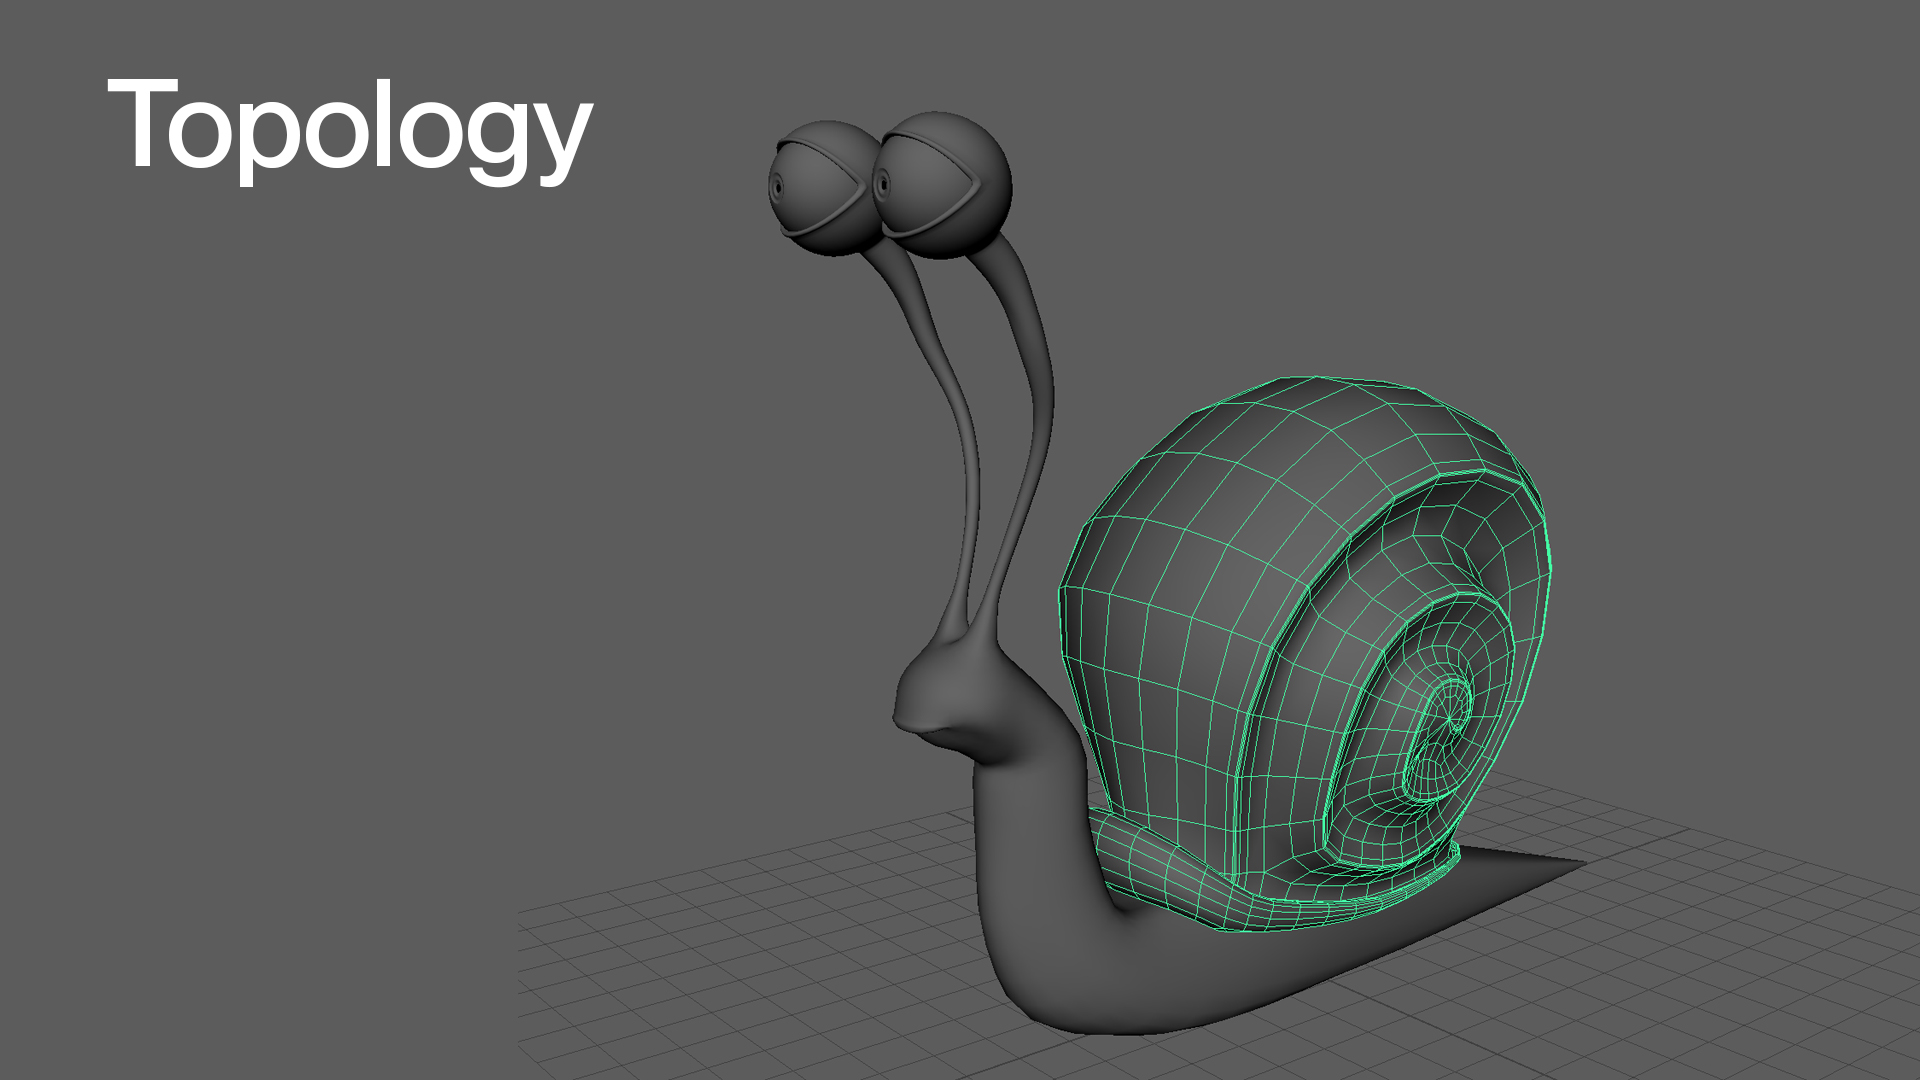
NURBS, points, edges, and faces will create whatever type of geometry you use. Topology is how these components are connected and the flow around the 3D object. You can think of topology as the type of polygon faces, the type of vertices, and the flow of the edges.
Triangle
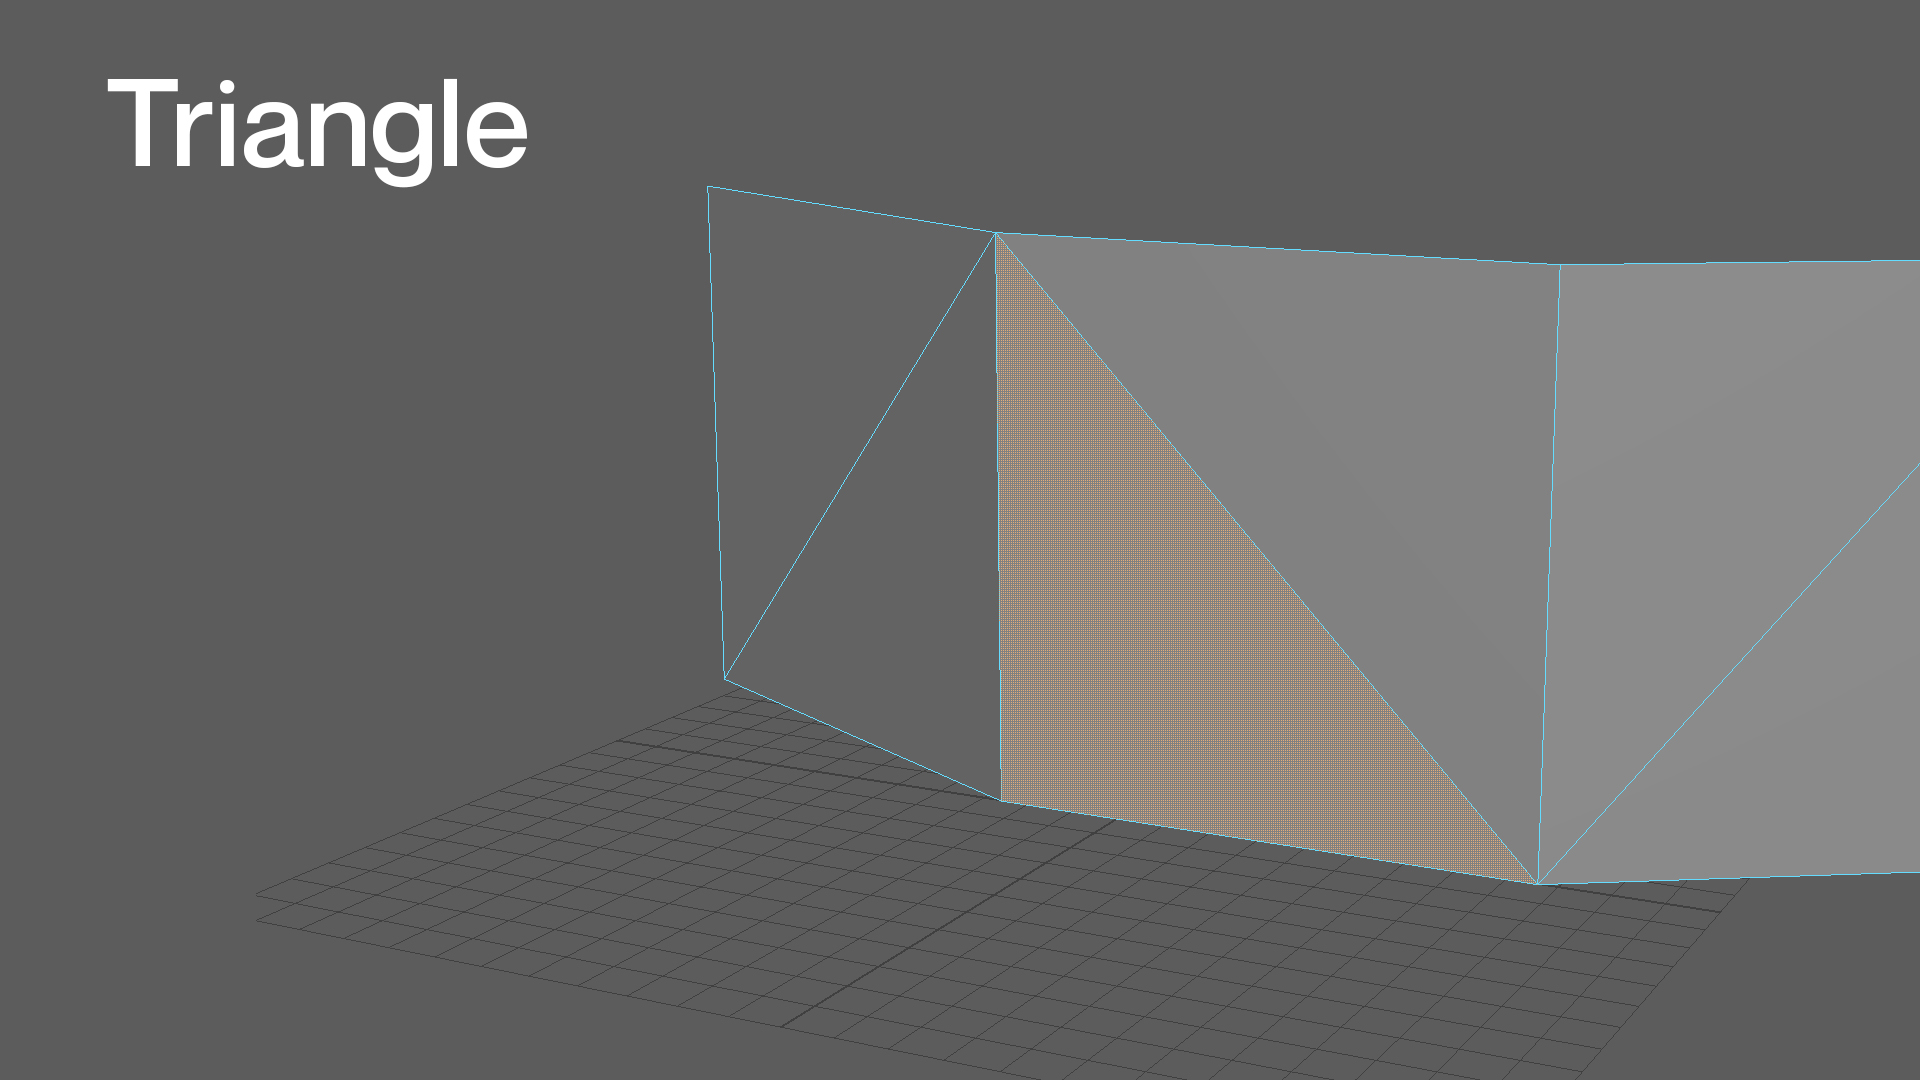
A triangle is the simplest polygon comprising three sides or edges connected by three vertices, making a three-sided face. When modelling, triangles are a polygon type that is often avoided. When creating complex meshes, triangles tend to pose problems when subdividing geometry to increase resolution and when a mesh will be deformed or animated.
Quad
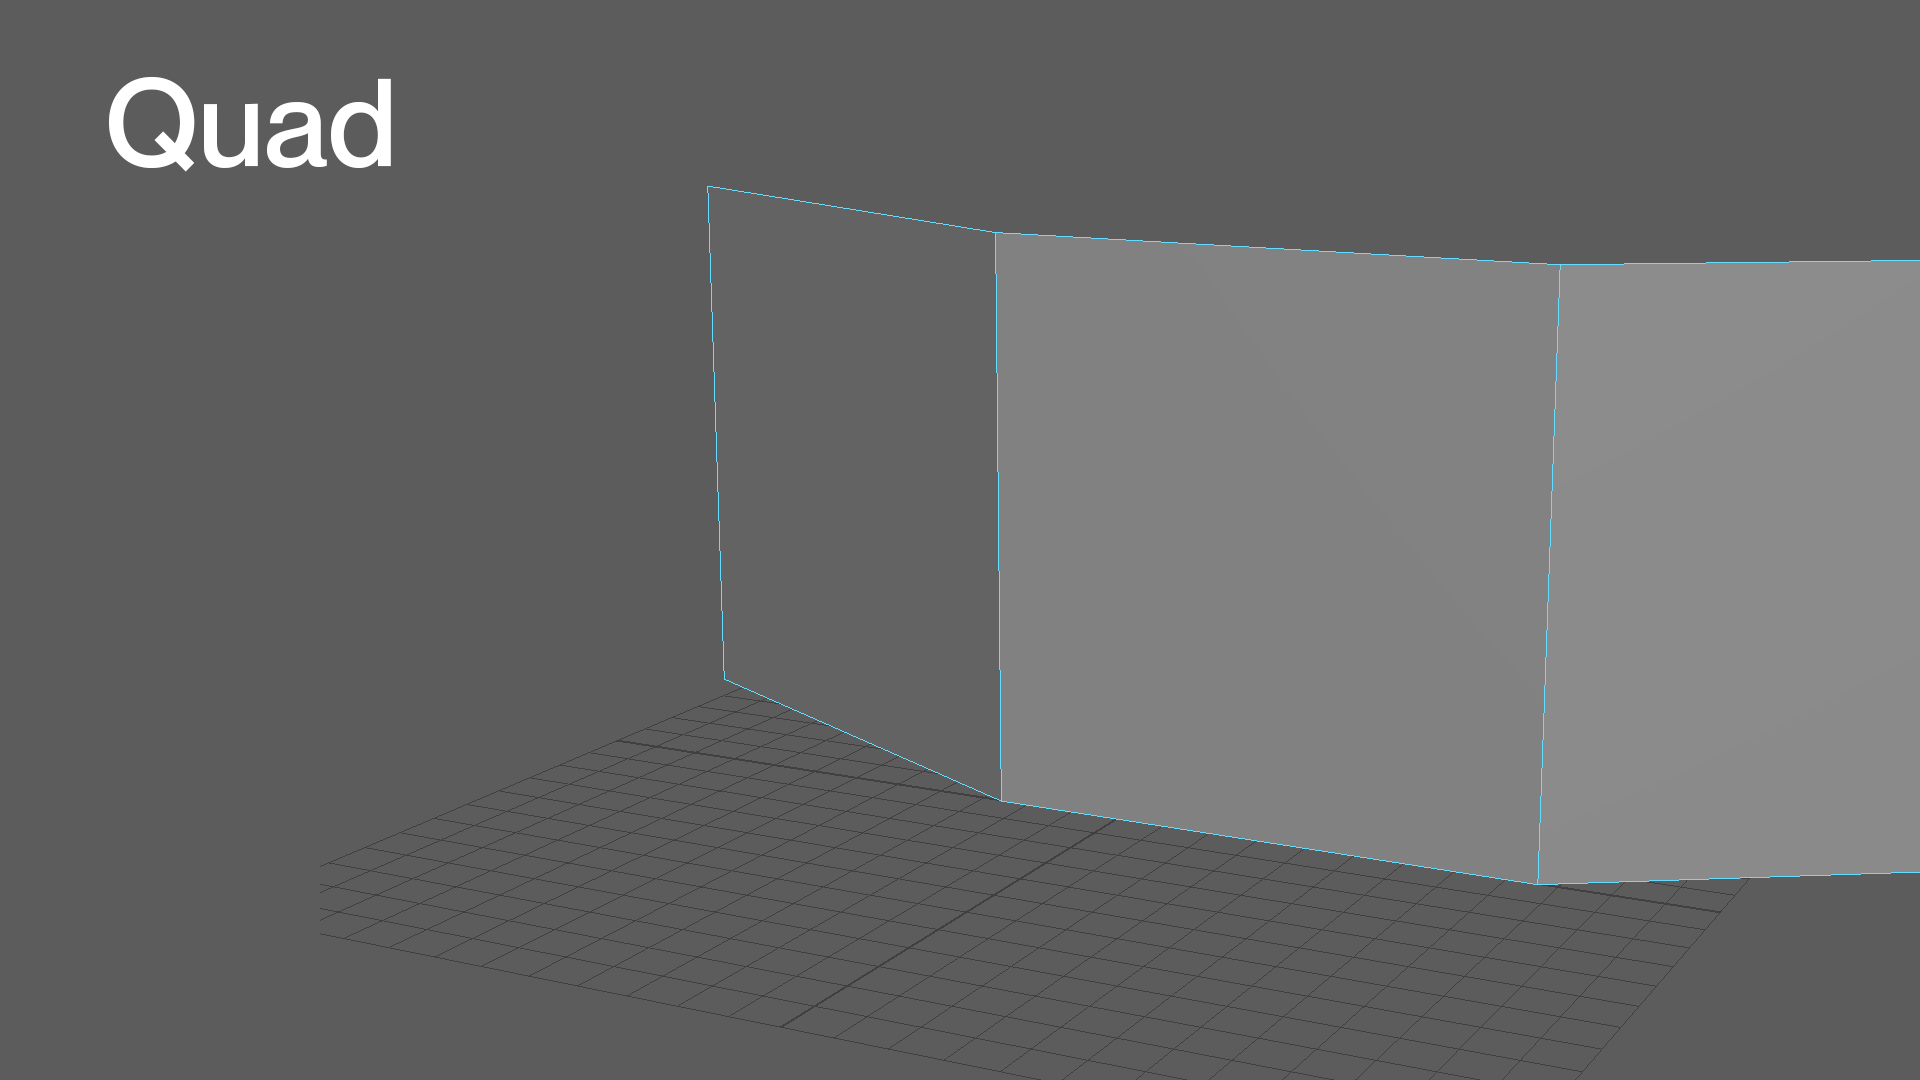
A quad is a polygon of four sides or edges connected by four vertices, making a four-sided face. Quads are the polygon type you'll want to strive for when creating 3D models. Quads will ensure your mesh has a clean topology and that your model deforms properly when animated.
N-gon
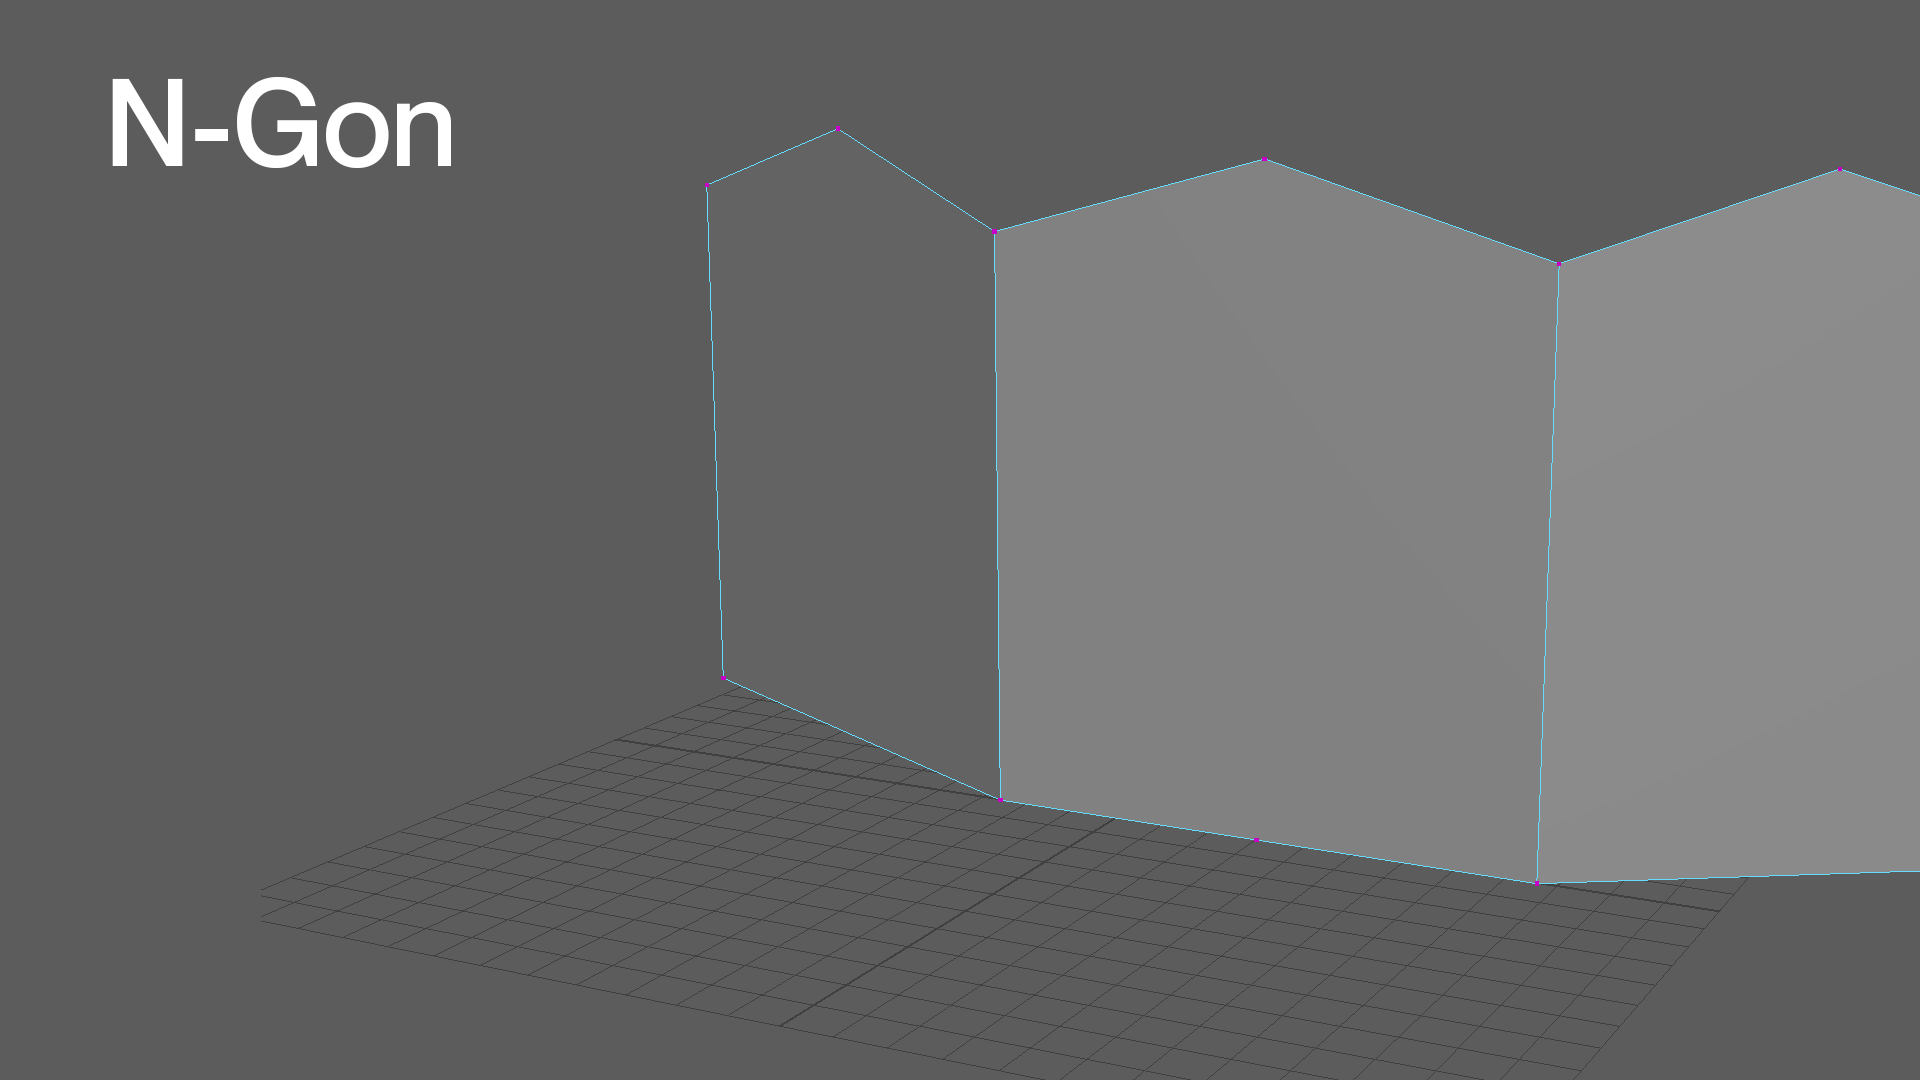
An n-gon is a polygon comprising five or more sides or edges connected by five or more vertices. It is important to remember that an n-gon is typically related to a five-sided polygon but is not limited to just five sides. An n-gon should always be avoided; they often pose problems during render time, texturing, and especially when deforming for animation.
Extrude
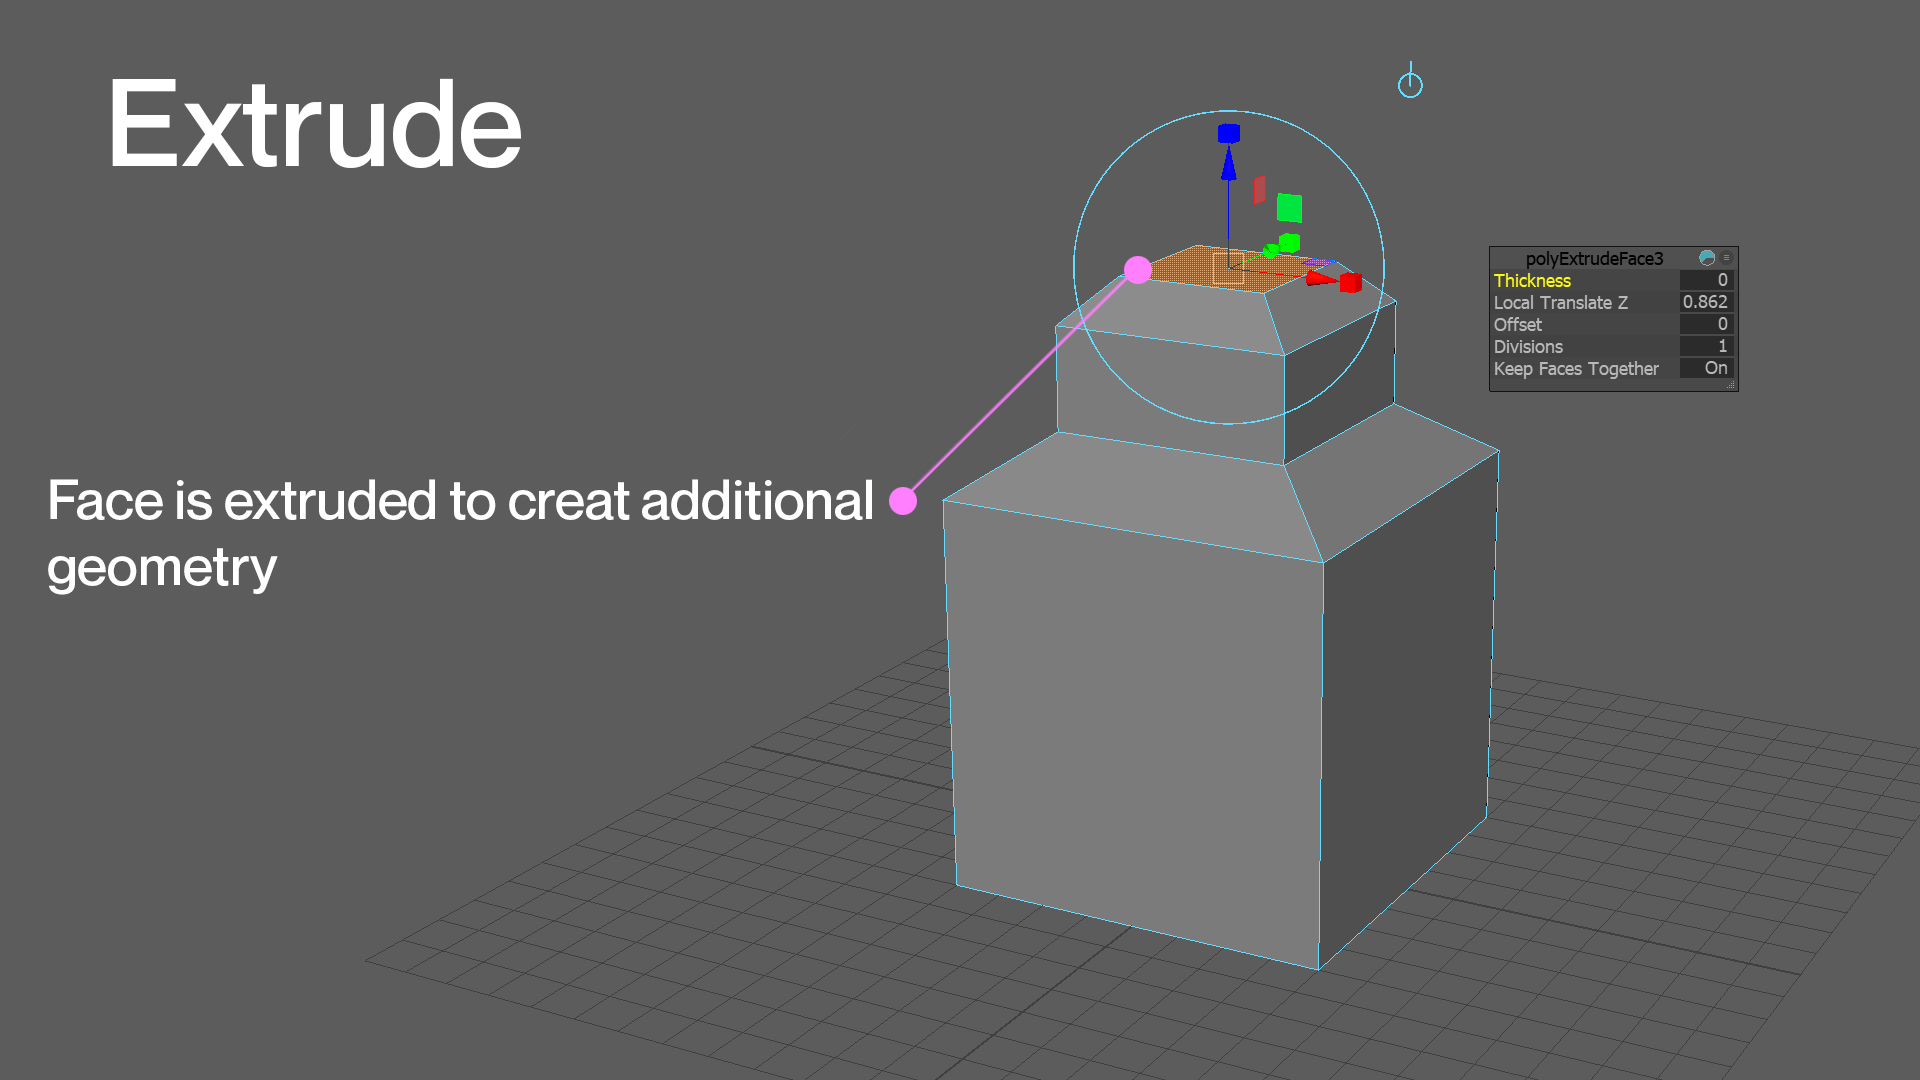
Extruding is one of the primary ways of creating additional geometry on a mesh. The extrude command allows you to pull out extra geometry from a face ('polygon' in 3Ds Max), edge or vertex. For instance, you can use the extrude command on the face of a simple cube to pull out the geometry needed to create fingers. These additional extrusions can be edited and manipulated just like any other area of the mesh.
Edge loop
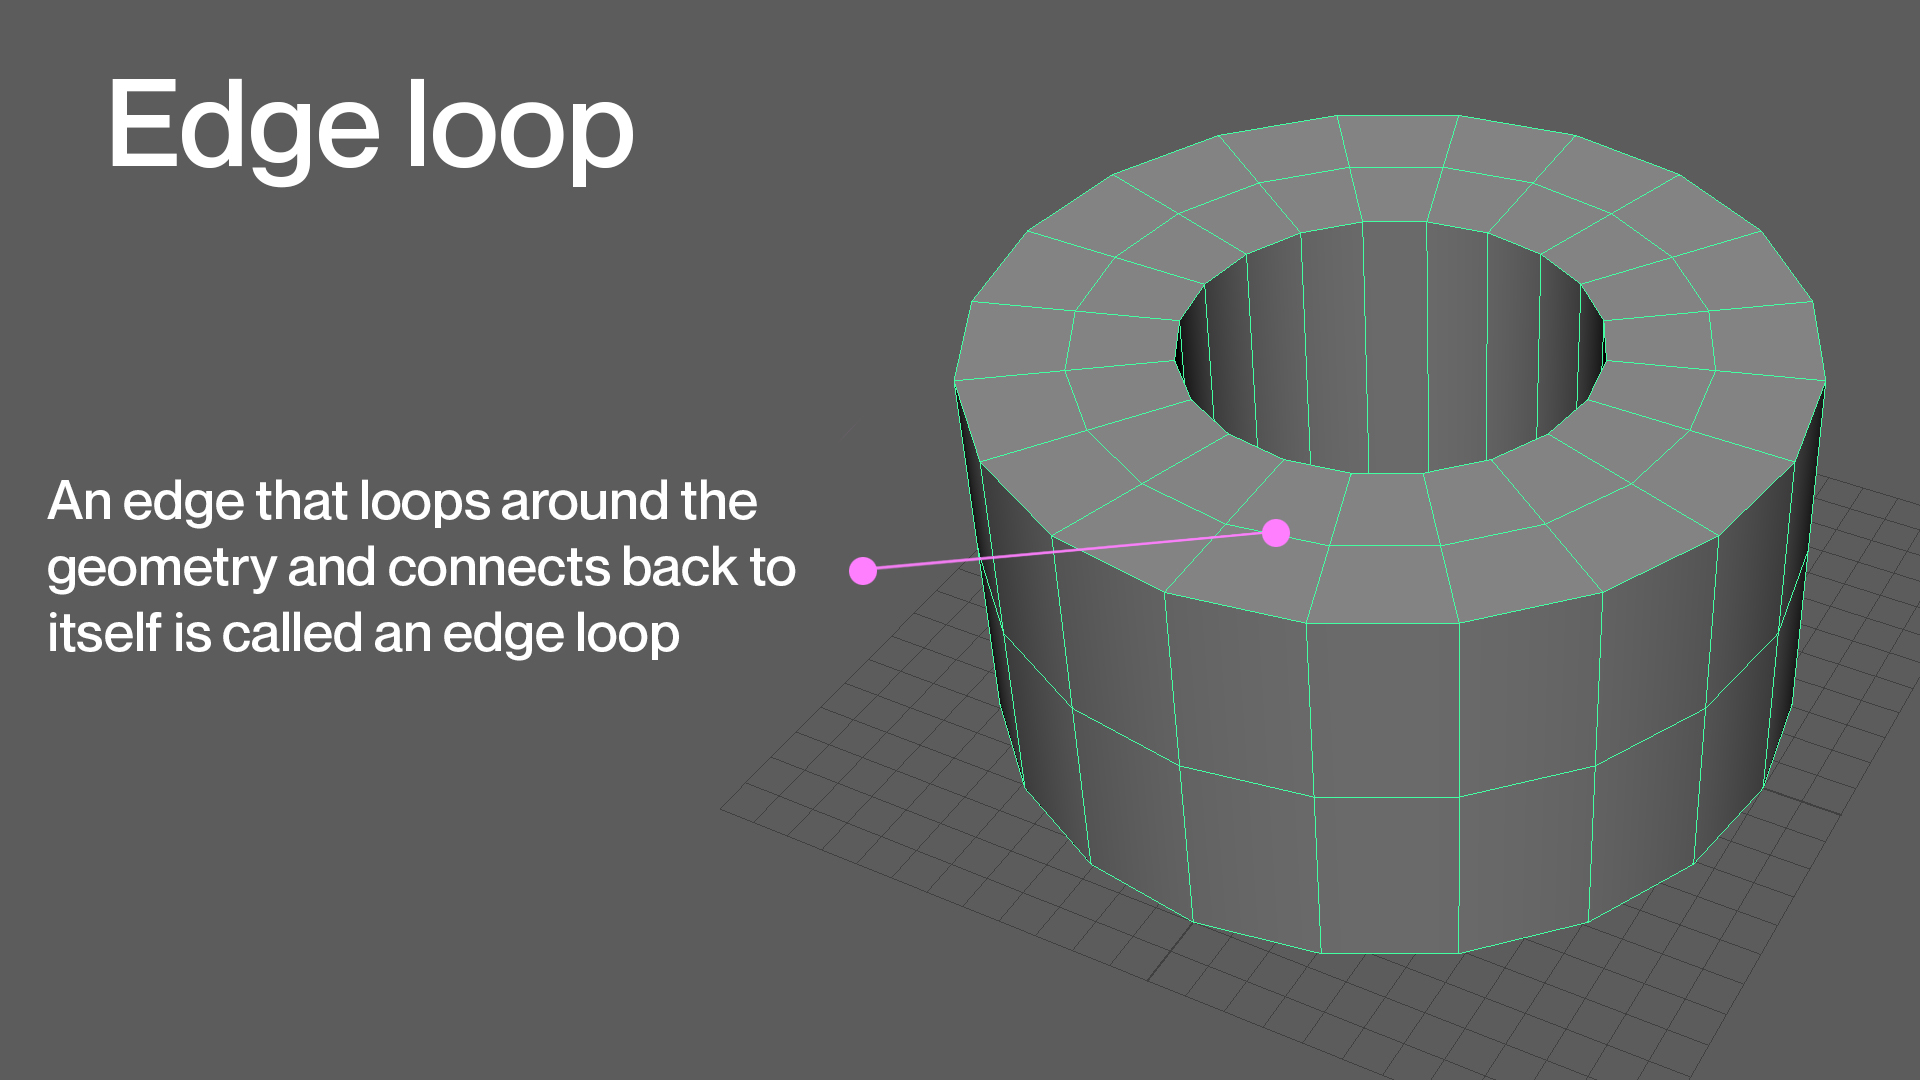
An edge loop is a series of edges connected across a surface, with the last edge meeting up with the first edge, creating a ring or loop. Edge loops are especially important for maintaining hard edges in a mesh and for more organic models. For example, for an arm to deform properly, there will need to be edge loops on each side of the elbow joint so that there is enough resolution.
Bevelling
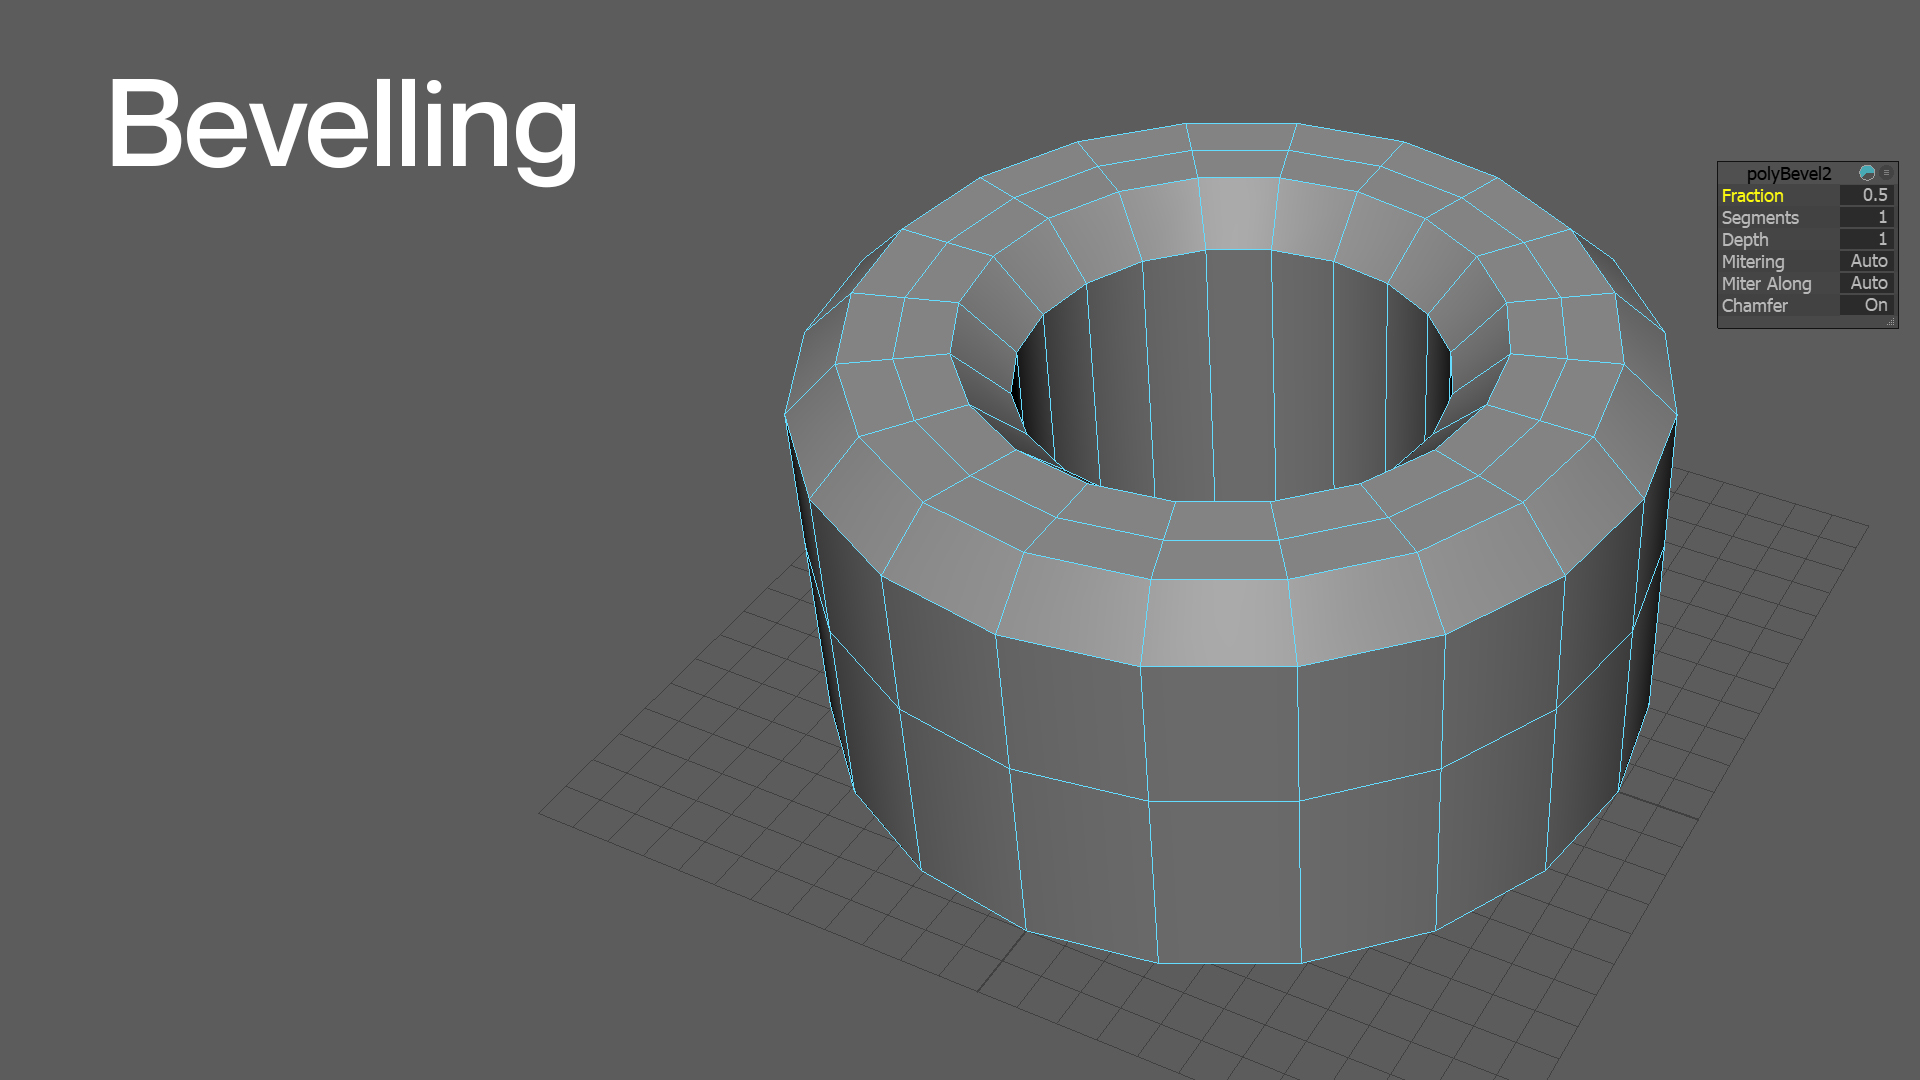
Bevelling is the process of chamfering or creating rounded edges on a mesh. Bevelling expands each vertex and edge into a new face. In the real world, objects rarely have completely hard edges. So, bevelling is required to lose some of the computer-generated look that comes with 3D modelling.
Pivot point
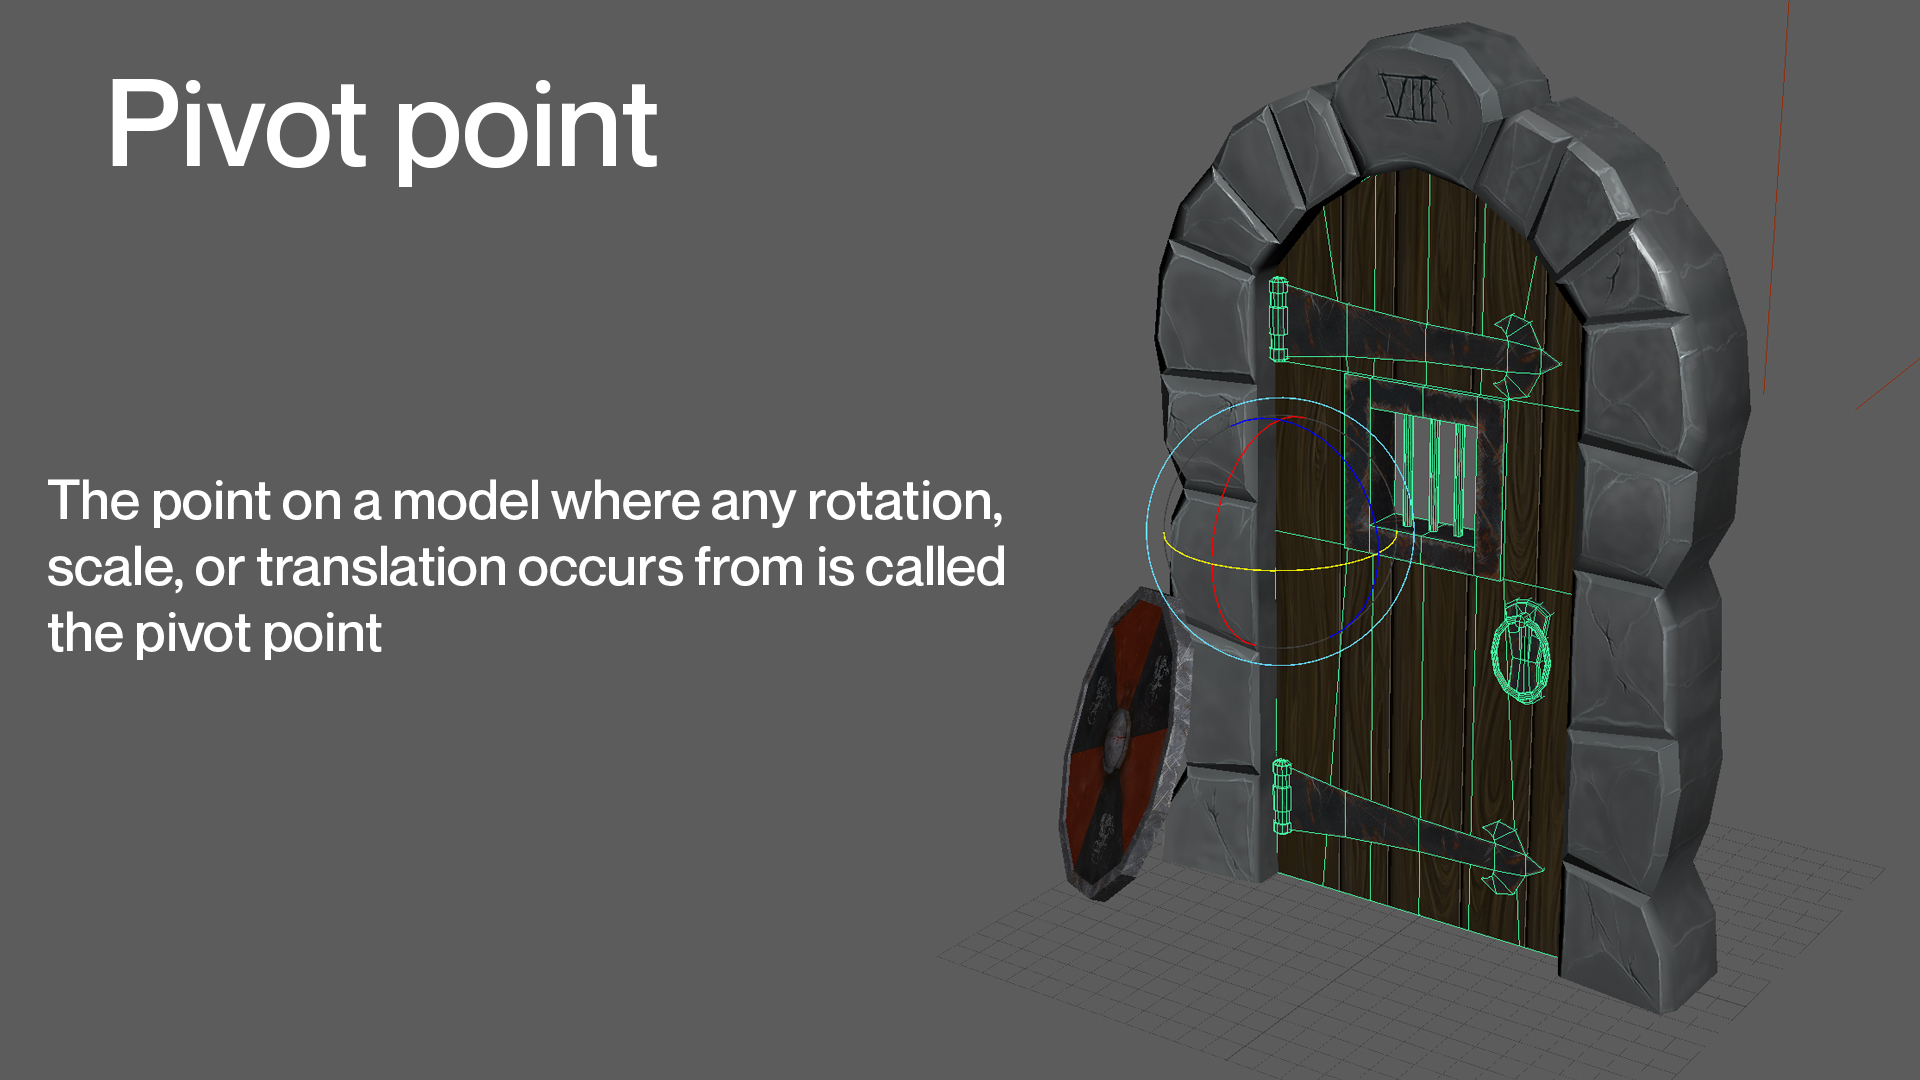
The pivot point is the point on a 3D object from which any rotation, scale, or move you do will occur. This pivot point can be moved to any position on the model. For example, placing the pivot point on the hinges of a door will tell the computer where it should rotate from.
Instances
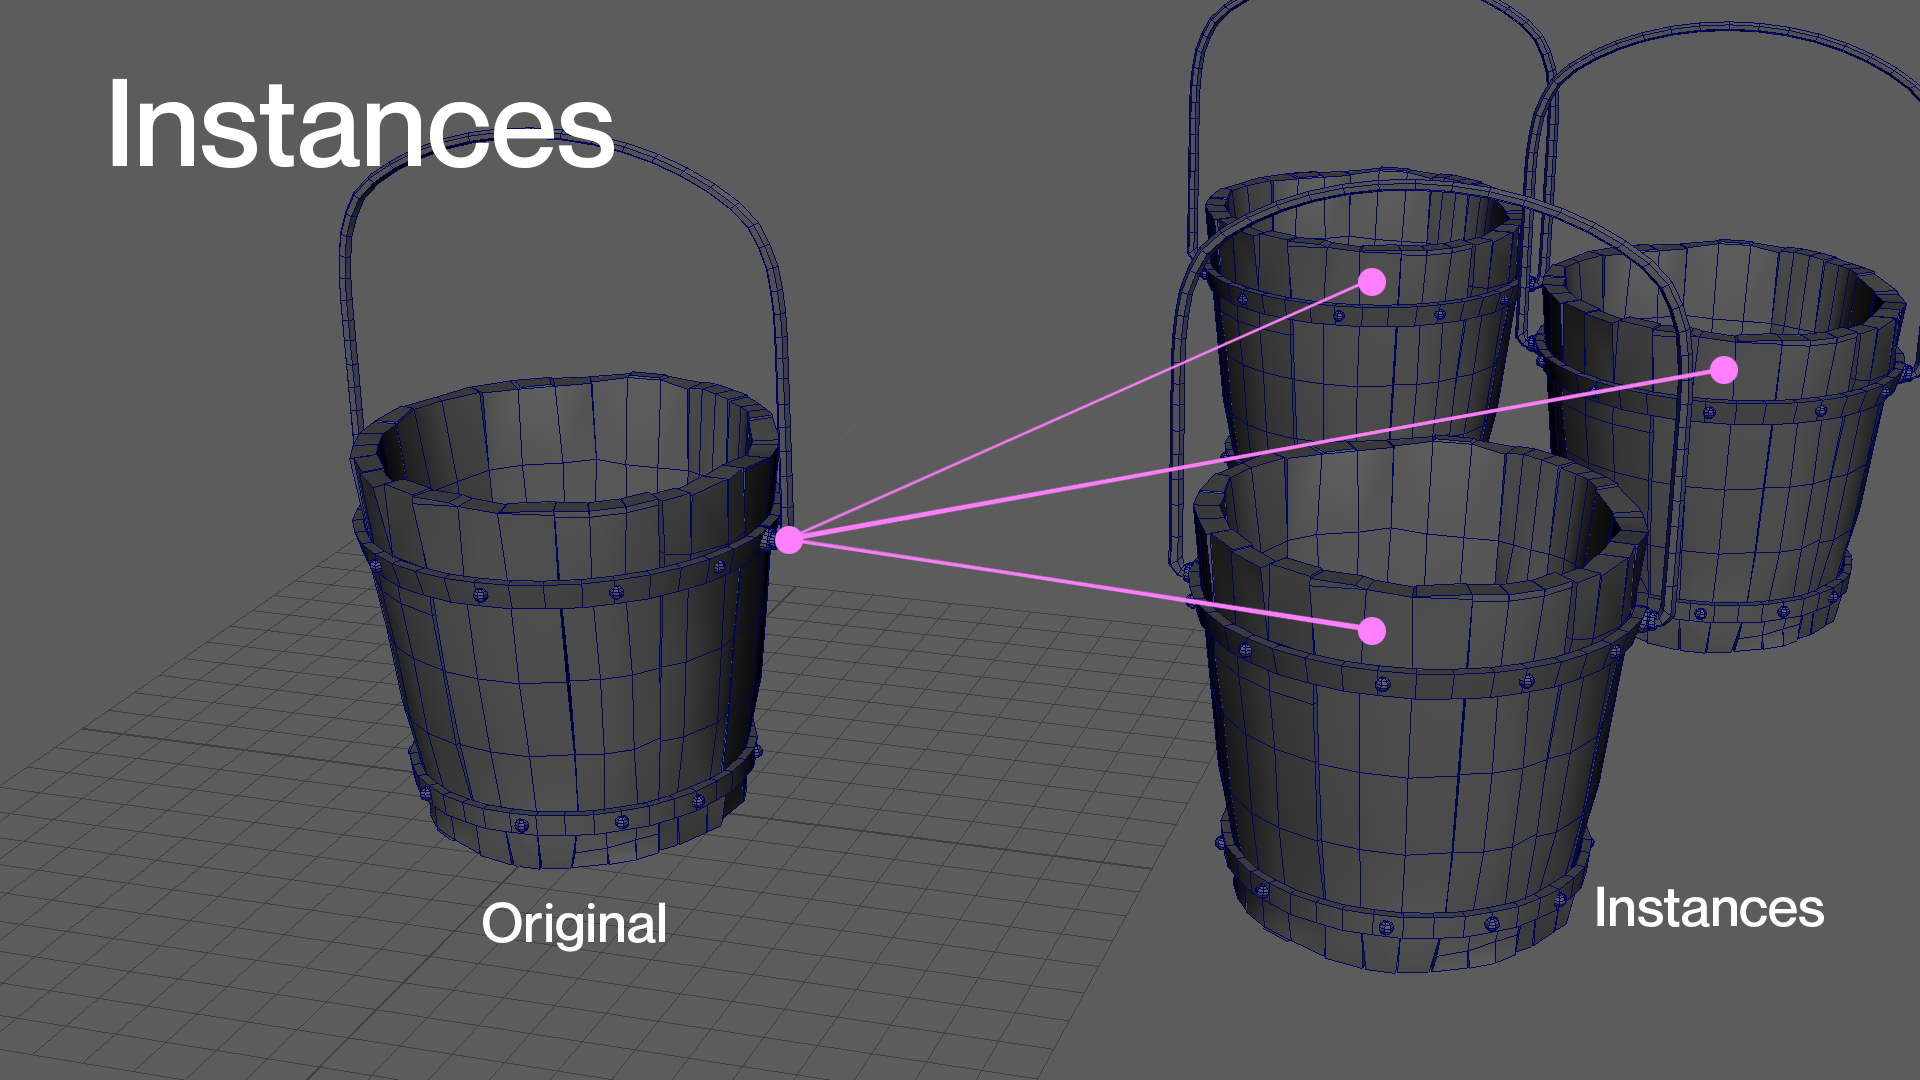
When working with a 3D set, you will often need to create duplicates of a single object, whether it's hundreds of trees or fence posts. Doing this, however, can greatly increase render time because the computer must calculate all this new geometry. You can create an instance instead of creating a duplicate of an object.
Instances are copies of objects that derive all their information from the original object; the computer must calculate the geometry for the original object only. It is important to remember that you cannot edit an instance's shape on its own. If you edit the shape of the original object, all the instances update to reflect that change.
Construction history
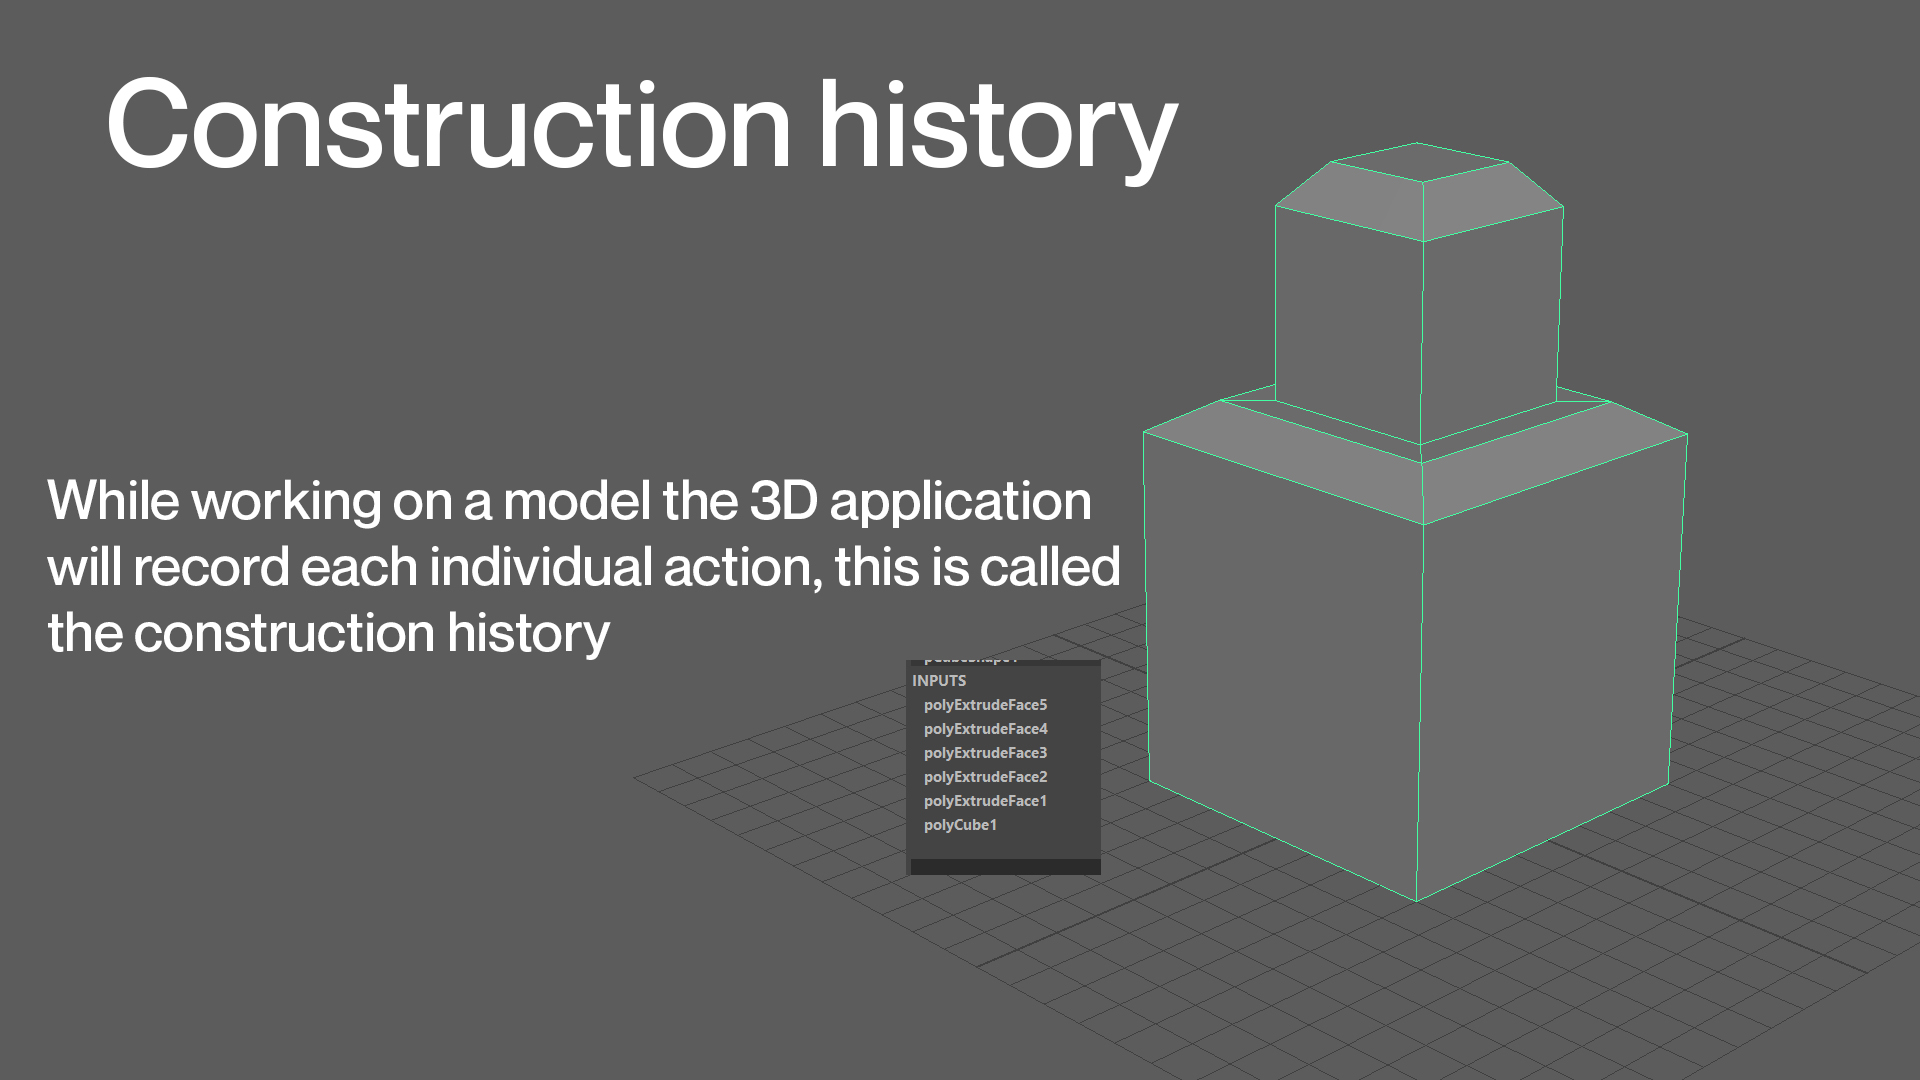
While working on your 3D models, you will likely use many tools to achieve the desired result. For example, you may need to extrude many faces or bevel the model's edges to create a particular shape. Most 3D applications keep track of all these actions in the construction history.
The construction history lists every tool you've used on your 3D model in the order you used them. If you need to go back and adjust the settings of a tool you used, you can find it in the construction history. Keep in mind that as your construction history starts to stack up, it will slow down your computer, so you will need to delete your construction history periodically.
Digital sculpting
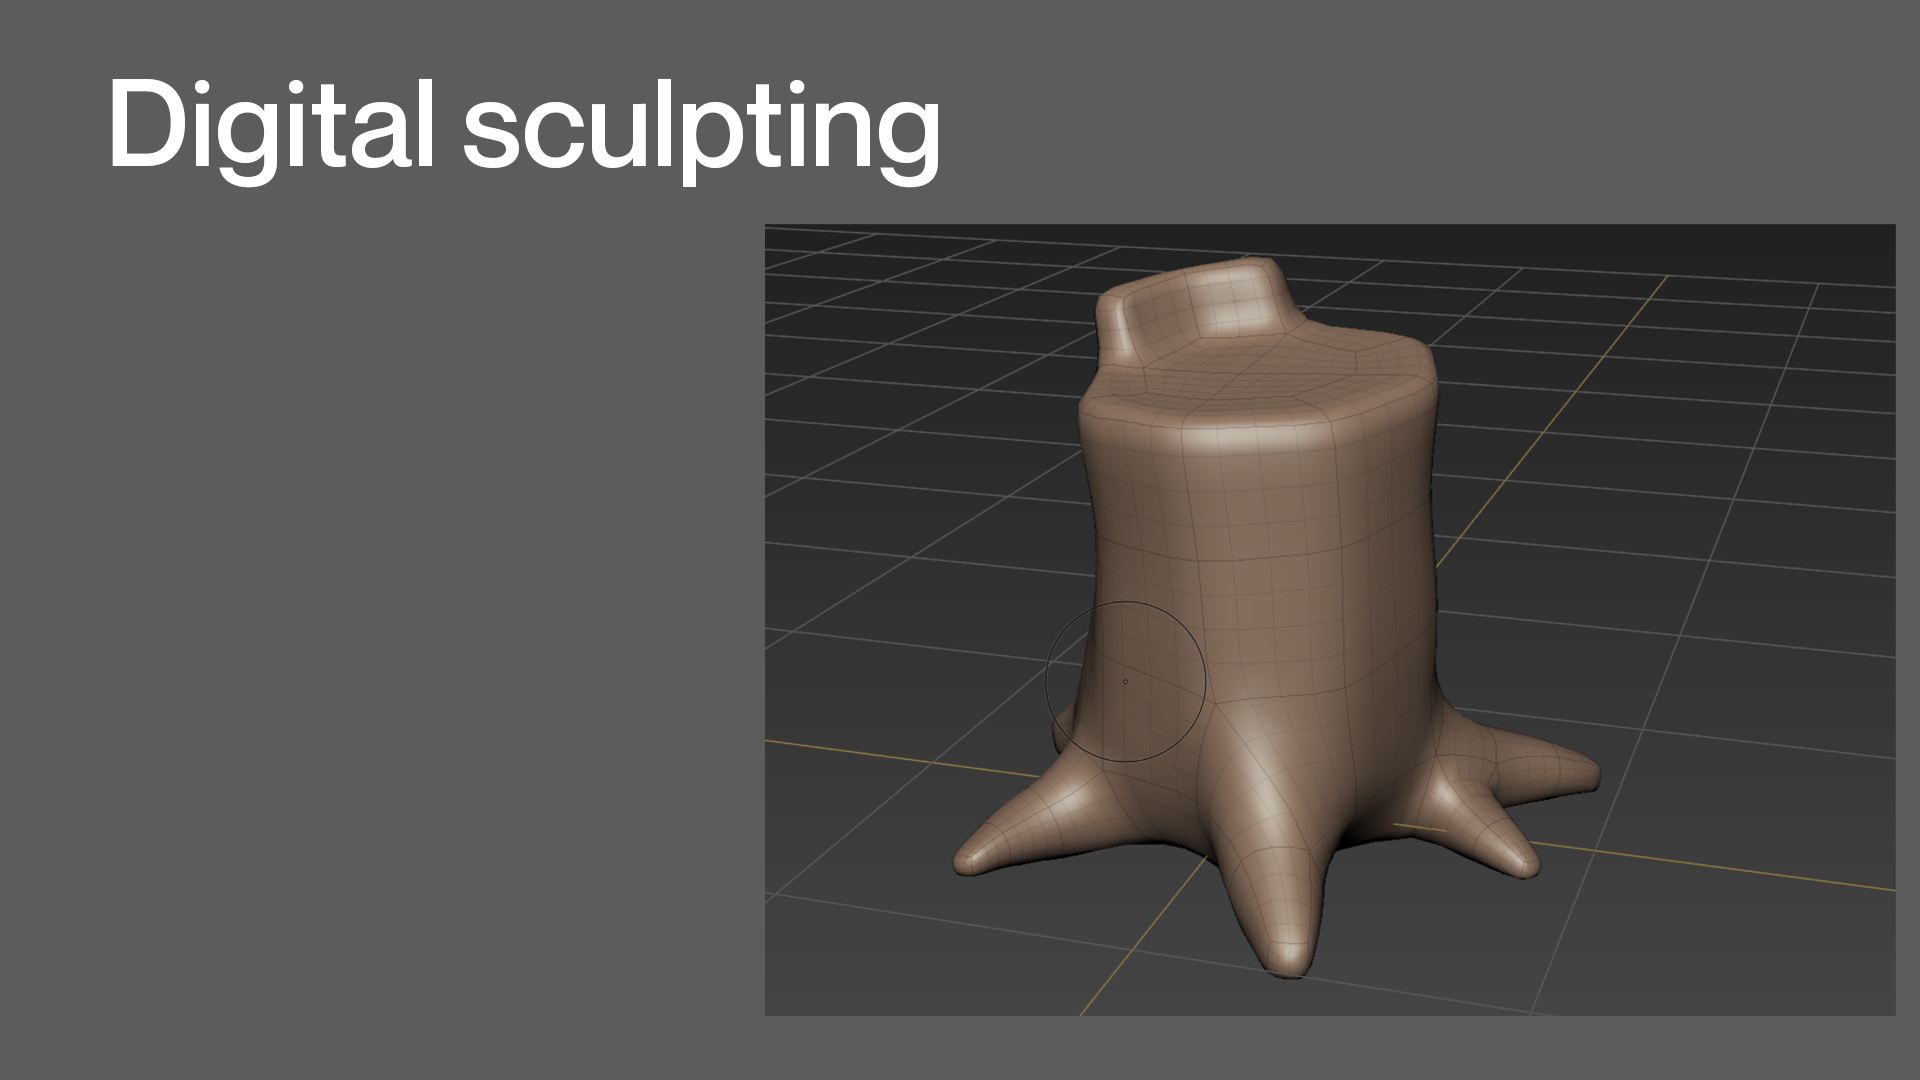
Creating 3D models in an application like Maya includes manipulating vertices and edges to get the desired look. While this works, it can be hard to get the fine detail that is often required, especially in organic models. Digital sculpting works around this issue by allowing you to create your 3D meshes in much the same way as a traditional sculptor would.
You can interactively push and pull areas of your model out. You can create details like wrinkles and scratches without ever having to select an edge or vertex. Often, a modeller will create the low-resolution base mesh in a program like Maya and import that into digital sculpting applications like ZBrush or Mudbox to be able to create those finer details.
Check what you know about modelling terminology
Use the quiz below to test your knowledge of modelling terminology to help ensure you're on the right track, and identify areas where you may need to revisit the subtopic.
Practice
Task 1: Check your knowledge - Modelling Terminology
Get ready to put your modelling terminology knowledge to the test! This quiz is designed to help reinforce your understanding and is not part of the formal assessment process. So, treat it as a valuable tool to gauge your progress and identify areas for improvement.
You'll encounter a variety of question formats, including multiple-choice and true or false. Ensure you approach each question with a critical eye and draw on your learning to choose the best answers.
What steps should you take to complete this knowledge check?
- This quiz has 13 questions. Read each question carefully. Make sure you understand what is being asked before attempting an answer.
- Provide the most accurate and complete answers you can. If a question stumps you, make an educated guess based on your knowledge.
- Don't let difficult questions discourage you. Stay confident and do your best. Remember, it's a learning opportunity and not a formal assessment!
- Once you've reviewed your answer and are satisfied, select the 'Check button' to see if you chose the correct answer. You can also retry questions and show solutions.
- Good luck, and enjoy the challenge!
What should you do after completing this knowledge check?
Building a solid understanding of Maya terminology, and in this case, modelling terminology, is crucial for enhancing your animation skills. Take the time to practice the concepts covered in this knowledge check.
Remember, continuous learning and practice are key!
Now that you have developed an understanding of modelling terminology, it is time to increase your knowledge about texturing terminology.
Texture mapping
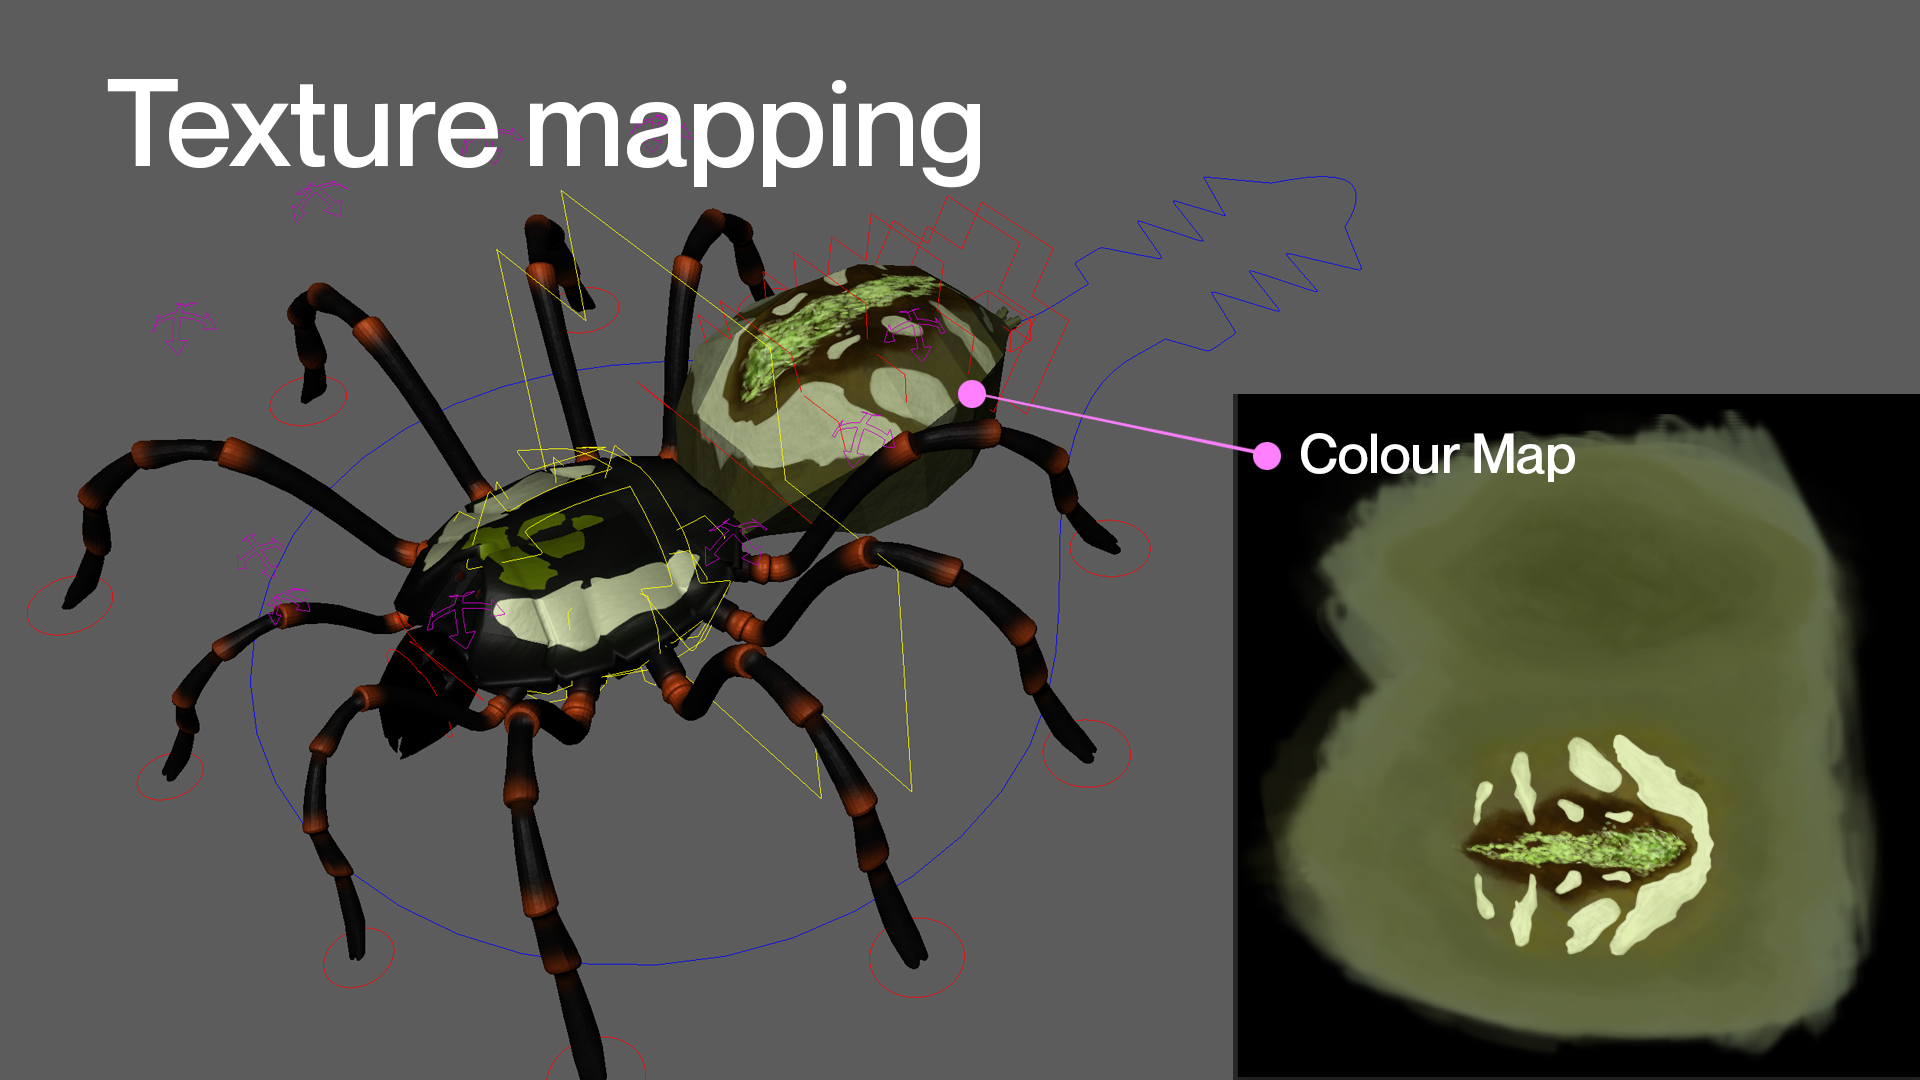
You need to use texture mapping to create a surface resembling real life. This process is like adding decorative paper to a white box. In 3D, texture mapping is the process of adding graphics to a polygon object. These graphics can be anything from photographs to original designs. Textures can help age your objects and give them more appeal and realism.
Shaders
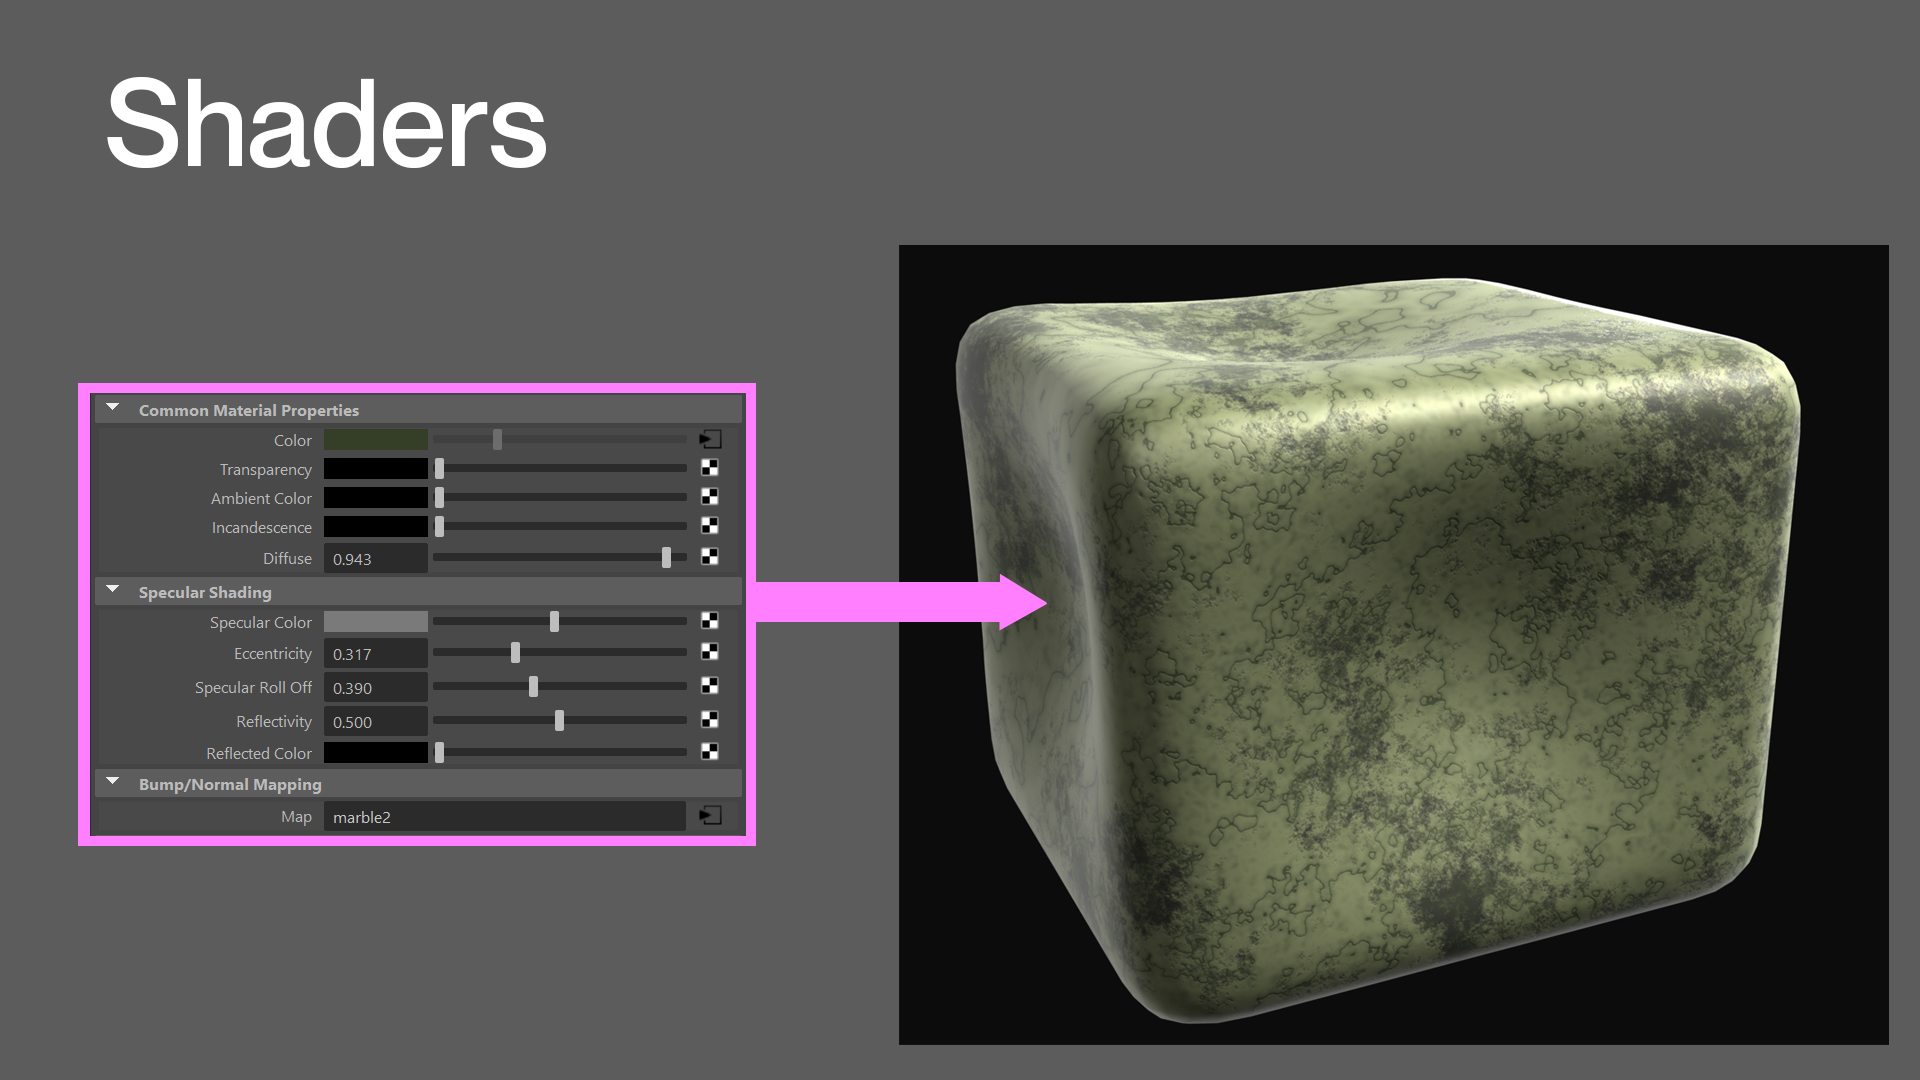
A shader describes the entire material on an object, how the light is reflected, how it is absorbed, translucency, and bump maps. Shaders and textures can often be confused, but a texture is something that gets connected to a shader to give the 3D object its finished look.
UV mapping
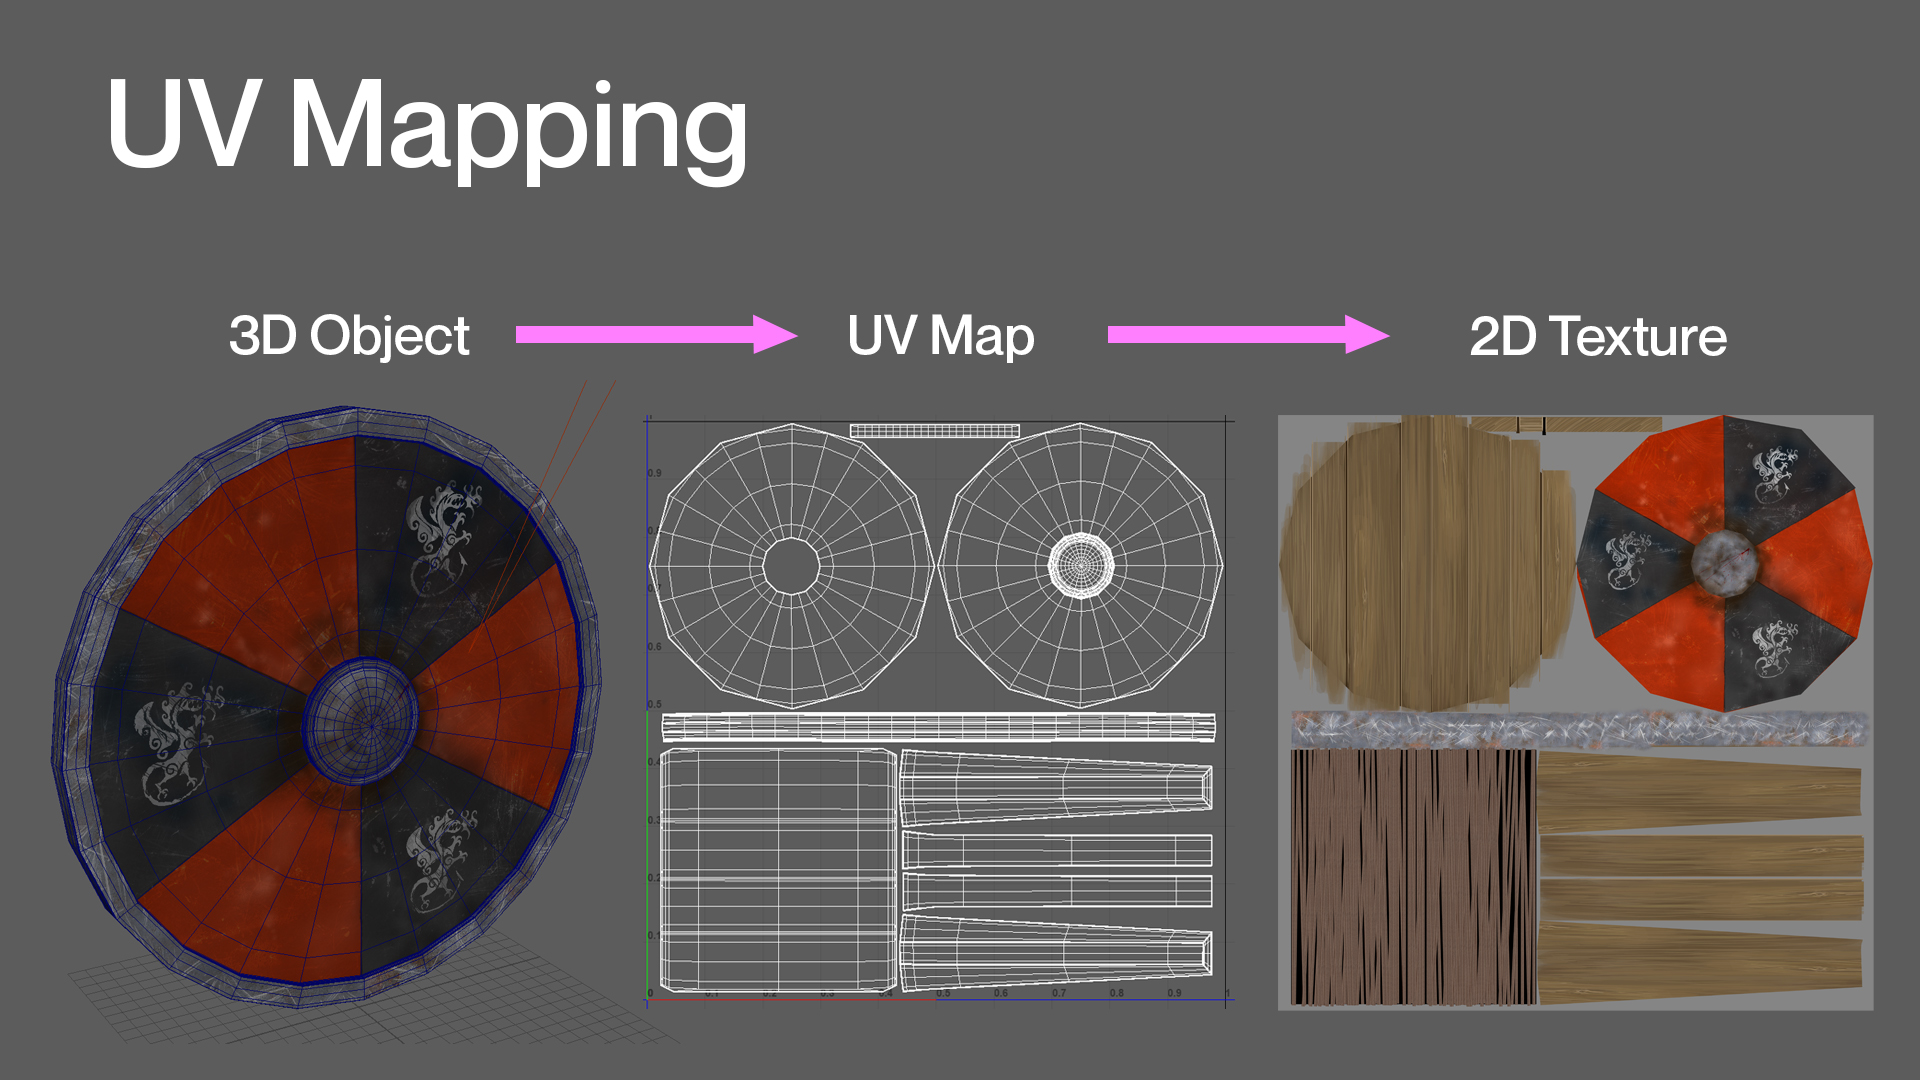
A 3D object has many sides, a computer doesn't know how to correctly put a 2D texture onto a 3D object. A UV map is a 3D model stretched out into a flat 2D image. Each face on your polygon object is tied to a face on the UV map. Placing a 2D texture onto this new 2D representation of your 3D object is much easier.
Specularity
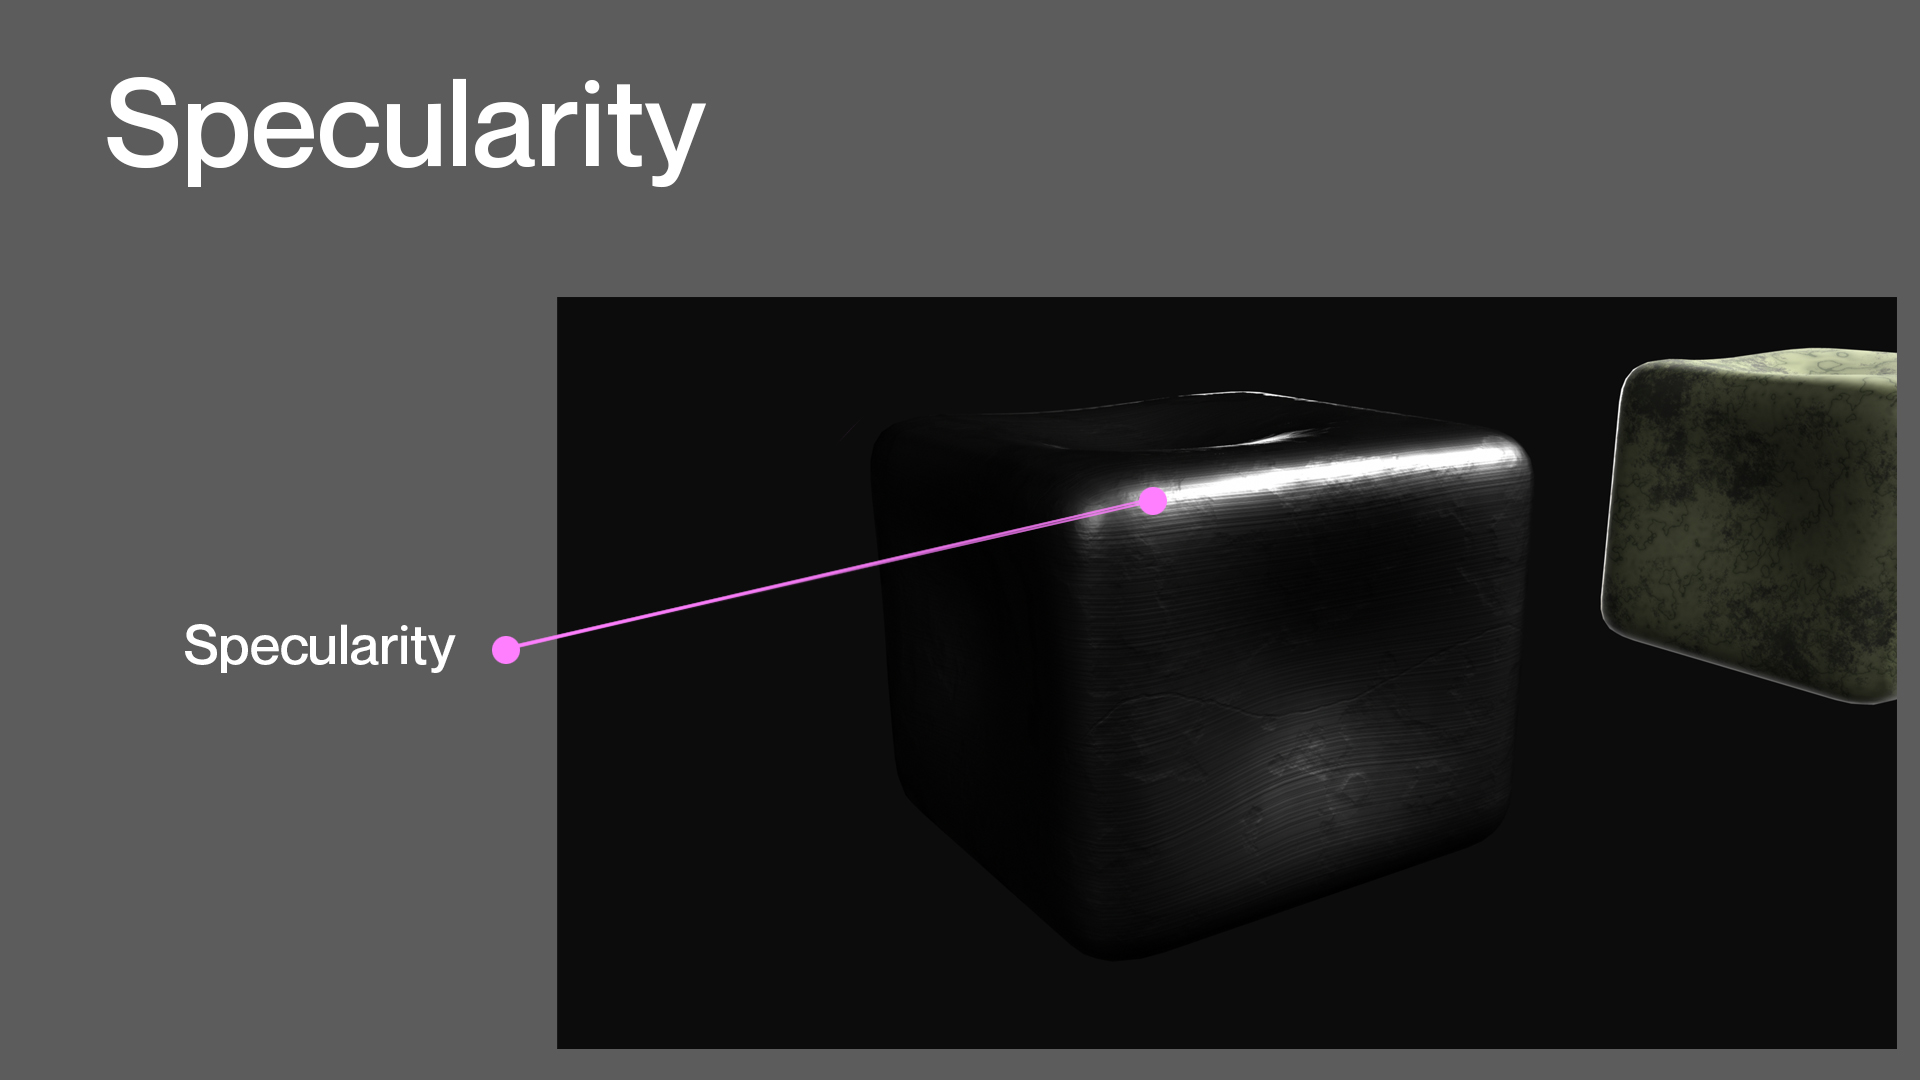
Specularity defines how a surface reflects light. It is the texture's reflection of the light source and creates a shiny look. Having the right specularity is important in defining what the 3D object's material is made from. For example, a shiny metal material will have a high level of reflectivity. In contrast, a flat texture like cement will not.
Normals
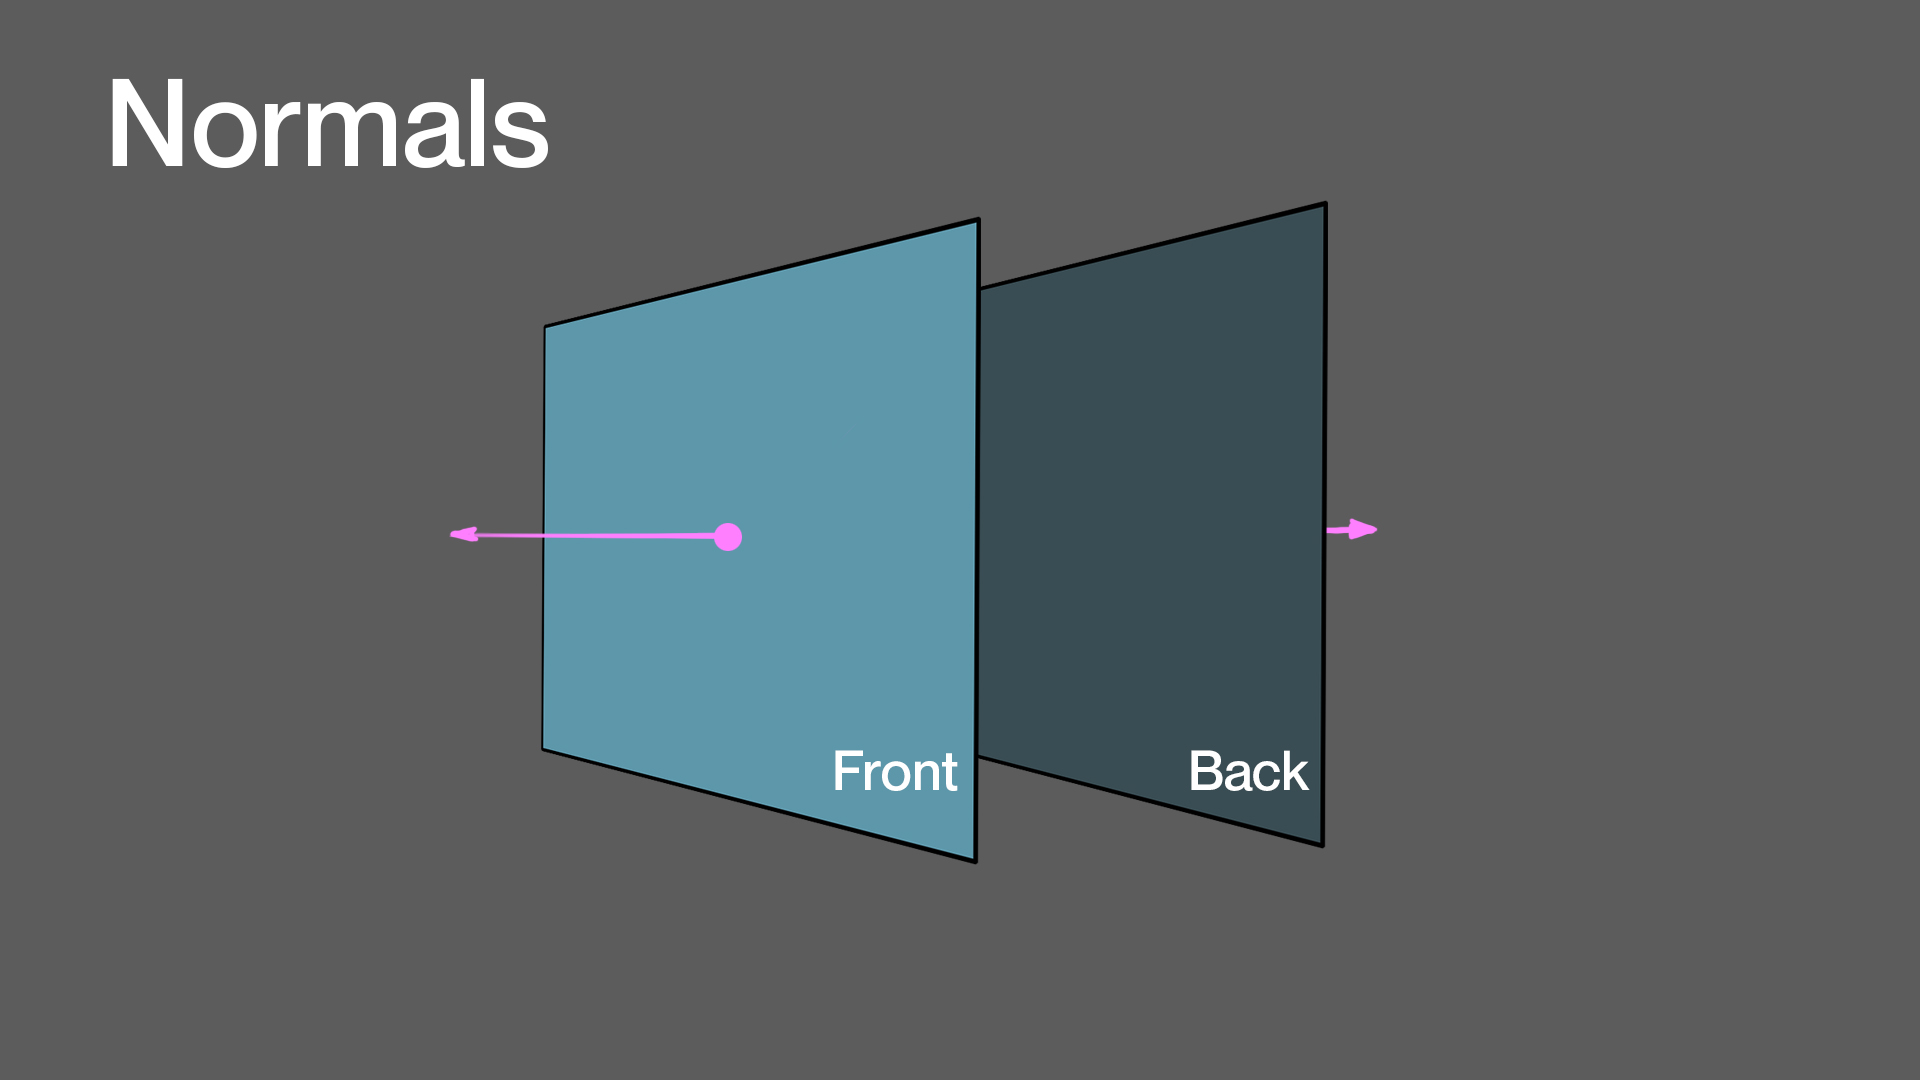
A normal is an invisible line that points straight out from a polygon face or NURBS patch. These normals help the 3D application determine which side of a surface is the front and which side is the back. Correct normal orientation is important, especially when rendering, because a render engine will often not render backward facing normals.
Bump maps
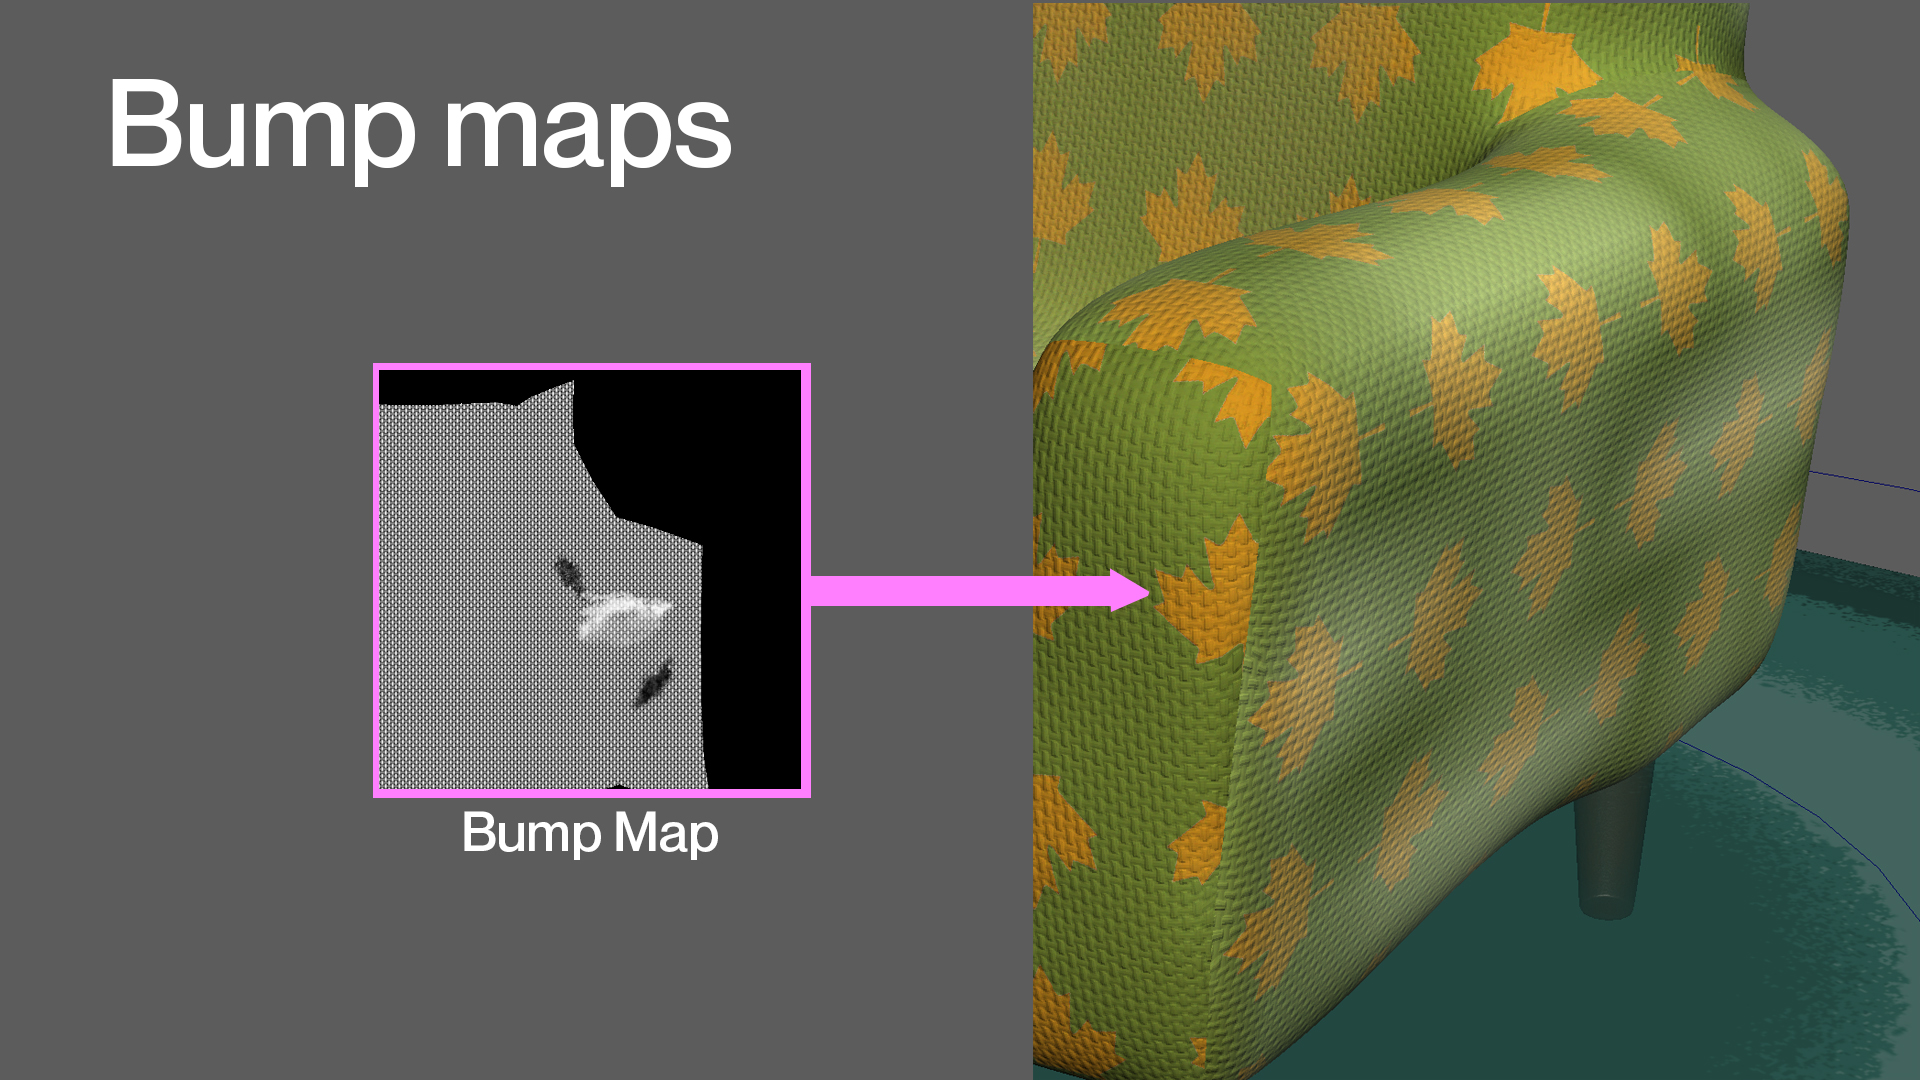
A bump map gives the illusion of depth or relief on a texture without significantly increasing render time. For example, a bump map can fake the raised surface on a penny. The computer determines where areas on the image need to be raised by reading the graphic's black, white, and grey scale data.
Transparency maps
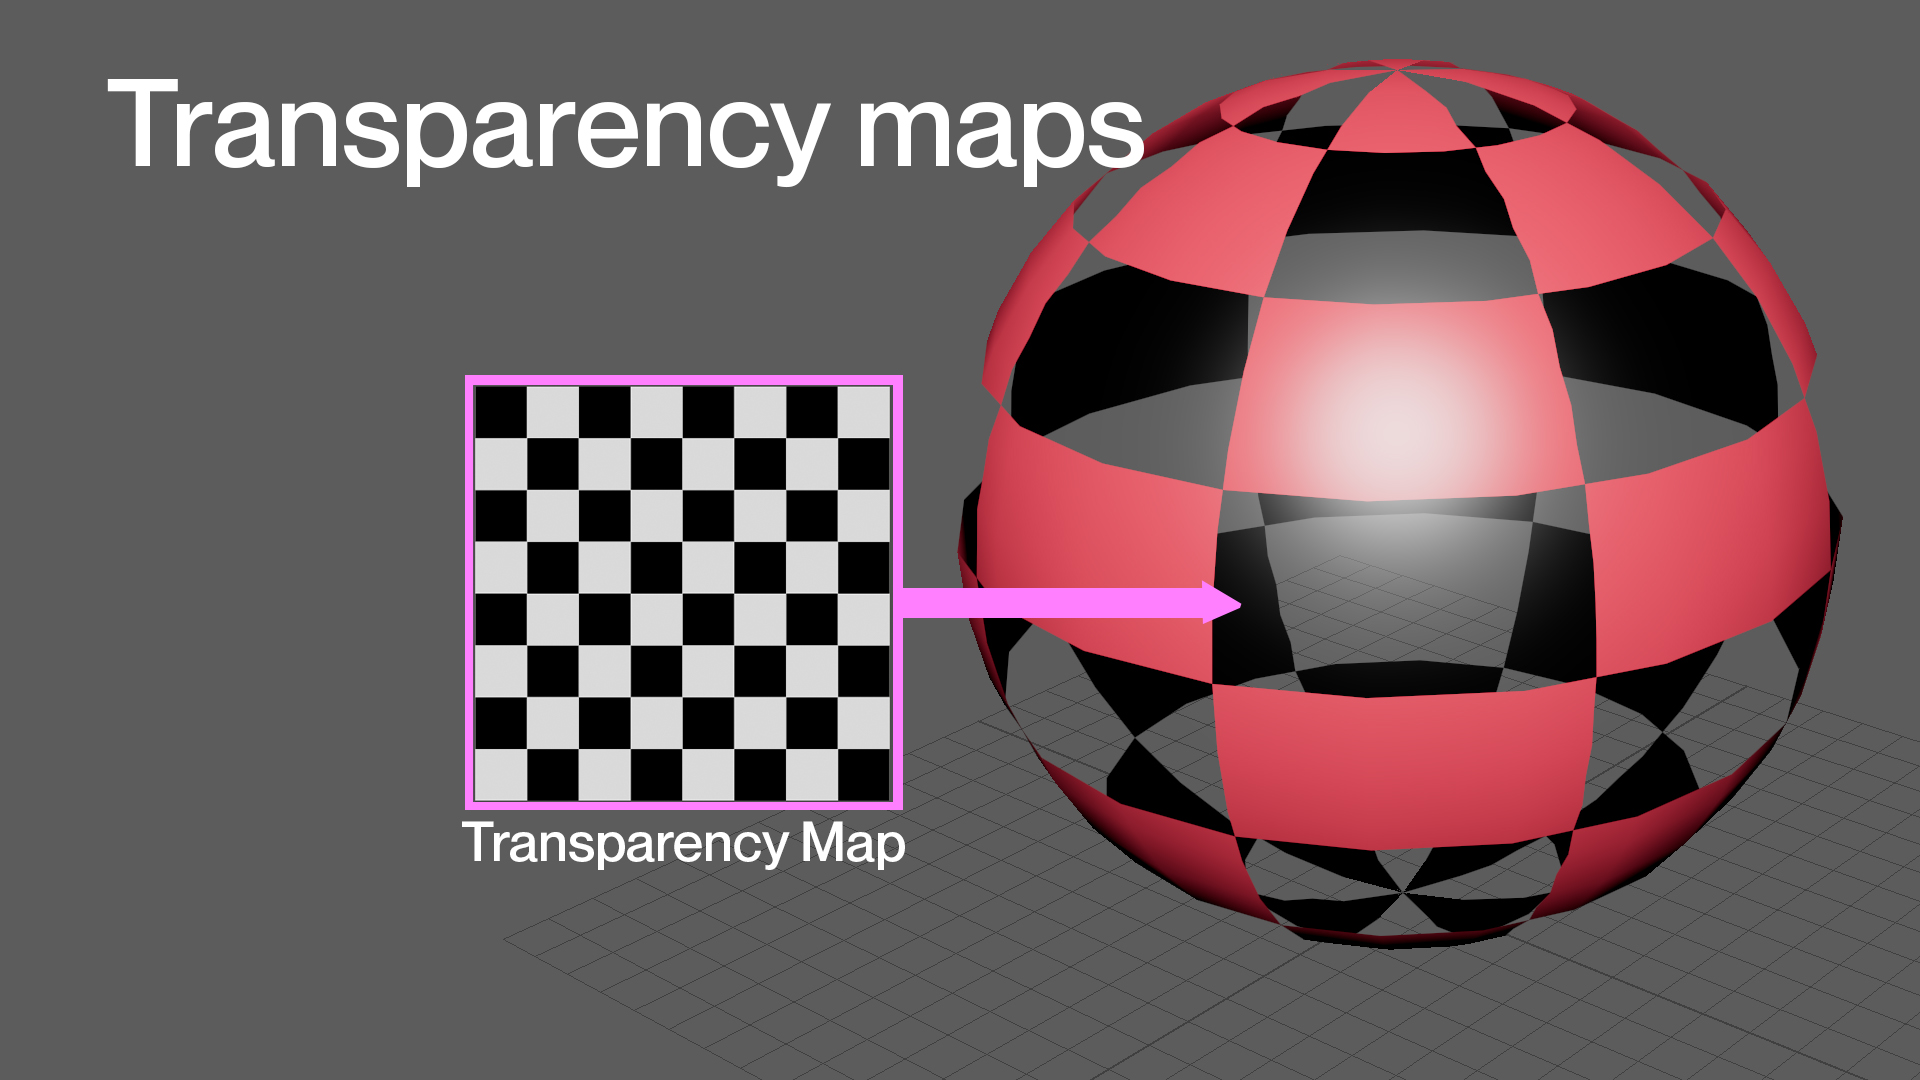
Transparency maps are grey-scale textures that use black-and-white values to signify areas of transparency or opacity on an object's material. For example, when modelling a fence, instead of modelling each chain link, which would take a significant amount of time, you can use a black-and-white texture to determine what areas should stay opaque and what should be transparent.
Normal maps
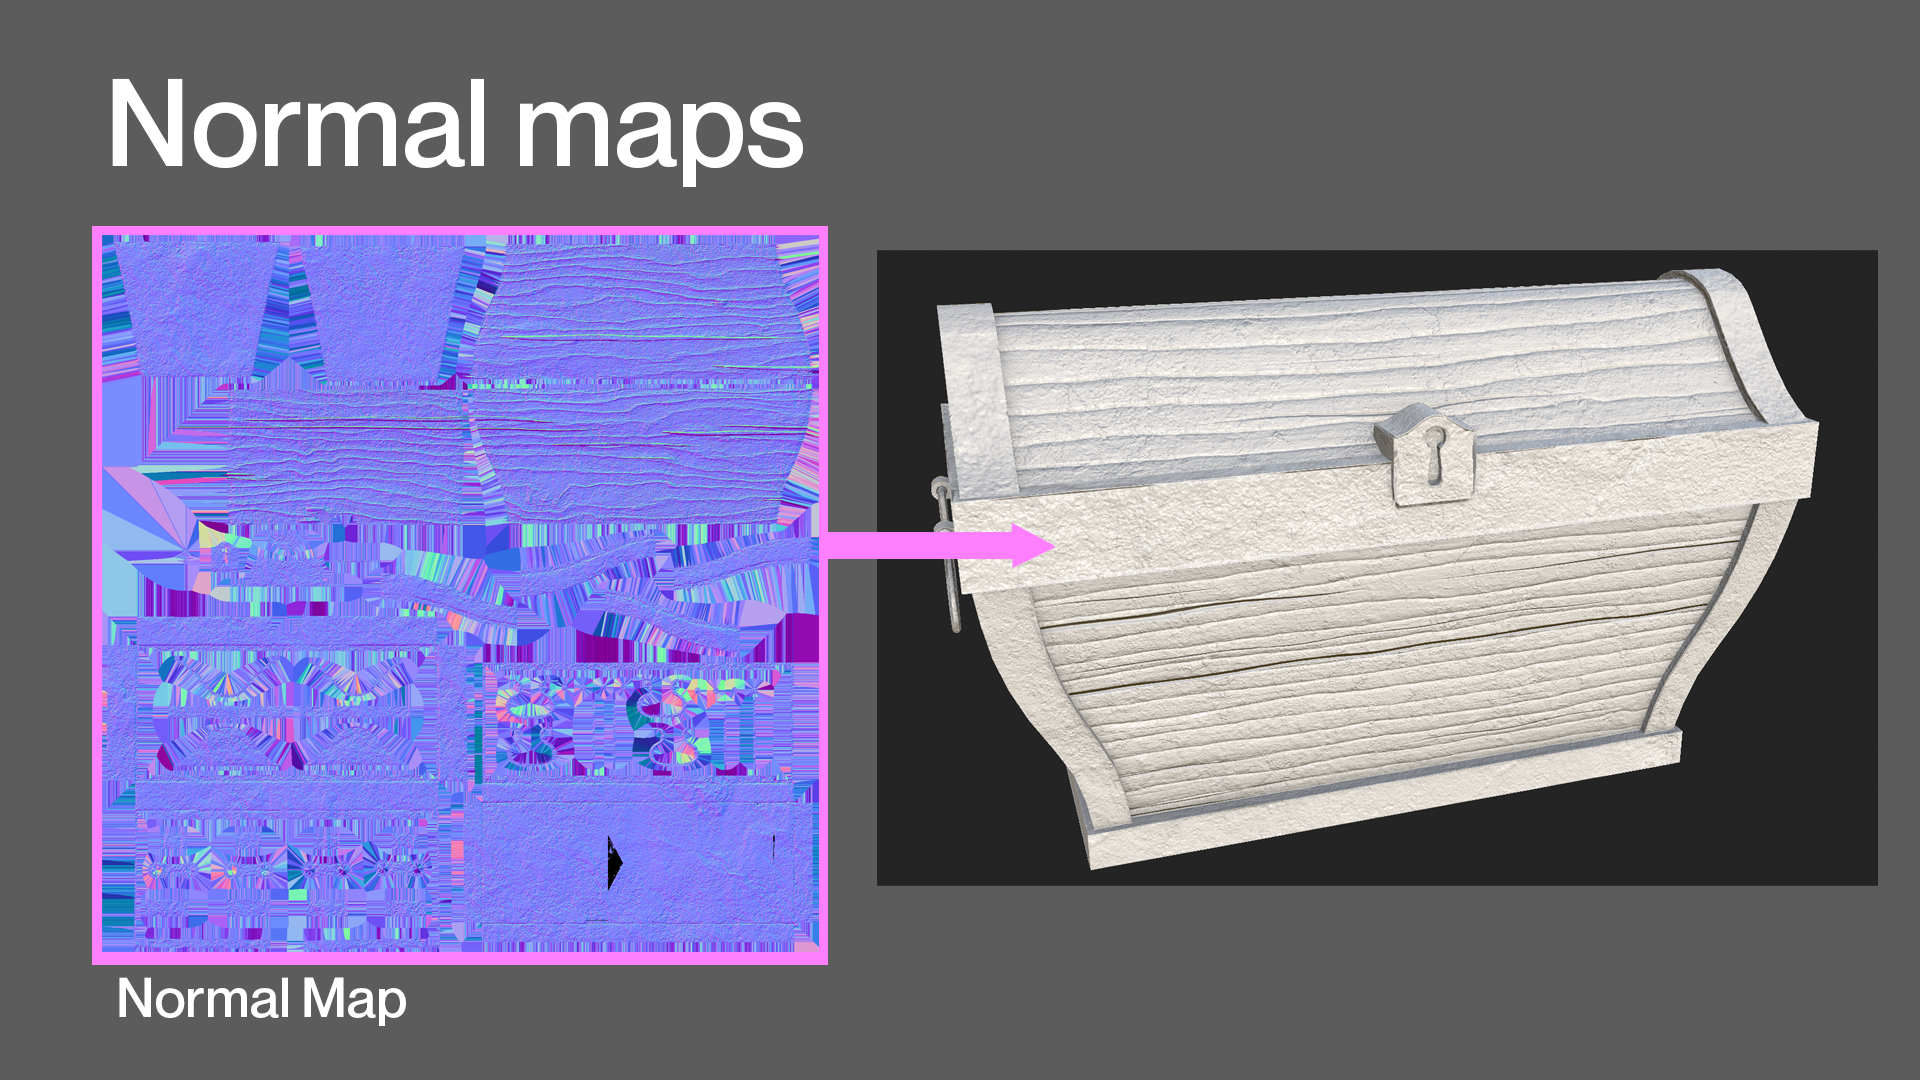
A standard map creates the illusion of detail without relying on a high poly count. For example, a character can be detailed into a sculpting program like ZBrush, and all the information can be baked onto a normal map and transferred to a low poly character, giving the illusion of detail without increasing the actual poly count for the model. Game studios, for example, utilise normal maps often because they need to stay within a tight polygon budget but still need a high level of detail.
Normal maps vs. Bump maps
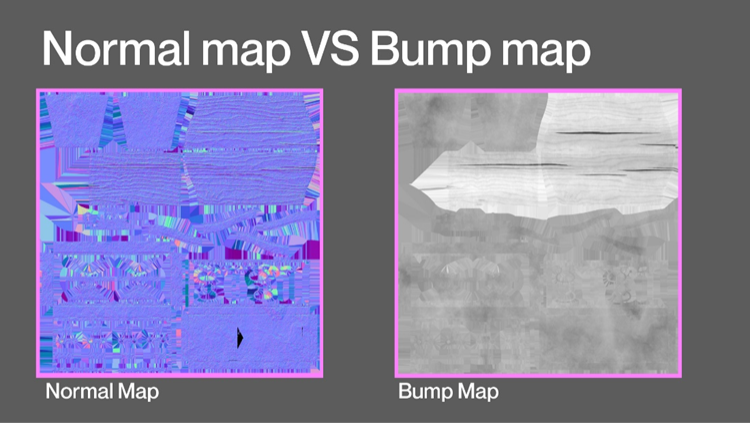
Normal maps and bump maps are similar in that they both affect the normals of your geometry and create the illusion of detail without relying on extra geometry. The big difference is that bump maps encode height information using black-and-white values. In contrast, normal maps use RGB values to signify the orientation of the surface normals. The information in the normal map's red, green and blue channels corresponds with the surface's X, Y and Z orientation. Normal maps can typically get more detailed information onto the surface.
Baking
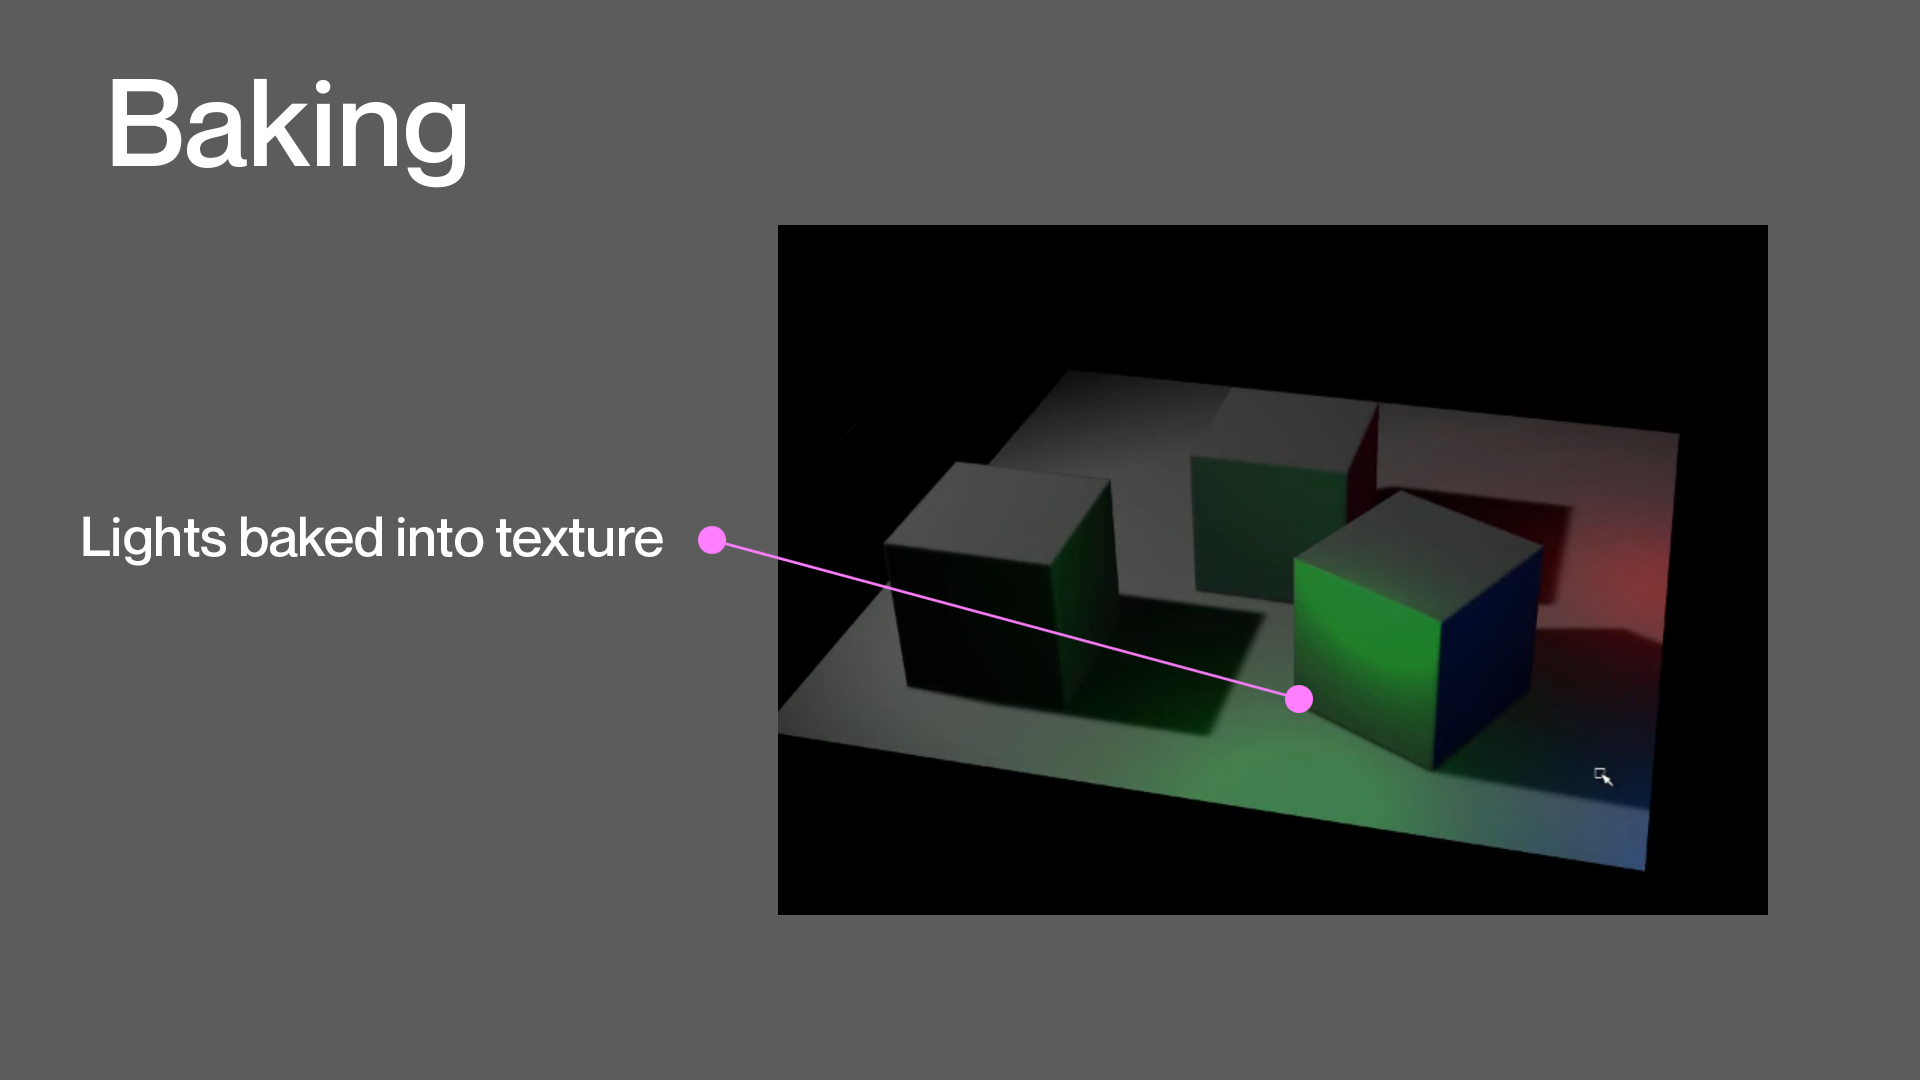
In your typical 3D scene, you will want to shade, texture and light objects to create the exact look you want, and then you render. To shorten render times, you can bake all the materials, textures and illumination information into an image file. For instance, you could bake all the lighting information directly onto an existing texture, render it once, and then delete the actual lights used in the scene. This is great for games because a light must be recalculated in every new frame.
Check what you know about texturing terminology
Use the quiz below to test your knowledge of texturing terminology to help ensure you're on the right track and identify areas where you may need to revisit the subtopic.
Practice
Task 2: Check your knowledge - Texturing Terminology
Get ready to put your texturing terminology knowledge to the test! This quiz is designed to help reinforce your understanding and is not part of the formal assessment process. So, treat it as a valuable tool to gauge your progress and identify areas for improvement.
You'll encounter a series of multiple-choice questions. So approach each question with a critical eye and draw on your learning to choose the best answers.
What steps should you take to complete this knowledge check?
- This quiz has 15 questions. Read each question carefully. Make sure you understand what is being asked before attempting an answer.
- Provide the most accurate and complete answers you can. If a question stumps you, make an educated guess based on your knowledge.
- Don't let difficult questions discourage you. Stay confident and do your best. Remember, it's a learning opportunity and not a formal assessment!
- Once you've reviewed your answer and are satisfied, select the 'Check button' to see if you chose the correct answer. You can also retry questions and show solutions.
- Good luck, and enjoy the challenge!
What should you do after completing this knowledge check?
A solid understanding of texturing terminology is crucial for enhancing your animation skills. Take the time to practice the concepts covered in this knowledge check.
Remember, continuous learning and practice are key!
In this Maya terminology topic, you've explored various terms used to refer to modelling and texturing. You've:
- Learnt the key terms and detailed descriptions
- looked at the imagery associated with these terms
- touched on how they will be incorporated within the practical aspects of the module.
Reflect on what you've learnt, practised, and achieved
As you wrap up this topic, take a moment to reflect on what you've learnt, practised, and achieved by completing the two learning tasks in this topic.
Understanding and learning modelling and texturing terminology is essential as you progress through this module. Keep these terms in your repertoire to guide you through the various practical components they are paired with during this avenue of animation.
