Now we have looked at some of the hazards of working in kitchens, and some of regulations governing the way we work in them we need to look at the tools we can use to keep kitchens safe for food and humans. Many aspects of a kitchen’s operation are repeated over and over again, and should always be performed the same way every time. In order to simplify this, repetitive jobs are set out in Standard Operating Procedures (SOPs). In this topic, you will learn about
- What is a Standard Operating Procedure (SOP)?
- What does an SOP look like?
- Examples of kitchen SOPs
- Cleaning schedules
A Standard Operating Procedure (SOP)is a step-by-step set of instructions which specify how any particular process should be carried out. In a professional kitchen SOPs play a vital role in maintaining high standards of consistency in food safety, food quality, cleanliness and operational efficiency.
Processes are completed the same way each time, no matter who is doing it. This is particularly useful when a new staff member comes on board. Think about a new chef starting work and needing to make a house sauce – they need a recipe to do this the same way as their colleagues do it.
SOPs help the business to be better organised and streamline regular activities.
SOPs are especially relevant to cleaning and safety tasks. They are needed to ensure surfaces are cleaned correctly and using the correct cleaning chemical, equipment is cleaned and stored safely, rubbish is handled correctly etc.
How SOPs are applied in a professional kitchen
- Food Preparation and Cooking
SOPs define standard procedures for preparing and cooking dishes. An example of this type of SOP is a Standard Recipe, which details- ingredients
- measurements
- cooking instructions
- cooking times
- recipe yields
- Food Safety and Hygiene
SOPs detail step by step procedures for maintaining kitchen hygiene with guidelines on activities like:- handwashing
- cleaning and sanitising surfaces
- ingredient storage
- cross-contamination prevention
- Equipment Use and Maintenance
SOPs detail instructions on the proper use, cleaning and maintenance of kitchen equipment, to ensure they are used, cleaned and stored correctly and therefore are safe to use and ensure equipment has a long lifespan in the kitchen. - Health and Safety
SOPs detail health and safety procedures to prevent accidents and injuries. Amongst many other potential activities, this includes the likes of:- handling sharp objects
- proper lifting techniques
- emergency procedures
- sickness protocols
- identifying potential risks and hazards and how to mitigate them
- Cleaning and Sanitising
SOPs outline cleaning and sanitising routines for kitchen spaces, utensils and equipment to maintain a clean and safe working environment and to prevent the spread of contaminants. - Inventory Management
SOPs are used to detail how food orders are placed and stock levels are maintained at an efficient level to prevent wastage.
What does an SOP look like?
While SOPs don’t all look the same, they do all share some common features. Some of the key features they share include:
- Simplicity SOPs must be written clearly and simply to avoid any change of ambiguity. They must be easy to understand for all individuals at all levels of the organisation.
- Detailed SOPs must provide step-by-step instructions for performing a specific task. Details such as specific actions, measurements and timings are included to make sure these are all done correctly each time and ensures consistency.
- Documented SOPs should be written down so they can be used as a reference for any individual performing a task. This is especially important for new staff members or staff performing unfamiliar tasks.
- Regulated SOPs must be written in compliance with all appropriate rules, regulations and company policies.
- Revised SOPs should be revised periodically and updated as needed. This could be for changes in menus, change in supply chain, changes in regulations etc.
Case Study
SOP for washing pots, pans and crockery

Hotels and large kitchens may have a team dedicated to washing pots, pans, crockery etc. Small kitchens may have one person doing this, or sometimes even the chefs need to do this. Having an SOP for the processes is critical to ensure a consistent level of cleanliness and hygiene.
This is a sample SOP for these tasks which may be used in a hotel stewarding department.
Hotel Banqueting Kitchen Plate Washing SOP
Date Issued: 23/11/2023
Purpose: Procedures for washing and sterilising crockery to reduce microbial or chemical contamination.
Responsibilities The Executive Chef and Stewarding Manager are responsible to ensure that SOPs are followed for the proper cleaning of kitchen and F&B equipment.
| 1. Correct PPE must be worn in the dishwash area, including waterproof apron and safety shoes. Note: food gloves may be worn (optional) | |
| 2. Prepare dishwasher for use according to the Dishwashing Machine Startup and Use SOP. Note: Check levels of detergent at the start of every shift. | |
| 3. Scrape any left over food off each plate into the compost bin. Note: make sure to separate compostable items and recyclable items from landfill items. | |
| 4. Any non-food items are place in the landfill rubbish bin. Note: Empty all bins into waste collection area when full. Don’t overfill bin bags. | |
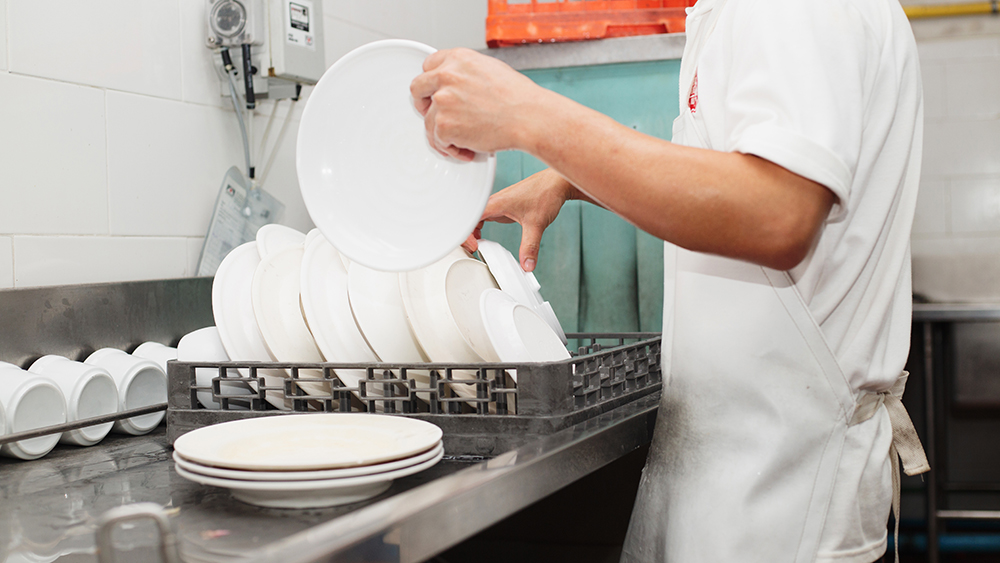
| 5. Stack the plates in separate stacks for each plate size, no more than 10 plates high. Note: Don’t over-stack plates – this may be unstable and cause breakages. | |
|
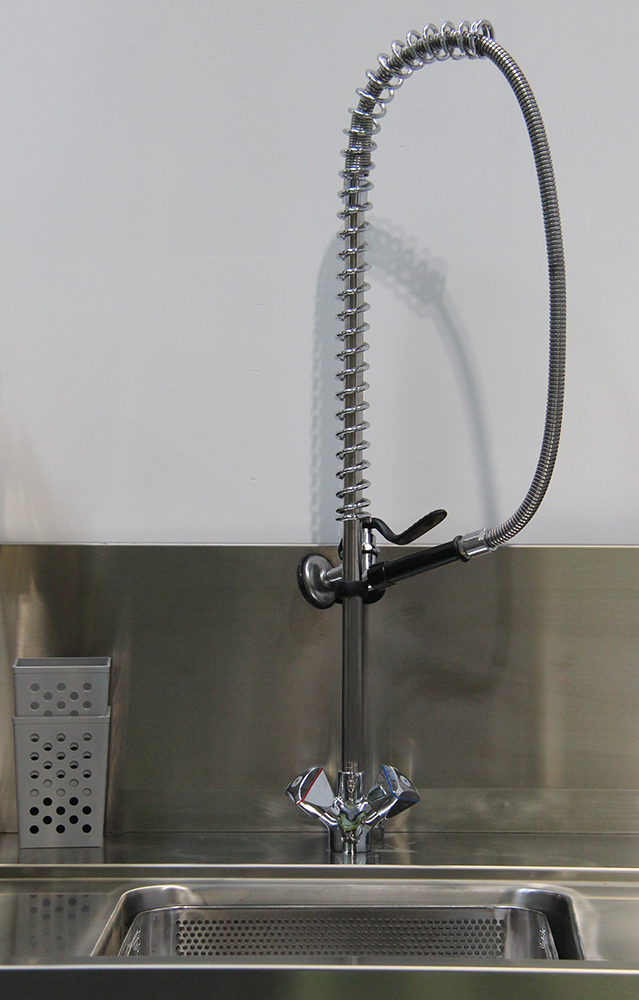
6. Rinse each plate using cold water from the hose with spray nozzle in the pre-rinse sink.
|
|
|
7. Place rinsed plates one at a time into the correct plate rack making sure there are gaps between each plate.
|
|
|
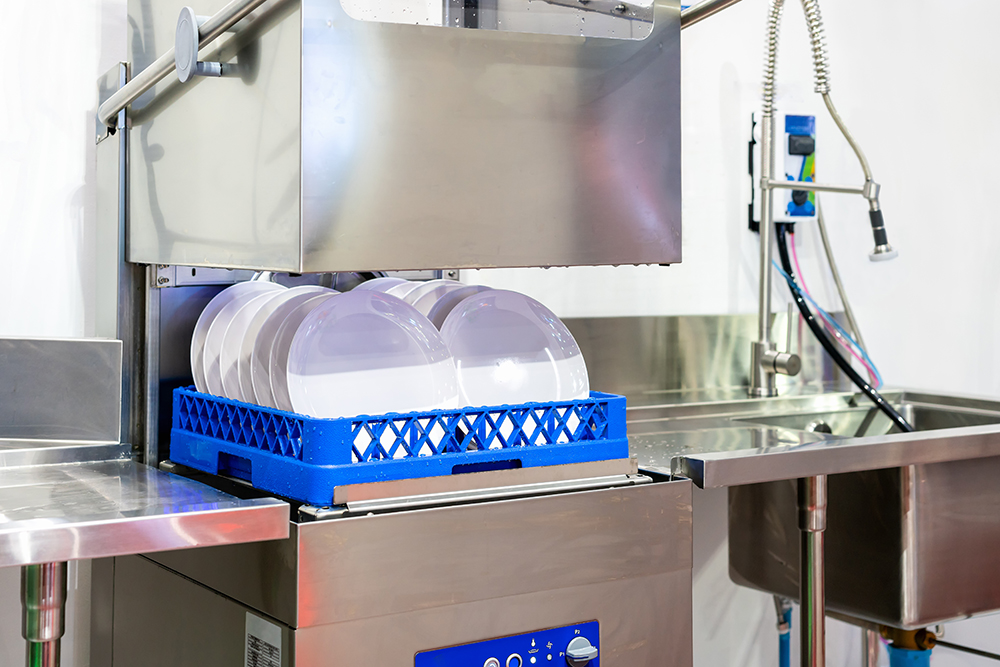
8. When the rack is full slide into the dishwashing machine.
|
|
| 9. Close dishwashing machine lid and switch on. Plates should be washed on Cycle 1.Note: If plates are excessively greasy, or if washing pots and pans you may need to use Cycle 2. Remember to switch back to Cycle 1 afterwards. | |
| 10. When the machine has finished, open the lid and slide the rack out. Do not open the lid until the green “cycle finished” light has come on. Note: Wait until the “Ready” light has come back on before atempting to start a new cycle. | |
| 11. Allow plates to air-dry in the rack. Note: Never use tea towels to dry plates as this is an unhygienic practice. |
Useful Kitchen SOPs
There are some basic SOPs which will be common to most commercial kitchens. We’ll look at a few examples here related to cleaning – these will be put into practice when you have your practical kitchen lessons. Throughout the course we will introduce SOPs covering other aspects of kitchen operations.
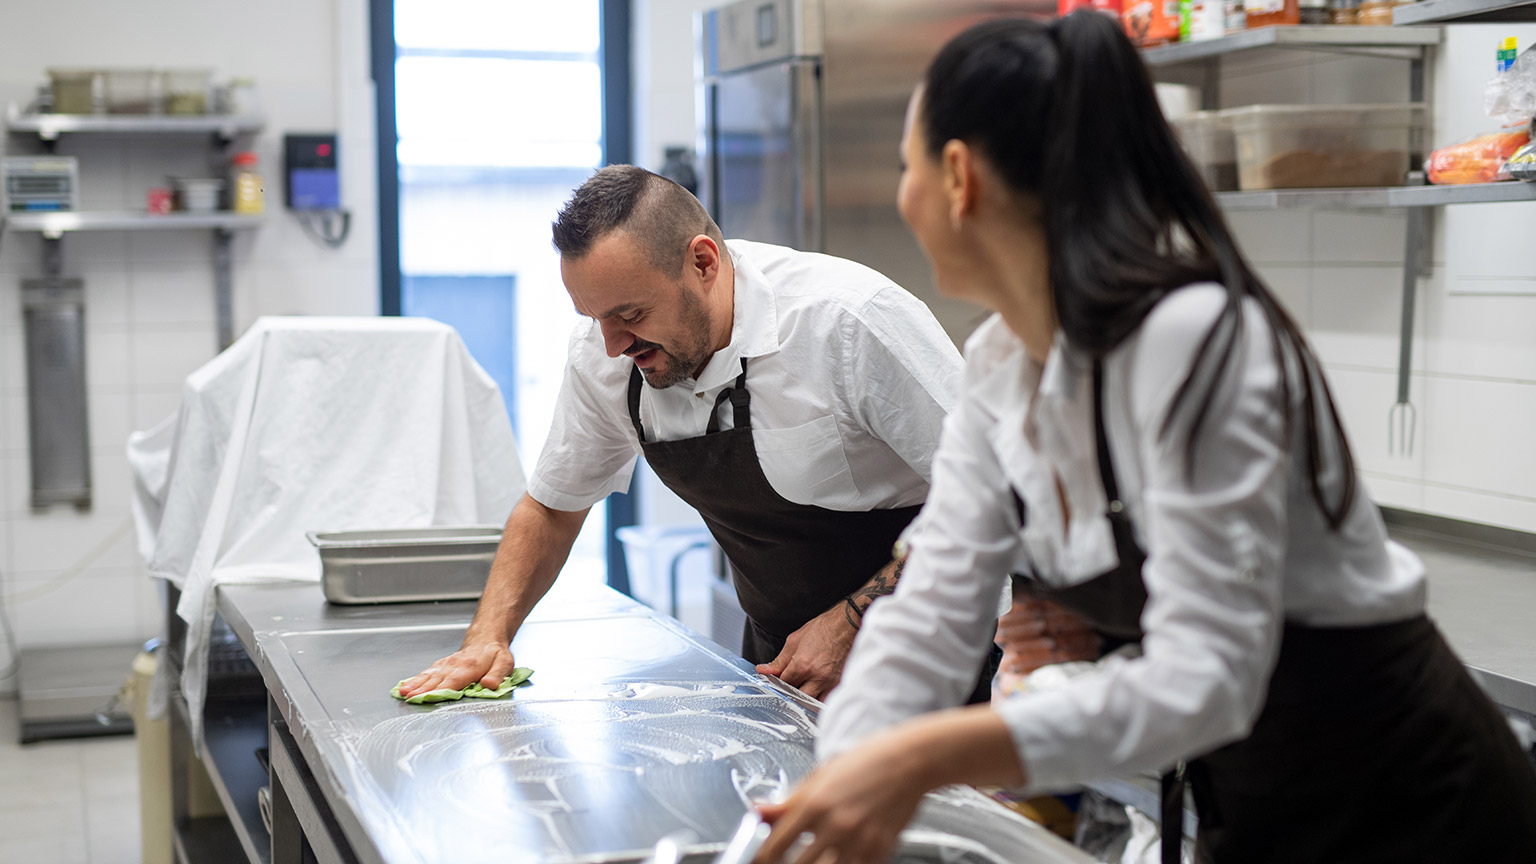
Cleaning and Sanitising
Two key terms you will hear very often in a commercial kitchen are “cleaning” and “sanitising”. They are very different processes but go hand-in-hand to create a hygienic working environment.
- Cleaning
This involves removing all visible dirt and contaminants from a work surface. This can be done with a bench scraper or similar tool. After this, the surface is scrubbed with hot, soapy water to degrease and remove any residue of dirt. Once clean, the surface needs to be dried using paper towels, or allowed to air-dry if there is time. Note: you must not use dish towels, oven cloths etc. to dry surfaces as these are very likely to be dirty and re-contaminate the surface, as well as becoming wet and therefore no longer safe to use with hot objects. - Sanitising
Once the surface is clean and dry it needs to be sanitised. Commercial sanitisers are designed to be used in the correct dilution (always marked on the label) and should be sprayed onto the work surface using a spray bottle. Sanitised surfaces can be wiped again with paper towels or left to air-dry. Spray bottles must be clearly labelled and only used for this purpose – NEVER use a spray bottle which has contained any chemicals for food purposes. Commercial sanitisers vary in how they are designed to work, so always check the instructions on the label.
Cleaning Schedules
Cleaning schedules are a type of SOP checklist which details the cleaning jobs that must be done and with what frequency. Once completed, the job is signed off with the date and time by the person that did it so everyone knows it has been done. This system ensures all parts of the kitchen are clean and hygienic.
Cleaning schedules can be divided into daily tasks, weekly tasks or monthly tasks. Some jobs, like mopping the floor need to be done every day, whereas deep-cleaning jobs like cleaning the ventilation extraction filters may only need to be done once a month. Each kitchen will have a different set of cleaning needs, so cleaning schedules will vary from one to another.
Sometimes there is a need to perform a cleaning task even if it is not scheduled to occur at that time – for example if there is a spillage on the floor that needs to be cleared up and the floor mopped or your work surface is cluttered and dirty.
Clean as you go!
Work Bench Cleaning SOP example
Commercial kitchens have work surfaces made of stainless steel, such as benches and sinks. There are also shelves on walls and in store rooms, and racks in chillers and freezers. All surfaces must be cleaned and sanitised according to the cleaning schedule (or more frequently if needed).
| Work Bench Cleaning SOP | |
|---|---|
1. Gather supplies needed
|
|
| 2. Clear bench of all items of food, utensils, equipment etc | |
| 3. Use a dry cloth to brush off any loose debris from the bench top. | |
4. Using the scrubbing brush or scourer and hot, soapy water clean the bench top.
|
|
5. Use the same method to clean the side edges of the bench.
|
|
| 6. Use paper towels to dry off excess water from the bench. | |
7. Spray sanitiser solution over the entire surface and side edges of the bench.
|
|
|
Frequency:
|
Chopping Board SOP example
| Chopping Board Cleaning SOP | |
|---|---|
1. Gather supplies needed
|
|
| 2. Scrape of any excess debris left on the board | |
3. Use a scrubbing brush or scourer to scrub both sides of the chopping board
|
|
4. Rinse the board under hot running water
|
|
5. Dry board on both sides with paper towels
|
|
6. Spray sanitiser solution over the top and bottom surface of the chopping board
|
|
7. Return chopping board to use or store if no longer needed.
|
|
|
Frequency:
|
Floor Cleaning SOP example
| Floor Cleaning SOP | |
|---|---|
1. Gather supplies needed
|
|
2. Remove any obstacles on the kitchen floor
|
|
3. Sweep floor
|
|
4. Pick up all the sweepings off the floor
|
|
| 5. Remove rubbish bins from the kitchen | |
6. Prepare mop bucket
|
|
7. Clear all personnel from kitchen
|
|
8. Wet mop
|
|
9. Mop floor
|
|
10. Replace water as needed
|
|
11. Allow floor to air dry
|
|
12. Empty mop bucket into the mop sink
|
|
13. Rinse mop head and mop bucket in the mop sink
|
|
14. Return mop and mop bucket to storage
|
|
|
Frequency:
|
Watch
Restaurant floor care
A demonstration of how to clean kitchen floors
Duration: 1.19
Now it’s your turn
Before moving on to the next topic think of a simple task you perform frequently. It could be something you do at home like making a cup of tea, or something you do regularly at work.
Break the task down into a step-by-step procedure and write an SOP for it. Identify any hazards or risks associated with each step and think how you could eliminate or minimise the risk.