In this topic we’ll explain what the programme covers and what it doesn’t, and why it has been designed this way.
Next, we’ll take a look at each of the modules in sequence to briefly introduce what it covers and what you’ll need to move onto the next module.
Finally, we’ll list the equipment you’ll need access to and the type of site you’ll need to work on.
By the end of this topic, you’ll be able to:
- Define the scope of practice of someone who has completed this programme using relevant examples.
- Identify a site that will be suitable for this programme.
- Create a list of the equipment you’ll need for this programme.
Learning by doing
The LDB3 programme is designed around the kaupapa (principle) of learning by doing.
In each module we’ll introduce you to the key information you’ll need to do the mahi (work), but this is really just the starting point. Equipped with that knowledge, you’ll need to put it into practice by trying the techniques we’ve introduced.
In some cases, this will come easy. For other skills it might seem really hard at first, but with a bit of perseverance, you’ll get better at it.
Ever heard of the saying “practice makes perfect”? Well, in reality, this isn’t always true.
Practice does not make perfect. Practice makes permanent. Repeat the same mistakes over and over, and you don't get any closer to Carnegie Hall.Sarah Kay, No Matter the Wreckage: Poems
With some skills, your performance improves the more you practice, as you start to form muscle memory and over time you do get better. But for most things we actually need to think about how we can improve.
This is called experiential learning (Kolb, Fry and Cooper, 1975), and we’ll use this approach throughout the programme. In simple terms it’s about:
- trying something (having an experience)
- thinking about how well you did (reflecting)
- coming up with a game plan for how to improve (conceptualising)
- testing the strategy (experimenting) through a series of small experiments to develop new skills
- trying the experience again using the new skills.
In this programme we’ll provide you with opportunities to try out new skills, reflect on how well you performed them, think about how you can do better next time, and then apply that to a related activity.

Getting a taste for a career in landscaping
You might be doing this programme knowing full well that you aren’t going to get into landscape design, because you’d much rather be outside working with your hands. Alternatively, the idea of working in landscape construction day in, day out, may not be your idea of fun. Or perhaps you just want to stick to landscaping your own property; that’s fine too.
This programme is designed to let you experience both landscape design and construction in small doses to give you a taste for possible careers in landscaping.
At the end of the programme, we hope you will have worked out what parts you like doing and will be in a good position to choose what to do next. The important thing is that you got a taste for these different roles.
This will also help you put yourself in the shoes of others. Knowing what information they need and how they operate will mean you’re in a better position to work in ways that are effective for you both.
Design as a method of inquiry
When you finish this programme, you will be awarded the New Zealand Certificate in Horticulture (Landscape Construction) (Level 3). There is no qualification for landscape design at Level 3 on the New Zealand Qualifications and Credentials Framework (NZQCF).
We’ve included landscape design topics in this programme because we use garden design as a way of better understanding what “good” designs look like and consider what is “buildable”. In other words, you’ll learn:
- the importance of implementing the design accurately, as even small variations may lead to a landscape that is at odds with intended design, and
- what may need to be redesigned prior to construction because it isn’t “buildable”.
When we get to the point in the programme where we need to start constructing hardscaping, it will be a relief to know that you’ve already confirmed that the structure or surface can actually be built.
Furthermore, this knowledge will make you stand out as a landscaping contractor. Using your design knowledge, you will be able to fine tune what you're building to meet your clients’ needs. Not just building something that isn't practical.
Before we turn our attention to what you’ll need to do in this programme, let’s look at what we will cover (in scope) and what we won’t (out of scope).
| In scope | Out of scope | |
|---|---|---|
| Engaing with clients |
|
|
| Operating a landscaping business | Nil – there are business management programmes at Level 3 and Level 4 available to enrol in if this is something that you are interested in. |
|
| Visual communication |
|
|
| Terrain |
|
|
| Engineering design | Nil – this is not a civil engineering programme | Designing retaining walls Designing major earthworks |
| Surfaces |
|
|
|
Structures |
|
|
|
Water features |
|
|
|
Irrigation and drainage |
Nil – this is not an irrigation system design or civil engineering programme. |
|
This programme follows the landscaping process that we outlined earlier. Let’s take a look at this more closely and explain the key things you’ll need to do or produce to complete each module and the impacts on the client and site. Note that this is a high-level overview to help you work out the things you need to prepare for now, such as having a conversation with the client about what you’ll need to do to their site.
As you move on to each module you should spend some time reviewing the assessment requirements in more detail.
| Landscape phase | Module | Module guidance (site and client requirements) |
|---|---|---|
| Determining the client’s needs | LDB01: Landscaping Getting Started (this module) |
By the end of the module, you need to have interviewed someone (“the client”) to determine their needs for a new or revised garden. The client must be someone who has a property that would like you to:
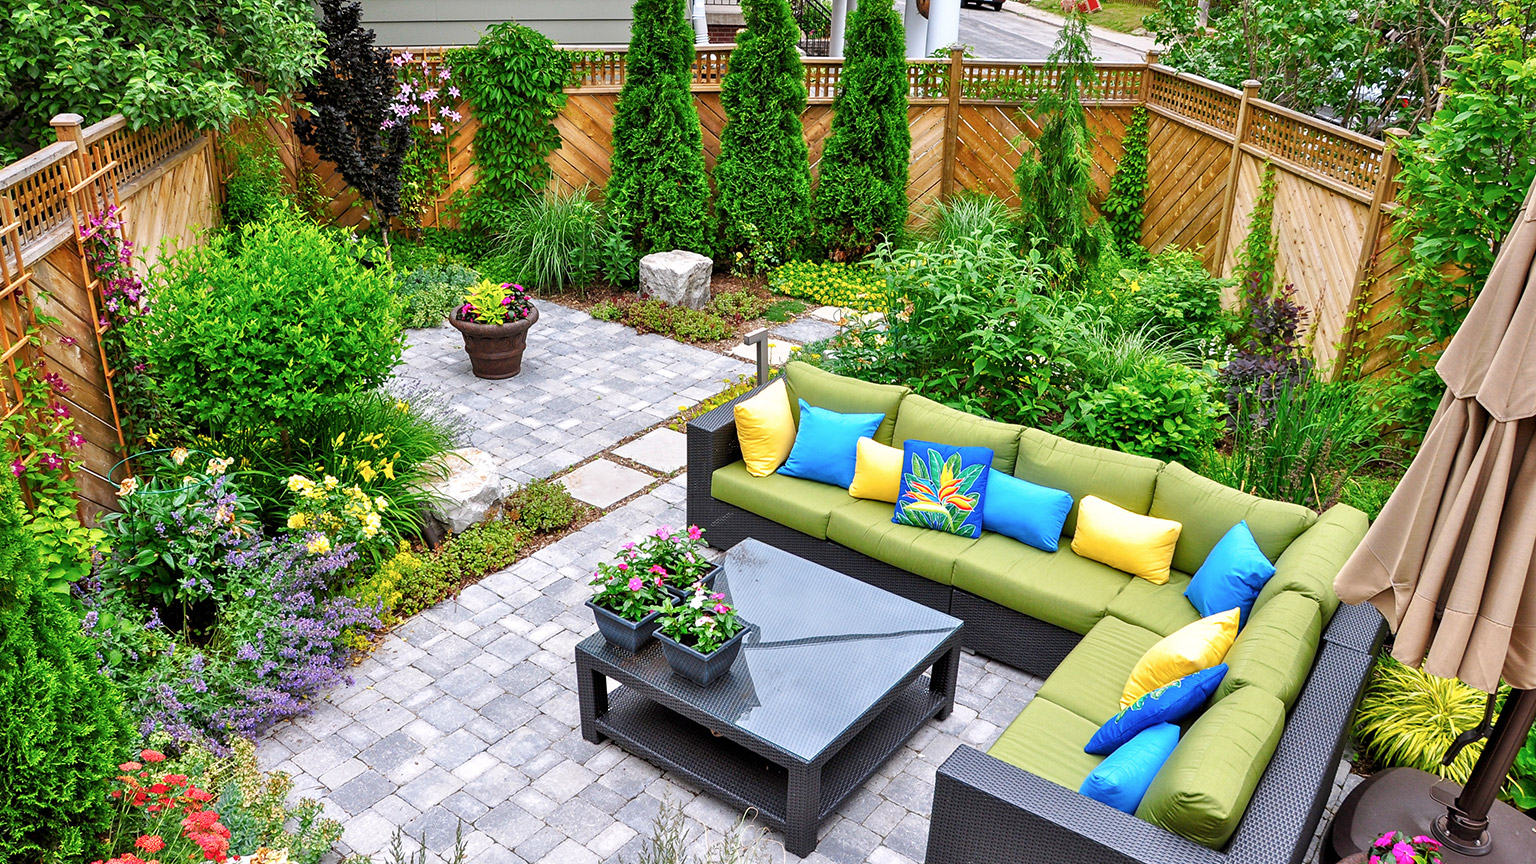
Ideally you should design the project for a flat urban/residential site with a space of no more than 40m x 20m that can be landscaped. If the site is larger, choose a smaller area to focus on, or buy drawing equipment big enough to fit A2 paper. You shouldn’t work on a site that requires you to go any bigger than A2 paper, for this programme. If the site has a mix of flat and sloping areas, choose a flat area to focus your design on, ideally one that joins the house. The client could be your partner, a family member, or a friend. They must have authority over the garden to allow you to carry out the landscape construction activities. Make it clear to your client that you are still learning the trade and that the programme (and therefore the design and build activities) will take roughly 40 weeks to complete. |
| Measuring up the site and evaluating the site and surrounding features | LDB02: Site Analysis |
By the end of this module, you need to have visited the site and conducted a site survey and appraisal and drawn up a plan of what’s there (a “base plan”). To do this you’ll need to have access to the site to measure up the buildings, boundaries, and other site features and take plenty of photos. It might be wise to let your client know that you may need to do two visits to the site during this module. The second one may be needed if you realise, when drawing up your base plan, that you’ve forgotten to gather a measurement or two! |
| Designing and refining different concepts | LDB03: Garden Design 1 |
By the end of this module, you need to have developed garden design concepts and produce a concept plan that responds to the client’s needs, for their site. You shouldn’t need to visit the site or speak to the client during this module. |
| Creating a proposal for the client to approve | LDB04: Garden Design 2 |
By the end of this module, you need to have produced plans for a simple garden design proposal. At the beginning of this module, you need to present your concept plan(s) to the client and seek their feedback. Use this feedback to inform the development of your garden design proposal. At the end of the module, you need to present the garden design proposal to the client. |
| Selecting a contractor | Not covered by this programme | |
| Setting out | LDB05: Setting Out |
By the end of this module, you need to have worked effectively as a member of a team to set out the real-world locations of key landscape features according to a plan. Enlist the help of at least one other person to help you set out the location of at least one hard landscaping feature and at least one soft landscaping feature using measuring equipment, pegs, stakes, spray paint, string lines etc. You will need to hammer the pegs or stakes into the ground and/or spray the spray paint onto the ground and will need to leave these markings in place for several weeks. |
| Constructing hard landscaping | LDB06: Hard Landscaping |
By the end of this module, you need to have worked as part of a team to install one hard landscaping feature. This will involve doing one of the following tasks, depending on your space available and cost:
More details will be provided in your assessment document. However, it’s important to consider the space you have available before choosing your feature. For example, if you choose to build a chip pathway, you will likely need a good 2 metres or so to demonstrate this in your assessment. Note that materials for this project will come at your own cost, or you may negotiate with the client regarding the costs. You may want to consider searching second-hand marketplaces to help reduce the costs for your project, or see what you can borrow from your local community. |
| Installing soft landscaping | LDB07: Soft Landscaping |
By the end of this module, you need to have installed and established a soft landscaping feature. This will involve doing one of the following tasks, depending on your space available and cost:
You also need to oversee the establishment of the plants. The Establishment process involves activities that ensure the plants grow during the first few weeks, months, and potentially up to a year. You’ll need to develop an establishment guide for your client or visit the site periodically to look after the plants. You’ll also need to come back after a few weeks to take photos of the established plants. As per the previous module, more details will be provided in your assessment document. However, it’s important to consider the space you have available before choosing your feature. For example, if you choose to prepare and plant a garden bed, you will need access to a good sized plot and be able to remove any existing plant matter or structures in the way. Note that materials for this project will come at your own cost, or you may negotiate with the client regarding the costs. You may want to consider searching second-hand marketplaces to help reduce the costs for your project, or see what you can borrow from your local community. Costs for this project will vary depending on the project – make sure to consider your budget and plan appropriately so you can complete assessment requirements. |
Establishing soft landscaping |
||
| Ongoing landscape maintenance | Not covered by this programme |
Cross credit
If you have completed NZMA’s Horticulture Level 3 programme, you may like to apply for Recognition of Prior Learning (RPL) for Module 7 Soft Landscaping.
Please contact the Online team for further information this.

Landscape design equipment
In the first half of this programme, you’ll be focussed on landscape design. The following list is suggested, but you do not need to purchase everything. Where possible, borrow from friends, family, or neighbours, use second hand stores or marketplaces to reduce costs.
- General: camera or camera phone app
- Tape measures: surveyor’s tape measure (50m), optional: builder’s tape measure (5-8m)
- Stationery: pack of sketching pencils, coloured pencils, black liner pens, pencil sharpener and eraser, clipboard
- Paper: A2 or A3 drawing paper, A4 graph paper, lined notepad, tracing paper (see below for details)
- Tools: drawing compass, circle template, masking tape
- Drawing board and rulers (see below for details).
It is a good practice to learn to draw landscape plans at a scale of 1:100. A scale of 1:100 means that a distance of 100 units on the ground will be drawn as one unit on the page. So, a boundary fence that runs for 20 metres will be drawn on the page as a line that is 20 centimetres long (20m is 2,000cm so 2,000 divided by 100 (the scale) equals 20cm).
When drawing at this scale you’re less likely to make mistakes when transferring real world measurements to the page. Additionally, as you do more drawings at this scale, you’ll start to get a sense for how big to sketch objects, instinctively.
Many urban, residential sites in cities in Aotearoa will be small enough to fit on an A3 sheet of paper. That’s a site that is roughly 30m x 20m or smaller. If your chosen site is bigger than this, you’ll need to go up to A2 paper.
You’ll probably need up to 50 sheets of paper for this programme, so the most cost effective option is to buy a 50-sheet pad of tracing paper sheets at the right size:
- A3
- A2
Once you’ve worked out what size paper you’re going to need to work with, you’ll want to decide which drawing board to buy.
Drawing board options
If you’re going to be working on A3 paper your options are:
- a desk with a smooth surface and hard, square edges and a tee square
- an integrated drawing board and ruler set, such as the Rapid Drawing Board A3
- an A2 parallel ruler board, see below.
At A2, integrated drawing board and ruler sets don’t exist, so your options are:
- a parallel ruler board (A2 or A1)
- a desk and T-square as for A3, above.
Unless you go for an integrated drawing board and ruler set, you’ll need to buy at least one set square, but ideally both of:
- 45 degrees
- 60 degrees.
If you think you might go on to do more landscape design work and can afford to buy larger paper and equipment, do it. It’ll be worth the investment.
Activity
Make a list of the landscape design equipment you’ll need, based on the information above. Identify the items you already own. For the rest, determine what you’ll need and where you’ll get it from. For instance, what size and type of drawing board will you get? Will you try to buy it second-hand or new? If new, where from?
Landscape construction equipment
What you need for the second half of the programme (landscape construction) will depend on the projects you choose based on your design.
If you’re keen to buy some tools in the meantime (perhaps items for your birthday wish list), the following serve as a good “starter pack” for an aspiring landscaper, but may not be required for you to complete your assessments:
- Safety gear: glasses, boots, comfortable sturdy clothing
- Stationery/measuring tools: builder’s pencil, stringline, spirit levels, straight edge
- Tools: sledge hammer, wheelbarrow, spade and/or shovel*, rake, yard broom, hammer, builder’s square, saw, drill and impact driver.
* If you need to pick just one spade or shovel, something like the Atlas Trade Plumbers Trenching Shovel will do the job of both!
Activity
In this topic we’ve explored what the programme covers and what it doesn’t, and what you need to organise within the next week or two – a site and drawing equipment.
In the next topic we’ll take a closer look at the digital skills and tools you will need to succeed in this programme.