Welcome to Module 2 – Site Analysis!
The module has been created to give you the skills and knowledge to:
- measure the location, position, and size of site buildings and features
- draw up accurate site plans
- identify the intended action for site features.
This module is worth 10 Credits, which is roughly equivalent to 100 hours of learning. For some people it will take a little less time and for others it may take a little longer.
You should aim to complete this module in:
- Full-time learners: 2.5 weeks
- Part-time learners: 5 weeks.
Assessment outline
To finish this module you need to complete two assessment tasks:
LDB02A1: Conduct a site survey, which involves:
- Visiting your client’s site and measuring the location, position and size of the boundaries, buildings, and site features.
- Taking photos of, and notes about the quality of, site features and environmental conditions.
- Writing up a site appraisal table.
LDB02A2: Prepare site plans, which involves:
- Using your measurements, notes, and photos to draw up a base plan of the site.
- Tracing key components of your base plan and adding environmental information to create a site analysis plan.
Go to the assessment section now and read the full assessment requirements.
We're here to help!
Firstly, remember, it’s ok to make mistakes. When we make mistakes we can learn from them by thinking “what went wrong?” and “what can I do differently next time?” Secondly, we’re here to help! If something doesn’t make sense, or you’re not sure what to do next, get in touch with your Tutor.
Topic content
In this topic we’ll introduce the equipment you’ll need to conduct your site analysis and draw up your site plans and demonstrate how to use these objects correctly.
By the end of this topic you’ll be able to:
- Select the right tool or piece of equipment for a given task.
- Identify the correct way to use a range of site analysis tools and equipment.
- Use drawing equipment to produce pencil and ink linework.
As we mentioned in Module 1 (outlining the landscaping process), once we’ve met with the client and determined their requirements, we need to measure up the site and evaluate the surrounding features. The tools and equipment you’ll need for this task are:
- camera
- clipboard
- paper
- pencil
- eraser
- tape measures
- hammer and tent peg
- trowel.
Camera
You need to be able to take clear photos of the area and features you are including in your site analysis. Any modern smartphone camera – using its inbuilt camera app – should be sufficient. Whatever camera you use, make sure you have enough storage space for all of the photos you will need, and a way to upload them when necessary.
Clipboard, paper, pencil, and eraser

When conducting your site analysis you will need to take a lot of measurements and notes. The easiest way to do this is by using an A4 clipboard. If you can find one with a cover, this can help keep your notes safe from adverse weather conditions such as wind or light rain.

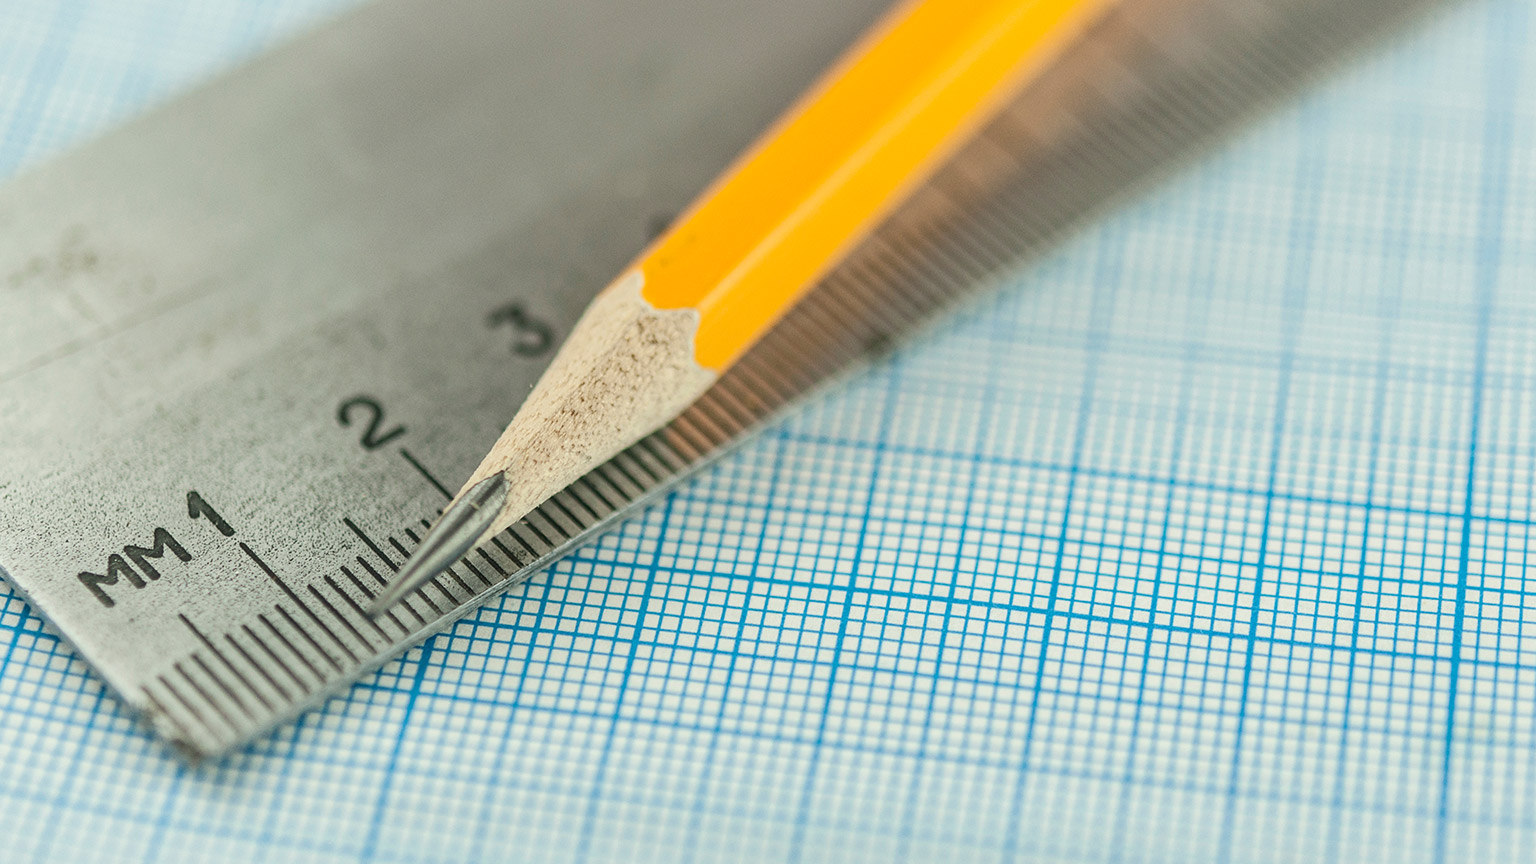
If possible, use graph paper when drawing up your initial measurements to give a sense of scale; for example one medium square could represent one metre in your drawing. At this stage you don’t need to draw everything perfectly to scale, but it will be useful to you later if it is close.

A good quality pencil will save you time sharpening broken leads.
Most graphite pencils will be marked with a grade – for example “2H”, “HB”, “4B” – which tells you about the properties of that pencil. H pencils are harder as they contain more clay filler, and they give fainter marks. B pencils are blacker as they contain less filler and thus more graphite, they are also softer than H pencils. HB pencils are a mid-point between the two. The numbers on the pencil indicate how much harder or darker the pencil will be, with the higher number on an H meaning a harder pencil, and a higher number with a B meaning a blacker pencil.
For your site analysis, you can choose which pencil type you prefer; 2H is a good pencil for sketching faint lines, but these can be hard to erase. 2B pencils leave a darker line but these erase easily. Whichever you choose, be sure to bring along a pencil sharpener.
You may wish to use a ballpoint pen instead, but be aware that, unlike pencils, the pen won’t work if your paper gets wet.

Choose an eraser with a sharp (rather than rounded) edge so that you can erase with precision.
Tape measures

To measure larger areas of the site, you will need a surveyors tape – ideally 50m in length. These can be purchased at hardware stores for around $30. Some tapes have a hook and a loop on the end. If you will be measuring alone, you may also wish to bring along a tent peg to push through the loop to keep the end of the measuring tape in place while you run it out.

Ideally you will also have a builder's tape measure of 5-8m to measure short distances and vertical surfaces (such as a house wall).

Particularly if you’re doing the site analysis on your own, you’ll want to bring a hammer and a sturdy metal tent pen. Make sure the peg fits through the end of your surveyor’s tape.
Trowel

It is helpful to take a few soil samples at different points around the garden, so you know what you’re dealing with. This will help you choose plants that will do well in this garden.
A standard garden trowel will come in handy for this task.
Helper
While most definitely not a piece of equipment, we strongly recommend arranging to have a helper join you for the site analysis visit.
Your helper should be able to hold the end of the tape measure and call out accurate measurements to you.
Once we’ve measured up the site we’ll be converting the information we gathered into two key drawings:
- Base Plan
- Site Analysis Plan.
To do this you’ll need the following drawing equipment (see details below):
- paper, drawing board, rulers, tape
- pens, pencils, and pencil sharpener
- drawing compass, circle template, and computer and printer (optional)
Paper
It is common practice to draw your base plan on standard white printer paper because this is sturdier than tracing paper and this is the bottom layer.
However, if you want to trace other objects onto the base plan, then create the drawing on tracing paper. We’ll discuss this further, later in this topic.
Remember that the paper must be big enough to fit your site at a scale of 1:100 and some space around it for notes and other information.
You might also find it useful to have some graph paper handy. You can slip this in behind your tracing paper, making sure it’s level, and use the lines as guides for writing text.
Drawing board and rulers
Your drawing board needs to be large enough to fit the paper you’re going to use. There are a variety of drawing boards available. How you use them will vary slightly depending on which you choose. Here are some videos showing how to set up three of the most common types of boards.
Watch: Aristo A3 / A4 College Drawing Board (1:44 minutes)
Integrated drawing board and ruler set:
Watch: How to use a T-Square (5:05)
Drawing board with tee square:
Watch: Drawing Board Setup (2:17)
Drawing board with parallel ruler.
Set squares

Set squares are used to draw vertical lines or lines on a set angle. The most common sizes are 30/60 degrees or 45 degrees.
You will most likely be using them to create perpendicular lines. To do this, you sit the base against your parallel ruler or set square as explained in the video below.
Watch: How to use triangles (5:51 minutes)
If you wish to draw your line with an ink pen, flip the ruler over so that the ink doesn’t bleed under it.
Tape
If you’re using an A3 drawing board with integrated rulers and paper clasps, you won’t need tape, but in all other cases, you’ll use tape to hold the paper in place.
Pencils
When drawing plans we use a 2H pencil to make construction lines. Construction lines are faint lines used to assemble the drawing. The ruler must be placed in the right place but the length of the construction line (formed by dragging the pencil gently along the ruler) can be longer than needed.
Make sure you keep it sharp so that the lines remain a consistent width.
Always drag the pencil along the paper. If you push the pencil, instead of dragging it across the page, you are likely to rip your paper.
Practice using the pencils with the drawing board and rulers on both printer paper, and the tracing paper.
Pens
When you are happy with your drawing, you can go over the pencil lines with ink pens. Fine tip pens – also called fineliners – will keep your drawing looking sharp and precise. Using ink lines also makes them easier to see when tracing over the drawing and the line work is easier to interpret when the drawing has been photocopied.
Pens come in a variety of different sizes, such as 0.2 or 0.5. These numbers indicate the nib diameter or width, where a 0.5 is 0.5mm (half a millimetre) and so on. A 0.05mm pen is 1/20th or a millimetre and is probably the finest (narrowest) you’ll be able to find.
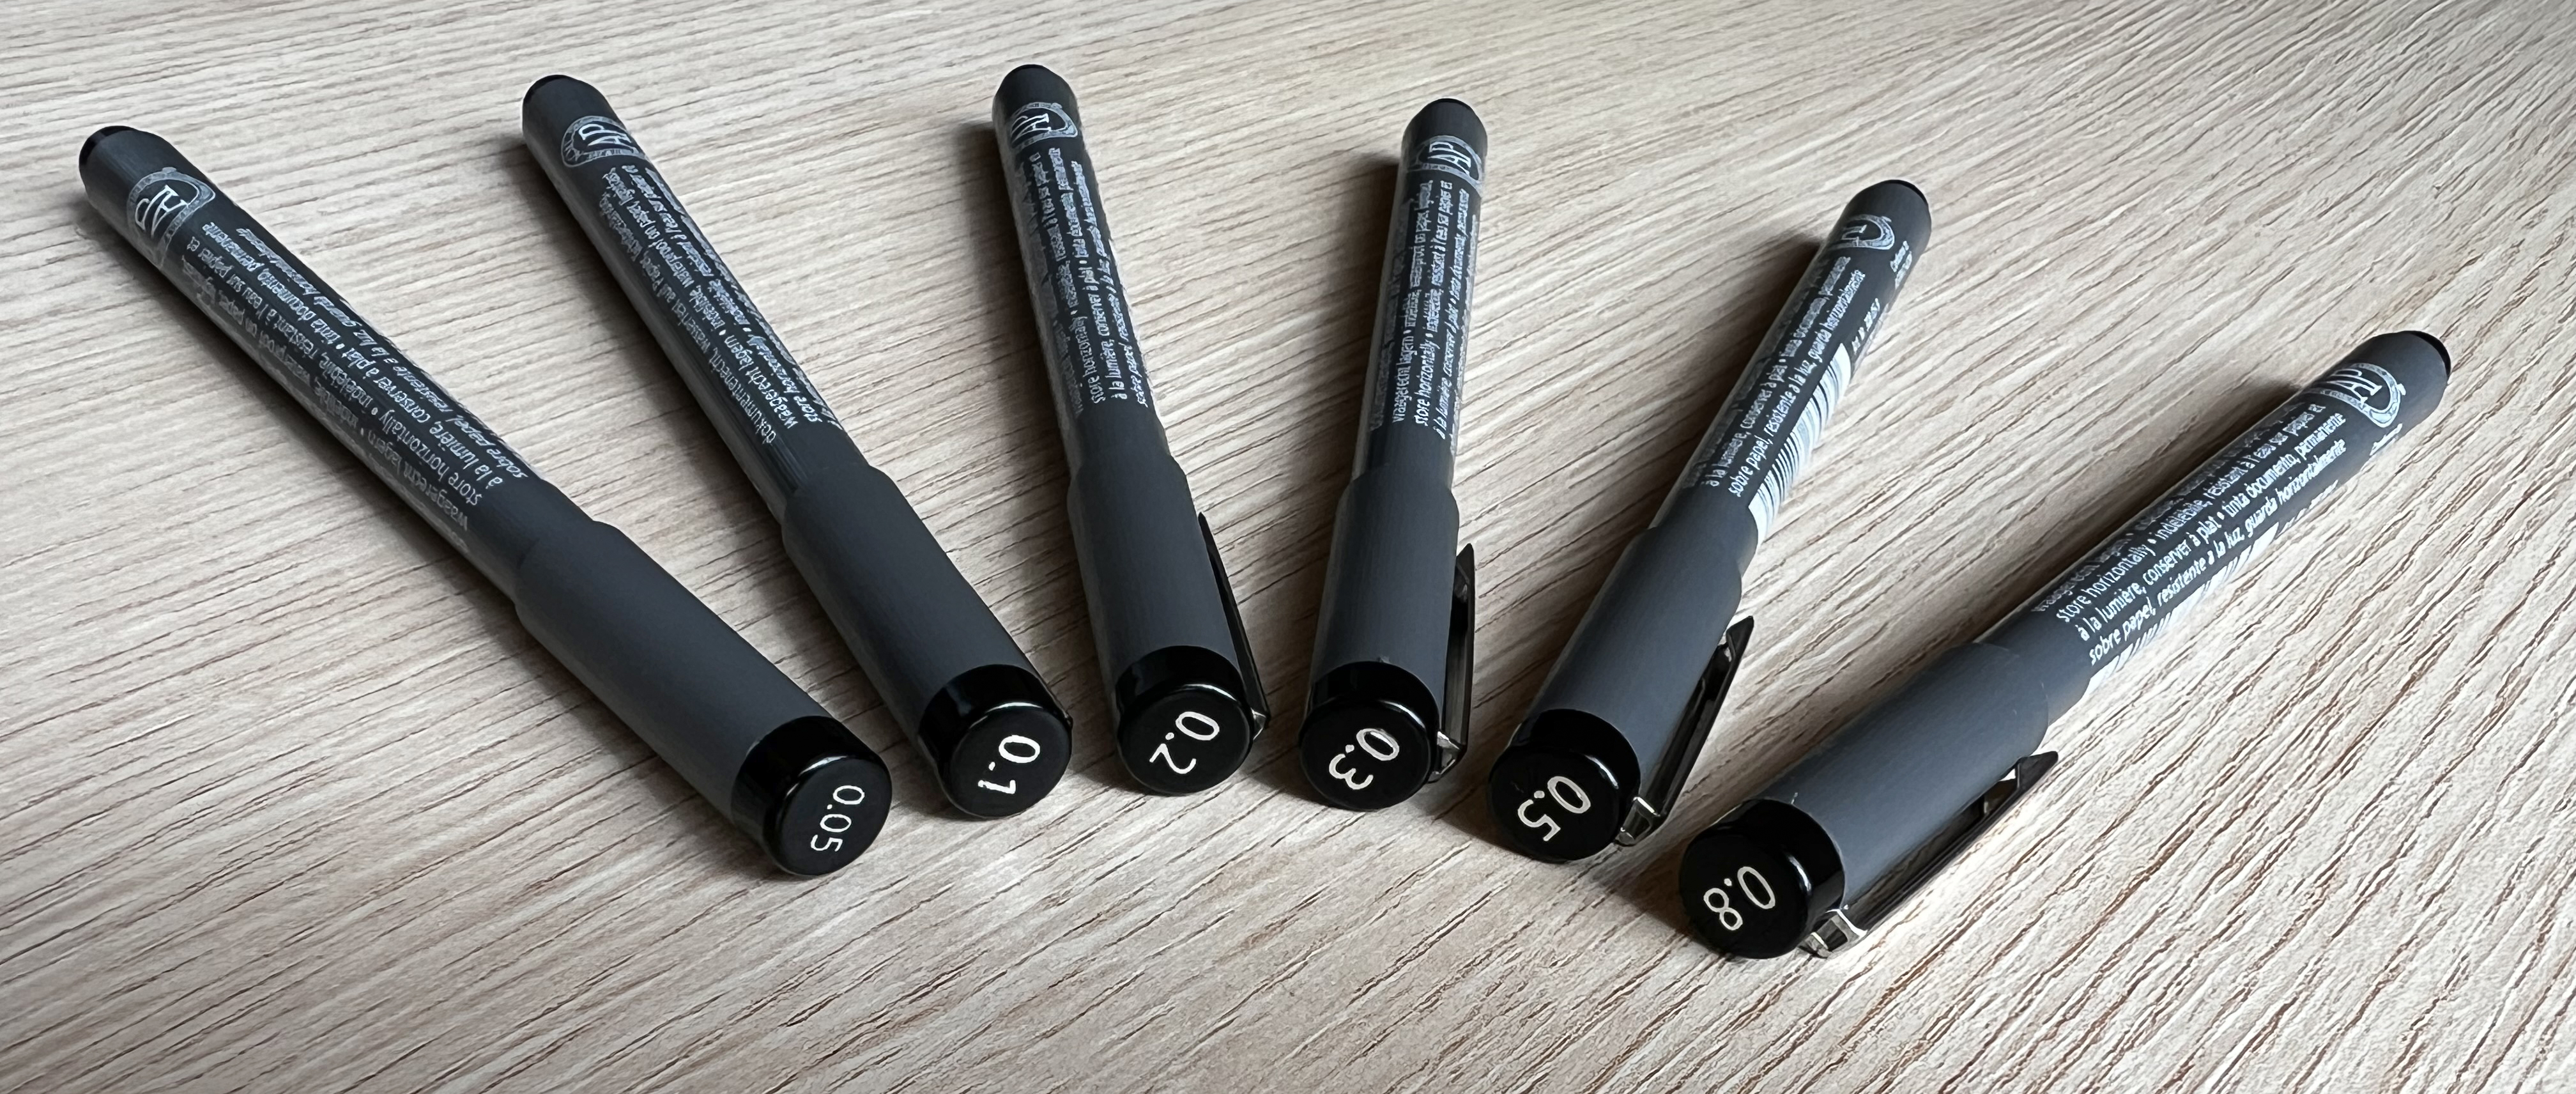
Six fine liner ink pens from finest to boldest (thickest) (left to right).
To avoid smudging it's important to:
- Use the inking edge side of your set squares.
- Always move your rulers away from the line you’ve just drawn. When inking the linework on a whole drawing start with the horizontal lines and work from the top of the page down, using the top edge of your tee square or parallel ruler.
- Then give it a minute or so for the ink to set before you slide your ruler back up. Then work on your vertical lines, then any diagonal ones. Right-handed people typically find it easiest to do vertical and diagonal lines working from the right side of the page to the left. For left-handers, the opposite is usually true.
- Try not to rest your hand on the paper, particularly if it’s a humid day as this can leave oily residue on the paper (tracing paper in particular) which may stop the pens working on those spots.
- Some people find it helpful to wear a thin fabric glove to prevent smudging and residue.
These pens can dry out, so take care to replace the lids correctly when not in use. It’s also worth noting that many brands of fine liners only list the size on the cap so if you don’t put the caps back on as soon as you’ve finished, they could get muddled up leading to you using the wrong pen.
If you make a mistake, use a white-out pen or white-out roller to correct it.
Drawing compass

You will be using your compass to help you with positioning features on your plan when you have some measurements but need to establish the exact position. This will be explained in detail later in the course. It can also be used to draw larger arced features where the circle template is too small.
Choose a compass that has a central rod with an adjusting nut, this enables you to easily lock off the radius you need so it doesn’t spread mid-circle.
Watch: How to use a compass (1:56 minutes)
This video explains how to set up your compass and some tricks for using it to draw circles.
Circle template

Get a circle template that is made specifically for graphics. It should have small lumps on the back side to lift the circle edges off the paper to avoid ink bleeding.
Each circle will have a set of crosshairs that can help you line it up in the right place. Place a small dot on your paper with your 2H pencil, then eyeball the crosshairs on the circle of your choice moving the template until it appears that the dot is in the centre.
When using ink pens with a circle template, make sure to lift the template straight up when you’ve finished inking the circle. If you drag it, it will smudge the ink.
Computer and printer
You’ll need to add a title block to your drawings. A title block is a section of text that contains key information about the drawing.
You can create this using rulers and pens and your own handwriting, or you can create one on the computer, print it and tape it onto your plans and then photocopy them.
Now that you know what each object is used for and how to use it, have a go by following along with this short tutorial.
Practice
Watch the video and then practise the skills. Note: the video is slightly sped up, and gets faster near the end, but it gives a good idea of the basic drawing process.
Here are the key points from the video:
- Secure a piece of tracing paper in place, making sure it’s level.
- Use a 2H pencil and rulers to draw very light straight lines on the page, some horizontal, some vertical and some diagonal.
- Use your pencil and your circle template to draw some circles or arcs.
- Select some of the lines you’ve created and use your ink pens to draw along them. Remember to flip your set squares over so that the ink doesn’t bleed under them when you draw and remember to lift your circle template straight.
- Try all of the different pens (different thicknesses) to get a sense of how they feel to use and to observe the different intensity (thickness) they produce.
- See if you can join up the lines to create an interesting shape or object. Create something of your own or try to replicate the drawing below.
- Place a section of graph paper under your drawing and line it up so it’s level.
- Use the graph paper to help you write tidily on your drawing.
- Add another layer of tracing paper on top of your drawing and select some of the linework to trace through. Take note of which lines you can see and which you can’t.
- Trace some of the lines by moving your rulers into the right place and drawing directly over top of the lines using the matching ink pen.
Here is the drawing that was completed in the video. This is the traced layer, on which all line work uses the same 0.3, apart from the circles, which are drawn with a 0.5mm pen. 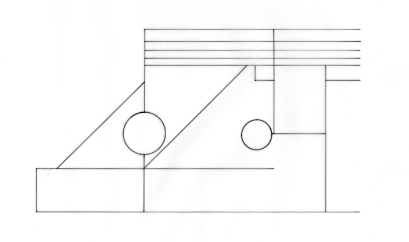
It’s important to point out that this is not perfect, and that’s ok. The lines are straight and dark and join up at the intersections, which is what we want. It is better to have lines that overlap slightly than ones that don’t quite touch. (The dark “smudges” in this image are caused by the scanner; they aren’t visible on the drawing itself.)
Summary
In this topic we looked at the equipment needed to conduct a site analysis and draw up site plans and how to use these objects correctly.
You’ve also had a go at producing your first pencil and ink linework using a range of drawing equipment.
In the next topic we’ll look at what you need to do before you head to site to conduct the site analysis.
Ka mau te wehi!