Introduction
In this topic we’ll:
- explain the purpose of a site inventory and environmental analysis
- describe the features and environmental information you need to record and take photos of, including soil type, and plant names and health
By the end of this topic you’ll be able to:
- identify types of features and environmental information you need to record
- use your own knowledge or digital tools to identify plant species
- use visual clues to estimate plant health
A site inventory is a list of all site features and a few words about the quality of each. We’ll come back to this information when we complete our site appraisal where we’ll make recommendations about what needs to happen with each site feature.
The following is the site inventory for Genevieve’s property. This should give you some idea of how much detail to include.
- House – near new, good condition
- Crushed lime paths – weedy, no hard edging
- Small pohutukawa – healthy
- Mixed pittosporum hedge – mostly healthy plants
- Deck – temporary only, untreated pallets with treated decking
- Willow trees – healthy but in wrong location
- Small manuka – healthy, client loves it
- Blueberry – moderate health
- Front deck – good condition
- Paving to catio – pavers in good condition but not well laid
- Pseudopanax – x9 – x4 are on a lean, otherwise healthy
- Stand-alone pittosporum – healthy
- Potted griselinias – average health
- Potted renga rengas – poor health
Buildings and hard surfaces
For buildings and fences consider:
- Are they true (upright) or on a lean?
- Are the materials in good condition? Does any timber appear to be rotten? Is the mortar between bricks crumbling?
- Are paint finishes in good condition or are they peeling?
For paths and driveways consider:
- Are there any cracks or uneven areas?
- Do the bricks move when walked on?
- Are there any weeds, lichen, or moss growing?
- Are the surfaces anti-slip?
For utilities:
- Is the clothesline true and in good condition?
- Are utility areas serviceable? For instance:
- Are heat pumps in locations where they can be serviced if required?
- Can gas bottles be easily replaced by the gas company?
- Are wheelie bins easy to fill and transport to the roadside?
- Are compost bins easy to access and in a good condition?
Plants

Taking an inventory of all key plants on site means you need to have a fair idea of the species of these plants and how healthy they are.
Plant names
Each plant species has a number of different names, including:
-
One or more common names. In Aotearoa, common names are usually in English or Māori. Where a plant is native to Aotearoa, it is best to use its Māori name with other names in brackets.
- A scientific name (or species name or botanical name). In botany – the study of plants – species names consist of two parts: the genus and species. When writing these the genus has a capital first letter, and the species is all lowercase. When writing it by hand it is common practice to underline each word separately, such as Metrosideros excelsa. When using a computer use italics instead, for instance Metrosideros excelsa.
Here is how you might write a few other plants:
- Tōtara (Podocarpus totara)
- Kowhai (Sophora microphylla)
- Kapuka (Griselinia littoralis, griselinia)
- Harakeke (Phormium tenax, flax)
At this early stage of your landscaping career, it’s ok to use the common name – Māori or English – or just the genus if you’re not entirely sure of the species. As we get further into this programme we’ll start using scientific names when choosing out plants and drawing plans.
It’s a good idea to use common names when talking with your clients, unless they start using scientific names. Better still, show photos of the plants you’re proposing. When dealing with suppliers and writing notes and plans, always use the scientific name.
Plant identification
If you’re not sure what species a plant is, a simple tool to get you started is iNaturalist. iNaturalist is an extremely popular app that links to the iNaturalist website, which was created by the California Academy of Sciences and National Geographic.
You need to create an account, but it’s free to do so. Once you’ve created your account, you can use the app or website to upload photos for identification. The database scans your photos and suggests possible family, genus, or species. This is a useful starting point. You can either post your observation for others to comment on and contribute their own thoughts about what type of plant it is, alternatively, don’t upload it but use the recommendation as a starting point and then use other online search tools once you’re back home to research it further.
You can find iNaturalist in the App Store of your mobile phone.
Activity - using iNaturalist
- Download the iNaturalist app, or visit their website.
- Create an account; it’s free.
- Go outside and use the app to identify three plants, ideally two that you already know and one that you don’t.
- Click the “Observe” button then take a photo of the leaves close up.
- Click the + icon next to the thumbnail of the photo you’ve just taken to add another photo. This could be of the flowers, fruit, or a photo from further back to show the plant form/shape.
- Click the “What did you see?” button to get suggestions.
- Click the “i” icon next to any recommendation to see more photos and read a description.
- Either click the back arrow and then cancel to not submit the observation or click on the best recommendation and then click the “Share” button to ask the community to confirm the species.
Alternatively, take photos, upload them to your computer and submit these observations that way.
Now think about:
- Did the recommendations that the app provided make sense?
- Did it correctly identify the plants you already knew the name of?
- Did one of the recommendations for the plant you didn’t already know match the plant, based on the photo and description in the app?
- How easy was it to use?
- Do you think you’ll use this app again?
Plant height and spread
Measure or estimate (by pacing) the spread of the plant. The spread is the width of the plant’s canopy. If the spread of a tree is 10m from one side to the other (its diameter) write this down.
Estimate the height too.
Plant health
A healthy plant is one that has an appearance that matches its lifecycle stage and season and has no signs of pests, diseases, or disorders.
Sometimes a plant will look unhealthy, but it may be a case of its lifecycle stage. It may be healthy but have no leaves because it is dormant. Dormancy is the stage where there are no visible signs of growth. But just because it's dormant doesn’t mean it’s unhealthy.
For example, a plum tree (Prunus domestica) will have no leaves in winter, but it will still be alive. In fact, it will be sending energy down to its roots to help them grow.
There are a few ways to check if a tree is dormant or dead. A simple one is to bend a small branch. If it bends easily, water is still inside, so it is probably dormant. If it snaps and the wood is hard and dry, that part of the tree is dead.
Another way to check is to scrape off a small piece of bark from a branch. If the layer underneath is green, then the plant is still alive. If it is brown or grey and there is no moisture, that part of the tree is dead.
Watch: How to do a scratch test on trees and shrubs (1:07 minutes)
Another sign to look for is dieback. In trees, dieback occurs where the leaves on the branches furthest out from the trunk die off. In some cases, this will cause the tree to form smaller shoots along the main branches and trunk to try to replace the leaves lost from the outside branches. This results in trees with bare branches at the tips and a mass of green leaves close to the trunk. In most cases, these trees will die in the next few years.
This illustration from Briggs and Taws (2003), shows the dieback process in five stages.
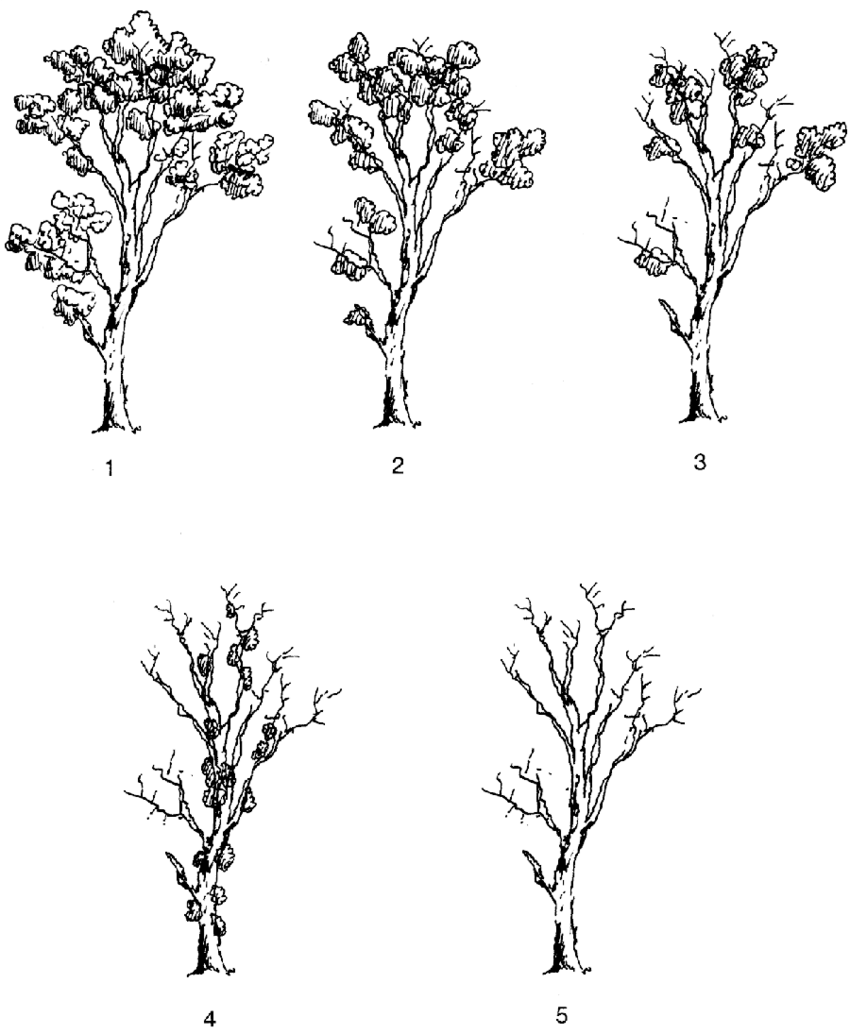
Categories of dieback, adapted from Heatwole and Lowman (1986). Dieback categories:
- healthy tree
- foliage beginning to die from the tips of the branches, some thinning or ‘sickness’ of leaves and some partly dead branches
- as with 2, but with greater loss of foliage and some completely dead branches
- most of the epicormic foliage has died
- dead tree.
Also look for dead, dying, or crossing branches on trees and shrubs. If they are present the plant should be pruned to remove these, which should improve its health.
In garden design, an environmental analysis is a snapshot of the growing conditions that the people and plants that occupy the site need to deal with. It usually takes the form of arrows and notes on your site survey plan, or on a separate piece of paper.
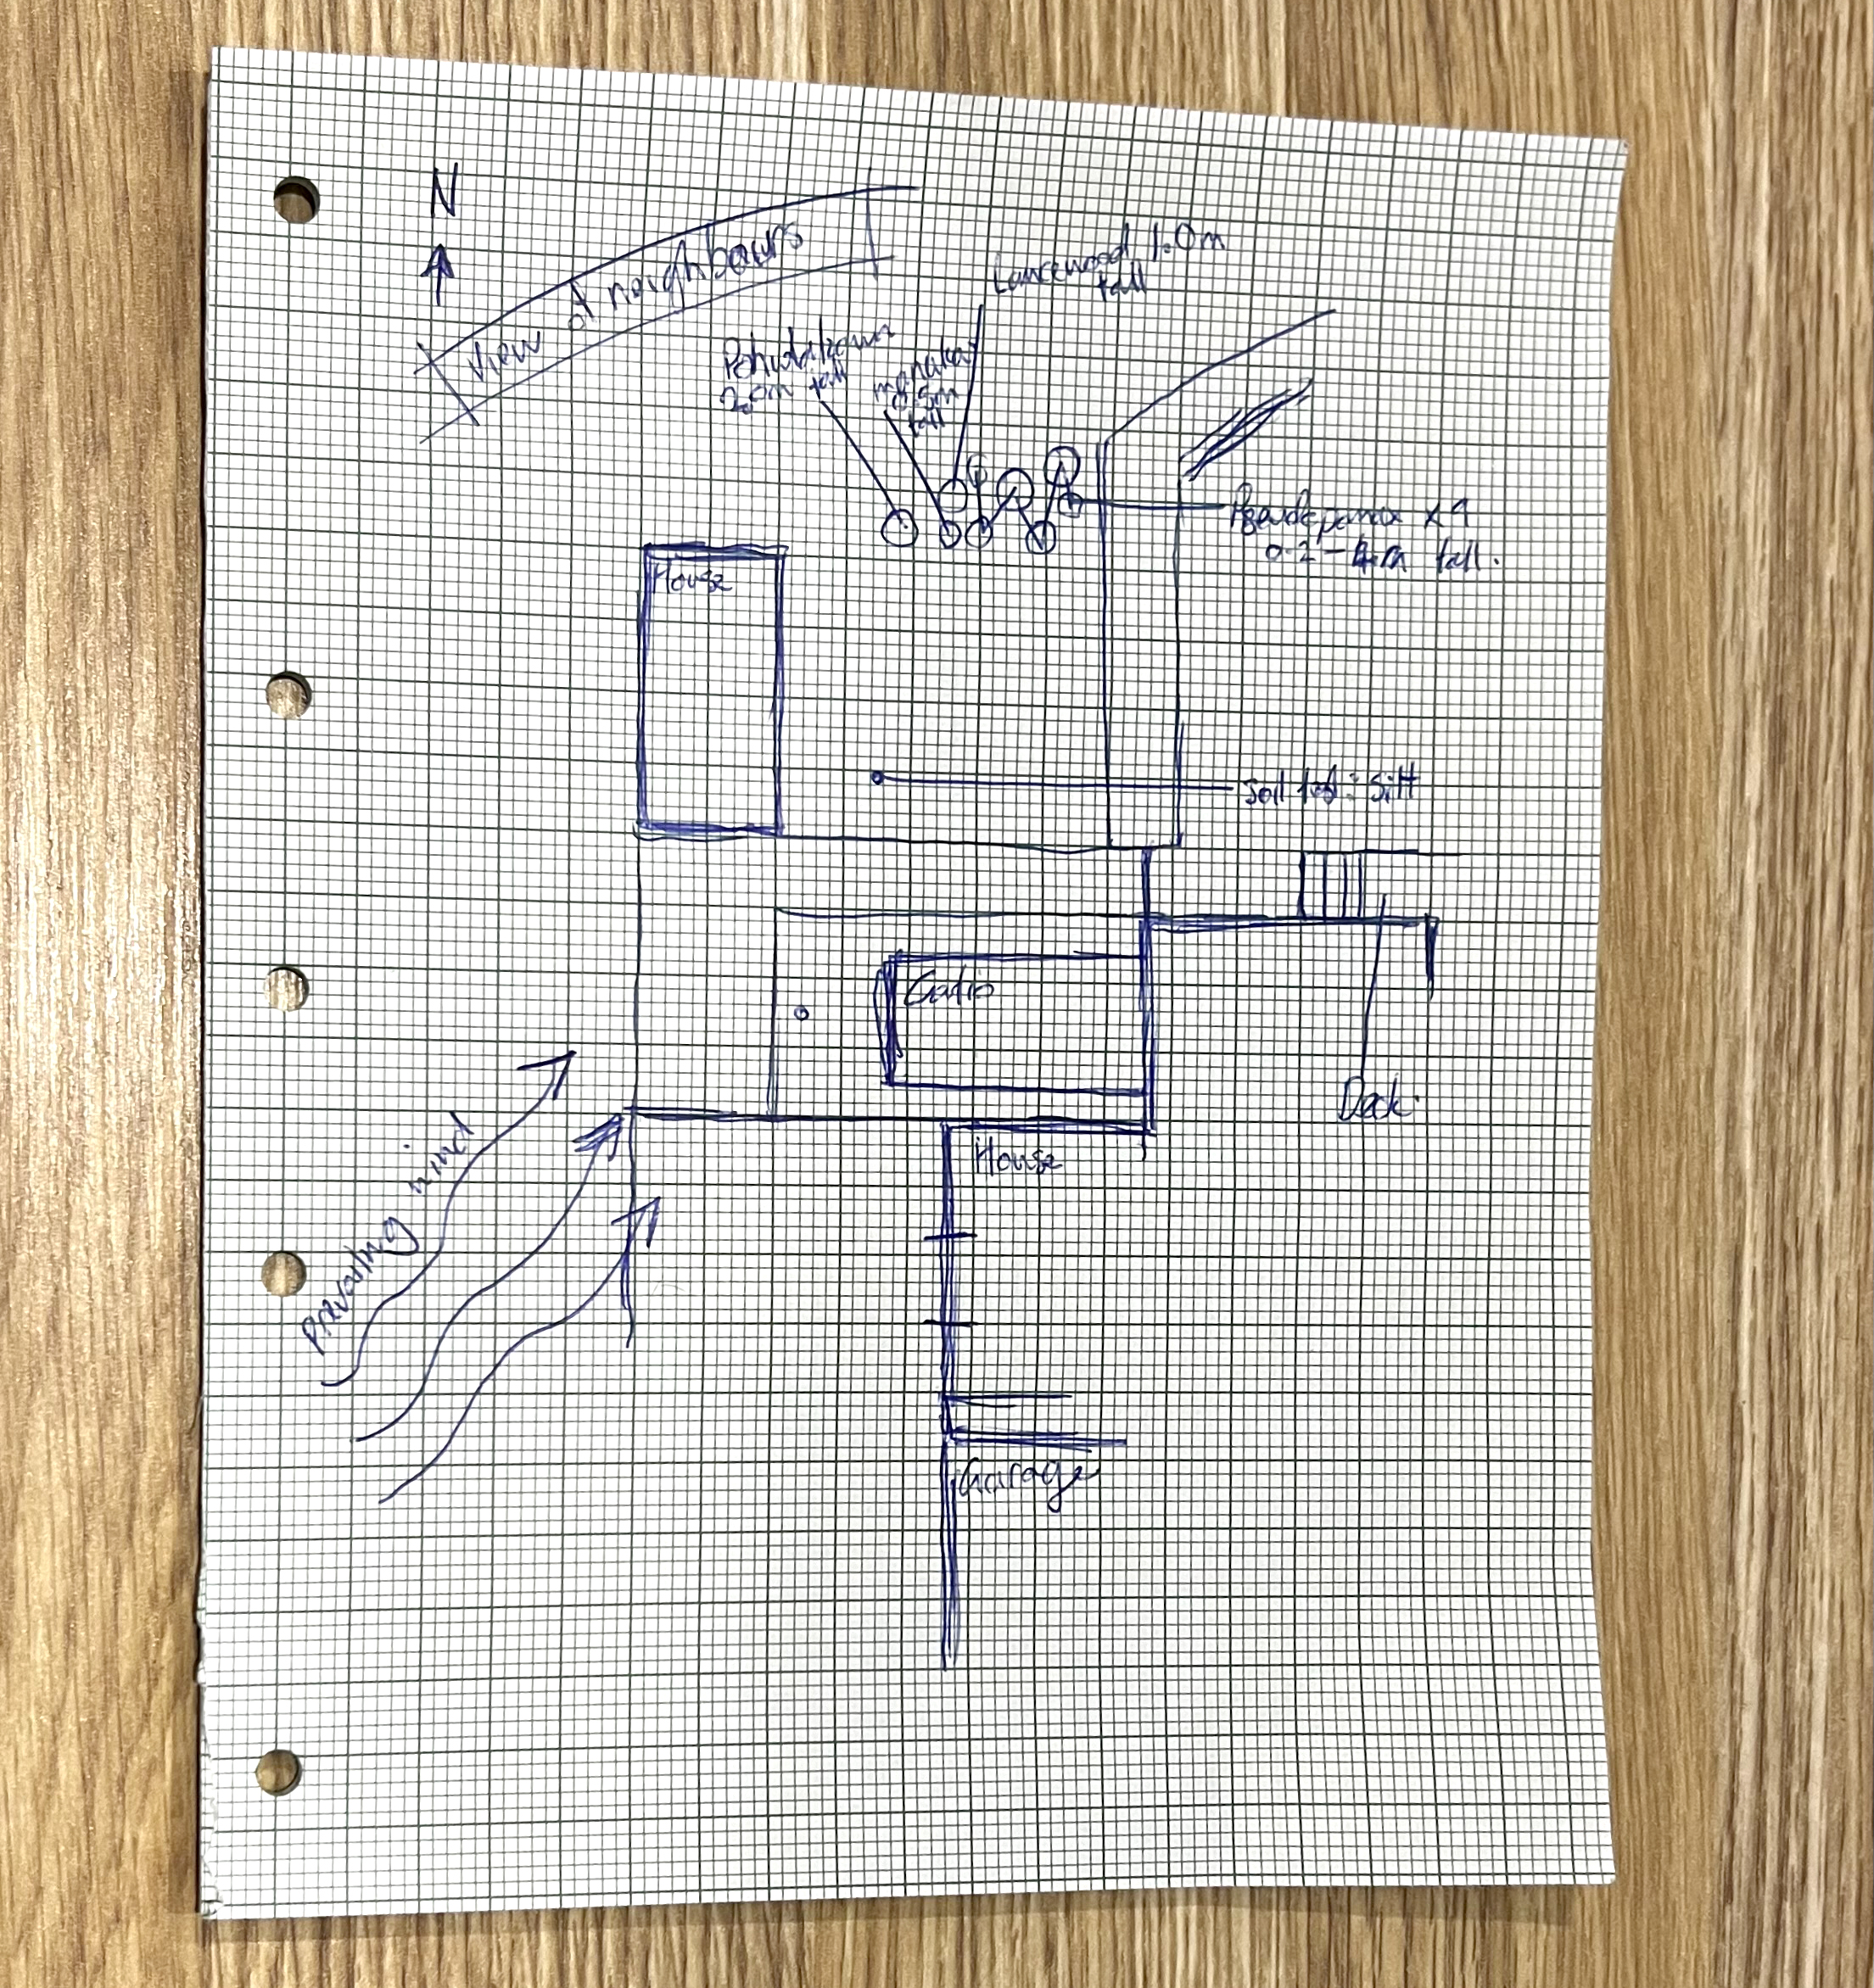
Example rough notes from environmental analysis, showing north, prevailing wind, undesirable views, soil test location, and height of trees and shrubs.
Sun
On your site plan, mark which direction north is. This will enable you to factor in sunlight when you are looking at it later. Your client may also have told you about any particularly sunny or shady spots in the current design.
Wind
Mark the prevailing wind – the direction that the wind comes from most often. You can get this information from your client interview, or there may be signs in the garden itself such as wind-blown trees.
Views
Make note of what views can be seen from different areas of the garden and house (if the client is happy for you to walk through their house). Undesirable views can be minimised with planting, or fences. Pleasant views can be taken advantage of by placing high-use areas such as outdoor living spaces in line with the views and by planting taller plants on either side. This is known as ‘framing the view.’

Noise
Take a moment to stop, listen, and smell in various parts of the site. Record the direction of any loud noises that you expect to be ongoing – a busy road, a nearby factory, the airport and so on. Do the same for strong smells that you need to try and address. While it is hard to eliminate these types of issues completely, well thought out design can help to ‘lessen the blow.’
Soil
Later in the programme we’ll look at selecting plants that fit with our design and are appropriate for the site conditions. To choose the right plants it helps to know what type of soil we’re dealing with.
Soil texture
Soil texture is a term that describes the main type of mineral particles in the soil, which are either sand, silt, or clay.
Sand particles are the largest and can be seen with the naked eye. Sandy soils generally allow water to run through them quickly, so they drain excess water away quickly, but they don’t hold onto nutrients well.
Silt particles are smaller. You’ll need a magnifying glass or a microscope to see them. Silt typically holds more water and nutrients than sand, but less than clay.
Clay particles are the smallest. You’ll need an extremely powerful microscope to see individual clay particles – one with a magnification of 1000x or more! Clay soils are excellent at storing nutrients that plants need, but also tend to hold water for a long time. In soils that are mostly clay, the soil can become waterlogged, which can kill plants.
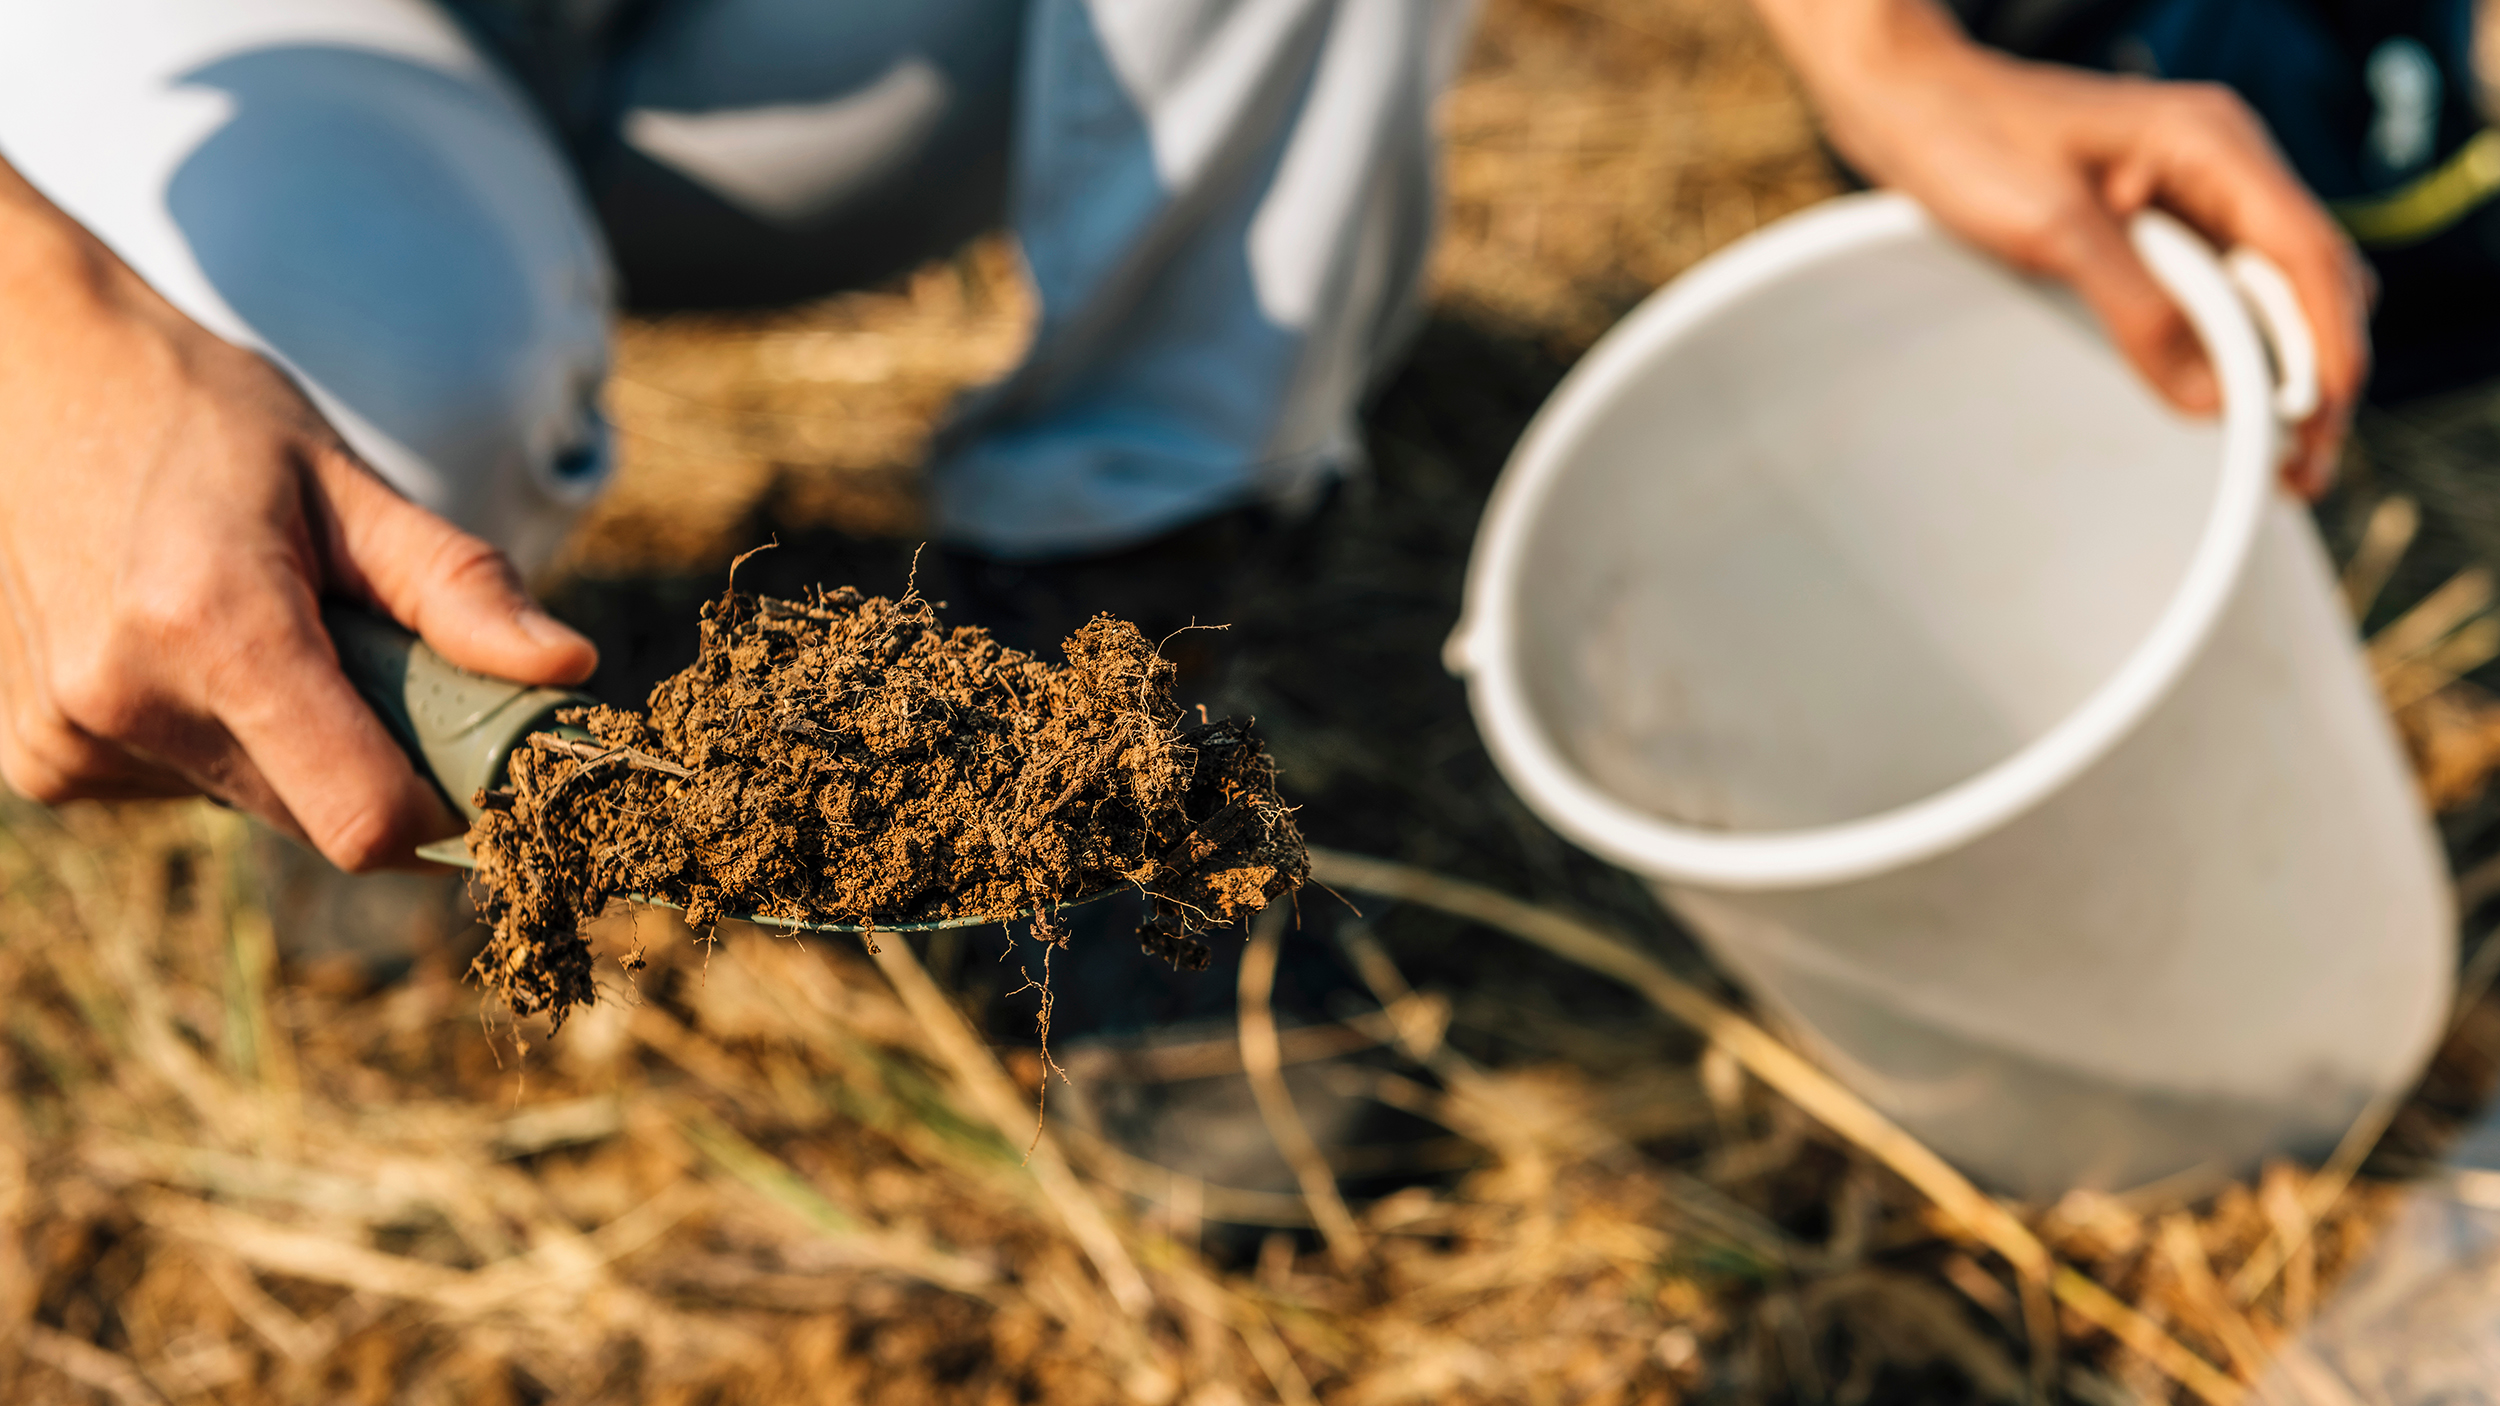
When doing a site analysis it is useful to dig up a small amount of soil using a trowel and do what is known as a soil texture test.
Watch: How to test your soil - texture (sand, silt, clay composition) (3:40 minutes)
Watch this video by the New South Wales Government, which shows how to test soil texture in the field, then complete the activity that follows.
Post watch activity
The following is a summary of the soil analysis steps shown in the video. Follow the steps using soil from either your own yard or your client’s yard.
- Take a handful of soil (remove anything larger than 2mm), and if dry, add water until the soil comes together to form a ball.
- Knead the soil between your thumb and your forefinger ensuring that the soil is completely mixed, and no large lumps are present, this should take 1-3min.
- Let the feeling of the soil indicate the soil texture:
- If it feels gritty and hard to the touch, and/or sounds raspy when held to your ear, the main mineral particles are sand.
- If it feels smooth, silky, even soapy but not sticky, the main particles are silt.
- If it feels smooth and sticky, the main particles are clay.
On a small site, one soil texture test will probably be enough. On larger sites, take more tests. For instance, one in the front yard and one from the back yard.
Soil drainage
Soils that are high in clay generally have poor drainage, but so can soils with lots of organic matter. Organic matter is anything in the soil that is animal or plant, dead or alive.
As you walk around the site keep an eye out for areas of poor drainage. Some signs are:
- water pooling in depressions for longer than 24 hours since heavy rain
- presence of reeds or rushes
- plants dying, particularly in depressions in the ground.
Note the approximate location of the areas of poor drainage on your plan.
Activity
- Complete the soil test as set out in the video in the learning content above.
- Flip the card below that matches your result (flip the others over too if you like).

When carrying out your site analysis it’s a good idea to take photos of everything! Well, not quite everything, but do take lots of photos. This will help when you come time to draw up your plans, or when doing your designs and realise you can’t remember the colour of the house walls.
Try to take photos of:
- The views looking out the house windows. If that’s not possible, try standing directly outside each and take a photo looking straight ahead.
- Each side and corner of the house and all other buildings.
- All fences to get a sense of the height, construction, and quality.
- The main plants and planting masses (garden areas).
- Other features, such as clotheslines, heat pumps, and paths.
- Views of the surrounding area, both desirable and undesirable.
In this topic we looked at what to include in a site inventory and the information to gather about the soil and the surrounding environment. We also reinforced the importance of taking lots of photos of the site, and the views from the site to the surrounding area.
Now you're ready to go and do the site survey, environmental analysis and site inventory for your chosen site. Go forth! Karawhiua!