In this topic we’ll work conclude the development of the proposal plan which includes:
- drawing in the plants
- adding the title block
- adding annotations
- rendering the drawing.
By the end of this topic you’ll be able to:
- Produce a proposal plan ready for submission to your client.
To add interest to your proposal plan, use a few different plant symbols.
Here are some examples that you might like to use.
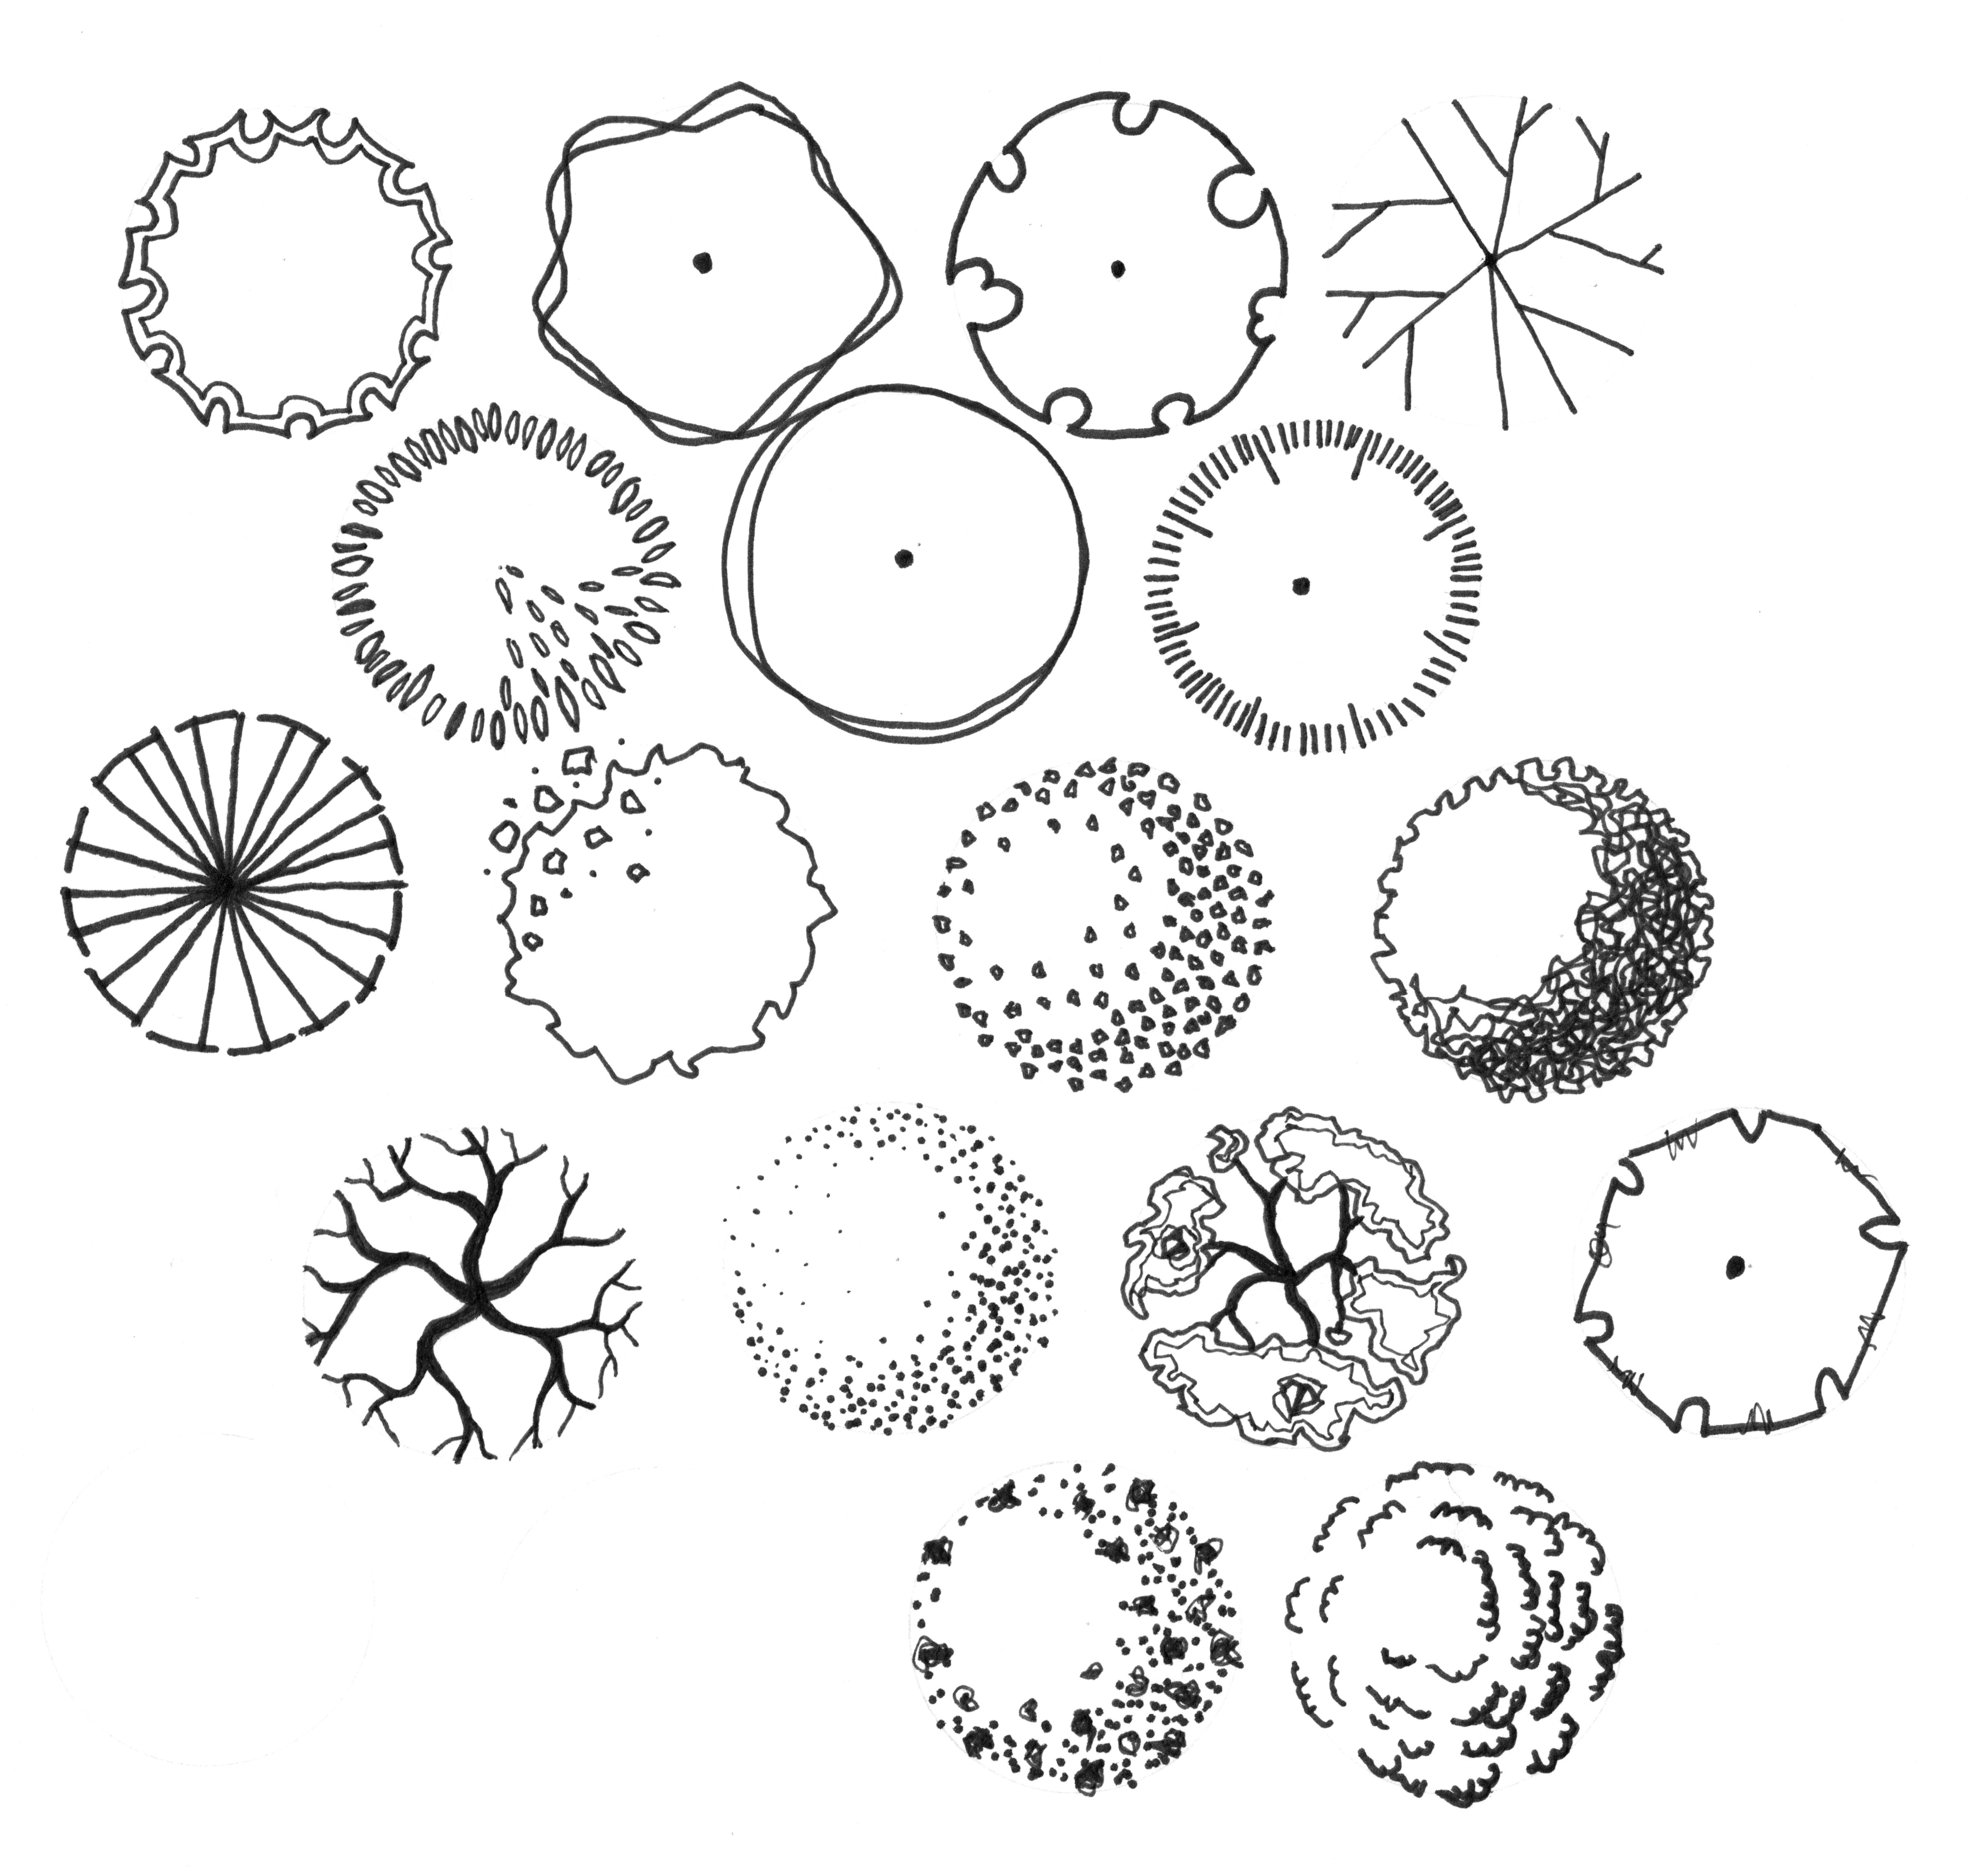
A range of tree symbols. For all of these, the process begins by lightly drawing a circle with a pencil. After that, use one or more ink pens to add detail. The more three-dimensional symbols take much longer to draw, so it may be better to stick with the more simple symbols for your design.
For lower-level plants – shrubs and below – where the pencil circles overlap, only draw the outside edges or lines.
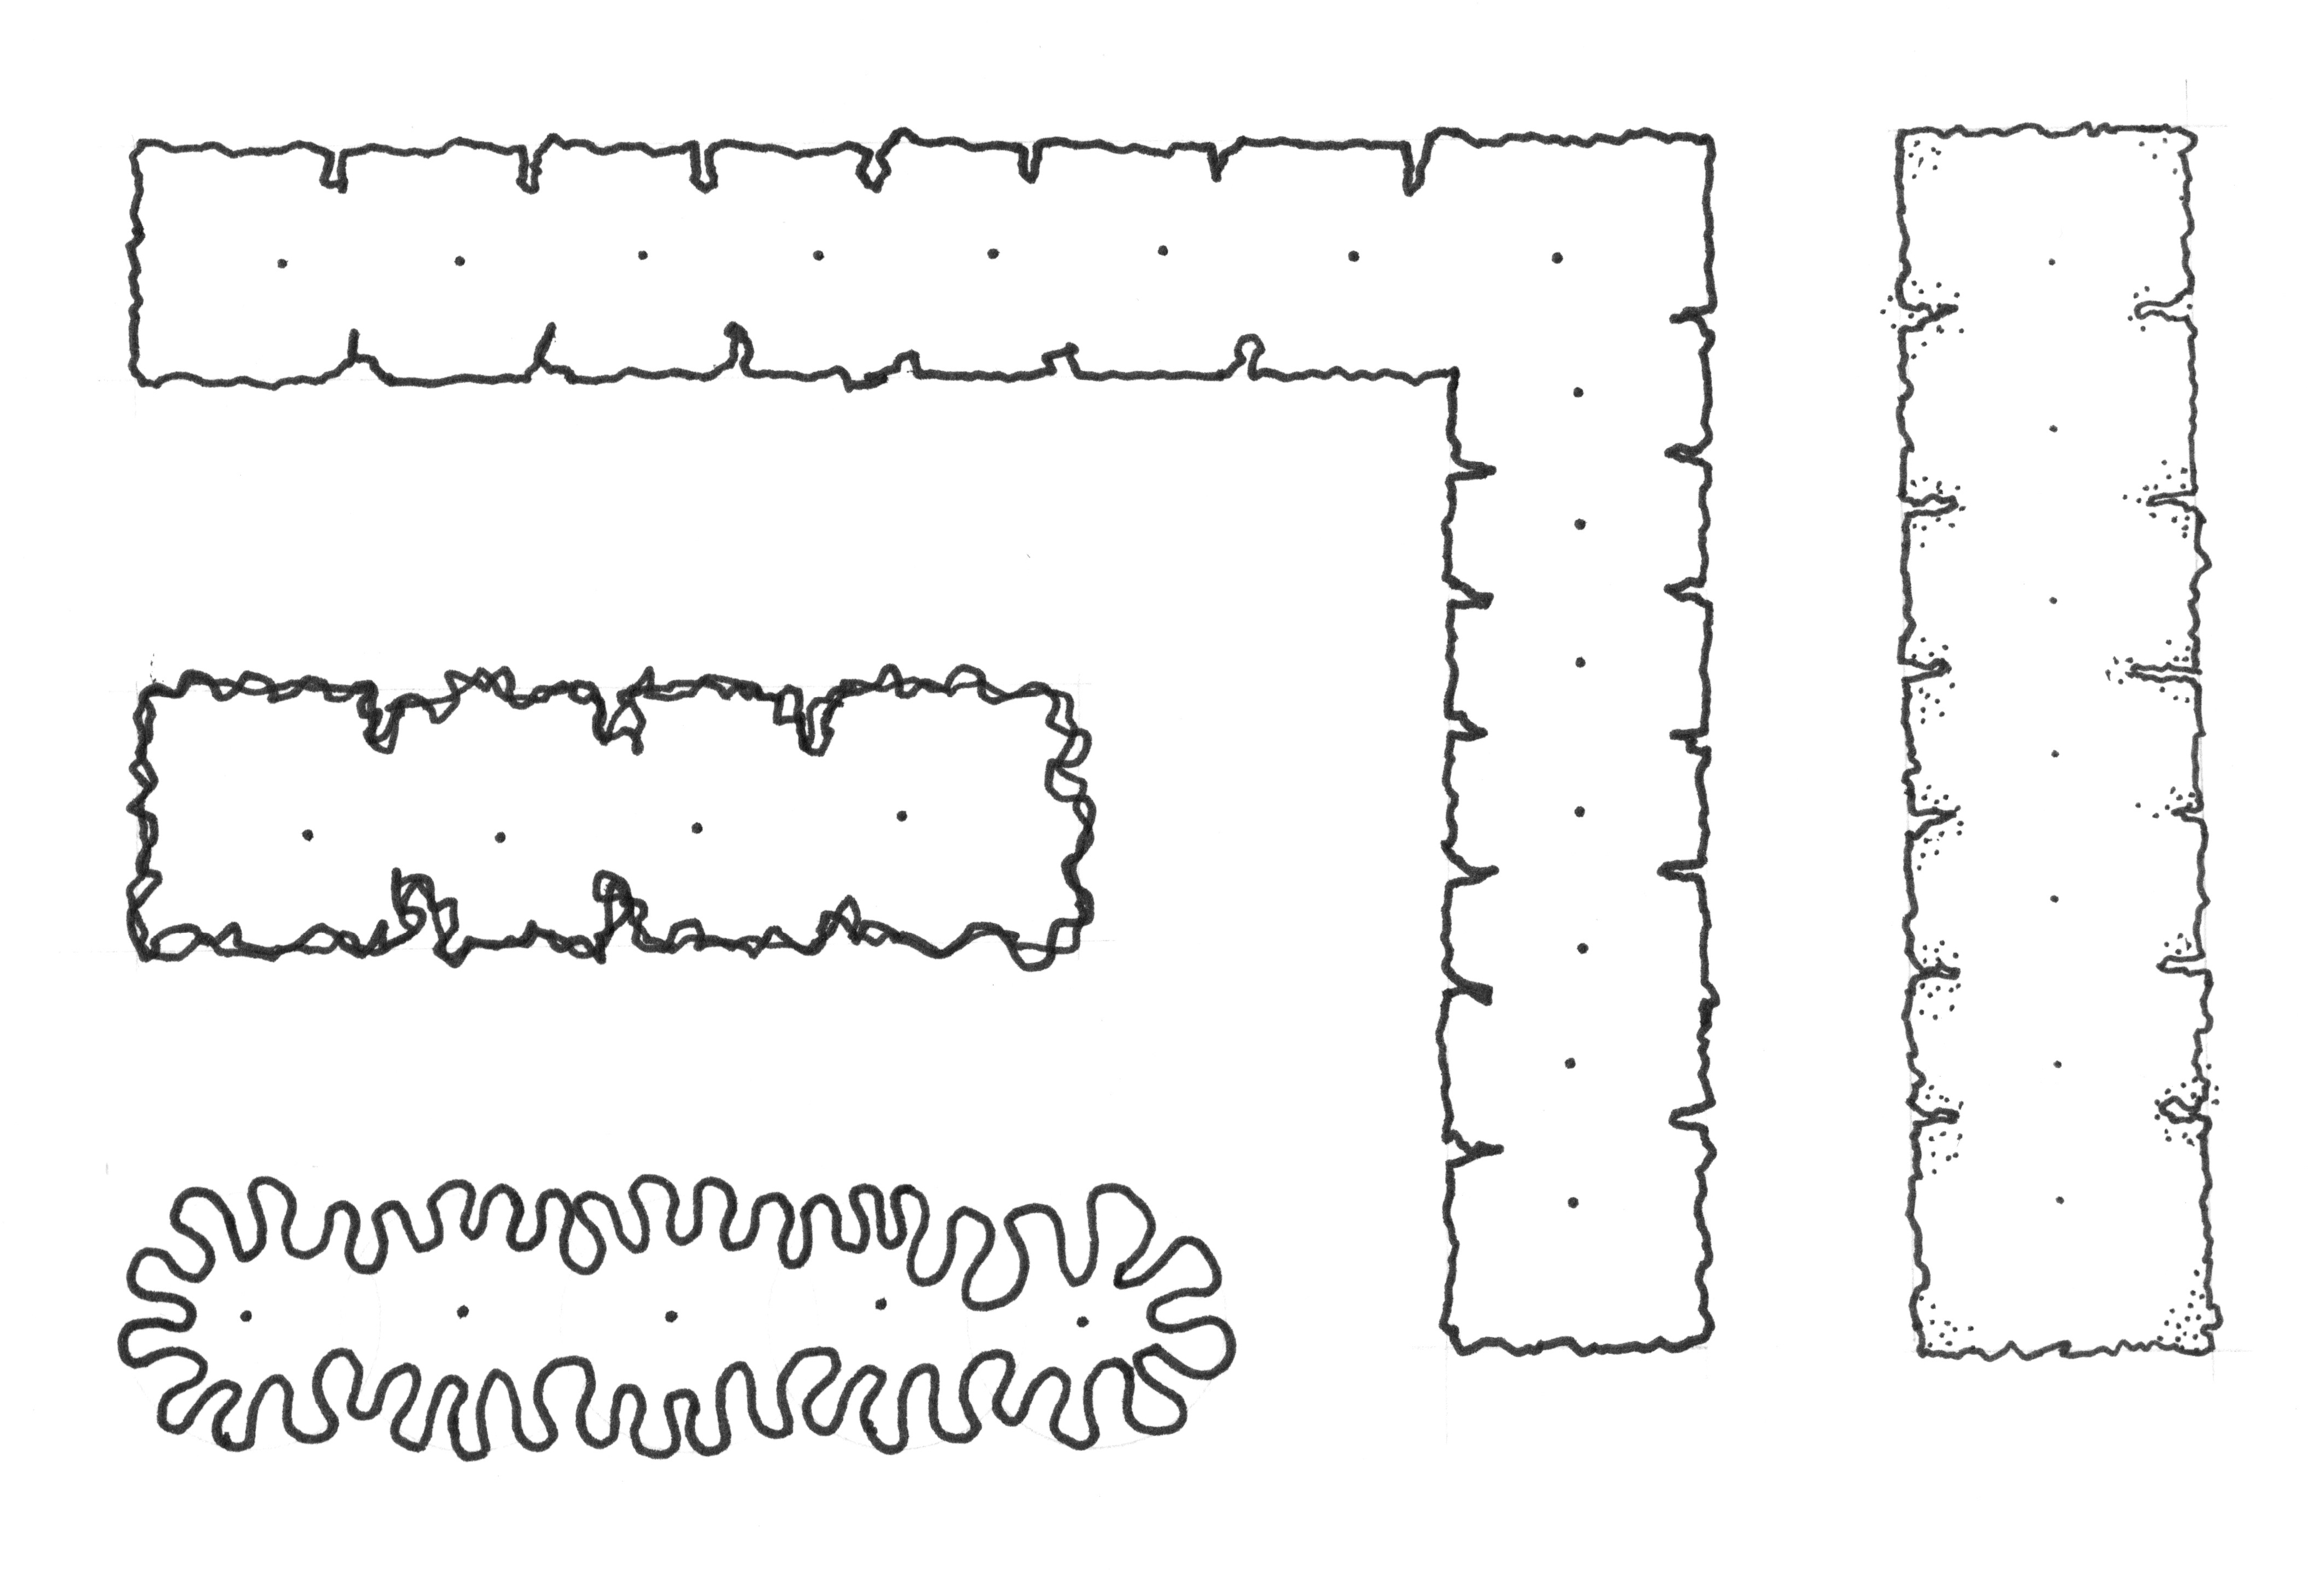
When drawing hedges, the plants are usually – though not always – drawn using a square shape for each plant.
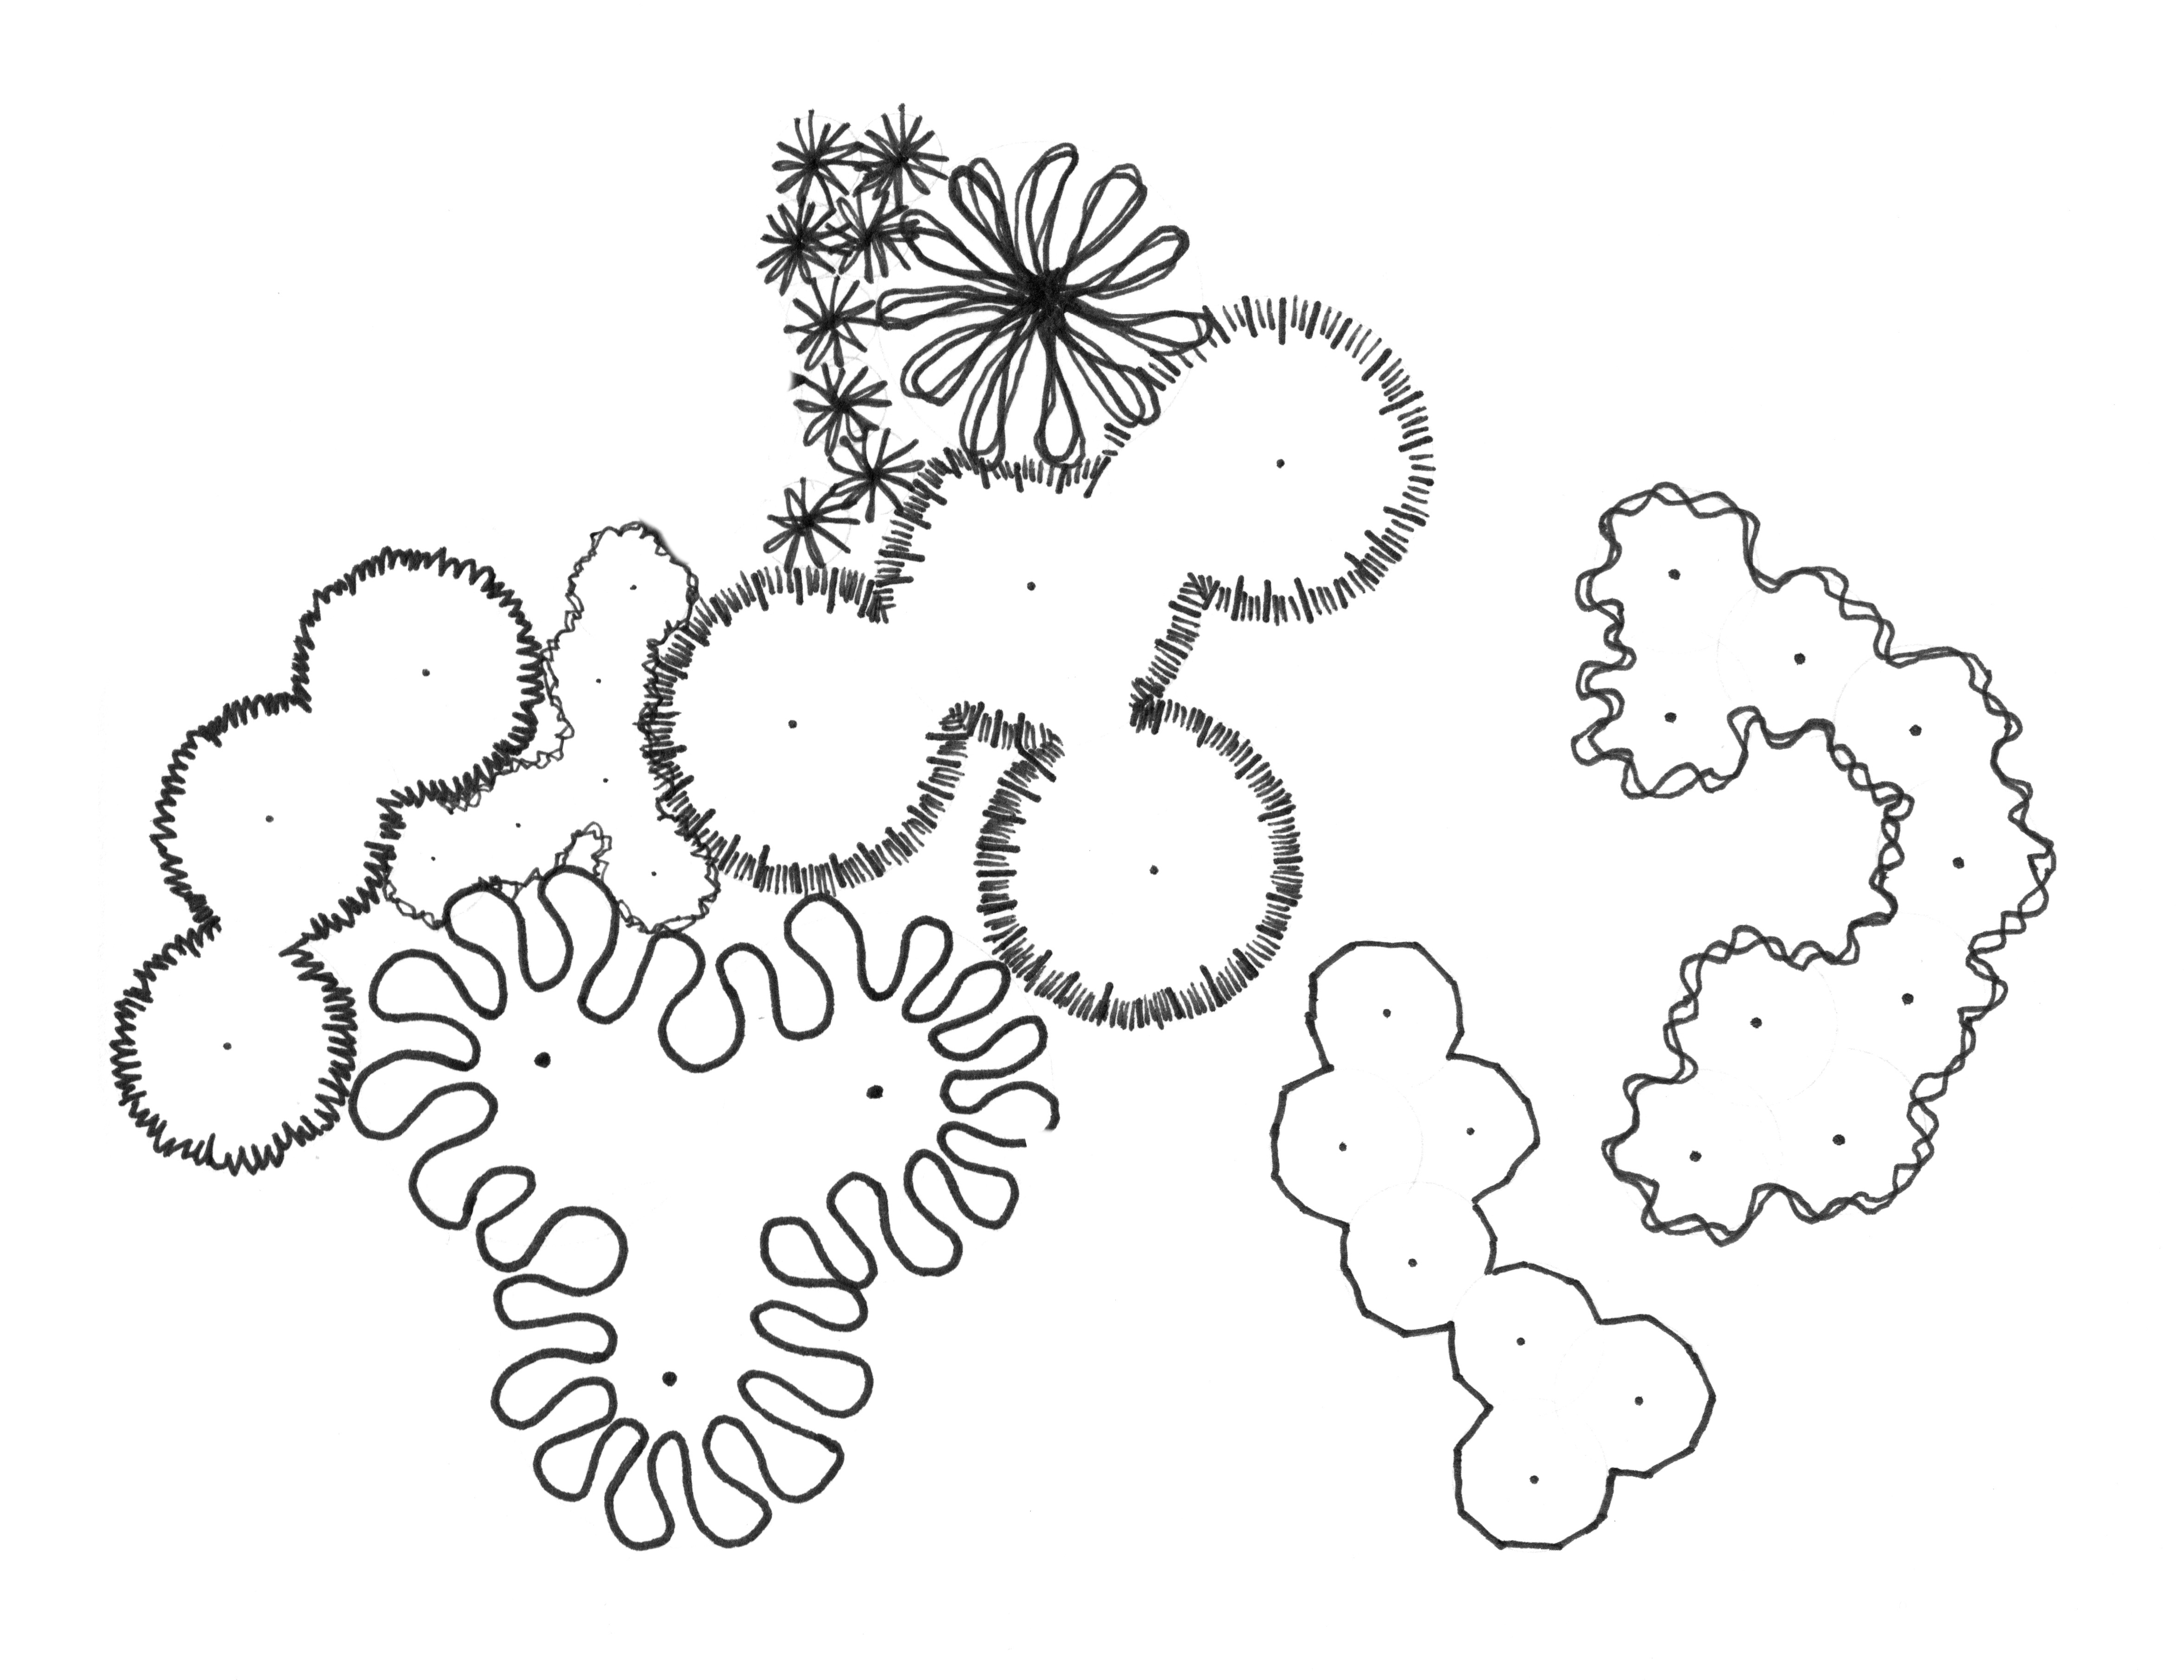
Watch the following which shows how to combine plant graphic symbols to draw plant groups. Lisa suggests which types of trees you might use each symbol for, but these are only guidelines.
Watch: How to Group Plant Symbols (3:30 minutes)
This video shows the steps involved in combining plant graphic symbols to draw plant groups.
Activity
Drawing practise
Practice drawing these plant symbols as individual plants and in groups, then consider the following questions:
- Which ones do you find easiest to draw?
- Which ones are you definitely not going to draw for this garden design?
Choosing which symbols to use
Before you start drawing, decide on which plant graphics symbols you want to use. The key is to keep it simple; don’t over clutter the drawing by adding too much variation.
Choose symbols that broadly represent the plants that you’ve specified and go for the ones you found easiest to draw. For a small site, aim to use no more than five different symbols. For a larger site, perhaps up to eight.
You might find it useful to draw the symbols on a separate piece of paper and list next to each one which plants you’ll use it for.
Drawing in the plants
Rearrange the order of your drawings on your drawing board. The bottom layer should be your planting plan and the top layer should be your proposal plan.
Draw the plants on the proposal plan using pencil to form the selected symbols. When you are happy with the pencil linework, go over it with your pens. Use the same size pens you used for the planting plan, which should be:
- Trees: 0.8mm
- Shrubs and tall perennials: 0.5mm or 0.3mm
- Low planting and groundcovers: 0.2mm
Begin by annotating the name of each space (or garden room). For these annotations use a 0.2mm pen to give them extra impact.
Next add in all other annotations – the hard surface specifications – using a 0.1mm pen. Don’t include any information about plants on this plan.
For focal points either provide a text specification, or a code – like “Focal point 04” if supplying supporting images.
You might find it useful to slide a sheet of graph paper behind your proposal plan and line it up horizontally to use as a writing guide. Use all capital letters for your annotations on this plan.
Use a 0.05mm or 0.1mm pen for all leader lines.
Like with the concept plan, we’re going to use a rough pencil rendering technique. Use a simplified colour palette, but with some variation in the planting, this could be by using different colours or by making some plants slightly more vibrant. Try out some colour combinations on a blank piece of paper first.
If areas of the garden beds are visible, where there are no plants, render these a very light shade (use very little pressure) of dark green.
Once you’ve rendered all parts of the drawing, add shadows in the same way you did for the concept plan.
Assessment 1
And that’s it, you’re all done! You are now ready to complete Assessment 1: LDB04A1: Produce a garden design proposal.
For this assessment you need to submit your completed proposal plan, planting plan, and planting schedule. Go to the assessment now to read the full requirements.
Once you have submitted this assessment, you have made it to the end of this module!
In the next module we’ll work through the process of setting out landscape features so you can be certain that you’re going to install them in the correct location.
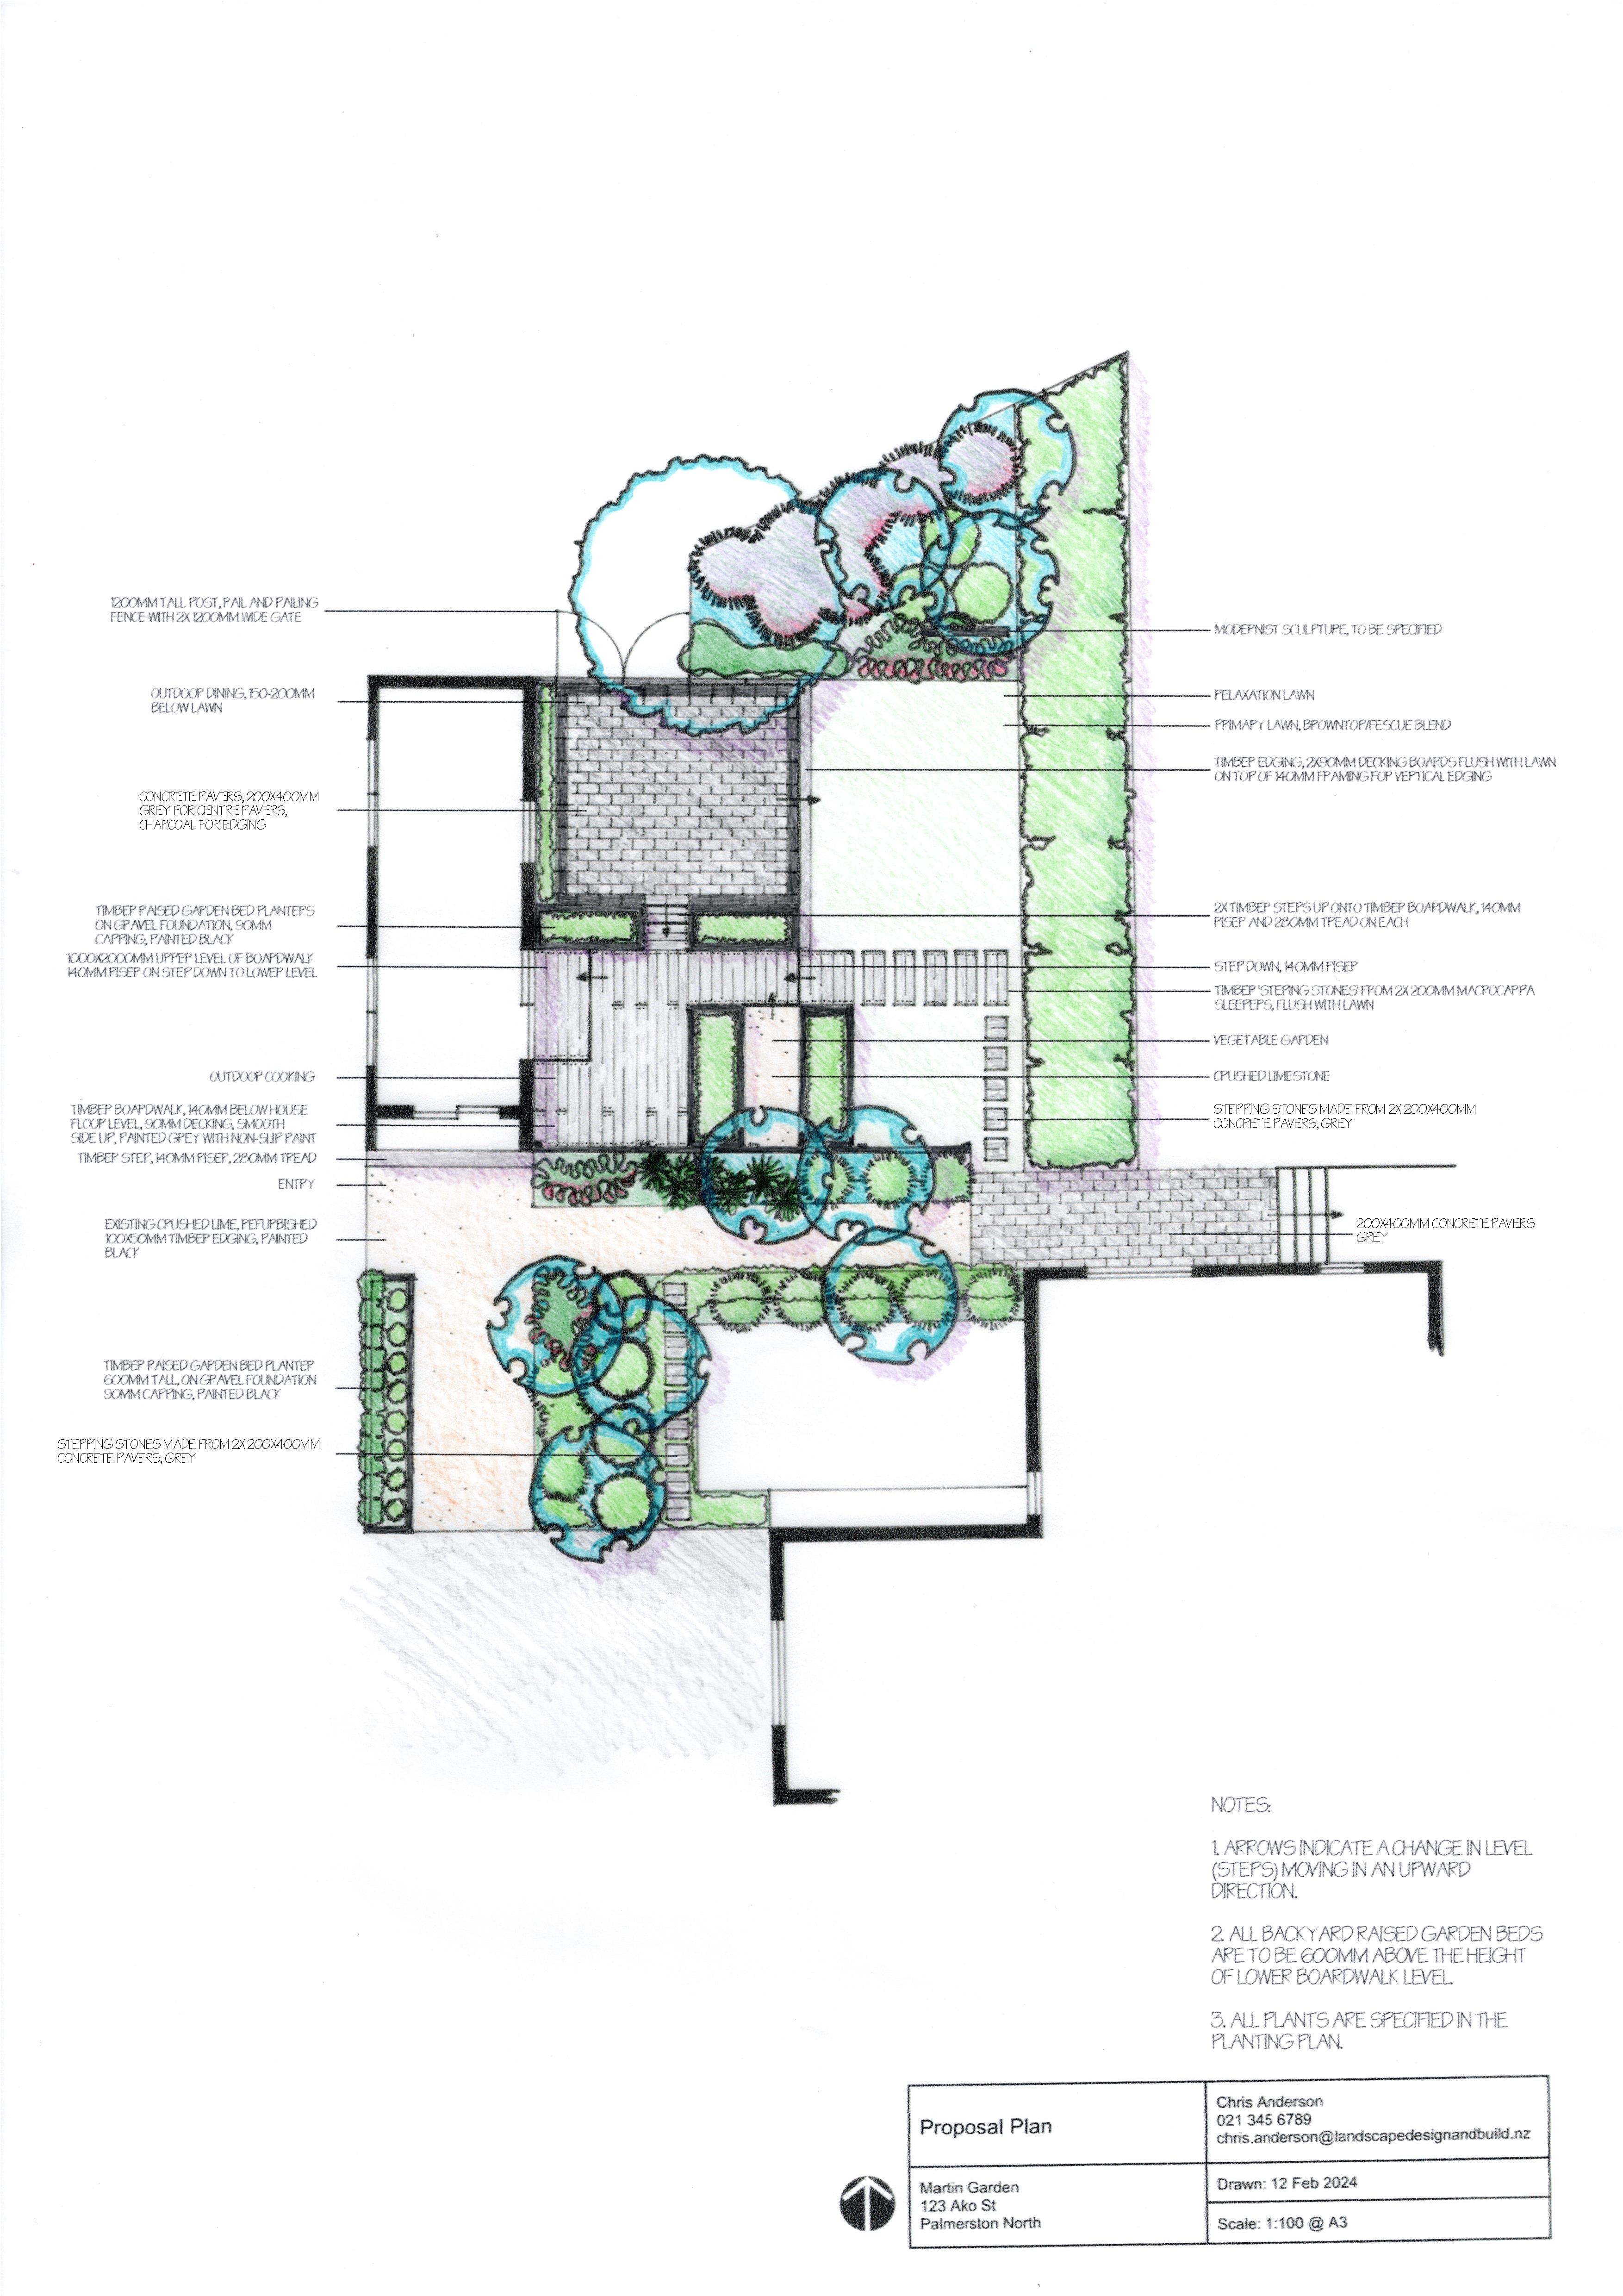
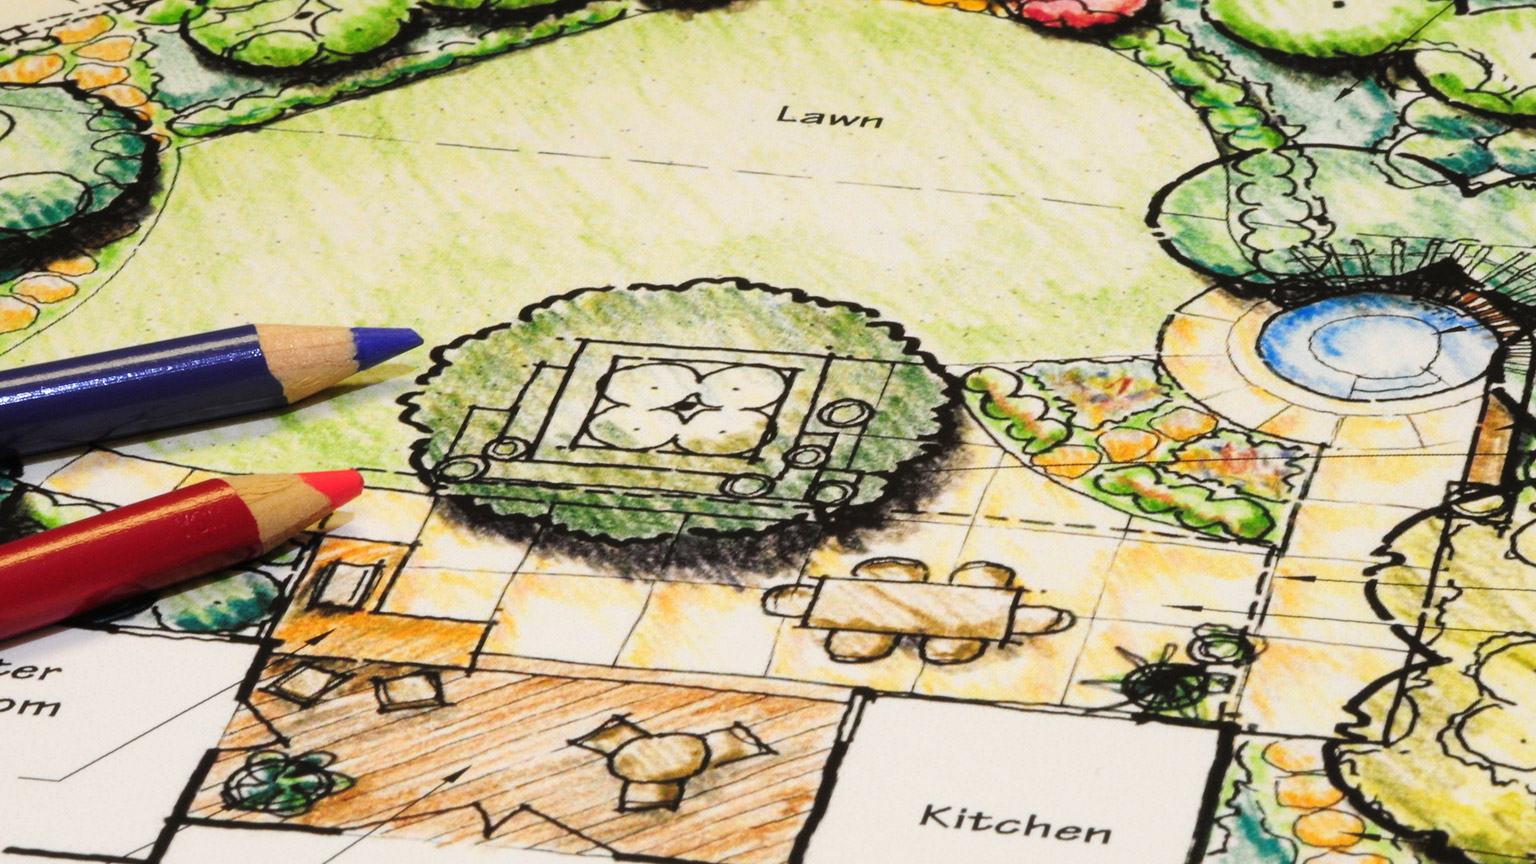
Completed proposal plan for the Martin Garden.