This is the final module in the programme. It’s called Hard and Soft Landscaping.
By now you have completed the initial set out of the hard and soft landscaping features that you are going to install. Now we turn our attention to installing these features.
By the end of this module, you will be able to:
- implement hard landscaping features as a part of a team
- install and establish soft landscaping.
The module has been created to:
- outline tools and equipment commonly used for landscaping
- build your understanding of routine hard landscaping tasks
- build your understanding of routine soft landscaping tasks
- explore plant establishment activities.
Time to complete this module
This module is a big one. It’s worth 25 Credits, which is roughly equivalent to 250 hours of learning. For some people it will take a little less time and for others it may take a little longer. Learning time includes reading, watching videos, completing learning activities, processing ideas, discussing what you’re learning with others, and completing the assessments.
You should aim to complete this module in:
- Full-time learners: 6 weeks
- Part-time learners: 12 weeks.
Assessment outline
To finish this module you need to complete three assessments:
LDB06A1: Install hard landscaping:
To do this you will need to:
- Work with at least one other person to install/construct the hard landscaping feature you did the initial set out for in the previous module, according to the plans and specifications.
- Have someone who is not part of the construction team to take photos of your team carrying out the work.
- Take photos of the completed hard landscape feature.
LDB06A2: Team member appraisal:
To do this you will need to:
- Ask all team members who worked with you to install the hard landscaping feature in Assessment 1 to complete a 360 Degree Feedback form.
- Review the 360 Degree Feedback forms from all team members and complete a Self-Review Form.
LDB07A1: Install soft landscaping:
To do this you will need to:
- Install and establish the soft landscaping feature you did the initial set out for in the previous module, according to the plans and specifications.
- Have someone take photos of you completing the work.
- Take photos of the soft landscaping feature immediately after installation.
- Take photos of the plants 2-4 weeks later to make sure they are still in good health.
Go to the assessment section now and read the full assessment requirements.
Structure of this module
As mentioned, this is the final module in the programme and it’s a big one!
Take a bit of time now to understand how this module is structured, because it’s a little different from the ones you’ve completed so far. In previous modules you’ve started at the first topic and finished at the end of the last one.
In this module, you’ll need to work out the sequence that works best, based on your situation.
Landscape construction sequence
As we learned earlier in the programme, hard landscaping is normally installed before soft landscaping. Doing it this way means that there are less things in our way as we construct the hard landscaping, which may involve the use of machinery, like excavators.
In this programme you’re only installing one hard landscaping feature and one soft landscaping feature. If these are in different areas, there may be no need to do the hard landscaping before the soft landscaping.
When deciding what to work on first, consider:
- Does your hard landscaping require any earthworks, such as digging holes for posts or piles, or excavating to lay the base course for paving?
- How wet is the ground?
- Will earthworks create a huge mess of mud?
- Can you leave the earthworks until later and still complete all three assessments before the end of the programme?
- Is it a good time to plant plants now?
- The best time to plant plants is usually in spring or autumn.
- If it’s winter, can you leave the planting until spring?
- If not, are the plants frost tolerant and have they been acclimatised to winter conditions?
Study sequence
With this in mind, the best sequence is to leave the activity that requires the most ground work till the end, providing it won’t interfere with your other tasks.
If it’s not too boggy or too cold, right now, we recommend the following sequence:
- Start by working through Topics 6.1 and 6.2.
- Then move on to the topics related to the features you are going to set out.
- Hard landscaping features are covered in Topics 6.3 to 6.7 and soft landscaping topics are covered in Topics 6.8 to 6.10.
- So if you are going to install an aggregate pathway and sow a lawn, go through Topics 6.3 and 6.8 only.
- Complete the assessments in whichever order makes the most sense for your situation.
- Once you’ve submitted your assessments, go back to the topics that you haven’t covered yet. Doing so will help expand your knowledge of the other areas of landscape construction.
- Finish off the programme by reading Topic 6.11, which is called Next steps.
If it’s currently too boggy or too cold to do much outside, we suggest going about it this way:
- Work through Topics 6.1 to 6.10 in order.
- Complete the assessments in whichever order makes the most sense for your situation.
- You’ll need to finish installing your soft landscaping feature at least two full weeks before the end of the programme. This is because the last step of the assessment requires you to take photos once the plants have been established. Ideally this will be four weeks or even longer, but if you are pressed for time two weeks will be enough.
- Once you’ve submitted your assessments, finish off the programme by reading Topic 6.11, which is called Next steps.
We’re here to help!
Firstly, remember, it’s ok to make mistakes. When we make mistakes we can learn from them by thinking “what went wrong?” and “what can I do differently next time?”
Secondly, we’re here to help! If something doesn’t make sense, or you’re not sure what to do next, get in touch with your Tutor.

In the previous module we went into great depth about how to work safely in landscape construction.
Here, we offer a few more practical suggestions to help ensure you and your team work safely together.
Safe working practices
You should follow these safe working practices, and any others that are specific to the work you are carrying out:
- Write up a Work Risks and Controls Plan for each distinct piece of work. For example, one for installing your hard landscaping feature and another for installing your soft landscaping feature.
- Facilitate a daily briefing with your team at the beginning of each day. Review and revise the Work Risks and Control Plan as part of the briefing.
- Make sure everyone knows and follows accepted safe working procedures. These may include:
- Making sure underground utility scans have been done before you start on any groundwork deeper than 200mm.
- Only using tools and equipment you’re competent to use unless you are under direct supervision.
- Wearing all necessary personal protective equipment (PPE) correctly.
- Ensuring you are aware of others on site and the tasks they are working on and any hazards that may be present as a result.
- Working safely around machinery, including:
- Knowing the hazard zone (distance from the machine that is considered dangerous to be within while it is working) and remaining outside the whole time the machine is being used.
- Knowing and avoiding pinch points.
- Knowing how to safely get the machine operator’s attention.
- Calling a “safety stop,” if you think there is a chance of someone being injured or subject to a situation that could lead to illness. Agree on how to do this, it could be by shouting “STOP!,” whistling, or some other way of getting people’s attention.
- Follow safe lifting and manual handling techniques.
WATCH
Safe Lifting in the Workplace
Duration: 5:50 minutes
Lifting loads is different for each worker as we all have a different level of strength and flexibility. Your choice of lift technique will depend on a number of factors. In this video, Gail Archer-Heese, SAFE Work Manitoba Prevention Consultant, and Jill Volk, Interlake and Eastern Health Region Musculoskeletal Injury Prevention Specialist, will demonstrate different lifting techniques to help you lift safely for different tasks.
- Pre Watch Question: What things do you do to get your body ready to lift a heavy load?
- Post Watch Task: Which of the techniques shown in this video are you most likely to use? Why?
Emergency procedures
Make sure you and your team know what to do if there is an emergency, such as an injury or damage to utilities.
Injury or sudden illness
Make sure everyone in your team knows where the nearest first aid kit is.
If an injury or sudden illness occurs, think DRS ABCD.
WATCH
DRSABCD Action Plan
Duration: 3:44
This video introduces the seven stages of the first aid response action plan, also referred to as a primary survey.
- Pre Watch Question: Do you know what the letter of DRS ABCD stand for, in first aid?
- Post Watch Task: Can you recall the seven stages of the first aid response action plan are? Hint they start with the letters DRS ABCD.
How you treat the injury or illness will depend on what you find when you do your primary survey.
We strongly recommend you complete a first aid course. The skill taught in these courses will come in handy in many different areas of your life, so it is a worthwhile investment.
Remember the emergency phone number in Aotearoa is 111.
Damage to utilities
If you inadvertently damage a utility such as power or fibre cables, or gas or water pipes:
- Separate yourself and others from the damaged utility.
- Check if anyone has been injured. If they have, send for help and treat their injuries to the best of your ability.
- Contact the utility provider to have the supply isolated (switched off).
- Keep people away from the damage until it can be repaired.
In this topic we’ll introduce you to common landscaping tools. This builds on those that we’ve already covered earlier in the programme. In the last module we covered the following:
- levels
- sledge hammer
- spray paint
- 3-4-5 square.
In this section, many of these tools will be familiar to you, so feel free to skip ahead to those that you don’t have any experience with.
We’ll introduce specialist tools and equipment in the relevant topics.
Hand tools
Hammer
A good quality hammer is an essential tool for landscape construction. The most common type of hammers are claw hammers. The claw can be used for pulling out nails and prying objects apart.
Pliers
Pliers are used for gripping and pulling small objects.
Pry bar
A pry bar, also called a crowbar or wrecking bar, is used for prying (spreading apart) objects and is particularly useful when you need to take apart an existing fence or deck. They come in a wide range of sizes.

Spades
Spades come in different shapes and sizes for slightly different uses, but they are all designed for digging (which is how they are different to shovels). The part that digs into the soil first is called the blade.

A spade with a long, strong handle is a good investment if you expect to do a lot of digging, particularly in hard clay soils.
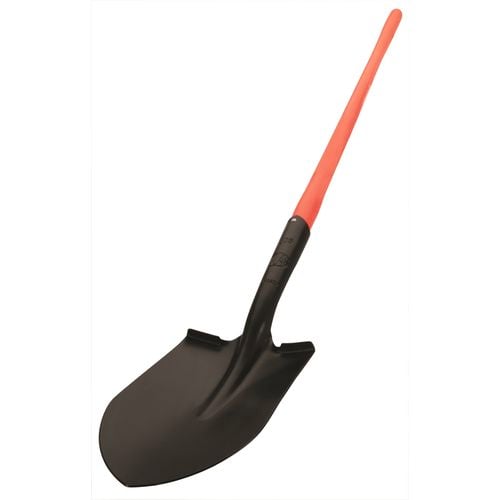
Shovels
Shovels are for moving material, such as soil or compost. They come in two main types:
- Square-mouth
- Round-mouth
Square-mouth shovels are ideal for scraping material off a hard surface, such as a concrete driveway, but can be harder to press into a pile of material.
Round-mouth shovels are easier to plunge into a pile of material but are less useful when it comes to scraping material off a hard surface.
While most shovels are designed to be excellent at shovelling and not particularly good at anything else, there are a few that strike a fine balance, being reasonably good at both digging and shovelling.
The Atlas Trade Plumbers Trenching Shovel is an example of a hybrid shovel that is good at digging and shovelling.
Rakes
The main types of rakes are:
- leaf rake
- garden rake
- landscape rake (sometimes referred to as a bed prep rake).
Leaf rakes are used for collecting leaves – useful when making compost – but are too fragile for other gardening uses.
Garden rakes are used for pulling out weeds that have already been hoed, and for spreading and levelling soil or amendments.
Landscape rakes are much bigger than standard garden rakes. They often come in 750mm (30”), 900mm (36”) and 1065 (42”) width. Given our standard raised beds are 75cm (750mm) the smallest would be a fine investment.
Most garden and landscape rakes have two working edges:
- The tines (prongs) which are great for collecting coarse objects like weeds and sticks and for pulling aggregates from one place to another.
- A flat edge which is excellent for carefully levelling areas.

Garden forks
A garden fork is a useful tool. It can be used for moving coarse material, like raw or partially decomposed compost, but also for aerating soil, and harvesting root crops.

Hoes and manual cultivators
There are a wide range of hoes and manual cultivators which are used for weeding and cultivating (breaking up and aerating the soil).
The oscillating stirrup hoe, also called a hula hoe, is a tool of choice for many small market gardeners. They are expensive, but extremely good at cultivating the soil with minimal effort and can be used for creating shallow trenches easily, such as when installing garden bed edging.

The head of an oscillating stirrup hoe.
Wheelbarrows
Wheelbarrows are excellent for moving bulk materials, like soil and compost, around your site. But they are also surprisingly useful for moving tools and plants too.

Combination squares
A combination square, sometimes called a set square, is used for making 45 and 90 degree marks. It has a ruler and level built in to help you make precise measurements and marks.

Speed squares
A speed square is another tool to help you make 90 and 45 degree marks, but it has a few more uses too. In the following video, Joe shows the five most popular uses for a speed square.
WATCH
5 good reasons to use a speed square
Duration: 3:17
Clamps
Clamps are used to hold objects in place during construction. A good quality set of clamps will save you a lot of time and frustration, particularly during times when you are working alone.
The most useful clamps for landscape construction are quick clamps, or trigger clamps, which are tightened by pulling a large trigger handle. Squeezing the small trigger will release the clamp and allow you to slide it back to open it further.
Most quick clamps allow you to remove the small end and install it on the other end of the shaft, effectively converting it into a spreader. This can be helpful when installing decking boards. Screw one decking board squarely into place some distance from the ones you are installing, then use two, three, or four equal sized clamps to press the next board into place. Once you’ve secured that one, slide them back and slot the next board into place.
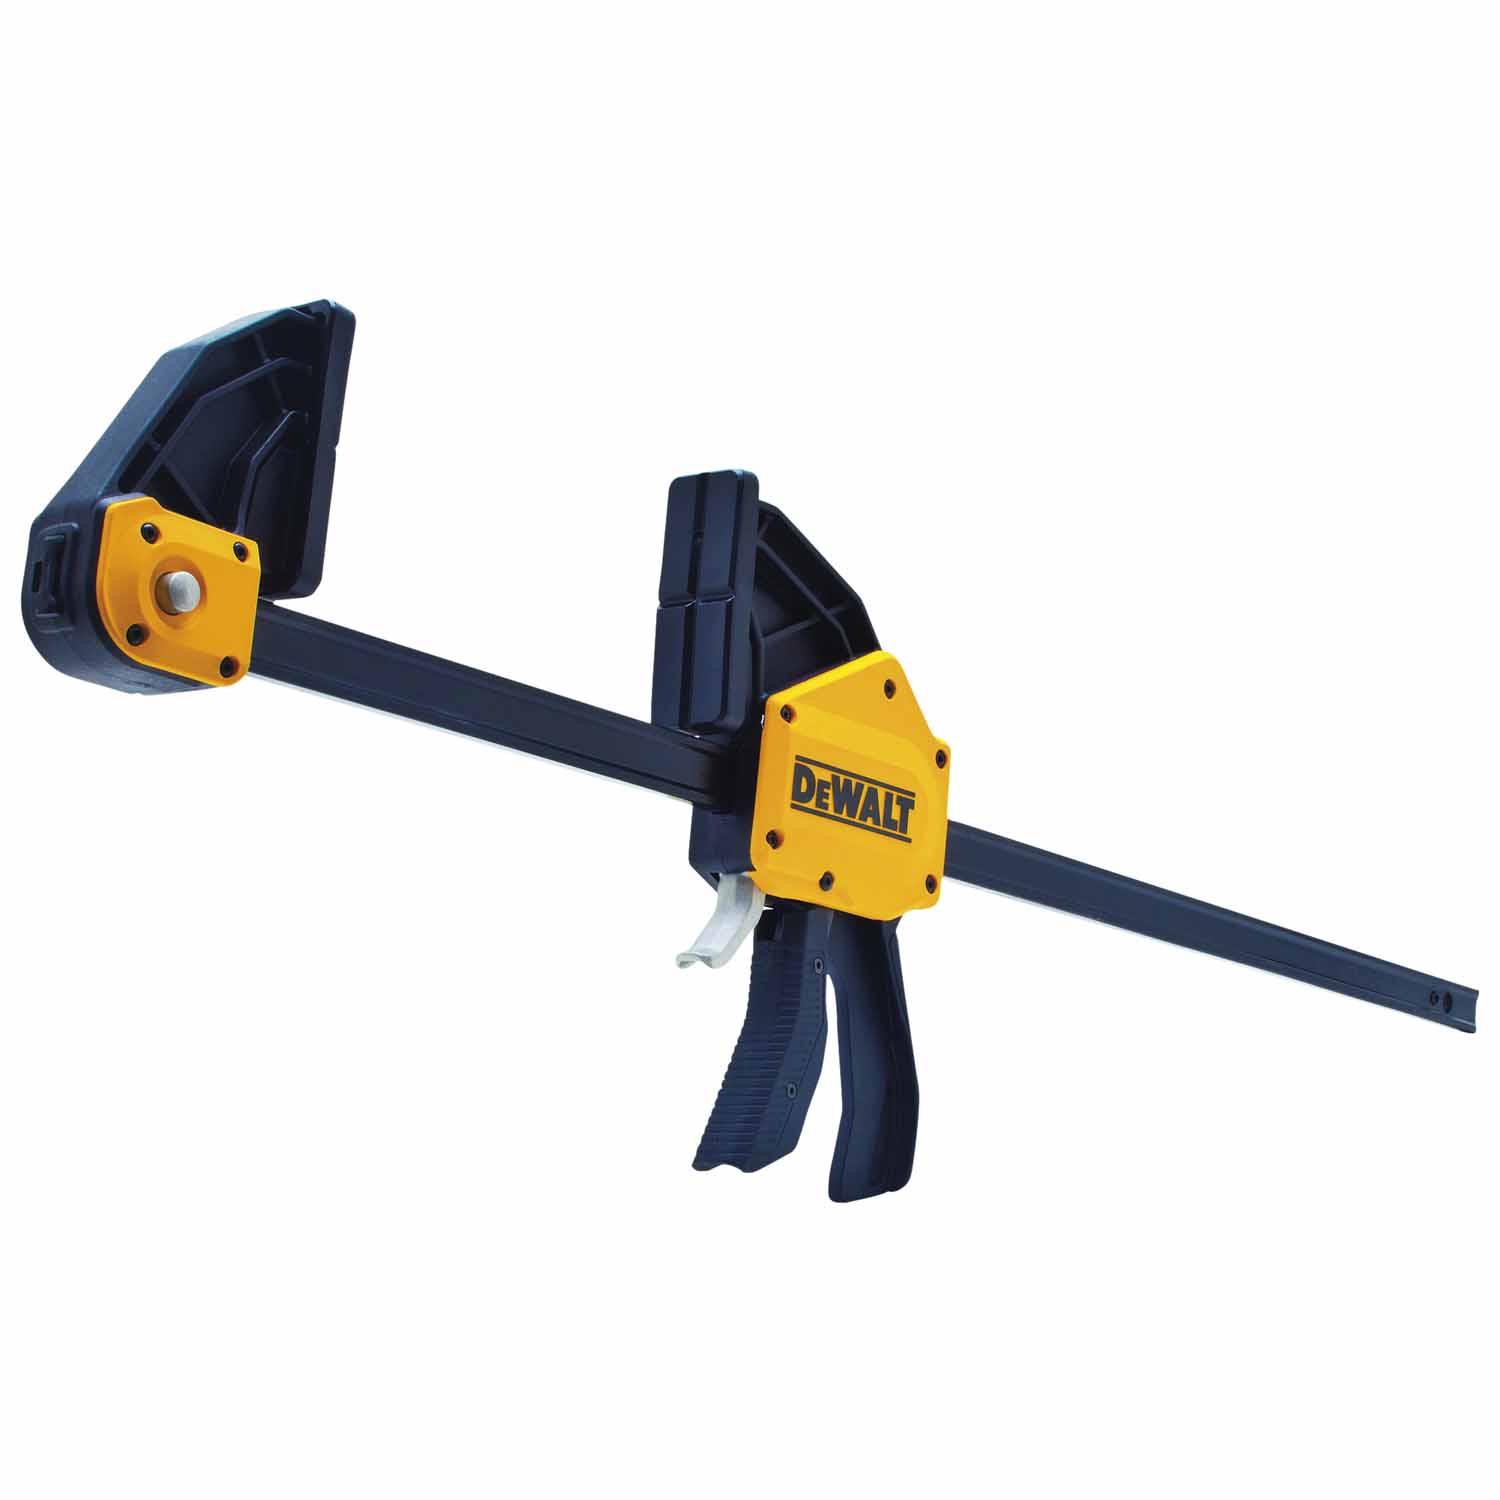
To remove the small end from this quick clamp, press in the small metal button near the far left of this image and slide it off.
Handsaws
Handsaws are used to cut wood into different pieces. There are many different types of handsaws, including pruning saws and hacksaws.
When cutting dried timber such as that used for decks, boardwalks, or fences, use a handsaw, like the one shown below. The higher a saw’s teeth per inch (TPI) the smoother the cut will be, however, a higher TPI will generally mean it will cut slower.

We’ll look at pruning saws in the topic called Planting and maintaining trees and shrubs.
Power tools
Caution
Incorrect use of power tools can lead to serious injuries and in some cases death.
Power tools can make light work of landscaping and construction tasks, but they must be used with care.
As mentioned earlier, this programme cannot teach you how to use specific tools, such as a circular saw. This is the kind of thing that needs to be taught in-person by someone who is competent, and for them to supervise you closely while you develop these skills.
Always follow the manufacturer’s instructions, training from a competent person, and wear all required safety equipment when operating power tools
We use the term power tools to refer to anything that is powered by an engine or motor. Most of the tools below are available in different power configurations. For instance, a drill could be powered by an electric motor with the electricity supplied by a cord attached to a wall socket or it could be battery powered. Alternatively, some industrial drills are powered by compressed air which is attached to an air compressor by a hose.
We’ll focus on those most commonly used in residential landscaping.
Drills and drivers
The primary purpose of a drill is to form holes in rigid materials, such as timber or metal. Modern drills are also designed to drive (screw in) screws.
Impact drivers, often simply referred to as drivers, focus on driving screws and other fasteners into place. This video from Ryobi gives a great overview of the three most common types of cordless drills and drivers.
WATCH
Drill vs Impact Driver vs Hammer Drill EXPLAINED | RYOBI Tools 101
Duration: 4:12
Not all tools were made equal and in this episode of the Beginner's Guide, we'll walk through the main differences between three of the most common tools; the drill/driver, hammer drill, and impact driver.
- Pre Watch Question: Do you know the difference between a drill and a hammer drill?
- Post Watch Task: Can drills be used to drive screws into timber?
https://www.youtube.com/watch?v=pnVgXtBRP4E
Circular saws
A circular saw is a hand-held saw with a spinning blade that is used for cutting timber in two main ways:
- cross-cutting (cutting across the grain of the timber)
- ripping (cutting “with the grain” or cutting sheet products, like plywood, into pieces).
WATCH
Hot to use a circular saw for beginners - Part 1
Watch Duration: 4:21
Watch this video from Training Hands Academy which introduces circular saws, names their key parts and explains their uses.
The portability of circular saws means they can do things that drop saws can’t, such as trimming the ends off a set of decking boards all in one go.
Drop saws
Drop saws, also called mitre saws, compound saws, or compound sliding mitre saws, are a type of large circular saw used for cross-cutting. They are ideal for repetitive cutting tasks, for example cutting joists or decking boards to the right length.
This video by Training Hands Academy introduces the three main types of drop saws, explains their key parts and demonstrates the four most common types of cuts and how to set up the saw for repetitive cutting operations.
WATCH
Mitre saw for beginners
Watch Duration: 8:21 minutes
Plate compactors
Plate compactors are used to press down loose aggregate materials to form a strong base. They do this by moving the wide flat plate at the bottom of the machine up and down quickly.
WATCH
How to use a plate compactor - correctly and safely | Speedy Services
Watch D uration: 3:00
This video by Speedy Hire shows how to start, operate and stop a plate compactor.
- Pre Watch Question: How confident are you in your ability to use a plate compactor?
- Post Watch Task: What PPE does Speedy Hire recommend for this machine?
Rotary hoes
Also sometimes referred to as rototillers, rotary hoes are machines that have long tines that spin around a horizontal shaft and break up the soil. Rotary hoes can be hired from most hire centres in a range of different sizes.
WATCH
How to Use a Rotary Hoe
Duration: 4:15
This video by Kennards Hire shows how to start, operate and stop a large rotary hoe.

Now that you know about tools and equipment commonly used for landscaping, it is important you know how to maintain and store them correctly.
A good quality set of tools will last a lifetime if they are properly used and looked after.
| Object | Maintenance | Storage |
|---|---|---|
| Wooden handled tools | If dirty, clean and dry the handle. Oil with linseed oil periodically. This page on The Tool Merchants website provides more information: How to care for wooden tool handles. | Ensure tools are clean and dry, and stored in a dry place such as a shed. |
| Battery electric power tool | Follow the manufacturer’s instructions. Generally, this will involve cleaning dirty tools without using water, such as using a leaf blower or compressor. | If you are unlikely to use the tool for some time, check the manufacturer’s instructions for information about how to store the batteries. Some batteries need to be stored in a partially discharged state in order to prolong their life. Others will automatically discharge after a period of inactivity to protect the health of the battery. Store the batteries, charger and tool in a cool, dry place. |
| Corded power tools | Follow the manufacturer’s instructions. Generally, this will involve cleaning dirty tools without using water, such as using a leaf blower or compressor. | Store in a cool, dry place. |
| Motorised power tools |
Follow the manufacturer’s instructions. Generally, this will involve: 1. cleaning the tool taking care not to get the engine too wet 2. carrying out servicing at periodic intervals and set out in the manuals. |
Store in a cool, dry place. |
| Spades and shovels | If dirty, clean all parts. If the blade gets blunt, sharpen it using a sharpening stone, or grinder. | Ensure tools are clean and dry, and stored in a dry place such as a shed. |
| Garden forks and rakes | If dirty, clean all parts. Remove any rocks that get stuck between the tines. Straighten bent tines. | Ensure tools are clean and dry, and stored in a dry place such as a shed. |
| Hoes and manual cultivators | If dirty, clean all parts. If the blade gets blunt, sharpen it using a sharpening stone, or grinder. | Ensure tools are clean and dry, and stored in a dry place such as a shed. |
| Wheelbarrows | If dirty, clean all parts. Check the tyre pressure from time to time and add more air if required. Check and, if required, tighten bolts, annually or more frequently. | Ensure tools are clean and dry, and stored in a dry place such as a shed. |
| Tape measures | If dirty, clean all parts, dry then retract. | Ensure tools are clean and dry, and stored in a dry place such as a shed. |
When working on site, it is a good idea to store all tools in one place, so you know where they are.
Store tools in such a way that they don’t create safety issues, such as facing the tines on rake and forks and sharp edges on spades and shovels towards the ground.

A shovel and spade laid upside down. This is far safer than having them the other way around.
In the topic we introduced the tools most commonly used in hard and soft landscaping and explained how to maintain and store them.
Move onto the next topic to learn about producing technical documents for landscape construction.