In this topic we’ll look at a few of the most common types of chip pathways and show how to install this cost-effective surface for pathways and hard surface areas.
By the end of this topic you’ll be able to install a wood chip or aggregate path in a residential garden, according to accepted industry practices.
A chip pathway is one made of a thick layer of loose material. Examples of chip materials include:
- Pea metal, also known as pea gravel, is made of small round river stones and is gentle on bare feet.
- Crushed stone is hard wearing. Larger chips are suitable for driveways while smaller chips are more suited to pathways.
- Crusher dust is a mix of crushed rock and fine particles. It is more commonly used as a base layer but can be laid as a top course where a more utilitarian look is desired.
- Wood chips can be used to create a rustic style path. Ensure that the wood chips you buy for use as chip paths don’t have much leaf matter mixed in.
- Crushed limestone, crushed lime, or pathway lime, is an easy to work aggregate that compacts to form a hard surface.
There are such a wide range of chip pathways and ways of constructing them that you are spoilt for choice – much more than we could include here. Chip pathways can be cheap to construct and somewhat temporary in nature, or more robustly constructed leading to a long term solution, but at greater cost.
In this topic we’ll demonstrate how to construct both extremes. From there, you can choose what suits your site and budget best and modify the specifications accordingly.
Common specification for a wood chip path
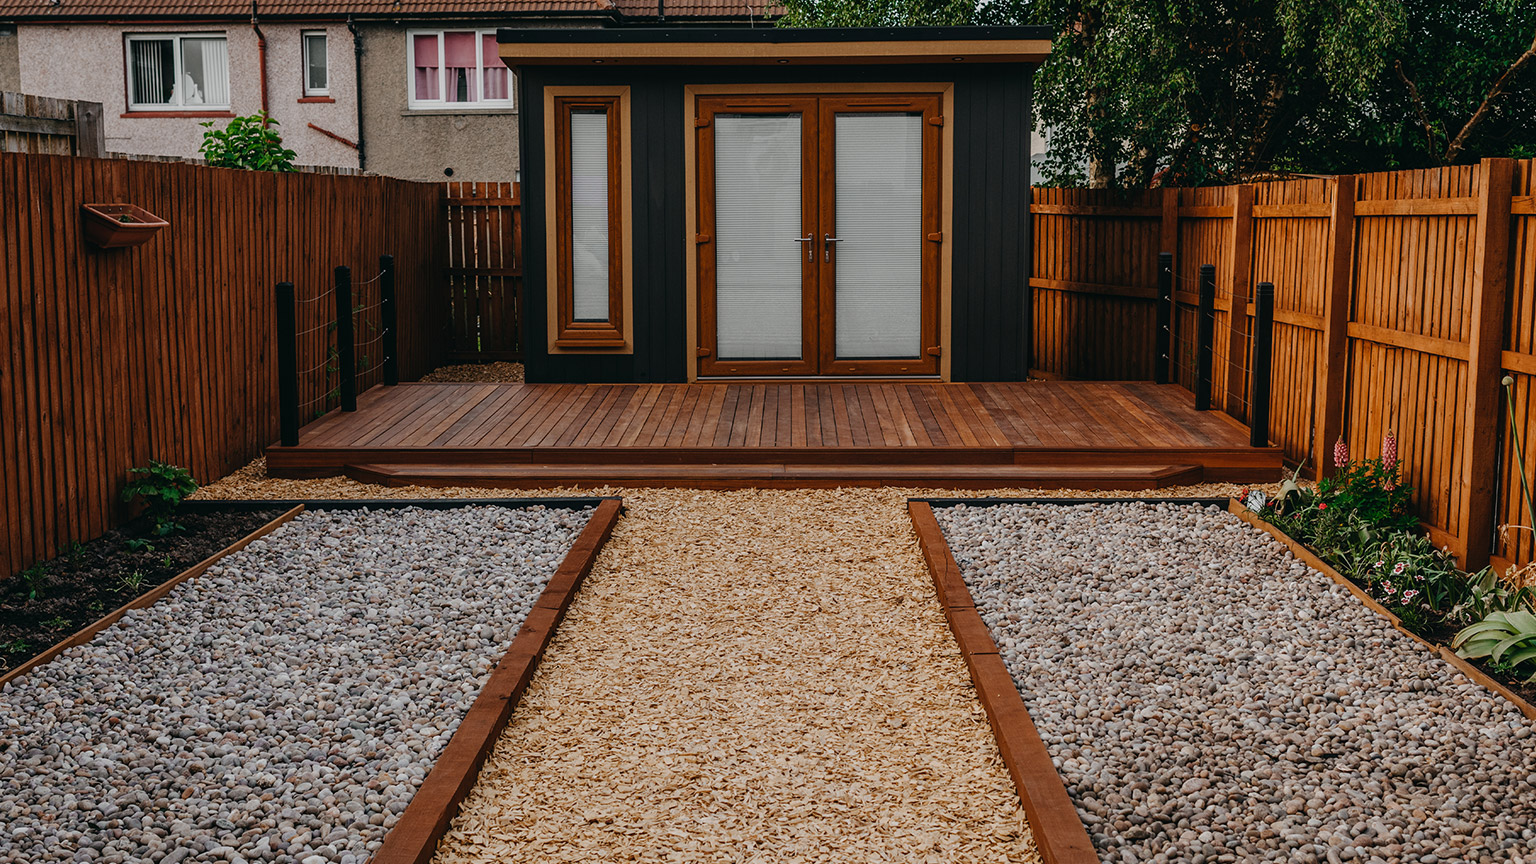
Wood chip paths are often used for small, infrequently used, informal paths throughout the garden. Therefore they don’t need to be as robust as gravel and aggregate paths. If your soil is well draining, you may choose to simply clear back all vegetation, lay down a weed stopping layer, and lay 100mm of wood chip on the soil. If drainage is a problem, you may need to dig out some of the soil and lay an aggregate base first.
For a more defined pathway, use timber edging. See the section of aggregate pathways, below, for details.
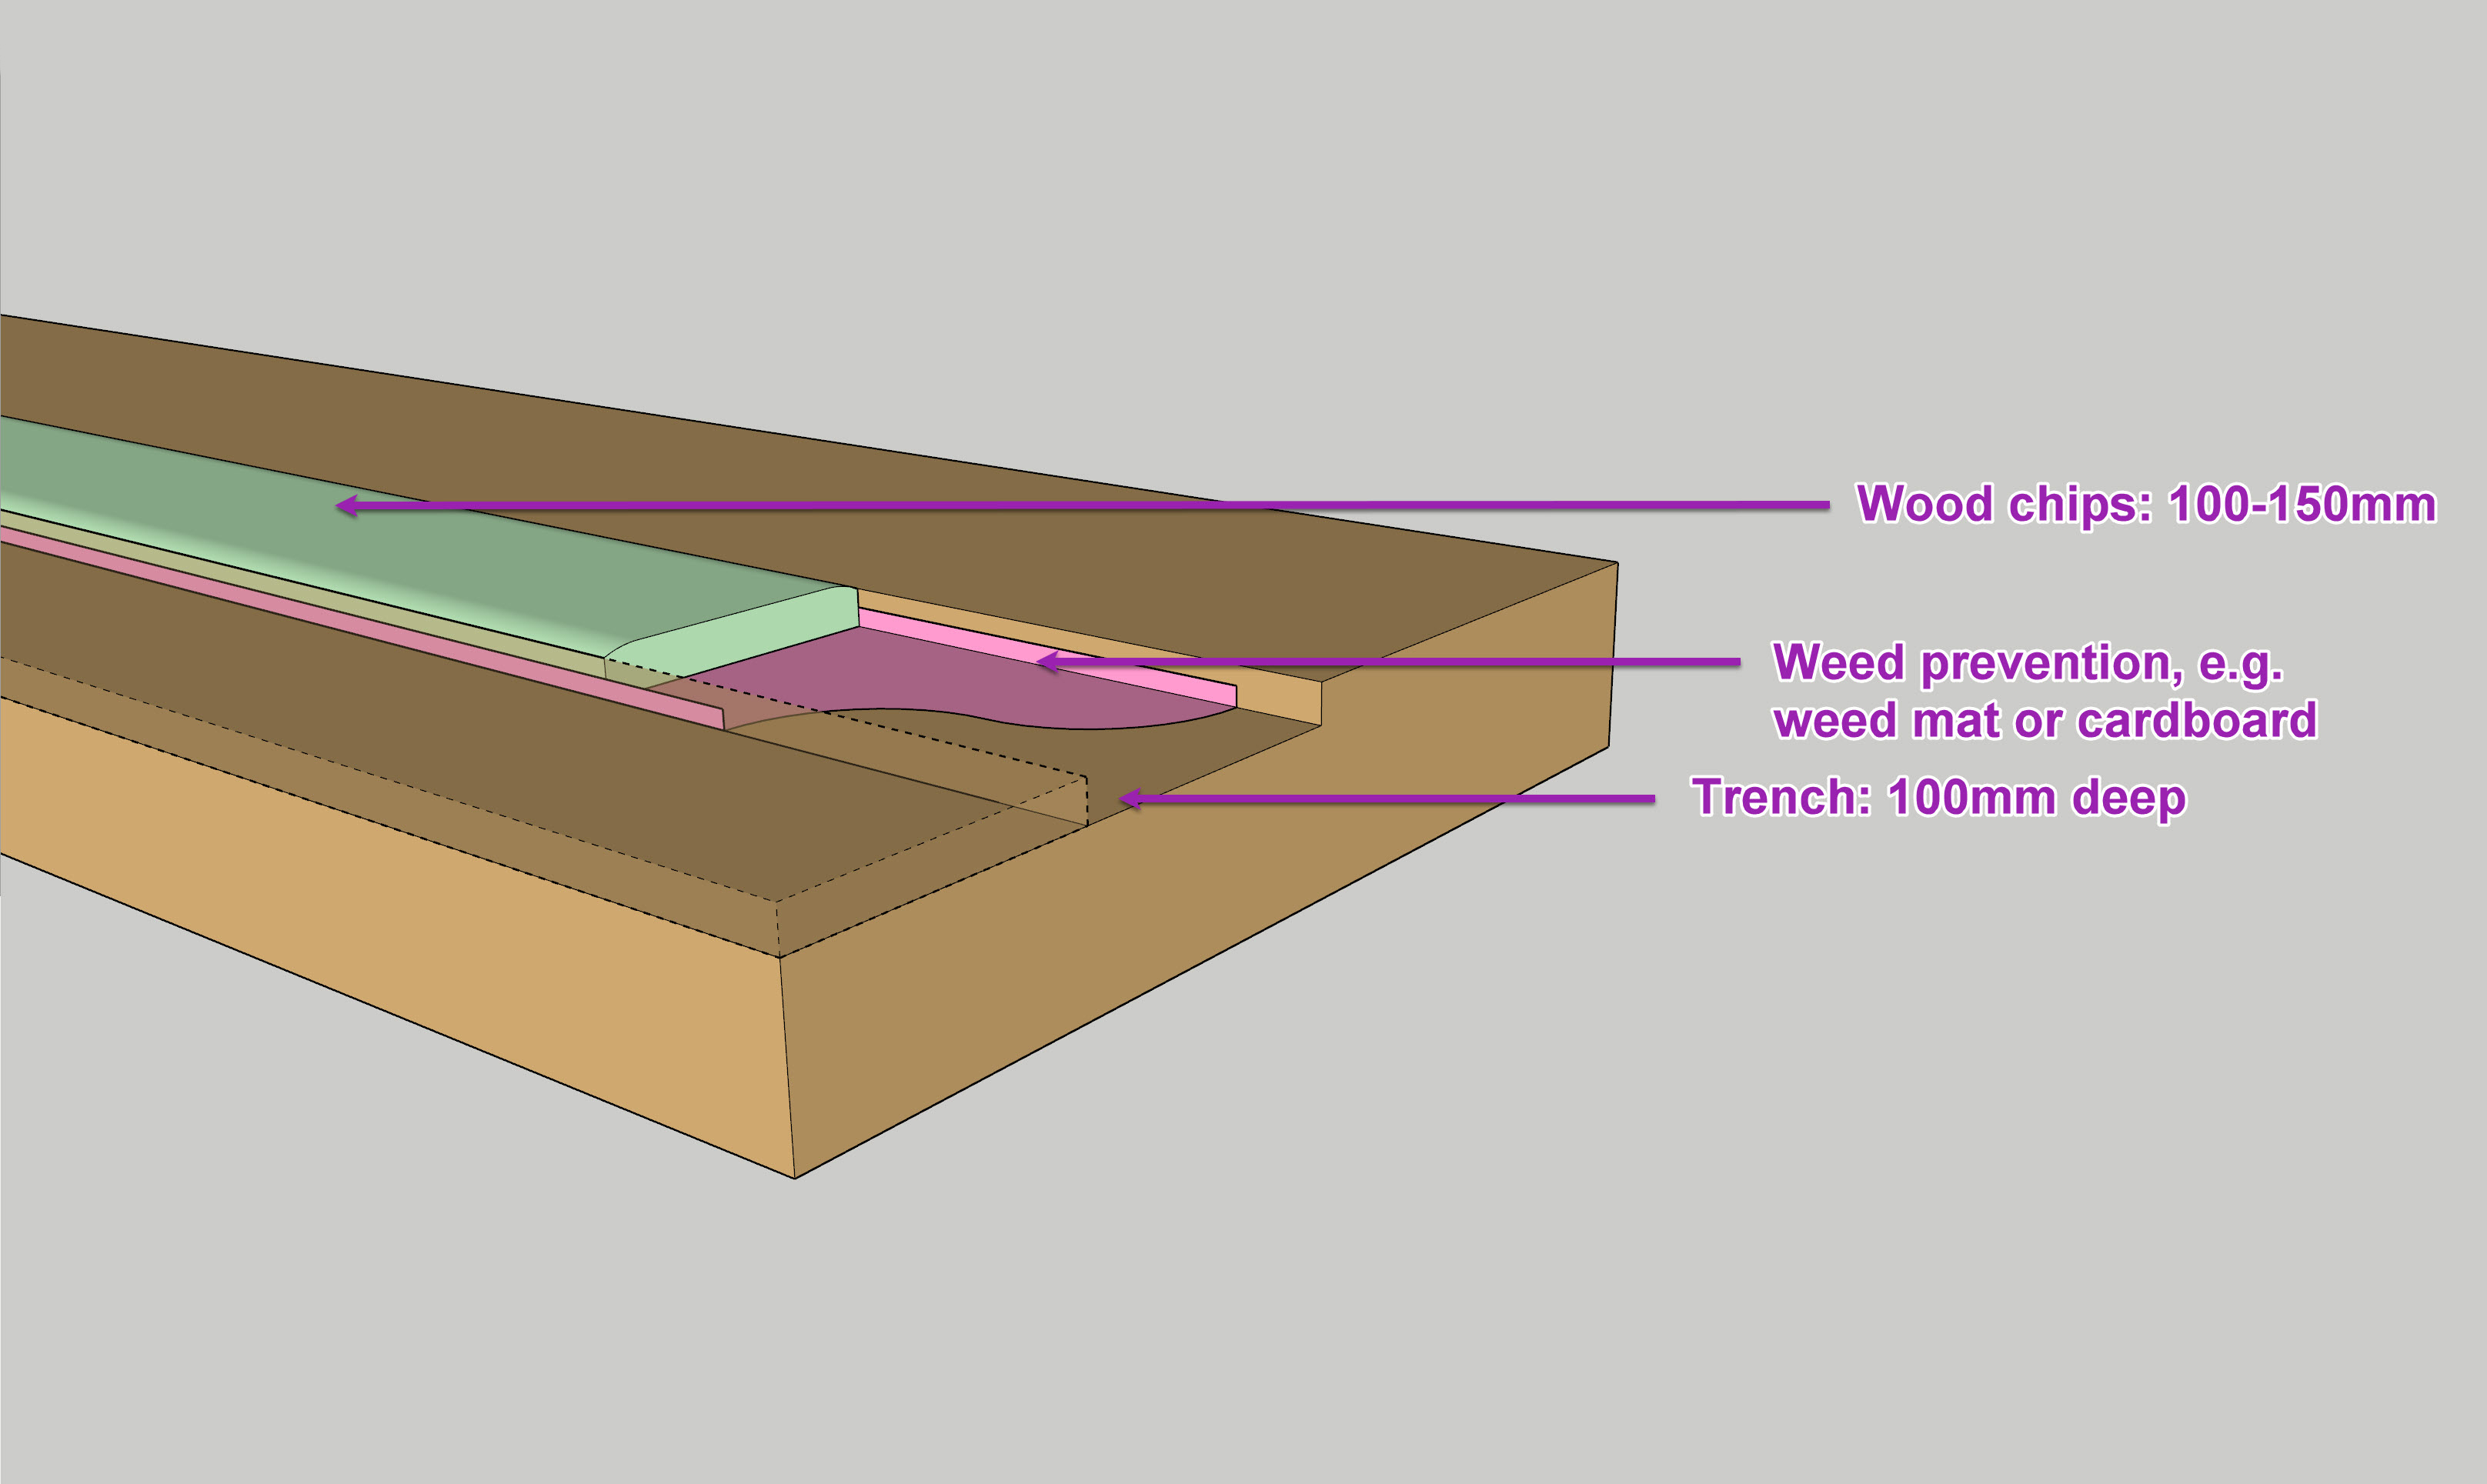
Common specification for an aggregate path
Gravel and aggregate paths are used where a more robust solution is needed.
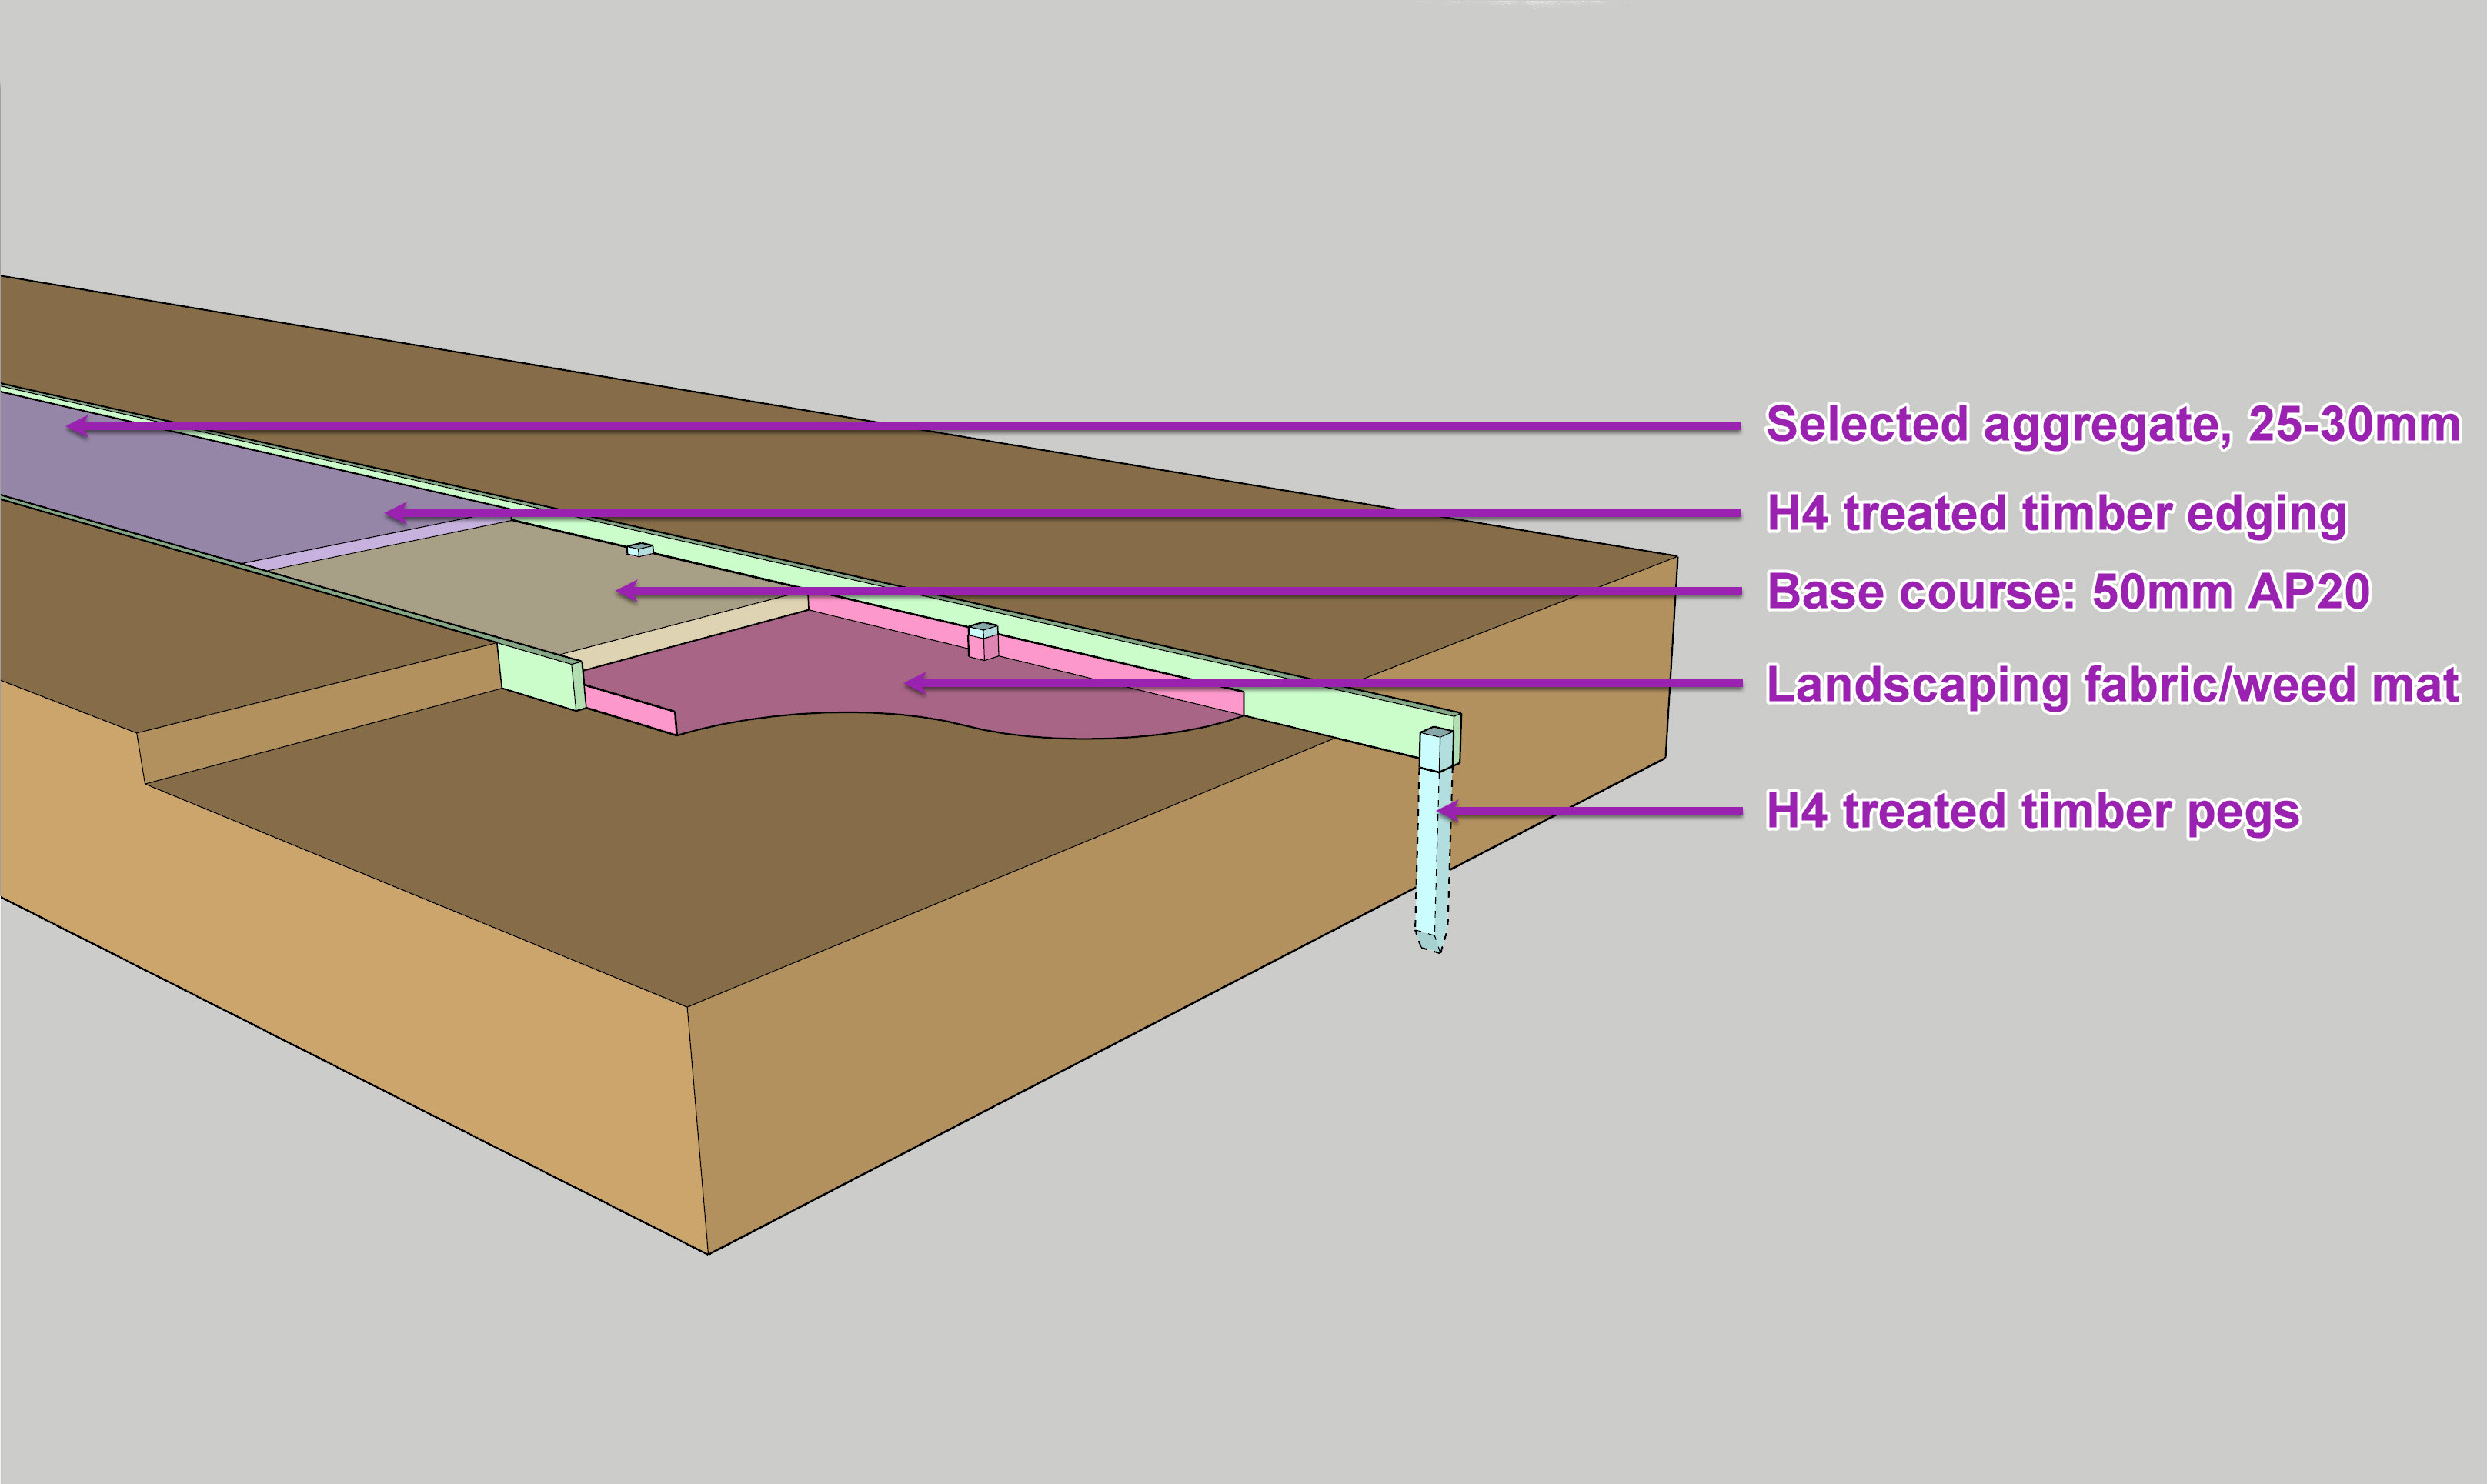
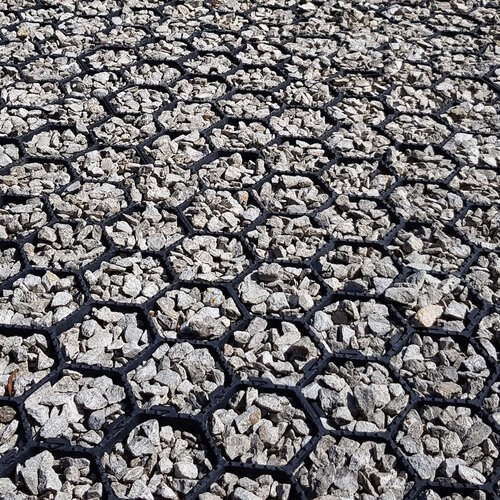
This diagram shows a typical specification. For increased stability of loose aggregates, such as pea metal, you may wish to install a stabilising mat on top of the base course and fill it with your top course. One example is Jakmat, which is shown below.
If your pathway is going to be higher than the surrounding area, even for just a few days while you build up the ground around it, put the pegs on the outside. If you put them on the inside and fill the pathway up, the weight of the pathway material may push the edging and pegs out.
If using an aggregate that packs together tightly, such as crushed limestone, is it a good idea to have a gentle fall (angle) from one side to the other. Alternatively, ensure the pathway is mounded slightly in the middle. Either option will allow water to run off the surface.
Activity: Preparing construction documents for paving
If you’ve chosen to install a chip pathway for your hard landscaping feature, create a working drawing and bill of materials (BOM) for the area.
The working drawing will help you explain the project to your assistant and the BOM will give you the information you need to order the materials.
Your working drawing can be orthographic, isometric, or perspective, and can be done with pen on paper or inside SketchUp.
We recommend you use the Bill of Materials template for your BOM.
These two videos by Urban Farmstead show three different ways of creating wood chip paths and evaluate the effectiveness of each.
Wood chip path Installation
WATCH
Installing Wood Chip Pathways or Mulch - Testing Three Methods
Duration: 3:32
Kyle Hagerty demonstrates three different approaches to constructing wood chip pathways.
Pre Watch Question: How would you construct a wood chip pathway? What materials would you use and in what order would you lay them?
Post Watch Task: Did any of the methods Kyle demonstrated match your design?
WATCH
Weed Barrier Review. Two Months After Install
Duration: 7:29
Kyle Hagerty reviews how effective each of the wood chip paths he installed in the previous video is, as preventing weed growth.
Pre Watch Question: Which method do you think will be most effective?
Post Watch Task: If you were to create a wood chip path in your garden, which approach would you use and why?
Maintaining wood chip paths
It is important that you know how to maintain wood chip paths, either to do it yourself or explain to your client what they need to do to keep it looking good and functioning properly.
The key tasks are:
- Pull up or spray weeds with herbicide to prevent them from overrunning your path. Do this when the weeds are small; if you let them get too big you’ll create a mess.
- One drawback to wood chip paths is that over time, the chips decompose so it is important to top up the path with fresh wood chips on a regular basis.
Watch
How to lay a path with Wickes
Duration: 5:01, but you only need to watch the first 2:05
Watch the first 2:05 of the following video by Wickes, which shows how to install a gravel path.
Pre Watch Question: Have you specified any gravel paths or hard surface areas in your garden design?
Post Watch Task: Do you like the look of the gravel pathway in the video? Why or why not?
The following notes relate to the video:
- When installing the edging, make sure that it follows the levels set out in your plan. Generally this means that the edging should be level from one side of the path to the other, but along the length of the path the level may change. Think of a path that runs from the front door down to the road; it slopes downwards, but usually there is no slope from one side to the other.
- Driving pegs into the ground so they are vertical and have not twisted in the hole is a real artform. You’ll get better in time.
- Where possible, position the edging in the right place and have someone else hold it. Then hammer the peg into place, making sure to keep it hard up against the edging as you do. Once it’s far enough in the ground, go ahead and secure the edging to the posts.
- You don’t need to drive the pegs all the way in. Get them in far enough that they are firmly in place and then cut the tops off at the right level.
- If you don't have a helper, you can lay the edging in place and lightly clamp the peg to it, then hammer the peg into the ground. Using the clamp against the edging will stop the peg from twisting.
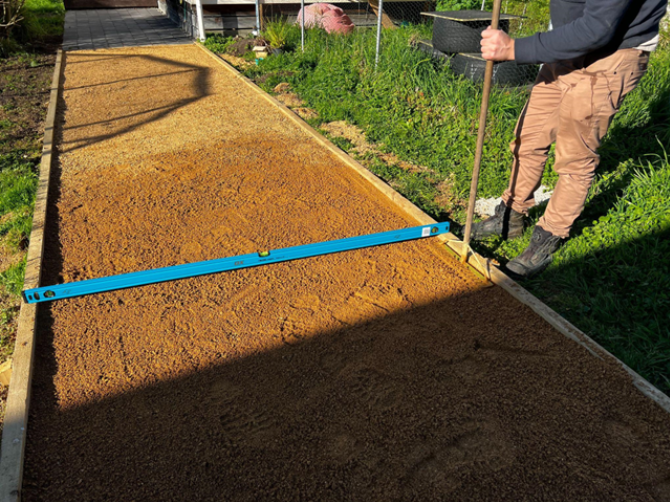
When working with an aggregate that packs together tightly, compact the edges of the pathway using the back of the rake to get the aggregate to the desired level.
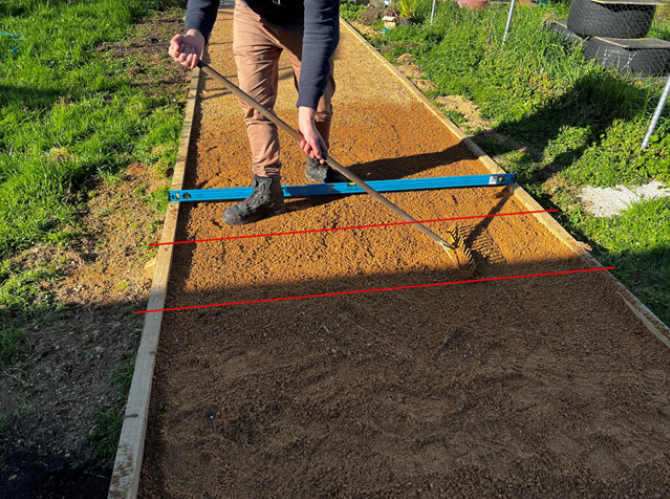
Sometimes when levelling the aggregate you will find that a trench or depression has formed as a result of raking in the same direction (between the red lines). When this happens pull some extra aggregate onto the trench then rake back and forth at 45 degrees or perpendicular to the trench (as shown here) until you’ve levelled it out fully.
Maintaining aggregate paths
Like with wood chip paths, aggregate paths need to be weeded to remain in good condition. The main maintenance task is to stop the weeds. How you do this will depend on the aggregate you are using.
For pea metal and crushed aggregate paths the weeds should be hand weeded or sprayed with herbicide.
For crushed limestone, we recommend raking it periodically, to prevent it becoming too hard-packed, and to remove weeds. If it does become hard-packed, you can use a hoe, or even a rotary hoe to break up the surface and then use a rake to remove the weeds and re-level the surface.
Assessments 1 and 2
If you’ve chosen to install a chip pathway or areas for your hard landscaping feature, you should be ready to make a start.
Go to the assessments section and read the full assessment requirements in detail. If you have any questions, contact your tutor.