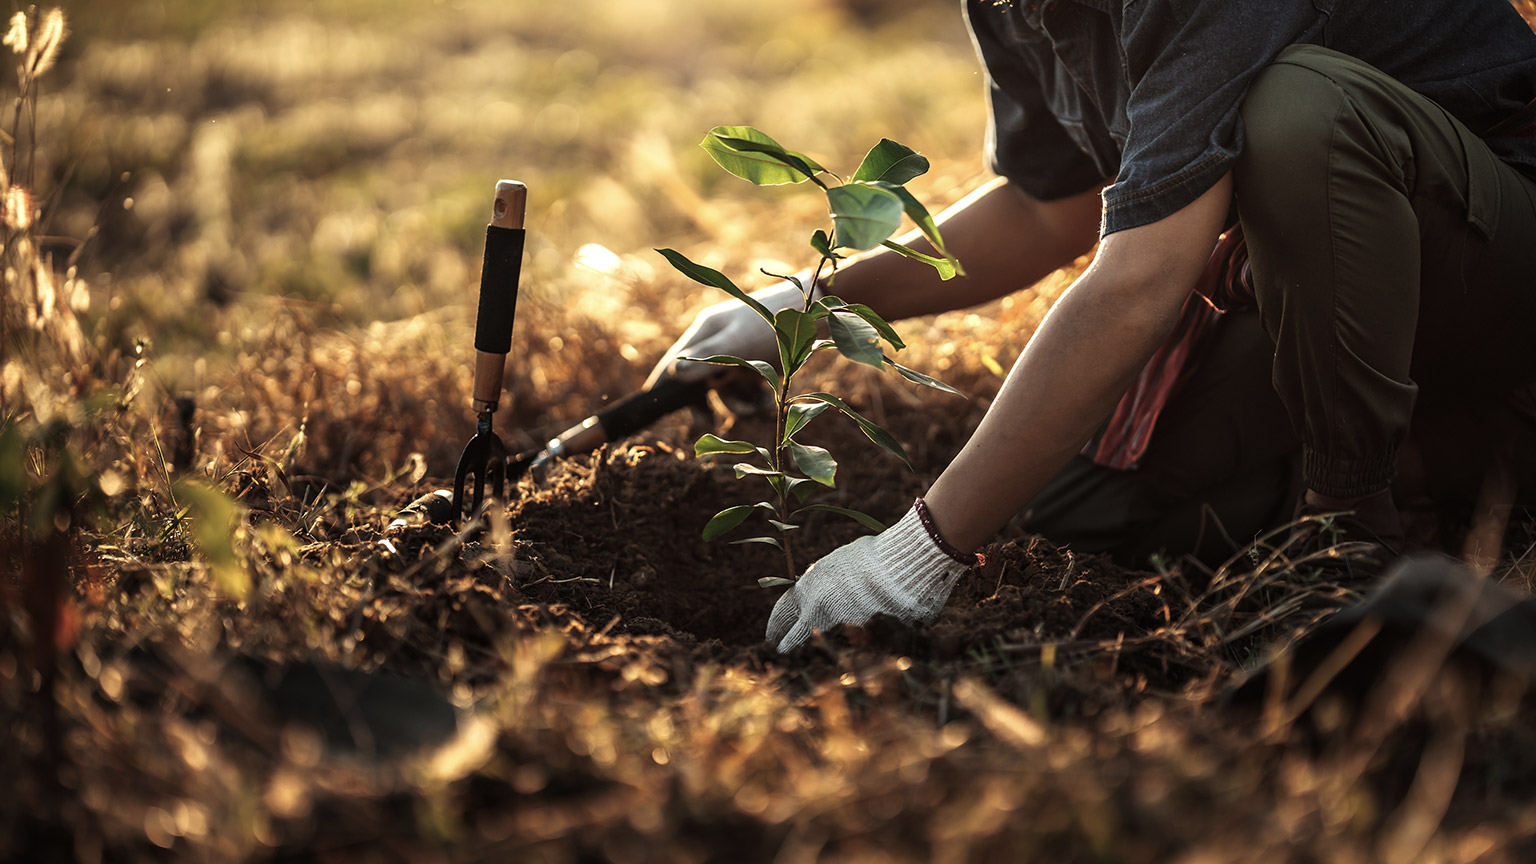
In this topic we’ll cover how to plant trees and shrubs, the activities that need to be carried out to set them up for healthy growth and longer term care, in the form of pruning.
By the end of this topic you’ll be able to:
- plant trees and shrubs according to accepted industry practices
- describe plant establishment activities that promote healthy growth
- prune small trees and shrubs to promote plant health.
The best time to plant a tree is twenty years ago. The second best time is now.
Anonymous
In reality, the best time to plant a tree in Aotearoa is in autumn (large tree planting guide, no date). But like the saying above, we could argue that the second best time is now – meaning, if you plant it and look after it should grow well.
Another saying, common in the landscape industry, is “It’s better to dig a five-dollar hole for a fifty-cent plant than to dig a fifty-cent hole for a five-dollar plant.”
Preparation is the key to success when it comes to planting trees.
Tree planting guide
The text included in this section is provided by Germinate Aotearoa, and is kindly reproduced with their permission.
Notes
The guide is specific to planting large trees but can be used for shrubs or smaller trees too. In these cases, the diameter of the hole can be twice the diameter of the root ball.
The guide is specific to planting trees supplied in plastic bags (PBs), pots, or balled and burlapped (where the plant roots are in dirt and the rootball is wrapped in fabric). If planting bare-rooted trees, refer to the section called Other situations.
Step 1: Assemble your tools and materials
Gather the following tools and materials:
Tools
- Scissors
- Spade
- Staple gun or stapler
- Tarpaulin
- Watering can, or hose
- Wheelbarrow
- Post rammer, or sledgehammer and stake protector*
- Secateurs (may be required for removing snapped branches)
*A stake protector is a block of wood that can be placed on top of the stake to stop the stake from splitting when hammered in. It has a few smaller pieces of timber screwed into it to keep it on top of the stake as you hammer it in. Instructions on how to make your own are provided later.
Materials
- Compost – 1x 20l bag
- Soft tree tying cord – 2m approx.
- Mulch – 1x 20l bag of organic bark chip mulch
- Organic seaweed liquid fertiliser, such as Seasol or Tui organic seaweed tonic
- Stakes – 2x 50x50mm pointed 1.5m
- Staples to fit the staple gun
- Tree
Step 2: Prepare the tree for planting
- Fill a watering can with water and dilute the liquid fertiliser in accordance with the instructions on the packaging. Or attach the hose-on adapter bottle to your hose, as per the instructions.
- Water the tree thoroughly in its bag, ball, or pot, with the diluted liquid fertiliser solution until the root ball is soaked.
- Remove any nursery stakes by cutting the plastic ties and pulling the stake up and out of the rootball.
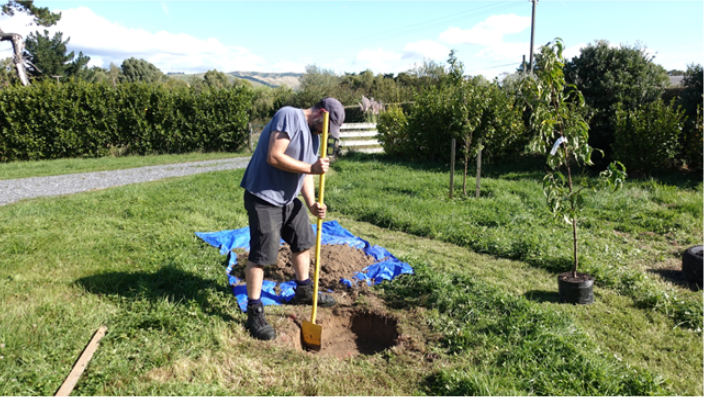
Step 3: Prepare the hole
- Identify the planting location according to the planting plan or set-out plan.
- Place the tarpaulin next to the working area.
- Dig a hole that is circular, three times the diameter of the root ball.
- If planting in a garden bed, scrape back any compost or mulch before digging.
- If planting in the lawn, refer to the instructions in step 7.
- Dig the hole deeper and stockpile the topsoil on the tarpaulin.
- If the soil changes colour significantly this means you are now digging in subsoil. Stockpile this in a different place on the tarpaulin.
- Periodically check the depth of the hole and compare this to the height of the rootball. The depth of the hole needs to be the same as the height of the rootball.
- When the hole is complete, score the edges by slicing them with the spade. This will make it easier for the roots to penetrate the surrounding soil in the future.
- If the hole is especially dry, lightly water the bottom of the hole with the diluted liquid fertiliser solution. Do not allow water to pool in the hole.
Here's an overview of the process with images:
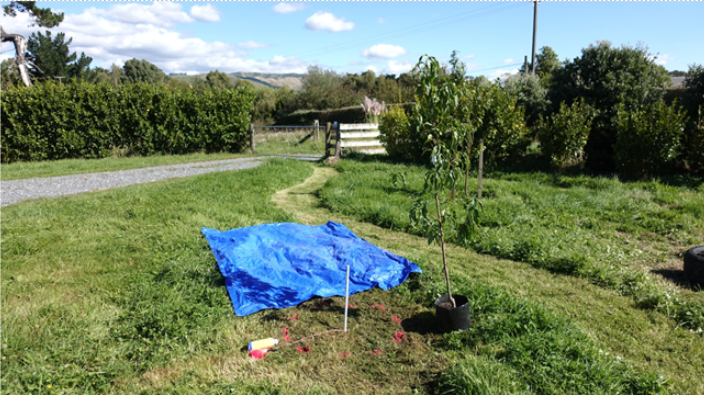
Mark the location of the hole. This needs to be three times as wide as the planter bag or pot.
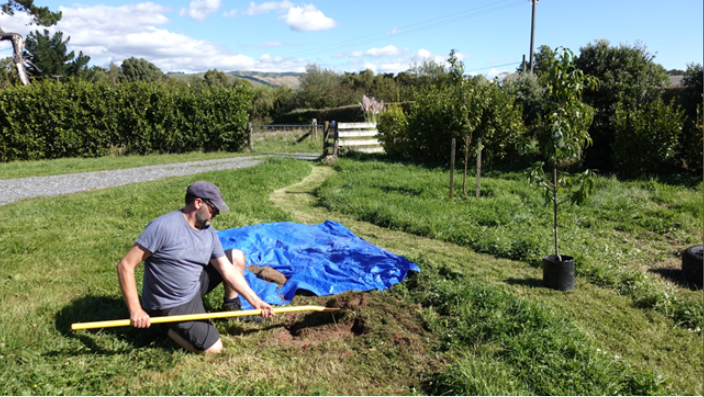
Cut the turf into squares and then skim off horizontally.
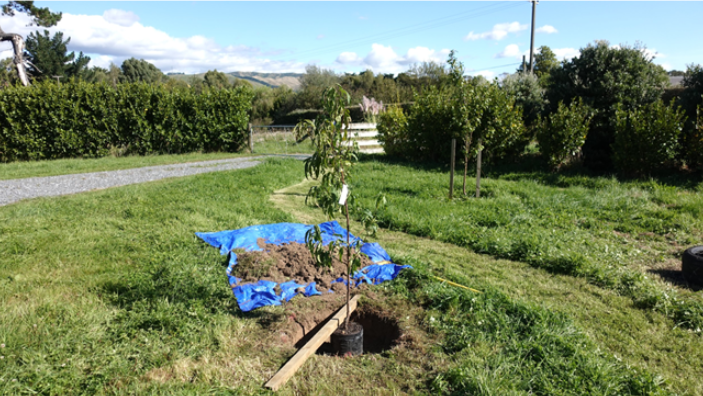
Dig the hole slightly shallower or the same depth as the height of the soil in the bag or pot. You can check this by placing the tree in the hole and laying something straight across the hole – in this case a stake – to see if the soil in the bag touches the object. Try not to dig deeper than the soil in the bag.
Once the hole is the right depth, slice the sides of the hole with your spade to make it easier for the plant roots to spread out.
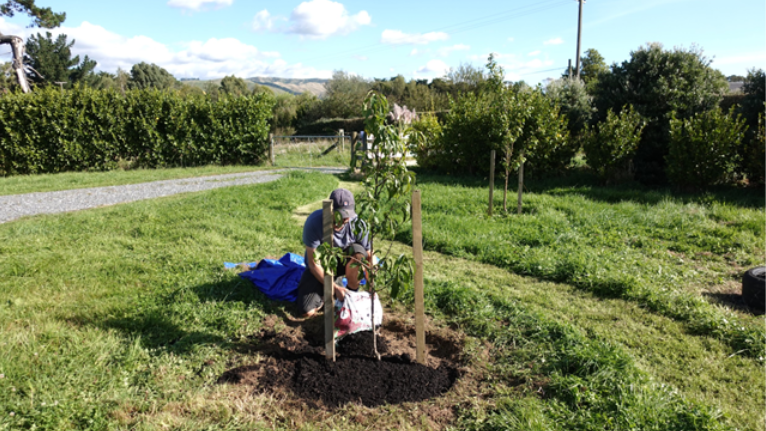
Step 4: Plant the tree
- Cut the bag that the tree is in on opposite sides, but leave the bag in place.
- If the tree is in a large pot, remove it from the pot by tipping the pot upside down – taking care not to damage the trunk or branches – tapping the pot hard and pulling it off. You might need an assistant to help with this.
- If the tree is in burlap, untie the burlap and fold it down.
- If roots are visible at the edges of the root ball and these wrap around it tightly, gently tease them out with your fingers to free them up.
- Place the tree in the hole by, either:
- Lifting it by the bag and then when it’s in the hole, sliding the bag out from under it, or
- Placing one hand on the trunk at the top of the root ball and one under the root ball and lifting it into the hole.
- Rotate the tree so the best side is facing forward – the position it is going to be viewed from most of the time.
- Ensure the root ball is level, and most importantly, the trunk points directly up.
- If staking is needed (see note below), hammer two stakes into the hole on opposite sides of the rootball, but not into the rootball.
- Put one stake on the windward side of the tree, and the other on the leeward side.
- Ensure they remain vertical as you hammer them in.
- Hammer each stake until 1/3 of the stake is in the ground and 2/3 remains above the surrounding ground level. For a 1.8m stake, 1.2m should be above ground, and for a 1.5m stake 1.0m should be left above ground).
- Fill in the hole, placing the subsoil in first.
- Do not add any additives, such as compost or mulch to the bottom or side of the hole. These are to be added to the top, to mimic nature’s processes (leaf litter breakdown).
- Press the soil down as you go to remove any air pockets that may form. You don’t need to press too hard, just enough to make it feel firm.
- Fill in with the remaining topsoil and firm it down as you go.
- If planting into a garden bed, ensure the finished surface is level with the surrounding group.
- If planting into a lawn, refer to step 7.
- Spread 30-50mm of compost on top of the soil.
- Top with bark mulch 50-100mm deep.
- Pull the compost and mulch back from the trunk about 20mm. This will help prevent the mulch from burning the trunk as it decomposes.
- Water the tree again with the liquid fertiliser solution.
- Remove all debris to leave the site tidy.
Note: Staking is only needed when:
- trees are supplied ‘bare rooted’ (no soil around the roots) – refer to additional instructions in the Other situations, below, or
- trees are large specimens, over 1.5m tall, or
- the site is particularly exposed to strong winds.
Here's an overview of the process with images:
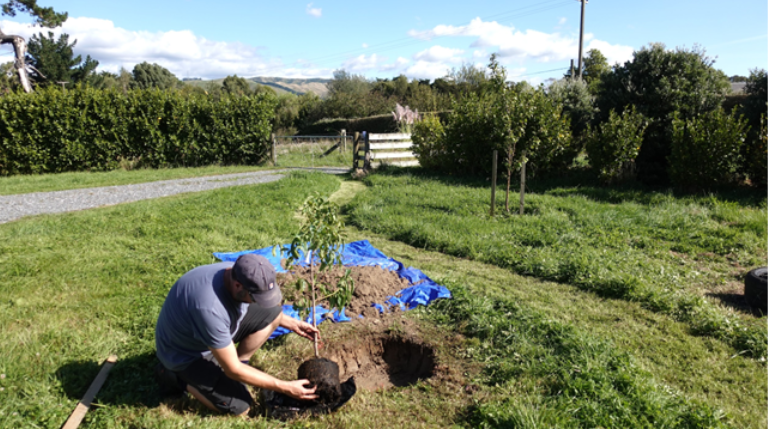
Cut the bag on opposite sides and pull it down. If the roots are visible and wind around the outside of the root ball, carefully tease them out with your fingers.
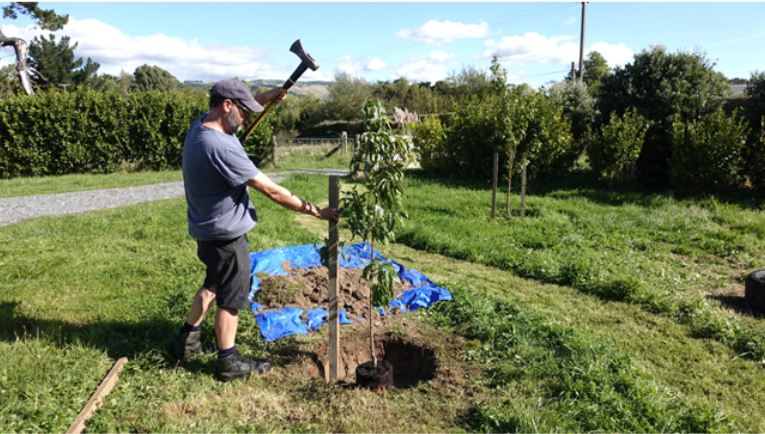
If your tree needs staking, hammer two stakes into the hole on opposite sides. You should hammer them so 1/3 of the total height of the stake is below ground level and 2/3 are above ground.
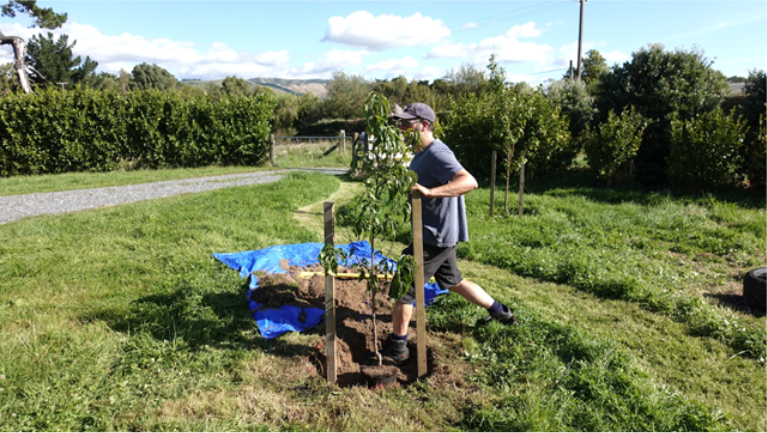
Backfill the hole with the soil you dug out. After partially filling it, press the soil down using the heel of your boot. The aim here is to make sure there are no major pockets of air and that the soil is firm to help prevent the root ball being loose in the soil. You don’t need to compress it too much.
Add a layer of compost 30-50mm deep. Note that when planting in lawn or pasture it is a good idea to skim the soil off for another 200-300mm wider than the hole and taper this downwards away from the tree.
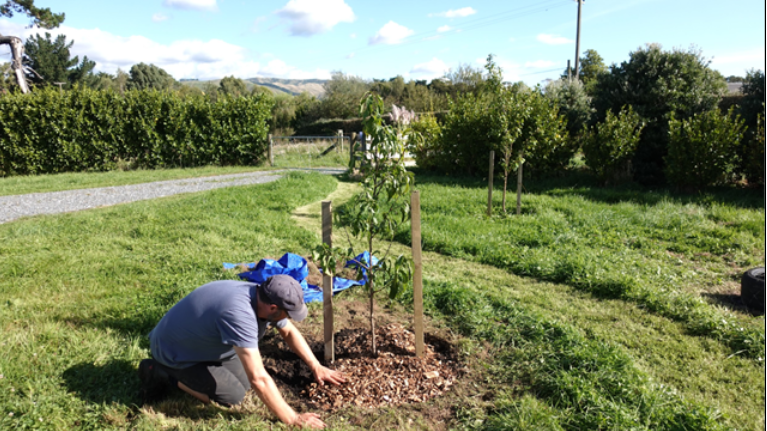
Add a layer of organic bark mulch chips 30-50mm deep and pull the bark and compost back from the trunk slightly. If you made the hole slightly shallower than the root ball the mulch may not touch the trunk.
Step 5: Tie the tree
If you are staking the tree, do the following, if not, go to step 6.
- Cut a length of soft tree tying cord long enough to create a figure of eight between one stake and the tree.
- Staple one end to the side of the stake using 2-3 staples about 2/3 of the way up the stake (700-800mm approx.). If branches prevent you from tying at this height, move down so you’re under them.
- Pass the cord around the tree in a figure of eight and then back to the other side of the stake.
- Ensure the cord is firm but not tight. Staple it 2-3 times.
- Cut off any excess cord.
- Repeat the process for the second stake, 100-200mm lower than the first.
Here's an overview of the process with images:

Tie the tree to the stakes using soft tree tying cord at about 1/3 to 1/2 the height of the tree. Use a figure-of-eight pattern. Repeat on the other side. Offset the height of the ties by about 100mm. They need to be firm, but not too tight.
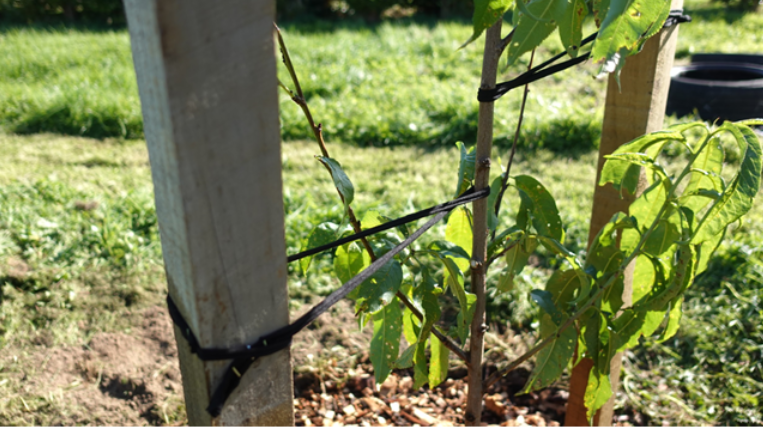
Figure-of-eight pattern visible on both ties, which are separated by about 100mm. If you tie them at the same height it is easier for the trunk to be snapped off at that point by strong winds or vandals.
Other situations
Planting bare rooted trees
Follow the instructions in Steps 1-3. For Step 4:
- Carefully remove any material (such as sawdust, moss, or burlap) from around the roots.
- Look closely at the trunk to the point where the soil surface was. If you can’t see it, assume that it was about 30-50mm up from the top of the highest root.
- Once your stakes are in place, ask an assistant to hold the tree so the previous soil line is level with the surrounding soil surface.
- Carefully fill in the hole taking time to make sure no air pockets form around the roots.
- Continue with the steps for bagged and potted trees.
Planting into lawn
- In Step 3 cut the turf off by using the spade to cut a pattern of crosses across the area. Then cut in almost horizontally to skim the turf off. Dispose of the turf.
- Remove the turf from an additional 300mm around the hole.
- In Step 4, once the tree is planted, stakes installed, and hole backfilled, dig the extra 300mm un-turfed area around the hole so it angles down at the edges and sits about 100mm below the surrounding turf (see image below).

Cross-section of a tree planted in a lawn.
Making a stake protector
If you’re hammering your stakes with a sledgehammer, your stakes may split. It is recommended that you place a block of wood on top. To keep it from falling off, make a simple stake protector using the diagram below, as a guide.
Ensure the space in the middle is 55-60mm wide in each direction.
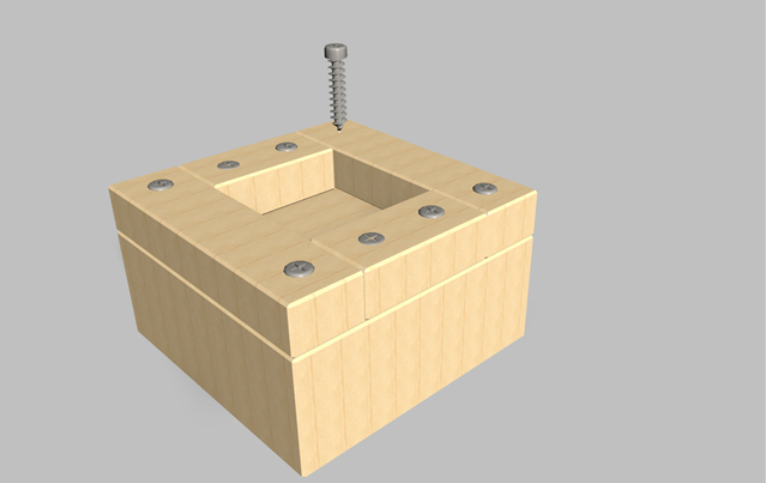
Stake protector (upside down) made from five pieces of timber and eight screws (image courtesy of Germinate Aotearoa).
The longer you make the timber sides, the more likely it will be to stay on the stake between hits. Alternatively, drill a hole through one of the side pieces and screw it into the stake while you’re hammering it in.
Carry out the following maintenance schedule, or ensure that the client understands that they need to do these things in order to give the tree the best chance of survival:
- Deep water the tree once a week during summer if no significant rain has fallen that week. Run a hose at low flow (5-10 litres per min) and leave it on the root ball for 5 minutes.
- Remove weeds as they appear.
- Leave the stakes in place until the tree’s roots are established. This should only take one growing season (12 months) so set a reminder on your phone or add a note to your calendar to remove the stakes in one year.
- Early each spring, apply a layer of compost and bark mulch, the same thickness as the first year. This will help keep your tree growing strong. You may also choose to water it with a solution of organic seaweed liquid fertiliser at the same time to give it an energy boost.
To ensure the plants grow well, maintenance is key, for at least the first year. Make sure your client knows this and has a plan for maintaining them, whether that is by doing it themselves or bringing in a landscape maintenance contractor.
We’re going to finish this section by introducing the basics of pruning. You may need to prune the trees or shrubs you’ve planted, to encourage health growth. Alternatively, if you are going to provide landscape maintenance services, these are useful skills to develop.
Pruning for plant health
We prune plants for a number of reasons. In this module we’re focusing on pruning to support plant health. This involves removing:
- dead and dying branches
- diseased: branches, leaves, flowers, and fruit
- crossing branches.
Crossing branches are removed because they will rub together and cause damage to the bark. This could cause wounds which:
- are susceptible to diseases
- damage the parts of the branch that transport water and nutrients around the plant.
Pruning tools
The main tools you’ll use when pruning small trees and shrubs are:
- secateurs
- loppers
- a pruning saw.
Secateurs
Secateurs are scissor-like clippers designed for cutting small woody branches. There are two main types:
- Bypass secateurs – these are the most common and produce the cleanest cut and can get close to the stem. “Bypass secateurs have a curved shaped blade, sharp only on the outer edge and cuts down beside the anvil (non-sharp hook)” (Secateurs - types and use, no date).
- Anvil secateurs – these are less common, but are better when more cutting force is required, such as for removing deadwood. Anvil secateurs have an upper blade that is typically sharp on both sides and cuts down onto the flat or curved lower part, called the anvil.
This video does a good job of pointing out the differences.
Watch
What's the difference between a bypass and an anvil pruner?
Duration: 2:05 minutes
There are so many different tools that sometimes it can be a little confusing as to which tool is best for which job. Use the wrong tool and you could end up doing unnecessary damage to your plants and flowers.
Adam Greenman of Greenman garden tools, shows us the difference between a bypass and an anvil pruner and why it's important to understand in what areas they should be used.
If you plan to buy a pair of secateurs and can afford only one, we suggest getting a pair of bypass secateurs. If you need more force than you can apply with your bypass secateurs, use a pair or loppers or a pruning saw instead.
Loppers
Like secateurs, loppers are also available in bypass and anvil forms. Again, we’d recommend a set of bypass loppers unless you have a lot of large, hard branches that you can’t reach with a pruning saw.
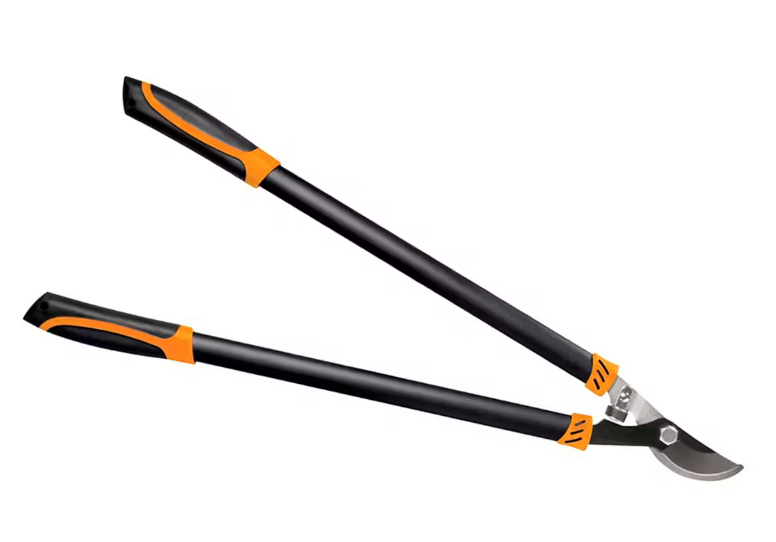
Fiskars Powergear X bypass lopper.
Pruning saws
Pruning saws are specifically designed for cutting live branches (wet wood). They are smaller, have differently designed teeth and their blades are much stiffer than saws used for carpentry.
Caution
⚠️ Take care when using pruning saws, they are extremely sharp!
When cutting, make sure your other hand is well out of the way. If you’re using that hand to hold the branch to steady it while you cut, make sure you’re holding the part above the saw, so it can’t slip down onto your second hand as you cut.
A high-quality pruning saw is a great investment if you plan on getting into landscape maintenance. Silky saws, such as the Gomtaro, are used extensively by arborists and trusted for their sharpness, robust design and long life. When blunt, the blade can be removed and a new blade fitted.
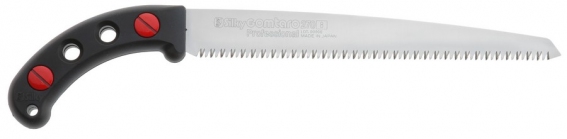
Silky Gomtaro pruning saw.
Pole tools
Loppers and pruning saws are also available on long extension poles so you can prune branches that are higher off the ground. If you plan on buying a pole lopper, try to get one that has the hook at the top, which the bypass blade rotates up to. This way you can hook it over the branch and pull down gently on the pole to hold the branch in place while you cut it.
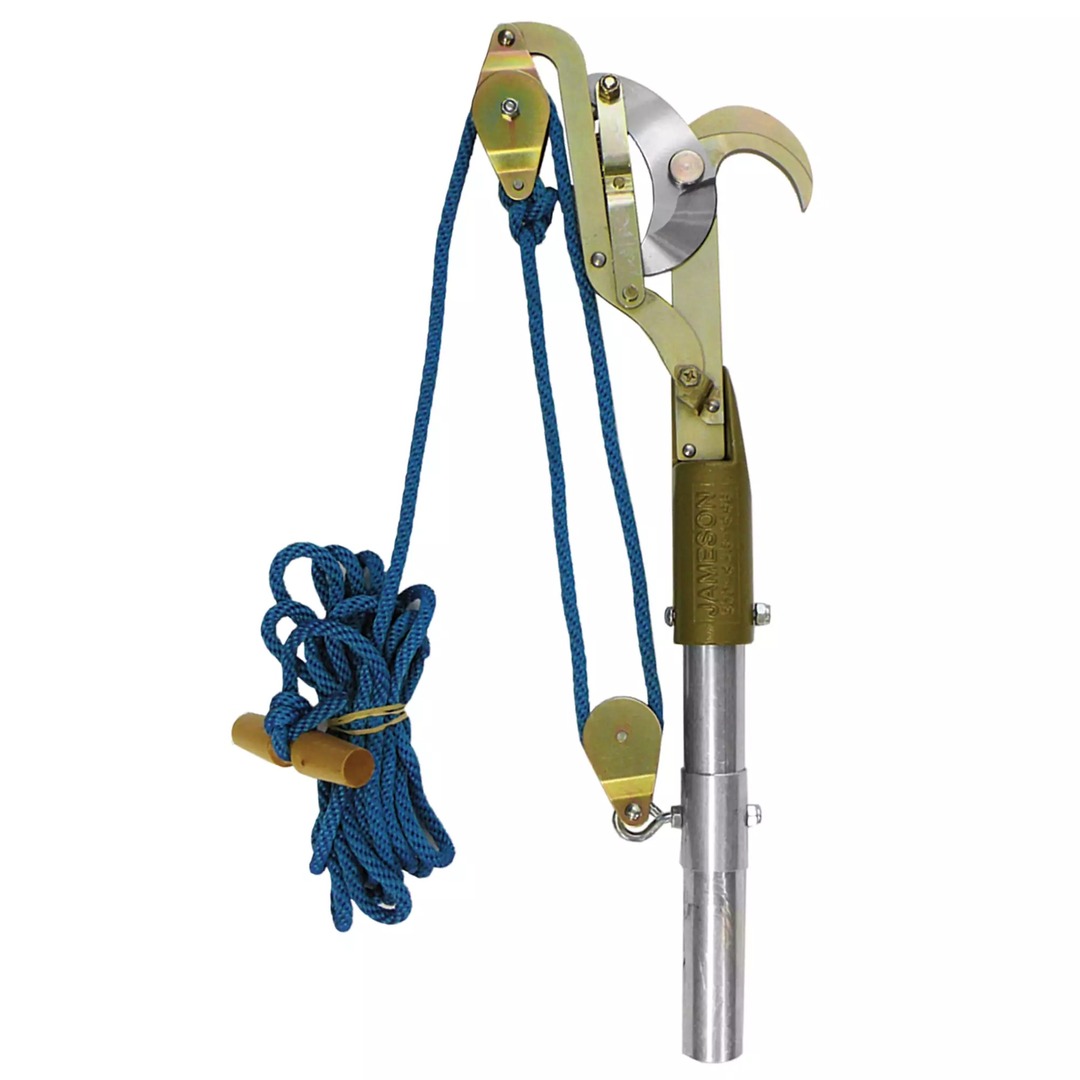
The Jameson ‘Big Mouth’ is an example of a pole lopper with the hook at the top. This style lopper head fits onto one or more fibreglass poles to give it the desired height.
Pruning cuts
One tikanga related to pruning is to only ever remove a maximum of one-third of the foliage in any one year. For instance, if the tree has six branches each with roughly the same amount of leaves, do not cut off more than two of the branches.
Once you have identified which branches need to be removed, cut them back to the main branch or trunk they have grown from.
When you do this, make sure you don’t cut into the raised ring at the base of the branch. This is called the branch collar. It is a special part of the plant that produces substances that help the plant fend off rot and disease nearby.
Make your cut close to, but not into the branch collar.
The following images show where, how and on what angle to make these cuts.

The correct location to make a pruning cut with secateurs or loppers.

Looking end-on at the lopper blades when making a pruning cut.

The three-cut approach for pruning saws is important when there is a lot of weight in the branch.
Watch the following video (start at 1:51) for a demonstration of the three-cut method of pruning.
Watch
How to Prune a Tree Using the 3 Cut Method
Duration: 4:23 minutes
In this video, Kenny, from Russell Tree Experts, shows you how to prune a tree using the three-cut method.
Post Watch Task: What would happen if you simply cut from the top down right through the branch?
By now you should be able to:
- Plant trees and shrubs according to accepted industry practices.
- Describe plant establishment activities that promote healthy growth.
- Prune small trees and shrubs to promote plant health. It’ll require some practice, but you know the correct techniques to use now.
Assessment 3
If you’ve chosen to plant trees or shrubs for your soft landscaping feature, you should be ready to make a start.
Head over to the assessments section and read the full assessment requirements in detail. If you have any questions, contact your tutor.