Welcome to the Software Lab.
In these topics, you will be provided with videos that explain how to use certain functions and tools of software. You will then be presented the opportunity to explore these tools and functions on your own while creating a masterpiece in an activity. Feel free to go at your own pace, pausing the videos when you need to, and then trying out your newly learned skill in the software on your computer.
Selections basics
You have now had the opportunity to learn about and become familiar with the basic functions of Photoshop.
We will now dive in to explore the selection tools used to create, transform and modify your images into a work of art.
Selection tools are designed to select images, or the desired part of an image, so you can work on them without affecting the unselected areas.
We will specifically focus on the selection tools below:
- Selection tools--lasso and marquee
- Selection tools--object and quick selection, magic wand
- Saving and loading selections
- Colour range
- Focus area.
Click here to see how we can use the basic selection tools within Photoshop to modify and alter desired parts of an image.
Once you have viewed the tutorial, follow along with the activity below to explore different selection methods.
Activity - Selection basics
Selections give us a way to define areas to work on. We can use selections to copy elements, apply filters, restrict brush strokes and create masks.
The most common selection methods are lasso and marquee. Marquee selection can be rectangular or elliptical.
- With the rectangular marquee tool selected, click and drag from the top right corner of the house image to the bottom left and release the mouse button.
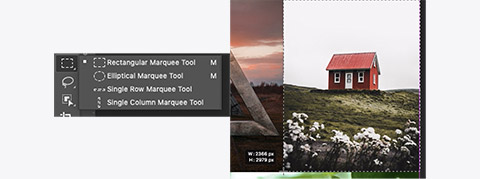
Selections are indicated on-screen by the marching ants. - Copy the image and paste it into a new document.
Only the selected area will be copied. - Using the elliptical marquee, select the round window on the left. Hold the space bar while creating the selection to position it correctly.


Copy and past the window in the new document.
- The regular lasso tool can be hard to use for accurate selections.
Try using it on the leaf. You’ll find it difficult to stay on the edge.
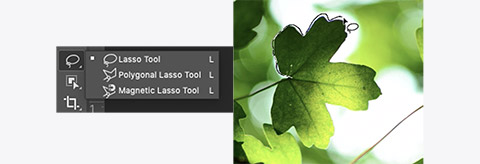
- Try again, but this time with the magnetic lasso. Do a single-click anywhere on the edge of the leaf, then slowly trace the edge until you are back where you started.
Do another single-click to finish.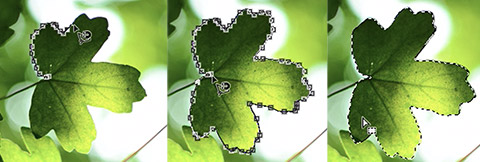
Copy and paste the leaf into the new document.
The polygonal lasso tool works by making straight lines between single clicks. -
With the polygonal lasso tool selected, do a single-click at the top of the triangle.
Move the cursor to the bottom right corner. Click again, and repeat until back at the start point. Click the start point to finish.Copy and past the triangle into the new image.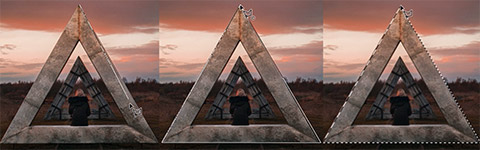
Sometimes the marquee or lasso tools won’t be appropriate to use.


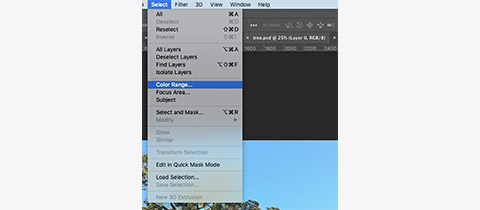
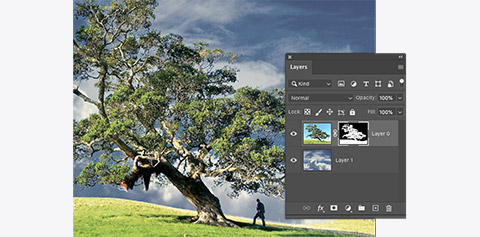
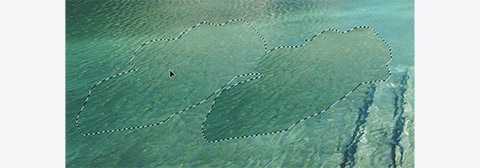
The tree image below has far too many details to select by hand.
- In the menu bar go to Select/Colour Range.
- With the eyedropper, select a blue colour from near the top of the image.

- Hold Shift and select a blue from the middle left of the image.
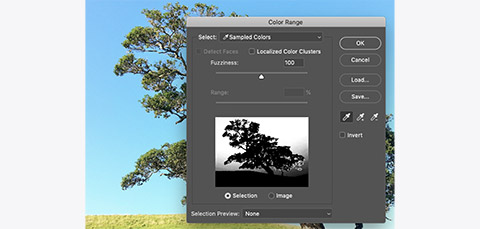
- Hold Shift and click just under the branches on the right.
- Adjust the fuzziness to 100 and click OK.
We have just made a very accurate selection of the sky by sampling different shades of blue.
We can invert the selection so the tree and ground are selected.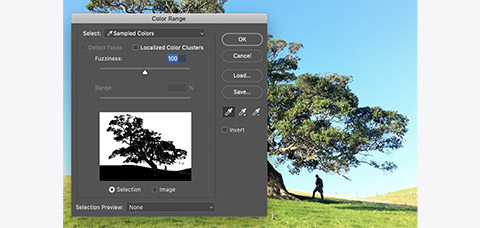
- Go to Select/Inverse from the menu bar.
- With the selection active and the tree layer selected, click the mask button at the bottom of the Layers panel.


Healing and cloning tools
In Software Lab 1, you were shown a video explaining the brush selections and how they work within Photoshop. Let us extend our brush selection skills and dive a little deeper to explore how you can use those selections to clone, heal, remove blemishes, duplicate images and clone between layers.
Whether you want to remove blemishes on the skin or paint over large areas of an object during manipulation, you can achieve this with the healing and cloning tools. They are also used to blend, make corrections, remove objects and duplicate aspects of an image.
These are techniques you can use to further improve on your design.
Click here to see a step-by-step video that will guide you in achieving these techniques throughout your design.
Activity - Cloning
The clone tool is used to paint out elements of an image by replacing them with elements from somewhere else in the image. It can be used to hide blemishes on the skin, paint out objects in the sky and in this activity, remove boats from the water.
Let us paint out the small boat in the middle of the photo.

The clone tool requires you to first define a source. This will be the point used to copy from.
Otherwise, we will receive this message.

- With the clone tool selected, hold option and click somewhere about two boat lengths to the left of the boat, at about the same distance away.
- Now hover the cursor over the front of the boat. You should see the boat begin to be obscured by water from the source point.
- Increase or decrease the brush size so that it is about half the height of the boat and start painting the boat away.
The effect may look a little obvious up close but if you zoom out it will appear much better. Try cloning some of the lighter areas back to make it less obvious.
-
Try using the clone stamp to remove the bright spots in this image. Remember to select a source that is as close to what should be there as possible.

Activity - Healing
The heal tools are also used to remove elements from an image; however, instead of copying from a source, they calculate from a source or from an area surrounding the element to be removed.

- Using the Healing Brush Tool, option-click to the right of the boat slightly further back in the centre.
- Paint over the boat image. Notice how it is not being replaced with an exact copy of the source. You may want to revert this image and try the first boat using the healing brush.
Activity - Patch Tool
The big boat in the middle of the scene would be difficult to remove using the previous tools as there are shadows and a boat ramp that could interfere with our sources.
For this one, we will use the Patch Tool.

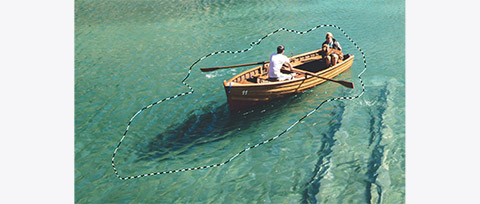
- Using the Patch Tool, draw a selection roughly around the boat and its shadow.
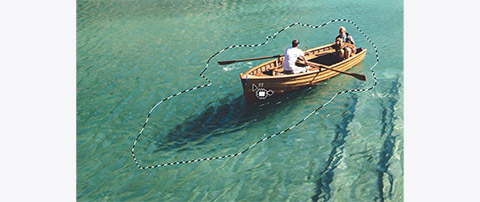
- Click and drag the selection to the left and release when the boat is covered.
- Try removing all the boats using the tool discussed.


You have now had the opportunity to follow step-by-step instructions on how to remove and heal objects within an image.
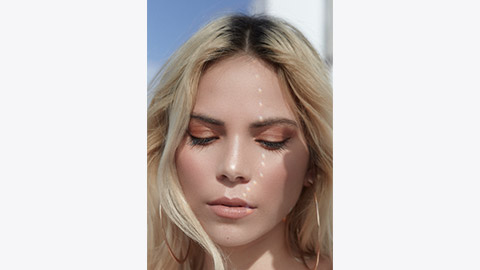
Using the following image, try removing the nose ring and necklace.

Layer masking
What is 'layer masking' you might ask?
It may sound a little daunting, but we have broken it down into multiple tutorials to explain the crucial steps.
Layer masking allows us to edit and shows things from different layers at the same time. It provides you with the flexibility to adjust layers without touching the original image.
The amazing thing about layer masking is that you can make specific parts of an image transparent, allowing you to fade from one image into another.
You will find a series of tutorials below that will help you wrap your head around how you can achieve this look within your design.
- Click here to see how layer masking works.
- Click here to see how you can use layer masks to make composites of multiple images.
- Click here to see how you can use layer masks with selections to remove objects.
- Click here to see how you can refine layer masks.
Remember to go at your own pace, pausing the videos when you need to, and then trying out your new skills in the software on your computer.
Once you are confident, you are ready to attempt the following activity.
Activity - Layer masking

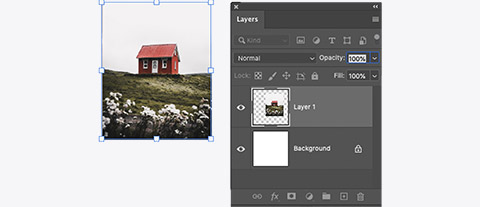
A mask in Photoshop is a greyscale representation of what is visible and invisible on a layer. They sit next to the layer they relate to and are often chain-linked to the image so they will move with the image.
White indicates areas that are visible. Black indicates areas that are hidden.
Areas of the masks that are grey will be semi-transparent depending on the density of the grey.
-
Shift-clicking a layer mask will toggle the layer mask on or off. You can edit a layer mask using the same tools you might use to edit an images layer.
-
Select the layer mask by clicking in the layer panel. You can tell if it is selected by the white corners around it.
-
Use a brush tool with black as the foreground colour to paint the mask so that the house no longer has a white border.

To make a mask, we often start with a selection.
- Make a selection of the centre leaf.
- Click the mask button at the bottom of the layers panel.

A mask revealing the selected area will be applied to the layer.

Masks also allow us to combine objects together in interesting ways
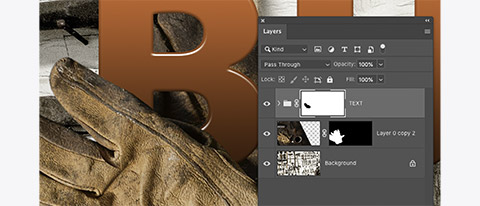
- Move the gloves from the tools.pds file into the text and tools.psd file. Place them under the 'B' in BUILD so that the top glove can just be seen through the lower part of the B.
We are going to make the top glove appear as if it sits on top of the B. - Using a brush tool, paint on the mask for the TEXT group to hide the portion of the 'B' that should be under the glove.
You may accidentally mask more than necessary. You can paint the 'B' back in by switching the paint colour to white.
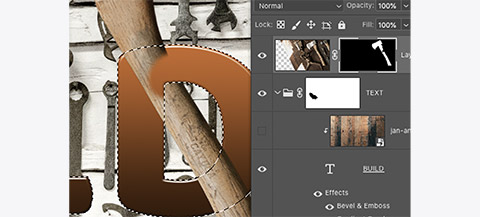
- Place the axe so its handle crosses diagonally through the middle of the 'D' and is above the TEXT group.
We will make it appear as if the handle is going through the 'D' by hiding the section of the handle that covers the 'D' at the top. To make this easier we can make a selection of the BUILD text first.
- Expand the text group and command-click the 'T' icon for the text layer.
- Select the axe layers mask, paint to hide the section of the handle that should go behind the 'D'.
The active selection means of mask edit only apply where the text is avoiding the need to move carefully with the brush.
- Do the same with the hammer and another letter.
- Select mask and use a couple more tools in the image.
- Activate the wood texture layer to complete the image.


As an additional challenge, try using a mask adjustment layer to add some shadows to help with the appearance of depth.