Welcome to this topic of Communication Practices.
Our aim in this topic is to:
- Outline oral instructions to construction personnel.
- Understand and take part in effective discussions on a construction site.
In this subtopic of Implementing Effective Communication, we look at implementing the communication practices that:
- Keep communication barriers to a minimum.
- Are based on the communication chain of command.
- Encourage documentation of verbal communication.
- Designate communication responsibilities.
- Promote constant communication and updates.
- Encourage feedback.
Below are a few practices that demonstrate the key conditions mentioned above.
| Means of Onsite Communication | Implementation Practices |
|---|---|
| Emails |
|
| Face-to-face Verbal Communication |
|
| Video Conference |
|
| Two-way Radio |
|
| Telephone Contacts |
|

Visual communication predominantly uses our sense of sight (vision), instead of our other senses (smell, sound, touch, etc.).
Visual signs are dominant and effective because they are universally understood at a glance, using symbols and images. They are highly visible, memorable, and transcending language barriers. In emergencies, they prompt quick action and ensure clarity and compliance with regulations.
While visual signs are dominant, a combination of visual, auditory, and written signs can offer comprehensive communication in complex environments.
Reflection
Your current work environment would have plenty of visual communication that is already in use.
- Can you recall signs at the top of your head that don't use words?
- Does the use of colour play a significant role in your work site?
Team members on a construction site must understand and adhere to these visual signs to ensure safety and effective communication within the construction environment.
These signs help prevent accidents, guide people to their destinations, and inform them about the site's rules and regulations.
The main visual elements of signs used in New Zealand typically include:
- Boards
- Colour scheme
- Symbols and pictograms
- Reflective material
Visual communication aids are available for purchase online and reusable for future project use.
Let's look at a few examples of visual communication aids in a construction site.
Boards
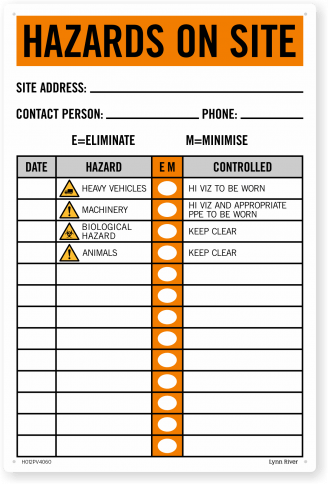
The hazard board, often referred to as a "safety hazard board" or simply "hazard board," serves several important functions on a work site, primarily related to safety and risk management. Its key functions include:
- Safety awareness. The board raises awareness about potential hazards and risks on the site.
- Hazard identification. It lists and categorises specific hazards present, helping identify risks.
- Emergency information. The board displays emergency contact numbers, evacuation routes, and locations of safety equipment.
- Safety procedures. It provides safety procedures and guidelines for workers to follow, including the use of personal protective equipment.
- Communication and compliance. The board serves as a communication platform for safety messages, training, and updates, ensuring compliance with safety standards and promoting accountability.
Warning lights
Warning lights or beacons are another visual communication commonly used on construction sites. The advantage of warning lights is that they can be seen across the whole site, at any time of the day and in any conditions.
- Machinery lights. Heavy machineries like cranes or diggers must have orange/amber flashing lights on the vehicles to improve visual safety awareness.
- Traffic control lights. On larger construction sites, traffic may need to be controlled. This is when temporary traffic lights can be used.
- Barricade lights. Orange/amber warning lights are set up on barricades to protect people from falling into deep excavations at night or in bad conditions. These are used mainly where warning tape may not be visible.
Hand signals
Hand signals are also very common on construction sites because of the noisy environment and the distance between you and the person to whom you need to communicate information.
Many hand signals used on site are of a basic concept; examples include the thumbs-up sign, which means okay or correct, and the sign telling someone to stop - the palm facing outwards.
Designers or surveyors working with levelling equipment often use hand signals. Surveying requires two people standing far apart, one reading the levels and the other holding the staff. Rather than shouting at each other, they use hand signals to communicate.
Some job roles use specialised hand signals, for example, a rigger or dogman directing cranes when they are in direct line of sight of the crane driver. Spotting while reversing also uses specified hand signals.
Hand signals for day-time spotting
Work Safe New Zealand shares the diagram below. The diagram shows the signals that spotters should use to help drivers to reverse their vehicles safely during day-time operations. The signals should be slow, deliberate and clear.
![[image] illustrations of spotting signals for day-time operations](https://www.worksafe.govt.nz/assets/Topic/Vehicles-and-mobile-plant/WKS-Reversing-Spotting-Fig10.JPG)

Establishing a clear communication channel facilitates the flow of information. Let's look at an example of how a client's concern progresses through the established communication channel.
- The client expresses concerns regarding the work or general onsite activities.
- Concern is directed to the project manager.
- The project manager disseminates to the team leaders of contractors and supervisors.
- Team leaders and supervisors forward the relevant information to the relevant people under their supervision.
- The administrator is notified of administrative concerns.
- The quality control manager is notified of quality control concerns.
- The health and safety supervisors are notified of health and safety concerns.

A contracting situation can have several levels in a shared workplace or a contracting chain. This process ensures that every person in the line of command will be well informed, and the information and communication will be systematic.
This also applies in reverse; any issues from the end of the chain of command will be brought up to higher management through their immediate superiors.
Imagine that you have some important information that you need to communicate to your workforce in an upcoming group meeting session. To communicate this information effectively, it's important to consider the way that you structure and sequence it.
Start by gathering all necessary information and determine the key points you wish to convey to your workforce.
It is recommended to jot down these main points, regardless of their order. In addition to the main points you would like to cover, some common areas to consider could be:
- safety
- policies
- procedures
- responsibilities
- practical applications
- care of equipment
Main points
After jotting down your main points, assess which ones are crucial for the specific audience you are speaking to.
Points to consider could be:
- Is my information clear and concise?
- Is this repeated information that serves as a reminder or reinforcement?
Try to look at your main points in two ways:
- What are the most important points in the information you have been given?
- What are the most important points for these particular team members?
Overall aim
Now, take a moment to consider your overall aim. This is your main mission, a single aim you will consider throughout the session. Often, the overall aim will be obvious to you.
Look at your main points. For instance, if your important points are about new hazards or potential risks, your overall aim for the session will be to ensure staff and client safety.
You have the aim now, so think of the situation of this particular session.
- Are you trying to improve some aspects of your workers’ work?
- Can you use this session to make progress in some areas?
For example, a particular team member is not sharing his knowledge with the apprentices. A few new workers still don’t feel part of the team, and you’re not getting the most out of them.
The main points of a group meeting session could be:
- Introduction and objective: Briefly explain the purpose of the meeting.
- Knowledge sharing and training: Discuss the benefits and impact of knowledge sharing.
- Onboarding of new employees: Address the concern of new workers not feeling part of the teams.
- Action plan: Summarise the proposed solutions in the future.
- Questions and answers: Feedback.
The overall aim of the meeting in this scenario would likely be to address the issues related to knowledge sharing, team cohesion, and productivity within the workplace.
Sequence
Most experienced supervisors give a lot of thought to the order they will follow in giving instructions. Unless you have simple information, you must plan your sequence.
Communication is successful when the message is conveyed and understood in the intended way. Standard sequencing ensures that important points are presented first and supporting details follow, enhancing effectiveness.
Workers will be distracted if you don’t know what you will say next. Of course, you also need to be flexible. You shouldn’t just charge ahead if your team members are not following you.
Be prepared to stop, recap and go over some things again.
Often, you will have several things to get through in a session, especially if it’s a daily toolbox meeting. If you have several topics, decide which is most crucial. If you have one very important topic (e.g. a major safety issue or concern), you should run a separate session or deal with certain topics separately within one session.
Any standard conversation sequence might look like this:
- Open by explaining what this is all about. Why they are here, and why it’s important.
- Go through your main content. Probably in the order workers will use in practice, and highlight your main points.
- Get feedback. Ask for questions and make sure they have understood your main points.
- Finish by repeating your main points. Try wording the points slightly differently and explain what will happen next.
Remember also to consider how to handle questions, demonstrations, and hands-on experience when sequencing the instructions.

What is a discussion?
A discussion on a construction site typically refers to a conversation or meeting among various stakeholders involved in the construction project. These discussions are essential for effective project management, communication, and problem-solving.
When faced with a problem on a construction site, we hold discussions to determine the best approach for how to carry out the task at hand.
So, there is no point in discussing whether or not to comply with a new safety requirement. But you could discuss how you will comply with the safety requirements.
As a supervisor, you will have some ideas on the situation, but to get the commitment, you decide that the best way to deal with this particular issue is to get everyone to talk it through themselves.
You might find that the team might come up with a better idea, and if people have been involved in a decision, they are more likely to accept it and get on with it.
Discussions can be useful to get everyone’s ‘buy-in’ for a plan of action in the future.
Generally, everyone starts a discussion with some assumptions, such as, they are wanting to:
- have a discussion because an outcome has not yet been decided.
- share views on the same issue.
- have their views heard and considered.
- reach a resolution that everyone feels positive about, even if they don’t entirely agree with what was decided.
Remember, many one-to-one discussions have similar aims.

Listening involves engaging your brain and your ears; listening strategies are what you can use when someone is talking to you.
Some of them you use already. Others may be new to you, and you may think about using them to listen to people better to gain all the information you can.
There are several listening techniques you might already know. Below are five that you should remember to gain information.
Not every listening strategy can be used in every situation or occasion. We will look at how to use these techniques to fit the situation, the occasion, the subject matter, and the speaker.
Pay attention
One of the most important communication strategies is paying attention to what the speaker is saying. When we give attention to something, we focus carefully on that thing. When you listen to a speaker, you must pay attention to them to listen well. There is a big difference between hearing and listening.
Hearing is a physical activity in which your brain registers sounds. However, it is a passive activity because it is an automatic process. Listening, therefore, is an active process that requires you to be involved. You need to use your brain and think about what you are hearing. We are usually more interested in voicing our opinions or telling others about ourselves.
To be an effective listener, you must take the limelight away from yourself and focus on the speaker. Keep in mind the following:
- What is the point of what they are saying?
- What information are they giving?
- How will it affect you?
Therefore, listening to the speaker's words is crucial to effective listening.
Stop talking
If you are to pay attention to what others are saying and listen rather than hear them, you must stop talking. This seems obvious, but it is amazing how often people forget this. The simple truth is that it is difficult to listen and speak simultaneously. The fact that we have two ears and only one tongue is a gentle reminder that we should listen twice as much as we talk.
Encourage the speaker
Another technique you can use in listening is encouraging the speaker to continue talking. Doing so conveys to the speaker that you are interested in what they say.
You can encourage someone talking to you by using neutral words, neither agreeing nor disagreeing with them and using a positive tone of voice. Repeating keywords the speaker says is another way to encourage them.
Here's an example:
Speaker: "I've been working on this project stage, and meeting the deadlines has been quite challenging."
Response: "I understand how meeting deadlines on a challenging project can be tough. It sounds like you're putting in much effort to handle the situation. Tell me more about the specific hurdles you've encountered."
Clarify
The purpose of this listening technique is to help you clarify what is said, and it can also help the speaker see other points of view. You can do this by asking questions or restating an interpretation of what you have heard to encourage the speaker to explain further.
Here's an example:
You are a supervisor of a trade team on site, and the following statement has been made to you by another subcontractor.
"I am sure your workers in the room next door can make less noise. I get on very well with them. You know they are really good workers at heart. I sometimes talk to them on the smoko break. But I cannot go into their workspace and tell them to quiet down as I am not their boss".
Here are the kinds of questions that could be asked to clarify:
- How often does this noise issue occur?
- Does the noise come from specific equipment or activities?
- You mentioned you get along well with them; have you discussed the noise concern with them?
- Are you seeking a short-term or more permanent solution to the noise issue?
Another way you can clarify what the speaker has said is by paraphrasing what you have heard and asking them if it is correct. To paraphrase means to express the meaning of a passage using your own words.
Here is an example:
"I'm confident that my employees in the adjacent room could lower their volume slightly. I have a great rapport with them. They're dedicated workers. I'll engage in conversations with them during our break. However, there might be occasions where the noise levels might be high, but I'll request them to reduce the noise when not needed."
Restate
This final listening technique shows that you are listening and understand what the speaker is saying. At the same time, you are ensuring you understand things correctly.
You do this by restating the basic ideas or facts you have heard the speaker say.
Using the example before on the noisy workers, examples of restating could be:
- So are you saying that my workers next door to your guys are not being supervised?
- If I understand you correctly, do you feel it is not your place to go and tell my guys to quieten down?
It can be easy to misunderstand some or all of what the other person is saying when we’re communicating with others.
Confirming your understanding is crucial to effective communication, especially in a high-power environment like the building industry.
Misunderstandings can occur when:
- We make assumptions about what the other person means or what we already know.
- We don’t understand the words the other person uses.
- The person doesn’t speak clearly.
- The listener thinks they already know more than we do.
- Both the listener and or the speaker are distracted.
It is important to ensure that your team understands instructions, safety procedures, and project details to prevent mistakes and accidents on-site. Obtaining information or instructions for a task correctly on a worksite is crucial, as improper job completion can result in serious consequences.
Here are some basic steps you can use to confirm understanding while being an effective communicator on-site:
- Use clear and concise language
- Encourage questions
- Visual aids
- Actively listening
- Regular check-ins and briefings
- Lead by example
- Use technology to aid in your communication, such as including a photo and digital project update.
Remember to regularly evaluate your communication strategies and styles and be open to feedback and observation from others as an ongoing process for effective communication.

Communicating information and instruction is essential for effective communication on a construction site.
If the information you give is not clear and concise, there’s a good chance it won’t be understood or followed up on correctly. You are responsible for ensuring that your information or instructions are fully understood.
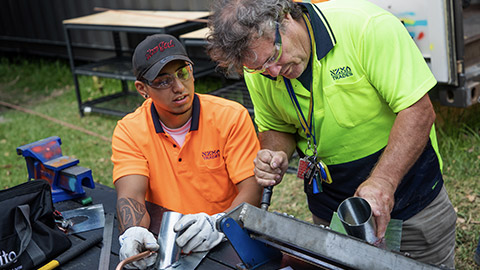
Demonstration
Most people in a practical environment will learn more from instructions when seeing them carried out or done more than just by listening to them being explained.
If there is something practical to explain, think about how and when you could demonstrate it.
You might have to explain a new piece of equipment that's been delivered, a particular building technique requiring a certain safety application, or corrective measures if something went wrong.
When doing a demonstration, repetition is key.
- Tell them what you're going to demonstrate.
- Demonstrate the full procedure yourself.
- Tell them what you have just demonstrated.
- Allow the team members to have hands-on practice.
- Supervise and give feedback.
The possibility of conducting a practical demonstration depends on the complexity of the topic or task. In some cases, it may not be feasible to conduct a demonstration. However, you can create a simulated scenario and guide the audience through each process step with the instructions given.
A helpful suggestion is to have one team member learn and explain the process or steps while under your supervision. This team member can then teach the rest of the team, which can serve another purpose, such as building the worker's confidence and providing training on responsibility.
Hands-on experience
To truly comprehend a new process with the instructions that you give them, workers must experience it first-hand.
The most effective way to ensure everyone understands what you have told them is to observe each individual performing the task.
The method and timing for scheduling hands-on experience will vary depending on the content, group size, and group dynamics.

Providing clear and comprehensive instructions is a crucial skill to practice.
To give instructions effectively, try these step-by-step approaches:

Sharing information should focus on essential details to avoid overwhelming the recipient. A clear plan, whether to provide on-site instructions or during training, is crucial. It ensures tasks are completed according to instructions, aiding in upskilling and employee performance. This plan monitors and evaluates performance, helping workers understand expectations and preventing potential misunderstandings. Providing planned instructions helps eliminate unclear communication, fostering a more effective and productive work environment.
Some ways of checking whether your instructions are effective with workers include:
Encouraging feedback
It is always best to seek feedback after a piece of information has been relayed. This would indicate whether the message’s sender and receiver are in sync with their understanding.
Encouraging questions and comments is valuable for instruction improvement. It provides insight into the recipient's understanding and helps enhance clarity for future communication. Be mindful of maintaining control during discussions, bringing individuals back on track if needed. Encourage questions, especially from those less experienced with a task, to foster a supportive learning environment.
Some useful tips on questioning include:
- Ask people for their opinion – this could encourage them to go on and ask a question.
- Ask participants directly.
- Ask individuals to repeat the main points back to you.
- Use questions in your final summary.
- Watch the group’s reactions as you talk to them.
It is crucial to give encouraging and respectful feedback when responding to questions. This will make the team feel more comfortable asking questions and prevent them from feeling foolish.
Three helpful tips to remember when answering questions are:
- Try to be positive no matter what.
- Avoid any personal judgements.
- Keep to the facts.
Feedback
Feedback is one of the most powerful influences on learning and achievement, but this impact can be either positive or negative.Hattie & Timperley (2007
Feedback is information you give to individuals that helps them close the gap between where they are now with their work and where they could be.
The goal of feedback is to provide insights that help them to improve their performance. The feedback given should make the person feel they want to do better and that you support them.
Feedback can be as formal as a planned review with a client or as informal as saying to someone on-site, ‘What do you think of my idea?’
Staff on site can choose to respond to feedback in several ways. For example, they could:
- admit that they have made an error.
- justify or explain their position better.
- resolve any differences of opinion.
To initiate feedback and encourage self-reflection involves three steps:
- Self-assessment of current level of performance.
- Self-assessment on areas of improvement.
- Plan actions to respond to points of self-assessment.
Use affirmation (support or encouragement), but ensure you affirm their performance rather than praising them as people, with no personal comments. Use correct and direct feedback to help inexperienced and struggling individuals with the undertaking.
Here’s an example:
An employee who doesn’t speak up or share ideas in team meetings.
“I’ve noticed that you rarely share ideas in big meetings. But in our one-on-one discussions, you develop many meaningful and creative ideas to help solve problems. What can I do to help make you more comfortable speaking up in front of the team?”
When offering feedback, highlight what they’ve done well and steer them in the right direction when you suggest where they might have gone wrong; you should try to include a mix of positive and negative comments.
Some “don’ts”
- Don’t be disrespectful and or unprofessional in your approach.
- Don’t use just yes or no comments; it is uninformative.
- Don’t make it personal; address the issue and not the person.
Resolving issues
After reaching an agreement on an issue emphasised, as a supervisor, you would need to conduct follow-up checks to ensure that the discussed issues have been resolved.
These checks would consist of:
- What has been decided or agreed? Summarise in very simple terms what has been decided and agreed upon. If complicated in its approach, write it down if you need to.
- Is what has been practised agreed to by worksite practice? Ensure that the resolution or any further action meets workplace requirements.
- Do all parties understand what has been agreed? Get everyone to check that they understand all of it and that all angles have been considered. Confirm again that it’s the best solution.
- Is it realistic? What you have agreed will fix the immediate problem, but look at the bigger picture.

As part of your role in the construction industry, it is common to report to your team members and other stakeholders about the progress of tasks or document accidents that you have witnessed or experienced.
These forms of communication should be a factual account of what occurred without including any personal opinions or interpretations.
Reporting can be done in a written or a verbal approach.
Verbal reports
Reporting verbally can be as simple as telling your client you’ve completed a task, about a fault you’ve found in a material, or describing an incident on the site.
You may also be expected to give more detailed reports at a site meeting about, for example, a safety issue. Most workplaces have policies about what should be reported and to whom the report should be given, so always refer to these for clarification.
When giving a verbal report, remember the communication skills of sharing information we have covered previously. These include:
- Think about what you want to say before you begin.
- Including only relevant information and details.
- Putting things into a logical sequence.
- Being aware of non-verbal language.
Written reports
Writing reports as a construction site supervisor is an important aspect of your job, as it helps document the progress, issues, and activities on the site.
These reports serve as a record of events and can be useful for communication with all parties, decision-making, and resolving potential disputes.
In some cases, written reports are a legal requirement in New Zealand as the information they contain may be used in the case of a work health and safety issue or as evidence in a formal investigation from an external party.
Below are a few ideas you could use to ensure you create an effectively written report for others:
- Use simple, everyday language, and avoid technical terms (jargon) unless you’re writing for a field specialist and know they will understand.
- Use the active voice, which lets the reader know who does what.
Here are two examples:
Active voice - practise using this.
‘The electrician will fix the plug’.
Passive voice – refrain from using this; it takes longer to write and is a more complicated sentence.
‘The plug will be fixed by the electrician’.
- Include only relevant facts and avoid unnecessary details and opinions.
- Make sure you’ve included all the necessary information. You may be unavailable later to provide more information if something is incomplete or unclear.
Remember that basic effective communication is crucial in construction, so your reports should be informative, accurate, and timely.
Tailor your reporting style to your audience, whether it’s executives, contractors, regulatory agencies, or other stakeholders.
Case Study: Electrical Walkthrough at 11 January Place
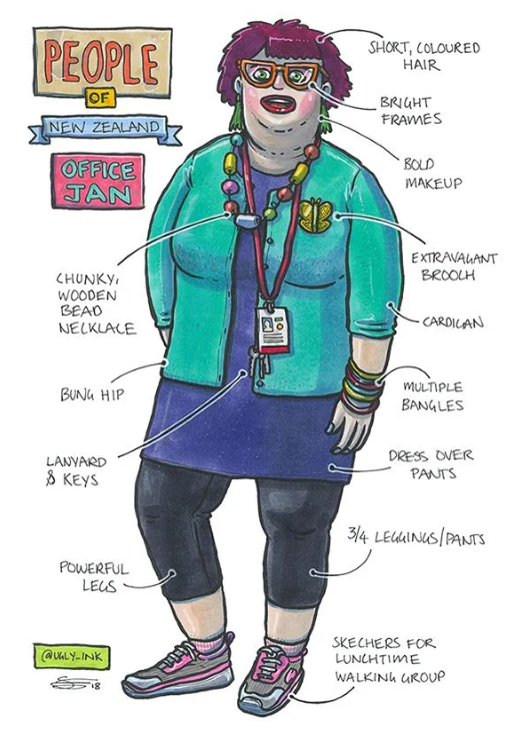
Your client, Jan at 11 January Place, has just done a walkthrough of the electrical wiring of her new home with you, the site supervisor.
She has requested that the height of the switch for the telly be lower so it’s not an eye sore when she watches her favourite show. She would also like to have a light switch for the laundry nook. You noticed that there’s no mention of this in the document checklist.
Write a report using the following documentation tool to a list of team members you believe should know about this request or variation. You can use this to share and discuss with your tutor and peers during a Live Session.
That's the end of module four. Let's hear a summary of what we've covered so far.
Click 'Video Transcript' or the plus icon (+) to expand and reveal the transcript for the previous video.
So, you made it back out the other side! Good job. Communication is vital in the worksite, and you now know how many methods there and how we go about it. And even how we shouldn’t go about it. I’m not here to pull the wool over your eyes, you’ll certainly see plenty of examples of poor communication throughout your carrier, especially on a typical building site. But with these skills, you’ll be an effective member of the team, and you’ll be able to make some positive changes in your workplace. So, I hope you put these skills to good use, and really start practising from day one. Speaking from experience, getting up and raising a concern in a workplace can be daunting, especially within the first few weeks of any new job. But don’t hold back, remember safety first and ask questions.