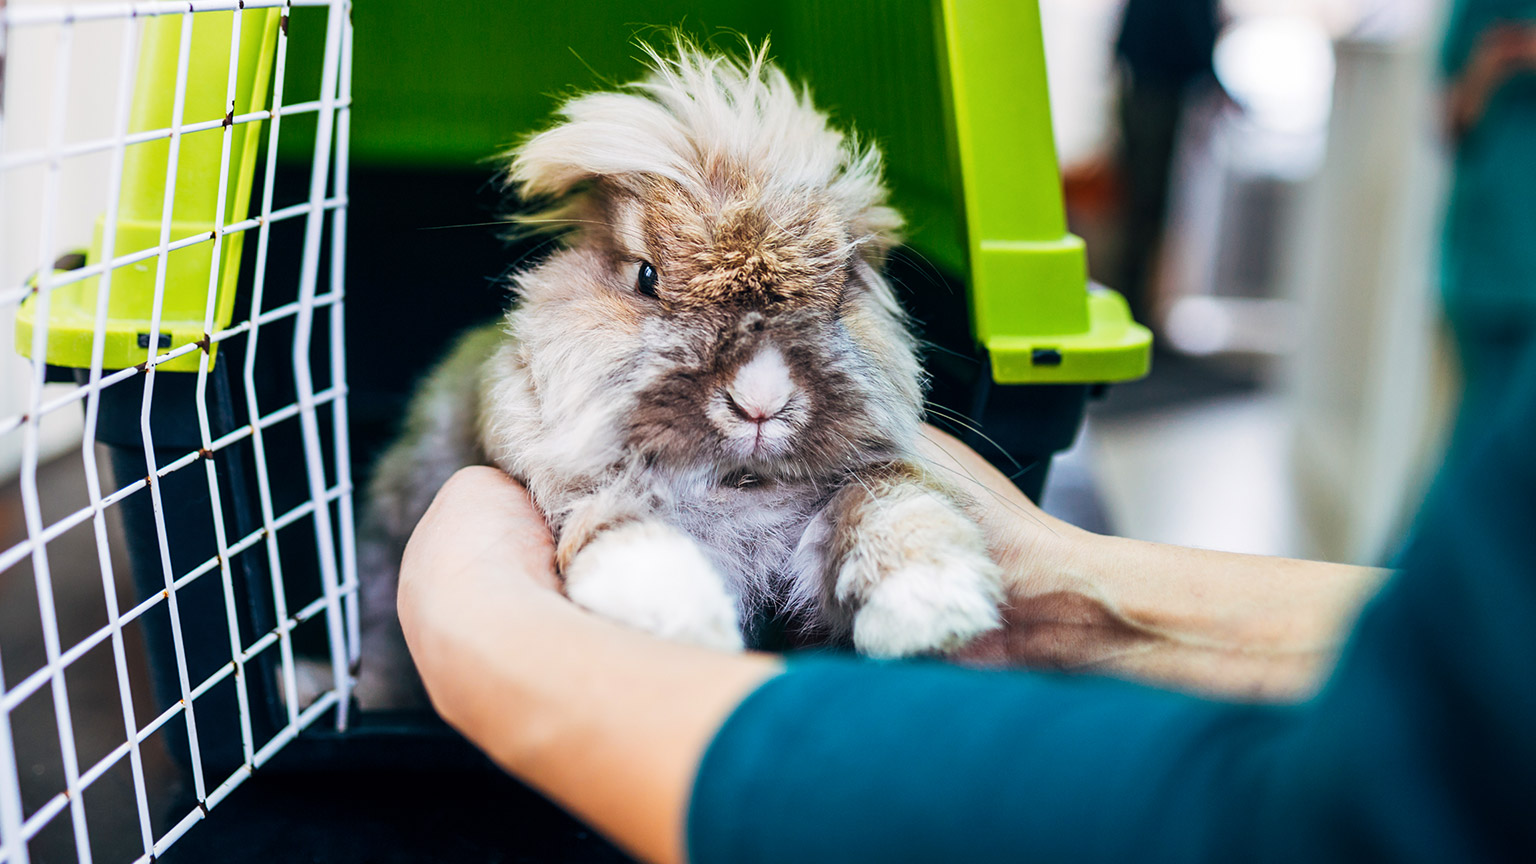
Now that you, the work area and all required equipment are fully prepared, it is time to prepare the animal for its healthcare treatment.
The four key steps in preparing an animal for a healthcare procedure are as follows.
- Observe and interpret animal body language and behaviour.
- Confirm exactly what you need to do to approach, secure and handle the animal with your supervisor.
- Use low-stress techniques to approach and secure the animal.
- Assist with moving the animal to the inspection or treatment area.
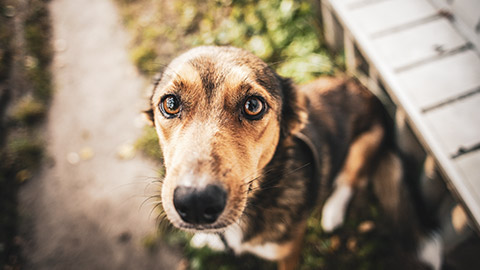
It is very important to observe an animal before you try to handle it. The animal’s behaviour – its movement and actions – will help determine the safest approach for handling and securing. Calm animals are easier and safer to handle than animals that are distressed, excited, anxious, afraid, aggressive or young and unfamiliar with handling.
Animal temperament and behaviour
An animal’s temperament is its individual “personality, makeup, disposition, or nature” (American Kennel Club n.d.). In other words, how an animal usually behaves is determined by its temperament. However, it is critical to remember that it is not unusual for animals with calm temperaments to become aggressive when they are in pain or frightened. Other animals may be completely calm outside a cage but become agitated and aggressive once placed inside a cage.
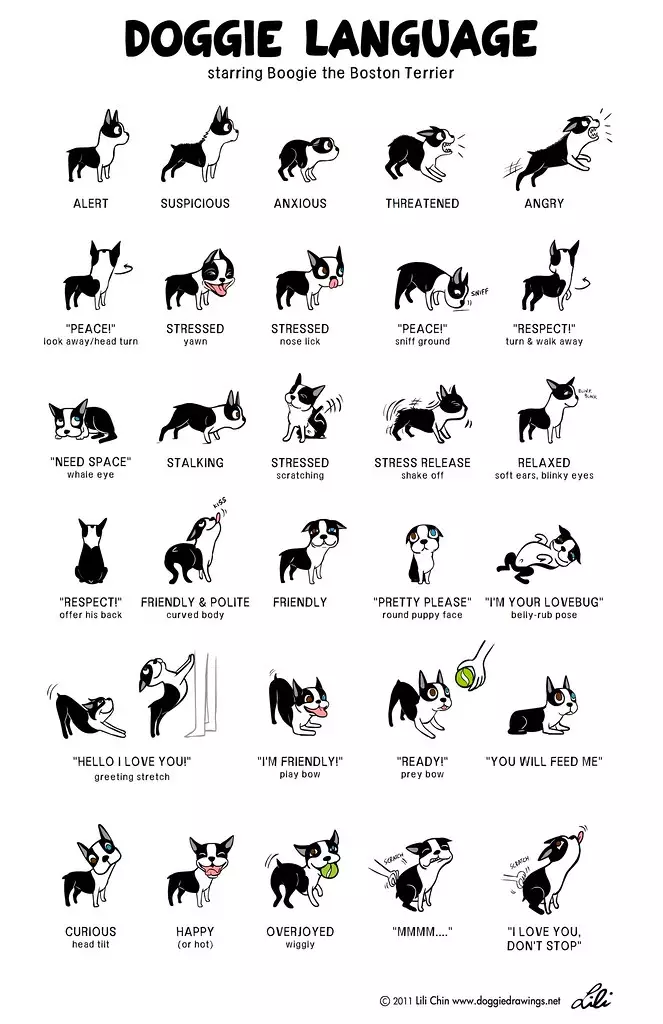
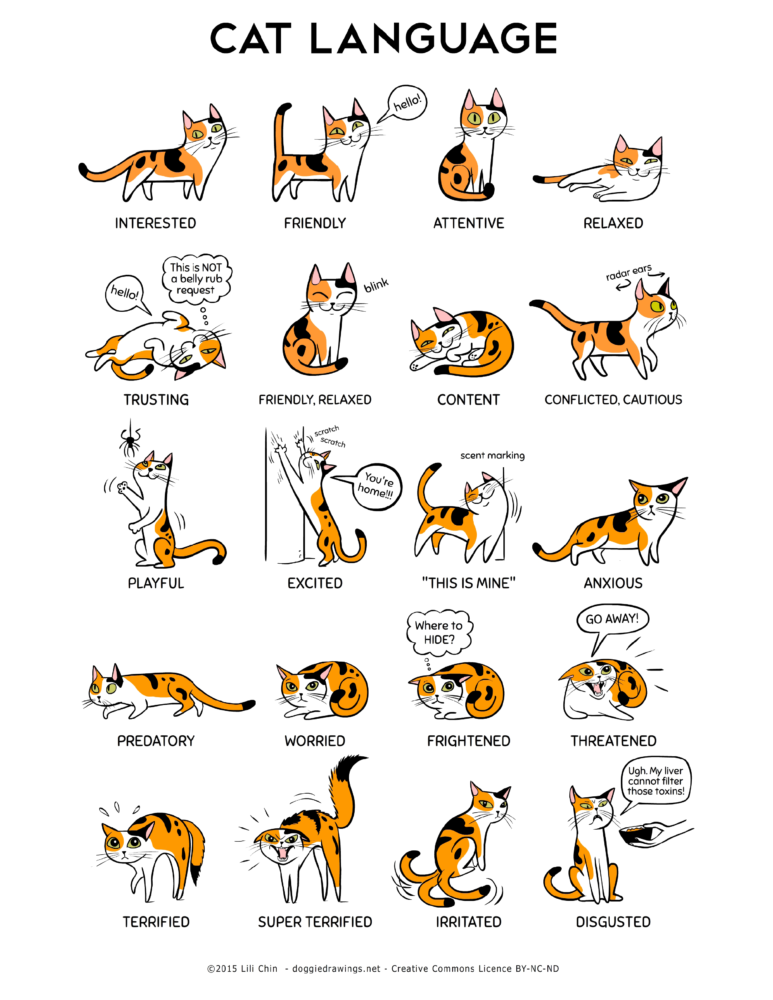
There will be many types of animals that you will work with over time, and behaviour and body language are typically different between different species as well as between different breeds or even different individuals. However, some behaviours and body language can be common across multiple animal species. The following table summarises some common animal behaviour and body language to look out for.
| State | Common body language and behaviours |
|---|---|
| Calm/relaxed | Cats: Ears upright and forward, whiskers relaxed, eyes relaxed with slow blinking, slow flicking of tail, shows signs of curiosity and affection Dogs: tail wagging, alert but relaxed ear posture, mouth relaxed or partially open, grooming Rabbits: Looking around – shows signs of curiosity, grooming, relaxed whiskers Birds: Looking around – shows signs of curiosity, normal vocalisation, grooming Horses: Eyes, ears and nostrils relaxed, resting a hind leg, tail relaxed and gently swishing, head in line with withers (not raised) |
| Fearful-aggressive | Cats: Ears flattened, eyes taught (strained and tight), whiskers pulled back or straight out, flattened fur, hissing, biting, scratching Dogs: Barking, growling, biting, lunging, scratching Rabbits: Biting, thumping, trying to escape Birds: Biting, lunging, Horses: (Fearful) head high, wide eyes, ears moving, snorting through nostrils, tail clamped down, spins away from people or other animals (Aggressive) ears back, whites of eyes showing, teeth bared, head up, tamping, kicking rearing, sweating |
| Anxious/Stressed | Cats: Ears partially flattened, tail held tight against body, shifting head or body away from perceived threat Dogs: Hiding, jumping up on owner, trying to get away, whining and trembling Rabbits: Freezing and hunching, ears flat against body, bulging eyes, easily startled Birds: Flattened feathers, neck stretched out, wide eyes, flying, torpor (a state of shock) Horses: Head high, widened nostrils, wide-open eyes, fast breathing, snorting through nostrils, fidgeting, pawing at the ground with front hoof, ears focused or twitching, sweating neck and flank |
Whenever possible, temperament and typical behaviour should be noted on the animal’s computer file and on the animal’s cage or pen or noticeboard, especially when the animal is distressed, aggressive or in pain. “Fractious” is typically used to describe cats that are difficult to handle, while “aggressive” is used for dogs.
Tip
Here are some useful links to help you explore and understand animal behaviour.
Below are some infograph posters that you may see at animal care clinics and shelters.
Watch
Identifying when an animal is in pain
It is very common for animals to hide their pain. However, a change in the animal’s temperament or typical behaviours can often signal that the animal is injured or in pain. It is easiest to detect signs of pain when you are familiar with the animal’s typical temperament and behaviour.
However, common signs that an animal is in pain include the following:
- Decreased appetite
- Quiet, submissive behaviour
- Unusual posture or facial expressions
- Difficulty or reluctance to move, climb or jump
- Increased licking and biting of self in specific areas
- General neglect of coat care/grooming – dull, unkempt fur
- Hissing, growling, whining and whimpering (FOUR PAWS Australia 2020).
The following table summarises some common behaviours displayed by cats, dogs, rabbits and horses when they are in pain or discomfort:
| Cats | Dogs | Rabbits | Horses |
|---|---|---|---|
|
|
|
|
There are several tools for assessing pain levels in animals. The Glasgow Composite Measure Pain Scale (CMPS-SF) is a common decision-making tool for assessing pain in cats and dogs. The CMPS-SF lists around 30 visual descriptors of possible animal posture and behaviour. The descriptors are typically grouped into 6-8 categories, based on actions the observer needs to take before assessing the animal’s response, behaviour or condition. Within each category, the descriptors are ranked numerically according to their associated pain severity” (Reid 2021). The observer chooses the descriptor from each category that best fits the animal’s condition or behaviour. The scores of the selected descriptors are then added together to produce an overall pain score. The pain score is used to determine what pain treatment is required.
Compare the Animalcare Acute pain assessment scale for cats (pdf) with the Short Form of the Glasgow Composite Measure Pain Scale recommended for dogs by Royal Canin at the end of the ‘Pain assessment in the dog: the Glasgow Pain Scale’ article.
Risks associated with animal temperaments
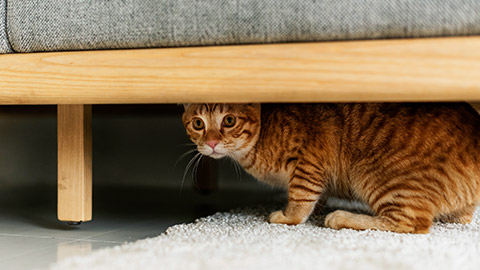
The risks of the handler being bitten, scratched or kicked are associated with handling any animal in any situation. However, those risks tend to increase when the animal is in pain, stressed or anxious. The risks tend to be higher when the animal is fearful-aggressive.
The stress level of the animal also increases the risk of injury for the animal itself. The more stressed an animal is, the more likely the animal will injure itself by trying to get away or avoid being handled.
Here are some of the common risks associated with animal temperaments:
1. Aggression
|
2. Fearfulness and Anxiety
|
3. Stress-Induced Reactions
|
4. Dominance and Territorial Behavior
|
5. Unpredictable Reactions
|
6. Pain-Related Aggression
|
7. Social Animals and Separation Anxiety
|
Knowledge check 6
Case Study

At Happy Paws Animal Care, a multi-species boarding and care facility, the staff frequently encounter animals with diverse temperaments and behavioural needs. Understanding an animal's temperament and behaviour, recognizing signs of pain, and managing associated risks are critical for ensuring both the animal's well-being and the safety of the staff.
|
Animal Profile: Bella, a 5-year-old Border Collie Temperament and Behaviour: Bella is known to be a generally friendly dog, though she displays strong protective instincts, particularly around unfamiliar people and animals. During previous boarding stays, she has shown signs of mild separation anxiety when left alone but quickly settles down with familiar caregivers. She is highly intelligent and energetic and requires mental stimulation, often becoming restless or irritable if not given enough attention or exercise. |
Incident: On a recent visit, Bella was brought in for a routine veterinary check-up and boarding. The staff at Happy Paws noticed that Bella was more agitated than usual. She growled softly when one of the staff members attempted to leash her for a walk, which was uncharacteristic of her normally playful behaviour.
1. Animal Temperament and BehaviourIn assessing Bella's temperament, the staff took note of her:
|
2. Identifying When an Animal is in PainThe caregivers were trained to recognise the subtle signs of pain in animals, which can often manifest as changes in behaviour. In Bella's case, the following indicators were observed:
These behaviours suggested that Bella was likely in pain despite her initially energetic disposition. |
3. Risks Associated with Animal TemperamentThe staff at Happy Paws recognized that Bella’s protective nature and current pain levels posed certain risks. These risks included:
|
Action Plan and Mitigation |
| Step 1: Assessing the Cause of Pain To mitigate the risks, the staff immediately contacted the on-site veterinarian to assess Bella’s condition. Upon examination, it was discovered that Bella had a minor strain in her hind leg, likely from overexertion during a previous walk. This explained her sudden change in temperament. |
| Step 2: Pain Management and Handling The veterinarian prescribed an anti-inflammatory medication to relieve Bella’s discomfort. The caregivers were instructed to limit her physical activity for a few days. They also adjusted their handling techniques to be more cautious and gentle, avoiding unnecessary stress or physical contact with her sore leg. |
| Step 3: Addressing Anxiety The staff used familiar commands and comforting techniques to help calm Bella. They also provided mental enrichment activities (like food puzzles) to keep her engaged without exacerbating her physical injury. A pheromone diffuser was placed in her kennel to reduce her anxiety. |
| Step 4: Monitoring Behaviour The staff continued to monitor Bella for any signs of escalating aggression or further changes in behaviour. Her pain levels gradually improved, and she returned to her normal, playful self once the strain healed. |
This case study demonstrates the importance of recognizing and managing the impact of an animal’s temperament, behaviour, and pain on their overall well-being. Bella’s protective nature, combined with her pain, posed several risks to both herself and the staff. However, by carefully identifying the signs of pain and adjusting their approach, the caregivers at Happy Paws were able to mitigate these risks and ensure a positive outcome for Bella
Now that we have explored what animal behaviour is and what it looks like let's explore some scenarios of animals exhibiting a type of behaviour, identifying it correctly, and identifying potential risks to both the animal and the handler/ human.
Scenario |
Animal Temperament |
Risk to Animal |
Risk to Handler and others (Human) |
|---|---|---|---|
| Handling an anxious dog in a noisy shelter | Anxious | Self-injury from panic or escape attempts | Risk of bites or scratches due to fear-aggression |
| Leading a high-spirited horse during grooming | High-spirited | Risk of injury from sudden movements or rearing | Risk of being kicked or stepped on during handling |
| Introducing a territorial cat to a new enclosure | Territorial | Increased stress and aggression | Risk of scratches and bites due to defensive behaviour |
| Performing a health check on a docile rabbit | Docile | Low, but can injure itself if startled | Minimal risk; could scratch or nip if mishandled |
| Approaching a protective mother goat with kids | Protective | Potential harm if stressed | Risk of head-butting or kicking, especially around young |
| Handling a defensive snake for an enclosure move | Defensive | Potential self-injury from striking | Risk of bites, especially from venomous species |
| Bathing an excitable dog after a walk | Excitable | Low risk, but may slip or injure in bath | Risk of accidental scratches or bites if dog jumps or slips |
| Restraining a shy bird for a medical exam | Shy | High stress, potential injury from flailing | Risk of scratches or pecks as the bird tries to escape |
| Herding cautious cattle for transport | Cautious | Risk of stampede or trampling due to fear | Risk of being trampled if cattle feel cornered or pressured |
| Administering medication to a stubborn pig | Stubborn | Risk of injury if it resists forcefully | Risk of bites or head-butting if pig becomes frustrated |
| Capturing a horse | Fearful- Aggressive | Risk of Injury and distress, stomping injury | Risk of being stomped, pushed, ran over |
| A cat laying in its bed | Calm | Falling out of its bed, being frightened | Risk of being scratched |
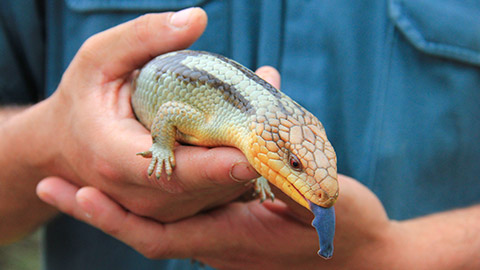
Depending on the animal’s species, body language and temperament, you or your supervisor will decide on the most appropriate method to approach, secure (capture and contain) and handle the animal. If you feel unable to interact with an animal appropriately and safely, ask your supervisor for help. Remember to use active listening and questioning skills to work out and confirm exactly what you need to do.
Approach the animal safely

To approach an animal means to move towards it. In general, you should always approach an animal with caution. Remember that even well-socialised, calm and confident animals may react unexpectedly to an unfamiliar person, in unfamiliar surroundings or if they are injured or unwell. Wildlife will instinctively be afraid of people and being handled.
Before you approach the animal, do a distance assessment. Look at the animal’s body language and behaviour and look for any notes on the cage card that will provide you with specific information about the animal you are about to handle.
Regardless of the species or individual traits of the animal you are working with, the following approach techniques are advised to alert the animal to your presence and to avoid startling them:
- Approach slowly
- Avoid getting into the animal’s blind spots
- Talk softly and avoid sudden or loud sounds
- Avoid sudden movements (Kramer 2019).
Let us go through some quick steps you can take when approaching an animal that ensure you do it the best way possible for you and the animal.
1. Assess the Animal's Behaviour and Body LanguageBefore approaching any animal, it’s important to assess their mood and body language from a safe distance. Look for the following cues:
Knowing how the animal is feeling can help you adjust your approach accordingly. |
2. Move Calmly and Confidently
|
3. Allow the Animal to Come to You (if possible)Whenever it’s safe to do so, allow the animal to approach you rather than reaching out to them. This helps them feel more in control and reduces the risk of a negative reaction.
|
4. Approach from the Side or Front, Not from BehindApproaching from behind can startle an animal, as they may not be aware of your presence. Instead:
|
5. Speak Softly and Reassure the AnimalAnimals often respond to the tone of your voice. Speaking in a calm, soothing voice can help reassure a nervous animal.
|
6. Use Proper Restraint TechniquesWhen necessary, use species-specific restraint techniques to prevent the animal from injuring themselves or others. It’s important that restraint is secure but gentle to avoid causing distress or harm:
|
7. Be Aware of Signs of Escalating BehaviourWatch for signs that the animal is becoming increasingly anxious or aggressive:
If these signs appear, stop and reassess the situation. It may be necessary to back away slowly and give the animal space to calm down before attempting another approach. |
8. Safety EquipmentUse appropriate safety equipment when handling animals known for aggressive tendencies or when the situation requires it:
|
9. Seek Assistance if NecessaryIf the animal shows extreme signs of aggression or fear, do not attempt to approach it alone. Seek assistance from a colleague or a veterinarian to help manage the situation safely. |
Secure the animal safely

To secure an animal means to capture and contain it. For small animals, such as rabbits and lizards, securing may simply mean picking them up. For larger animals, such as horses, securing may require attaching a lead rope or other equipment that allows you to control the animal’s movement.
Common methods of capture
The method of capture that you use will depend on the animal species, taking its temperament and demeanour into account. For example, you may be able to simply pick up a calm rabbit out of its cage, while it may take two or three people to secure an agitated cow.
All animals must be captured according to WHS procedures and safety guidelines. This will ensure the safety of the animal as well as the staff members involved in the capture. The method and equipment you choose to use to capture the animal will depend on your distance assessment, which you should have done before you approached the animal.
The following are some common pieces of equipment used in capturing most species of animal:
- Your hands
- Collar
- Leash, slip-lead or harness
- Towel, pillowcase, sheet, tea towel, blanket or clothing
- EZ-nabber or catch net
- Hessian or calico bag
- Plastic container, bucket, or clean ice cream container for aquatic animals
- Gloves
- Cage or cat trap
- Halter and/or length of rope for a horse or livestock.
As with approaching an animal, your behaviour should aim to reduce the risk of startling the animal and help them feel less threatened.
- Move slowly, but with purpose.
- Avoid eye contact and avoid touching the animal’s face.
- Don’t move in behind or crowd the animal.
- Concentrate fully on the animal you are securing without being distracted by other activities.
- Always be prepared to protect yourself or move away quickly if an animal unexpectedly becomes aggressive.
The specific equipment and techniques you use to secure an animal will depend on the animal, its demeanour and condition. However, the following are examples of the safest and most humane way to capture a:
- Nervous dog
- Bird
- Rabbit
- Cat.
Capturing a nervous dog
Keeping calm and confident when handling any animal is important because any hesitation on your part can increase their anxiety. So, when capturing a nervous dog:
- Approach confidently, use the dog’s name, and have a slip lead ready before opening the cage door.
- Ask the dog to sit (if possible) then open the cage door slightly.
- Put your hand with the lead through the door and secure it around the neck.
- Open the door fully and lead the dog out.
Don’t get into the cage and shut the door behind you if the dog is nervous or fearful. Always approach the dog from the side and keep your eye on the dog’s body language to anticipate any sudden movements or aggression. Remove yourself from the area if you are worried and ask for assistance.
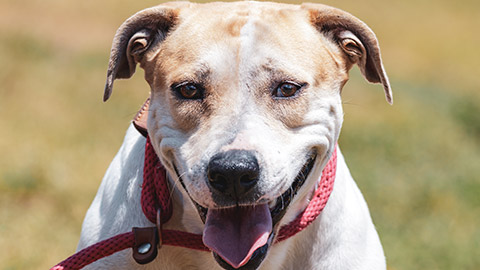
The following image shows a slip lead around a relaxed dog.
Capturing birds
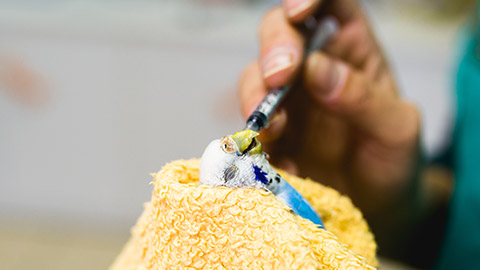
Birds have hollow bones and so are often much lighter than you think they are. Be firm but gentle when capturing birds. It is important to note that birds are very easily stressed and quickly go into a state of stress-torpor – a state of lowered consciousness. So be calm and confident, and work efficiently to minimise your contact with them.
- Make sure you are in a room with all the doors and windows closed.
- Use a small, thin towel or another piece of material to capture the bird. Thick gloves are not recommended because they make it difficult for you to tell how much pressure you are using, which means you could inadvertently injure the bird.
- Put your hand in the cage door and use the towel to capture the bird. Try to do this in one swift motion so you don’t have to chase the bird around the cage, causing it additional stress. Aim to grab the whole body, not just the tail or a wing or a leg, which will stress the bird and likely cause injury (Douglas et al. 2022, pp. 329-330).
- Do not hold the bird too tightly. Birds breathe with their whole body, so the more tightly you hold them, the more stressed they will become.
Swiftly snatch a bird, using a motion that ensnares or surrounds the animal, avoiding pinning or crushing it.(Douglas et al., 2022 p. 329)
Capturing a rabbit
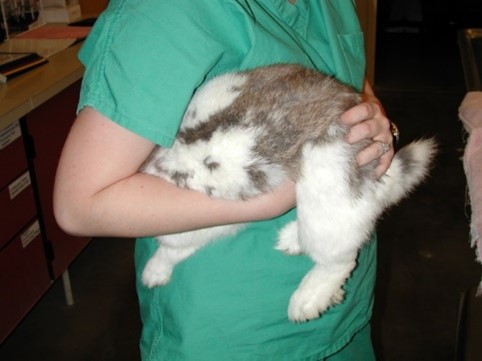
It is important always to support the back when securing or carrying a rabbit. If they twist or kick out, they can seriously injure their spine.
To pick up a rabbit safely:
- Tuck the rabbit’s head under your elbow and put the hand of that same arm under the rabbit’s stomach.
- With your other hand, scoop the rabbit’s backside up as you lift the animal off the table.
- Hold the rabbit firmly to prevent them from squirming, twisting or kicking.
Capturing a cat
Conduct a distance assessment before you approach a cat. If the cat is in a carrier, if possible, take off the top half of the carrier rather than trying to pull the cat out through the door. The doors are small and awkward and force you to put your hand towards the cat’s face, which can be very threatening.
If you can access the cat from above:
- Place one hand under the chest and one under the stomach and lift the cat up.
- Tuck the cat’s bottom under your arm and hold them close to your body.
- Use your other arm to support the body and make the cat feel secure.
Working with others to secure an animal
The minimum number of staff should be involved when securing an animal. Fewer people will reduce the amount of stress the animal experiences and will reduce complications that may result in harm to the animal or an unsuccessful capture.
However, when more than one person is required to secure an animal safely, it is vital that you are fully aware of and understand your role in the process. You must work calmly and efficiently with the other person to ensure low-stress and humane animal capture.
To coordinate your actions with those of other staff members, make sure you listen actively to instructions and ask questions to clarify and confirm your role in the process. Clear communication and understanding are critical for your safety as well as that of the other staff members and the animal.
The staff members involved with the capture must be qualified animal carers, veterinary nurses, veterinarians or other senior qualified animal carers within your facility.
All junior staff, non-qualified staff and clients should not assist with capturing any animal, especially highly aggressive animals. The risk of injury to the animal, you, other staff members and the clients is too great.
Highly aggressive animals should only be captured by a qualified staff member.
Mechanical and chemical restraints, such as muzzles and sedatives, may be needed for your safety.
If you notice that an animal has escaped, you must capture it safely before the animal, other animals in the facility or someone else becomes injured. If you cannot capture the animal, call for someone to help you, but do not leave the animal unsupervised.
If you have an injury yourself (back, neck, cut to hand, etc.), you will not be permitted to restrain or capture any animal that places you at risk and that is outside your ‘return to work plan’.
Watch
The following video, ‘Health checks in the wild for bushfire affected koalas’ (3:41 min), provides a brief demonstration of how wild koalas are captured using a flag and hessian bag and then restrained in the bag while they are given a basic health check. Consider the ways in which animal ethics and the principles of animal welfare are upheld by the arborists (tree-climbers) and vets shown in this video.
Handle the animal safely
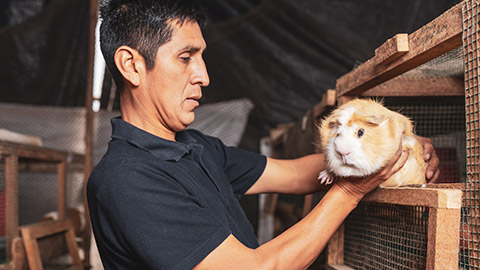
Handling an animal includes picking it up, transporting it safely, positioning it for examination as well performing the examination itself. You will often be required to help move an animal into the inspection or treatment area. The method you use to transport the animal will depend on the species and its temperament and demeanour.
Extremely uncooperative, aggressive or dangerous animals may need to be sedated before transport.
You can assist in moving an animal into the examination room by:
- accompanying a client walking their animal into the room
- leading the animal into the room on a lead, leash or rope
- carrying the animal using a stretcher, blanket or towel
- placing the animal on a table and wheeling it into the room
- carrying the animal in a box or carrier
- carrying the animal in your arms.
Care must be taken while moving the animal so that neither you nor the animal are injured in the process. Always ensure you move them safely and with care.
As with approaching and securing the animal, the techniques you use to handle and transport the animal will depend on the species, its temperament and welfare needs.
Handling techniques for different species
It is often easiest to transport small animals in a carrier to reduce their risk of escaping. Cat carriers are ideal for transporting most animal species that are the size of a cat or smaller, as long as the animal can’t fit its head between the bars of the cage.
Covering the carrier can also help reduce stress for prey animals, such as small birds, rabbits or guinea pigs.
Regardless of the species, ten principles of low stress handling you should consider are:
- Make the environment as calm and comfortable as possible.
- Try to keep the animal from pacing, squirming or making sudden movements.
- Position your hands, arms and body to properly support the animal so that it doesn’t feel like it is off balance or will fall.
- Position your hands, arms and body to control the animal’s movement in any direction.
- Remember, animals that are nervous, scared or in pain are less likely to cooperate with trained behaviours and more likely to resist handling.
- If possible, wait until the animal is calm and relaxed before starting an examination or treatment.
- Use the minimum restraint possible, including involving as few people as possible.
- Try to avoid prolonged (more than 2 seconds) or repeated fighting or struggling.
- Use rewards and distractions if appropriate or when necessary.
- Be sensitive to the animal’s response to restraint and continually adjust your positioning and technique to best suit the animal in that moment (Willink 2016).
Watch the following video, ‘6. Best practice sheep handling’ (7:22 min), which takes the natural instincts and behaviours of sheep into consideration when handling them. The video also demonstrates the importance of working together with other staff to efficiently and humanely handle sheep in a manner that is safe for both the staff and the animals involved.
Taking welfare needs into consideration
Before you handle or transport an animal, you should have already confirmed the health task required and any welfare needs of the particular animal. These may alter the way in which you handle the animal. For example, if the animal is suspected of having a spinal injury, then you should transport it on a flat surface, such as a spinal board. If an animal has a preferred method of being held (or one they particularly hate) this may be noted on the cage card or be mentioned by the owner.
Knowledge Check 7
Case Study
Procedure Guide: Approaching, Securing, and Handling Animals at Happy Paws Animal Care
This guide provides the appropriate procedures for safely approaching, securing, and handling animals at Happy Paws Animal Care. These procedures ensure the safety and well-being of both the animals and the staff.
1. DogsApproaching:
Securing:
Handling:
|
2. CatsApproaching:
Securing:
Handling:
|
3. BirdsApproaching:
Securing:
Handling:
|
4. SnakesApproaching:
Securing:
Handling:
|
5. HorsesApproaching:
Securing:
Handling:
|
6. SheepApproaching:
Securing:
Handling:
|
7. CowsApproaching:
Securing:
Handling:
|
8. LizardsApproaching:
Securing:
Handling:
|
9. RabbitsApproaching:
Securing:
Handling:
|
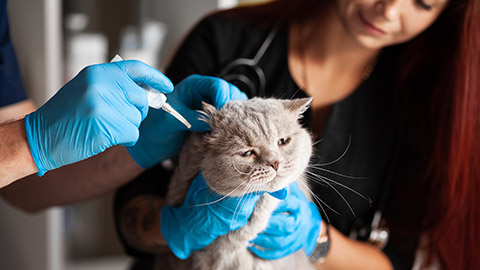
Even the most compliant animal is unlikely to sit or stand still during its healthcare treatment. For their safety and the safety of the person giving the treatment, all animals need to be restrained in some way to restrict their movement. However, it is important to remember that restraint does not necessarily mean completely immobilising the animal. Excessive restraint can cause stress in many animals.
Appropriate restraint is all about empathy, finesse, and technique – it has little to do with strength.(Veterinary Medical Center of Long Island n.d.)
As with approaching, securing and transporting an animal, the level of restraint needed and the techniques you use will depend on the animal species, taking its temperament, demeanour, and welfare needs into account.
You should also consider the age of the animal. Older animals may have other conditions, such as deafness, blindness or arthritis, that you should consider before handling or restraining them. Pregnant animals may need to be handled differently to avoid causing the animal additional discomfort. Use minimal force with young animals, such as puppies and kittens, to reduce the risk of causing negative associations with handling that may make the animal difficult to work with in the future.
General Guidelines for Restraining Animals
- Safety First: Always prioritize your safety and the animal’s well-being. Never attempt to restrain an animal beyond your capabilities. Seek assistance if necessary.
- Use the Least Restraint Necessary: Overly tight or excessive restraint can cause stress, injury, or provoke aggressive behaviour.
- Be Calm and Confident: Animals can sense nervousness. Calm movements and a confident approach can help reassure them.
- Know When to Stop: If an animal shows extreme stress or aggression, it may be necessary to pause and allow time for them to calm down before attempting restraint again.
Restraint Tools
- Leashes and Harnesses: Essential for controlling dogs or small mammals like ferrets and rabbits.
- Muzzles: Useful for dogs or other animals that may bite during restraint.
- Towels/Blankets: Versatile tools for wrapping small animals like cats, birds, or rabbits.
- Halters and Lead Ropes: For controlling large animals like horses, cows, and sheep.
- Snake Hooks and Gloves: Used for safely restraining snakes and other reptiles.
Low-stress methods for safe restraint
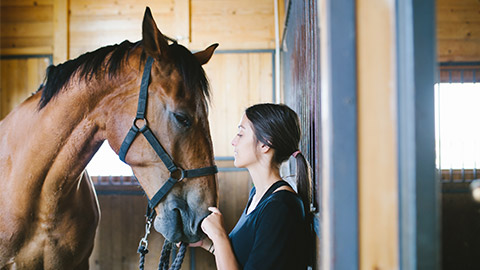
There are several ways to restrain animals safely. Your supervisor will help you choose the appropriate one for the animal you are working with.
The following list of general methods of restraint is ordered from the lowest to highest levels of restraint. In all situations, use the lowest level of restraint possible by:
- Using light hand pressure
- Using a collar, halter or lead to keep the animal still
- Holding the animal against your body and ensuring control over the animal's head and limbs
- Confining the animal using a towel or other cloth
- Using fitted restraints.
Examples of Low Restrainint techniques on specific animals include:
1. DogsLow-Stress Techniques:
Special Considerations:
|
2. CatsLow-Stress Techniques:
Special Considerations:
|
3. BirdsLow-Stress Techniques:
Special Considerations:
|
4. SnakesLow-Stress Techniques:
Special Considerations:
|
5. HorsesLow-Stress Techniques:
Special Considerations:
|
6. SheepLow-Stress Techniques:
Special Considerations:
|
7. CowsLow-Stress Techniques:
Special Considerations:
|
8. LizardsLow-Stress Techniques:
Special Considerations:
|
9. RabbitsLow-Stress Techniques:
Special Considerations:
|
Watch
The following video, ‘Performing a health examination’ (6:11 min) demonstrates how to perform a general health examination of a cat. While you are not expected to know how to examine a cat, pay close attention to the various ways in which the cat is restrained during the different stages of the examination.
Methods for safely restraining dogs

The two most popular restraints for dogs are the:
- Lying down restraint
- Headlock restraint.
You can also use these restraint techniques for cats.
Remember that you may need to muzzle the dog before you start your restraint.
Lying down restraint
- Start by standing alongside the dog. Make sure that the front of your body is along the side of the dog.
- Coming from over the top of the dog, hold the front and hind leg that is closest to you.
- Ask someone to hold and guide the dog’s head as you gently pull the dog’s legs out from under them. At this point, there may be some struggling, so be prepared.
- Once the dog is down do not let go of the legs otherwise, the dog will be able to stand again.
- Using your elbow at the front of the dog gently apply pressure to the dog's neck. This will prevent the dog from lifting its head, allowing you to have control.
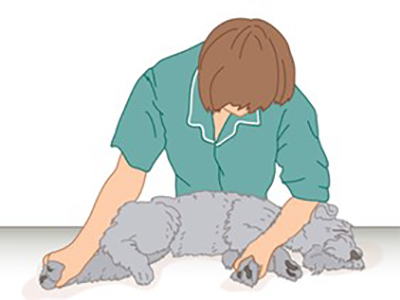
Dr Sophia Yin demonstrates how to (and how not to!) position a dog on its side in the following video (0.27 min).
Headlock restraint
- Stand beside the dog, facing the dog’s body.
- Place your forearm snugly around the dog’s neck and hold the head still (headlock formation).
- Place your other arm under the dog's belly close to the hips. Hold this position firmly.
- Some dogs may find it difficult to stand like this so they can lie down. When the dog is lying down, place your other hand (that would have been under the dog) around the dog’s body holding the body firmly into your body.
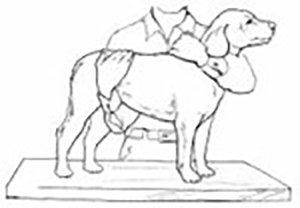
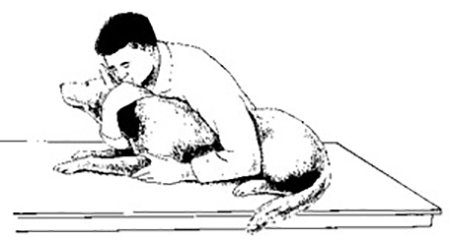
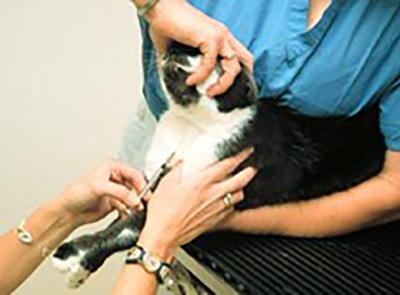
Methods for safely restraining cats

There are several different ways to restrain cats. Three of the most popular cat restraints are the:
- side restraint
- cat bag restraint
- head-raising restraint.
Side restraint
- Use the same technique as with dogs to position the cat on its side.
- Hold the leg that is closest to the table just above the elbow joint. Place your forearm across the cat’s neck and shoulder with the minimal amount of pressure required to stop the cat from getting up.
Cat bag restraint
- Place the cat’s head into the opening at the top of the bag.
- Tighten the neck opening so the cat cannot get its front foot out.
- Either hold the cat off the table and zip the bottom up or turn the cat onto its back to zip the bottom up.
- Be careful of the cat’s fur and tail when zipping the bag up.
- The bag can then be unzipped slightly to allow particular limbs to be exposed.
- Mesh cat bags allow the cat to be shampooed and rinsed while in the bag.
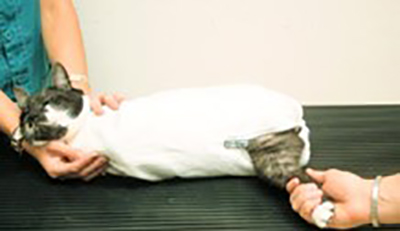
Head-raising restraint
- Hold the cat's front legs with one hand.
- With the other hand hold the cat’s head and raise it to the roof, stretching the cat's neck out.
- You can also stretch the cat over the examination table to allow for extra stretching.
Methods for safely restraining rabbits

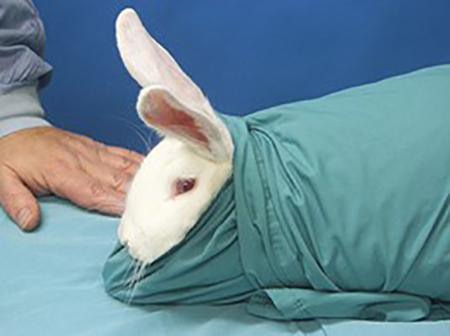
Rabbits need to be restrained properly as they can be very wriggly and can easily seriously injure themselves with incorrect restraint or if you drop them. The most popular way to restrain a rabbit, other than with just your hands, is with towel wrapping.
Towel wrapping
- Place the towel, blanket or another piece of cloth on the examination table.
- Pick up the rabbit, ensuring that you are always supporting its back, and place the rabbit in the middle of the towel.
- Wrap the towel under the neck and around the body of the rabbit leaving only the head and ears out.
Methods for safely restraining birds

The type of restraint to use on a bird will depend on the size and type of bird.
Small birds
Many small birds are very sensitive to restrictions to their breathing, including any pressure on their body during handling and restraint. Small birds are also very sensitive to high and low ambient temperatures, which also affects their ability to breathe. Signs that a bird is in respiratory distress include:
- gaping (holding their mouth open)
- panting
- closed eyes
- drooping head
- lethargy (Palmer et al. 2022, p. 586).
The bander’s grip or ringer’s grip is the most ethical way of restraining small birds. This hold is effective for birds about the size of a pigeon or smaller and allows you to control the head and wings with one hand, while allowing the body to expand for free breathing.
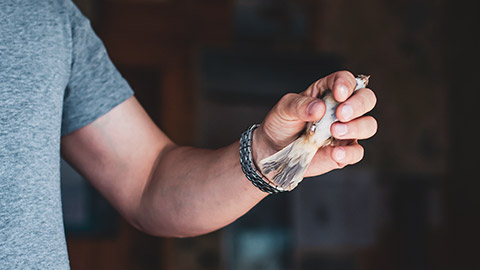
Place your hand over the back of the bird and position its head between your pointer and middle finders. Gently, but firmly, wrap your thumb and index finger around the bird to pin its wings to its sides. You can release one wing at a time to examine or treat them, if necessary.
If using a towel to restrain the bird, hold the bird around the neck and ensure the towel is not too tight around the bird’s body.
Large birds
Larger birds, such as chickens, ducks, geese and swans, will require two hands to restrain. Place one hand on either side of the bird’s body, securing the wings, then lift it up. You can then tuck the bird under one arm or wrap one arm over the bird and use the other hand to control its head and beak so that it doesn’t bite you or any other staff members.
Birds of prey
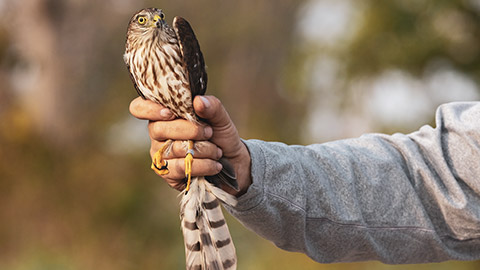
The most dangerous part of a bird of prey (raptor) is its feet. When restraining birds, such as owls, hawks and falcons, use thick gloves (falconer’s gloves) and hold them around their “lower body and upper legs, so that the wings and legs are secured” (Olsen 2022, p.595).
For smaller birds, you may be able to contain the wings and feet in one hand. For larger species, you will need both hands. Use one hand to hold and separate the thighs and the other hand to wrap around the wings and tail. Covering the head with a loose bag or properly fitted falconry hood will help keep the bird calm (Olsen 2022, p.595).
Knowledge check 8
Case Study

At Happy Paws Veterinary Clinic, a nervous dog named Max, a medium-sized Border Collie mix, has been brought in for a routine check-up and vaccination. Max has a history of anxiety during veterinary visits, and he is particularly fearful of restraint. As the vet and the vet assistant prepare to restrain Max for his examination, his behaviour starts to escalate due to fear.
Background on Max:
|
Restraining Max: The Initial Attempt
The veterinarian (Dr. Amy) and Veterinary Assistant (Emma) prepare for the routine check-up. Dr Amy explains to Emma that they must approach Max with care, as his behaviour may worsen if he feels trapped or threatened.
 |
Dr. Amy: "Emma, let's start by approaching Max slowly. He’s already showing signs of nervousness—his ears are back, and he’s licking his lips. We need to avoid any sudden movements." |
 |
Emma: (Emma crouches down, offering her hand for Max to sniff. Max hesitates but takes a few sniffs. His tail is tucked, and he appears uneasy but doesn’t growl.) |
 |
Dr. Amy: (Emma carefully slips the leash on Max. As she tries to guide him onto the exam table, Max starts resisting, pulling backward and panting heavily.) |
Signs of Escalating Fear
Max’s fear begins to increase as he is led toward the exam table. His body becomes stiff, his tail tucks further under his body, and his eyes widen. He starts to pant and whine, showing clear signs of distress.
 |
Dr. Amy: "Emma, stop for a moment. Max is getting too scared. See how his panting has increased, and he’s trying to back away? If we force him now, it will only make things worse." |
 |
Emma: "Yes, I noticed. He seems much more anxious than when we started." |
Calming Max Down: Adjusting the Approach
 |
Dr. Amy: (Emma gently lowers Max to the floor, allowing him to stand on solid ground. Dr. Amy kneels beside him, softly stroking his neck.) |
 |
Dr. Amy: (Dr. Amy pulls out some small treats from her pocket and offers one to Max. He sniffs it cautiously before taking it, though he still looks wary.) |
 |
Dr. Amy: (Emma offers Max a treat, speaking softly and calmly. Max takes it and his panting slows down slightly. His ears start to relax, though he is still on edge.) |
 |
Dr. Amy: "Okay, now that he’s a little calmer, we’ll keep him on the floor for the exam. I’ll examine him here while you gently hold him. Let’s avoid using too much restraint—just hold him enough to prevent him from moving too much." |
 |
Emma: (Emma kneels beside Max, placing one arm lightly around his chest while continuing to speak softly to him. Max’s breathing remains a little fast, but he stays still.) |
Successful Low-Stress Restraint
Dr. Amy begins the examination while Emma maintains light restraint on Max. As Dr. Amy listens to Max’s heartbeat and checks his vitals, Max remains tense but manageable. Emma continues offering calm words and occasional treats. They keep the restraint as minimal as possible, focusing on keeping Max calm rather than forcing him into position.
 |
Dr. Amy: "Well done, Emma. He’s doing so much better now that we’ve kept him on the ground. His stress level dropped significantly once we took the pressure off." |
 |
Emma: "I can see that. He’s still a bit anxious, but he’s not trying to pull away anymore." |
 |
Dr. Amy: "Exactly. If we had forced him earlier, he might have started growling or even snapping at us. By going slower, we’re making this a much better experience for him." |
Max’s behaviour initially worsened due to fear when placed on the exam table. His signs of distress—such as panting, whining, and stiff body language—clearly indicate that the restraint method was too stressful for him. By recognizing these signs early, Dr. Amy and Emma adjusted their approach to reduce his anxiety.
Using low-stress techniques, such as keeping Max on the floor, offering treats, and using minimal physical restraint, they could complete the examination without escalating his fear or provoking aggressive behaviour.
Key Learning Points:
- Recognizing Signs of Stress: Understanding the dog’s body language was crucial in identifying when the situation was becoming too stressful.
- Adapting Restraint Methods: By shifting from the exam table to the floor and using treats, the veterinary team calmed Max down.
- Minimal Restraint: Using just enough restraint to keep Max from moving without forcing him into an uncomfortable position helped keep him calm.
- Positive Reinforcement: Treats and gentle words helped create a more positive experience, even for a nervous dog like Max.
This scenario highlights the importance of adapting restraint techniques to each individual animal's behaviour and using low-stress methods to improve the overall experience for both the animal and the veterinary team.
Case Study
 At Happy Paws Equine Care, a horse named Blaze, a 7-year-old Thoroughbred, has been brought in for a routine hoof examination. Blaze is known to be skittish, especially when unfamiliar people or procedures are involved. As the veterinarian, Dr. Kate, and the veterinary assistant, Tom, prepare to examine Blaze, his behaviour starts to become more erratic due to fear.
Background on Blaze:
|
Restraining Blaze: The Initial Attempt
Dr. Kate and Tom approach Blaze in the examination yard. Blaze appears alert but keeps a close eye on his surroundings. Dr Kate reminds Tom that they must use a gentle approach, as Blaze has a history of reacting poorly to being restrained.
 |
Dr. Kate: "Tom, we’ll start by getting Blaze used to us being close. He’s watching us pretty closely, so he’s already feeling a bit uncertain. Let’s take it slow and give him time to settle." |
 |
Tom: (Tom approaches Blaze from the side, avoiding direct eye contact to keep Blaze at ease. He reaches out his hand, letting Blaze sniff it. Blaze snorts and shifts his weight but doesn’t move away.) |
 |
Dr. Kate: (Tom places his hand on Blaze’s neck and starts to stroke gently. Blaze’s ears flick back and forth, showing he’s still alert but not panicking.) |
Signs of Escalating Fear
As they prepare to lead Blaze into the stocks for the hoof exam, he starts to show more signs of discomfort. His breathing quickens, he stomps one of his back feet, and he begins to toss his head slightly, showing he’s becoming increasingly agitated.
 |
Dr. Kate: "Hold up, Tom. Blaze is getting a bit too worked up. See how he’s stomping and his head’s going up? He’s not comfortable with this situation. Let’s back off for a moment and give him a break." |
 |
Tom: "Yeah, I see what you mean. Should we try walking him around a bit to relax him?" |
 |
Dr. Kate: (Tom leads Blaze slowly around the yard, giving him time to move and relax. Blaze’s breathing starts to slow down, and he seems more at ease with the change in environment.) |
Calming Blaze Down: Adjusting the Approach
After walking Blaze for a few minutes, they bring him back towards the stocks, but this time, they don’t try to move him in immediately.
 |
Dr. Kate: "Alright, Blaze is looking a bit more relaxed now. Let’s try again, but this time, we’ll keep him outside the stocks. I’ll take a look at his hooves right here on the ground. No need to rush him in and make things worse." |
 |
Tom: (Tom stands at Blaze’s side, keeping a loose grip on the lead rope. Dr. Kate crouches down slowly beside Blaze, talking softly to him while she inspects his hooves.) |
 |
Dr. Kate: (Blaze’s ears flicker again, but he remains mostly calm. Dr. Kate continues her exam, gently lifting each hoof in turn while Tom keeps Blaze steady.) |
Using Positive Reinforcement
After the examination, Dr. Kate and Tom used positive reinforcement to ensure Blaze remained calm and associated the procedure with a positive experience.
 |
Dr. Kate: (Tom reaches into his pocket and pulls out a few horse treats, offering them to Blaze. Blaze nuzzles the treats from Tom’s hand, his posture visibly more relaxed.) |
 |
Tom: "That worked a treat, no pun intended! He seems to have settled right down now." |
 |
Dr. Kate: "Exactly. By giving him space and not forcing him into the stocks, we’ve kept his anxiety low. If we had pushed him, we could’ve ended up with him panicking, pulling back, or even kicking." |
Blaze initially showed signs of escalating fear when he was being led into the stocks. His body language—quickened breathing, foot stomping, and head tossing—indicated that the restraint process was making him more anxious. By recognising these signs early, Dr. Kate and Tom adjusted their approach to reduce his stress.
Rather than forcing Blaze into the stocks, they used alternative techniques, such as walking him around to calm him and performing the exam outside the stocks to keep him comfortable. Additionally, positive reinforcement with treats helped Blaze associate the experience with something positive, ensuring he would be more cooperative in future exams.
Key Learning Points:
- Recognising Stress in Horses: Blaze’s body language indicated his discomfort, which allowed Dr. Kate and Tom to adjust their approach before his behaviour worsened.
- Adapting Restraint Techniques: By performing the exam outside the stocks, they reduced the pressure on Blaze and allowed him to feel more in control.
- Minimal Restraint: Using minimal restraint kept Blaze calm and made the procedure safer for both the horse and the veterinary staff.
- Positive Reinforcement: Treats and calm handling created a positive association, reducing Blaze’s anxiety for future visits.
This scenario highlights the importance of reading a horse’s behaviour and adjusting handling techniques to ensure the safety and well-being of both the horse and the veterinary team at Happy Paws Equine Care.
