A treatment explanation in the context of animal care involves detailing the approach and procedures used to address an animal's health issue, injury, or condition. Treatment explanations are essential for ensuring that all caregivers, including vets, assistants, and pet owners, understand the plan for managing the animal’s condition. These explanations cover the recommended treatments, their purposes, the expected outcomes, and potential side effects or risks.
Treatment is the medical care provided to an animal that aims to prevent illness or promote recovery. In this module, we will look at three general forms of treatment:

- First aid
- Preventative treatments
- Maintenance treatments.
After the animal has been treated, you will need to document the treatment and any other health information, then perform post-treatment routines, including cleaning the treatment area.
Before we dive in this section of the module, let's review some of the key components of a treatment explanation:
- Clearly state the diagnosis or health condition that requires treatment. This can include specific diseases, injuries, infections, or other medical issues.
- Example: "Max has been diagnosed with a mild case of kennel cough, which is a respiratory infection common in dogs."
- Outline the objective of the treatment: whether it's to cure, alleviate symptoms, slow progression of a disease, or provide palliative care.
- Example: "The goal of the treatment is to reduce the severity of Max's cough and prevent the infection from worsening."
- Explain the type of medications prescribed, their dosage, and how they should be administered. Include the purpose of each medication and potential side effects.
- Example: "Max has been prescribed antibiotics to treat the bacterial component of his infection and a cough suppressant to relieve his symptoms. Administer the antibiotic twice daily with food for 7 days. Side effects may include mild gastrointestinal upset, like diarrhea."
- If the treatment involves a procedure (e.g., surgery, wound care, or diagnostic tests), explain what the procedure entails and what the animal will experience.
- Example: "Max may need nebulization therapy to help clear his airways. This involves using a mask that delivers vaporized medication, which he will need to inhale for 10–15 minutes twice a day."
- Provide guidelines for aftercare, including rest periods, exercise restrictions, or environmental adjustments needed for recovery.
- Example: "Max should have limited outdoor activity while recovering from his cough. Keep him calm and avoid exposure to cold air, which could irritate his airways."
- Explain any changes in diet that are necessary for the treatment plan, whether due to the condition itself or to support the medication's effectiveness.
- Example: "Max's appetite may decrease due to the medication, so offering smaller, more frequent meals or tempting him with cooked chicken can help maintain his nutrition."
- Include instructions for follow-up appointments or future checks to monitor the animal's progress and ensure the treatment is working as expected.
- Example: "Max needs to come back in one week to check if the infection has cleared and to assess his recovery."
- Outline any risks or potential complications that could arise during treatment or recovery. Inform the caregiver of what signs to watch for that might indicate problems.
- Example: "In rare cases, Max's cough could worsen despite treatment, or he may develop a secondary infection. If you notice rapid breathing, lethargy, or refusal to eat, contact us immediately."
- Describe the expected timeline for recovery and what the outcome of the treatment is likely to be.
- Example: "Max should start to feel better within 3–4 days, with his cough improving significantly. Full recovery is expected within 10 days."
- Provide specific instructions for the owner or handler on how they can assist in the treatment, whether it involves administering medications, monitoring symptoms, or performing home care.
- Example: "Ensure that Max takes all his medications as prescribed, and keep him in a warm, quiet environment to support his recovery."
Case Study
Example Treatment Explanation: Kennel Cough in a Dog
Diagnosis: Max has been diagnosed with kennel cough, a respiratory infection common in dogs, often caused by a combination of bacteria and viruses.
Treatment Goal: The aim of treatment is to reduce the severity of Max’s cough, alleviate his discomfort, and prevent the infection from worsening or spreading to the lungs (which could cause pneumonia).
|
Medications:
|
|
Rest and Recovery:
|
| Diet: Max may not feel like eating much. Offer small, soft meals (like boiled chicken and rice) to tempt him to eat and ensure he remains hydrated by providing plenty of fresh water. |
| Follow-up Care: Bring Max back in 7 days to assess his response to treatment. If the cough persists, we may need to consider additional therapies. |
| Potential Risks: Watch for signs of secondary infection, like difficulty breathing, lethargy, or lack of appetite. If these occur, bring Max in immediately for further assessment. |
| Expected Outcome: Max should show improvement within 3 days, with his cough reducing in severity. Full recovery is expected in 7 to 10 days. |
Importance of a Treatment Explanation:
- Clarity: Helps pet owners and animal handlers understand the rationale behind each part of the treatment plan and what outcomes to expect.
- Compliance: Ensures caregivers administer medications and follow aftercare instructions properly, improving the chances of recovery.
- Communication: Provides an opportunity for the vet to address concerns or answer questions, fostering a collaborative approach to care.
In veterinary practice, a well-detailed treatment explanation builds trust and ensures the best possible outcomes for the animal in question.

First aid is a form of basic medical treatment provided in an emergency before a medical professional can attend.
First aid care is not a substitute for veterinary care, but it may save [an animal’s] life until it receives veterinary treatment.(American Veterinary Medical Association n.d.)
Proving first aid does not replace professional medical treatment. As a first aider (the person providing or assisting to provide first aid) your focus is to stabilise the animal’s condition until a vet can attend.
The Seven Principles of First Aid

The seven principles of first aid are to:
- Preserve life
- Prevent deterioration
- Promote recovery
- Take immediate action
- Calm the situation down
- Call for medical assistance
- Apply the relevant treatment.
The key to providing effective first aid is only to do what is required to preserve life long enough for a qualified veterinarian to attend to the animal.
What is a first aid situation?

First aid is only required in an emergency - a situation where there is an immediate risk to the life of an animal. The purpose of first aid in an emergency is to:

- to stabilise the animal (prevent death)
- protect the animal from further harm
- increase the likelihood of survival until veterinary intervention.
Importance of First Aid
- Prevents further injury: Immediate care can stabilise the animal and prevent conditions from worsening before a vet intervenes.
- Reduces pain and suffering: First aid can alleviate some of the animal's pain and make them more comfortable.
- Saves lives: In severe cases (e.g., choking, bleeding, heatstroke), swift first aid can mean the difference between life and death.
- Gains time for proper medical care: Proper first aid buys precious time for the animal to receive professional veterinary treatment.
First Aid Kit Essentials for Animals
Every pet owner or animal caregiver should have a first aid kit readily available. Some key items include:
- Sterile gauze pads and bandages
- Adhesive tape
- Antiseptic wipes or solution
- Tweezers and scissors
- Latex gloves
- Thermometer
- Emergency blanket
- Muzzle or soft cloth (for restraint)
- Saline solution (for eye or wound cleaning)
- Styptic powder (to stop minor bleeding)
Key Components of Basic Animal First Aid

1. Assess the Situation Safely
|
2. Check Vital SignsBefore providing first aid, check the animal’s vital signs to assess the severity of the situation:
|
3. Common First Aid ProceduresBleeding (External)
Bleeding (Internal)
Fractures (Broken Bones)
Burns
Choking
ShockShock occurs when the body’s organs do not get enough oxygen, often after trauma, bleeding, or severe illness.
HeatstrokeAnimals, especially dogs, can suffer heatstroke if exposed to high temperatures without enough water or ventilation.
SeizuresSeizures can be caused by epilepsy, toxins, or underlying medical conditions.
Poisoning
|
4. CPR (Cardiopulmonary Resuscitation)If an animal stops breathing and has no heartbeat, CPR can be performed while en route to emergency care. CPR for animals is similar to CPR for humans but must be adjusted for the animal’s size.
|
5. Transporting Injured Animals
|
Levels of emergency

The following table summarises the four emergency levels with a few possible examples of incidents from each category. However, the severity of the emergency may change depending on the life stage of the animal, the species, the individual’s medical history and several other situational factors. The examples listed in this table are only a guide. If you are unsure of the level of emergency of a first aid situation, confirm with your supervisor.
| Life-threatening emergency | |
|---|---|
| Description | Veterinary care required |
| The animal is at risk of dying or deteriorating significantly if it does not receive immediate attention. | Within 1-30 minutes |
|
|
| Intermediate emergency | |
| Description | Veterinary care required |
| The animal requires immediate attention but is not at risk of dying within the next 30 minutes. | Within 30 minutes – 2 hours |
|
|
| Minor emergency | |
| Description | Veterinary care required |
| The animal has a low risk of dying but requires veterinary attention for full treatment. | Within 24 hours - preferably sooner rather than later |
|
|
| Non-emergency | |
| Description | Veterinary care required |
| The animal can usually be treated with very basic first aid and is not at risk of dying. | May not need veterinary attention unless the animal's condition deteriorates |
|
|
All other medical situations are considered health maintenance issues or preventative treatments as part of routine care for the animal. Routine care is planned and, therefore, does not require first aid.
DRABC
The acronym DRABC (pronounced ‘Doctor A, B, C’) is used to help remember the five key things to do in every emergency situation. DRABC stands for:
D |
r |
A |
B |
C |
| Danger | Response | Airways | Breathing | Circulation |
Danger – secure the scene
When attending to an animal emergency, the first priority is to make sure that no one else becomes a casualty. So, before you gave provide first aid, you must first secure the scene. To secure the scene:
- Assess the situation. Look for potential dangers to yourself, the injured animal, other people (including staff, clients or the general public) and other animals. Dangers may include, but are not limited to, factors such as road traffic, hazardous substances, the presence of aggressive or venomous animals, and slippery or unstable surfaces.
- Where possible, control or remove the dangers, but make sure your actions do not put yourself or anyone else at further risk.
The specific hazards and risks will vary depending on the situation. If you are unsure the scene is appropriately secured, seek assistance or advice.
Keep yourself safe
Always keep yourself safe when administering treatment to any animal. [The animal] may normally be an angel, but when frightened and in pain they could suddenly bite or scratch.(RSPCA Victoria n.d.)
Common risks to first aiders include:
- Bites, kicks or scratches from the animal needing first aid. In many situations, it may be safest for the first aiders to restrain the animal and/or to use a handmade muzzle, such as a towel, to prevent the animal from biting.
- Transmission of zoonotic disease. If possible, wear disposable gloves and remember your hand hygiene to protect both you and the patient from possible transmission of disease.
- Hazards from the immediate area. Be aware of your surroundings, especially if you are near traffic or other animals.
Response – check demeanour
The level of responsiveness may be an indication of the level of emergency. Assess the animal’s demeanour by observing the response to one or more of the following:
- Call the animal’s name (if known)
- Shake the animal (do not shake an animal if you suspect spinal or neck injuries)
- Shine a bright light on the eye to see if the pupil contracts
- Tap the medial canthus (inner corner) of the eye to see if the animal blinks
- Pinch between the toes to see if the animal reacts to pain.
The following table, adapted from MSD Veterinary Manual (n.d.), summarises the key interpretations for an assessment of responsiveness and demeanour.
| Factor | Assessment | Interpretation |
|---|---|---|
| Demeanour | BAR or QAR: Alert and responsive to surroundings | Indicates normal neurological (brain) activity. |
| Depressed or obtunded: appears sleepy, but shows some response to visual and tactile (touch) stimuli | The reduction in normal responses can be mild (depressed), moderate or severe (obtunded). May be caused by illness or reduced blood flow around the body, especially to the extremities. | |
| Stupor: unable to be roused, but responds to painful stimuli | Indicates a severe neurologic (brain function) or metabolic (body function) impairment, including from exposure to a toxin or poison. | |
| Comatose: does not respond to any stimuli, including pain or Seizures: typically present as whole-body convulsions, excessive salivation, facial tremors, and/or involuntary urination and defecation |
Indicates abnormal neurological activity, possibly:
|
Airways – check and clear airways as required
Oxygen is critical for survival. If an animal can’t breathe effectively, it will likely die within a few minutes.
If at any point you are concerned the animal isn’t breathing well, for example, you can hear gasping or bubbling sounds as they breathe, check its airway to ensure there is no obstruction (something blocking the airway). If you see something you will need to remove the obstruction to clear the airway and allow the animal the best opportunity to breathe.
Only check the airway if it is safe to do so. There is a high risk of being bitten.
To check and clear the airway:
- Position yourself on one side of the animal.
- Place one hand across the top of the animal's muzzle and slide your thumb and index finger gently into the mouth, between the teeth.
- As the top and bottom teeth separate, insert the pointer finger of your other hand between the front incisor teeth, and apply pressure to the bottom jaw and tongue to open the mouth fully.
- Look inside the mouth and as far down the throat as you can.
- If necessary, use a sweeping motion with your pointer and middle fingers across the tongue to remove excess saliva.
- If you see an obstruction and can clearly see the entire object (in other words from start to finish), you can use your fingers or tweezers to remove the object carefully. When using tweezers, be extremely cautious to avoid injuring the mouth or throat. If the object is too far in or you cannot see how far down it goes, do not attempt to remove it. Removing obstructions like this may cause further injury or bleeding. Immediately take the animal to a vet.
- If you have access, administer oxygen. This can be done by simply holding the oxygen tubing close to the animal’s face – fly-by O2. You can also use an oxygen face mask, hood or tent for a more direct delivery of oxygen.
Breathing – check breathing effort and respiratory rate
Even if the animal does not have an airway obstruction, assess its breathing and RR.
Assessing the animal’s breathing by listening to and watching the animal breathe. Ask yourself the following questions and take note of the answers.
- Is the animal breathing?
- Is breathing easy or laboured?
- Are the breaths deep, shallow or irregular?
- Can you hear choking, whistling, gasping, excessive coughing, wet noises or other strange sounds while the animal breathes?
- How breaths per minute does the animal take? Is the rate of breathing consistent or irregular?
- Is the way the animal is breathing deteriorating?
If an animal stops breathing, its body will be deprived of oxygen, and it is unlikely to survive. Brain damage from a lack of oxygen can occur as quickly as within 5 minutes. If an animal is not breathing but has a heartbeat, artificial respiration is a technique that may help the animal survive until it can receive proper medical treatment.
Do not attempt artificial respiration on your own. Seek assistance.
Artificial respiration
The following steps explain how to perform artificial respiration:
- Lay the animal on its right side.
- Check and clear any obstructions in its airways (using the instructions supplied in the previous section).
- Gently pull the tongue out of the mouth as far as it will comfortably go.
- Cup your hands around the animal’s nose and muzzle, holding the mouth shut without damaging the tongue.
- For small animals, completely cover the animal’s mouth and nose with your own mouth and gently blow into the nostrils and mouth until you see the chest rise.
- For larger animals, hold the mouth closed to reduce the amount of air escaping. Then, cover the animal’s nose with your mouth and gently blow into the nostrils until you see the chest rise.
- Only blow as hard and for as long as it takes to see the animal’s chest rise. Be as gentle as you can.
- Give one breath every 3-5 seconds for the first minute. Then check to see if the animal has started to breathe on its own. Check to see if you can still find a pulse or heartbeat.
- If the animal is still not breathing, continue to breathe for it every 6 seconds. Check every minute for a heartbeat and to see if the animal has started to breathe on its own.
- Transport the animal to a vet immediately. If possible, have one person continue artificial respiration while a second person drives them to the vet (Vetwest n.d.c).
Circulation – check for a pulse
Check for a heartbeat and pulse. You may need to check several places on the animal depending on the equipment you have available. Check for a heartbeat and note the HR. Check for a pulse at the femoral artery or at the dorsal pedal and determine the pulse rate in bpm.
Ask yourself the following questions and note the answers:
- Can you find a heartbeat? Can you find a pulse?
- Does the HR match the pulse rate?
- Is the heat rate higher (tachycardic) or lower (bradycardic) than normal?
- Is the heartbeat steady or irregular (arrhythmic)?
- Is the HR getting faster or slower over time?
The following table, adapted from MSD Veterinary Manual (n.d.), summarises the key interpretations for an assessment of heart and pulse rates.
| Vital sign | Assessment | Interpretation |
|---|---|---|
| Heart rate | Within normal range | At least one aspect of heart function is normal. However, this does not necessarily mean the animal is healthy. Complete your check of the vital signs and physical assessment. |
| Bradycardia | The heart is not pumping blood as effectively as it should and blood flow around the body is decreased. | |
| Tachycardia | A fast heart rate may be caused by hypovolaemia (reduced blood volume) resulting from serious blood loss, pain or heart disease. | |
| Pulse rate | Strong and synchronous with each heartbeat | Normal - both femoral and dorsal pedal pulse should be felt. |
| Irregular | Cardiac arrhythmia (irregular heartbeat) may indicate heart disease | |
| Bounding (abnormally strong) | Often results of hypovolaemia – the heart contractions are abnormally strong to pump a smaller volume of blood around the body. | |
| Weak or absent | Decreased cardiac (heart) function and/or vasoconstriction of blood vessels in extremities (limb and tail) make it difficult to detect a pulse. May indicate a heart attack or thrombosis (large blot clot) |
If you cannot detect a heartbeat or pulse anywhere on the body, it is likely the heart is not beating. If the heart is not beating, that means oxygen and nutrients are not circulating around the body and the animal will likely die within a few minutes.
If the animal does not have a heartbeat, perform cardiopulmonary resuscitation (CPR).
Do not attempt cardiac massage or CPR on your own. Seek assistance.
Cardiac massage and CPR
Cardiac massage compresses the heart through the chest wall and keeps the blood pumping around the body. If the animal is not breathing, a second person can perform artificial respiration at the same time. If a second person is not available, prioritise cardiac massage.
The following steps describe how to perform cardiac massage on most pets. This process may not be appropriate for livestock or larger animals.
- Lay the animal on its right side and extend their head and neck to be in a straight line with its body.
- Slide one hand under the animal’s chest and position it under the heart.
- Place your other hand on top of the animal’s chest over the animal’s heart. In other words, your two hands and the animal’s heart should be in a line.
- Press down firmly with the heel of your top hand, squeezing the chest wall over the heart, simulating a heart contraction. For small animals, position the fingers of one hand under the animal’s chest. Wrap your hand around the chest and place your thumb over the heart on the other side of the chest. Compress the heart with just one hand.
- Compress the chest wall at a rate that is ‘normal’ for the animal species you are working with. Only use just enough force to compress the chest by a third to a half.
- Check for a heartbeat every minute.
- Transport the animal to a vet immediately. If possible, have one person continue cardia compressions while a second person drives them to the vet (Vetwest n.d.b).
Other vital signs to assess
Checking airways, breathing and heart rate is always the priority in a first aid situation. If the animal is breathing and has a heartbeat, and it is safe to do so, check the MM and CRT as indications of their overall blood flow and oxygen levels.
For animals that do not require artificial respiration or cardiac massage, it is important to check their vital signs to gauge the severity of their illness or injury.
The following table, adapted from MSD Veterinary Manual (n.d.), outlines two additional health features to evaluate during a first aid incident.
| Feature | Evaluation | Interpretation |
|---|---|---|
| Mucous membrane colour | Pink (Note: cats’ gums tend to be a paler pink than dogs’) | Normal |
| Pale or white | The animal is likely experiencing anemia (significant blood loss) or shock | |
| Cyanotic (blue) or muddy (brownish or mottled) | Severe hypoxemia (the tissues are starved of oxygen) typically indicates respiratory distress, a heart condition or shock | |
| Jaundice (yellow) | Typically indicates hepatic (liver) disease/injury or hemolysis (excess damaged red blood cells) | |
| Capillary refill time | 1–2 seconds | Normal perfusion (circulation and blood flow) |
| More than 2 seconds | Poor perfusion or peripheral vasoconstriction (tightening of blood vessels in extremities) | |
| Less than 1 second | Increased blood flow; could be associated with fever, heat stroke or shock | |
| Level of pain | Vocalisation, changes in behaviour (avoidance, aggression), or physical changes (tachycardia, dilated pupils, etc.) | Clinical signs can be similar to those seen when animals are in shock. Pain delays healing and must be treated. |
Case Study

The following Case Studies are examples of Animal First Aid Situations and how to apply DRABC.
1. Situation: Dog Hit by a CarD - Danger:
R - Response:
A - Airway:
B - Breathing:
C - Circulation:
|
2. Situation: Cat with Suspected Poisoning (Ingesting Toxic Plants)D - Danger:
R - Response:
A - Airway:
B - Breathing:
C - Circulation:
|
3. Situation: Horse Found Collapsed in a PaddockD - Danger:
R - Response:
A - Airway:
B - Breathing:
C - Circulation:
|
4. Situation: Snake Bite on a Dog’s LegD - Danger:
R - Response:
A - Airway:
B - Breathing:
C - Circulation:
|
5. Situation: Bird Stuck in a Netting or WireD - Danger:
R - Response:
A - Airway:
B - Breathing:
C - Circulation:
|
Common animal first aid situations

Every emergency is unique, and you will need to respond to the specific needs of the animal. However, there are several common first aid situations including, but not limited to:
| Broken Bones | Wounds and Bleeding | Choking and Airway Obstructions | Exposure to Toxins and Poisons |
| Convulsions | Eye Injuries | Hyperthermia and Hypothermia | Tick Paralysis |
When assisting someone in providing first aid, it is critical that you listen actively to instructions and to use questioning to clarify and confirm. While you must act quickly, it is important not to rush. An emergency is not the time to make mistakes.
Broken bones
There are two main types of broken bones – closed fractures and open fractures.
A closed fracture, also called a simple fracture, occurs when a bone breaks but the skin remains intact. An open fracture, also called a compound fracture, occurs when the skin is broken over the break site. Broken skin increases the chance of the broken bone becoming infected.
For all types of limb breaks, including suspected closed fractures, immobile the limb to prevent further injury. You can use the following steps to immobilise the limb.
- Firstly, do not pull on the limb. Do not try to straighten the limb or the broken bone. This will only cause pain and more injury.
- Attend to any bleeding with open fractures.
- Splint the limb using a firm object, such as a medical splint, a piece of wood, rolled up newspaper or stiff cardboard. Position the splint to prevent the animal from bending or moving the joint(s) nearest the injury and secure the splint to the limb with a bandage or strips of cloth (for example, a torn-up shirt).
- Try to limit the animal’s movement and pressure on the limb. If possible, elevate the limb with a pillow, towel or suitable alternative.
- When transporting the animal to a vet, provide additional padding to reduce any movement while in transit.
Where a broken bone is suspected or confirmed in areas such as the chest or pelvis, you will not be able to splint the injury. These types of fractures tend to be very painful for the animal, so be very gentle when moving them. Apply a dressing, if needed and love the animal using a sling, stretcher, spinal board or similar (Vetwest n.d.c).
Wounds and bleeding
If you see blood, check the animal for wounds. Where blood is oozing or only dripping slowly, such as from a graze or a scratch, clean the wound with saline or clean, tepid water and apply a sterile/clean dressing or bandage before taking the animal to the vet.
If you see blood steadily dripping or spurting, the animal is at risk of excess bleeding. Excessive blood loss is very dangerous for an animal because it means that its organs and tissues won’t receive enough oxygen or nutrients to function properly. An important step in first aid is to control the bleeding – slow or stop the bleeding.
To control the bleeding:
- Appropriately restrain the animal.
- Apply firm pressure to the wound for at least 3 minutes, using a clean towel, swab, dressing or bandage.
- If the blood soaks through the first dressing, add another. Do not remove the first dressing in case it disturbs a clot that is forming and reopens the wound.
- Keep the animal warm.
- Secure the animal, ensuring it is adequately restrained and cannot tamper with the dressing or cause further injury to itself and transport it to a vet.
Penetrating objects
If the animal has an object lodged in its flesh, such as a stick, do not remove the object. Instead:
- If possible, reduce the size of the object by cutting it off 3-4 cm above the skin.
- Restrict the animal’s movement and prevent them from pulling at the object in case they increase the injury.
- Control the bleeding, but do not put any pressure on the object.
- Keep the animal warm.
- Get the animal to a vet as quickly as safely possible (Vetwest n.d.c).
Choking and airway obstructions
Choking is a life-threatening emergency. Transport the animal to a vet immediately.
During transport, if someone else is driving, and only if it is safe to do so, check the animal’s airways. If you see an obstruction and can clearly see the entire object (in other words, from start to finish), you can use your fingers to remove the object. If the object is too far in, you cannot see how far down it goes, or the animal is moving too much, do not attempt to remove it. Removing obstructions like this may cause further injury or bleeding. Do not use tweezers or other implements in case you cause further injury.
Exposure to toxins and poisons
It is not uncommon for animals to eat something they shouldn’t. Different substances may be toxic to different species. For example, chocolate can be toxic for dogs while perfectly safe (and delicious!) for humans.
Common toxins and poisons that animals may eat include:
- Plants - for example, Azaleas and Rhododendrons are poisonous for cats (Coates 2022)
- Cane toad toxins
- Pest bait, such as snail bait, rat bait, etc.
- Cleaning products
- Drugs, including human or animal prescription medication, over-the-counter medications and illegal drugs
- Fertilisers and pesticides.
If you suspect an animal has been poisoned or has eaten something toxic, transport the animal to a vet immediately. Do not try to treat the animal in any way.
If known, record how much the animal ate and when. If possible, bring the product packaging or a sample of the plant or substance to the vet as well as the animal.
Convulsions
Convulsions are usually associated with a seizure. Convulsions are characterised by uncontrollable shaking and rapid, rhythmic contractions of the body muscles.
If you see an animal convulsing:
- Clear the area around the animal so they do not accidentally injure themselves during the seizure. If it is safe to do so, place a rolled-up towel or cushion under the animal’s head to reduce the chance of injury from banging its head on the floor.
- If possible, make the area quiet and dark.
- Wait until the convulsions have stopped, record the length and number of the seizures, and then perform DRABC.
- Take the animal to a vet.
Do not interfere with the animal in any way while they are convulsing:
- Do not place your fingers or any objects into the animal’s mouth.
- Do not attempt to give the animal food or water during the convulsions, or afterwards.
Eye injuries
The most common eye injuries in animals include:
- Corneal ulceration (inflammation of the outer layer of the eye)
- Prolapse (bulging of the eye, or proptosis if the eye slips out of the socket)
- Foreign bodies (grass seeds or other objects lodging in the eye).
Eye injuries tend to be very painful and may result in blindness if not treated quickly. If an incident has occurred to or near the eyes, monitor them carefully for signs of trauma that may develop after the incident. Signs of eye problems include:
- Redness
- Swelling
- Increase tear production
- Unusual discharge
- Squinting or holding the eye shut
- Cloudiness or blueness of the cornea
- Membrane (third eyelid) across the eye.
Transport the animal to a vet immediately. Do not put any medications in the animal’s eye unless advised by a vet. If the eye has prolapsed and it will take a while for a vet to attend to the animal, you can wrap a clean, damp cloth over the eye.
Hyperthermia and hypothermia
"Hypo" is a term that means "below," while "hyper" means "above."
When an animal’s temperature is significantly above or below its normal range it can cause serious health problems and even death. The first aid for both hyperthermia and hypothermia is aimed at returning the animal to a normal temperature range.
Active cooling for hyperthermia
Hyperthermia is particularly dangerous and can happen very quickly in small or very young animals. It is important to cool the animal slowly. Rapid cooling can cause blood vessels to constrict and reduce blood flow, which prevents the core from cooling. So, use tepid (room temperature) water and never use ice packs.
To slowly cool an animal, use one or more of the following techniques:
- Wet the animal, focussing on the groin, armpits and neck using:
- cool (not cold) running water
- a wet towel or other material soaked in tepid water.
- Wrap the animal in a wet towel/blanket
- Cool the animal’s surroundings, including moving the animal into a cooler area, into the shade, turning on air conditioning or wetting the ground around the animal.
During cooling, monitor the animal’s temperature frequently (every 5 minutes). When they reach the normal range, dry the animal to prevent them from cooling too much and take them to a vet.
Active warming for hypothermia
Hypothermia slows the body’s metabolic activities, which can cause serious health problems. It is important to warm an animal slowly to avoid overheating it. To warm an animal, use one or more of the following techniques:
- Dry the animal if it is wet.
- Wrap the animal in dry blankets, towels or other materials.
- Place the animal on a heat pack or heating pad, making sure the item is not too hot. You should be able to handle it comfortably with your bare hands. If the animal cannot move on their own, move them regularly to prevent burns. If the animal is mobile, provide them space to move off the heat pad of their own accord.
- If you have access to one, use a Bair Hugger blanket and set the temperature to be appropriate to the species (Coates 2021).
As with active cooling, monitor the animal’s temperature every 5 minutes to make sure you don’t overheat them and stop active warming once the animal reaches a temperature that is normal for that species.
Tick paralysis
Tick paralysis can be fatal if not treated in time. Early signs of tick paralysis in cats and dogs include:
- Change or loss of voice
- Loss of strength and coordination of the hind legs
- Change in RR and breathing effort
- Gagging, coughing or vomiting
- Dilated pupils (Atwell 2022).
If an animal displays any or all these signs, check them for ticks.
Searching for ticks
To search an animal for ticks, run your fingertips through the animal’s fur and feel its skin. Move your fingertips in all directions repeatedly over sections of the animal’s skin. Pay particular attention to the head and neck areas as well as between the toes. Up to 90% of ticks are in these areas (Veterinary Specialist Services 2022).
If you feel a small, firm lump, stop and examine it carefully to identify if it is a tick or something else. If you are not certain, take the animal to a vet for a qualified diagnosis.
If you can find the tick, remove it. Physically remove the tick; do not use chemicals. You can use a tick-removal device or your fingers to pinch the tick as close to the skin as possible and ‘pluck’ it out of the skin.
Even if you remove the tick, take the animal to see a vet. Take the tick with you too.
Watch
The following video, ‘Searching for Ticks’ (5:08 min), demonstrates how to check an animal for ticks as well as provides some other helpful information about ticks.
Knowledge Check 12
Case Study
In this Case Study, let's explore some of the common first aid situations you may encounter with animals and how to apply the DRABC technique.
1. Broken BonesScenario:A dog playing in a park jumps awkwardly off a ledge and lands on its leg, resulting in a suspected fracture. The dog is limping, unable to put weight on the leg, and is visibly in pain. DRABC Approach:
|
2. Wounds and BleedingScenario:A cat is found with a deep cut on its side after escaping from home. The wound is bleeding heavily. DRABC Approach:
|
3. Choking and Airway ObstructionsScenario:A dog swallows a toy and starts coughing, gagging, and showing signs of distress. It is struggling to breathe. DRABC Approach:
|
4. Exposure to Toxins and PoisonsScenario:A dog ingests rat poison while roaming the backyard. It begins drooling, vomiting, and showing signs of weakness. DRABC Approach:
|
5. Convulsions (Seizures)Scenario:A cat suddenly starts convulsing on the floor, its body twitching uncontrollably. The seizure lasts for 1 minute. DRABC Approach:
|
6. Eye InjuriesScenario:A rabbit is found with a swollen, watery eye after being scratched by another animal. It is rubbing its face and showing signs of discomfort. DRABC Approach:
|
7. Hyperthermia (Heatstroke) and HypothermiaScenario - Hyperthermia:A dog is left outside in extreme heat. It begins panting excessively, drooling, and collapses. DRABC Approach:
Scenario - Hypothermia:A cat is found outside after being exposed to freezing temperatures. It is lethargic, shivering, and cold to the touch. DRABC Approach:
|
8. Tick ParalysisScenario:A dog shows signs of tick paralysis after spending time in bushland. It is weak, wobbly, and has difficulty breathing. DRABC Approach:
|

Common preventative health and health maintenance treatments include, but are not limited to, administering:
| Internal and External Parasite Topicals | Eye Drops | Long-term Medication, Including Tablets, Liquid Medications or Water Additives for Birds | Ear Cleans | Bathing, Clipping and Grooming |
| Teeth Brushing | Medicated Shampoo (Flea or Skin Condition) / Mite Spray for Birds | Vaccinations | Nail/Claw Trims and Hoof Care | Anal Gland Expressions (EAGs) |
Procedures for common preventative and health maintenance treatments

The preventative and maintenance heath care treatments you will need to perform will depend on your workplace. Always follow your workplace procedures for specific treatments. However, the following step-by-step instructions are typical procedures.
You may like to revisit Topic 2, Subtopic 5: Prepare the work area to refresh your memory of the PPE, equipment and supplies required for each of the following treatments. If you are not confident administering any of the following treatments or the animal requires restraint, ask for assistance.
If any animals you work with are known to have any kind of infection, make sure you dispose of your gloves in the biohazard bin, rather than in the general waste, and perform an antiseptic hand wash after cleaning up.
Administer parasite topicals
To administer a liquid, ‘spot-on’ parasite topical:
- If possible, wash the animal beforehand, so its coat is nice and clean.
- Confirm that you have the correct product for the animal.
- Remove the collar and any other items from around the animal’s neck.
- Wear disposable gloves, so your skin doesn’t come in contact with the product.
- Part the hair at the base of the neck, between the shoulder blades, so the skin is visible. Placing the product here prevents the animals from accidentally licking it during grooming.
- Make sure there are no lesions or broken skin in that area.
- For small doses, squeeze the entire contents onto one spot. For larger doses, spread the dose over three spots in the same general area, making sure that all three spots are positioned so the animal can’t reach them with its tongue or paws.
- Dispose of the product packaging and your used gloves in the general waste.
- Wash your hands with a routine hand wash or antiseptic hand rub.
- Check the product label to find out how long you must wait before the animal can get wet.
- If you are treating multiple animals, keep them separated for a while to prevent them from grooming each other.
Review this procedure in the following video demonstration (1:45 min).
Administering mite spray for birds
Mites are a common external parasite for birds and are prevented by regular administration of a mite spray. To administer a mite spray:
- Confirm that you have the correct product for the animal.
- Wear disposable gloves, so your skin doesn’t come in contact with the product.
- Make sure you are in a well-ventilated area. Remove any water or food bowls if you are administering the treatment in the bird’s enclosure.
- Spray the bird from above, from approximately 30-40 cm away. Do not spray directly towards their face – avoid the face and eye areas as much as possible.
- Store any remaining product properly or dispose of empty product packaging in the general waste.
- Dispose of your used gloves in the general waste.
- Wash your hands with a routine hand wash or antiseptic hand rub.
- If you spray the bird’s nest box, bed, cage, etc., allow them to dry completely before allowing the bird access to them again.
Administer eye drops
To administer eye drops:
- Confirm that you have the correct product for the animal.
- Wear disposable gloves, so your skin doesn’t come in contact with the product.
- Stand to the side of the animal. Place your non-dominant hand under the animal’s jaw to hold its head steady.
- Open the product and hold it between your thumb and pointer and the middle fingers of your dominant hand.
- Use the little finger of your dominant hand to gently pull up the top eyelid and hold the animal’s eye open.
- Being careful not to touch the eye with the nozzle of the product, which could cause infection, gently squeeze:
- the required number of liquid drops into the eye and let the animal blink to disperse the product.
- a small strip of gel into the middle of the eye or along the inside of the bottom eyelid and let the animal blink to disperse the product.
- Store any remaining product properly or dispose of empty product packaging in the general waste.
- Dispose of your used gloves in the general waste.
- Wash your hands with a routine hand wash or antiseptic hand rub.
Review this procedure in the following video demonstration of administering an eye gel (0:43 min).
Administer long-term medication
Long-term medications treat ongoing illnesses or conditions. You will likely need to administer long-term medication if an aniaml stays in your care for extended periods, such as at a boarding kennel.
Long-term medication or supplements may be in the form of tablets, liquid medications or water additives.
Administering tablets
To give an animal a tablet:
- Confirm that you have the correct product for the animal.
- Wear disposable gloves, so your skin doesn’t come in contact with the product.
- Check with your supervisor to see if the medication is safe to give with food and that the animal doesn’t have any food intolerances.
- If safe to do so, hide the capsule or tablet in a small amount of food. Use a strong-smelling food that you know the animal will like.
- Try high-value treats first, such as cheese or peanut butter.
- Only use a small amount of food to hide the tablet. If you use a large amount, the animal may eat around the medication.
- Make sure the entire small amount of food is eaten, and the medication is gone before giving the animal the rest of its food.
- If the animal will not eat the medication in food or the medication needs to be given on an empty stomach, you will need to tablet the animal. This can be done with your hands or a pill popper.
- Tablet by hand:
- Stand to the side of the animal. Place the palm of your non-dominant hand over the top of the animal’s head and/or nose.
- For a small animal, such as a cat or small dog, wrap your thumb and pointer finger over the top of the animal’s head. For larger animals, grasp the muzzle and place your thumb and pointer finger just behind the canine teeth.
- Tilt the head upwards so that the lower jaw goes slack.
- Hold the tablet with the thumb and pointer finger of your dominant hand.
- Use the little finger of your dominant hand to push the bottom jaw down.
- Push the tablet into their mouth, towards the back of the tongue and then hold the animal’s mouth closed to make sure it swallows.
- You can stroke the front of the throat to encourage the animal to swallow.
- Using a pill popper:
- Place the tablet in the end of the pill popper.
- Stand to the side of the animal. Place the palm of your non-dominant hand over the top of the animal’s head and/or nose.
- For a small animal, such as a cat or small dog, wrap your thumb and pointer finger over the animal’s muzzle. For larger animals, grasp the muzzle and place your thumb and pointer finger just behind the canine teeth.
- Tilt the head upwards so that the lower jaw goes slack.
- Insert the pill popper just behind the canine tooth and wiggle it a bit so the animal opens their mouth.
- Push the pill popper towards the back of the tongue and release the pill by pushing on the plunger.
- Quickly withdraw the pill popper and hold the animal’s mouth closed. You can rub the front of the throat to encourage the animal to swallow.
- Tablet by hand:
- Store any remaining product properly or dispose of empty product packaging in the general waste.
- Dispose of your used gloves in the general waste.
- Wash your hands with a routine hand wash or antiseptic hand rub.
Review the procedures of tableting a cat by hand and with a pill popper in the following video (6:00 min).

Liquid medications
To give an animal a liquid medication, you can either mix it with food or syringe it directly into the animal’s mouth using the following procedures:
- Confirm that you have the correct product for the animal.
- Wear disposable gloves, so your skin doesn’t come in contact with the product.
- Check with your supervisor to see if the medication is safe to give with food and that the animal doesn’t have any food intolerances.
- Mixing medication with food:
- If safe to do so, mix the liquid medication in a small amount of food. Use a strong-smelling food that you know the animal will like.
- Try high-value treats first, such as cheese or peanut butter.
- Only use a small amount of food to hide the medication. If you use a large amount, the animal may eat around the medication.
- Make sure the entire small amount of food is eaten and the medication is gone before giving the animal the rest of their food.
- Medicating by syringe:
- If the animal will not eat the medication in food or the medication needs to be given on an empty stomach, you will need to medicate the animal using a syringe.
- Draw up the correct volume of medication in a syringe.
- Stand to the side of the animal. Place the palm of your non-dominant hand over the top of the animal’s head and/or nose.
- Use the same technique as administering a tablet with a pill popper to secure than animal’s head and insert the syringe into their mouth.
- Push the syringe towards the back of the tongue and slowly push the plunger to release the medication gradually. Do not squirt a large amount in quickly or angle the syringe towards the back of the throat. This could cause the medication to go into the animal’s trachea (windpipe) and could cause breathing complications.
- Alternatively, slowly push the medication into the cheek pouch so that the animal can lap it up. However, if the medication is bitter or unpleasant in taste, the animal may simply spit it out.
- Withdraw the syringe and hold the animal’s mouth closed. You can rub the front of the throat to encourage the animal to swallow.
- Mixing medication with food:
- Store any remaining product properly or dispose of empty product packaging in the general waste.
- Dispose of your used gloves in the general waste.
- Wash your hands with a routine hand wash or antiseptic hand rub.
Medicating birds
Medication for birds is often in liquid form. Medicating birds can be very tricky, especially if you have not had a lot of practice. It is very easy to accidentally get liquid into the bird’s airways (aspiration), causing major respiratory complications for the bird. So, seek assistance.
To administer liquid medication to a bird:
- Confirm that you have the correct product for the animal.
- Wear disposable gloves, so your skin doesn’t come in contact with the product.
- Make sure you are in a room with the doors closed.
- Draw up the correct volume of medication in a syringe and have all equipment ready before starting.
- Restrain the bird using your non-dominant hand. Hold small birds in a ringer’s grip or use a towel to restrain a larger bird’s wings while you hold their head steady with your thumb and pointer finger.
- Make sure to hold the bird upright, so none of the medication accidentally drips into its airways.
- Use the tip of the syringe to pry open the beak from the side gently.
- Very slowly, push the plunger to add medication into the mouth drop by drop.
- Give the bird time to lick and swallow between drops.
Review the procedure of medicating a bird in the following video (2:46 min).
Water additive for birds
Adding medication or supplements to a bird’s drinking water Is not considered best practice because there is no way of knowing exactly how much the bird consumes. However, if this is the only method of administering medication:
- Confirm that you have the correct product for the animal.
- Clean the water bowl and remove all other sources of water from the bird’s cage or enclosure.
- Wear disposable gloves, so your skin doesn’t come in contact with the product.
- Carefully follow the dosing instructions on the label of the medication and add the correct amount of medication to the specified volume of water.
- Regularly clean and monitor the water bowl because birds will often bathe and dip their food in their water.
- Store any remaining product properly or dispose of empty product packaging in the general waste.
- Dispose of your used gloves in the general waste.
- Wash your hands with a routine hand wash or antiseptic hand rub.
Ear clean
Most ear cleaner products have applicator nozzles. However, if there is an active infection or excessive discharge present, it is easy to suck it into the nozzle and contaminate the solution accidentally. Instead, it is best practice to draw an appropriate amount of solution into a sterile syringe.
It may be easiest to have a second person comfortably restrain the animal’s head while you clean the ears. To clean an animal’s ears:
- Confirm that you have the correct product for the animal.
- Wear disposable gloves, so your skin doesn’t come in contact with the product.
- Following the instructions on the product label, draw up the required amount of solution in a syringe.
- With your non-dominant hand, hold the pinnae (outer ear structure) directly up in the air.
- With your dominant hand, use the syringe to gently squirt the required amount of solution into the ear canal.
- While continuing to hold the pinnae up, use the fingers of your dominant hand to massage the ear canal at the base of the ear until you hear a squelching sound.
- Gently wipe the ear opening with cotton balls or swabs to remove the excess solution and any discharge. Do not use cotton buds or try to stick anything else down the ear canal. Just remove what you can reach with your fingers.
- If the animal moves with the intention to shake its head, step out of the way. If possible, place a towel over the animal’s head to stop the solution from splashing around.
- You may need to repeat steps 5-9 several times.
- Wipe the residual solution off the animal with a towel.
- Store any remaining product properly or dispose of empty product packaging in the general waste.
- Dispose of your used gloves in the general waste.
- Dispose of the used swabs and cotton balls in the biohazard bin.
- Wash your hands with a routine hand wash or antiseptic hand rub.
Review the procedure of ‘How to Clean a Dog's Ears’ in the following video (4:21 min).
Teeth brush

You will likely need a second person to restrain the animal’s head while you brush its teeth. You must also always use veterinary-approved toothpaste and toothbrush. Human toothpaste is not suitable because they contain fluoride and foams up. Animal toothpaste comes in fun flavours like chicken, beef and cheese, making them more palatable for the animal. Finger brushes (rubber toothbrushes that you slide onto your finger) are a better option with most pets because they are less likely to cause injury if the pet moves suddenly.
To bush an animal’s teeth:
- Confirm that you have the correct product for the animal.
- Put on disposable gloves so that your skin doesn’t come in contact with the product or plaque.
- Make sure you are using toothpaste and a toothbrush suitable for the animal.
- Put a small amount of toothpaste on the brush.
- Starting at the front of the mouth, brush each tooth individually.
- You don’t need to brush as thoroughly as you do for yourself because animal toothpaste is more abrasive and contains enzymes that help break down the plaque. Just two or three brushes per tooth are adequate.
- It is also ok to just brush the outside surface of the teeth because this is where 96% of the plaque and tartar form.
- Store any remaining toothpaste properly or dispose of empty product packaging in the general waste.
- Clean and sanitise the toothbrush or dispose of it in the general waste as appropriate.
- Dispose of your used gloves in the general waste.
- Wash your hands with a routine hand wash or antiseptic hand rub.
Review the teeth brushing procedure and how to acclimatise an animal to having its teeth brushed in the following video (3:47 min).
Medicated shampoo

Medicated shampoos are used to treat skin conditions, such as dermatitis, or external parasite infestations, such as fleas. Regardless of the purpose of the product, the procedure is the same.
To wash an animal with medicated shampoo:
- Confirm that you have the correct product for the animal.
- Wear disposable gloves, so your skin doesn’t come in contact with the product.
- Wet the animal’s entire coat thoroughly with clean water.
- Follow the instructions on the product label as to the amount of product to use. Place small amounts of the shampoo on several areas of the body so that it is applied evenly.
- Massage the product into the coat and skin well using a sponge, exfoliating gloves or a silicone hairbrush.
- Focus on problem areas and hard-to-reach areas, such as the groin and between the toes.
- Take care not to get water or the product in the animal’s eyes or ears.
- Follow the instructions on the product label as to how long to leave the product on before rinsing. The product will not be effective if it is not left on the skin and coat for long enough.
- If the product instructions specify rinsing (some medicated shampoos are ‘leave in’), rinse the coat thoroughly with clean water. You may need to rinse several times to make sure there is no product left in the coat.
- Use towels to dry the animal.
- Store any remaining product properly or dispose of empty product packaging in the general waste.
- Dispose of your used gloves in the general waste.
- Clean and sanitise the bath, brush, sponge or any other equipment used.
- Wash your hands with a routine hand wash or antiseptic hand rub.
Clipping nails and claws
Animal claws and nails are important for grip when they walk or climb, for digging and for defence. They grow continuously but do wear down through use. However, it is important to check an animal’s nails and claws are an appropriate length. Too short and they may cause discomfort to the animal, too long and they may grow into the pad of the foot and cause injury or infection.
Review the following video, ‘How to Clip Your Rabbit's Nails - Bearwood Vets’ (3:52 min) to learn how to trim a rabbit’s claws. The process is the same for cats, dogs, guinea pigs and other small animals with claws.
Hoof care
Daily checks of horses’ hooves will identify conditions such as cracks, thrush and other hoof diseases, early so they can be treated effectively. During the daily checks, the hoof should be ‘picked’ to remove dirt, stones and other matter that can get caught and potentially cause infection.
Hooves, like claws and fingernails, are continuously growing. They do wear down with use, however, they need to be checked for damage and trimmed around every 4-8 weeks. Proper trimming gives the animal good hoof and leg balance, which can help avoid lameness or other injuries (Stewart 2022).
Trimming horses' hooves is generally carried out by a farrier or a vet. However, picking and daily checks can be carried out by anyone.
Other animals with hooves, such as cattle, sheep and exotic animals such as giraffes and zebras, also need their feet and hooves checked and maintained.
Review the following video (2:58 min), which demonstrates one method of trimming a horse’s hoof.
Eye clean
The following Veterinary Specialist Services video (1:36 min) demonstrates how to clean a dog’s eyes. This technique can be applied to cats, dogs, rabbits and guinea pigs.
Parasite Control
Parasite control is essential in maintaining the health and well-being of animals, as parasites can cause a range of health issues and can spread quickly within animal healthcare settings. Effective parasite control programs aim to prevent infestations, minimize the risk of disease transmission, and improve the overall quality of life for animals. Here’s a breakdown of the fundamentals of parasite control, strategies to manage it, product examples, and proper usage instructions.
Fundamentals of Parasite Control in Animals |
|
Parasites are organisms that live off other animals, often harming them in the process. Common parasites in animals include:
Parasite control involves regular treatments, hygiene practices, and preventive strategies to prevent infestations and reduce the spread of parasites to other animals and humans. |
Strategies to Control Parasites |
|
Examples of Products for Parasite ControlThere are several types of parasite control products available, including spot-on treatments, oral tablets, sprays, and collars. Here are a few common types: |
|
|---|---|
| Spot-on Treatments |
|
| Oral Tablets |
|
| Topical Sprays |
|
| Deworming Tablets |
|
| Parasite Control Collars |
|
Important Usage Instructions
When using parasite control products, it's essential to follow specific instructions to ensure safety and effectiveness:
- Check Weight and Species: Products are often species and weight-specific, so using a dog product on a cat or applying a large dog dose to a small dog could be dangerous.
- Read Labels Thoroughly: Each product will have specific application methods and reapplication schedules. For example, some are monthly treatments, while others are effective for longer.
- Wear Gloves: When applying topical products, wear gloves to avoid skin contact with the medication.
- Avoid Bathing After Application: With spot-on treatments, wait at least 24–48 hours before bathing the animal or allowing it to swim, as water can dilute the product’s effectiveness.
- Monitor for Reactions: After administering a product, monitor the animal for any signs of adverse reactions like skin irritation, vomiting, or behavioural changes, and contact a vet if symptoms appear.
Effective parasite control in animal care settings requires a combination of preventive treatments, environmental management, and proper usage of parasite control products. Choosing the right product based on an animal’s weight and species is crucial, as is following the usage instructions closely to avoid adverse effects. Parasite control products, when used correctly, keep animals healthy and help prevent the spread of parasites within care facilities and homes.
Knowledge check 13
Case Study

Emma has a small dog named Bella, a Miniature Dachshund weighing about 5 kg. She recently noticed Bella scratching frequently, and after a check-up at the vet, she was advised to start Bella on a flea and tick prevention program. The vet recommended a specific product but reminded Emma to read the instructions carefully, as parasite control treatments are often dosed according to weight.
When Emma picks up the flea and tick medication, she sees that the product comes in various doses based on dog sizes. She realises it's crucial to choose the correct dosage to ensure Bella gets adequate protection without the risk of an overdose.
Choosing the Right Dosage
Emma reads through the product packaging and finds the following dosing information:
Product: "SafeShield Flea & Tick Control for Dogs"
- For Small Dogs (2–10 kg): Use the 0.5 mL dose. Contains 40 mg of active ingredient per mL.
- For Medium Dogs (10–20 kg): Use the 1 mL dose. Contains 80 mg of active ingredient per mL.
- For Large Dogs (20–40 kg): Use the 2 mL dose. Contains 160 mg of active ingredient per mL.
Since Bella weighs 5 kg, Emma selects the "Small Dogs (2–10 kg)" dose to ensure she administers a safe and effective amount of the medication.
Reading the Product Information
Emma reviews the instructions and notices a warning section:
WARNING: Do not use on dogs under 2 kg. For dogs above 40 kg, consult a veterinarian for appropriate dosage. Using a dose higher than recommended for your dog’s weight could lead to adverse side effects.
She realises that using even a slightly higher dose could overwhelm Bella’s system, so she double-checks that the product she’s picked up is indeed for small dogs.
Why This Matters
Using the right size-based dose in parasite control treatments ensures that:
- Effectiveness: Bella will get the correct amount of active ingredients for her weight, ensuring the product will effectively prevent fleas and ticks.
- Safety: Dogs of different sizes metabolize medications differently, so a large dog dose could harm a small dog like Bella, leading to side effects such as vomiting or lethargy.
Emma applies the small dog dosage as per the package instructions, confident that Bella will be safely protected from parasites. This example shows the importance of reading labels and choosing products that align with a pet's specific needs based on size and weight.

After you’ve treated the animal, the next step is to document the treatment details and any relevant observations in the animal’s file. To do this well, your records should be:
| Easily Accessible | → | Accurate | → | Appropriate |
Good file notes will be detailed while being clear and concise and use accurate industry terminology.
Most organisations use computer-based, online software or a mobile application that will prompt you to enter information step by step. The record may not be able to be saved until all relevant information has been entered. This makes it easy to ensure all important details are entered.
Whether the records are paper-based or digital, they should be stored according to the organisation’s filing system for immediate retrieval at a later date, to make it easily accessible to those that need it and when they need it. If you are unsure where the file should be stored, ask your supervisor.
When communicating with the owner of the animal or the vet, listen actively to gain accurate information. Clarify and confirm anything you may not have heard correctly or fully understood.
Case Study
Happy Paws Animal Care Facility - File Note
| Animal Information: |
|---|
|
Date of File Note: ____________________________________________Time: ______________________________________Staff Name: ________________________________________________ |
| Reason for File Note: |
|---|
|
(Tick the appropriate option)
|
Observation/Incident Description |
|---|
|
(Describe what happened, including any relevant details) |
| Actions Taken: |
|---|
|
(List the steps taken by staff or treatment provided) |
| Animal’s Response/Outcome: |
|---|
|
(Describe the animal’s reaction or changes noticed after the action was taken) |
| Next Steps/Follow-up Required: |
|---|
|
(Is further monitoring or action needed?)
|
| Comments: |
|---|
|
(Any additional notes or important information to keep on record) |
Signature of Staff Member: _________________________________
Date: _____________________________
Examples of common animal health care records include:
- Daily observation logs – can include behavioural, nutritional and health observations
- Medical history files – records of previous illnesses, injuries, symptoms and treatments
- Pathology reports – findings from blood and other pathology tests.
Below, you will see some examples of what these healthcare records look like and the information you need to provide.
Case Study

Daily Observation Log Template
(Behavioural, Nutritional, and Health Observations)
Animal Information:
- Animal Name: _____________________________________________
- Species/Breed: ____________________________________________
- ID/Tag Number: ___________________________________________
- Date of Birth/Age: __________________________________________
- Gender: __________________________________________________
Date: ______________________________________
Time of Observation: _______________________________
Staff Name: _______________________________________________
1. Behavioural Observations:(Document the animal's behaviour during the day)
|
2. Nutritional Observations:(Details on feeding, appetite, and water consumption)
|
3. Health Observations:(Monitor the animal’s physical condition and signs of illness)
|
Follow-up Actions or Recommendations:(Any treatments, adjustments to diet, or further observations required) |
Signature of Staff Member: _________________________________Date: ____________________________ |
Case Study
Medical History File Template
(Records of previous illnesses, injuries, symptoms, and treatments)
Animal Information:
- Animal Name: _____________________________________________
- Species/Breed: ____________________________________________
- ID/Tag Number: ___________________________________________
- Date of Birth/Age: __________________________________________
- Gender: __________________________________________________
Medical History Summary:
(Include any past illnesses, injuries, or health conditions the animal has had)
Previous Illnesses:
- Date of Illness: ____________________
- Description of Symptoms: _______________________________________________
- Diagnosis (if applicable): _______________________________________________
- Treatment Provided: ___________________________________________________
- Outcome/Recovery: ___________________________________________________
Previous Injuries:
- Date of Injury: ____________________
- Description of Injury: _________________________________________________
- Treatment Provided: ___________________________________________________
- Outcome/Recovery: ___________________________________________________
Ongoing Medical Conditions:
(List any ongoing treatments or conditions requiring monitoring)
Vaccination History:
- Date of Vaccination: ____________________
- Type of Vaccine: _______________________________________________________
- Booster Due Date: _____________________________________________________
Allergies/Medication Sensitivities:
(Record any known allergies or sensitivities to medications)
Signature of Vet/Medical Staff: _____________________________________
Date: ____________________________
Case Study
Pathology Report Template
(Findings from blood and other pathology tests)
Animal Information:
Date of Test: ________________________________________Sample Collected By: __________________________________ |
Type of Pathology Test:(e.g., blood test, urine analysis, tissue biopsy, etc.) |
Reason for Testing:(Symptoms, health concerns, or routine screening) |
Test Results Summary:
|
Pathologist’s Notes:(Additional interpretation or notable findings from the test results) |
Recommendations for Further Action:(Follow-up treatments, further testing, or other recommendations based on results) |
Signature of Vet/Pathologist: ____________________________________Date: ____________________________ |
The Victorian government has a useful list of the types of information that a veterinary medical record may contain. Not all animal care workplaces will require all of these details. However, the list gives you an idea as to the types of information you may be required to document when working at an animal care workplace:
- “details that identify the owner of the animal and/or their designated representative, including name, address, contact number
- 2the date that the animal is examined and/or receives veterinary treatment
- details that may identify the animal including its species, breed, colour, age, name, tag number and/or any microchip (as relevant)
- the history that led to the animal being presented to the veterinary practitioner and any other relevant historical information
- details of the physical examination of the animal, including any and all observations and findings whether normal or abnormal
- other clinical observations made during the examination
- details of any diagnosis whether provisional, final or other
- details of discussions with the owner (throughout the period veterinary services are delivered) about treatment/management options, including the limitations, risks and costs of those options
- the treatment option(s) chosen by the owner, including the reasoning as to why that choice was made
- progress notes for hospitalised patients at each and every point of assessment
- details of all discharge instructions provided to the owner after an animal’s discharge from a veterinary facility where they were hospitalised" (Vetboard Victoria 2021).
Ensure the information is easily understood and use plain English to make your record comprehensible to anyone that reads it. However, you must use appropriate and accurate industry terminology to document medical information. For example, ‘bpm’ to represent beats per minute, or ‘MM’ to represent mucous membranes or ‘hypothermic’ to mean too cold.
A comprehensive record makes the information useful for future reference, should animal health concerns arise, or for the purposes of handing over the care of the animal to a new organisation or facility. Firstly, the record should identify the animal and owner details clearly. When you enter information on an animal for the first time, gather all of the relevant historical health information. This will help the organisation determine what the particular needs are of the animal in your care. Consistently update the record each time you provide an animal with health care.
You must also make an accurate record of routine care or first aid details at the time the service is provided.
Record useful information for the ongoing care of the animal, such as alerting the owner when the next parasite treatment or vaccination may be due.
Important note: You also have a responsibility by law to keep the owner’s personal and animal health information private (Vetboard Victoria 2021).
Case Study
Doug the Pug, an 11-year-old dog, has presented at Long Road Veterinary Clinic for his annual health check and vaccination.
An animal attendant has been asked by their supervisor to record relevant information on Doug’s animal health record as they conduct an annual health check. A copy of what the attendant has written down follows.
Please note how the animal attendant has recorded the relevant information and use this as a guide to help you when you document animals in your care.
Animal health record
Animal’s details
| Animal identification | Details | |
|---|---|---|
 |
Name | Doug |
| Species | Canine | |
| Age | 11 years | |
| Date of birth | 10.10.2011 | |
| Breed | Pug | |
| Male/Female | Male | |
| Entire/Desexed | Desexed | |
| Colour | Tan and black | |
| Microchip number | 9704635400091827 |
Owner’s details
| Owner | Details |
|---|---|
| Name | John Smith |
| Phone | 0404 123 456 |
| john.smith@mail.com | |
| Address | 123 Long Road |
| Name of veterinarian | Long Road Vets |
Animal health record
| Medical history | Details |
|---|---|
| Allergies | None |
| Existing conditions | Osteoarthritis hind limbs (Diagnosed 2020) |
| Other | None |
Immunisation history
| Date | Batch no | |
|---|---|---|
| 21.10.2017 | (This is where the sticker from the vaccine bottle is placed) | Companion CC + C3 |
| 15.11.2018 | Companion CC + C3 | |
| 05.11.2019 | Companion CC + C3 | |
| 29.09.2020 | Companion CC + C3 | |
| 01.10.2021 | Companion CC + C3 |
Medical history
| Date | Veterinarian | Description | Tests performed | Medication | Comments |
|---|---|---|---|---|---|
| 15.11.2018 | Dr Jill | Heartworm injection | None | Proheart SR12 | |
| 05.01.2019 | Dr Jack | Ate a bee | None | Niramine Dexmethasone | |
| 29.09.2020 | Dr Bob | Ataxia | Haematology Biochemistry | Meloxicam | |
| 01.10.2021 | Dr Sarah | Heartworm injection | None | Proheart SR12 |
Vital signs
| Vital sign | Reading | Comments |
|---|---|---|
| Heart rate (bpm) | 126 | No arrhythmias |
| Pulse rate (bpm) | 126 | Strong synchronous regular |
| Respiratory rate (bpm) | 30 | No effort |
| Mucous membrane (MM) | Pink | Dental exam needed |
| Temperature (°C) | 38.2 |
Animal general health
| Health check | Observations | Comments |
|---|---|---|
| Demeanour | BAR | |
| Body condition score | 7/9 |
|
| Hydration | Immediate | |
| Eyes and nose |
|
|
| Mouth |
|
Dental with x-rays and possible extractions recommended |
| Ears | No purulent discharge | |
| Lymph nodes | NAD | |
| Lungs | Clear lung sounds all fields | |
| Abdomen |
|
Suggest metabolic diet for weight loss |
| Anus/genitals | NAD | |
| Limbs |
|
Currently medicated with NSAIDs |
| Skin/coat |
|
Knowledge check 14

After you have treated the animal and documented the treatment, it is time for post-treatment routines. There are two main post-treatment routines that you may be required to carry out:
| Post-treatment monitoring of the animal | Clean-up of the health care work area. |
|---|
Recognising signs of progress or deterioration

It is important to swiftly recognise changes in an animal’s condition – whether they are progressing, deteriorating or remaining the same. Therefore, monitor an animal’s general health and vital signs and record basic daily observations, if necessary, at these times:
- post-treatment or procedure
- if it has a chronic health condition
- if it is on medication
- if it is in your care for a period of time, such as when in a boarding kennel.
In your initial assessment, check for signs of progression or deteriorating health by assessing any changes to the animal's:
- demeanour
- normal baseline vitals.
To monitor an animal, first, establish a baseline. The baseline is the first set of vitals for that animal. Ideally, the vitals are taken when they are in a calm, resting state so that you have something to compare to when you do repeated checks.
There are normal vital sign ranges for each species, however, each individual is different. The size (Chihuahua vs Great Dane), life stage (neonate, junior, adult, senior, geriatric), health status and even the animal’s environment may have an impact on this. For example, the animal may have a chronic heart issue and so, although their heart rate and respiratory rate may be well outside normal ranges, it can be ‘normal’ for this animal.
To recognise signs of deterioration, you would look for changes to the normal baseline vitals for that particular animal. Take into consideration the above variables and consider if you need to alert your supervisor to the changes. If the vital signs and demeanour have changed drastically or show a trend in one direction or the other (heart rate keeps increasing/temperature continues to drop), you need to record this and report to your supervisor that the animal is showing signs of deterioration.
Sometimes it is very clear that an animal is not well, as evidenced by its demeanour. Demeanour is the most obvious indicator that an animal may be deteriorating in health. Poor demeanour would prompt you to check the vital signs to confirm the severity of the decline.
General health monitoring may include observing secondary health indicators particular to their illness or procedure, such as urine or faeces output, vomiting or pain score. Monitoring will alert you to seek timely help if needed.
The following table provides a sample monitoring record. Mock comments have been added in red to give you an idea as to what may be entered on a real-life record. The final column indicates the initials of the person monitoring the animal. Again, alert your supervisor and seek assistance if the animal shows signs of deterioration.
| Date | Demeanour | Eating | Drinking | Urinating | Defecating | Comments | Initials |
|---|---|---|---|---|---|---|---|
| 7/11 AM | QAR | No | Offered | ++ | Soft stool | Admitted today. | SH |
| 7/11 PM | QAR | Small amount | Offered | ++ | Soft stool | Notified supervisor of faeces. Changed diet to gastrointestinal. Continue to monitor. |
SH |
| 8/11 AM | BAR | Ate half of offered food. | Offered | ++ | Normal | SH | |
| 8/11 PM | BAR | Ate all | Offered | +++ | Normal | SH |
Clean-up of the healthcare work area
 |
Regardless of the treatment you have administered to an animal, the following should form part of your post-treatment routine:
|
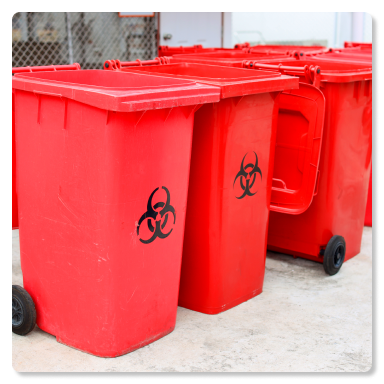 |
Waste should be dealt with in the following manner, regardless of the treatment type. Dispose of:
|
 |
Cleaning and Sanitising The level of cleaning and sanitising required will depend on the treatment and the health care work area. For example, a clinic room will require cleaning and sanitising of all surfaces and equipment after treating an animal with an open fracture and significant bleeding, whereas you would only need to give the floor a sweep and clean and sanitise the equipment after a routine hoof trim in a stable. |
Where animals are concerned, the environments you work in can become exposed to contamination very quickly. Therefore, appropriate cleaning and sanitising tasks need to take place to help prevent any spread of infection. To maximise the effectiveness of infection control, a combination of cleaning and sanitising should become a part of regular cleaning responsibilities.
In the first step, clean with a standard soap or detergent that removes organic material (for example, dirt, blood and saliva). In the second step use a disinfectant that is an antimicrobial to destroy pathogens such as bacteria, fungi and viruses.
It is important to consider that cleaning and disinfecting methods may vary depending on the surface or the type of equipment you are using. For example, you would not use the same cleaning equipment to clean the treatment area as the flooring in the kitchen. You would also need to apply a certain procedure for cleaning clippers or surgery equipment. All staff must be trained properly when it comes to cleaning and familiarise themselves with the relevant safety data sheet for the chemical they are using.
The following information about cleaning and sanitising is a general guide only. Refer to the Practical Infection Control Guidelines (pdf) (2016) for specific information regarding the cleaning, disinfecting and sterilising of specific health care work areas and equipment and instruments.
Cleaning
Cleaning is the process of removing accumulated matter, such as faeces, urine, blood, dirt or food, from an item or surface. Cleaning typically involves the use of a detergent to help break down the matter. When cleaning the treatment area, consider:
- removing loose dirt with a cyclonic vacuum cleaner containing a HEPA filter
- sweeping with broom before mopping
- cleaning, disinfecting and drying mops daily (dispose of mops in the biohazard bin after cleaning up after a significant contamination event)
- wearing appropriate PPE, especially where splashing is possible.
- using a face mask where airborne exposure is likely
- scrubbing with detergent when matter is difficult to remove (AIDAP 2016).
Sanitising
Sanitising, or disinfecting, is the process of applying a product or process to destroy pathogens. You should always clean before disinfecting in case any matter on the surface protects pathogens from the sanitising process. Appropriate use of disinfectants can reduce the spread of infection.
The following procedure outlines the general considerations when using a disinfectant:
- Ensure the area is well ventilated before using disinfectant.
- Wear gloves. Either disposable or reusable rubber gloves may be appropriate. Ensure reusable gloves are cleaned, sanitised and dried before using them again.
- Wear googles or other eye protection if there is a risk of splashing.
- Always follow the product instructions for:
- correct dilution rates
- appropriate time to leave the product on the surface.
- When rinsing is required, do so thoroughly.
Post-treatment clean up
The following table outlines the steps involved in the clean-up after some common preventative and health maintenance treatments. Remember, regardless of the treatment, you should always:
- Clean and sanitise the treatment area if necessary
- Dispose of your gloves and any empty product packaging in the general waste bin
- Wash your hands.
| Treatment type | Post-treatment routines specific to the treatment |
|---|---|
| Parasite topicals |
|
| Eye drops |
|
| Long-term medication, including water additives for birds |
|
| Ear clean |
|
| Teeth brush |
|
| Medicated shampoo |
|
| Mite spray for birds |
|
Case Study

Post-Surgery Cleaning Procedure for Animal Care Facility
1. Personal Protective Equipment (PPE):Before starting the cleaning process, staff must put on appropriate PPE:
|
2. Remove and Dispose of Used Materials:
|
3. Clean the Operating Table and Area:
|
4. Clean and Sterilise Surgical Instruments:
|
5. Clean Floors and Walls:
|
6. Air Circulation and Ventilation:
|
7. Final Disinfection of the Room:
|
8. Remove and Dispose of PPE:
|
9. Documentation:
|
10. Inspection:
|
Disposing of hazardous waste

Animal facilities use materials that can pose a considerable hazard to employees, the general community and the environment. Often, the use of these hazardous materials can’t be avoided. However, measures can be taken to ensure their impacts are minimised. The use and disposal of hazardous materials is regulated by local and/or state governments and workplaces must comply with the requirements or face fines and other ramifications.
Examples of hazardous materials include:
- Biological products – for example, blood, tissue, faeces and contaminated cloths
- Clinical waste – for example, sharps, bandages and swabs.
External or internal medications should be disposed of in clinical (hazardous) waste bins.
“The disposal of unwanted or expired pharmaceutical drugs and veterinary biologicals is an emerging environmental issue. All medications applied externally, injected or ingested (and their bioactive transformation products) have the potential to be excreted or washed into the sewage system and from there discharged into the aquatic or terrestrial environments. Veterinarians should make every effort to ensure these products are properly disposed of… In general, with the exception of Schedule 8 drugs, pharmaceutical waste should be disposed of in the same manner as clinical (hazardous) waste, i.e. with clinical waste or with sharps… Examples of Schedule 8 drugs are fentanyl, ketamine, oxycodone, morphine, pethidine, pentazocine, buprenorphine, and butorphanol” (Bond 2013).
For more information on disposing of veterinary medicines, review the Australian Veterinary Association’s Guidelines for Prescribing, Authorising and Dispensing Veterinary Medicines (pdf).
Follow your workplace and state or territory legislative recommendations for the use and disposal of hazardous waste. Remember that your environmental responsibility includes a duty of care to reduce and improve the use and disposal of hazardous materials.
Review and follow the Australian government’s guidelines on Exporting, importing or transiting hazardous waste in your state or territory.
The Victorian Government has excellent guidelines for cleaning and waste disposal to control infection in human hospitals. The guidelines are also useful for the animal care workplace as they detail how to clean effectively when dealing with biological exposure and waste.
“Waste is classified into three main groups of waste:
| General Waste | Clinical Waste | Pharmaceutical Waste |
|---|
All waste should be stored in secure areas until collected. Waste disposal companies licensed with the EPA will collect all clinical and pharmaceutical waste for disposal in specialised waste disposal facilities, which are also licensed by the EPA” (The Department of Health 2021).
An excellent guide to laboratory and animal waste disposal comes from the University of Queensland’s Environment Management System (pdf). Identify the type of waste then work through the infographic to determine the best method of disposal.
As learnt previously, you must ensure hazardous substances are used according to the manufacturers or suppliers written instructions, in the form of a safety data sheet (SDS), and the safe working procedures are followed at your workplace. Make sure you know where to access the SDSs for the substance you are working with.
Hazardous substances must be stored securely and labelled clearly. A number of the substances used in animal care practice must be kept in locked storage and accessed only by animal care practitioners. They may include medications and dangerous drugs.
Hand washing after treatment

The final step of your post-treatment routine is to remove your gloves and wash your hands. Regardless of treatment, use a:
- routine hand wash or antiseptic hand rub if you were working with a healthy animal
- antiseptic hand wash if you were working with an animal with a known or suspected infection.
If the animal you are treating has a known serious infection, such as a zoonotic disease or a highly contagious, life-threatening disease, the hand washing routine is slightly different.
- Treat the infectious animal.
- Remove and dispose of your gloves in the biohazard bin.
- Wash your hands using an antiseptic hand wash.
- Put on clean gloves.
- Clean up the treatment area.
- Remove and dispose of your gloves in the biohazard bin.
- Wash your hands using an antiseptic hand wash.
Case Study
Hand Washing Procedure for Animal Care Facility
Purpose:
To ensure that all staff properly wash their hands to maintain hygiene, prevent the spread of disease, and protect both animals and staff from contamination or infection.
1. When to Wash Your Hands:
- Before and after handling any animal
- Before and after performing any medical or surgical procedures
- After handling animal waste or cleaning cages
- After touching body fluids (blood, saliva, urine, etc.)
- After removing gloves or any other PPE
- Before preparing or serving animal food
- Before and after eating, drinking, or using the restroom
2. Required Materials:
- Clean running water (warm preferred)
- Antibacterial liquid soap (approved for veterinary use)
- Disposable paper towels or air dryer
- Hand sanitiser (optional, to be used after washing when needed)
3. Hand Washing Steps:
Step 1: Wet Your Hands
- Turn on the tap and wet your hands thoroughly with clean, warm running water.
Step 2: Apply Soap
- Dispense an appropriate amount of antibacterial liquid soap into your palm.
Step 3: Lather and Scrub
- Rub your hands together to create a lather, covering all surfaces of your hands.
- Be sure to scrub:
- The backs of your hands
- Between your fingers
- Under your nails (use a nail brush if available)
- Up to your wrists
- Scrub your hands for at least 20 seconds. A helpful tip is to hum the “Happy Birthday” song twice to ensure enough scrubbing time.
Step 4: Rinse
- Rinse your hands under clean, running water, ensuring all soap and suds are washed away.
Step 5: Dry Your Hands
- Use a clean, disposable paper towel to dry your hands or use an air dryer.
- Avoid using reusable towels or cloths, as they can harbour bacteria.
Step 6: Turn Off the Tap
- Use the paper towel to turn off the tap to avoid re-contaminating your clean hands.
4. Hand Sanitiser Use (Optional Supplement):
- If soap and water are not immediately available, use an alcohol-based hand sanitiser (containing at least 60% alcohol).
- Apply enough product to cover your hands and rub them together, ensuring you cover all surfaces.
- Continue rubbing your hands until they are completely dry (about 20 seconds).
5. Additional Tips:
- Remove any rings, watches, or jewellery before washing your hands, as these can trap bacteria.
- Regularly trim and clean under your nails to prevent the buildup of dirt and germs.
- Always wash your hands before and after using gloves to prevent contamination.
This hand washing procedure ensures staff in animal care facilities maintain hygiene standards, minimising the risk of cross-contamination between animals and staff.
Knowledge check 15
Watch
The next videos demonstrate how to wash your hands properly.
