Throughout the module, we will refer to a fictitious business, North Park Stationery Supplies. We strongly suggest you work through the exercises with us as this will greatly assist your understanding of how to set up and process payroll in MYOB or Xero.
North Park Stationery Supplies Background Information

Marsha Bing is the sole proprietor of North Park Stationery Supplies, a GST-registered organisation. The company focuses solely on promoting Australian paper and stationery suppliers. They work with Australian vendors that promote sustainable practices. They have three retail outlets that each have a salaried on-site manager and several hourly employees. Since its formation, the company has been relatively profitable. Currently, the business uses a manual accounting system managed by an external accounting firm, Alex's Accounting Services, to manage its accounts and pay its employees.
Marsha has decided to install a trial version on MYOB or Xero and process the payroll for her hourly staff starting July 2022.
Marsha's employees are paid under the Clerks-Private Sector Award 2020.
Access and familiarise yourself with the award, as it will be used throughout this module. In particular, take note of:
- Payment of wages
- Allowances
- First Aid Allowance
- Meal Allowance
- Clothing and Footwear Allowance
- Voluntary Employee Superannuation Contributions
- Ordinary Hours of Work
- Overtime and Penalty Rates
- Annual Leave Loading
- Annual Leave
- Personal Leave
During the course, you will be asked to complete activities to practice your knowledge and understanding of the topic. The practice exercises will be completed using MYOB Business™ and Xero.
To complete the practice exercise, you will need to create a business in MYOB or Xero for North Park Stationery Supplies.
If you have not done so already, activate your MYOB Business Education trial or Xero Accounting Software | Xero AU now.
Please be aware that the license provided to you is for educational purposes only.
Key details about your MYOB educational license:
- License Type: Educational Access
- Duration: 6 months
- Relevant Modules that use MYOB:
- FMSACC426 Set up and operate computerised accounting systems
- FNSACC426 Set up and operate computerised accounting systems
- FNSTPB411 Complete business activity and instalment activity statements
- FNSTPB412 Establish and maintain payroll systems
- FNSACC418 Work effectively in the accounting and bookkeeping industry
It's crucial to complete these modules within this 6-month timeframe. If, for any reason, you are unable to finish these modules within the six-month period, you must take the following steps:
- Contact MYOB Help: Reach out to MYOB support for assistance. Located in the top right corner of the dashboard.
- Request Extension: Ask for an extension due to course requirements.
We encourage you to manage your time effectively and plan your coursework accordingly. Failure to contact MYOB help before your trial expires will result in the loss of access to your MYOB file, and any work you have completed to date will be irretrievably lost.
Key details about your XERO:
- Duration: 6 months
- Relevant Modules that use Xero:
- FMSACC426 Set up and operate computerised accounting systems
- FNSACC426 Set up and operate computerised accounting systems
- FNSTPB411 Complete business activity and instalment activity statements
- FNSTPB412 Establish and maintain payroll systems
- FNSACC418 Work effectively in the accounting and bookkeeping industry
It's crucial to complete these modules within this 6-month timeframe. If, for any reason, you are unable to finish these modules within the six-month period, you must take the following steps:
- Contact SOE Student Support and let them know you need an extension.
Use the email address you use to access your Swinburne Open Education course, and when asked ‘How would you best describe your role?’ select ‘Student or teacher’.
Create a new trial for North Park Stationery Supplies by adding your first name, last name, and phone number and setting your password.
Sign into MYOB or Xero and add:
- Name of the business - North Park Stationery Supplies
- ABN - 26008672179
Answer yes when asked if the business is registered for GST and click next.
Use Retail to describe the industry your business is in and use Student or teacher to describe your role.
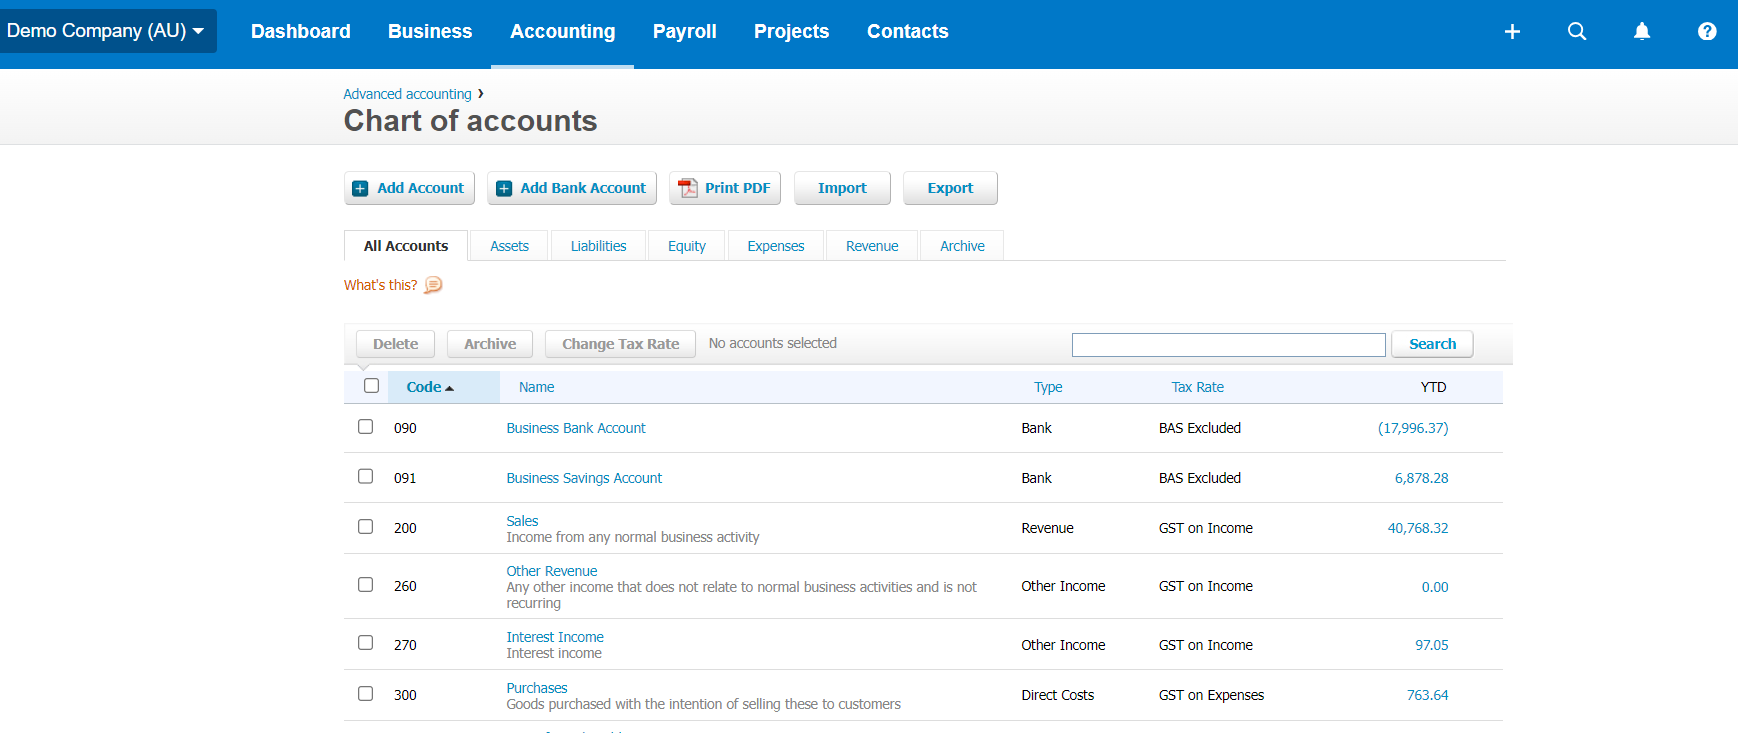
Chart of Accounts
Before configuring the payroll system, we need to consider what general ledger accounts will be required to store the payroll data.
The individual accounts of a business are grouped together in the chart of accounts. Each account is assigned a unique number based on the order it appears in the financial statements. Balance sheet accounts are usually presented first, followed by income statement accounts.
When setting up a chart of accounts, the accounts that are listed will depend on the nature of the business. When listing accounts in the chart of accounts, a numbering system is used for easy identification. Numbering also makes it easy to record a transaction.
Small businesses commonly use three-digit numbers, while large businesses use four-digit numbers to allow room for additional numbers as the business grows1.
The chart of accounts is essentially an index to the General Ledger.
EXAMPLE CHART OF ACCOUNTS (partial)
MYOB

XERO
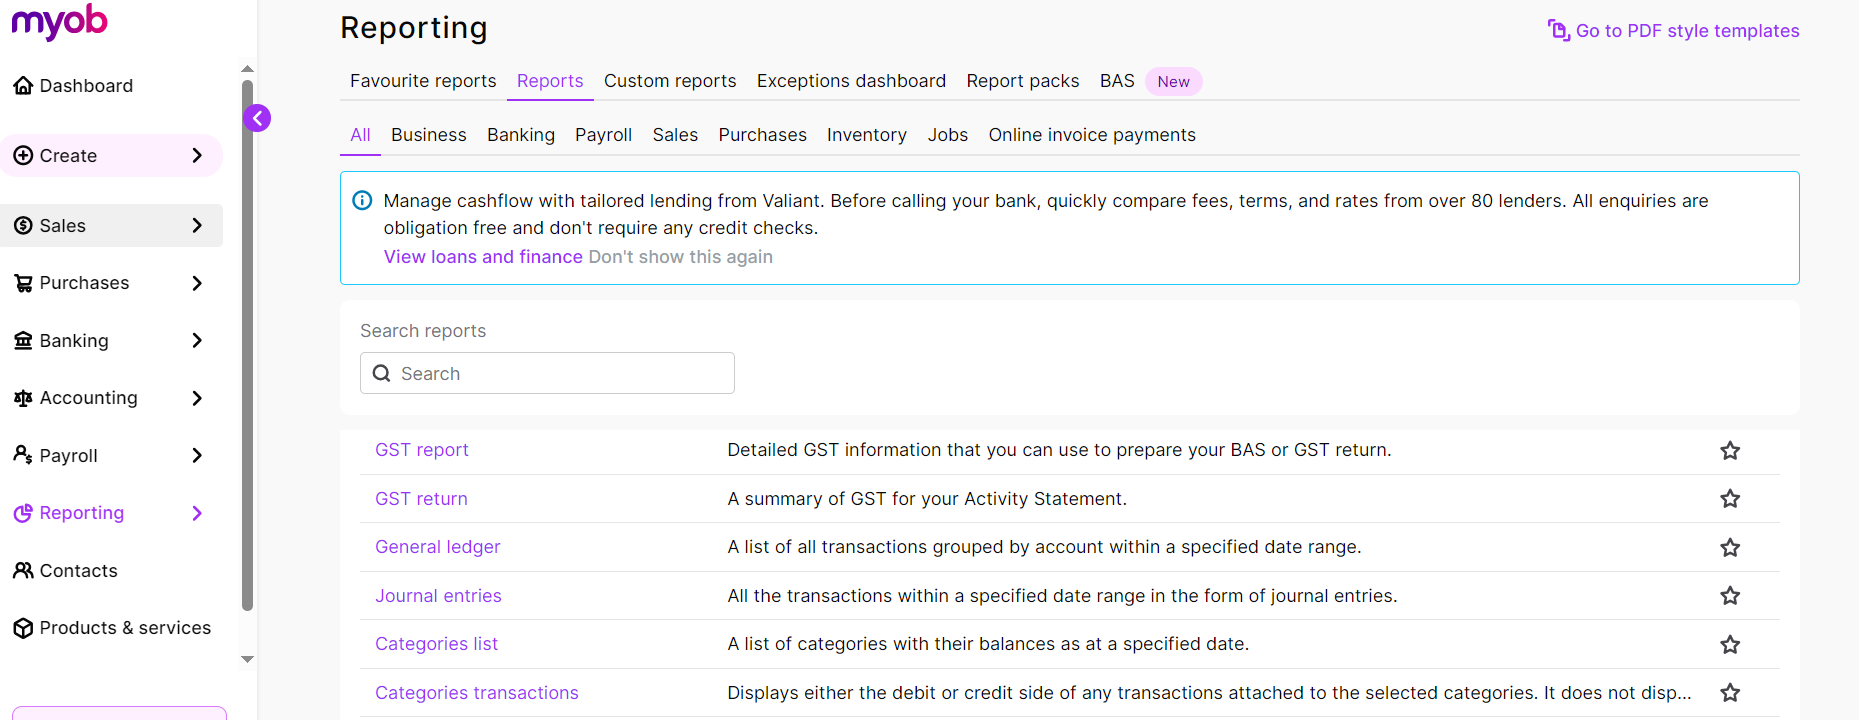
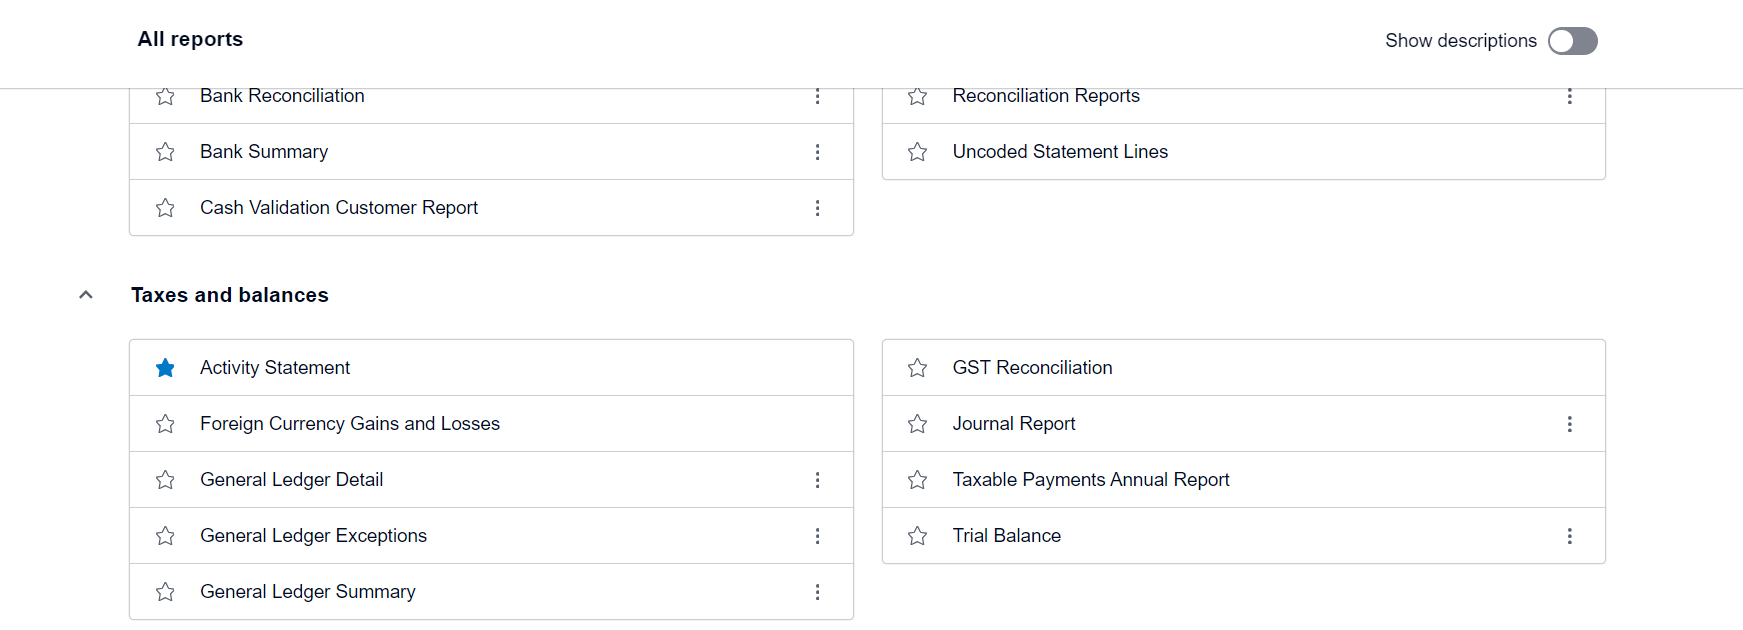
The General Ledger
The general ledger is a business’s master account book listing all the accounts in the chart of accounts. In a manual accounting or bookkeeping system, the general ledger is a "book" with a separate page or ledger sheet for each account. In a computerised system, the general ledger will be an electronic file of all the needed accounts. The General Ledger in MYOB Business and Xero can be found under the Reporting/Reports.
MYOB
XERO

When you create your company in MYOB or Xero, a default chart of accounts is created based on the business type you select in the setup. It is important that you customise the Chart of Accounts to the needs of your specific business.
You can learn more about how to add cusrtomise the Chart of Accounts in MYOB and Xero in the videos below:
North Park Stationery Supplies have two bank accounts
| Account | Account Details |
|---|---|
|
ANZ - North Park SS Trading Account |
|
|
ANZ - Investment Saver Account |
|
Tax codes are three-letter codes that are assigned to each and every transaction that you process, and they tell your accounting system whether or not there is GST in the transaction or not and what rate. The most common tax codes are:
- GST – for sales/purchases that are subject to GST
- FRE – for sales/purchases where the current rate of GST is NIL eg. basic food items, health services, etc.
- GNR – for purchases where the supplier is not registered for GST but still has an ABN
- N-T or NTR – for transactions that are not a good or service eg. transfers between bank accounts, fines and depreciation
Electronic Payments
Setting Up Electronic Payments in MYOB
- Set Up a Bank Account for Electronic Payments: Go to the Accounting menu and click Manage linked accounts. Under Payroll or Purchases, assign the appropriate bank account for electronic payments.
- Create an ABA File for Bank Upload: After processing payroll or bill payments, go to Banking > Prepare Electronic Payments. Select the transactions and click Bank File. Save the ABA file to your computer, which you will upload to your bank’s online system.
- Upload ABA File to Your Bank: Log into your bank’s online system. Go to the section where you can upload payment files (usually called bulk payments or batch payments). Upload the ABA file and confirm the payment.
- Send Remittances: After processing payments, MYOB can send remittance advices via email to your suppliers.
Watch
Watch the video below to find out how to set up online payments in MYOB.
Setting Up Electronic Payments in Xero
- Set Up Bank Account for Payments: Go to Accounting > Bank Accounts. Add a bank account or edit an existing one, ensuring you include the correct details for batch payments.
- Enable Batch Payments: When paying bills, select Batch Payment at the bottom of the bill screen. Xero will generate a file (usually a .ABA or .CSV file depending on your bank's format).
- Upload the Batch Payment File to the Bank: Log into your bank’s online banking system and find the bulk or batch payments section. Upload the file generated from Xero and confirm the payments.
- Send Remittances: Once the payment batch is processed, Xero allows you to email remittance advices to your suppliers directly from the system.
Watch
Watch the videos below to find out how to add a payment service and how to pay your suppliers with Xero.

Managing Linked Accounts in MYOB
- Go to the Accounting Menu: From the MYOB Business dashboard, click on Accounting in the left-hand menu.
- Select Manage Linked Accounts: In the Accounting section, select Manage Linked Accounts.
- This will bring up a list of linked accounts for different business functions, including:
- Sales: Linked to income accounts for customer receipts and freight.
- Purchases: Linked to expense accounts for bills, discounts, and supplier deposits.
- Payroll: Linked to accounts for wages, PAYG, and superannuation.
- Categories & Banking: Linked to accounts for bank transactions, electronic payments, and undeposited funds.
- Change Linked Accounts: For each category (Sales, Purchases, Payroll, etc.), you can change the linked account by clicking on the dropdown next to each item and selecting a new account from your chart of accounts.
- Create or Edit Accounts: If necessary, you can create new accounts by going to Chart of Accounts and then link them through the Manage Linked Accounts section.
Managing Linked Accounts in Xero
- Access Chart of Accounts: Go to the Accounting menu and select Chart of Accounts.
- Check or Assign Linked Accounts: In Xero, linked accounts are typically assigned to specific functions like bank feeds, payments, and payroll. You can review and change these by editing individual accounts within the chart.
- Manage Bank Accounts for Payments: To link or change the bank account used for transactions like bill payments or payroll, go to Bank Accounts under the Accounting menu and select the account you wish to manage.
- Edit Default Accounts: For invoices, purchases, and payroll, go to the specific settings for these functions (e.g., under Payroll Settings for payroll) and update the linked accounts for things like wages, taxes, and super.
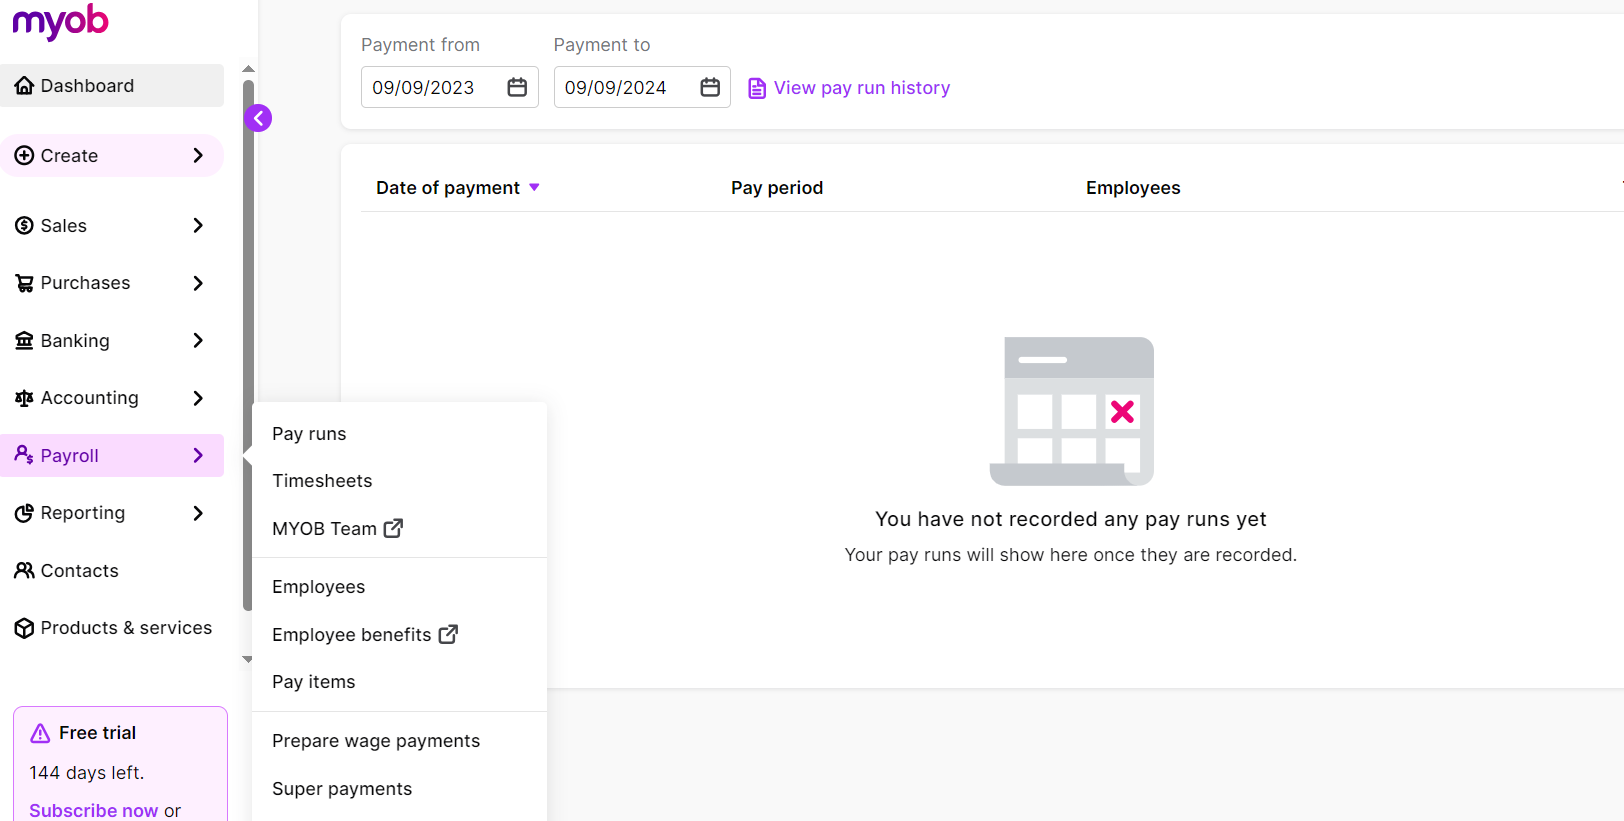
Before you can process payroll you need to set up the payroll details.
Every business's payroll setup is different. It is important that you correctly configure and check your payroll settings so that errors do not occur due to incorrect information being entered when setting up the payroll.
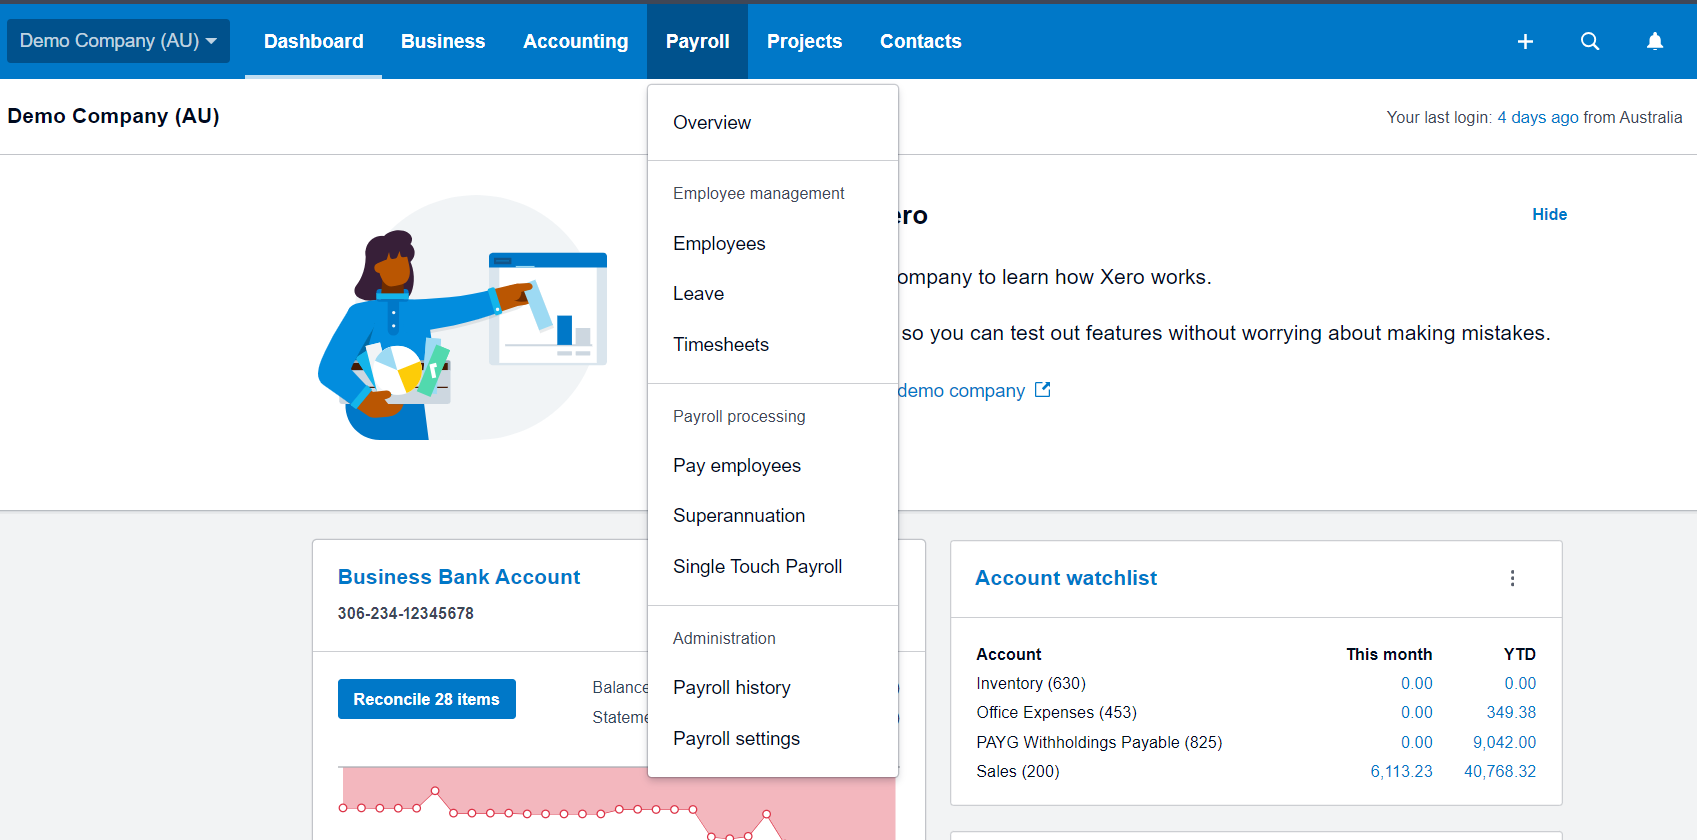
Basic payroll settings in MYOB and Xero can be accessed from the navigation menus under the tab Payroll:
Configuring the payroll settings for North Park Stationery Supplies
General Payroll Information3
- Full-time employee weekly hours are the default hours in your working week. You can change employee hours when you pay them
- You only need to enter a Withholding Payer Number (WPN) if you have one
- You might choose Cents to round net pays down to a specific cent value if you pay cash in MYOB. Xero automatically handles rounding to the nearest cent for payroll calculations, including tax and net pay.
- The Tax table revision date is the date the tax tables in MYOB apply from. The tax tables (or tax scales) in MYOB are updated annually and provided by the ATO. This ensures that pays dated from 1 July onwards will use the latest tax tables to ensure the correct amount of tax is calculated on your employees' pays
- Xero does not have a specific "Tax Table Revision Date" like MYOB. Instead, Xero automatically updates its tax tables in compliance with the Australian Taxation Office (ATO) each year. Xero ensures that the latest tax rates are applied automatically to employee payroll from the start of the new financial year (from 1 July onwards), ensuring compliance with any changes in tax laws.
- You can set a Default Superannuation fund if you have one and it'll apply to all new employees, or you can set up your super funds later in both MYOB and Xero
- If you have employees paid by the hour, you can opt to use timesheets to track their hours in MYOB. In Xero, you can opt to use timesheets by selecting the option "Timesheet Only" in the pay template.
North Park Stationery Supplies has provided the following payroll information which we will now use to configure the general payroll settings.
General Payroll Information - North Park Stationery Supplies
| Full-time employee weekly hours |
38 hrs based on Clerks - Private Sector Award 2000. |
|---|---|
| Cents to round net pay down to | .05 |
| Default Superannuation fund | Rest Industry Super |
| Fund contact details |
Ph: 1300 300 778 |
Superannuation
MYOB
-
Access Payroll Settings:
- Go to the Payroll tab in MYOB and select Payroll Settings.
-
Set Up Superannuation Funds:
- Under Payroll Settings, you’ll find a section for Superannuation.
- Click Add Super Fund or Create Super Fund. You will need to input the details of the superannuation provider and relevant fund details.
-
Configure Superannuation Categories:
- After adding the super fund, set up the superannuation contribution categories (e.g., Super Guarantee).
- Go to Payroll Categories > Superannuation and ensure that the correct default account is selected for super payments.
-
Assign Super Funds to Employees:
- Once the fund is set up, you can assign the default fund to employees or add individual superannuation funds when setting up employees' payroll details.
Xero
-
Go to Payroll Settings:
- In Xero, navigate to Payroll > Payroll Settings.
-
Add Superannuation Funds:
- Under Superannuation, click Add Superannuation Fund. Enter the super fund’s details, such as the fund name, USI (Unique Superannuation Identifier), and any relevant membership information.
-
Assign Default Super Fund:
- You can also assign a default super fund under Payroll Settings. This default will apply to any new employees, but you can override this with specific funds if needed.
-
Assign Super Funds to Employees:
- While setting up or editing an employee’s payroll details, assign them the appropriate super fund from the list of available funds.
-
Pay Superannuation:
- Once superannuation is set up, Xero allows you to process super payments directly through the Auto Super feature (available in Australia). This makes superannuation payments directly from Xero to employees' super funds.
Employment classification
In MYOB, employment classification refers to the categorisation of employees based on their role or position within the company. This can include job titles or other classifications that help organise payroll and reporting.
- Setting Up Employment Classifications:
- Navigate to the Payroll tab and go to the Payroll Categories section.
- Under the employee setup, you can assign an employment classification.
- MYOB provides a default list of classifications, but you can customise this list based on your organisation's needs. You can create new classifications or edit existing ones.
- Assigning Employment Classifications:
- When setting up an employee, go to the Payroll Details section and assign a classification from the list.
- This classification will be used in pay slips and reports for clear documentation of the employee’s role.
In Xero, employment classification isn't as explicit as in MYOB, but you can still categorise employees based on their role or job title during the employee setup process.
-
Assigning Job Titles:
- When setting up an employee in Xero (under Payroll > Employees), you can enter the employee's job title in their personal details.
-
Using Tracking Categories:
- Xero uses tracking categories that can act as classifications to categorise payroll expenses by departments, locations, or roles. This helps track and report expenses for different groups of employees or roles within the company.
-
Payroll Reporting:
- You can use job titles and tracking categories to generate specific payroll reports, allowing for classification based on department or role.
Pay slip email defaults
In MYOB, you can customise the default settings for emailing pay slips to employees. Here’s how to set the pay slip email defaults:
-
Access Payroll Settings:
- Navigate to the Payroll tab and go to Payroll Settings.
-
Customise Pay Slip Email Defaults:
- You can set the default email subject and message for pay slips. This applies to all pay slips you send to employees.
- In the Email Defaults section, you can also specify the From Name and the Reply-To Email Address. This ensures consistency across all communication related to payroll and pay slips.
-
Automatic Pay Slip Emailing:
- Once the default settings are applied, when you process payroll, MYOB will automatically send out the pay slips with the customised email settings.
In Xero, you can also customise how pay slips are emailed to employees. Here’s how to manage this in Xero:
-
Access Payroll Settings:
- Go to Payroll > Payroll Settings.
-
Customising Pay Slip Emails:
- Under the settings, you can set up the default subject and message for the pay slip emails.
- Xero also allows you to specify the From Email address and the Reply-To Email Address for pay slip emails, ensuring they are consistent across your organisation.
-
Sending Pay Slips:
- After processing payroll, Xero will automatically send out pay slips via email with the default settings you’ve configured.
In MYOB
-
Access Payroll Categories:
- In MYOB, go to the Payroll tab and select Payroll Categories.
-
Set Up Wages:
- Under Payroll Categories, choose Wages.
- Click New to create a new wage category (for example, hourly wage or overtime).
- Enter the name of the wage category, set the type (Hourly or Salary), and configure how it will be calculated (e.g., fixed rate or per hour).
- Assign the wage category to specific employees if needed by ticking their names.
-
Set Up Deductions:
- Still under Payroll Categories, go to the Deductions section.
- Click New to create a new deduction category, such as union fees, salary sacrifice, or health insurance.
- Enter the name of the deduction, define the calculation basis (e.g., fixed amount or percentage of wage), and assign it to relevant employees.
- You can also choose the linked liability account to track where the deduction is posted.
-
Assign to Employees:
- For both wages and deductions, after setting up the categories, go to the Employees section under Payroll.
- Open an employee’s record and go to the Payroll Details tab to assign specific wages or deductions to that employee.
Watch
Watch the videos in the playlist below to find out more about Payroll (AU) with MYOB Business.
In Xero
-
Access Payroll Settings:
- In Xero, go to Payroll > Pay Items.
-
Set Up Wages:
- In Pay Items, under the Earnings tab, click Add to create a new wage type (e.g., salary, hourly rate, or overtime).
- Enter a name for the wage item, set the type (e.g., Ordinary Time Earnings), and define whether it’s based on a fixed amount or per hour.
- Assign the wage item to the relevant employees by adding it to their pay template.
-
Set Up Deductions:
- Still under Pay Items, go to the Deductions tab.
- Click Add to create a new deduction category, such as health insurance or other voluntary deductions.
- Define the deduction name and whether it is a fixed amount or a percentage of gross pay.
- Assign the deduction to employees by updating their pay templates with the specific deduction.
-
Assign to Employees:
- Once the wage and deduction items are set up, go to the employee’s profile under Payroll > Employees.
- Open the employee’s Pay Template and assign the appropriate wage and deduction items to their pay.
Watch
Watch the video to learn how to set up your payroll in Xero.