Levelling is the process of identifying the heights of specific points above or below another point on a building site. It can be confusing initially, so let us try and paint a picture to establish your understanding.
Consider the following scenario.
A residential house block positioned on uneven ground, there are some slight hills, a dip in the middle and a slope to one side. The plans say that you should build a house on 900 mm piers. So, the builders diligently set out the site and construct piers that are all exactly 900 mm from the ground. After considering the instructions, it would be assumed the house should be level, right? Wrong! If the measurements are taken from the take ground, the levels (heights) will follow the contours of the ground. The considerations do not stop there. What about sewerage and where it is likely to flow, down the contours of the land or away from the house in a smooth, continuous fall?
The solution, levelling. It is about selecting one point, called the datum and taking all height measurements (above and below) from that.
The following video gives you a visual representation of the previous scenario. It also introduces you to some of the tools used in levelling.
In the initial stages of your career, the terminology, tools and techniques can be a rather overwhelming concept, levelling is no different. There are specific tools, methods, and terminology you need to familiarise yourself with, so you are able to effectively apply levelling techniques to projects. Take some time now to get to know the language of levelling.
Levelling tools and equipment
There are a range of tools and equipment that you will need to become familiar with when carrying out levelling. The following table illustrates some of the more common levelling tools and equipment:
|
Picture |
Tool/equipment |
Use |
Serviceability |
|
|
Automatic level |
To determine levels. They provide high magnification and consist of a level device that is attached to a tripod. They must be used with a staff/rod so that the measurements can be taken and heights can be calculated. These levels can be manual or digital. |
Tripod should be clean and be able to be opened and closed with little trouble, screw to connect level to tripod should be present, level should be clean, glass should be clean for optimal viewing, should be handled with care due to their fragility. |
|
|
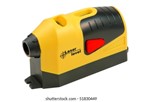
Laser level |
To determine levels. |
Tripod should be clean and be able to be opened and closed with little trouble, screw to connect level to tripod should be present, level should be clean, glass should be clean for optimal viewing, should be handled with care due to their fragility. |
|
|
Plumb bob |
Used before spirit levels were invented, and a tool that uses the law of gravity, a plumb bob is a weight that tapers down to a pointed tip. The top centre of the weight is connected to a string. It is used to find the plumb line. |
Ensure that string is secured. |
|
|
Spirit level |
To check whether surfaces are level and plumb. |
Check for clean surfaces; edges are free from damage; vials are clear and visible; calibration should be done using the reverse reading method. |
|
|
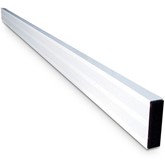
Straight edge |
Straight edges are tools made out of wood, metal or plastic that can be used to mark straight lines, to guide tools and equipment along a straight edge and to check whether materials are straight. They are often used in levelling in conjunction with a spirit level to transfer levels over short distances (up to about 4.000 m). |
Check for nicks, warping. Ensure that they are clean and dry. Ensure that they are not damaged. Must be stored and used according to manufacturer instructions. |
|
|
String line/string level |
To mark a straight line between two points, to mark a straight, level line between two points |
Ensure string is tangle free and not frayed.
|
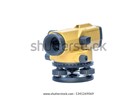


Automatic level
An automatic level is an accurate surveying tool which is used to measure and calculate heights and transfer levels over longer distances than can be achieved by simpler levelling tools like spirit levels. It consists of a telescope with adjustable leveling components which can be fitted to a tripod. It is used with a staff that is marked with measurements.
It is used regularly on building and construction sites to check the accuracy of measurements on the plan, to transfer measurements across the site or to calculate heights of different components of the building.
Components of an automatic level
The following diagram illustrates the components of an automatic level 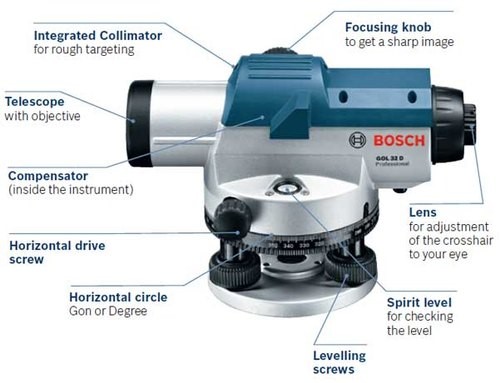
The following video introduces the parts of an automatic level, while you are able to see them in the diagram the video demonstrates how each function operates.
Care
An automatic level is a sensitive piece of equipment. You should avoid knocking or dropping it. It must be kept clean and dry. Use a clear rain cover if using it in poor weather. Always transport it in its protective case. Store it away from excessive heat. It should be checked for accuracy prior to use via a two-peg test (you will learn more about this below).
Setting up
The following steps outline how to set up the automatic level:
Step 1: Ensure the legs of the tripod are firmly in the ground
Step 2: Aim to have the top of the tripod as level as possible
Step 3: Fix the level securely to the tripod with the fixing screw
Step 4: Check the spirit level and adjust the auto level over the top of the dome top until the bubble is in the middle of the circle.
Digital levels
Digital levels fulfil the same functions as an automatic level. But the key differences are they take readings from the staff and perform calculations automatically. They also record and store readings. They are fast and accurate. Digital levels are becoming increasingly popular.
Staff
A staff is used in conjunction with an automatic level. Folding or extending, staffs can be made from aluminium, timber or fibreglass. They are marked with measurements which are read through the automatic leveller’s telescope.
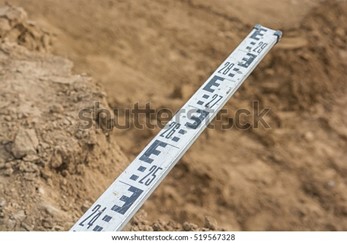
The staff most commonly used on building sites is an E type staff. It is called this because of the pattern of the markings on the staff. The ‘E’s are in 10 mm blocks and are marked in this way so the operator can read the staff in millimetres through the automatic leveller. A second person is usually required to hold the staff in position.
The following image is an example of what an E- staff looks like.
Watch the following video from Buildsum for an introduction to reading the E-type staff.
Two-peg tests
A two-peg test is a test used to check the accuracy of your automatic level. If the test identifies an issue with the level, it can be removed from service and sent away for recalibration. A two-peg test should be conducted each time you set up your level to begin work, if your device is knocked or dropped and if you suspect that a fault has developed.
The following video demonstrates how to apply the two peg test to check the accuracy of your automatic level.
Stadia lines
Stadia lines are lines are the smaller lines that sit horizontally at the top and bottom of the cross-hair lines in your automatic level and are used to calculate distance. The stadia lines can be seen through the telescope of the automatic level and set at a specific distance apply the calculations from the automatic level to determine the distance.
There following formula is used to calculate the distance using the stadia lines.
- D= kS
- D = Distance from the automatic level to the E-Grad Staff.
- K =Stadia constant (or Ratio). This is usually 100 (or 1:100).
- S = Upper Stadia reading minus the Lower Stadia reading.
The following video outlines how to measure distance using stadia lines.
Laser levels
Laser levels are a levelling tool used to transfer heights and levels across a wider area than a simple tool like a water level or a spirit level and straight edge.
Just like with auto levellers, laser levels should be handled carefully. You should transport them in their own protective case, avoid bumping or dropping them and should keep them clean and dry. Laser levels should also be checked regularly for accuracy.
You can also use laser levels in conjunction with a measuring rod (or staff) and receiver to measure heights. This video shows you how to use laser levels to get heights and levels for some steel posts on a building site.
Spirit levels and straight edges
Spirit levels and straight edges are used to determine whether a surface is horizontal (level) or vertical (plumb). In some cases, a spirit level can also be used to check for a 45-degree angle. If the surfaces are uneven, the accuracy may be implicated.
When using spirit levels and straight edges, it is important you select the appropriate level for the job and ensure you have checked the accuracy of level, that is, ensuring it is in good working condition and the edges have no damage and vials are clear. As with any time you are taking measurements or calculations, levels should be no different, you will need to ensure you have double checked to confirm the accuracy of the measurements and levels.
For more information on checking the accuracy of your spirit level (level and plumb) watch the below video:
Straight edges
Straight edges are tools made out of wood, metal or plastic that can be used to mark straight lines, to guide tools and equipment along a straight edge and to check whether materials are straight. They are often used in levelling in conjunction with a spirit level to transfer levels over short distances (up to about 4.000 m).
Water levels
Water levels are simply a clear, flexible length of tubing filled with water to within a couple of centimetres or so from each end. Water levels are based on the principle that water always seeks its own level. The advantage of a water level is that it can be used to transfer levels around corners or obstacles.
String lines
String lines are used by marking a straight line between two points or, when used in conjunction with a line. It is important to be mindful, however, a string line may not be suitable where you are unable to anchor it or where there is an obstacle in its pat and you will need to ensure it is tangle free. Correct use: Ensure that line is secured. Make sure that there is no sag in the line and that it is properly attached.
For more information about how to use a string line, watch the below video.