
The term ‘hand tools’ describes those tools that are powered by you. They don’t rely on an external power source to drive them. While many of these tools have a powered option which can be easier to use, there are times when power is unavailable or you need the added control of the hand tool option.
This isn’t an exhaustive list of all of the tools that you will use. We have focused on those tools that it’s likely that you will come across during the first year or so of your training. Take the time to familiarise yourself with any new tool before you use it. Make sure you know how to use it safely, how to check it for serviceability, what PPE you should be utilising and how to clean and store it. Ensure that you utilise appropriate PPE, follow the manufacturer instructions and work safely.
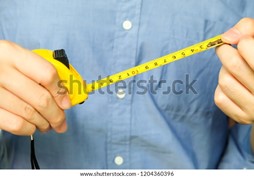
Suitable for: Retractable tape measures are most suitable for measuring distances of less than 10 metres. Characteristic/ descriptor They have an inbuilt mechanism which automatically winds the measuring tape (called the blade) into the housing.
Limitations: Use can be limited by damage to the blade, the blade not being long enough, difficulty obtaining an accurate enough measurement (can be caused by stretching to the hook, drooping in the tape etc), lack of accessibility and so on.
PPE: Safety glasses.
Serviceability: The blade should be free of kinks, the mechanism should work effectively, measurements must be legible, blade should be long enough for the task and the hooks should be checked for stretching or damage.
Correct use: Ensure that the tape is flat against the surface. The tape should be horizontal or plumb if measuring across an open span. Enlist the help of a second person to adjust for damage/stretching to hook.
Special notes/precautions/WHS: Ensure that metal tapes are clean and dry before retracting.
For more information on using a tape measure watch the video below.
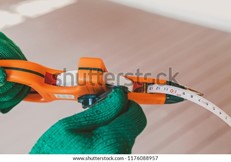
Suitable for: Measuring longer distances (usually over 10m). These tape measures are retracted manually.
Limitations: Use can be limited by damage to blade, the tape not being long enough and high winds.
PPE: Safety glasses.
Serviceability: The blade should be free of kinks and damage, the mechanism should work effectively, measurements must be legible, blade should be long enough for the task and the hooks should be checked for stretching or damage.
Correct use: Ensure that the tape is taught and that it is horizontal or plumb if measuring across an open span. Enlist the help of a second person to adjust for damage/stretching to hook.
Special notes/precautions/WHS: Ensure that the tape is clean and dry before retracting.
For more information on using a tape measure watch the video below.
Suitable for: Measuring and marking straight lines.
Characteristic/ description: A folding or steel ruler has the following components:
- inbuilt extender
- pivot points the enable the ruler to unfold and lock securely into place to take measurements.
- measures approximately 2-3m when extended.
Limitations: Use can be limited where the surface is not flat, there are chips in edge of the blade, the ruler is not long enough, or the measurements are not visible.
PPE: Standard precautions.
Serviceability: Ensure that the edges are free from chips and nicks and that markings are legible. Check for warping or bending.
Correct use: When taking multiple measurements, work from left to right rather than moving the ruler.
Special notes/precautions/WHS: Clean and dry the ruler after each use and before storage. Don’t be tempted to use your ruler as a straight edge and vice versa.
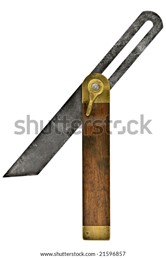
Suitable for: A combination square is used for measuring angles (45 and 90 degrees), centre if a circular object, as well as height or depth.
Characteristic/ description: Combination squares are commonly equipped with:
- a blade (steel ruler)
- protractor
- centre head
- bubble vial for ensuring object is level
- moving heads called the squareheads
- adjustable knob.
Limitations: Insufficient access, damage to tool.
PPE: standard precautions.
Serviceability: Is the blade free of chips? Are the measurements legible? Is the adjustable screw in good working order? Is the bubble vial clear?
Special notes/precautions/WHS: Test for accuracy prior to use (against set square/triangle).
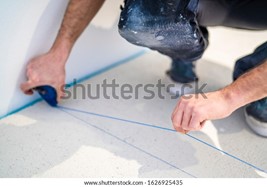
Suitable for: Marking a straight line between two points, marking a straight, level line between two points.
Characteristic/ description: Stringlines are a relatively simple device made of string and a plumb bob or plumb line, which is a small piece of metal that weighs down the string to measure the distance between the two points.
Limitations: A string line may not be suitable where you are unable to anchor it or where there is an obstacle in its path.
PPE: Standard precautions.
Serviceability: Ensure that it is tangle free.
Correct use: Ensure that line is secured. Make sure that there is no sag in the line and that it is properly attached.
For more information about how to use a string line, watch the video below.
Fun fact!
A string line is one of the oldest of basic hand tools and plumb bobs are said to be used by the Ancient Egyptians during the building of the pyramids.
Suitable for: A chalk line is used for marking a long, straight line on flat surfaces.
Characteristic/ description: A chalk line is a device with:
- retractable string
- geared reel
- plastic casing that disperses the chalk when taking measurements.
- string at the end with a hook like attachment which can be used to secure at point of measurement.
Limitations: A chalk line may not be suitable where the surface is uneven or where there is an obstacle in the way.
PPE: Standard precautions.
Serviceability: Check that the chalk reservoir is filled.
Correct use: Ensure that line is secure, pull the line tight, snap the line cleanly.
For a simple demonstration of using a chalk line, watch the video below.
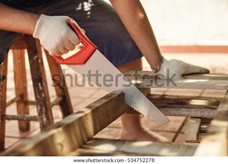
Suitable for: Cutting timber and other materials
Characteristic/ description: A hand saw is characterised by the following:
- spring-steel blade with teeth set along the bottom edge.
- timber or plastic handle set on one end that allows the user to push and then pull the blade across the timber
Limitations: Hand saws may not be suitable where there are knots or nails in the timber, where there is damage to the teeth of the saw or where you have insufficient access to use the saw safely or effectively.
PPE: Standard precautions, mask, gloves, eye protection.
Serviceability: Check the saw for signs of damage (loose handle, missing teeth, bent blade etc). Make sure the saw is clean and dry before and after use. Lightly oil the blade before storage to help prevent rusting.
Correct use:
- Check the material for nails/screws etc.
- Mark the cutline, select the right type and size saw for the job.
- Hold the saw correctly and start slowly.
- The angle that you start at will depend on what you are cutting and the type of saw that you are using (see the video below).
- Use long, clean strokes.
- Don’t force or twist the blade.
- Use a mitre box to help you establish the correct angle if required.
Special notes/precautions/WHS: Do not test the sharpness of any saw with your hand. Secure material with clamps, vice etc if possible.
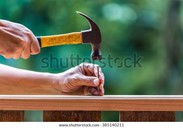
Suitable for: Driving/removing nails, dowel pins, spikes/stakes.
Characteristic: They have a metal head which is hardened and tempered, and a timber, steel or fibreglass handle that is usually fitted with a leather or rubber grip.
Limitations: Could damage soft surface, not suitable for driving metal stakes, not suitable for use with chisels.
PPE: Standard precautions, eye protection.
Serviceability: Check for signs of damage (loose/cracked handle, chips or cracks in head). Listen for a ‘ringing’ sound which can indicate a loose head. Make sure hammer is clean and dry before and after use.
Correct use:
- Select the correct hammer for the job
- Hold the hammer as if you are shaking hands.
- Hold the handle depending on whether you are looking for power or control (closer to head for control, at end of handle for increased power).
- Avoid holding the neck of the hammer (sometimes called strangling the hammer).
- Hold the nail close to top and tap lightly to get started.
- Use a holder for small nails.
- Drill pilot holes and/or lubricate nails where necessary to prevent splitting.
- Use smooth, deliberate swings.
Special notes/precautions/WHS: Do not hit the heads of two hammers together – the hardened steel can chip.
The following is a video with tips for using a hammer correctly.
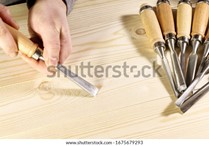
Suitable for: Removing sections of wood to create joins (or joints) in framing, flooring, stairs, cutting mortises etc.
Characteristic/description: Wood chisels are characterised with
- sharpened steel end or blade
- timber or hardened plastic handle designed to be struck with a mallet or hammer3
Limitations: You may be limited to damage to the blade, the chisels may need sharpening or you may not have the type of chisel available that you need.
PPE: Standard precautions, eye protection.
Serviceability: Check for signs of damage (loose/cracked handle, chips in blade, ensure cutting edge is sharp). Make sure chisel is clean and dry before and after use. Store chisels with protective covers when not in use. Lightly oil blades prior to storage to help prevent rust.
Correct use:
- Select the correct chisel for the job.
- Check the material that you are working with for nails, screws, knots etc.
- Secure the material with clamps where possible.
- Keep your hands and body behind the cutting edge.
- Use a wooden or plastic mallet, not a hammer, to strike the chisel.
Special notes/precautions/WHS: Stores chisels with protective covers or otherwise safely when not in use.
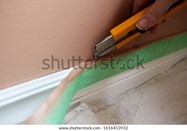
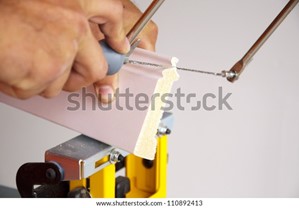
Suitable for: scoring, trimming, sharpening pencils and accurately marking.
Characteristics/ description: Small, pocket sized knife with either straight edge or serrated blade that can be retracted into a durable plastic case which doubles as the handle.
Limitations: Knife may not be strong enough for some materials, for some purposes, the knife is best used with a straight edge so use could be limited where one is not available.
PPE: Standard precautions, gloves.
Serviceability: Keep the blade clean and dry, check for nicks in blade, ensure that the blade is sharp.
Correct use:
- Hold material safely and securely before cutting or scoring it.
- Use a straight edge or other guide where possible.
- Store the knife securely when it’s not in use.
Special notes/precautions/WHS: ensure that the blade is retracted when not in use. Dispose of used blades or blade segments safely and responsibly. This tool must not be caried off site and on your person because it has been classified as a weapon.5
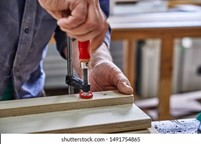
Suitable for: Joining materials, securing materials for cutting etc.
Characteristic/ description: Clamps are available in a range of types and sizes, from the traditional heavy duty ‘G’ clamps to quick action clamps, long sash clamps and the very small and lightweight spring clamps made from metal with durable plastic or metal handles 6
Limitations: You may not be able to use a clamp if you are unable to secure the clamp adequately, you don’t have access to the right type of clamp, you can’t get adequate access to fit the clamp or if the tools are damaged.
PPE: Standard precautions.
Serviceability: Ensure that clamps are in good working order, that all moving parts are working smoothly and that the clamps are clean and dry.
Correct use: Select the right clamp for each job (don’t try and ‘make do’), open the clamp to the correct width, protect surfaces where necessary, do not overtighten.
Special notes/precautions/WHS: Protect/guard your hands to avoid trapping/pinching.
Suitable for: Cutting curved lines in timber and other materials. Often used for mouldings etc.
Characteristics/ Description: U shaped narrow blade attached to plastic durable handle.
Limitations: You can break the blade by twisting it.
PPE: Standard precautions, eye protection, mask.
For more information on using a coping saw, watch the video below.
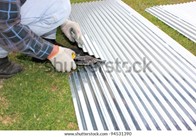
Suitable for: Cutting thinner sheets of metal.
Characteristic description: Designed to fit your hand, tin snips have straight handles with a spring between them and two sharp blades resembling scissors.
Limitations: Tin snips are designed for thinner sheets of metal (flashing etc). They are not designed for thicker metals. Also tin snips are made to fit your dominant hand. Their use can be limited if the right style is not available.
PPE: Standard precautions, gloves.
Serviceability: Check that snips are clean and dry, that hinges are smooth, that blades are free of nicks and damage.
Correct use:
- Select correct snips for the job (curved cut/straight cut/left- or right-handed etc).
- Mark the surface and check accuracy before making any cuts.
- Make long, firm cuts.
- Roll cut edge away to provide a clear path for the blades.
Special notes/precautions/WHS: Student should handle sharp edges carefully and clean up carefully. Metal fragments and waste should be disposed of according to workplace guidelines. Consider long sleeves.
For more information on using tin snips, watch the video below.

Suitable for: Checking whether a surface is horizontal (level) or vertical (plumb). In some cases, a spirit level can also be used to check for a 45 degree angle.
Characteristic/ description: Spirit levels are usually made from timber or aluminium, and have a number of glass or plastic tubes containing a liquid with a trapped air bubble inside.7
Limitations: Uneven surfaces.
PPE: Standard precautions.
Serviceability: Ensure that all surfaces are clean, that edges are free from damage and that vials are clear and visible. Check for level and plumb using reverse method (see below).
Correct use:
- Select the right type of spirit level for the job.
- Check the accuracy of the level.
- Ensure surface is smooth or establish string line or other levelling technique
- Double check to confirm measurements/levels.
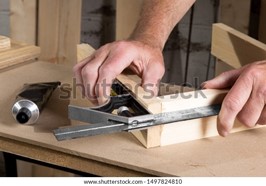
Suitable for: Hand planes are tools that are either pushed or pulled along the surface of a piece of timber to scrape away or remove timber to a set line or intended surface. There are many planes including jointer or try planes, jack planes, smoother planes and block planes, just to name a few.4
Characteristic/ description:
Limitations:
