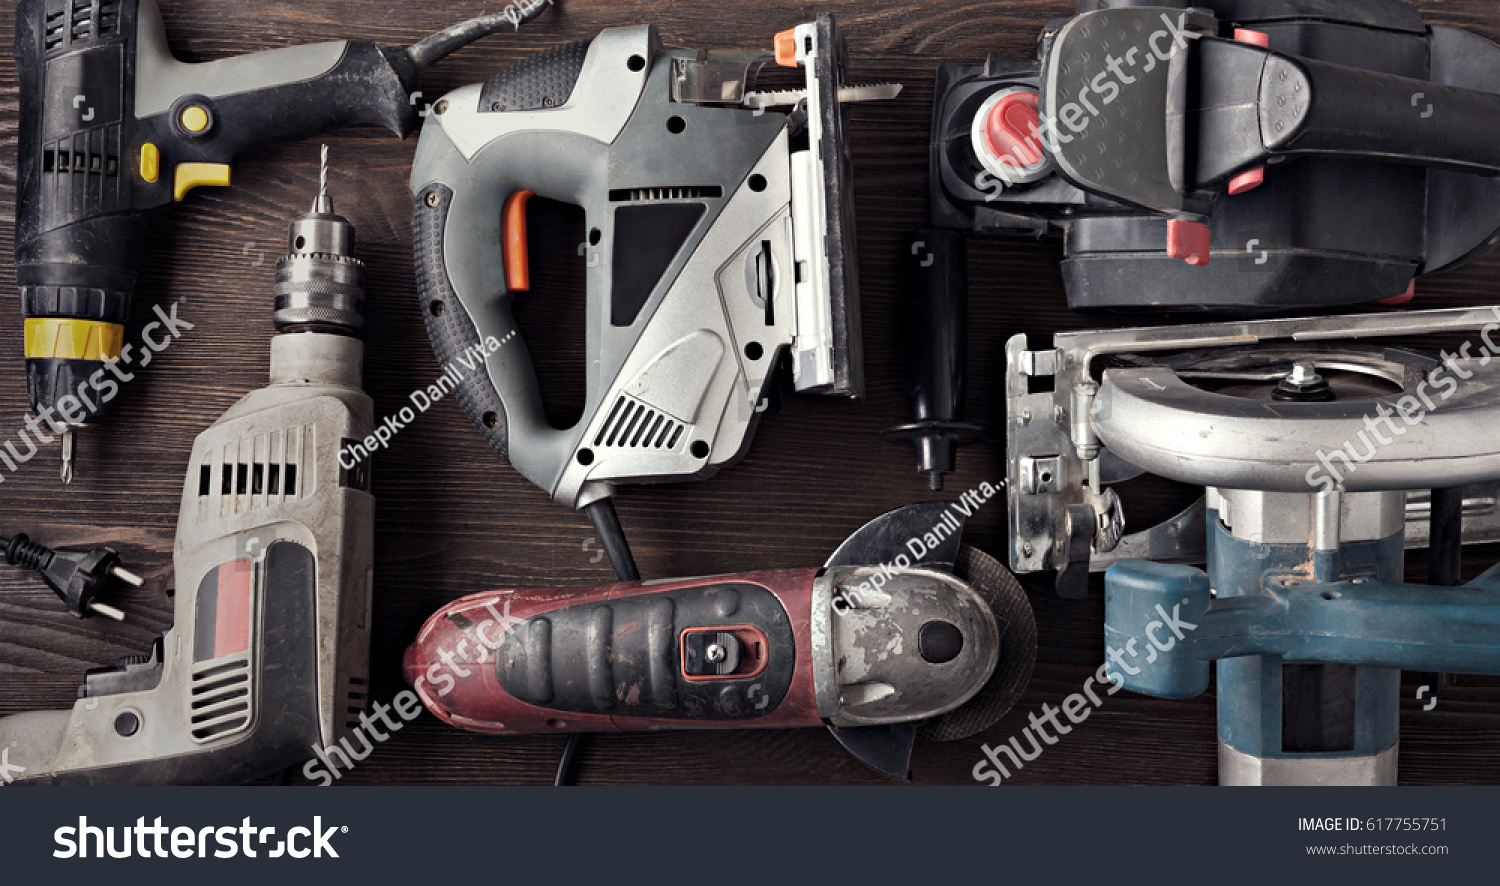
Power tools are those tools that are powered by an external power source. External power sources include:
 |
 |
 |
 |
| Electricity | Batteries (rechargeable or disposable) | Pneumatics (compressed air) | Fuel (petrol or diesel). |
Most power tools come with additional safety risks and serviceability requirements and it is important to consider the manufacturer instructions carefully.
Watch this video from Safe Work Australia about the safety rules for using power tools.

Suitable for: Making longer, straight, clean cuts in timber and other materials. ripping grooving trenching cross-cutting, rebating, compound and cutting.
Characteristic/ description: Circular saws can be cordless as well as being operated by a main power supply. Their common features include:
- Power source: Where the tool obtains electricity needed for operation. On cordless circular saws, they are equipped with a rechargeable battery.
- Switch: The switch activates the power and allows the electricity to operate the tool, the switch on a circular tool is a trigger and once pressure has been applied to the trigger the tool begins to operate.
- Motor: the motor converts the electricity into motion to enable to the tool to operate. Some higher end circular saws are equipped with an electric break that stops the blade on the release of the switch to maintain safety and preparation between cuts
- Transmission: The transmission indicates the speed in which the saw operates
- Lock nut system holds the blade in position.
- Shaft lock lever: Shaft lock lever keeps the saw stationary when removing the blade.
- Bevel lever: Holds the blade in place and sets the angle, once the lever has been released, the circular saw is able to move freely between the default vertical position and a 45-degree angle.
- Housing: the housing of a circular saw is often made of a combination of plastic and metal. All circular saws are equipped with a protective guard that sits on the outside of the blade. Some higher end circular saws have integrated lasers and LED light to maintain accuracy when cutting.
- Handle: The handle is where your right hand is positioned and where to operate the switch with pressure.
- Support handle The support handle is where you position your left hand to maintain stability for safety and accuracy when cutting.
- Base plate: Sits at the bottom of the saw and rests on the surface to maintain stability of the materials
- Chip chute is found on all circular saws and is attached to the protective guard and directs the debris away from the tool
- Parallel guide: Guides the saw along the length of the surface which needs to be cut, running through the base plate of the tool. 12
Limitations: Consider the environment that you are working in – if you are uncertain about the safety of using the tool, don’t proceed. You should also avoid timber with knots, nails etc.
PPE: Standard precautions, gloves, mask, eye protection, hearing protection.
Serviceability: Check the power cord and plug for signs of wear (or check battery for signs of wear, check connection points, ensure battery is charged), check casing for cracks/damage/splitting, check blade for signs of damage/wear (such as missing teeth, chipping etc), ensure guides and protective shield are in place and working effectively.
Correct use:
- Ensure that the saw is unplugged and/or battery is disconnected before making any adjustments.
- Select and fit the right blade for the job.
- Set offset and depth accurately.
- Ensure material is secured safely.
- Work against a straight edge wherever possible to ensure that you have good control.
- Work on a purpose-built surface at an appropriate height where possible.
- Work smoothly and at a constant speed.
- Keep all guards in place.
- Practise for safety before using unfamiliar equipment.
- Familiarise yourself with the with functions and features of the specific brand and model that you are working with.
Special notes/precautions/WHS: This information is general and must be read in conjunction with the manufacturer instructions. Consider lighting and dust extraction.
For more information about using circular saw, watch the videos below.
Suitable for: cutting a variety of materials, demolition.
Characteristics/ description: A reciprocating saw looks relatively similar to a hand drill, however the features include:
- there is a saw that moves back and forth.
- motor
- chuck to secure the blade before use.
- handle with a trigger which has control variables depending on how fast or slow the tool needs to be operated. The operator can control the speed with the amount of pressure placed on the trigger.
Reciprocating saws can come with various blades that can be used, depending on the task at hand. Some blades can be used for metal as well as timber/ wood.
Limitations: Hidden obstacles, potential safety issues and is more restricted to simple cuts and larger materials.
PPE: Standard precautions, gloves, mask, hearing protection.
Serviceability: Check the power cord and plug for signs of wear (or check battery for signs of wear, check connection points, ensure battery is charged), check casing for cracks/damage/splitting, check blade for signs of damage/wear (ie missing teeth, chipping etc), ensure guides and protective shield are in place and working effectively.
Correct use:
- Ensure that the saw is unplugged and/or battery is disconnected before making any adjustments.
- Select and fit the right blade for the job according to manufacturer instructions.
- Plan and mark cuts according to the plans and specifications.
- Ensure that you check for services, safety issues, hidden obstructions etc before making any cuts.
- Adjust the speed and steady the saw against the surface being cut.
- Let the saw do the work – don’t force the saw or apply undue pressure.
- Check the blade regularly (follow safety procedures).
- Practise for safety before using any new or unfamiliar equipment.
- Familiarise yourself with the with functions and features of the specific brand and model that you are working with.
Special notes/precautions/WHS: This information is general and must be read in conjunction with the manufacturer instructions. Consider lighting and dust extraction.
For more information on using a reciprocating saw, watch the videos below.
Fun fact!
The blade of the saw can be inserted facing upwards or downwards (depending on the task)

Suitable for: A sliding compound saw is used to make angled and bevelled cuts on pieces of timber which are wider than the saw.
Characteristics/ description: A sliding compound saw is also known as a mitre saw and commonly used to cut timber on an angle. The compound saw sits on a benchtop comprising of:
- a metal jagged blade,
- a guard over top of the blade which moves when the saw is moved into position for cutting.
- a fence which is used to keep the timber in place and to support the cutting of straight lines in the wood.
- a lever with a gauge that is used to set the angle of the saw along with a bevel which helps to manoeuvre the position of saw.
- handle with a trigger at the top to operate the saw. 1
Limitations: Sliding compound saws are not suitable for use on some larger pieces of timber.
PPE: Standard precautions, eye protection, gloves, mask, hearing protection.
Serviceability: Check the power cord and plug for signs of wear (or check the battery for signs of wear, check connection points, ensure the battery is charged), check the casing for cracks/damage/splitting, check blade for signs of damage/wear (such as missing teeth, chipping etc), ensure guides and protective shields are in place and working effectively.
Correct use:
- Use the saw according to manufacturer instructions.
- Ensure that the blade guard is in place every time that you use the saw.
- Mark the material that you are going to cut, align the material against the guides and (before starting the saw), check that it is in the correct position by lowering the blade. The blade should sit to the outside (or waste) side of the line.
- Raise the blade and start the saw in the up position. Wait until the blade has reached full speed before making the cut.
- Leave the saw in the down position until the blade has come to a stop.
- Adjust guides before starting saw.
- Hold material on the open side (widest angle),
- Work on a purpose-built bench or saw-horse at correct height.
- Practise for safety before using unfamiliar equipment.
- Familiarise yourself with the functions and features of the specific model that you will be working with.
Special notes/precautions/WHS: This information is general and must be read in conjunction with the manufacturer instructions. Consider lighting and dust extraction.
For a detailed look at sliding compound saws (or mitre saws), watch the video below.

Suitable for: Making straight or curved cuts in a variety of materials.
Characteristics/ description: Similar to a circular saw, the jigsaw is equipped with the following features:
- a blade
- Handle
- an adjustable base plate
- trigger which operate the tool.
- Straight fixed blade.
There are two types of jigsaws commonly used in the construction industry, one being a top grip, where as the name suggests, has a handle at the top of the jigsaw and the other being a barrel grip where the grip sits behind the motor.
Limitations: Nails or knots in timber, potential safety issues.
PPE: Standard precautions, eye protection, mask, hearing protection.
Serviceability: Check the power cord and plug for signs of wear (or check the battery for signs of wear, check connection points, ensure the battery is charged), check the casing for cracks/ damage/splitting, check blade for signs of damage/wear (such as missing teeth, chipping etc), ensure guides and protective shields are in place and working effectively.
Correct use:
- Use the saw according to manufacturer instructions.
- Ensure that the blade guard is in place.
- Secure material using clamps/ vice where possible.
- Check that you have sufficient clearance below the material being cut.
- Check material for nails etc before making any cuts.
- Fit correct blade.
- Work on a purpose-built bench or saw-horse at correct height where possible.
- Apply a steady, guiding pressure but don’t force the tool.
- Practise for safety before using unfamiliar equipment.
- Familiarise yourself with the functions and features of the specific model that you will be working with.
Special notes/precautions/WHS: This information is general and must be read in conjunction with the manufacturer instructions. Consider lighting and dust extraction.
For more information on using a jigsaw, watch the below video.

Suitable for: grinding, cutting (cement, reo, metal, etc), sanding, polishing, sharpening, removing mortar (tuckpointing).
Characteristics/ description: Angle grinders are a handheld power tool powered by compressed air, battery, electricity, or petrol engine. Angle grinders come with a variety of discs depending on the task at hand. Typically, an angle grinder has:
- two handles, one at the rear and one at the top for added control along with
- two triggers, at the base and top of the rear handle.
- Rotating circular blade
- Guard that sits on the top of the blade
Limitations: Lack of accessibility, potential safety issue, discs not suitable.
PPE: Standard precautions, gloves, mask/full face mask/shield/ visor, breathing protection, hearing protection, eye protection.
Serviceability: Check the power cord and plug for signs of wear (or check the battery for signs of wear, check connection points, ensure the battery is charged), check the casing for cracks/ damage/splitting, check disk for signs of wear/damage (such as dull spots, chipping etc), ensure guides and protective shields are in place and working effectively.
Correct use:
- Select appropriate wheel/disc.
- Use according to manufacturer instructions.
- Ensure handle is fitted firmly.
- Maintain a firm grip.
- Use two hands.
- Ensure others are clear of area.
- Ensure materials are secure where possible.
- Check for obstructions/wiring etc before operating grinder.
- Use guards where fitted.
- Ensure blades are spinning away from you.
- Ensure debris falls clear.
- Don’t use an angle grinder around combustible gases and liquids.
- Practise for safety before using unfamiliar equipment.
- Familiarise yourself with the functions and features of the specific model that you will be working with.
Special notes/precautions/WHS: This information is general and must be read in conjunction with the manufacturer instructions. Consider lighting and dust extraction.
An angle grinder is one of the more dangerous tools that you will use. This video has some important angle grinder safety tips.

Suitable for: smoothing and levelling timber.
Characteristics/ description: The planer is an electrical tool with the following features:
- a rapidly circulating blade beneath the tool
- adjustable front shoe
- fixed rear shoe
- attached to the rear shoe is a foot which acts as a wedge between the blades and the cut surface.
- knob to adjust the depth of cut required.
- handle
- power trigger along with a safety switch. In order for the trigger to turn the planer on, the safety switch needs to be pushed in.
Limitations: Noise, dust issues.
PPE: Standard precautions, gloves, mask, eye protection, hearing protection.
Serviceability: Check the power cord and plug for signs of wear (or check the battery for signs of wear, check connection points, ensure the battery is charged), check the casing for cracks/damage/splitting, check blade for signs of damage/wear (such as chipping, damage, blunt etc), ensure guides and protective shields are in place and working effectively.
Correct use:
- Check the material that you will be working with for nails, knots etc.
- Secure the material firmly where possible.
- Set up the bench, planer and material for dominant hand (ie dominant hand at back of planer, non-dominant hand as guide at front).
- Maintain a steady, direct rhythm.
- Avoid dropping the tool off the end of the material to prevent chipping/splintering.
- Practise for safety before using unfamiliar equipment.
- Familiarise yourself with the functions and features of the specific model that you will be working with.
Special notes/precautions/WHS: This information is general and must be read in conjunction with the manufacturer instructions. Consider lighting and dust extraction.
For some basic tips on using a planer, watch the video below.

Suitable for: trimming edges, cutting laminate and plastic, hollowing out designs in timber, cutting hinge mortises.
Characteristics/ Description: Most laminate trimers or routers are able to be used with one hand and are equipped with:
- Fixed base- for stability
- Locking clips- aide with motor release and depth adjustment
- Motor- to enable operation.
- LED- light integrated for precision and visibility.
Limitations: Noise, access, risk of chipping.
PPE: Standard precautions, mask, eye protection, hearing protection.
Serviceability: Check the power cord and plug for signs of wear (or check the battery for signs of wear, check connection points, ensure the battery is charged), check the casing for cracks/ damage/splitting, check disk for signs of damage/wear (such as dull spots, chipping etc), ensure guides and protective shields are in place and working effectively.
Correct use:
- Follow all manufacturer instructions.
- Ensure that the bit is clean and sharp.
- Fit an appropriate bit.
- Adjust router speed for size of bit.
- When using a router, work from left to right.
- Secure material using clamps or a vice where possible.
- Check material for obstructions.
- You should work slowly and steadily.
- To avoid splintering, begin with shallow cuts, working with the grain where possible.
- Working in the correct direction and in the correct order will also avoid chipping and splitting.
- Practise for safety before using unfamiliar equipment.
- Familiarise yourself with the functions and features of the specific model that you will be working with.
Special notes/precautions/WHS: This information is general and must be read in conjunction with the manufacturer instructions. Consider lighting and dust extraction.
For tips on using a laminate trimmer or router watch the video below.

Suitable for: Drilling holes in a range of materials.
Characteristics/ description: Drills are commonly equipped with the following:
- Power source, which provides the drill with electricity or in the case of a cordless drill, a rechargeable battery. Some cordless drills available are equipped with a better indicator to determine how much power is remaining.
- Switch, turns the tool on and allows the electricity to flow through the tool. On a cordless drill, you will find a variable speed trigger which starts the drill and indicates the level of speed which the drill operate which depends on the amount of pressure applied to the trigger.
- Forward/ reverse switch, this changes the direction of the drill and is found on all cordless drills. This switch has a neutral position to prevent accidental operation.
- Clutch collar enables for repetitive motions and resting points. All cordless drills are equipped with this function and is activated by selecting the torque setting, number between 6-24. The numbers are an indicator of the selected torque. Once this has been reached, the chuck will stop rotating.
- Mode switch is integrated in cordless drills enabling the operator to switch between screw driving, drilling, and hammer drilling.
- Motor is an integral part of all power tools putting the electricity into motion.
- Transmission or a gear box indicates the speed in which the drill needs to operate.
- Chuck holds the drill accessories into place, all cordless drills have keyless chucks making them quick and operatable completely by hand.
- Housing protects the internal compartments of the drill.
- Handle is where you hold and apply pressure to the drill, cordless drills have a pistol grip covered with rubber for comfort.
- Side handle the side handle adds stability and stops rotation, however, is only found on heavy duty cordless drills.
- Depth stop is a small metal (sometimes plastic) rod positioned on the side handle of the drill. The depth stop is designed to be set to ensure you are not drilling further into a hole then needed.13
Limitations: Not for heavier duty materials like masonry (see hammer drill).
PPE: Standard precautions, mask, eye protection, hearing protection.
Serviceability: Check the power cord and plug for signs of wear (or check the battery for signs of wear, check connection points, ensure the battery is charged), check the casing for cracks/ damage/splitting, check bit for signs of damage/wear (such as blunt, burring, broken etc), ensure guides and protective shields are in place and working effectively.
Correct use:
- Work according to manufacturer instructions.
- Selects correct drill bit (size and depth, appropriate to material etc).
- Check other settings (speed, torque, direction).
- Secures material where possible.
- Checks for obstructions before drilling.
- Check for clearance.
- Marks holes.
- Touch the bit to the surface before engaging the drill to avoid skipping.
- Start slowly and allow the bit to cut into the material before speeding up.
- Apply steady, constant pressure.
- Keep the drill spinning in the same direction while withdrawing the bit – this cleans the bit and the hole.
- Familiarise yourself with the functions and features of the specific model that you will be working with.
Special notes/precautions/WHS: This information is general and must be read in conjunction with the manufacturer instructions.

Suitable for: heavy duty drilling (structural concrete, raising tiles, large holes in dense timber etc. Hammer drills often have a dual function so that you can ‘lock’ the bit. This is so that you can prevent the bit from spinning, allowing you to fit a chisel bit or range of other bits and use the drill like a mini jack hammer.
Characteristics/ description: The rotary hammer drill is an electrical power tool and is equipped with the following functions:
- switch to turn the tool on. This switch or trigger is variable meaning it can adjust the speed to which the drill operates.
- lock button which fixes the speed.
- Forward/ reverse switch that enables the change in direction, however, is not found on all rotary hammer drills.
- Motor, this is essentially the ‘engine’ of the tool; meaning it is what converts the electricity to motion.
- Mode switch, this function allows you to switch between different drilling modes.
- The chuck is what grips the accessories or drill bits into place.
- Housing protects the internal components of the drill and are sometimes equipped with anti-vibration technology.
- Handle is where you hold and apply pressure to the drill and usually has a pistol grip handle.
- Side handle stops the rotation and provides additional stability.
- Depth stop, a small metal (sometimes plastic) rod, that sits on the handle of the drill and helps to set and secure the depth of the hole.10
Limitations: Noise, underpowered, overpowered, too much torque.
PPE: Standard precautions, mask, eye protection, hearing protection.
Serviceability: Check the power cord and plug for signs of wear (or check the battery for signs of wear, check connection points, ensure the battery is charged), check the casing for cracks/damage/splitting, check bit for signs of damage/wear (such as blunt, burring, broken etc), ensure guides and protective shields are in place and working effectively.
Correct use:
- Select the mode depending on function required (drilling/hammer function).
- Measure and set the depth stop if using the drilling function.
- Select and set the side handle angle.
- Use two hands at all times.
- Take a firm stance and prepare for a sudden reaction if the drill jams or stalls.
- Operate the drill in a single direction.
- Always keep your hands away from the trigger until you are ready to operate the drill.
- Wait for the drill to come to a complete stop before placing it down.
- Practise for safety before using unfamiliar equipment.
- Familiarise yourself with the functions and features of the specific model that you will be working with.
Special notes/precautions/WHS: This information is general and must be read in conjunction with the manufacturer instructions. Ensure the lock on button is released before disconnecting the tool otherwise upon reconnection, the tool will begin to operate and could result in injury.
Suitable for: Driving in or loosening screws and bolts.
Characteristics/ description: Impact drivers are commonly used for screw driving in wood, metal, and plastic. When rotary function of an impact driver reaches a high level of torque, the hammer and anvil impact is engaged.
The features of an impact drivers include:
- Power source- Provides the tool with electricity, or a battery in the case of a cordless impact driver
- Switch- turns enables the electricity to power the tool. Cordless impact drivers have a variable speed switch effected by the amount of pressure applied to the trigger.
- Forward/reverse switch that enables the change in direction and is equipped with a neutral position to prevent accidental operations of a drill and is found on all cordless impact drivers.
- Motor enables the tool to operate and convert the electricity to motion.
- Transmission indicates the speed the drill can operate along with the torque or amount of pressure that corresponds with the speed. The transmission can have single or multiple gears that are driven by the motor.
- Chuck grips the accessories that are attached to the impact driver. All impact drivers have a ¼” (6.35mm) hex drive chuck.
- Housing protects the internal components of the tool and some cordless impact drivers are also equipped with an LED light in the front to light up the material in use.
- Handle is where you hold and apply pressure to the drill and usually has a pistol grip handle.11
Limitations: Torque issues. Smaller gears in transmission can result in higher rotary speed but with less torque, whereas larger gears in transmission cause lower speed, but higher torque.
PPE: Standard precautions, mask, eye protection.
Serviceability: Check the power cord and plug for signs of wear (or check the battery for signs of wear, check connection points, ensure the battery is charged), check the casing for cracks/damage/splitting, check bit for signs of damage/wear (such as blunt, burring, broken etc), ensure guides and protective shields are in place and working effectively.
Correct use:
- Select the appropriate bit for material, fit, shape, are extensions required etc.
- Use the impact driver according to manufacturer instructions.
- Use a bit holder as necessary.
- Set the speed, torque and direction.
- Fit and exchange bits safely and efficiently.
- Keep hands away from trigger while changing bits and fittings.
- Practices for safety before using unfamiliar equipment.
- Familiarise yourself with the functions and features of the specific model that you will be working with.
Special notes/precautions/WHS: This information is general and must be read in conjunction with the manufacturer instructions.
The video below explains the different types of drills and their uses. Watch out for some glimpses of dust extraction systems during the impact driver section.
Fun fact! Transmission is also known as the gearbox!

Suitable for: Driving nails, brads, tacks, staples.
Characteristics/ description: Nail guns can be cordless or pneumatically powered. Common characteristics of nail guns include the following:
- Directional exhaust: this enables you to control the direction of the exhaust to prevent dust and debris dispersing in unwanted directions.
- Jam clearing- Prevents the nails from jamming.
- Depth adjusters- enables control over how far the nail is inserted into the surface and prevents from over protrusion or the insertion being too deep.
- Triggers-enable to operation of the tool
- Protective guard- protects the tool from any possible damage and flying debris.
- Nail size adjustments: enables you to change the size of the nails as you work through tasks
- Onboard work lights- Illuminate the worksurface for accuracy and precision.7
Limitations: Noise, access, unable to access power source (such as compressor, electricity).
PPE: Standard precautions, hearing protection, eye protection.
Serviceability: Check power cord and plug for signs of wear (or check battery for signs of wear, check connection points, ensure battery is charged). Alternatively, check compressor and compressor hoses for signs of wear, splitting leaks, check connections etc. Check casing for cracks/damage/splitting (such as blunt, chipping, burring etc), ensure guides and protective shields are in place and working effectively.
Correct use:
- Familiarise yourself with the features and functions of the model that you are using.
- Follow manufacturer instructions.
- Only ever use a nail gun in sequential mode (even if bump mode is fitted).
- Disconnect the power (regardless of type) before loading nails (or staples).
- Disconnect the power before clearing a jam.
- Keep your hands (and the rest of you) free from the line of fire.
- Secure materials with clamps etc where possible.
- Ensure that magazines are loaded securely and locked into place (or that coils are positioned correctly).
- Hold the gun perpendicular to the surface and avoid firing nails, brads, tacks or staples at an angle.
- Hold the gun steady.
- Practise for safety before using unfamiliar equipment.
- Familiarise yourself with functions and features of specific model.
Special notes/precautions/WHS: These benchmarks are general and must be read in conjunction with the manufacturer instructions.
Suitable for: A bench grinder has one or two abrasive wheels which spin. They are used for grinding, sanding, polishing and sharpening metal surfaces. You will most likely use a bench grinder to sharpen tools like chisels.
Characteristics/ description: bench grinders can be either bolted to or installed on a work bench. The following are key features of a bench grinder:
- Motor: is located in the middle of the grinder and underpins how much work the machine can use with dependence on the horsepower.
- Wheel guards: covers about 75% of the wheel and prevents sparks and debris from flying towards you as you operate the grinder.
- Eye Shield: is positioned above the grinding wheel and is an additional form of protection for your eyes and prevents debris from coming into contact with your face.
- Bench grinder tool rest: the tool rest holds the workpiece in position when grinding and secures materials when adjusting speed or changing the wheels.
- Grinding wheels: are the main function of the of the bench grinder with various types for use. Each wheel has its own limit of RPMs which will be displayed on the cover and not exceeded.14
Limitations: Access to grinder, access to power source.
PPE: Standard precautions, gloves, mask, hearing protection, avoid loose fitting clothing, pull hair back.
Serviceability: Check power cord and plug for signs of wear (or check battery for signs of wear, checks connection points, ensure battery is charged), check casing for cracks/ damage/splitting, check wheels for signs of damage/wear (such as grooves, uneven wear), ensure guides and protective shields are in place and working effectively, use a gap gauge to check gaps.
Correct use:
- Ensure that the eye shields and wheel guards are in place and in good working order.
- Use a gap gauge to check that the gaps between the rest and the wheel are accurate and adjust if necessary (see video below). This must be done before each use. If the gap gauge shows that the gaps are too large and you are unable to make adjustments, then the grinder must not be used and the wheel should be replaced. Remove the grinder from service until this is done.
- Turn off power to the grinder before making any adjustments.
- Always rest materials against the fitted rest while grinding.
- Hold smaller materials with pliers or a clamp.
- Cool materials as you work.
- Ensure that the wheel has come to a complete stop before moving away from the grinder or shifting your focus.
- Familiarise yourself with the functions and features of the specific model that you will be working with.
Special notes/precautions/WHS: These benchmarks are general and must be read in conjunction with the manufacturer instructions. Over spinning grinding wheels can cause explosion resulting in serious injury and in extreme circumstances, death.
Fun fact!
If a bench grinder is not equipped with a wheel guard, they are prohibited to operate.
The following video combines some important safety tips with some general advice about using a bench grinder.