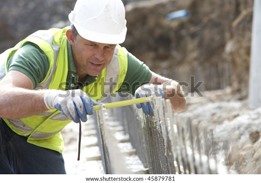
As you know, the majority of carpentry tasks that you will complete throughout your career will require materials. Ensuring that you have the materials where you need them, in the correct quantities, and in good condition is an important part of being able to complete your work efficiently. Even more importantly though, is ensuring that materials are moved around the site safely.
There are several materials you will need to work with at some stage during your construction career, some of these include:
The materials that you may handle include:
- concrete components (cement, aggregate, additives)
- insulation
- joinery units (pre-assembled windows, doors, furniture to be installed such as cabinets, etc)
- metal sheeting (flashing, corrugated steel, etc)
- paints and sealants
- plaster of fibre cement sheeting
- reconstituted timber products
- reinforcement materials (rebar, mesh sheets)
- scaffolding components
- structural steel sections and components
- timber (varying lengths, sizes etc).
Before divulging into the materials, safety first. We will now take the time to look at techniques for handling and moving some of the materials that you will come across. You should apply these skills to any situation where you are handling materials that pose a risk to the health or safety of yourself, your co-workers, bystanders, contractors, visitors to the site, passers-by and anyone else on or near the worksite.
There are a number of hazards and risks associated with materials handling. If proper care is not taken when handling such materials, the consequences may result in serious injury or permanent long-term damage. It is therefore essential you are aware of the hazards and risks commonly associated with handling of materials.
The following table illustrates the associated risks.
|
Manual handling risks |
Hazardous substances |
Hazardous materials |
Mechanical handling risks |


Reminder!
You will have become familiar with hazards and risk as you have progressed through your learning thus far, but it does not hurt to recap on hazards and risks. The following is a gentle reminder of hazards, risks, and controls.
|
Take a moment to remind yourself about hazards and risks. Hazards – A hazard is something which is identified as having the potential to harm any of the people on site. Remember that harm can mean a physical injury, an illness including a psychological illness or even death. Risks – Risk refers to the likelihood that a hazard will occur and what the significance of the harm will be. Controls – Controls are the strategies put in place to mitigate (prevent and/or manage) the hazards and risks. |
Site inspections
Site inspections are an important aspect of safety considerations. They should be carried out before tasks are commenced, particularly when it comes to handling materials.
Consider the following scenario.
|
A delivery of bricks has arrived early morning onsite and needs to be transported to the designated area for use. Christian, one of the workers carefully unloads the materials onto the trolley ready for transportation. Assuming the worksite has had the inspection carried out, Christian makes his way across the site and loses control of the trolley as there is a small pothole in the ground that was not identified. Christian attempts to regain control of the trolley and in doing so has twisted his back and the bricks have toppled off, causing some damage to the materials. When the incident report was being completed, the site supervisor asked if there was a site inspection to identify any trip hazards, to which the workers were all under the assumption at least one of them had done it. Turns out, lack of communication resulted in the inspection having not been conducted. The site supervisor called a toolbox meeting with the site members and concluded a site inspection was to be carried out by each member of the team on a rotating cycle, to prevent such incidents recurring. |
In this scenario, a simple error in communication (or lack thereof) resulted in injury to a team member and damage to materials. As repetitive as some of these tasks may appear, a lot of can change in a 24-hour period, therefore site inspections need to be carried out frequently to at least offer some means of risk control where possible.
The following is an example of what a common site inspection may look like. Each organisation will have their own inspection template and will usually be contextualised to suit their policies and procedures for the type of work they carry out.
ORSHY, DO WE PDF THE BELOW TABLE?
|
Site Address: |
|
Date: |
|
||||
|
Inspector name |
|
Signature: |
|
||||
|
Contractors on site: |
|
||||||
|
Supervisor name |
|
||||||
|
Construction stage |
|
||||||
|
Observation |
|||||||
|
Ground |
|||||||
|
|
Yes |
No |
Action |
Specify action to be taken |
|||
|
Are there trip hazards? For example, potholes, obstructions, or uneven surfaces? |
☐ |
☐ |
☐ |
|
|||
|
Is the ground smooth, dry and debris free? |
☐ |
☐ |
☐ |
|
|||
|
Are there trenches onsite? If so, have they been covered or barricaded? Trenched exceeding 1.5m deep will require a SWMS. |
☐ |
☐ |
☐ |
|
|||
|
Deliveries |
|||||||
|
Is there an allocated area of deliveries? |
☐ |
☐ |
☐ |
|
|||
|
Will the deliveries cause an obstruction near a footpath or walkway? |
☐ |
☐ |
☐ |
|
|||
|
Is there allocated storage area? |
☐ |
☐ |
☐ |
|
|||
|
Is the storage area organised |
☐ |
☐ |
☐ |
|
|||
|
Are all the materials/items stacked properly |
☐ |
☐ |
☐ |
|
|||
|
Where racking is used, is it functional and in adequate condition |
☐ |
☐ |
☐ |
|
|||
|
Are delivery schedules running on ‘just in time’ |
☐ |
☐ |
☐ |
|
|||
|
Site accessibility |
|||||||
|
Are site access and exit points clear? |
☐ |
☐ |
☐ |
|
|||
|
Are footpaths, walkways and driveways clear of obstructions/ materials |
☐ |
☐ |
☐ |
|
|||
|
Are walkways wide enough and equipment accessible? |
☐ |
☐ |
☐ |
|
|||
|
Is equipment appropriately stored when not in use? |
☐ |
☐ |
☐ |
|
|||
|
Is there sufficient lighting on site? |
☐ |
☐ |
☐ |
|
|||
|
Work areas |
|||||||
|
Is the work area (areas) clean, uncluttered and waste free? |
☐ |
☐ |
☐ |
|
|||
|
Are the trades cleaning as they go? |
☐ |
☐ |
☐ |
|
|||
|
Waste |
|||||||
|
Are there sufficient and empty skip bins? |
☐ |
☐ |
☐ |
|
|||
|
Are there specific bins for waste, such as recycling, green waste etc.? |
☐ |
☐ |
☐ |
|
|||
|
Parking |
|||||||
|
Are vehicles appropriately parked? |
☐ |
☐ |
☐ |
|
|||
|
Is the worksite overcrowded with parked vehicles? |
☐ |
☐ |
☐ |
|
|||
|
Does the designated parking area obstruct entry and exit points of the site? |
☐ |
☐ |
|
|
|||
Locating services
You will need to establish the services you have access to as part of risk control. Some of these services may include human resources, that is, the allocated first aid officer, site supervisor, WHS advisor just to name a few. You may also need to familiarise yourself with contacts in electrical, gas and plumbing should a situation arise requiring their services such as electrical or gas faults. There may be local services available that you will need to ensure you are able to access and notify in the even of seeking these services.
Signage and barricades
Adequate and sufficient signage and barricades can be a simple yet effective way to reduce the risks injury or exposure to harmful substances to workers, bystanders, or other personnel onsite.
As you have progressed through your studies, or through our firsthand experience on site for some of you, you will have come across the varies signs and barricades in use to assist with managing a dangerous worksite.
The following table illustrates some of the common types of signs and barricades that you may have seen or will likely need to use at some point throughout your career.
|
Signage |
Description / use |
Barricade |
Use / description |
|
|
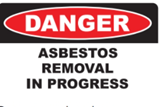
Danger signs This specific sign is for the removal of asbestos, however, there are other signs that may be erected with a danger warning. |
|
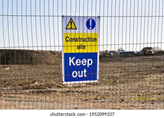
Hoarding/ fencing. This type of fencing is commonly found around a residential construction site. Many have signs attached to them with warnings of construction in place. |
|
|
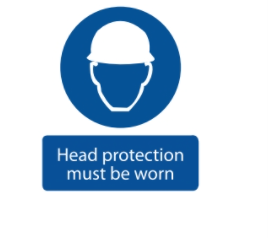
PPE Signs There are a number of signs that are erected pertaining to PPE. This sign is to indicate head protection must be worn, however there are signs to indicate hearing or eye protection is required. |
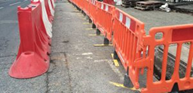 |
Tubes/ fittings This type of barricade is commonly used around trenches to prevent people from falling in. |
|
|
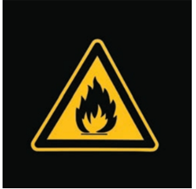
Hazard warnings Hazards are usually displayed with a triangle or diamond with an image indicating the type of hazard that is present. This sign for example, indicates there is a fire hazard. |
|
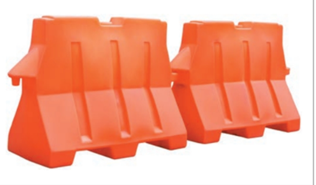
Plastic waterfilled barriers This barricade is commonly used to prevent vehicle access. |
|
|
Emergency information signs These signs are typically used to identify emergency exits and are illuminated in the dark or should there be a power outage. |
|
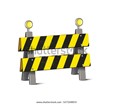
Trestle and board barriers This type of barricade is commonly used where roadwork construction is taking place. |
|
|
Fire signs These signs are in place to make it easy to locate fire hoses or fire equipment. |
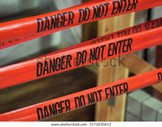 |
Barricade tape This type of barricade is simple, yet effective, especially considering the tape can be extended over distance. Usually designed with hi-vis colouring, the tape is placed around a designated area to issue a message of warning. |


Hazardous manual handling

When looking at hazardous manual handling, it is important to understand there is a level of care that needs to be taken as some materials may pose an immediate hazard and can be identified as hazardous substances and hazardous materials.
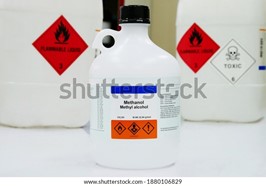
There are a total of nine categories associated with hazardous substances and materials, each of which comes with a label to tell them apart. The details of the design and selection of signs and labels for are contained in AS 1216 Class labels for dangerous good.
Flick through the following image sliders to learn the nine categories, take notice, each of the nine signs has the corresponding number they are associated with.
Fun fact!
Not all hazardous substances or materials have a dangerous goods label. This is mainly due to the diamond pertaining to dangerous goods indicates an immediate hazard.
Work Safe Australia tells us that:
A hazardous manual task is a task requiring a person to lift, lower, push, pull, carry, or otherwise move, hold, or restrain any person, animal or thing involving one or more of the following:
- repetitive or sustained force
- high or sudden force
- repetitive movement sustained or awkward posture, or
- exposure to vibration.1
Hazardous substances
Hazardous substances are any chemical or mixture that can pose a significant risk to a person’s health and/or safety if not managed correctly. Hazardous substances can have health hazards (that is, they can cause illness) or physical hazards (that is, they can cause injury). They can also cause both health and physical injuries.
Workplaces have a number of responsibilities in relation to controlling the risks associated with hazardous substances. There are other parties that have responsibilities too. For example, manufacturers, suppliers, importers, and transporters.
The way that the hazards associated with chemicals and other potentially harmful substances are managed and controlled are the same as any other hazard. They need to be identified, assessed, and controlled.
Safety data sheets
Each hazardous substance must have a safety data sheet (SDS). The Safety Data Sheet (SDS) is a document that describes the chemical and physical properties of a material and provides advice on safe handling and use of the material. Employers using or storing dangerous goods or hazardous substances must ensure that they obtain an up to date SDS for each product and that there is ready access to the SDS for people on site.
The hazardous substances that you may be working with and handling include paints, varnishes and stains, paint strippers and thinners, mineral turpentine, glues and resins.
Hazardous materials
Hazardous materials, like hazardous substances, are any material that can pose a significant risk to a person’s health and/or safety if not managed correctly. They can have health hazards (that is, they can cause illness) or physical hazards (that is, they can cause injury). They can also cause both health and physical injuries.
The risks also need to be identified, assessed, and controlled.
The hazardous materials that you may be working with and handling include cement, treated wood, MDF, CCA-treated timber and insulation.
There are two hazardous materials that you need to be particularly aware of in all aspects of your building and construction work (not least materials handling) – asbestos and silica dust.
Asbestos

One hazardous material that is particularly relevant to building and construction is asbestos. Asbestos fibres are very fine fibres which, when inhaled, can cause very serious, life limiting lung diseases. Asbestos is now banned in Australia and has been since December 2003. However, it was once used in almost 3000 products – many of which related to the building and construction industry.
Workplaces now have legislated responsibilities around managing the risks associated with asbestos including:
- maintaining an asbestos register
- assessing the risk of exposure to asbestos
- eliminating the risks associated with asbestos.
- ongoing review of the asbestos control measures to ensure they are effective.
What should you do if you suspect a material contains asbestos?
- Do not disturb the material.
- Follow your workplace’s policies and procedures.
- Report your suspicion to the site supervisor immediately so that specialised testing/removal can be organised.
- Isolate the area.
- Label materials as asbestos containing (or place label/sign near the materials).
- Put up barriers/barricades to protect the materials and to protect others from working in the area.
- Don’t handle or move the materials.
It is important to be aware of these restrictions, to follow your workplace requirements and to maintain situational awareness around signs, barriers and warning tape.
Silica dust (Crystalline silica)
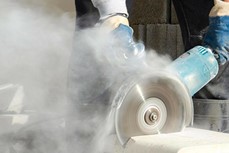
Silica dust is generated during the cutting, grinding, and polishing of stone and other products that contain silica, such as fibre cement sheeting. Tiny particles can be inhaled and can cause irreversible, life limiting lung damage. Some call silica dust the new asbestos. While awareness around asbestos is high, awareness around silica dust is still emerging.
Hazardous mechanical handling
While the hazard comes from the material in manual handling, and hazardous substances and materials, with mechanical handling, the hazard comes from the machine or tool used to handle or move the material. These include pallet jacks, forklifts, trucks, and brick trolleys.
Whenever you are handling hazardous substances or materials, it is important to remember the following good work practises:
- Maintain personal hygiene by ensuring you change your clothes after work and shower daily.
- Isolate or contain machinery that disperses dust particles.
- Ensure the workplace has appropriate control measures in place including the use and functionality of PPE, appropriate ventilation or systems are in working order and if a person (or people) have exposure do damaging substances such as asbestos, the appropriate medical attention is sought, and the person is monitored for effects.
There are a number of techniques and equipment used when handling materials that you are yet to familiarise yourself with. Familiarising yourself with these techniques and equipment is like learning another language, one in which is spoken commonly among those in construction. The following table illustrates some of the common times of equipment used when handling materials, take your time and work your way through the table to become familiar with this language.
Equipment used in materials handling
There is a range of equipment that you will need to become familiar with when handling carpentry materials.
|
Picture |
Description |
|
|
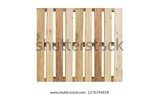
Pallets Pallets are a purpose-built platform designed for lifting by forklift or pallet jack. They provide a stable surface for goods and materials to be stacked on. They have bearers built into the base so that the arms of a forklift or pallet jack can fit under them. They are usually made from timber (often pine) but are sometimes made from recycled composite materials such as plastic. |
|
|
Australian standard pallet An Australian standard pallet is 1165 mm x 1165 mm and is 150 mm high. It complies with Australian Standard AS4068 and it can hold up to 2000 kgs. |
|
|
Pallet jack A pallet jack (or pallet truck) is a hydraulic lifting device used to lift loaded (and unloaded) pallets and move them around. There are two types of pallet jack – manual or powered. On building sites, you will sometimes find all-terrain versions that are built with larger wheels to deal with rough or uneven ground. |
|
|
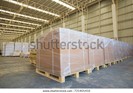
Pallet wrap Pallet wrap is plastic wrap which is used to secure materials to pallets for transport and storage. It is often used in additional to banding. It provides a protective layer, helps to secure smaller objects and provides a level of waterproofing and general protection. Imagine wrapping as strong, wide cling film. |
|
|
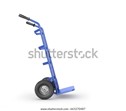
Hand truck/ trolley A hand truck is used to move boxes of components or bags of concrete/cement. |
|
|
Banding Banding (sometimes called strapping) is used to fasten bundles or to secure packs of timber and other materials. It is also used to strap materials to pallets. It is commonly made from plastic or metal. It can be applied with a banding tool or with a machine. |
|
|
Forklift A forklift is a ride-on vehicle with a hydraulic lifter for lifting and moving pallets. It can only be operated by a licensed operator. |
|
|
Tie-downs Tie-down straps are used to secure loads to trucks and so on. They are weight rated. |
|
|
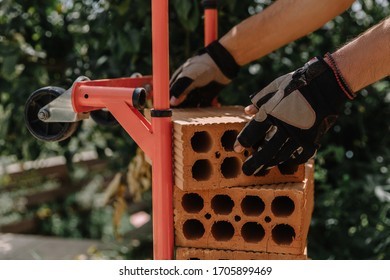
Brick trolleys A brick trolley is a heavy-duty trolley with wide wheels and a variety of height settings on the arms. It is used to carry bricks, tiles, and other similar materials. They are usually designed to carry up to about 300 kgs. |


When handling carpentry materials, there are safety requirements that need to be considered.
Some of the safety requirements may include:
- The implementation of a SWMS, JSEA, and SDS
- The correct PPE for the task at hand
- Following relevant workplace policies and procedures
- Following the specific instructions to carrying out the task
- Applying appropriate manual handling techniques
- Consulting with relevant workplace supervisor
Workplace instructions
In the initial stages of handling materials, the planning, which is carried out needs to be carefully considered, along with the instructions that are illustrated before commencing a job. You can look at this concept from this perspective, you would not generally start a game without first reading the instructions, establishing the rules, and identifying the number if people who can play. The same applies when planning the handling of materials.
There are often a set of instructions carefully articulated by the workplace/ site supervisor to members of the team. As a team member, it is essential you understand the instructions before you start commencing any work. Your supervisor may verbally explain what the job entails therefore giving you verbal instructions, in which case, it is highly recommended and advised you take down notes. Do not rely on your memory for verbal instructions. One small detail you may miss could be the difference between the success and failure of a project, this is why, you must always keep a record of the instructions.
You may also receive a set of written instructions entailing the plan and workflow including time frames, materials needed and so on. Ensure you have studied and understood these instructions before you have started the job and ensure you have double checked measurements, calculations, stock supplies and availability of resources (including relevant personnel).
Finally, the equipment you handle, or use will also require instructions. It is not assumed knowledge that you will automatically know how to drive a forklift or operate a pallet jack or know how to stack and order stock material. These are all acquired skills you will need to learn and add to your tool belt, all of which come from understanding instructions.
Remember, if you are unsure of any instruction, you have been given, ask. Be sure you understand exactly what has been said to you, no matter how minor you think the question is.
Example of instructions
Identifying the materials that you will be moving
You may need to calculate the quantities of volumes of materials that you will be required to handle to ensure that you have sufficient storage space and materials handling equipment. You should always account for waste in your calculations.
The area calculation is useful for things like working out how much floor covering is required or how much plasterboard to order. But how do you apply that in practice?
Step 1 is to calculate the area that you are working on.
A = L x W
Step 2 is to find out from the manufacturer how the material is supplied. For example:
- you will require 48.5 standard sized bricks to build one square metre of wall
- one sheet of 2400 x 1200 x 10 mm plasterboard covers 2.88 m2.
Step 3 is to calculate how much of the material you will require to cover the area by either multiplying or dividing.
Let’s look at the examples above.
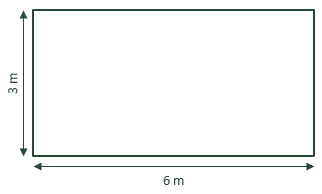
It is important to remember that when calculating quantities of materials, it is very unlikely you will be able to order part of something. For example, half a brick or a piece of a sheet of plasterboard so you would round up. In context, if you needed 10.2 pieces of plasterboard, therefore, you would order 11 pieces of plasterboard.
Bricks
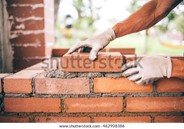
We know that we need 48.5 bricks to build one square metre of wall so, to calculate the total number of bricks that we need, we multiply the area by 48.5.
Quantity = 18 (A) x 48.5
The number of bricks required = 873.
Plasterboard

To calculate the plasterboard, we again start with the area of 18 m2. This time, however, we know from the manufacturer that a single board covers more than one unit of measure – it covers 2.88 m2. So in this case we divide.
Quantity = 18 (A) / 2.88
The number of boards required = 6.25
Calculating concrete
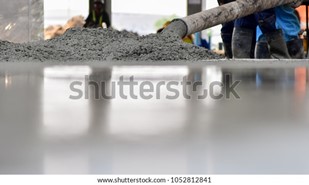
When you are calculating the amount of concrete that you will need, there are some key concepts that you should keep in mind. These include:
- You will need to know the area and the thickness of the slab so that you can calculate the volume. That will give you the volume of the concrete that you require.
- You should factor in 10% waste.
- Concrete is usually ordered in increments of 0.2 (although some companies accept orders in increments of 0.1).