Welcome to Art Pipeline for Games! In this course, we will explore the world of game development and the essential steps involved in creating stunning visuals for games. Our primary focus will be the 3D content creation pipeline, a vital process that brings virtual worlds and characters to life.
We will cover a wide range of topics and objectives to help you gain valuable knowledge and hands-on experience in the art pipeline for games. You will be equipped with the skills to create, texture, rig, and animate 3D models, allowing you to contribute to the immersive worlds and captivating gameplay experiences that define the gaming industry.
Our main objectives include:
- Familiarise yourself with the 3D content creation pipeline: We will start by becoming familiar with the various stages of the 3D content creation pipeline. This will involve learning about modelling, texturing, rigging, and animation, which are fundamental aspects of game art production.
- Create three 3D models, UV unwrap them, and apply materials: You will have the opportunity to create three-dimensional models using industry-standard software such as Maya. We will explore the techniques of modelling objects, unwrapping UVs to apply textures efficiently, and adding materials to enhance the visual appeal of the models.
- Use Maya and Photoshop for texturing: Texturing is a crucial step in game art production, and we will delve into the process using powerful tools like Maya and Photoshop. You will learn how to create realistic textures and apply them to your 3D models to bring them to life.
- Rig a model and add bones for animation: Rigging is the process of creating a skeleton structure and assigning it to a 3D model. We will explore rigging fundamentals, including bone creation and skinning, to prepare your models for animation.
- Create an animation cycle: Animation breathes life into characters and objects in games. Using your rigged model, you will learn how to create an animation cycle, which is a looping sequence of movements. This will enable you to bring a dynamic and engaging motion to your game assets.
Learning Outcomes
- LO1: Apply critical understanding of a range of industry-standard tools and procedures pertaining to a studio pipeline to generate technically sound, fit-for-purpose animation assets for interactive media
- LO2: Develop engaging animation assets, through creative and critical use of layout, colour, animation, and character performance, to contribute meaning to interactive media.
- LO3: Demonstrate an awareness of social contexts and ethical concerns influencing professional practice in software development.
- LO4: Employ effective business and academic skills to research and plan for software production.
- LO5: Integrate technical and procedural knowledge of animation production stages to participate productively and independently in generating high-quality, fit-for-purpose assets.
Assessment
CS204 Art Pipeline for Games contains one assessment. The assessment will primarily utilize Maya and Photoshop to teach modelling, texturing, rigging, and animation techniques within the context of game development.
| # | Assessment Type | Weighting | Due Date |
|---|---|---|---|
| Assessment 1 | Project | 100% | Friday, Week 16 |
CS205 Integration
CS204 Art Pipeline for Game is thoughtfully designed to complement and enhance the learning experience of CS205 Integrated Studio. By leveraging the knowledge gained from CS204, you can apply these principles in practical applications through CS205, further solidifying your understanding of art pipeline for games.
About this topic
Welcome to this course’s first topic, Introduction to Game Art. Let’s start by looking at one of the industry standard tools for 3D art development, the Autodesk application ‘Maya’. We will explore Maya’s strengths, navigating the 3D environment, working with 3D shapes, and the concepts of groups and hierarchy. This topic concludes with an activity in which you can put your emerging skills into practice as you create a restaurant or street scene using Maya.
Figure 1: Modelling
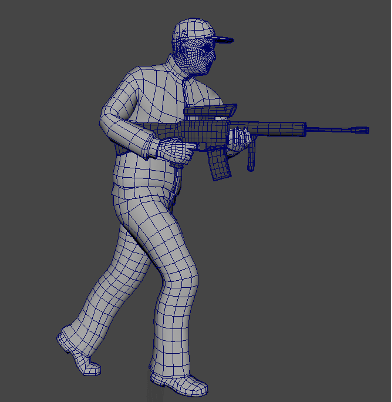
Figure 2: Rigging
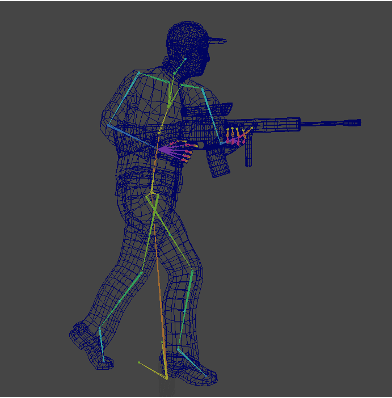
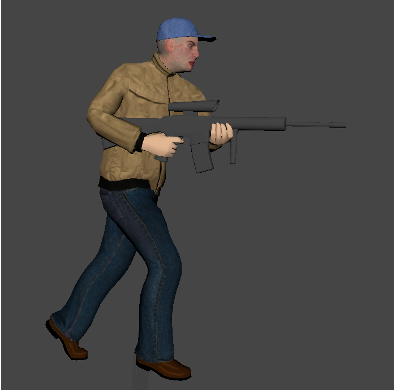
Figure 3: Animating
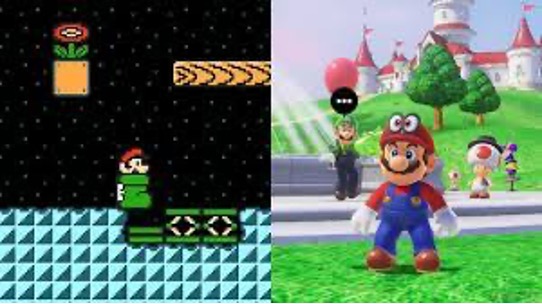
Maya is an industry-standard application widely used in computer graphics, particularly in the creation of 3D elements for games and movies. It is a powerful software package that offers a comprehensive set of tools and features, making it a preferred choice among professionals in the entertainment industry. It is used in some of the world's best games.
Take a look at four examples below:
1 of 12
Maya’s Strengths
To understand why Maya is the industry standard, we must first understand its strengths.
Versatility
One of Maya's key strengths is its versatility in handling various aspects of 3D production. It provides robust modelling capabilities, allowing artists to create intricate and detailed 3D models of characters, environments, props, and more. The software also offers advanced texturing and shading tools, enabling artists to add realistic materials, textures, and visual effects to their models.
Compatibility
Another significant advantage is Maya's compatibility with game development engines like Unity and Unreal Engine. The software provides efficient workflows and export options, facilitating seamless integration with these popular game engines. Artists can easily export their 3D assets from Maya to Unity or Unreal Engine, ensuring smooth transitions and optimal performance in-game environments.
Flexibility
Flexibility is a key characteristic of Maya. It supports a wide range of file formats and offers extensive customisation options, allowing artists to tailor the software to their specific needs and workflows. Maya also provides a highly adaptable user interface, empowering artists to optimise their workspace and streamline their creative process.
The 3D environment
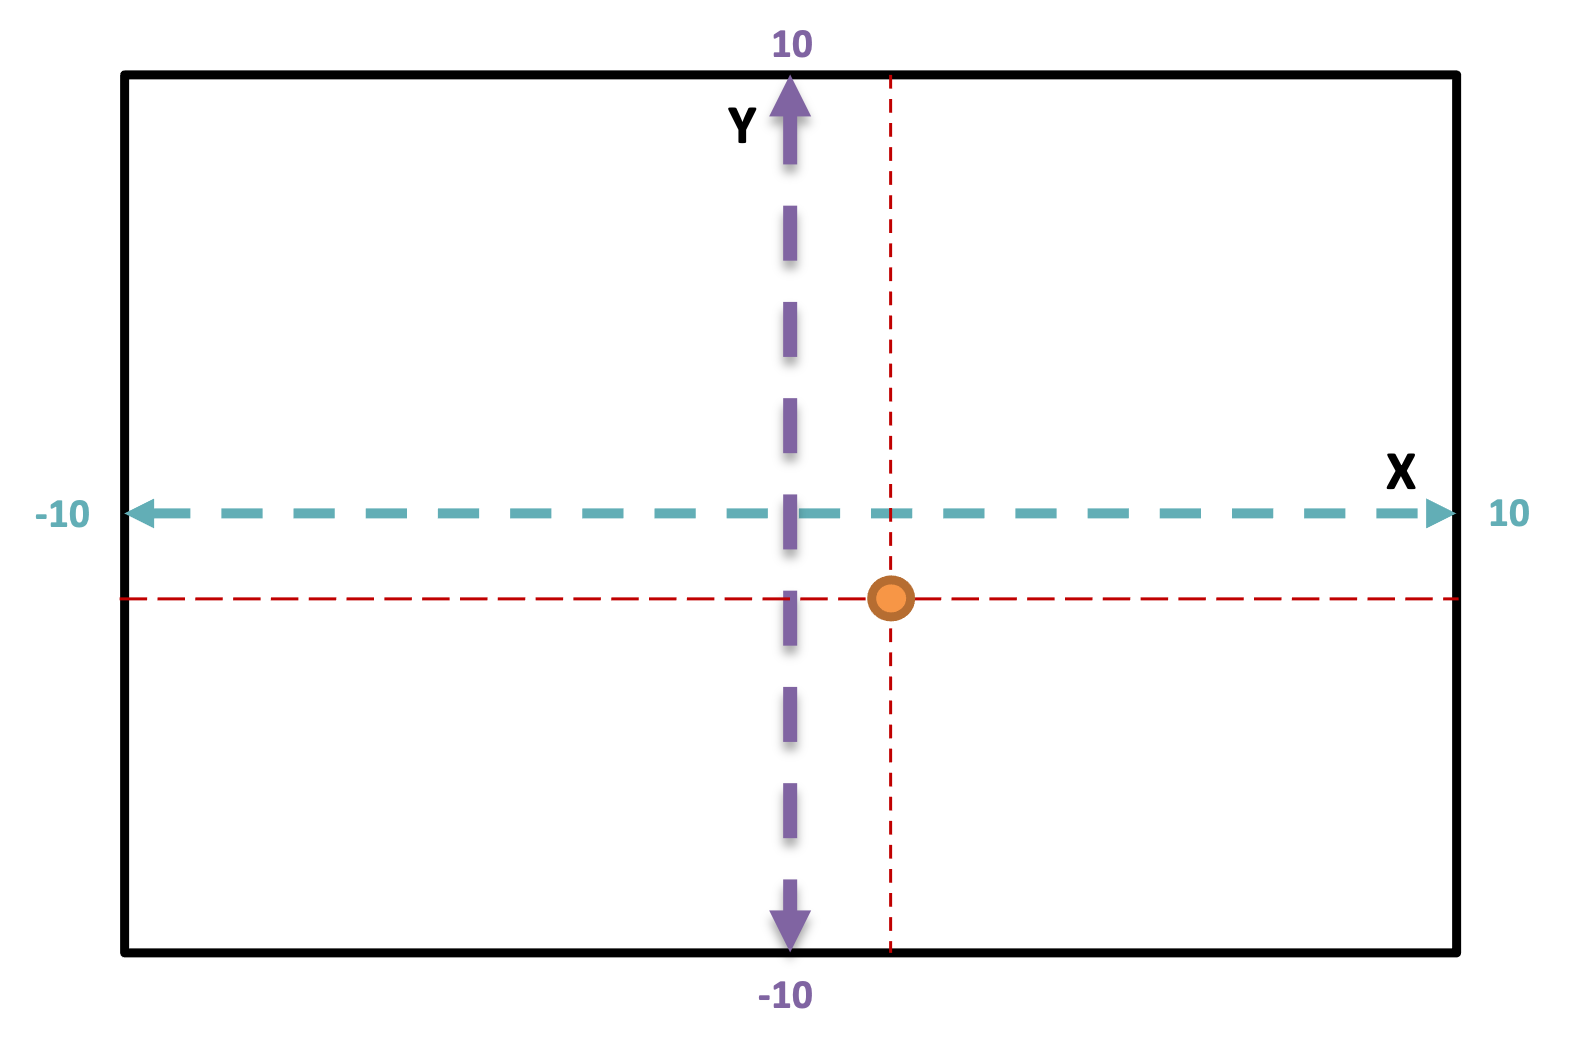
In CS201 you were introduced to the 3D world but before we dive into using Maya, lets first do a quick recap of the difference between 2 and 3 Dimensional objects. The Cartesian coordinate system (named after Rene Descartes) describes the location of an object in coordinates.
Two Dimensional Coordinates
In 2D, we describe the location of an object based on two values;
- Horizontal – the “X axis”
- Vertical – the “Y Axis”
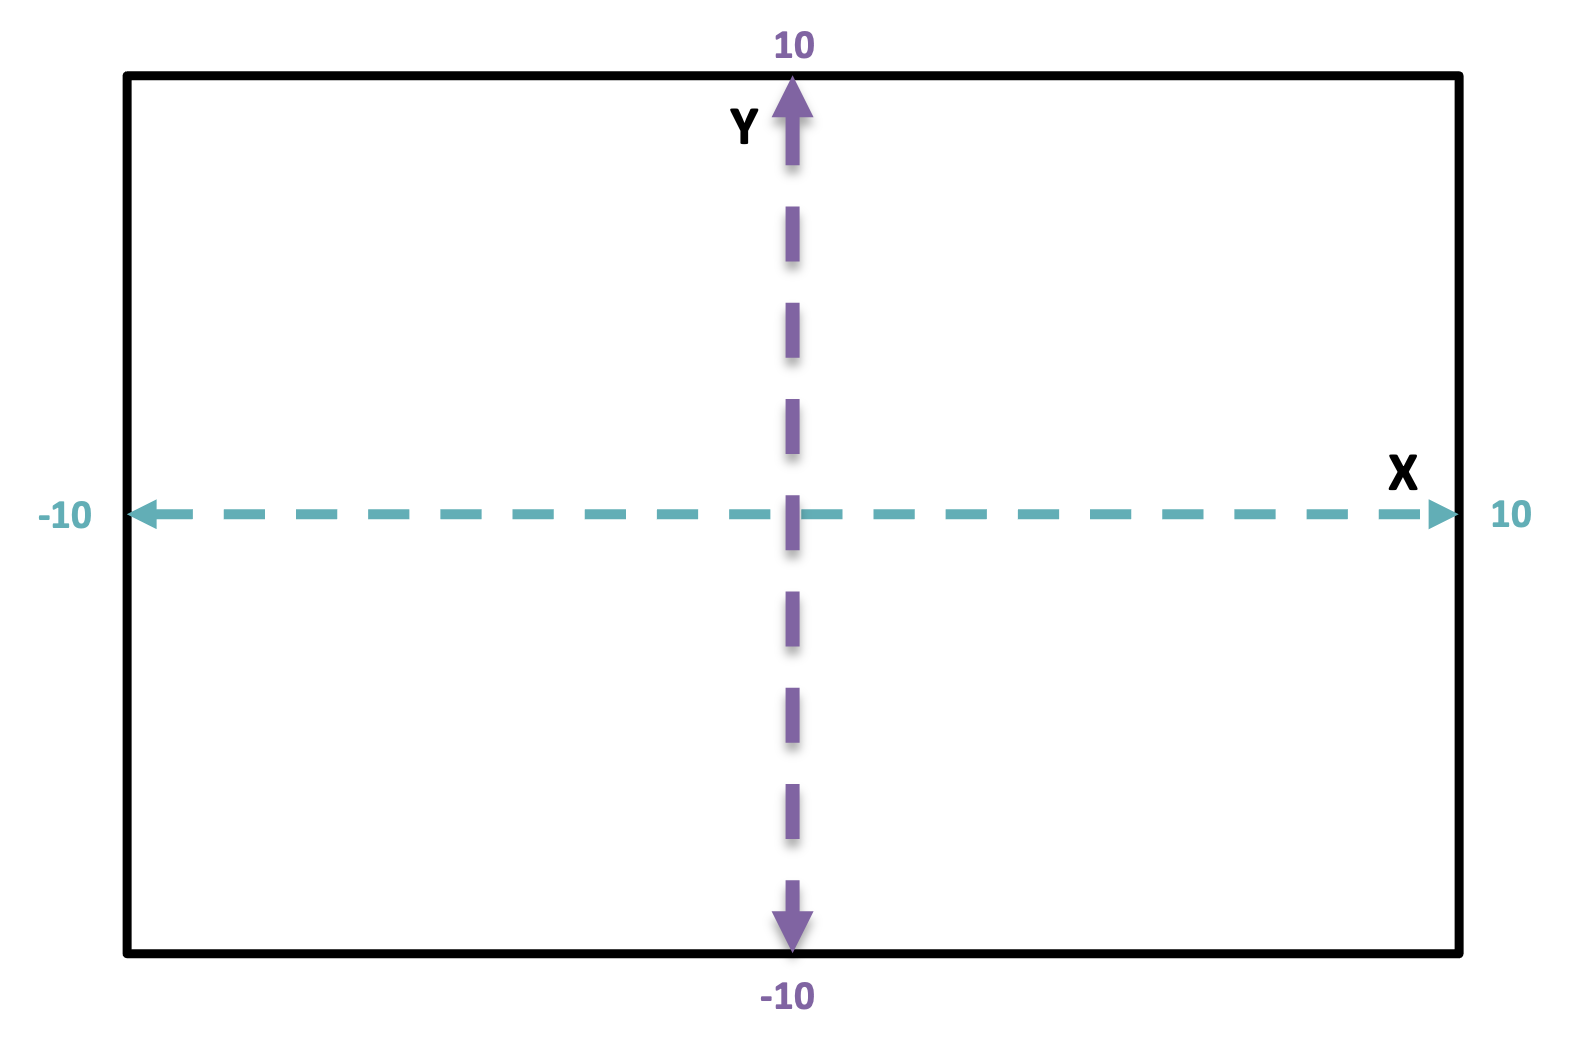
Therefore, the object's location is given a location using the X and Y values. For example
X=2 and Y=-2
Three Dimensional Coordinates
Like 2D, three dimensional coordinates have both the X and Y values; however, it also requires the addition of a new value:
- Horizontal – the “X axis”
- Vertical – the “Y Axis”
- Depth – the “Z Axis”
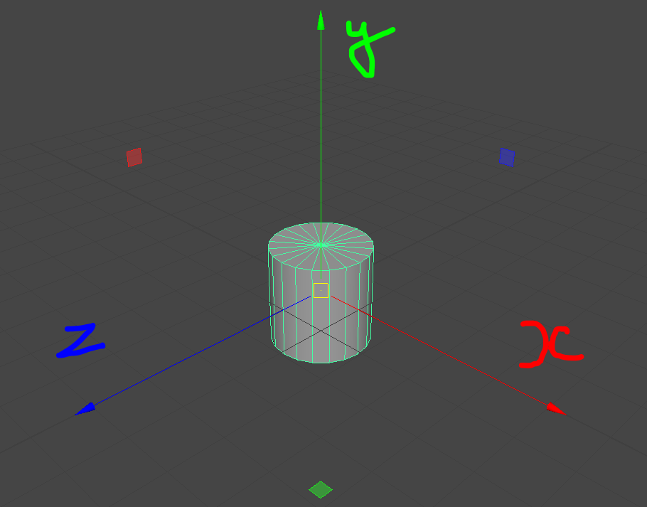
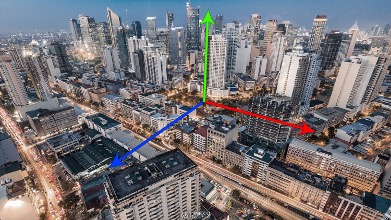
The Z Axis indicates how far away the object is from the viewer. We can then apply this to a real-world environment like so:
So now that we understand the coordinates of a 3D environment, let's take a look at how we navigate a 3D environment
Navigating the 3D environment
Navigating in a 3D environment refers to the process of moving and exploring within a three-dimensional virtual space. In 3D software applications, such as game engines or modelling software like Maya, navigating allows users to navigate and interact with the virtual environment, objects, and scenes they are working on.
The navigation controls and techniques may vary slightly depending on the specific software being used, but some common methods are used for navigating in a 3D environment:
Camera Movement
The camera represents the viewpoint from which the virtual world is observed. Users can move the camera to change their perspective within the 3D environment. This can involve panning (moving the camera horizontally), tilting (moving the camera vertically), and zooming in or out to adjust the field of view.
Orbiting
Orbiting involves rotating the camera around a selected point or object in the 3D space. By rotating the camera, users can view the environment from different angles and better understand the scene’s spatial relationships.
Zooming
Zooming allows users to adjust the camera’s distance from the objects in the scene. By zooming in, users can get a closer look at details, while zooming out provides a wider field of view.
Moving and Flying
Users can sometimes physically move or fly through the virtual environment. This involves moving the camera in all three dimensions (X, Y, and Z axes) to explore different areas or navigate a scene.
Object Selection
Navigating in a 3D environment often includes selecting and interacting with objects. This can involve clicking or dragging on objects to move, rotate, or scale them, allowing users to manipulate and position elements within the virtual space.
Navigating in a 3D environment enables users to explore and interact with the virtual world, providing them with the tools to position objects, create compositions, and view scenes from various angles and perspectives.
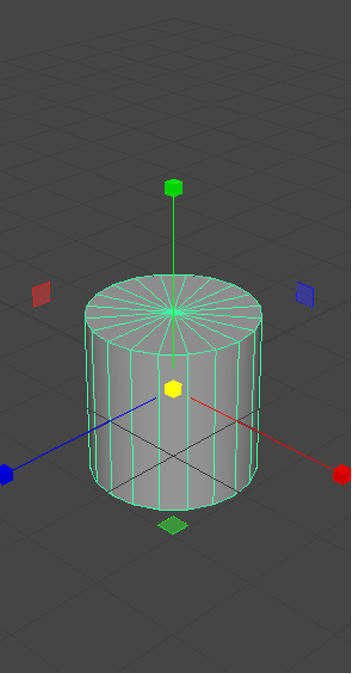
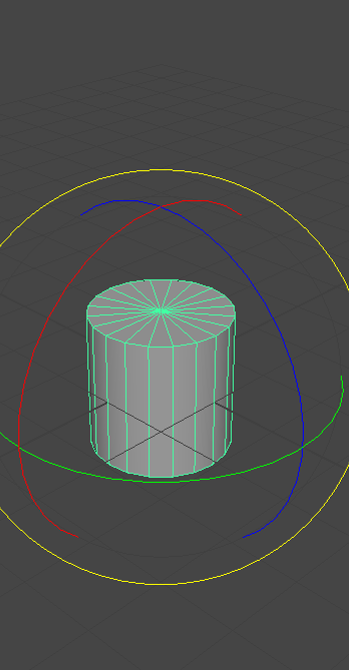
So on top of the three coordinates of the 3D world, it is important to also consider scale and rotation as per the examples below.
Example of Scale
Example of Rotation
Tutorial 1a: Discover the basic Maya skills you need
Welcome to your first tutorial in this course. By the end of this tutorial, you will become familiar with Maya’s interface, including adding and removing basic shapes from a scene.
To work through the tutorial, follow these steps:
- Watch the tutorial’s video below (1min 55sec):
- Observe the steps, tools, and techniques demonstrated in the video carefully.
- If the presenter highlights essential points or tips, take notes and pause the video to ensure you fully grasp the information provided.
- Interact with the tutorial:
- Pause the video and perform the actions within your Maya application, following the instructor’s guidance step-by-step.
- Experiment with the tools and techniques shown in the video to gain hands-on experience.
- If the tutorial presents challenges, pause the video to attempt the tasks or answer the questions independently before the presenter provides the solution.
- Have fun, and ask us if you need any help!
Explore further
If you want to dive deeper into basic skills required for Maya, visit Maya Getting Started, which introduces the different areas of Maya in a set of brief lessons. Go through the first section, Maya Basics.
This is an optional activity that you may find valuable for your learning.
In Maya, 3D shapes refer to the geometric objects or primitives that serve as the building blocks for creating 3D models. These shapes are predefined and readily available within the software, allowing artists and designers to quickly generate basic forms and structures for their 3D scenes.
Maya offers a variety of 3D shapes that can be used as a starting point or modified to create more complex models. Some commonly used 3D shapes in Maya include:
- Cube: A cube is a six-sided, box-like shape with equal dimensions along each side. It is often used to represent solid objects with uniform sides, such as buildings, furniture, or game props.
- Sphere: A sphere is a round, ball-shaped object with a consistent radius. It is commonly used to represent celestial bodies, planets, or organic shapes like heads or eyes.
- Cylinder: A cylinder is a geometric shape with circular top and bottom surfaces connected by a curved side. It is frequently used to create objects like bottles, pillars, or pipes.
- Cone: A cone is a three-dimensional shape with a circular base tapering to a point. It is often used to create objects such as traffic cones, ice cream cones, or mountains.
- Torus: A torus is a doughnut-shaped object with a circular cross-section and a hole in the centre. It is commonly used to create objects like tires, rings, or decorative elements.
- Plane: A plane is a flat, two-dimensional surface that can be used as a foundation for creating objects or as a background for scenes.
These are just a few examples of the basic 3D shapes available in Maya. Artists can combine, modify, and manipulate these shapes to create more complex models or use them as a starting point for sculpting and detailing. Maya also provides tools for adding more intricate details, manipulating vertices, edges, and faces, and applying textures and materials to enhance the appearance of the 3D shapes.
Tutorial 1b: Shape polygon objects in Maya
By the end of this tutorial, you’ll be able to shape polygon objects in Component Mode and move them around in Object Mode. To work through the tutorial, follow these steps:
- Watch the tutorial's video below (2min 32sec).
- Interact with the tutorial and Maya.
- Have fun, and ask us if you need any help!
For more tips on how to get the best out the tutorials, refer to the steps in Tutorial 1a: Discover the basic Maya skills you need.
Group and hierarchies
In Maya, groups and hierarchies are essential organisational concepts that help manage and structure the elements within a 3D scene. They enable artists and animators to efficiently work with complex scenes by grouping related objects and establishing parent-child relationships.
| Groups | Hierarchy |
|---|---|
| A group in Maya is a way to gather multiple objects together, treating them as a single entity. By grouping objects, you can manipulate, transform, and manage them collectively, simplifying the workflow and organisation of your scene. For example, you can group all the objects that make up a character's head, body, and limbs to easily manipulate and animate the entire character as a cohesive unit. Grouping also allows you to simultaneously apply transformations, animations, or attributes to multiple objects. | Hierarchy refers to the parent-child relationship between objects in Maya. When you create a hierarchy, you establish a hierarchical structure where one object becomes the parent of another, forming a parent-child relationship. The child object inherits transformations and attributes from its parent, allowing cascading changes throughout the hierarchy. This is particularly useful for animating characters or assembling complex scenes. For instance, you can create a hierarchy where the root object is the character's body, and the limbs are its children. By moving or rotating the body, the limbs will automatically follow suit due to their hierarchical relationship. |
Benefits
By utilising groups and hierarchies in Maya, you gain the following benefits:
- Organisation: Groups and hierarchies provide a logical and structured way to organise and manage your scene elements. You can easily locate and modify objects within their respective groups or hierarchies, enhancing efficiency and ease of use.
- Animation: Hierarchies play a crucial role in character animation. By establishing a hierarchy, you can animate a character's root object, such as the body or pelvis, and all the child objects, such as limbs or facial features, will follow in a coordinated manner. This simplifies the animation process and ensures consistent movement throughout the character.
- Transformation Control: Groups and hierarchies allow you to control the transformations of multiple objects simultaneously. For example, if you have a group containing various elements of a scene, you can scale, rotate, or translate the entire group as a whole rather than adjusting each object individually.
- Layered Editing: Maya's layering system enables you to stack groups and hierarchies, allowing for non-destructive editing. You can modify or animate objects within a group or hierarchy while maintaining the overall structure and integrity of the scene.
Now that you have explored the basics of Maya, it’s time to use it to work through this topic’s learning activity.
Follow the steps below to create a restaurant scene or street scene in Maya. Focus on using basic shapes, group objects, duplicating groups, maintaining a low poly count, assigning proper names, and sharing images in the designated Forum thread.
- Access Maya: Open Maya on your computer.
- Create the Scene:
- Use basic shapes (e.g. cubes, spheres) to construct a restaurant or street scene.
- Arrange the shapes to create the desired layout and environment.
- Group Similar Objects:
- Select and group objects that you wish to become single entities (e.g. tables and chairs).
- Group objects helps manage them collectively, simplifying your workflow.
- Duplicate Similar Groups: Duplicate the grouped objects to create multiple instances of the same group.
- Maintain Low Poly Count: Keep the polygon count low to ensure a light model and maintain a small file size.
- Assign proper Proper Names: Assign meaningful names to the mesh objects in the outliner – this helps maintain clarity and organisation within the scene.
- Omit Colour Additions:
- Note that adding colours is not necessary for this activity.
- Focus on creating the scene using basic shapes without applying colours.
- Share the Scene:
- Capture images of your restaurant or street scene.
- Post the images to the forum thread: Learning Activity 1: Create a restaurant or street scene, with a brief comment on how you would improve your scene.
- Viewing your peers' images will help you gain insights on alternative approaches to scene development.
Next steps
As you dive into the world of game art, you’ll develop a strong foundation in Maya and its key features. From understanding Maya’s strengths to navigating the 3D environment, this topic has been designed to help you gain the essential skills needed to bring virtual worlds and characters to life.
Explore Maya's capabilities further by experimenting with different 3D shapes, with groups and hierarchies, and challenging yourself to create unique and immersive scenes beyond this course. Share your progress and engage with people around you to receive feedback and inspire others.
Our next topic, Modelling, will take you deeper into 3D animation, equipping you with essential skills in polygon modelling, subdivisions, and mesh manipulation.