About this topic
Welcome to Modelling, where you explore 3D animation modelling using Maya. This topic will focus on polygon modelling, subdivisions, surfaces and elements, mesh editing, and UV wrapping. To put your modelling skills into action at the end of this topic, you’ll have the opportunity to use Maya to create a sword model.
In 3D animation, modelling refers to the process of creating digital representations of objects, characters, environments, or any other elements that populate a 3D scene. It is a fundamental step in the 3D content creation pipeline and is the foundation for creating visually appealing and realistic virtual worlds.
Modelling involves using specialised software, such as Maya, to define the shape, structure, and details of a 3D object. The goal is to create a digital model accurately representing the desired physical object or concept. This can include everything from organic forms like animals and humans to inanimate objects like buildings, vehicles, or even abstract shapes.
The process of modelling typically involves the following steps:

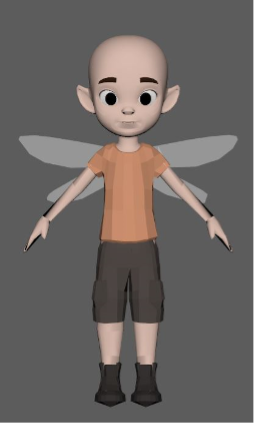
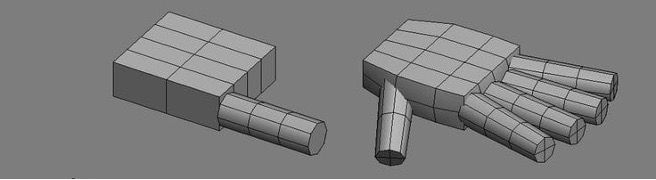
- Blocking: Initially, artists start with rough and basic shapes, often referred to as primitives, such as cubes, spheres, or cylinders. These primitives are manipulated and transformed to approximate the overall form of the object being modelled. This stage is commonly known as blocking or blocking out the model (see example below).
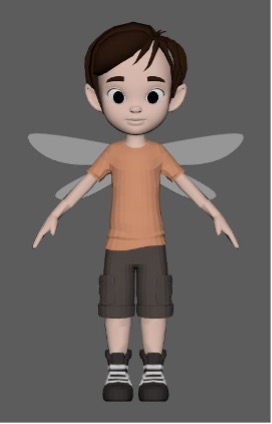
- Refinement: Once the basic form is established, artists refine the model by adding more detail and sculpting the shape to match the desired design. This includes manipulating vertices, edges and faces to create smoother curves, sharper edges, or intricate surface details (see example below).
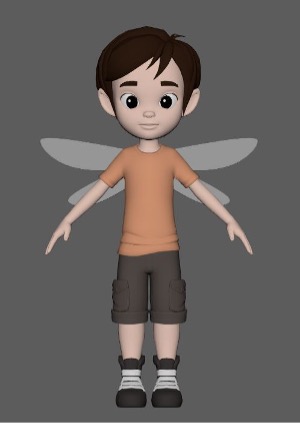
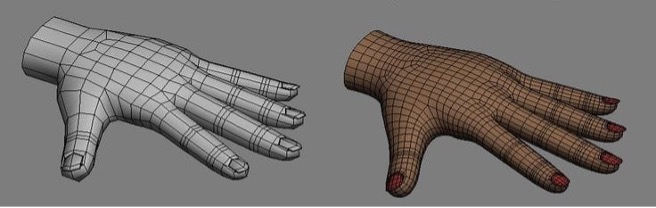
- Topology: Topology refers to the arrangement of vertices, edges, and faces that define the model's surface. Creating a clean and efficient topology is essential for ensuring proper deformation during animation and optimising performance in real-time applications. Artists pay close attention to the flow and organisation of the model's topology (see example below).
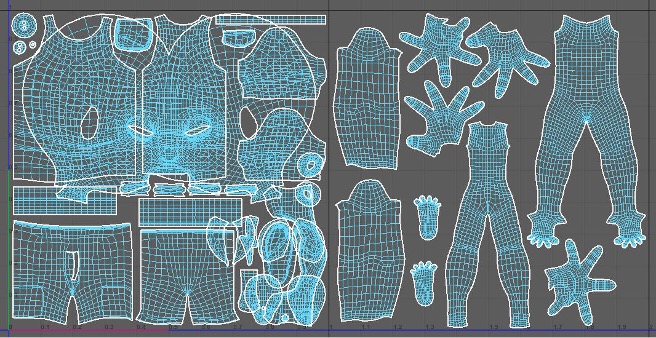
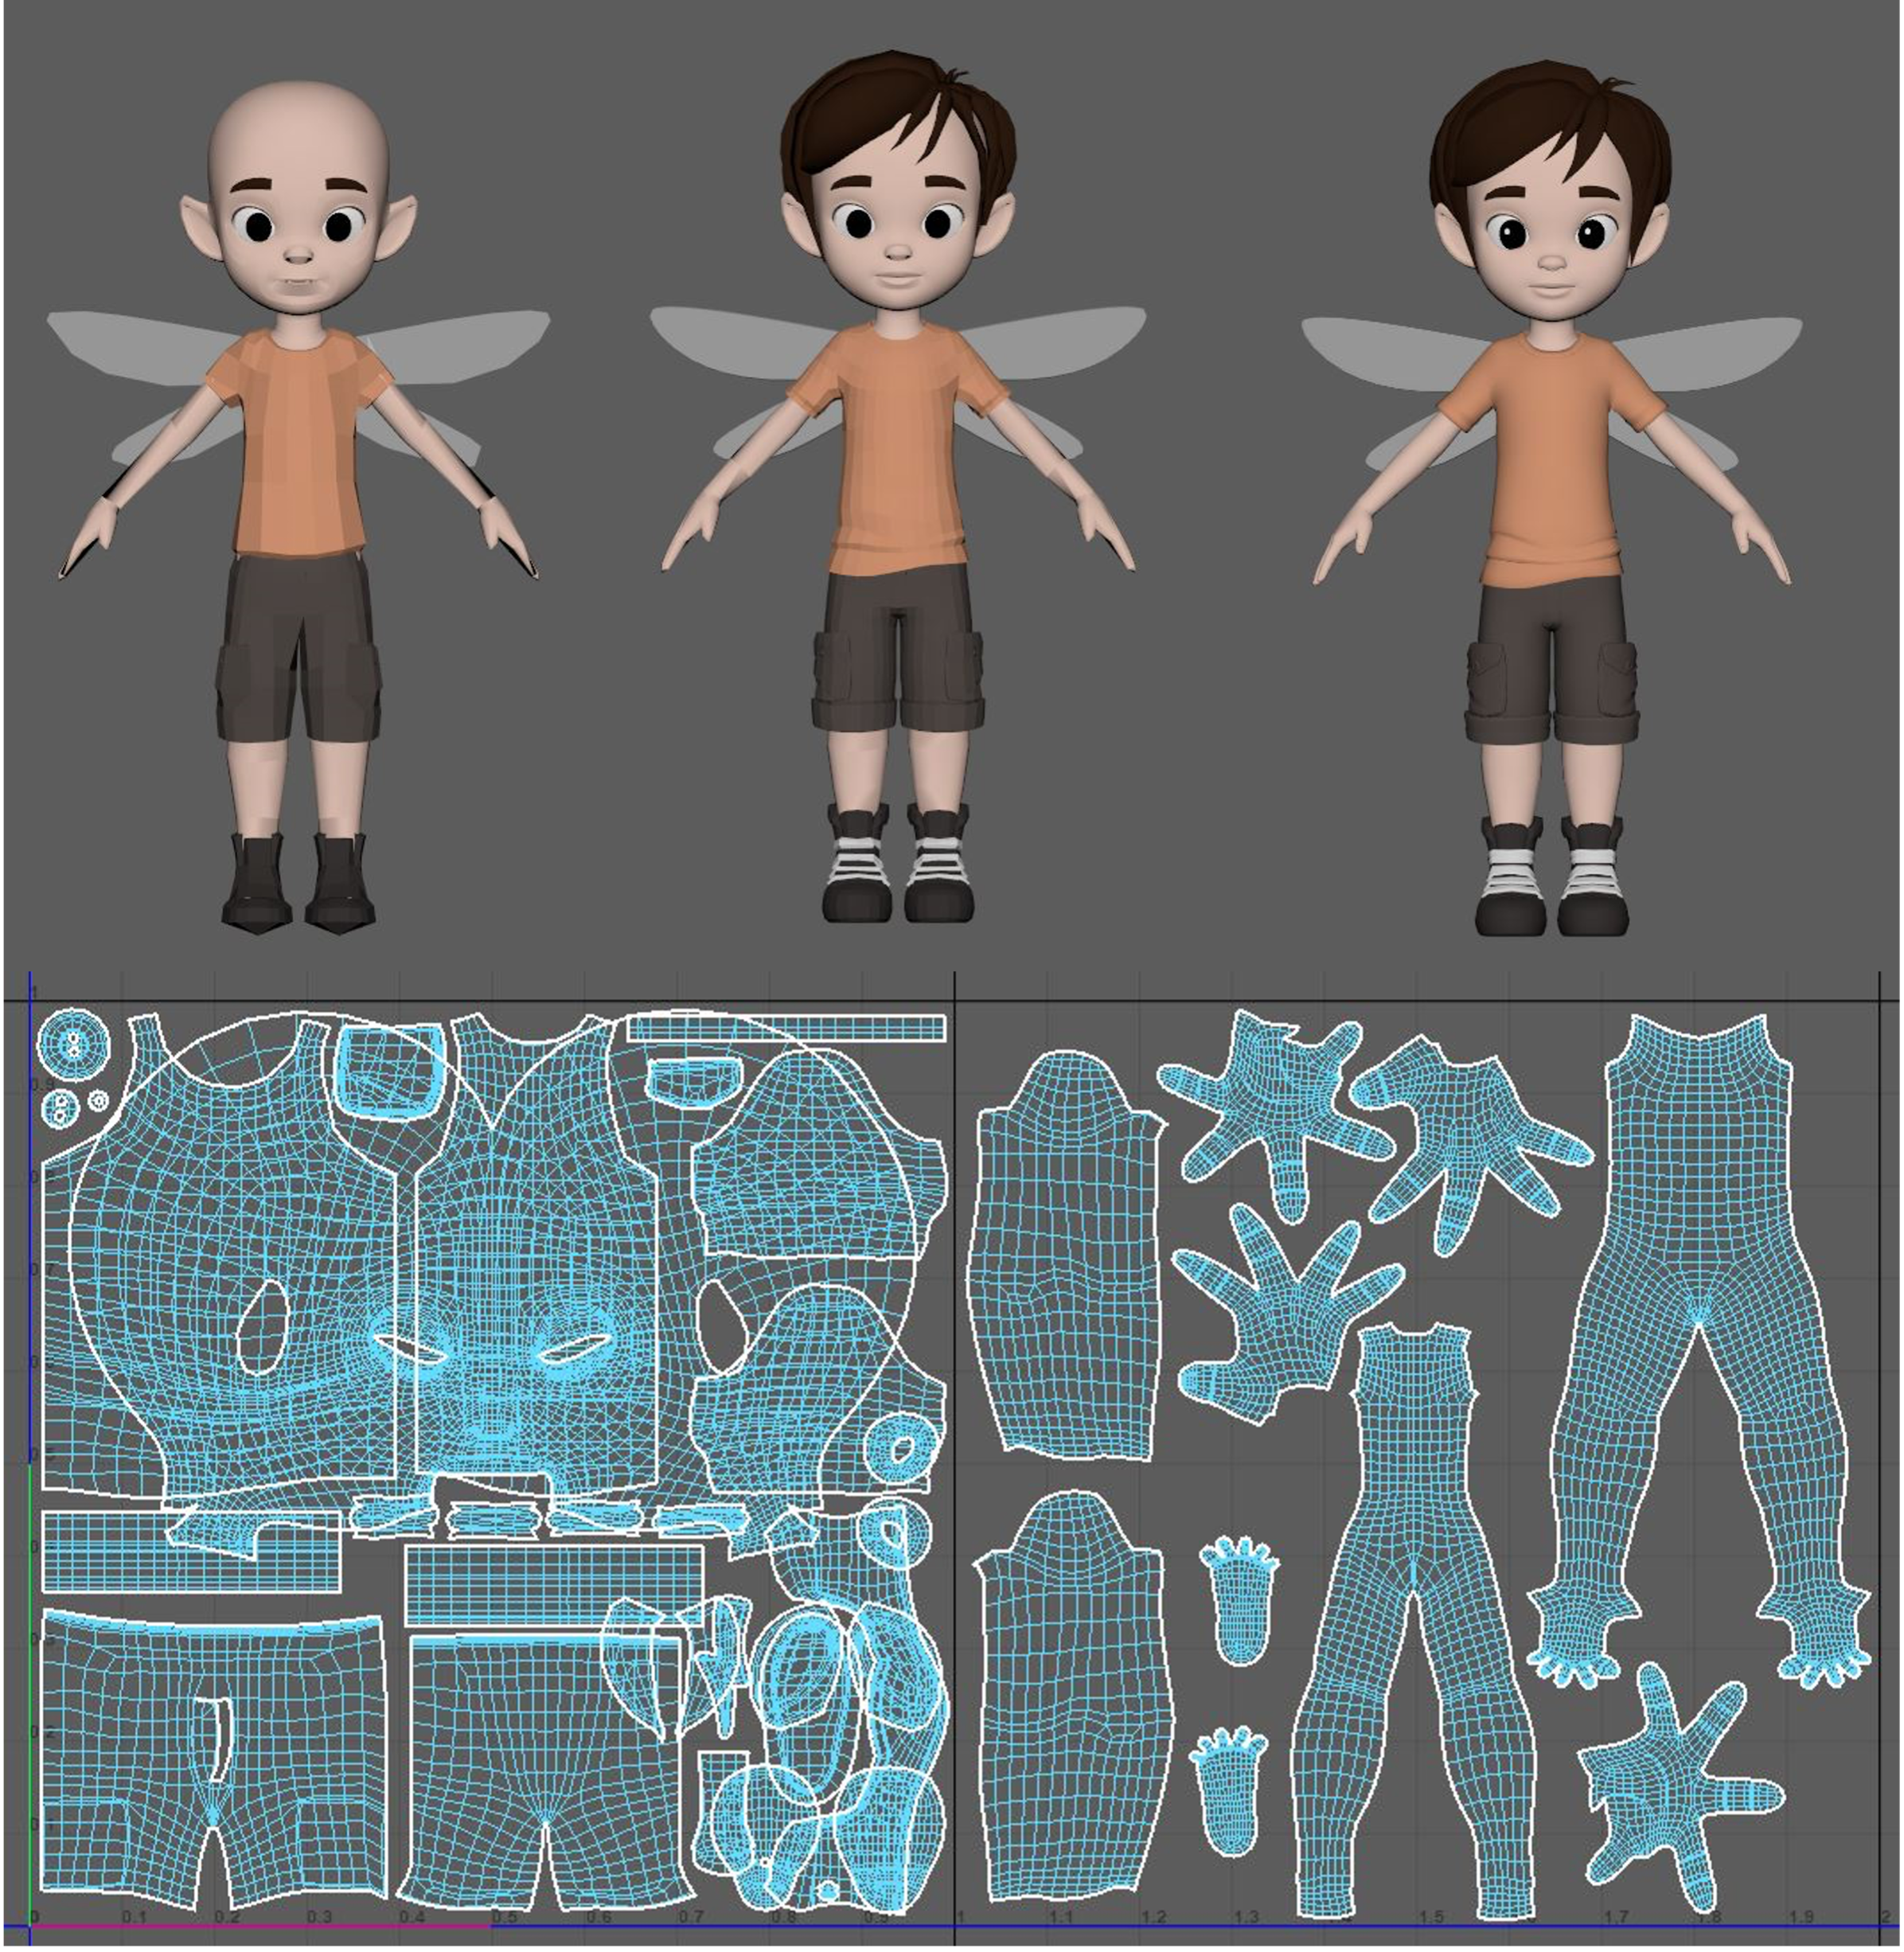
- UV Mapping: UV mapping is the process of unwrapping the model's surface and assigning a 2D coordinate system to it. This allows for the application of textures and materials accurately onto the 3D surface (see example below).
- High-poly and Low-poly: Depending on the project's requirements, artists may create high-polygon and low-polygon versions of the model. High-poly models contain more detail and are often used to render still images or pre-rendered sequences. In contrast, low-poly models are optimised for real-time applications like video games or interactive experiences.
Throughout the modelling process, artists rely on various tools and techniques provided by software like Maya to shape, sculpt, and refine 3D objects. These tools include selection tools, extrusion, beveling, sculpting brushes, and more, which enable precise control over the geometry and details of the model.
Polygon modelling, also known as poly modelling, is a widely used technique in 3D computer graphics for creating digital models using polygons as the building blocks. It involves manipulating and arranging vertices, edges and faces to define the shape and form of a 3D object.
In polygon modelling, artists construct models by connecting vertices to form edges and then connecting the edges to create faces. These faces, usually triangles or quadrilaterals, collectively make up the model's surface. Artists can sculpt and shape the desired object by adding or removing polygons and adjusting their positions.
The process of polygon modelling typically involves the following steps:

- Blocking Out: Artists start with basic shapes, often using primitive objects such as cubes, spheres, or cylinders, to establish the overall form of the model. These primitives can be scaled, rotated, and positioned to approximate the general shape of the object being modelled (see example below).
- Detailing: Artists refine the model by manipulating individual vertices, edges, and faces to add more detail and achieve the desired level of accuracy. This involves moving vertices to create smoother curves, extruding faces to add depth, beveling edges to create rounded edges, and merging or splitting polygons to refine the geometry.
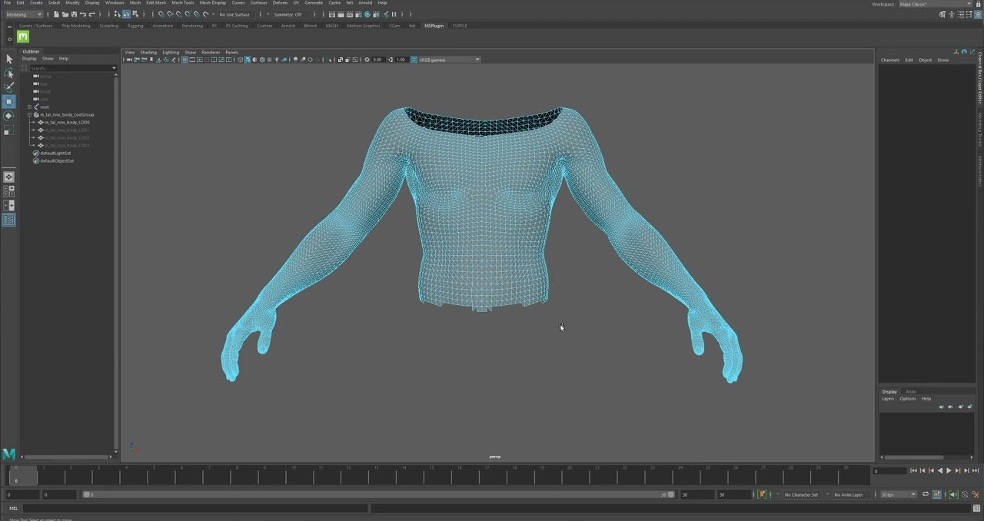
- Edge Loops: Edge loops are continuous paths of connected edges that follow the model's contours. Creating well-defined and strategically placed edge loops is crucial for achieving proper deformations during animation and maintaining a smooth surface flow. Edge loops help define areas like facial features, limbs, or other important regions of the model (see example below).
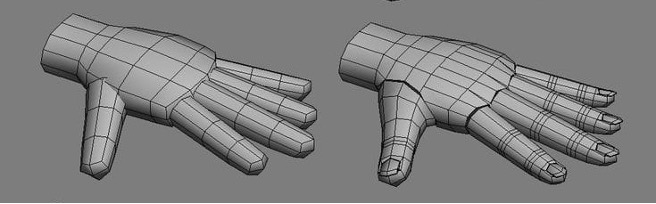
- Subdivision: Subdivision is the process of increasing the density of polygons in the model to create a smoother surface. This is achieved by applying a subdivision modifier or algorithm that divides each polygon into smaller ones, resulting in a more refined appearance. Subdivision surfaces are commonly used in high-quality rendering and visualisation (see example below).
Polygon modelling provides artists with a versatile and flexible approach to creating 3D models. It allows for precise control over the model's shape, structure, and level of detail. With various modelling tools and techniques available in software like Maya, artists can sculpt complex organic shapes, architectural structures, character models, props, and more.


Poly modelling is widely used in various industries, including animation, visual effects, video game development, product design, and architectural visualisation. It offers a powerful method for creating detailed and realistic digital models that can be further enhanced with texturing, shading, rigging, and animation to bring them to life.
Tutorial 2a: Build a rocket model
By the end of this tutorial, you can create your first polygon model, a rocket. To work through the tutorial, follow these steps:
- Watch the tutorial’s video below (2min 32sec).
- Interact with the tutorial and Maya.
- Share your rocket model:
- Capture an image of your rocket model.
- Post the image in the forum thread Tutorial 2a: Build a rocket model with a brief comment on what you thought of the modelling process.
- Viewing your peers’ images will also help you discover how others approach polygon modelling.
- Have fun, and ask us if you need any help!
Explore further
If you want to dive deeper into the basic skills required for Maya, visit Maya Getting Started, and go through Lesson 1: Modelling a polygonal mesh from a reference image.
This is an optional activity that you may find valuable for your learning.
Subdivisions
Subdivision surfaces are commonly used in various industries, including film and television visual effects, animation, gaming, product design, and architectural visualisation. They offer a versatile technique for achieving high-quality, detailed models with smooth surfaces and refined geometry.
Subdivisions refer to the process of subdividing or dividing polygons into smaller, more numerous polygons. It is a technique used to refine the surface of a 3D model, increasing its smoothness and level of detail.
When a model is subdivided, each polygon is divided into smaller polygons, resulting in a higher polygon density. This leads to a more refined and smoother appearance, especially when rendering or visualising the model.
Advantages
Subdivision surfaces offer several advantages in 3D modelling:
- Smoother Surfaces: By increasing polygon density through subdivisions, the model's surface becomes smoother and more continuous. Subdivisions help eliminate polygonal artefacts, such as visible faceting or jagged edges, which can occur when working with low-polygon models.
- Level of Detail: Subdividing a model allows artists to add finer details and intricate features to the surface. The increased polygon density provides more vertices, edges, and faces to work with, enabling artists to sculpt and shape the model with greater precision.
- Animation and Deformation: Subdivision surfaces are beneficial for animation purposes. The increased polygon density helps achieve smoother deformations and more accurate bending or stretching of the model during animation. This is particularly important for character models, where realistic movements and facial expressions are required.
- Sculpting and Editing: Subdivisions provide a more malleable surface for sculpting and editing. Artists can use various tools to manipulate the subdivided model's vertices, edges, and faces, allowing for finer control and detailed modifications.
Subdivisions can be applied in two forms: viewport subdivisions and render-time subdivisions.
| Viewport Subdivisions | Render-Time Subdivisions |
|---|---|
| Viewport subdivisions are used for real-time or interactive editing purposes. They offer a smoothed representation of the model while retaining the underlying low-polygon structure. This allows artists to work with a more visually appealing surface during the modelling process without significantly increasing computational overhead. | Render-time subdivisions are applied during the final rendering of the model. They increase the polygon density and surface smoothness, enhancing the quality of the rendered output. Renderers subdivide the model based on specified subdivision settings or algorithms, ensuring that the final result is a highly detailed and smooth representation of the model. |

Faces are the polygonal surfaces that make up the exterior or interior of a 3D model. They are the individual planar surfaces that make up a model’s external or internal structure, defining the object's shape, geometry, and surface details. They play a vital role in various stages of the 3D pipeline, including modelling, UV mapping, texturing, rigging, and animation.
Faces are created by connecting a series of vertices with edges, forming closed loops that define the boundaries of the face. These loops can be composed of three vertices (forming a triangle), four vertices (forming a quadrilateral), or more vertices (in the case of polygons with more sides).
The shape and arrangement of faces determine the overall appearance and structure of a 3D model. By connecting faces together, artists can create complex surfaces and define the shape of objects. The collective arrangement of faces in a 3D model is often referred to as the model's topology.
Faces play a crucial role in various aspects of 3D modelling and rendering:
- Geometry: Faces define the surface geometry and shape of a 3D object. They determine how light interacts with the model, affecting its shading, reflections, and overall visual appearance.
- UV Mapping: Faces are used for UV mapping, a process that involves assigning 2D texture coordinates to the surface of a 3D model. The vertices of a face correspond to points on the UV map, which allows textures and materials to be accurately applied to the model.
- Surface Detailing: Faces can be subdivided or manipulated to add more detail to the model's surface. By adjusting the position and arrangement of vertices, edges, and faces, artists can sculpt intricate features or create smoother surfaces.
- Rigging and Animation: Faces are important for rigging and animation purposes. They define the areas that deform and move during animation, allowing characters or objects to have fluid and realistic movements.
Edges and vertices are fundamental elements in 3D modelling, influencing the geometry, shape, and structure of the 3D model's surfaces.
Understanding how vertices and edges interact is essential for creating accurate and visually appealing 3D models. Vertices represent individual points in 3D space, while edges connect these points to form lines.
| Vertex | Edge |
|---|---|
| A vertex (plural: vertices) represents a single point in 3D space. It is typically represented as a coordinate (X, Y, Z) and acts as a corner or endpoint of an edge or face. Vertices are the basic building blocks of a 3D model and serve as anchor points for connecting edges and forming faces. The arrangement and position of vertices determine the shape and structure of the model. | An edge is a straight line segment that connects two vertices. It represents the line of intersection between two adjacent faces in a 3D model. Edges define the boundaries and shape of polygons and play a crucial role in determining the overall geometry of the model. The length, position, and orientation of edges contribute to the appearance and structure of the model's surfaces. |
Together, vertices and edges form the primary components of a 3D model's wireframe representation. By connecting vertices with edges, various polygons or faces are created, defining the surface of the model. These polygons can be triangles (composed of three vertices and three edges) or quadrilaterals (composed of four vertices and four edges). They can be further subdivided to add more detail and complexity to the model's surface.
Vertices and edges are essential for manipulating and shaping 3D models using various modelling techniques. Artists can move, scale, rotate, or adjust the position of vertices to modify the model's shape. Edges provide the framework for defining the model's topology, allowing for the creation of complex structures and surface details.
In computer graphics and 3D modelling, a mesh refers to a collection of vertices, edges, and faces that define the shape and structure of a 3D object. It is a fundamental component used to represent the geometry of objects in a virtual 3D space.
A mesh consists of individual points called vertices or vertex points, which are connected by edges to form lines, and these lines create polygons known as faces. The faces define the visible surfaces of the object and can be triangular (composed of three vertices) or quadrilateral (composed of four vertices) in shape.
Meshes are widely used in various applications, including 3D modelling, computer animation, virtual reality, and video games. They provide a flexible and efficient way to represent complex 3D shapes and surfaces. By manipulating the mesh's vertices, edges, and faces, one can sculpt, deform, and create a wide variety of objects and characters.
In addition to defining the shape of an object, meshes can also carry additional information such as texture coordinates (UVs), normals, colours, and material assignments. These attributes help define how the surface of the mesh interacts with light, textures, and other visual effects.
Meshes can be created from scratch using 3D modelling software or generated from scanning real-world objects using techniques like 3D scanning or photogrammetry. Once a mesh is created, it can be further modified, textured, animated, and rendered to create visually appealing and realistic 3D graphics.
Mesh Editing tool
Mesh editing tools are a set of functionalities and operations provided by 3D modelling software that allows artists and designers to manipulate and modify the geometry of a mesh. These tools enable users to sculpt, refine, and edit the vertices, edges, and faces of a 3D model, allowing for precise control over its shape and structure.
Mesh editing tools offer a wide range of operations that cater to different modelling needs and techniques. Some common mesh editing tools include:
- Selection Tools: These tools allow users to select and manipulate specific components of a mesh, such as vertices, edges, or faces. Selection tools can be used to modify individual or multiple components simultaneously.
- Transformation Tools: Transformation tools enable users to translate, rotate, and scale selected components. Artists can use these tools to reposition or resize parts of the mesh, adjust its overall shape, or align elements with precision.
- Extrusion: The extrusion tool allows users to create new geometry by outwardly extending selected faces, edges, or vertices. This operation is useful for creating protrusions, adding details, or forming complex shapes.
- Beveling: Beveling involves rounding or chamfering the edges of selected faces or vertices, creating smooth transitions or adding fillets to the mesh. Beveling is commonly used to create more realistic and visually appealing models.
- Bridge: The bridge tool enables users to connect or blend two or more selected edges or faces, creating a smooth transition or filling a gap between different parts of the mesh. It is often used to join separate components or create complex shapes.
- Splitting and Merging: These tools allow users to divide or combine selected faces, edges, or vertices. They are useful for refining the topology of a mesh, separating or combining elements, or creating complex cutouts or insets.
- Sculpting Brushes: Sculpting brushes simulate the behaviour of traditional sculpting tools, allowing users to digitally sculpt the surface of a mesh. These brushes enable artists to create organic shapes, add fine details, or modify the mesh with natural and intuitive brush strokes.
- Subdivision: Subdivision tools allow users to increase the density of the mesh by subdividing its faces, resulting in a smoother and more refined surface. Subdivision surfaces are commonly used for rendering high-quality images or preparing models for animation.
These are just a few examples of the many mesh editing tools available in 3D modelling software like Maya, Blender, or 3ds Max. The specific set of tools and operations may vary depending on the software used. Still, they all aim to provide users with versatile and powerful capabilities to manipulate and shape 3D meshes to achieve their desired results.
Tutorial 2b: Using mesh editing tools in Maya
By the end of this tutorial, you’ll be able to use mesh editing tools in Maya. To work through the tutorial, follow these steps:
- Visit this Maya’s Tools for Modelling playlist on YouTube.
- Locate and watch these five videos from the playlist:
- Maya’s Connect Tool
- Maya’s Multi-Cut Tool
- Maya’s Combined & Separate Tools
- Maya’s Bevel Tool
- Maya’s Target Weld Tool
- Interact with the tutorial and Maya.
- Remember to take breaks.
- Have fun, and ask us if you need any help!
Explore further
If you want to dive deeper into Maya’s modelling capabilities, visit Josh Antonio’s YouTube playlist Maya Tools, and find a video which interests you and helps improve your 3D modelling skills.
This is an optional activity that you may find valuable for your learning.
In 3D modelling, UV unwrapping is essential for accurately applying textures, colours, and materials onto the 3D model's surface. It provides a mapping between the 2D UV coordinates and the 3D model's vertices, allowing textures and materials to be applied precisely to specific areas of the model.
UV unwrapping is the process of creating a 2D representation of the surface of a 3D model, known as a UV map or UV layout. It involves unwrapping the 3D model's surface geometry onto a flat 2D plane, like unwrapping the skin of a 3D object and laying it flat.
The UV unwrapping process typically involves the following steps:

UV unwrapping provides the foundation for applying textures, materials, and patterns to a 3D model. Artists can paint or apply textures directly onto the UV map using 2D image editing software like Photoshop or substance painter. The UV map is then applied to the 3D model, aligning the texture with the corresponding UV coordinates.
UV unwrapping is a critical process in 3D modelling and texturing workflows, as it enables precise control over how textures are applied to the model's surface. It allows for realistic and detailed texturing, shading, and material mapping, enhancing the visual quality and realism of the 3D model in rendering and real-time applications.
Work through the next tutorial for detailed guidance: Tutorial 2c: Unwrap UVs in less than 5 minutes.
Case study: UV wrapping– No Man’s Sky
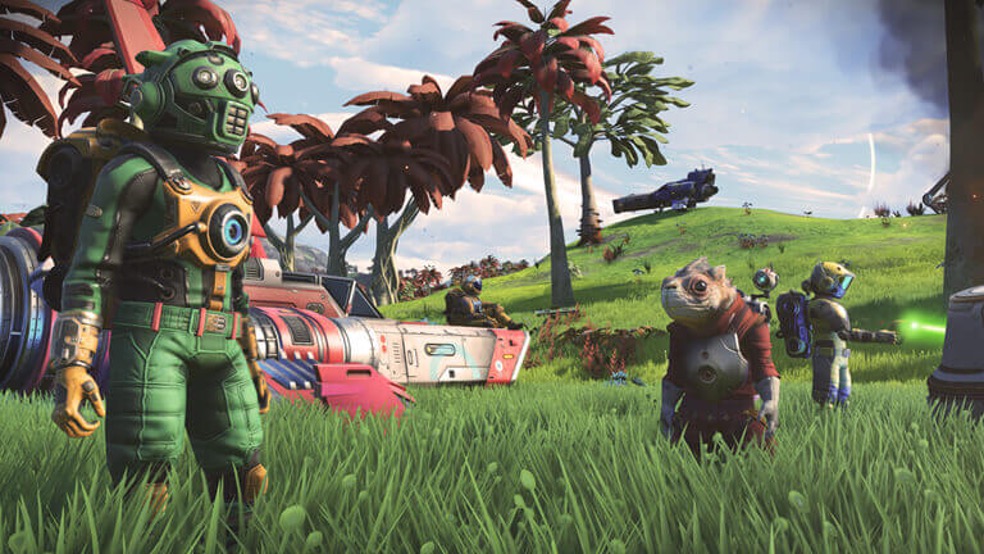
One real-life example of a game where players noticed bad UV wrapping is the game 'No Man's Sky' upon its initial release in 2016. Developed by Hello Games, the game features a procedurally generated universe with vast environments and diverse planetary surfaces.
During the game's launch, players quickly noticed issues with UV wrapping on the planetary surfaces. UV wrapping determines how textures are applied to the 3D geometry of objects, including terrain and environmental elements. In 'No Man's Sky', the UV mapping on certain planets resulted in visible seams, tiling artefacts, and texture stretching, leading to a lack of visual cohesion and immersion.
The problems with UV wrapping became especially noticeable when players explored the game's environments and encountered repetitive patterns, abrupt texture transitions, or stretched textures on terrain features like mountains or cliffs. These issues affected the game's generated worlds' overall visual quality and believability, detracting from the intended immersive experience.
Hello Games acknowledged the player’s feedback and worked on improving the game through subsequent updates and patches. Over time, the issues with UV wrapping and other graphical imperfections were addressed, improving the game's overall visual fidelity and rendering quality.
This example demonstrates the importance of proper UV wrapping in game development, particularly for open-world or procedurally generated games. Accurate UV mapping ensures seamless and realistic texture application on complex surfaces, ultimately enhancing the player's immersion and enjoyment of the game world.
Tutorial 2c: UV unwrapping in less than 5 minutes
By the end of this tutorial, you’ll be able to identify the process of UV unwrapping in Maya, with a focus on using five key steps to unwrap nearly any model in 3D. To work through the tutorial, follow these steps:
- Watch the tutorial’s video below (10min 13sec).
- Interact with the tutorial and Maya.
- Open one of your previously created models and try to UV unwrap it.
- Have fun, and ask us if you need any help!
Explore further
If you want to dive deeper into the related process of UV unfolding, visit Maya Get Started, and go through Lesson 2: UV unfolding.
This is an optional activity that you may find valuable for your learning.
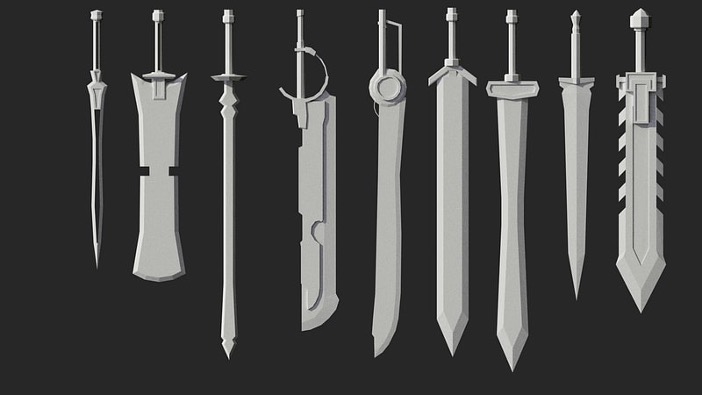
Now it's time to create something a little more exciting; choosing one of the swords in the reference image below as inspiration, you will create your own sword model in Maya.
Follow the steps below to complete this activity. Ensure you use the reference image below to guide your design, create the sword model with mesh editing tools, perform UV unwrapping, layout UVs on one tile, minimise seams and UV stretch, and then share the final image in the designated Forum thread.
- Access Maya: Open Maya on your computer.
- Choose a Sword: Select one of the swords in the image above as a guide for creating your own sword model.
- Create the Sword Model:
- Use the mesh editing tools in Maya to create a model of the sword.
- Refer to the chosen sword in the reference image for its proportions and design elements.
- UV Unwrap the Sword: Perform UV unwrapping on the sword model you have made.
- Layout UVs on One Tile:
- Arrange the UVs of the sword model onto a single UV layout.
- Maintain a uniform scale across the UVs.
- Minimise Seams:
- Try to have as few seams as possible in the UV layout.
- Reduce visible seams on the model to enhance its visual appeal.
- Minimise UV Stretch: Avoid excessive distortion or stretching of the UVs, which can negatively impact model quality.
- Share the Model:
- Capture an image of your sword model.
- Post the image in the forum thread Learning Activity 2: Create a sword model with a brief comment on what you found to be the most challenging aspect of creating your sword model.
- Viewing each other’s images helps you share techniques and learn from each other’s successes and challenges with game art.
Next steps
Building upon your understanding of Maya, this topic has helped you take your 3D content creation skills to the next level. You're learning the art of creating intricate and realistic models, from polygon modelling to subdivisions and mesh manipulation.
Apply your modelling skills to new projects outside of the course. Choose objects from your surroundings or recreate your favourite characters from different media. Experiment with other techniques and share your creations with your creative community for feedback and inspiration.
Having learnt about modelling, you’re now ready to venture into texturing and materials in our next topic, Texturing. Building upon your previous knowledge, you will explore texture mapping, texturing techniques using Maya and Photoshop, and rendering to bring your models to life.