There are three modules in this course, Digital Images, Vector Graphics, and Document Design. You'll be working on three projects, a poster, logo, magazine cover and DPS.
To complete this course, read through and watch all content, and complete the three projects found at the end of the first topic at the beginning of each module. Hand in each project once you complete the adjacent module.
Each other topic has a small activity at the end. Although it's strongly suggested that you complete each activity, this is not a course requirement. The more activities you complete, the more feedback and advice I can provide!
In this lesson, we'll introduce the Photoshop workspace and explore Design Process – the steps you will take to create solutions to graphic design problems. We'll also take a look at some free stock image websites, where you can download images to use in your learning projects.
This lesson also introduces the first learning activity for the course, a poster design.

A design process is a step-by-step approach used by designers to ensure that they produce the most effective design. It involves brainstorming ideas, research, analysis, problem-solving, developing ideas, evaluation and discussion, refinement and re-evaluation, production, proofing and finally presentation.
It is important to keep a record of the design process by writing down every single project requirement, idea and goal--including the smallest ones.
Starting a new project, a productive first step is to try your best to come up with a detailed plan of your actions. Design projects demand maximum concentration so you must structure your plan to detail every phase and step taken to achieve the final product.
During every phase you need to manage various, sometimes opposing, requests and there may be times where you need to perform quickly whilst paying attention to every detail and the overall big picture of the project.
If you neglect some important project requirements because you forgot about them or have lacked a structure from the beginning, you will come up short and your final product may not be effective in representing the ideas you had in place from the beginning.
An example of a record-keeping tool is a visual diary. In your visual diary (hard copy or online) you can record all the steps within the design process from the initial design brief, idea generation, concept, sketching, planning, analysis, feedback and final product.
Let’s visit the steps to see what the design process looks like.
The Steps
- Interpreting the brief
- Idea generation
- Planning (timeline/list)
- Research and analysis
- Concepts sketches (thumbnails)
- Development of concepts
- Critique and evaluation of concepts
- Refinement and re-evaluation
- Production and proofing
- Presentation.
We'll explore each of these steps as you progress through the course. But for know, keep in mind that the best design solutions make excellent use of each step in the design process.
Here are a few websites that will become your best friends throughout this course. Having ready access to a wide range of images can make your design process really flow – you can search for the perfect image by colour, mood, concept or subject.
Free Stock Images
Unsplash: https://unsplash.com/
You can do whatever you want with their collection of over 300,000 beautiful, high-resolution images from more than 50,000 contributors. Upsplash doesn’t offer the sheer volume of choice as some paid sites, but the photos are top-quality and thousands are added every day. Chances are good that you’ll find something to work with on this free stock site.
Pixabay: https://pixabay.com/
Pixabay has a great collection of HD stock videos. It offers over 1.2 million images and videos, all released under Creative Commons Zero License. That means you don’t need to get permission or give credit to the artist to use or modify the content, even if you’re using it for commercial purposes (but it’s still best practice to always credit the owner).
Pexels: https://www.pexels.com/
Similar to Unsplash, with a smaller selection of images, generally quite high in quality.
Adobe Create Cloud
Click the Creative Cloud Icon and then scroll down to Stock in the left side menu. The will take you to a website where you can search for different stock. Some stock is free and other stock costs money.
Paid Stock Images
iStock: https://www.istockphoto.com/
High quality and a massive selection. iStock offer subscription plans and pricing for individual images.
Throughout this course, we will guide you through various tutorials to develop your use of basic tools and techniques when using Adobe software. Let's start this journey with some Photoshop tutorials!
Follow along with these video tutorials, completing the exercises in your own time. You can start, stop and rewatch these at any time. If you have any questions about a tool or technique, please post these to the Learning Support forum.
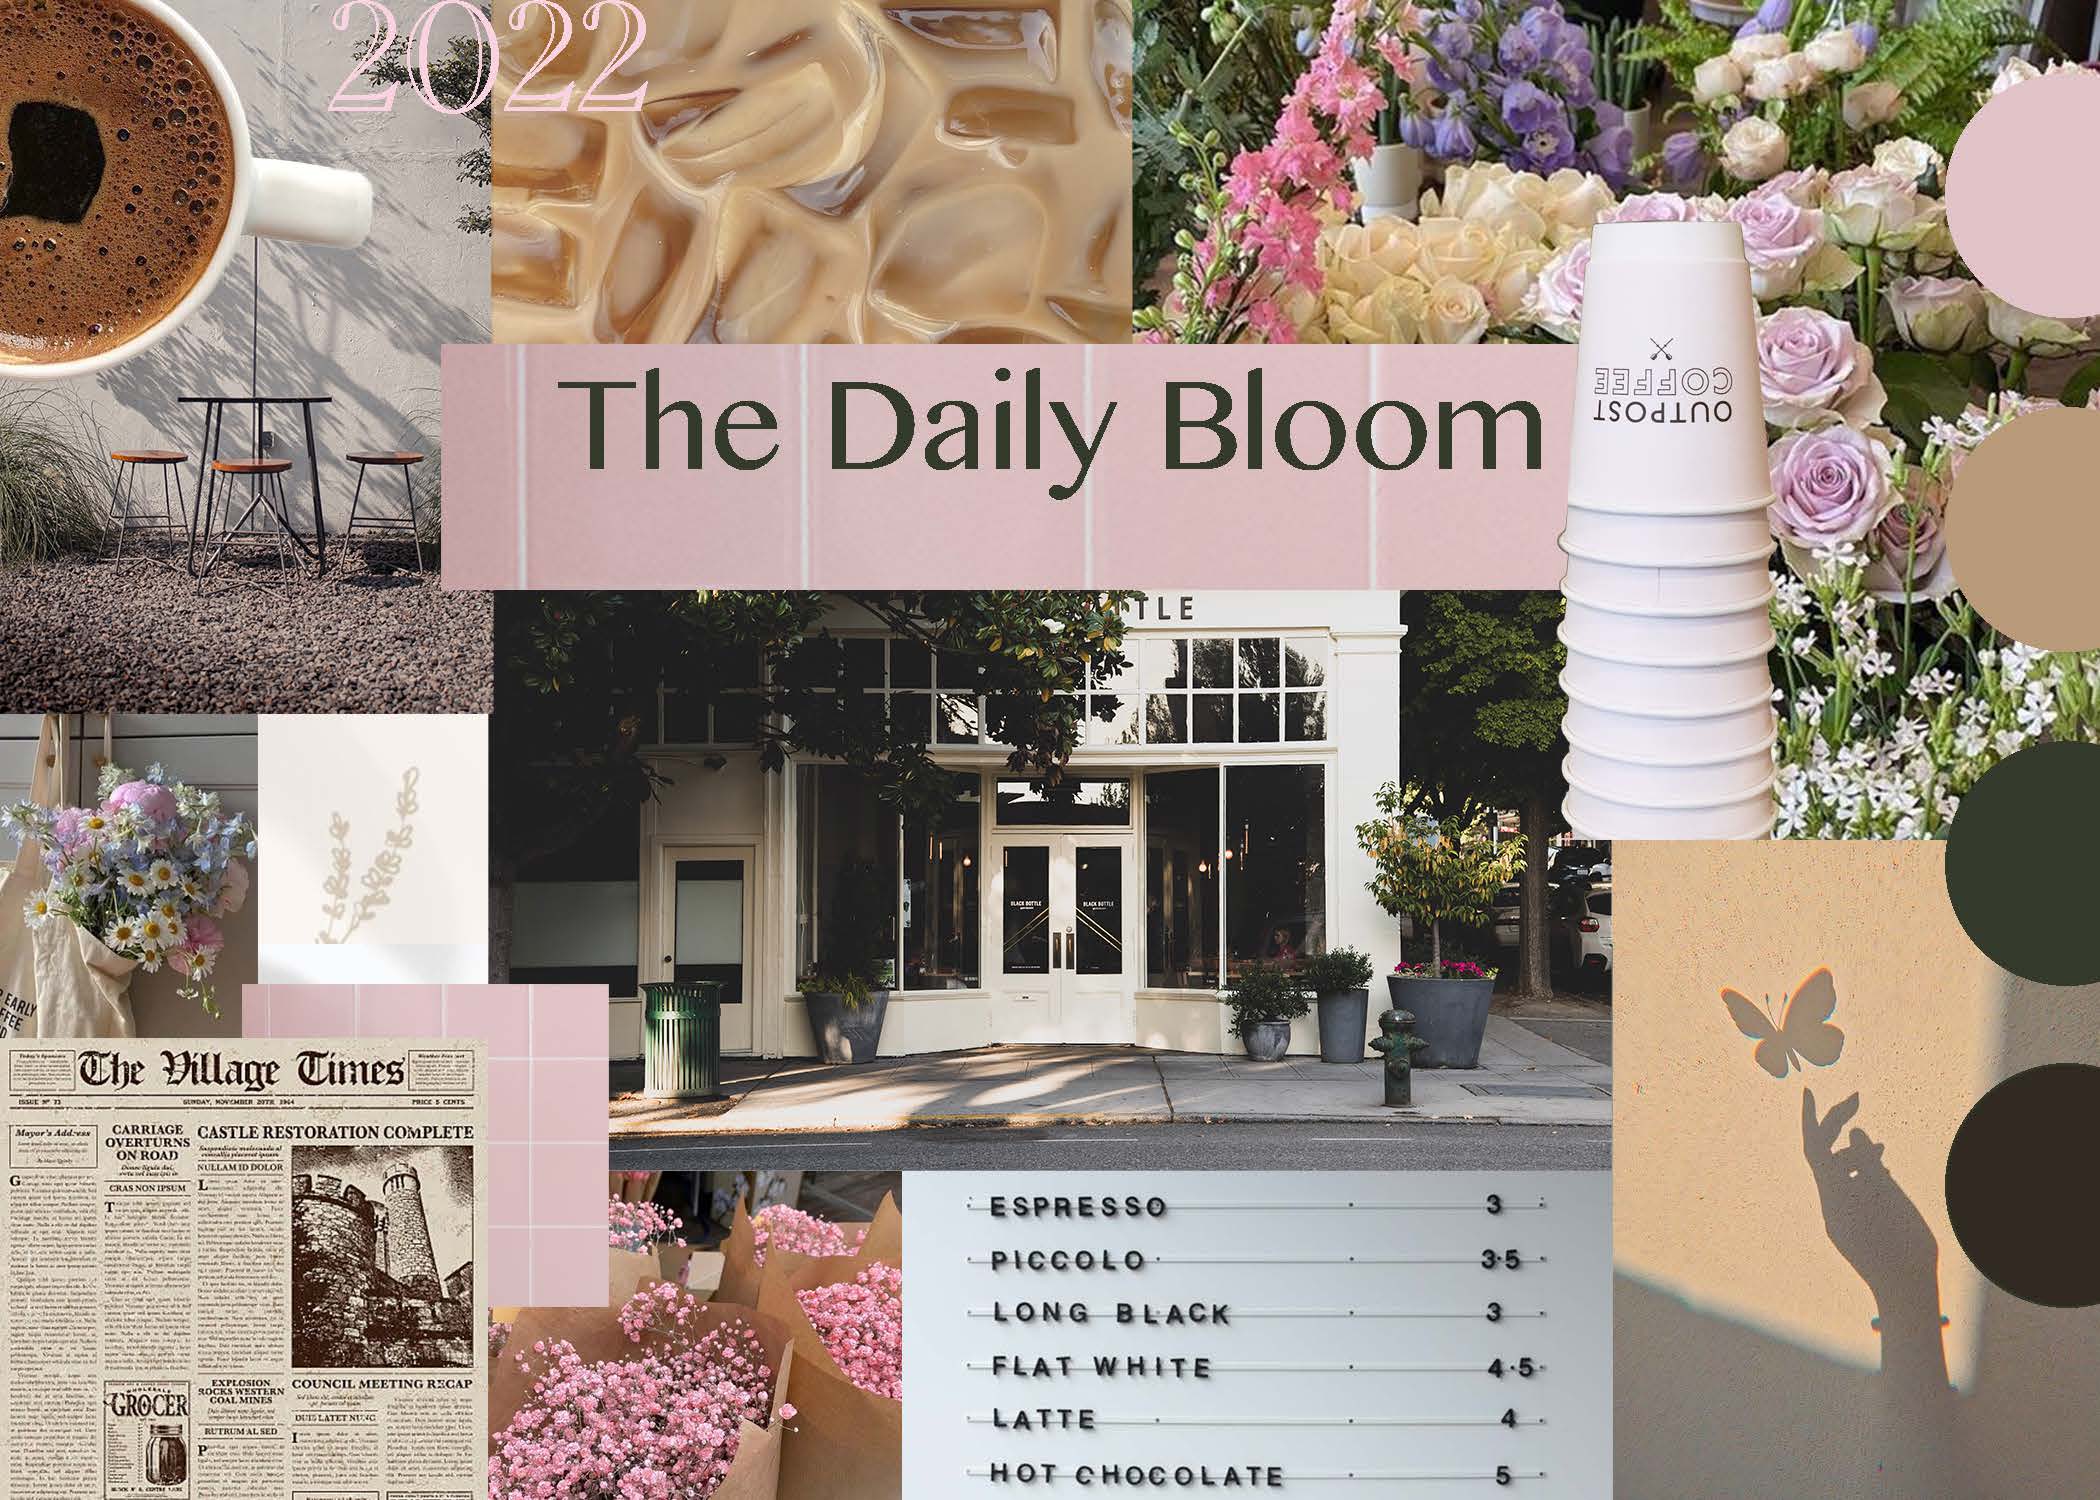
A moodboard is a collection of images that show the look and feel of an idea before it has been created. Moldboards are a collage of various inspiring things; collections of images that relate to the style, images of anything, from previous design work, to art, to furniture, to landscapes etc. As well as words, pieces of writing, anything that can help to serve as a visual tool to quickly inform others (such as a client) of the overall ‘feel’ or ‘flow’ that a designer and/or marketer is trying to achieve.
- An important step towards the beginning of the designing process
- Enables a person to illustrate visually the direction of style which they are pursuing
- Help decision making in the design process
- Communicate to others such as clients
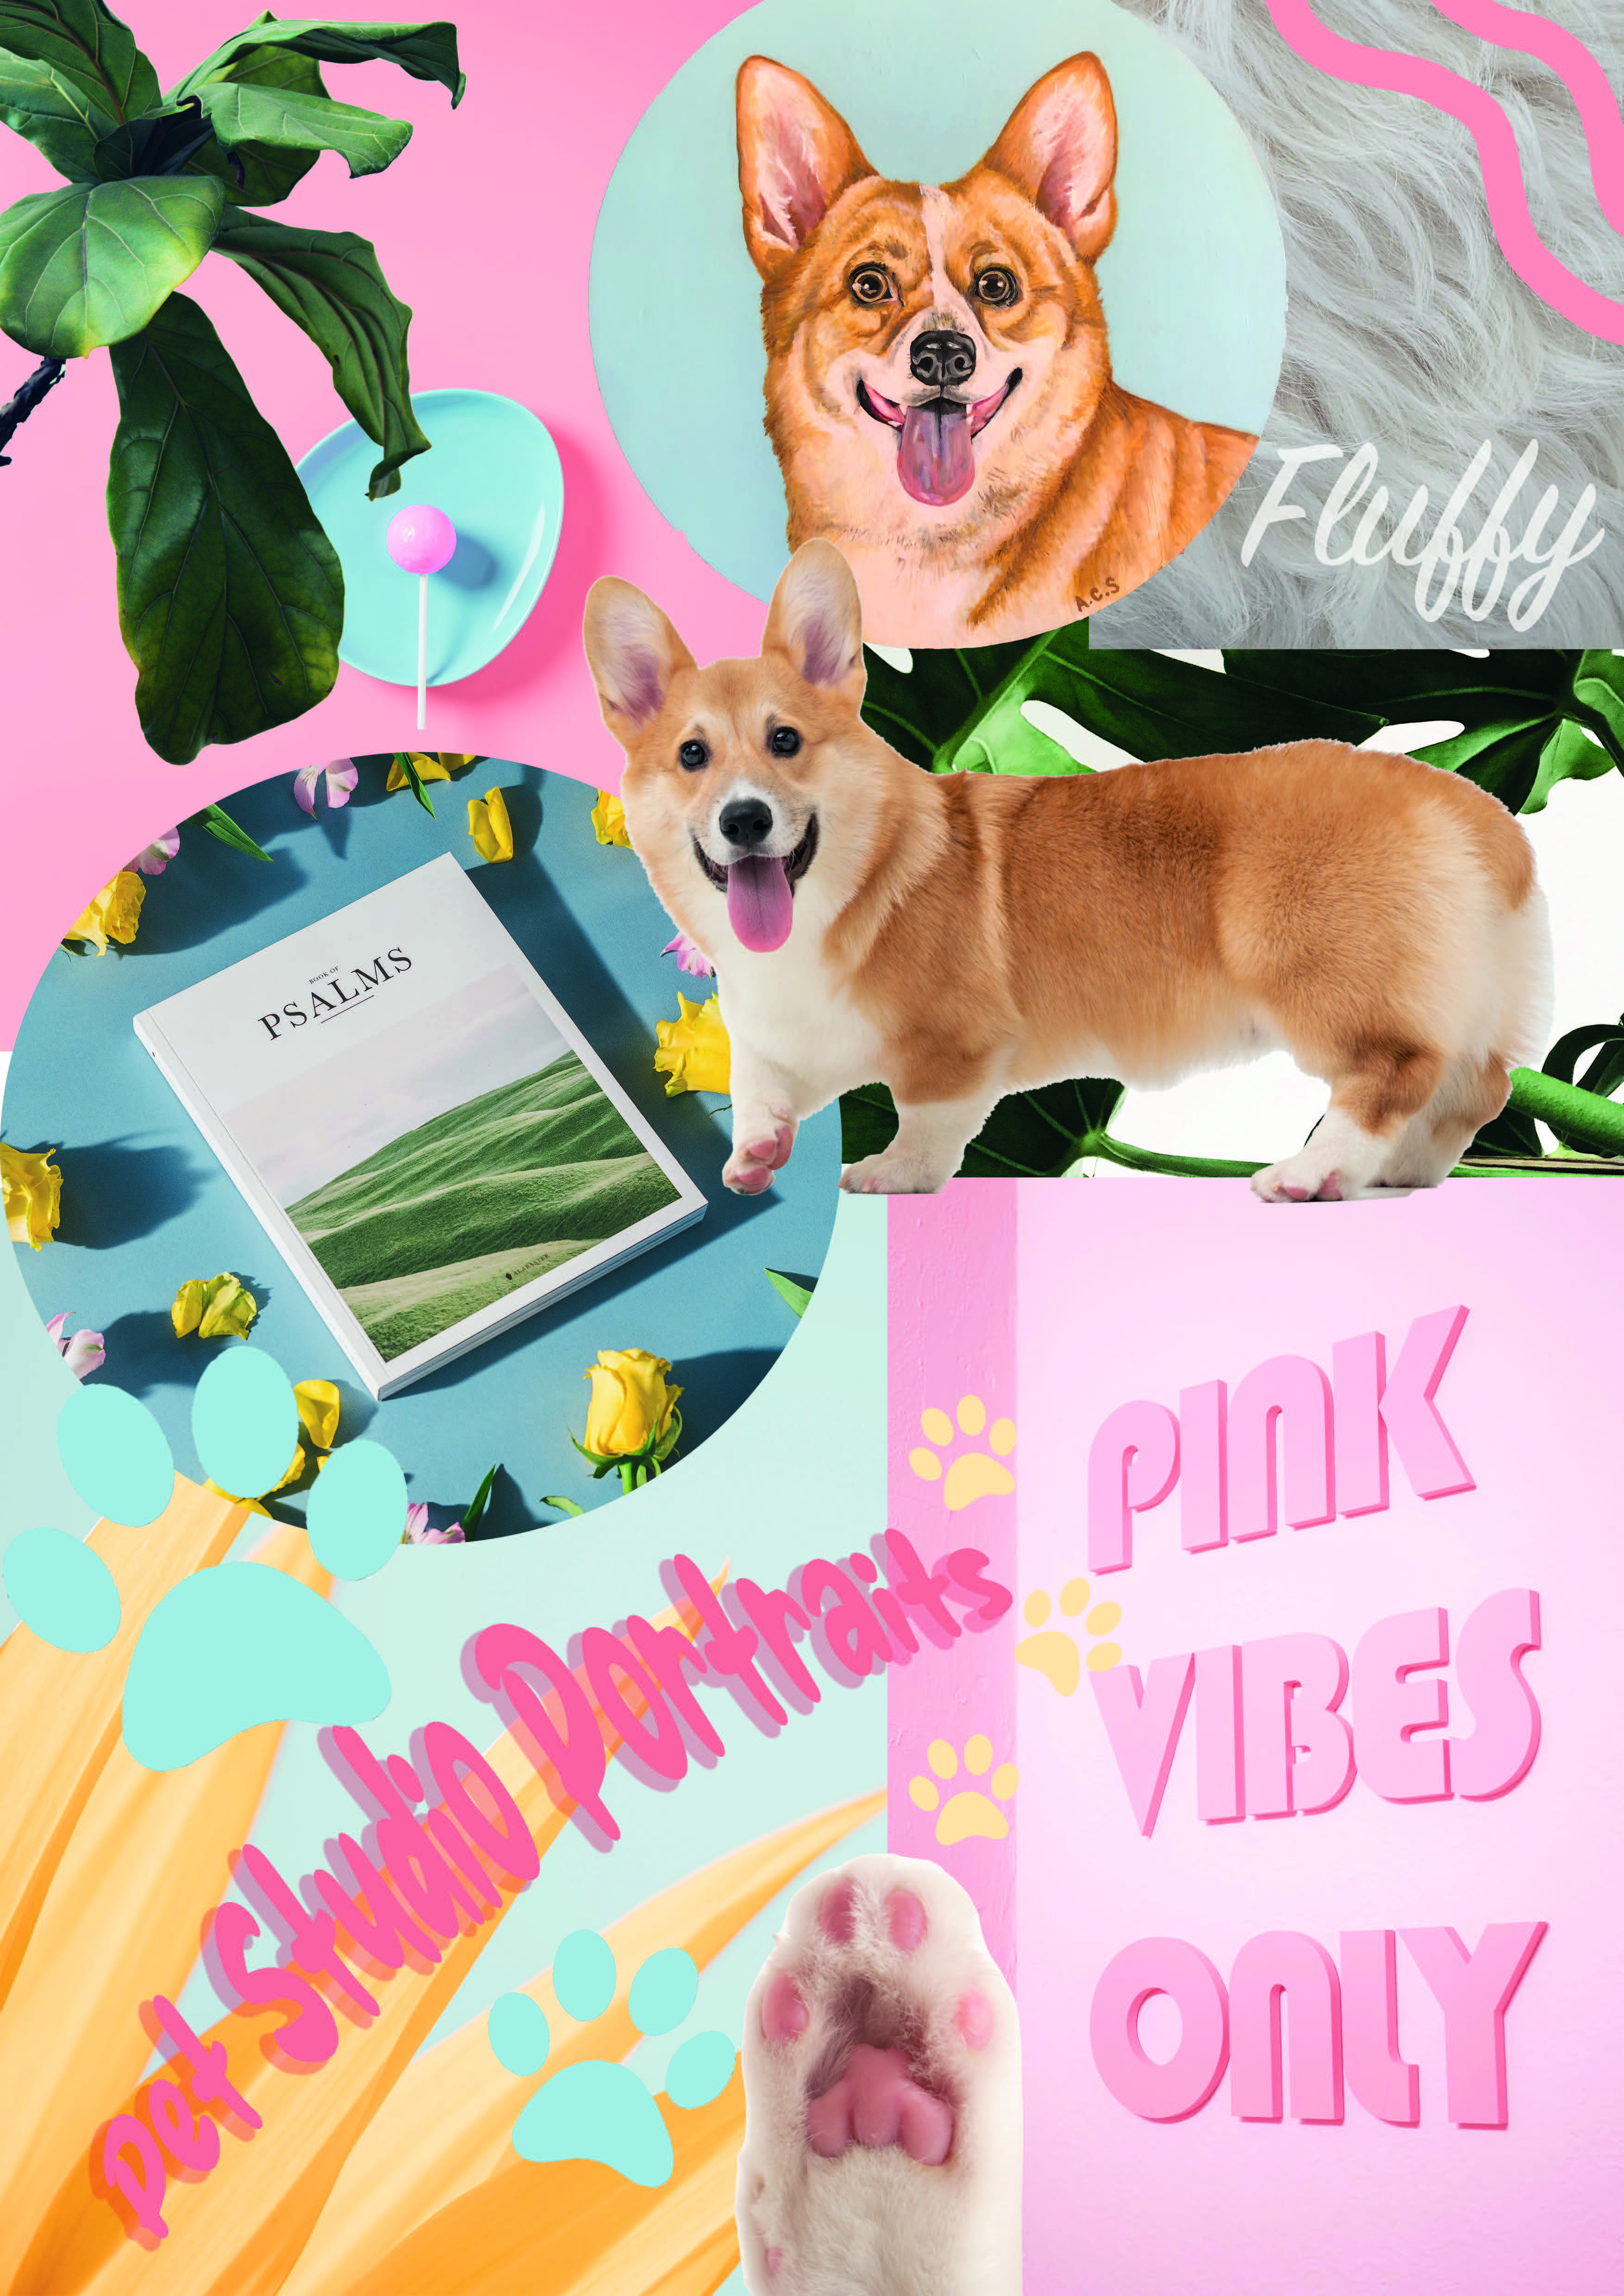
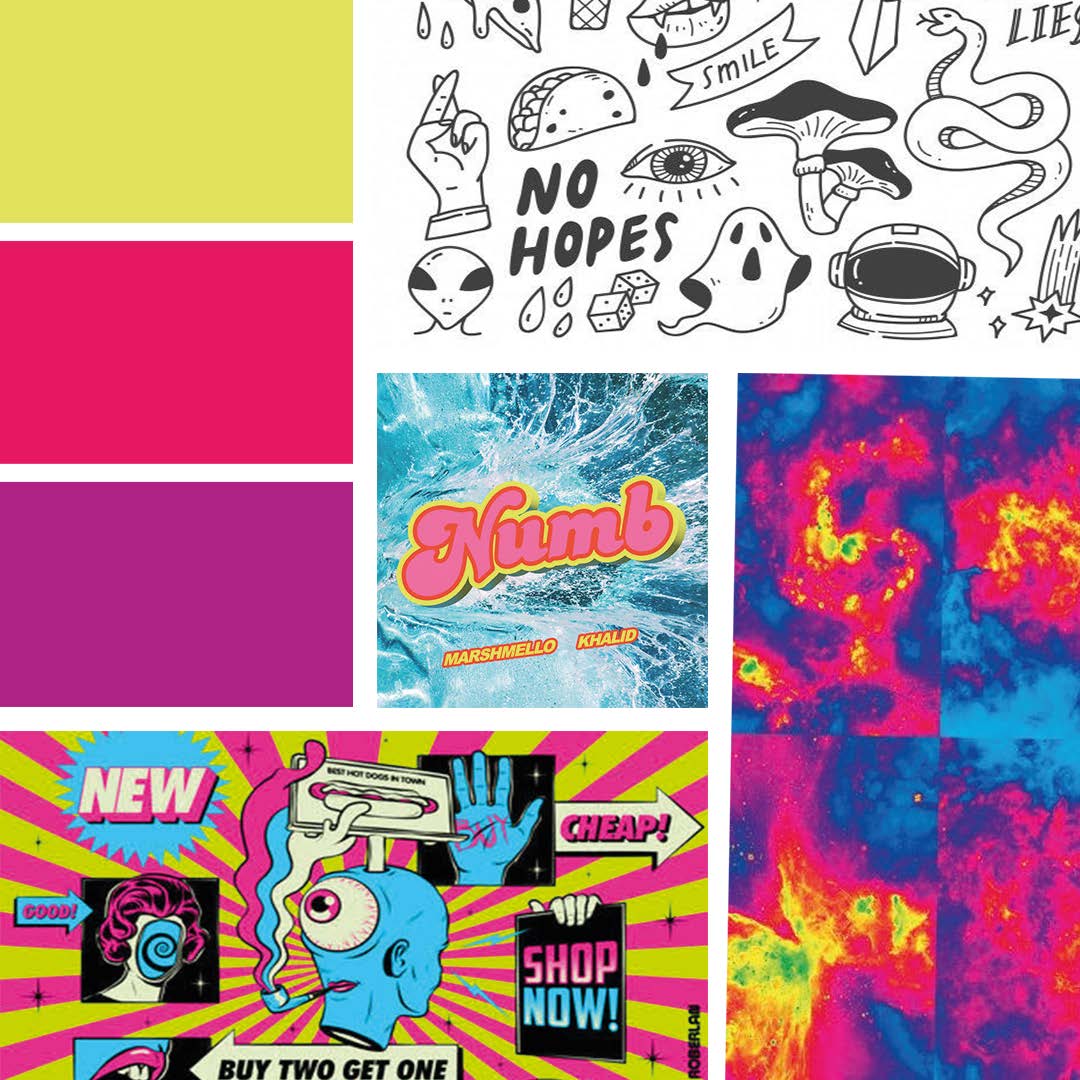
Student Examples
Example 1
 Example 2
Example 3
Example 4
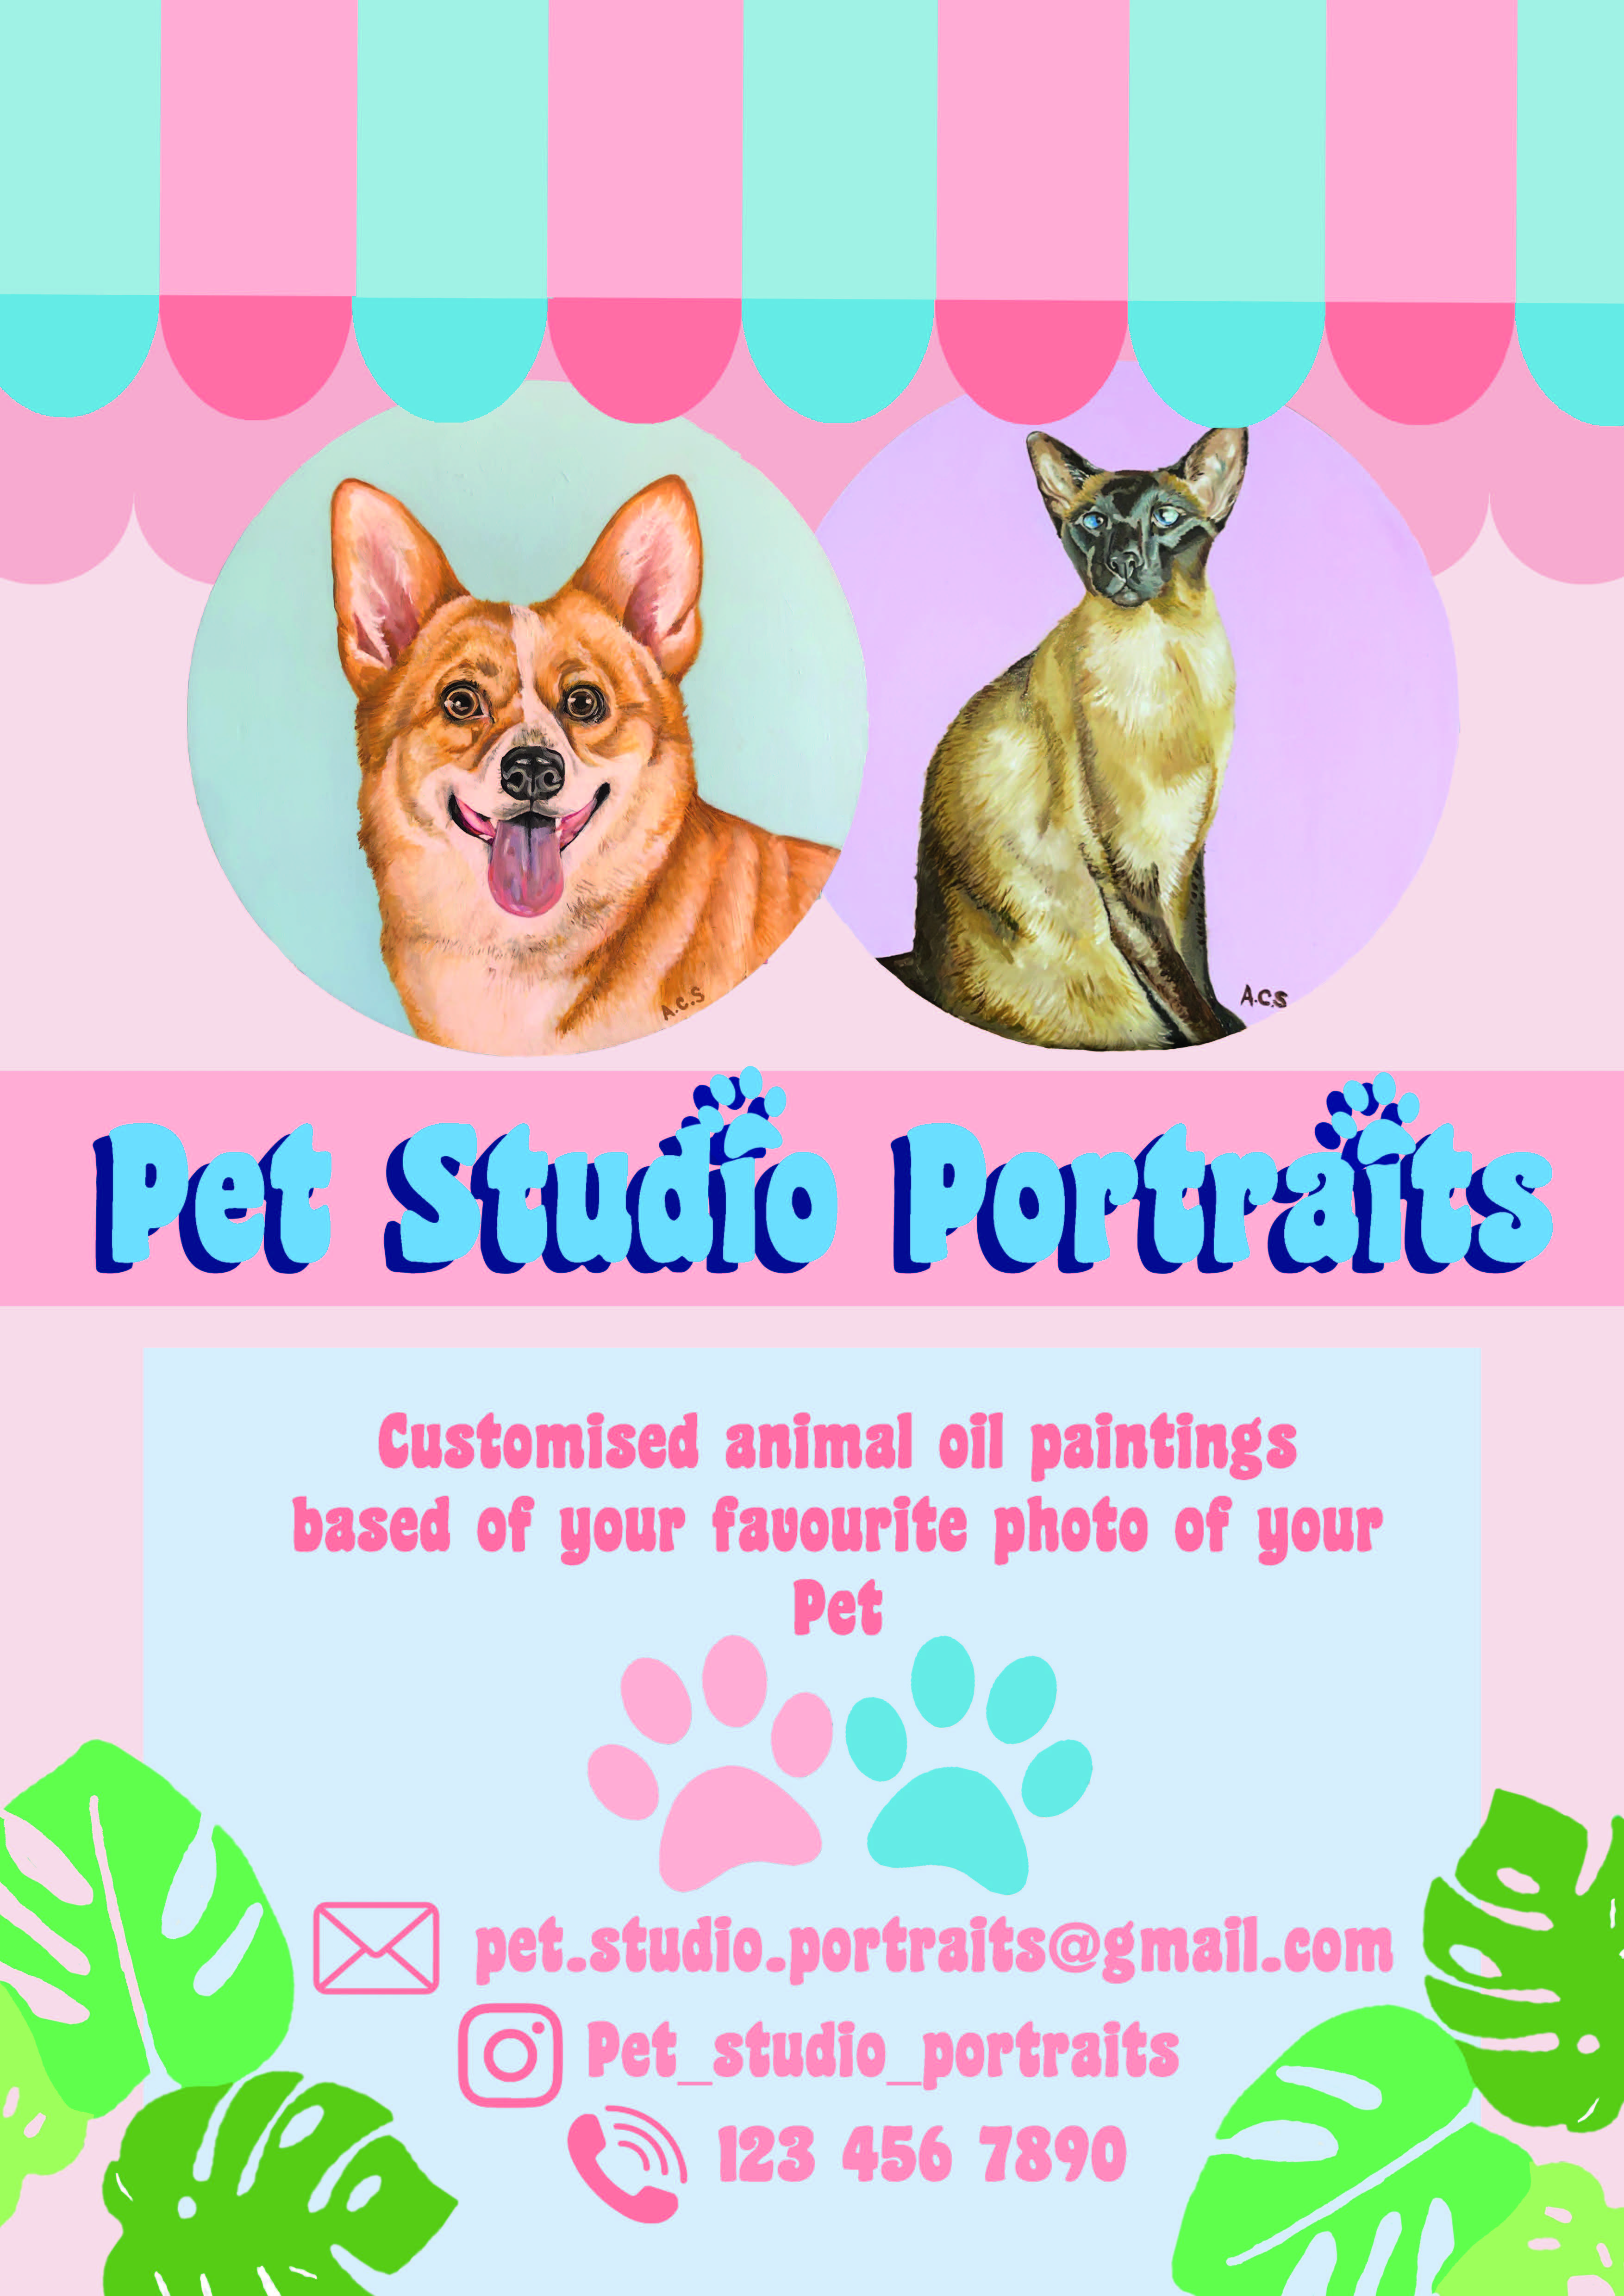
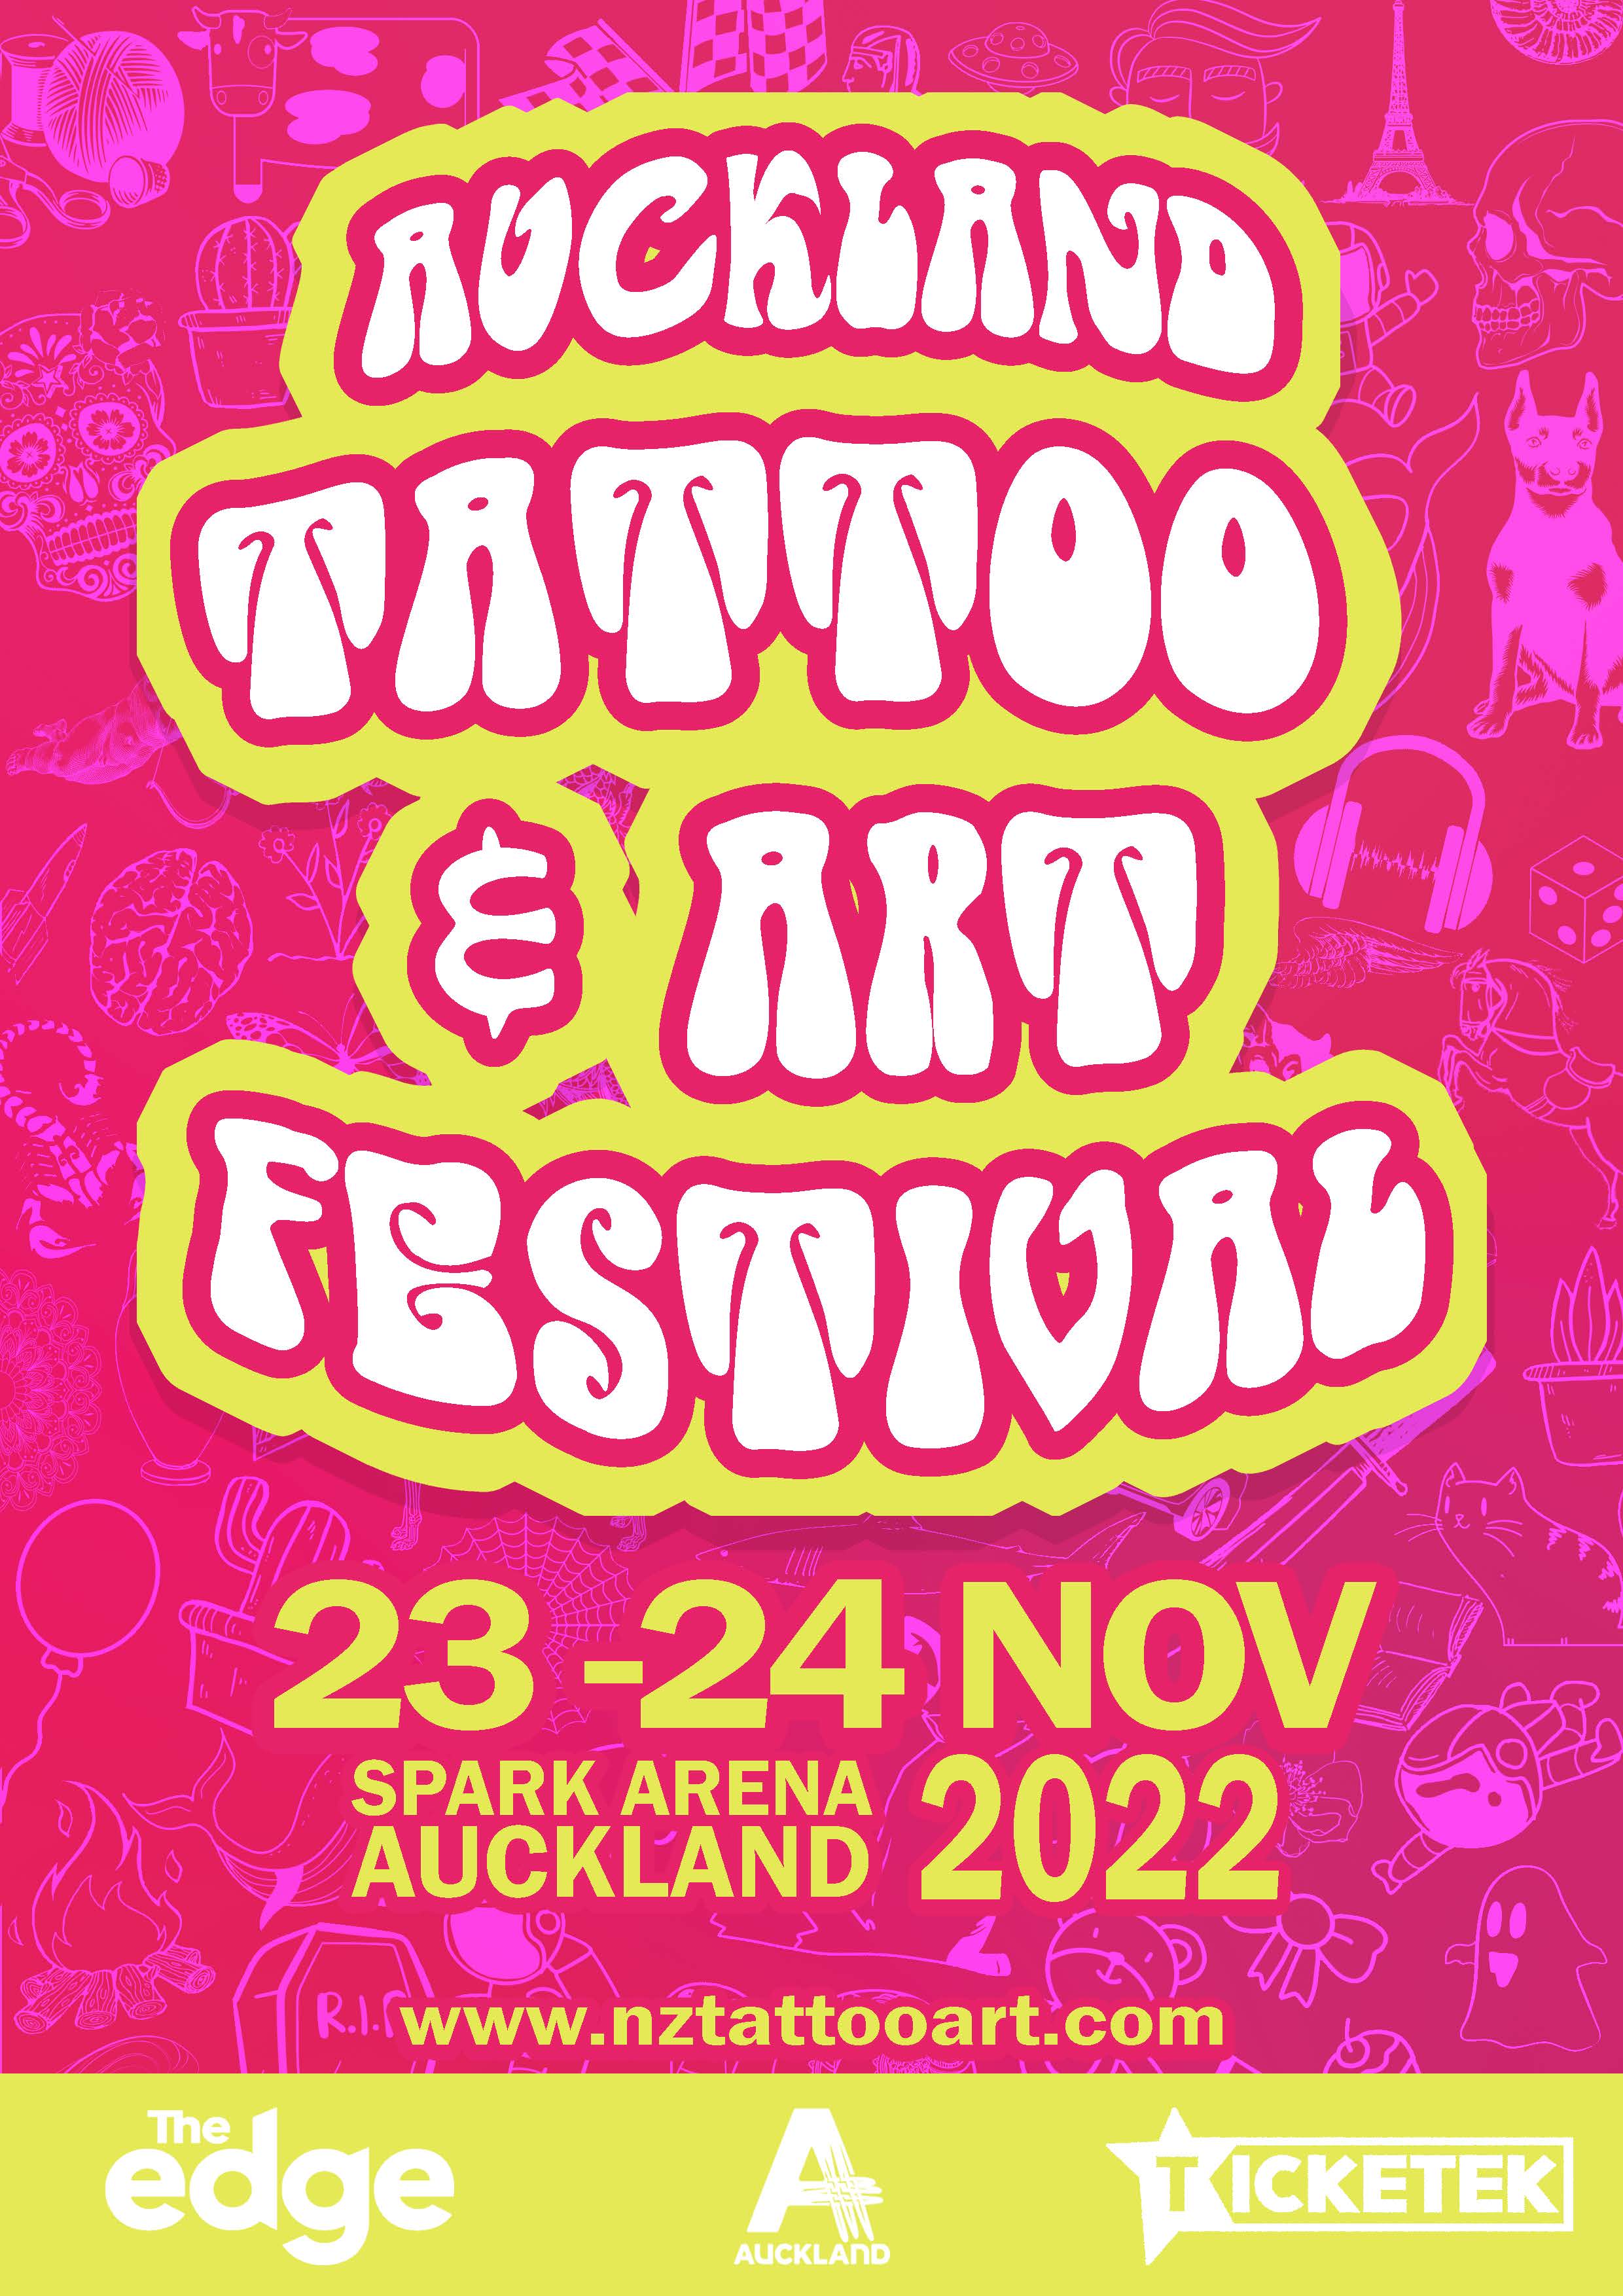
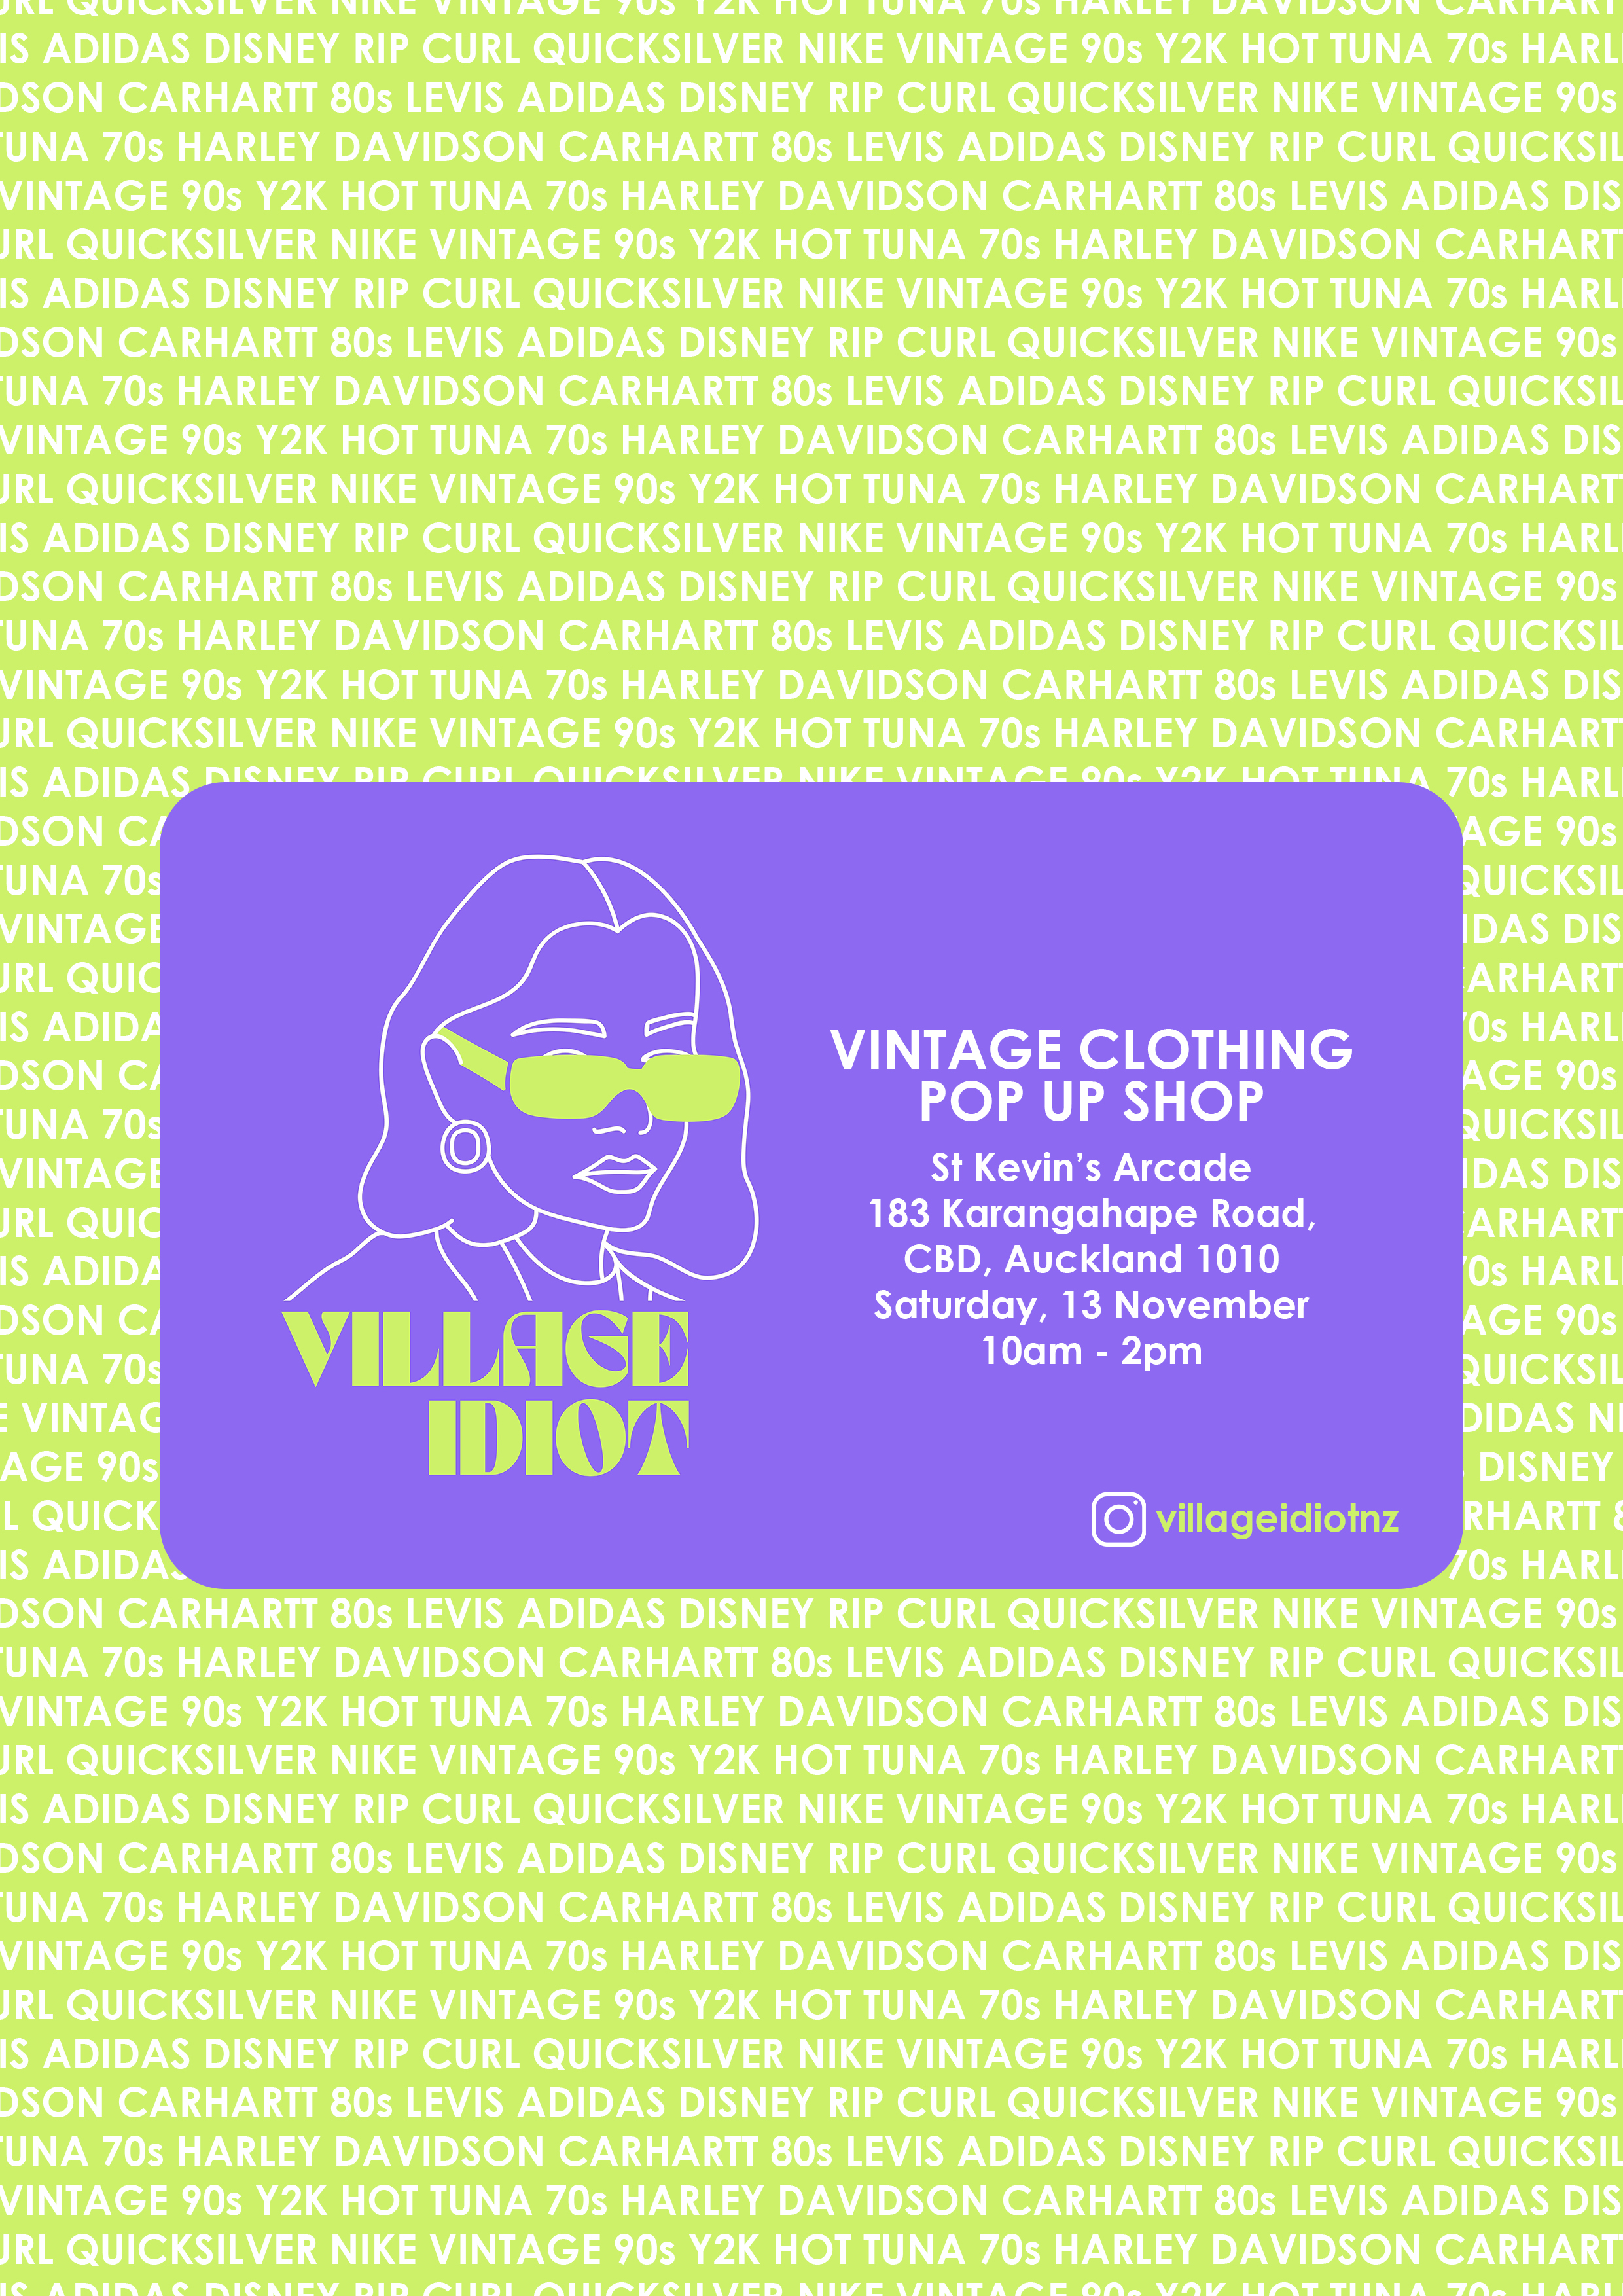
Your first project will be to create a poster in Adobe Photoshop. Over the next few lessons you will learn editing techniques including, cropping, colour correction, brushes, effects, blend modes, filters and retouching tools – all the things you need to complete this project.
The brief
It can be a poster for anything! Some examples are:
- Event: gig, concert, play, party, public talk
- Opening: shop, business
- Launch: movie, game
- Poduct: kitchenware, furnature
- Album release
- Political/social campaign
Task 1: Create a Moodboard
Let's use the first couple of steps in the design process to develop your poster.
- Interpreting the brief
- Idea generation
Interpreting the brief is fairly straightforward – it's a poster and you can choose the subject and visual style. Enjoy the freedom!
A good place to start when exploring potential ideas and developing a visual style (Idea Generation) is to create a MOODBOARD for your poster design.
You can create your moodboard as a photoshop file, pinterest board, or even use an online tool such as Miro. Just make sure you can export your moodboard as a PDF, so you can share it with other people. You may need to share your process with a client or art director, or in this case, upload it to the Assessment page.
Step 2: Create a Poster
Using your Moodboard as a reference create your poster in Adobe Photoshop.
Document setup:
- Size: A3/A4 (you choose)
- Resolution: 300dpi (for print)
- Colour Mode: CMYK
Post your project document to the Assessment page for feedback!
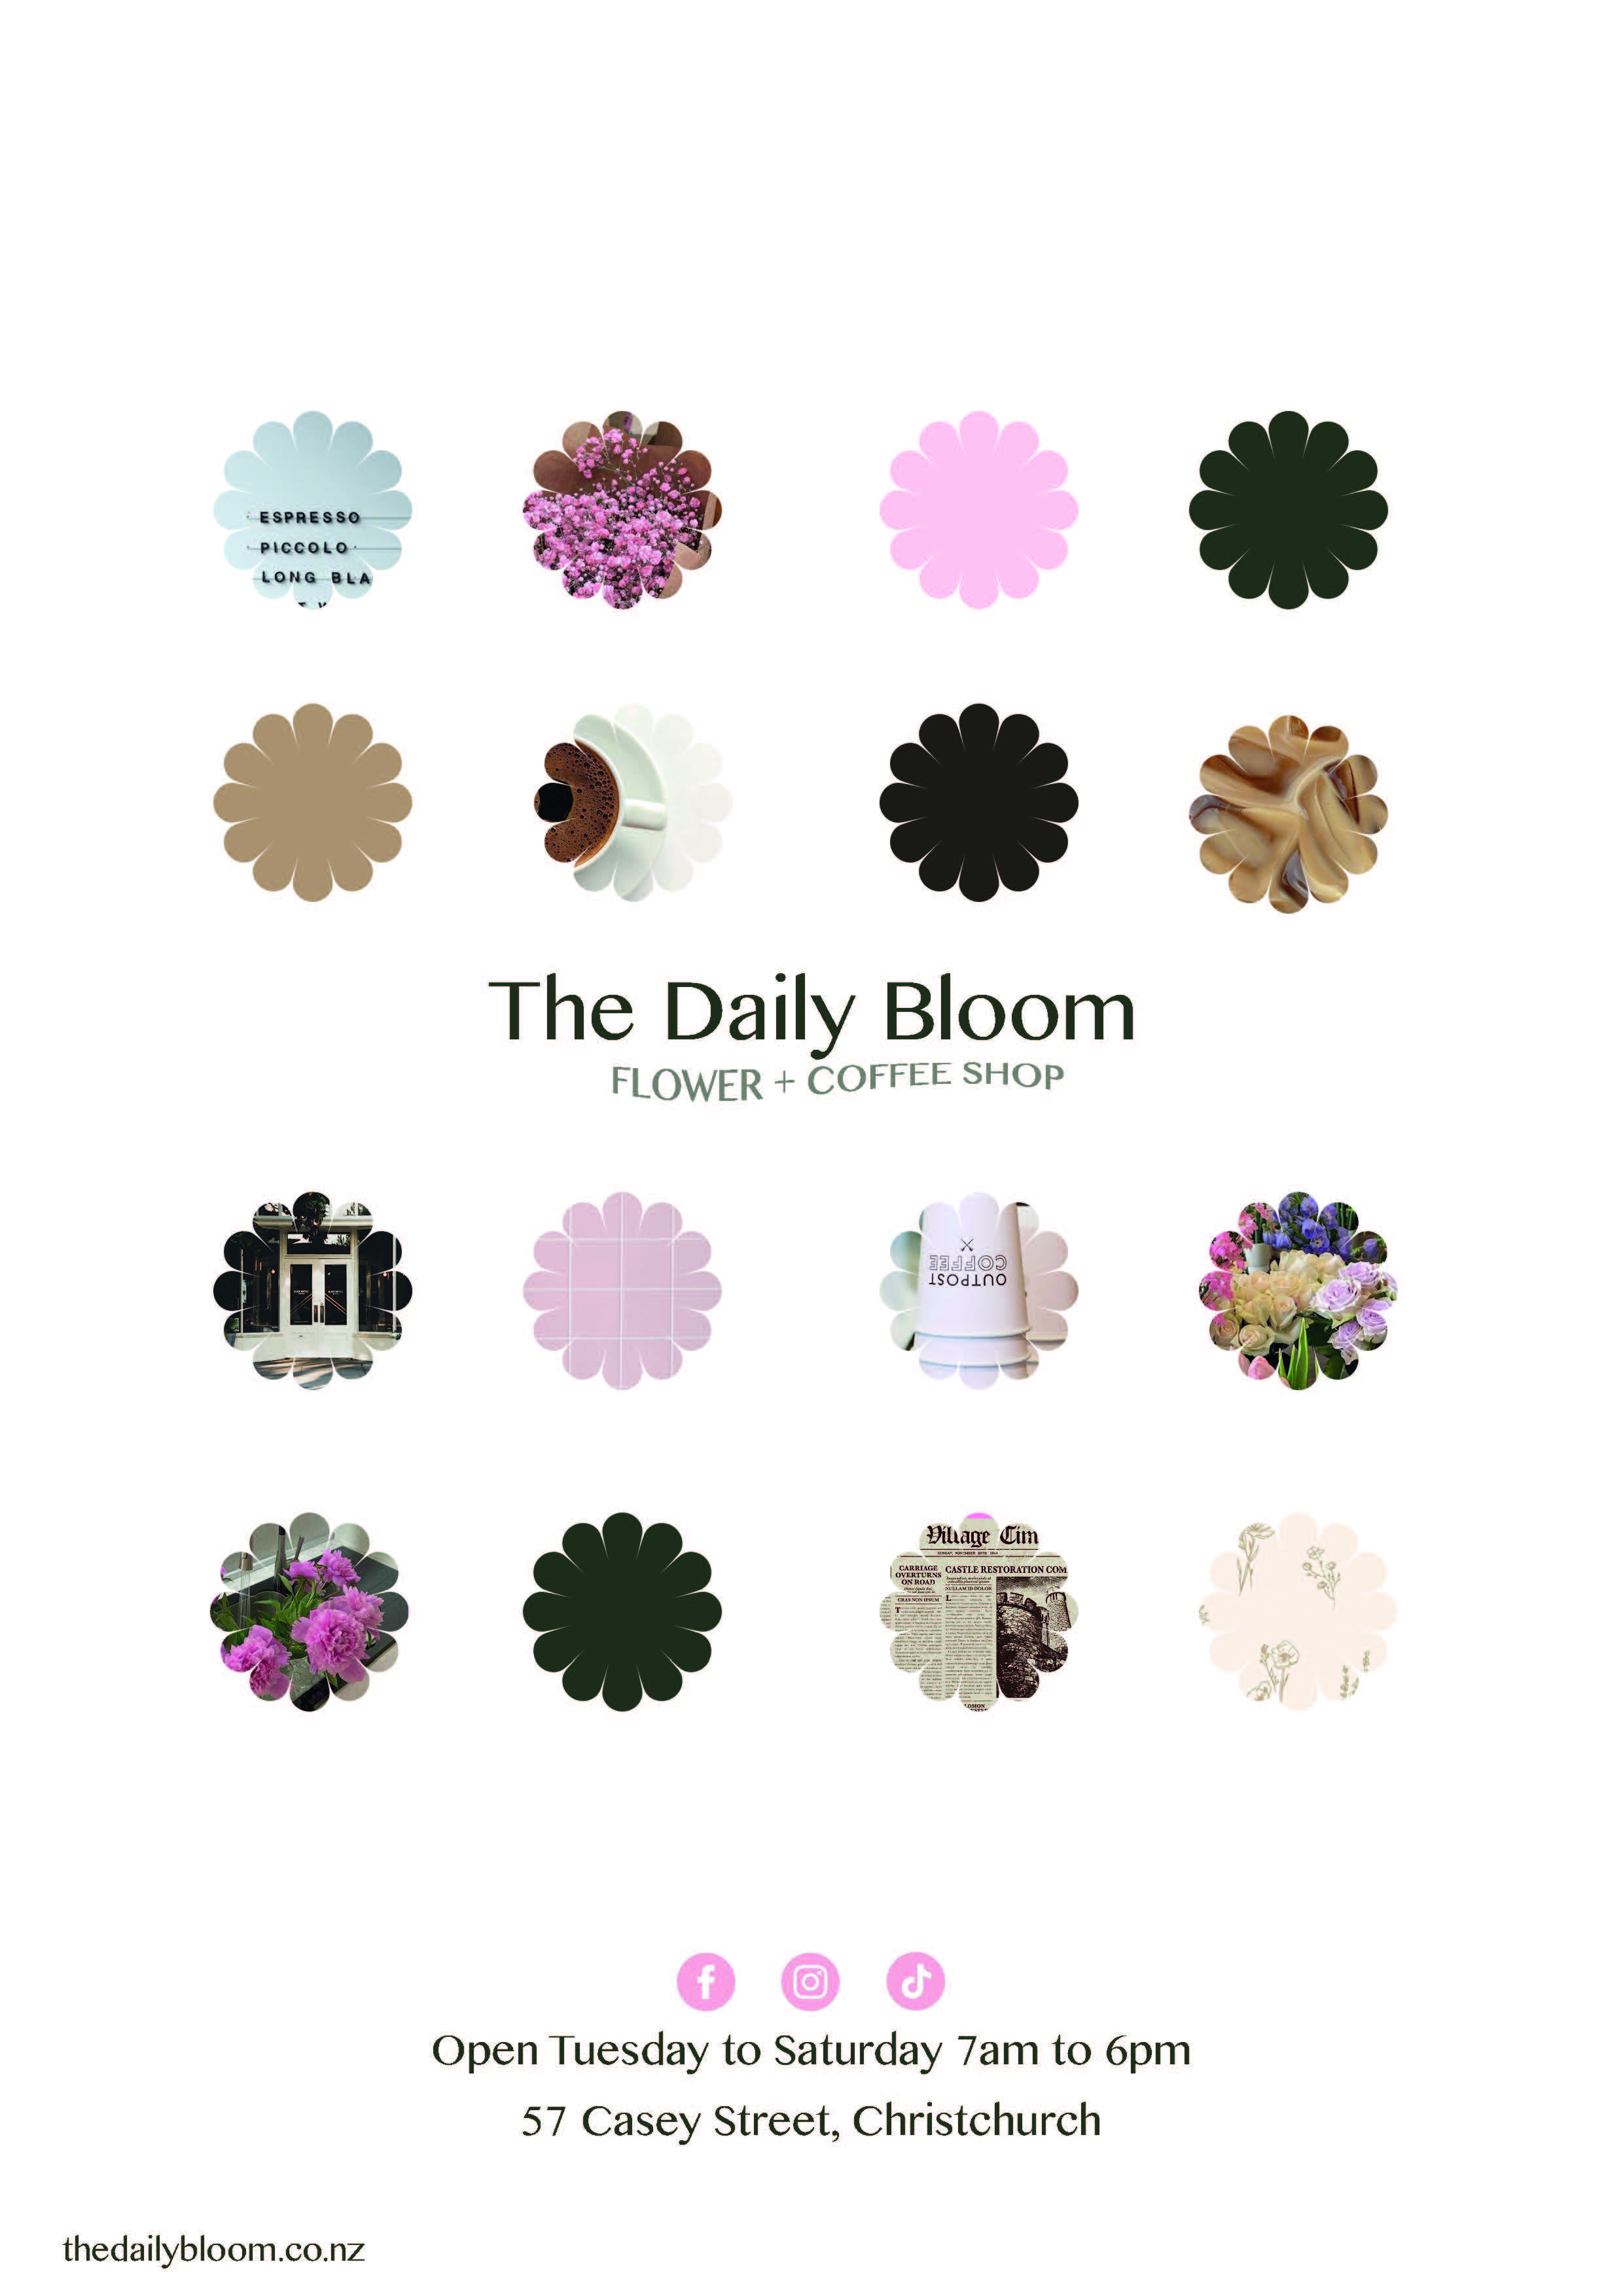
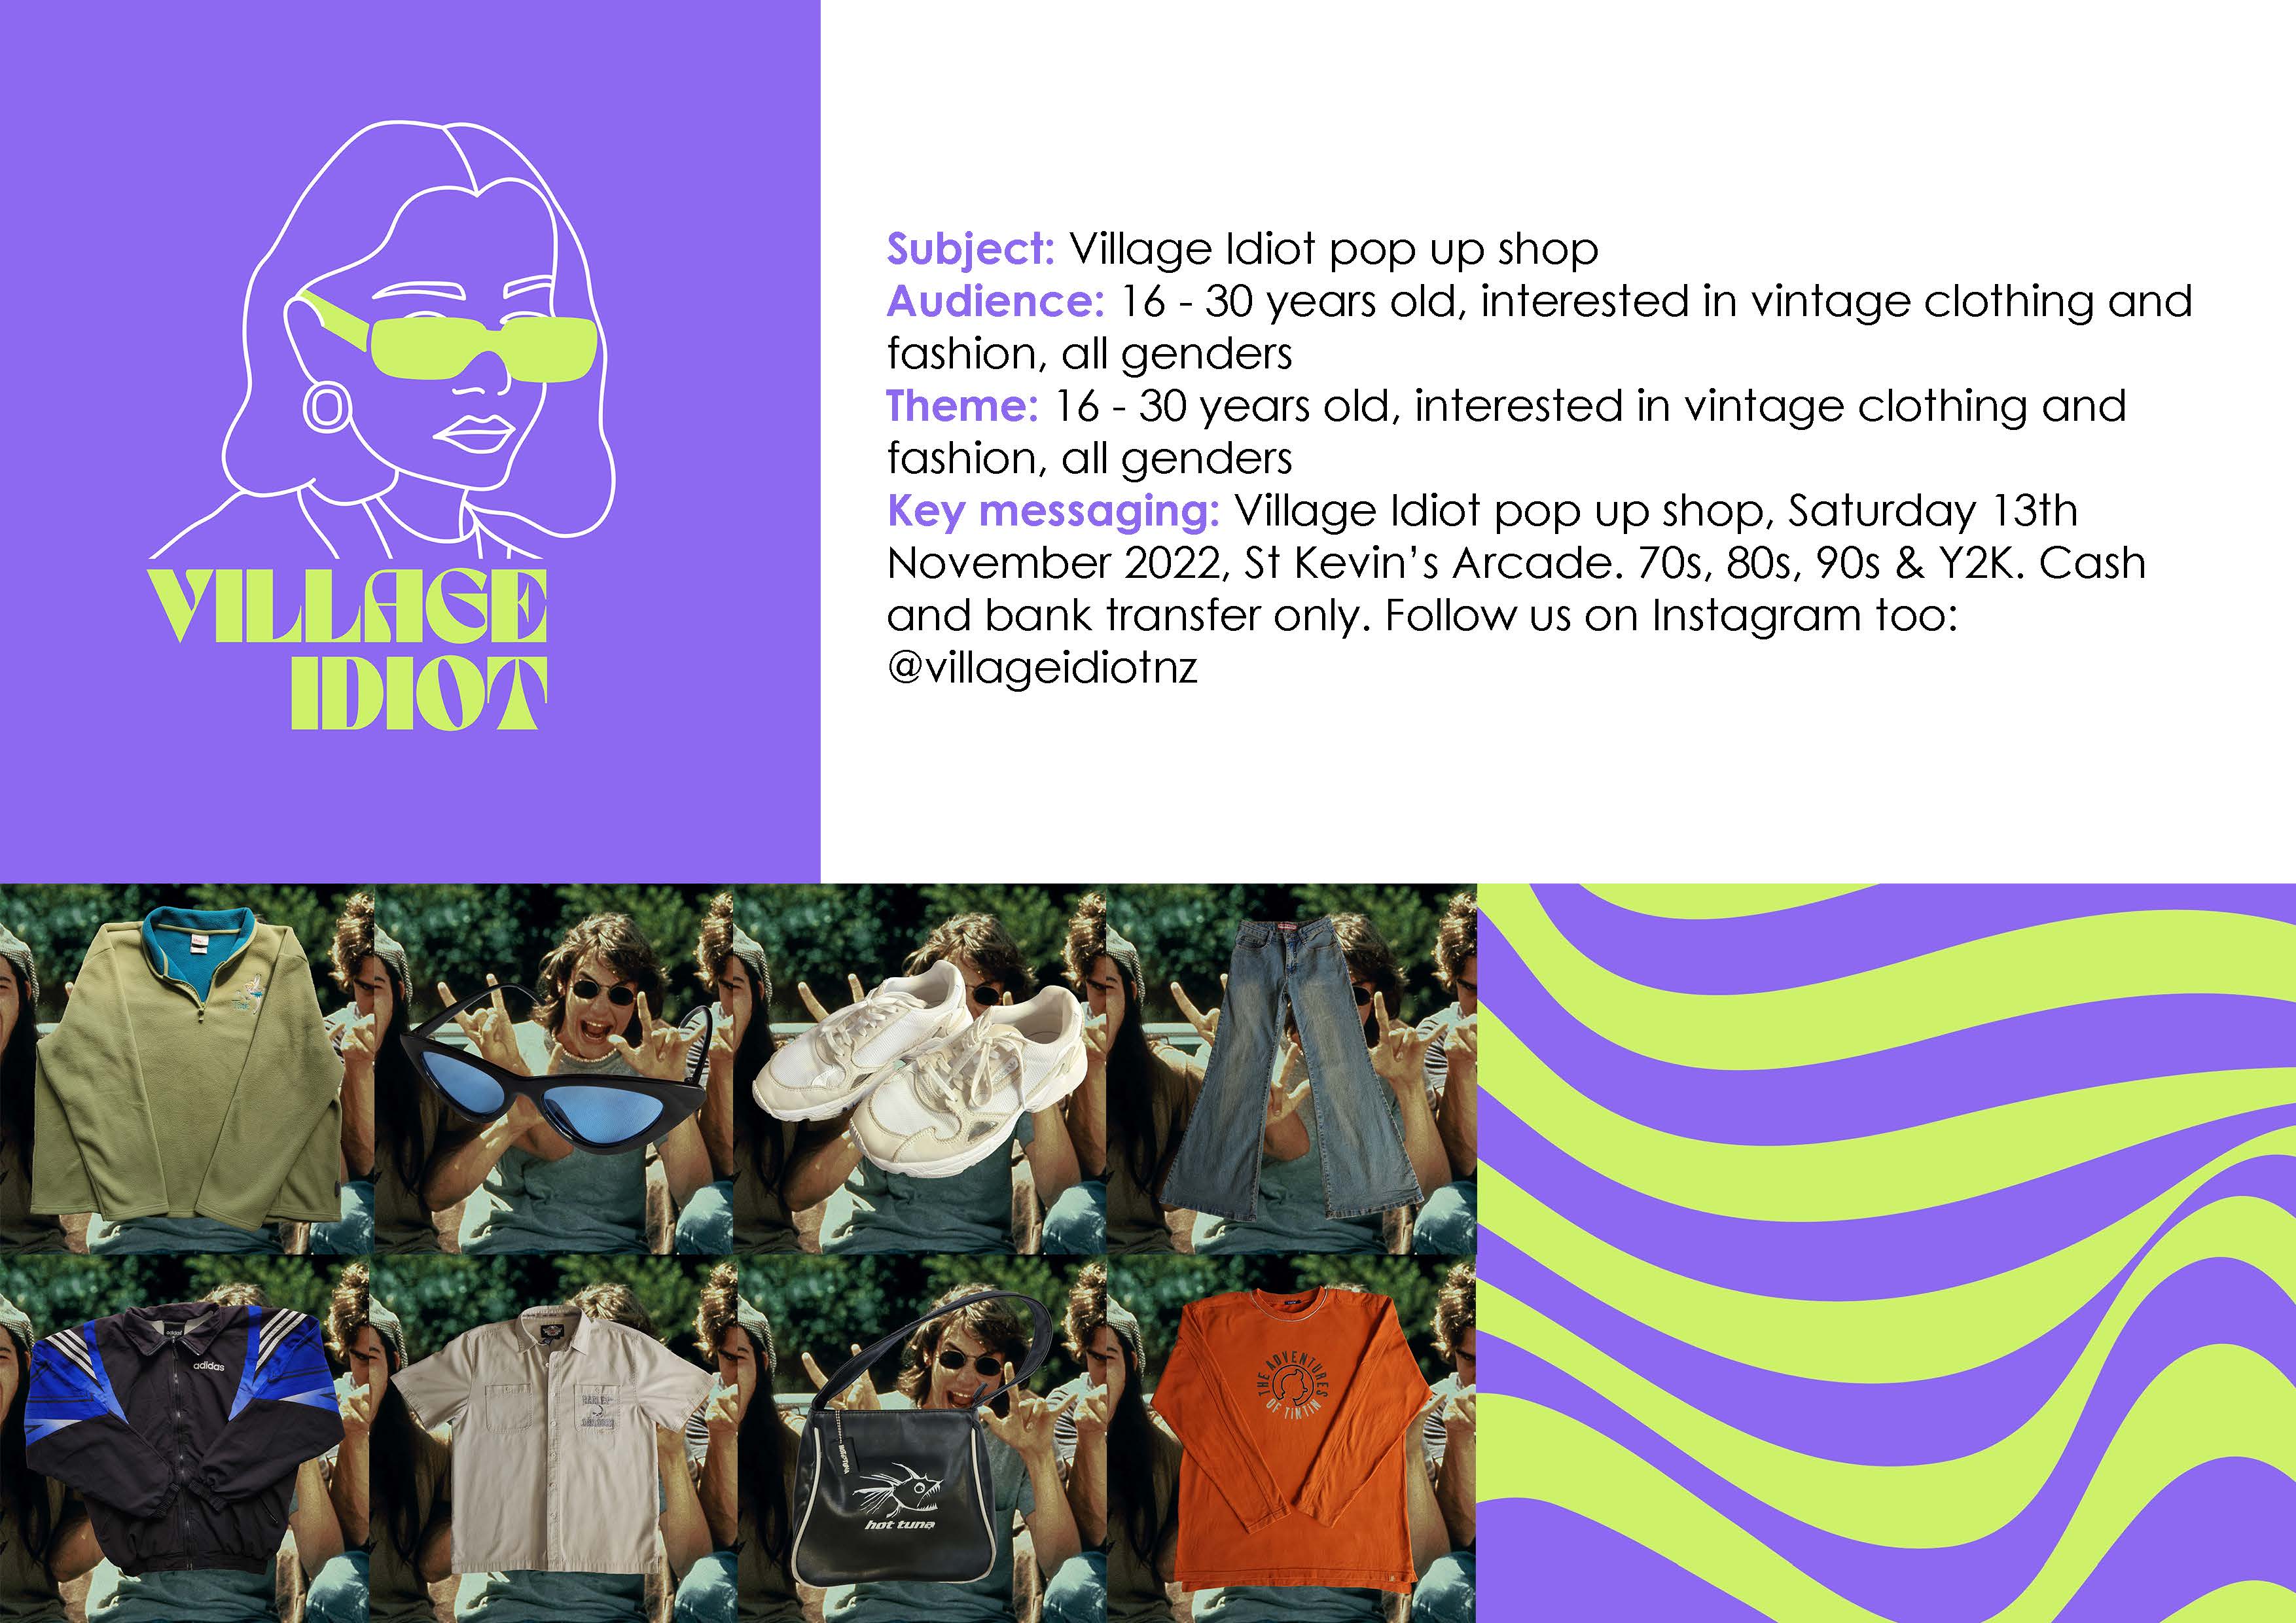
Student Examples
Example 1
 Example 2
 Example 3
 Example 4