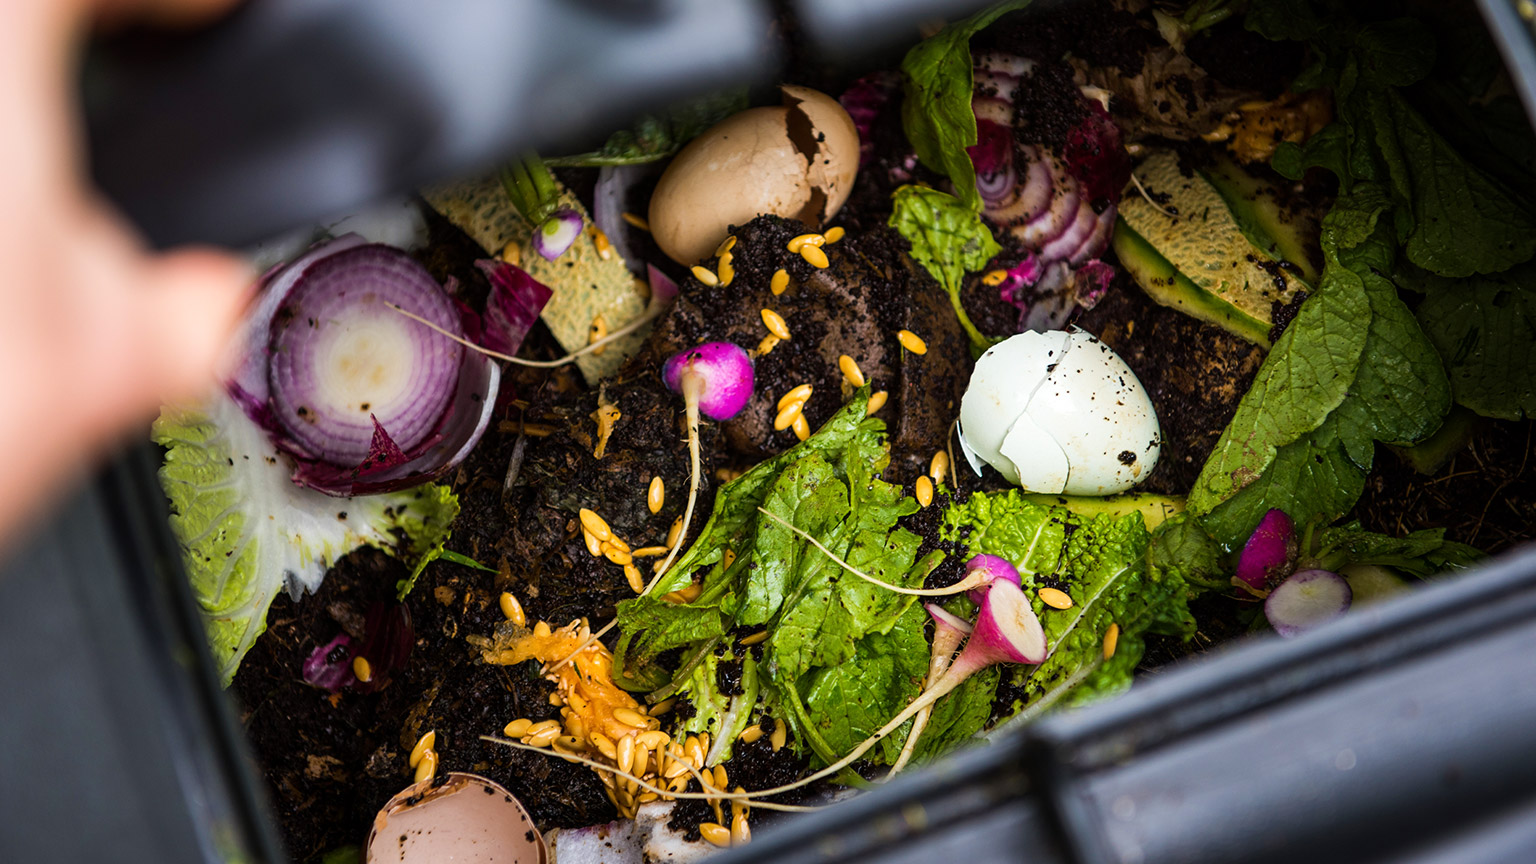
Everything that is organic decomposes when it dies.
- This decomposition is carried mostly by tiny organisms like bacteria and fungi known as microorganisms.
- If an organic material decomposes on or in soil, it feeds nutrients into the soil as it breaks down.
- We can harness the power of this natural process to give our garden a boost of energy, through a process called composting.
And how does it help our gardens?
Composting...
...replaces nutrients that have been removed during a growing season, improves soil structure and increases the amount of oxygen available to plants. Compost also conditions soil, improves moisture retention, increases earthworm activity and improves fertiliser use by plants.
There are two main types of composting:
- Cold composting
- Hot composting
Activity - Watch and learn
Watch the following video to learn about the two types of composting, and then answer the following questions about the information you learned.

Composting is an environmentally friendly option for getting rid of food scraps and garden waste.
Food waste accounts for a staggering 409,000 tonnes of carbon emissions in New Zealand annually
And that’s just food scraps! Remember, our gardens accumulate a huge amount of additional organic matter from things like weeds we’ve pulled out, branches we’ve pruned and the parts of vegetable plants that we don’t eat — which we call crop residues. If we throw those out in our rubbish too, we’ll add even more greenhouse gas into the atmosphere!
What is one tonne of CO2 equivalent to?
The following examples, from CrownOil.co.uk will help you to comprehend how much 409,000 tonnes is:
| 1 tonne = | 409,000 tonnes = | |
|---|---|---|
| CO2 fire extinguisher cannister | 500 cannisters | over 200 million cannisters |
| Emissions from return flight from Auckland to the South Pole |
1 return flight | 409,000 return flights |
| Driving a diesel car | for 6000 km | nearly 2.5 million kms |
| Charged smartphones | 121,643 phones | nearly 50 billion phones |
Depending on your climate, space, time, and goals, you will want to pick the right type of compost heap for your garden.
For hot composting, you’ll need to make large batches of compost, so your compost heaps for these will need to be much larger than the black plastic bins or rotating drums sold at most hardware stores. Whatever type you choose, it’s a good idea to make two or three heaps on the go so they can be at different stages.
Due to the amount of organic material needed for hot composting, we focus on cold composting in this programme.
The most common types of cold composting compost heaps are:
Compost mounds
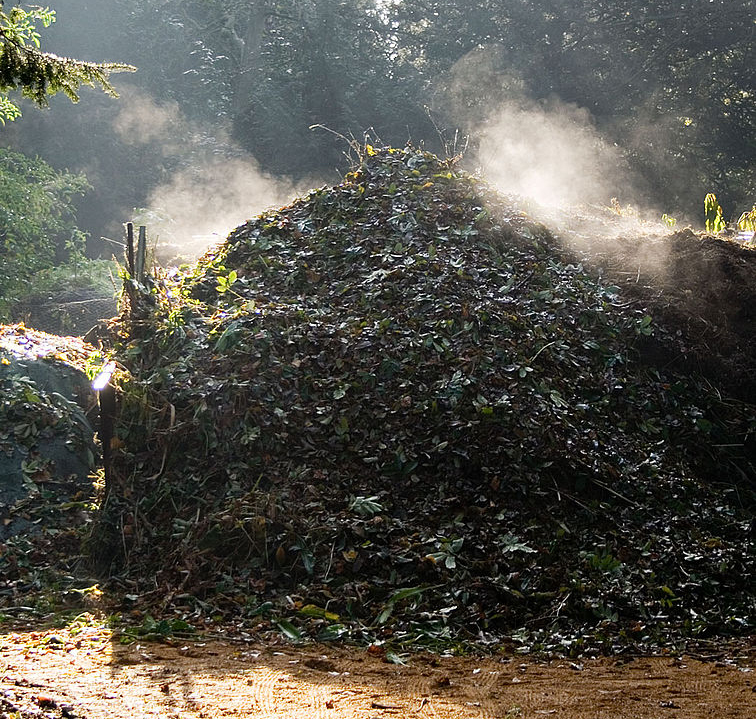
Considerations
The most simple option is to pile up your compost on the ground and cover it with black plastic film, a layer of leaves or cardboard, or a thin layer of soil to keep rodents away. (The compost heap shown above was likely covered in leaves.)
Advantages:
- Quick and easy to build up.
- Very cheap or free.
- Because there are no walls, it’s easy to access when you need to turn it (mix up the layers and aerate it).
Disadvantages:
- Because it doesn’t have any walls, it will tend to spread sideways rather than upwards, which will take up more space.
Plastic or metal bins

Plastic bins can be very simple, with a lid for warmth and protection, holes for circulation, and panels that allow access to the compost on the bottom. This one has panels that open completely, so we can see the material breaking down over time. You can pick up a simple plastic compost bin at any garden shop, such as this one.
Considerations
A plastic bin with a lid keeps the compost contained. Bins need to have holes in the sides to allow air to move through the compost, but the holes should be small enough that rodents can’t get in.
Advantages:
- Relatively cheap.
- Easy to assemble.
- Most plastic compost bins come in black, which helps increase the temperature in the bin to speed up composition. To avoid overheating the bin, which would deter worms, install in a partially shady area.
Disadvantages:
- Very light so it may be blown over by wind when empty. Install in a sheltered spot, or install on a still day and either dig the bottom edge into the ground or fill with a layer of soil or compost as soon as you’ve assembled it.
Slatted timber bins

Slatted timber bins are usually made from slats of timber that have notches cut into them to allow them to be lined together. Often they are used in pairs so that one is available to use for compost and the other is decomposing. You can buy a slatted timber bin at a garden supply store, or even make your own.
Considerations
Advantages:
- No lid, so it is a good idea to use black plastic film, leaves or a thin layer of soil to cover the top to keep rodents away.
- Nicer looking than plastic bins.
- The ability to add more slats as the pile gets bigger, and remove them as your use up your compost.
Disadvantages:
- More expensive than a plastic bin if bought as a kitset, although you could easily make your own from wood you may already have.
Consider building your own slat bin from timber pallets, as shown in the video below by GrowVeg. If rodents are a problem, use a fine chicken mesh wire to keep rats out and or use bait and traps to control mice.
Compost Tumbler / Rotating Bins
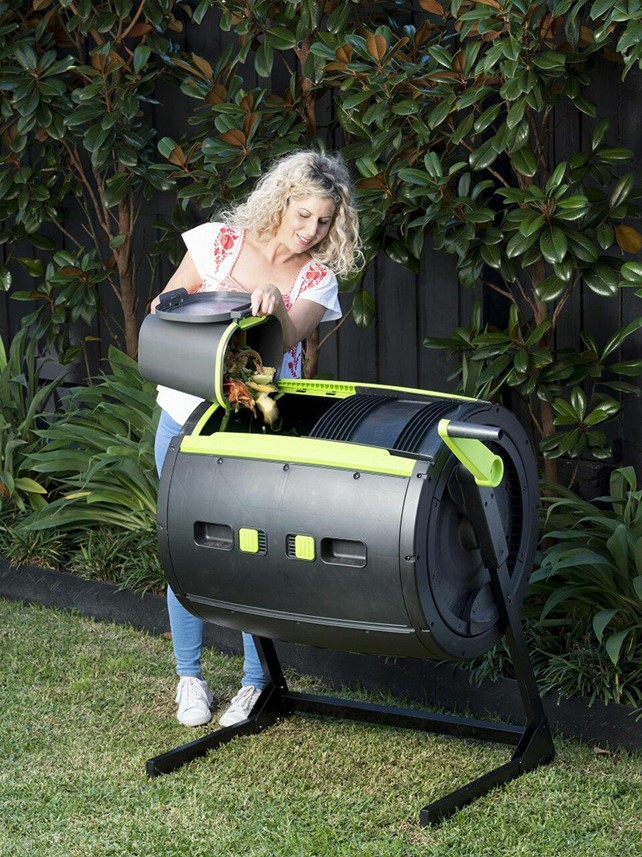
A woman fills the left-side compartment of this large compost tumbler. The handle on the right is used to rotate the bin once the compartment doors are closed.
A compost tumbler is a drum that is mounted on a frame which can be rotated around its central axis. Just open the door to the bin, put your compost in, close the door and spin the bin around a few times to mix and aerate the compost.
Considerations
Like the black plastic bins, these are suitable for small gardens but would be cost prohibitive work for larger horticulture operations.
Advantages:
- The bin is off the ground so it can be filled and emptied without bending down.
- Some bins use a mechanical advantage to make it easier to rotate the bin.
Disadvantages:
- Good quality compost tumblers are expensive.
- Cheaper tumblers won’t last as long as normal plastic bins due to their moving parts.
There are plenty of plans and “how to” videos and instructions online that explain how to make rotating bins from low-cost or recycled materials, such as these two:
1. Video: COMPOSTisCOOL’s video of how to make a compost tumbler uses a 200 litre drum, a sheet of plywood and some latches. This is a large bin with no rollers so will need a lot of force to rotate when full, but it is an easy design to build.
2. Article: The Family Handyman website provides instructions for a more refined, and easy to rotate bin that uses caster wheels to hold the bin.
Activity – The best compost for the conditions
For this activity, select the correct cold compost type for the following considerations. You will find out immediately if you are right or wrong and progress to the next question automatically.
There are four (4) main principles for building and looking after compost:
- Add layers of nitrogen-rich material and carbon-rich material in the correct ratio.
- Aerate it regularly.
- Keep it moist.
- Work in stages.
Adding layers and maintaining the carbon-to-nitrogen ratio
For ideal compost, we want 25-30 times more carbon than nitrogen in the materials we add to the compost. Here is a list of common materials added to compost heaps and their carbon-to-nitrogen ratios.
| Material | Carbon:Nitrogen ratio (C:N) |
|---|---|
| Cattle droppings | 12:1 |
| Chicken droppings | 7:1 |
| Chicken litter | 10:1 |
| Food wastes (uncooked) | 15:1 |
| Fruit wastes | 35:1 |
| Lawn clippings | 20:1 |
| Leaves | 60:1 |
| Paper | 170:1 |
| Sawdust | 450:1 |
| Straw | 100:1 |
| Weeds | 19:1 |
Source: Better Homes and Gardens, p.18
As you can see, no single material has a ratio between 25 and 30 to 1, so we need to mix different materials together. It’s also unlikely that you’d only have one of these materials available to you.
Some common combinations of materials that will give the right ratios are:
- twelve units of lawn clippings to one unit of sawdust, such as 12 buckets of lawn clippings to 1 bucket of sawdust (12:1)
- two units of fruit waste to 1.5 units of lawn clippings (2:1.5)
- four units of weeds to three units of paper to one unit of chicken litter (4:3:1).
These take into account the carbon-to-nitrogen ratio of each material and its weight (wet vs dry material).
You don’t need to know how to do these calculations, just that the correct ratio is between 25 and 30 to 1, of carbon to nitrogen.
In simple terms
If you’re not sure what to add, or want to skip the science and get right into it, start with a simple ratio of:
- two buckets of green material (like food scraps, lawn clippings, weeds) to
- one bucket of brown material (like dry leaves, shredded cardboard, or straw).
When you’re ready to add more, add greens then add browns. This approach (layering) helps prevent pockets of high-nitrogen and high-carbon materials from forming. Instead, we get a mix of the two.
Aerate your compost regularly, keep it moist and monitor it. If it starts to rot and give off a bad smell, add more browns. If it doesn’t seem to be decomposing, add more greens.
Aerate it regularly
The organisms that break down the soil need air to survive. If there is no air in the compost it will turn anaerobic and rot, rather than decompose. If your compost smells bad, this is a sign that it is rotting.
Use a garden fork to mix the layers of compost (unless you are using a compost tumbler) at least once a week. Plunge the fork deep into the compost and move it back and forth to aerate the compost deeply. We call this turning the compost.
Check the moisture each time you aerate.
Keep it moist

For the organisms to be actively breaking down the raw materials into compost, their environment (the compost heap) needs to be moist – not too wet or too dry.
- If the compost feels dry, water it.
- If it feels sodden (very wet) aerate it further and give it some time to dry out. If it’s still wet after a few days, dig some out into a separate bin to help it dry out. If it’s too wet, it will become anaerobic because all of the pore spaces will be full of water and the compost will give off a bad smell.
- If heavy rain is forecast, cover your compost with its lid, a tarp, or layer or black plastic film to stop it getting too wet.
Work in stages
As mentioned earlier, its a good idea to have two or three compost heaps. If you have three, use this approach:
- The working heap – this is where you add raw material.
- The curing heap – this bin is full and now actively decomposing.
- The finished heap – this one has finished decomposing and can be added to your garden.
Turn all three heaps and keep them moist.
Compost is ready when it is earthy and dark brown in colour and shows no traces of the original materials. Once it has broken down, compost can be used on the garden at any time of year.
Better Homes and Gardens, p. 19
Worms in your compost
You will often find worms in your compost heap (compost heaps that sit on the ground at least). While most of the decomposition in a compost bin is done by microorganisms, worms help out too, so they are welcome visitors.
It is not necessary to add worms to your compost heap. If the conditions are right, they will come and if not they won’t. Do not add worms to compost tumblers.
Inorganic matter
Materials that are not organic in nature, such as chemicals, plastics, and artificial fabrics are not able to decompose, so do not put them in your compost.