The neck, shoulder and thoracic spine (upper-mid back) is a particularly complex area of the body. There are many muscular demands associated with supporting the head and spinal cord, the articulation of the arms and in maintaining the appropriate posture to allow for proper functioning of the key internal organs for example, the heart and lungs. These functions, combined with the presence of critical nerve tracts and blood vessels passing through, speak to the importance of having a balanced and well-functioning musculoskeletal system in this area.
Modern living and the increasing prevalence of sitting and technology use at work or play, have seen a dramatic rise in neck, shoulder and thoracic spine complaints. According to Kazeminabsab et al (2022) neck pain is one of the most common musculoskeletal disorders complaints across the globe. These authors suggest the most common risk factors associated with neck pain are lack of physical activity, daily computer use, stress and being female. Mueller and Leggit (2017) report that neck and shoulder pain prevalence in the general adult population affects 42% of males and 51% of females at some point in their life. Between 2002 and 2021 between 60,000 and 80,000 annual neck and shoulder claims were lodged with ACC in NZ. That’s around 1.4 million claims in the last 20 years! (Statistics NZ, 2023).
As a personal trainer, it is vital that you have a strong working understanding of the musculoskeletal anatomy and function of the neck, shoulder and thoracic spine complex, as it is highly likely that you will work with clients that are experiencing issues in this area.
Prepare for assessment
Prepare yourself for the upcoming assessment by familiarising yourself with Assessment 1A.
- Review the requirements provided to gain a clear understanding of what is expected.
- Manage your time carefully to work on this topic and assessment for a total of a 1 week period.
- Aim to complete and submit your assessment at the completion of this topic.

The cervical spine (neck) starts at the base of the skull and extends down to the top of the thoracic spine. The neck joins the head with the trunk and upper limbs. It can be thought of simply as a conduit between the head and the rest of the body. The cervical spine contains some of the most complex anatomy in the body and houses some vital organs and tissues for normal physiology. Structures found within the neck are needed for breathing, speaking, swallowing, regulation of metabolism and the connection of the brain to the rest of the body.
The neck contains tubes for food and fluid passage (the esophagus), air transport to the lungs (pharynx, larynx and trachea) and extremely important blood vessels and nerves.
The neck generates movement of the head so that it can better carry out sensory input tasks related to vision & hearing.
The neck is a highly vulnerable area in humans due to its numerous vital structures and the absence of strong bone protection. Let’s read more about the neck’s bone structure.
The bone structure of the neck

The neck comprises seven cervical vertebrae (C1-C7 superior to inferior). The first two vertebrae are known additionally as the atlas (C1) and axis (C2) bones.
The cervical vertebrae have several defining characteristics that give them a different appearance from other spine vertebrae.
- They have a triangular-shaped vertebral foramen. This is a gap in the bone where the brain stem/spinal cord passes through.
- The spinous processes of these vertebrae are ‘forked’.
- They contain transverse foramina (smaller holes that give passage to major arteries and veins along with key nerves travelling to and from the brain).
The axis and atlas vertebrae have additional features that support their unique role in the neck.

The atlas (C1)
The atlas holds the head in place (just like Atlas from Greek Mythology supported the world). Its structure differs from that of the other cervical vertebrae in that it has no vertebral body or spinous process.
It has two concave scoops (facets) that articulate with the convex condyles of the skull's occipital bone at the posterior base of the skull. This joint structure allows the head to nod up and down (neck flexion and extension).

The axis (C2)
Directly below the atlas bone is the axis bone (C2). The axis bone is identifiable from its “dens” (a bony protrusion that sticks up from the anterior part of the vertebrae. The dens articulates with the atlas vertebrae creating a pivot joint known as the atlanto-axial joint. This joint allows for the rotation of the head.

Take a look at a visual summary of the cervical spine. Orthopaedic Surgeon Randale C. Sechrest, MD narrates the following animated video describing the basic anatomy of the cervical spine.
Ligament structure of the cervical spine
Six major ligaments hold the vertebrae of the cervical spine together. These include:
- Anterior longitudinal ligaments: This ligament runs along the front (anterior) surface of the vertebral bodies and intervertebral discs. It helps to prevent excessive hyperextension (backward bending) of the neck.
- Posterior longitudinal ligament: Located on the back (posterior) surface of the vertebral bodies within the spinal canal, the PLL helps to prevent excessive flexion (forward bending) of the neck and provides stability to the spinal column.
- Ligamentum flavum: Connects the vertebral arches of two vertebrae
- Interspinous ligament: Connects the spinous processes of two vertebrae.
- Nuchal ligament: A thick ligament that runs from the base of your skull and over the spinous processes of the cervical vertebrae.
- Transverse ligaments of the atlas: They connect the two sides of the atlas. They also anchor the axis dens in place.

Musculature acting on the neck
Several muscles play crucial roles in controlling the movements and stability of the neck. Some of the major muscles acting on the neck include the following:
- Sternocleidomastoid
- Trapezius
- Scalene muscles.
Look at the following video to learn more about all the muscles that act on the neck.
Write down the muscles you have learnt as your notes will support you in the activity that follows.
Try it out
How did you go with writing down the muscles? Check through each of the following images and see if you can correctly identify each musculature acting on the neck.

The neck is susceptible to various common issues that can cause discomfort and restrict movement. One prevalent problem is neck pain, which can be caused by ageing, muscle strain, mental stress, nerve impingement, poor posture, injury, or underlying conditions like cervical herniated discs or osteoarthritis. Let’s take a look at neck pains and some of these causes.
Neck pains
Most of us will suffer some form of neck pain at some point in our lives. Cohen (2015) reports neck pain is the fourth leading cause of disability, with an annual prevalence of over 30%. This author suggests most episodes of acute neck pain will resolve with or without treatment but that 50% of individuals will continue to experience some degree of pain either chronically or acutely throughout their life.
Based on these numbers, it is evident that you can anticipate encountering clients who frequently experience various forms of neck discomfort. The pain (cervicalgia) can be either axial (mostly felt in your neck) or radicular (pain that radiates into other areas like your shoulders or arms). The type of pain people experience include:
- Persistent ache.
- Stabbing or burning sensation.
- Shooting pain that travels from their neck down through the shoulder/arm.
This can be accompanied by additional symptoms such as headaches, stiffness (in the neck, shoulders or thoracic spine), an inability to turn the neck (or tilt the head), or numbness or tingling in the shoulders or arms.
According to Kazeminabsab et al (2022) report that females have a 25% higher incidence of neck pain than males and that neck pain increases with age, peaking in middle age and then diminishing again with advanced age (70+) as shown in the following image.
![[ADD IMAGE'S ALT TEXT]](/sites/default/files/12891_2021_4957_Fig5_HTML.png)
Common causes of neck pain
Neck pain can have multiple underlying causes, and it's not uncommon for these causes to overlap and contribute to the pain simultaneously. Therefore, it's important to recognise that a combination of factors can be responsible for neck pain, as one cause can lead to or exacerbate another issue.
The following is a list of the common causes of neck pain.
- Ageing
- Physical strain
- Poor posture
- Mental stress
- Injury
- Nerve impingement
AGEING
Due to age-related conditions like those that cause degenerative changes to your vertebrae, like osteoarthritis (the wearing away of articular cartilage) and spinal stenosis (the narrowing of spaces in your cervical spine). Repeated stress over your lifetime can also cause the intervertebral discs of your cervical spine to degenerate, leading to herniated discs or pinched nerves.
PHYSICAL STRAIN
Engaging in repetitive or strenuous activities that involve the neck, such as heavy lifting, prolonged sitting in awkward positions, or repetitive motions, can lead to muscle fatigue, tension, and strain in the neck area.
POOR POSTURE
Poor posture is becoming more prevalent in modern society as our dependence on using computers and mobile phones increases. Holding our neck in positions of poor posture can lead to muscular imbalances causing pain. Most commonly, this presents as a forward head and neck posture, which weakens the deep neck flexors and puts greater stress on the neck extensors.
MENTAL STRESS
Stress results in muscular tension that can lead to neck pain and stiffness.
INJURY
Trauma and injury can cause damage to muscle tissue, ligaments, discs, and joints leading to compression of nerves or muscle imbalance. An example of this is whiplash. Whiplash of the neck, is an injury that occurs when the head is suddenly jolted backward and forward in a rapid, whip-like motion. It is often associated with car accidents, particularly rear-end collisions, but can also result from sports injuries, physical abuse, or other traumatic events.
The abrupt movement of the head during whiplash strains the muscles and ligaments of the neck, leading to various symptoms and discomfort. The following image illustrates how the neck is backwards and forwards, which causes whiplash.

NERVE IMPINGEMENT
When the nerves in the neck become compressed or irritated, it can result in discomfort, limited range of motion, and radiating pain to the shoulders, arms, and hands.
Assessing active neck pain is beyond the scope of practice for personal trainers.
However, personal trainers can still perform certain functional tests on their clients to assess the presence of muscle imbalances in the neck.
Let’s view the following functional tests that can be performed for the neck:
- Active range of motion.
- Neck flexor endurance.
Active range of motion
The following video shows a series of movements that helps determine the active range of motion of the cervical spine (neck).
By identifying restricted movements in the neck, it becomes possible to pinpoint the muscles that may be tight and causing the limitation. Through thorough testing, corrective techniques can be applied to enhance the overall functional movement of the neck. This approach can effectively reduce the likelihood of experiencing neck pain.
TRY IT OUT
Utilise your knowledge of neck muscles and carefully analyse the movements demonstrated in the Active Range of Motion video. Based on this information, try to determine which specific muscles could potentially be tight and causing limitations in each of the movements listed in the activity that follows.
Hint: When certain muscles on one side of the neck become tight, they can limit the range of motion on the opposite side. To aid in formulating your answers, revisiting the images of each muscle can be helpful in understanding their roles and identifying potential restrictions.
Neck flexor endurance
The neck flexor endurance test is an effective way to assess the strength of the deep neck flexor muscles. Typically, an average hold time of approximately 40 seconds for men and 30 seconds for women is considered normal in this test.
Take a look at some of the corrective strategies that can be used on the neck.
The Muscle Energy Technique (MET)
This corrective approach can be employed to address a shortened or chronically tight muscle, aiming to improve its length and flexibility.
It involves the voluntary contraction of a subject’s muscle(s) in a precisely controlled direction against a counterforce provided by the trainer. El Laithy and Fouda (2018) suggest the MET may be used to decrease pain, stretch tight muscles and fascia, reduce muscle tonus (overactivity), improve local circulation, strengthen weak musculature and mobilise joint restrictions.
This gentle lengthening approach is thought to be best used on postural muscles, which often become short and tight and can lead to muscle imbalances. This can limit the range of motion and cause joint restrictions.
Several muscles in the upper body fall under this category, such as the upper trapezius and levator scapulae. When these muscles become shortened, they can restrict the range of motion in the head, neck and shoulder and often become painful (El Laithy and Fouda, 2018).
The following video showcases a test conducted on the upper trapezius and levator scapula muscles. It demonstrates how to assess the tightness of these muscles and then proceeds to illustrate the techniques used, including the Muscle Energy Technique (MET) and the "Post-Isometric Relaxation" (PIR) method.
The Muscle Energy Technique (MET) has garnered significant research support and demonstrates favourable outcomes compared to other corrective approaches. It operates on the principle that tight muscles exhibit increased responsiveness to lengthening once they have undergone activation.
The MET method can be used for addressing other postural muscles in the neck.
Remember, it is crucial to always handle the neck with caution. Ensure all movements are executed slowly and gently, and maintain constant communication with the client. Your clients are the ultimate source of feedback regarding how the technique feels, so their input is invaluable.
TRY IT OUT
This would be a great time to practice these functional assessments and corrective techniques. It would be helpful to have a willing participant to act as your client during this process, so you can practise explaining and conducting the assessments. Use the instructional videos above to guide you.
Remember, these assessments simply help you identify muscle imbalances that might be causing generalised discomfort in your clients. It is not within your scope of practice to diagnose injury. If a client complains of intense acute pain or has an active injury to their neck, they should be referred to a medical professional or allied health professional (e.g. physiotherapist).
There are a number of other tests related to muscle imbalance affecting the neck, but as they also relate to other areas of the body (upper back and shoulder complex) these will be introduced towards the end of this topic.
The Shoulder Joint (glenohumeral joint) is a ball and socket joint between the scapula and the humerus. It is the major joint connecting the upper limb to the torso.
It is one of the most mobile joints in the human body, but this comes at the cost of joint stability. Physiopedia (n.d.) suggests that shoulder pain is the third most common complaint presented to physiotherapists.
The origin of shoulder pain can be difficult to locate as a number of adjacent areas (such as the neck) can refer to pain through the shoulder complex. There are also a number of joints present around the shoulder complex, with a number of muscles that cross multiple joints. This can make it difficult to pinpoint the origin of the pain.
According to Physiopedia (n.d.) approximately 30 people in every 1000 will experience shoulder pain that they seek treatment for in a 5-year period. The incidence of shoulder pain appears to be around 6% higher in women than men. Shoulder complaints also appear to rise with age, peaking in the 45-64 year-old age group (Physiopedia, n.d.).
The bone structure of the shoulder
The bones that make up the shoulder joint include:
- The humerus (the upper arm bone)
- The scapula (the shoulder blade)
- The clavicle (the collar bone).

The shoulder joint is formed by the articulation between the head of the humerus and the glenoid cavity (or fossa) of the scapula. This is why the proper name for the shoulder is the glenohumeral joint. The articulating surfaces of the joint are covered in articular cartilage (a protective layer that prevents bone-on-bone contact). Unlike the hip, the head of the humerus is much larger than the glenoid fossa, and the fossa is somewhat shallow. This allows a wide range of movement at the joint but also increases the risk of instability. To somewhat reduce this difference in size between the connecting surfaces of the joint, the glenoid fossa is deepened by a rim made of fibrocartilage called the glenoid labrum.
Click the arrows below the following images for the anatomy of the shoulder joint.
While the glenohumeral joint is the main articulating joint of the shoulder, there are actually three additional joints that make up the shoulder complex.
- The sternoclavicular joint: A synovial saddle joint that connects the clavicle to the sternum.
- The acromioclavicular joint: A synovial gliding joint that connects the acromion process of the scapula to the clavicle.
- The scapulothoracic joint: Not technically a true joint, but rather where the scapula glides over the posterior thoracic rib-cage.

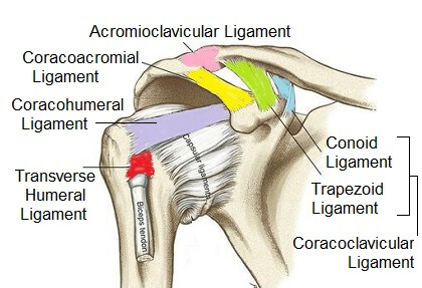
Ligaments of the shoulder
The ligaments of the shoulder play an important role in stabilising the joint. Remember, ligaments provide the bone-to-bone connection within a joint.
There are five key ligaments (or ligament groups) found within the shoulder joint:
- Glenohumeral ligaments (superior, middle and inferior): these extend from the humerus to the glenoid fossa, reinforcing the joint capsule. They act to stabilise the anterior aspect of the joint, helping to prevent anterior dislocation.
- Coracohumeral ligament: This extends from the base of the coracoid process to the greater tubercle of the humerus. It supports the superior part of the joint capsule and protects the head of the humerus.
- Transverse humeral ligament: This extends between the two tubercles of the humerus. It holds the tendon of the long head of the biceps in the intertubercular groove.
- Coracoacromial ligament: It extends between the acromion and coracoid process of the scapula, forming an arch-like structure over the shoulder joint (coracoacromial arch). This resists superior dislocation of the humeral head.
- Coracoclavicular ligaments (conoid and trapezoid ligaments): These connect the shoulder blade to the collar bone. The coracoclavicular ligament is extremely strong, carries a large load and keeps the scapula attached to the clavicle.
Bursa of the shoulder
A bursa is a synovial fluid-filled sac that cushions between tendons and other joint structures (like bones). They are found in areas where two structures make contact with each other. Eight bursae are present in the shoulder joint (the most of any joint in the body). Let’s have a look at the main bursae in the shoulder joint.
The subacromial bursa
This is located deep to the deltoid and acromion and superficial to the supraspinatus tendon and joint capsule. It reduces friction beneath the deltoid, promoting free motion of the rotator cuff tendons.
The subscapular bursa
This is located between the subscapularis tendon and the scapula. It reduces friction on the tendon during movement at the shoulder joint.
The subcoracoid bursa
This is located between the anterior surface of the subscapularis and the coracoid process. It reduces friction between the tendons of the coracobrachialis, subscapularis and short head of the biceps tendons.
![[ADD IMAGE'S ALT TEXT]](/sites/default/files/The-Bursae-of-the-Shoulder-Joint.jpg)
Musculature acting on the shoulder
Due to the mobility of the shoulder, the range of movements it allows and the shallow nature of the joint and the inherent stability issues this presents, the shoulder joint requires a lot of muscular attachment! No fewer than 19 muscles attach at the shoulder joint. These muscles offer dynamic stability and postural positioning and contribute to the wide array of movements possible at this joint.
For optimal shoulder function, the dynamic stabilisers must function in an efficient synergistic fashion. Some muscles exert a force superiorly on the shoulder, others must exert an equal and opposite inferior force.
Some muscles pull anteriorly on the shoulder structures, while others must balance this with a posterior force.
When any muscle group becomes dominant in the joint, this can lead to issues with proper mechanics and often results in pain or injury.
Let’s look closer at the key muscles acting on the shoulder joint and their role.
Dynamic stabilisers of the shoulder joint
Dynamic stability of the shoulder relies on numerous muscles working in harmony. Muscles of the shoulder exert their “pull” on the shoulder complex from a variety of angles. These must be in balance to ensure the proper functioning of the joint.
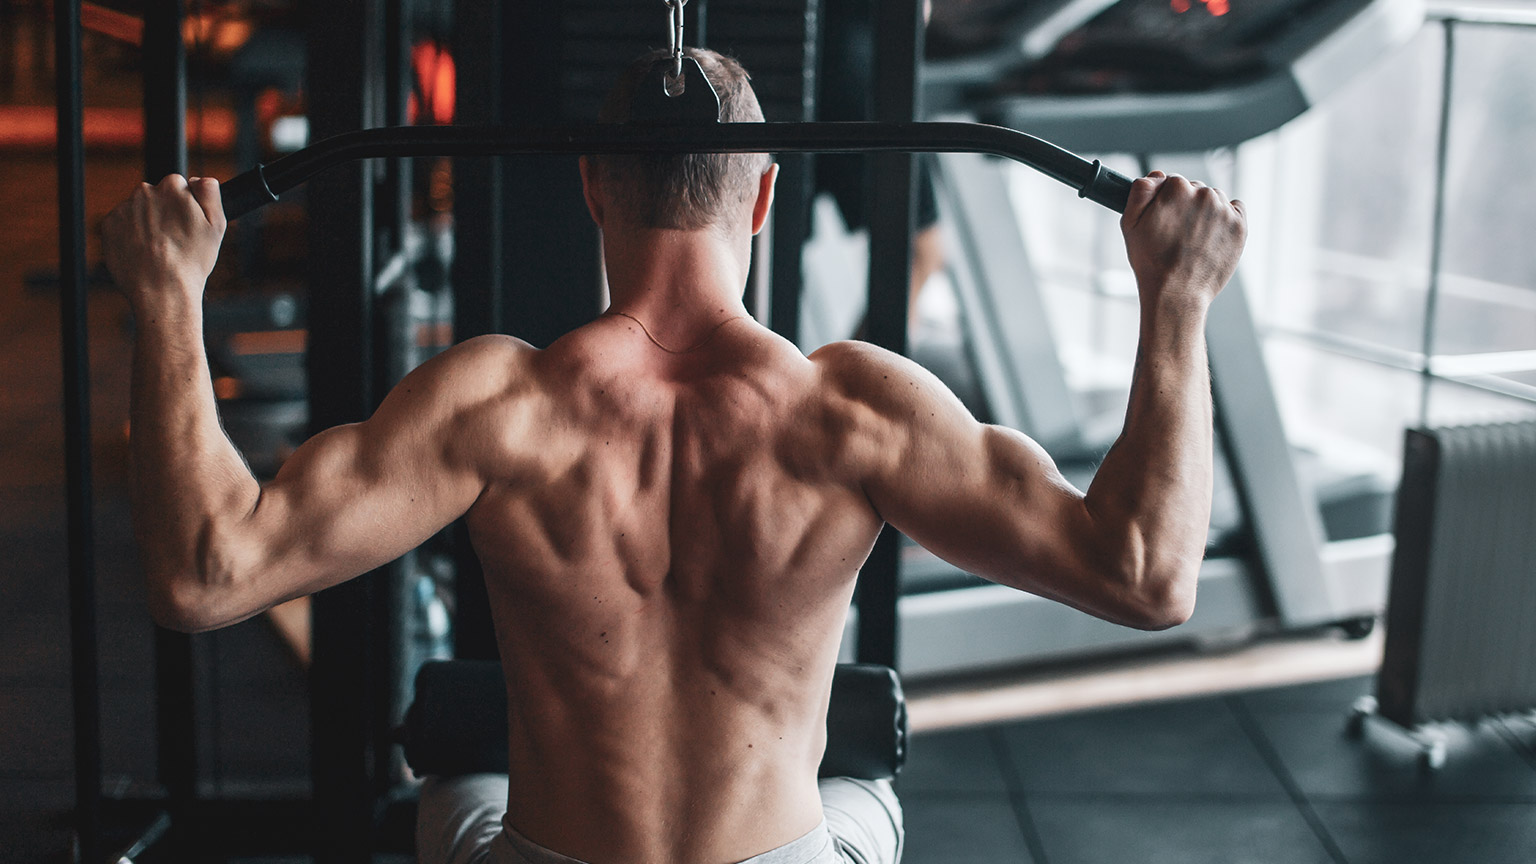
THE DELTOID
When most people think of shoulder muscles, they think of the deltoid. The Deltoid is a prime mover of the shoulder. It is a large triangular-shaped muscle that essentially encompasses the anterior, lateral and posterior aspects of the glenohumeral joint and gives the shoulder its rounded appearance.
While the deltoid is largely responsible for movement at the shoulder, it has a key role in dynamic stability, including prevention of subluxation or dislocation of the head of the humerus (particularly when carrying a load). The deltoid line of pull in isolation means it draws the head of the humerus superiorly (upwards) towards the coracoacromial arch.

THE ROTATOR CUFF
The rotator cuff is actually a collection of 4 muscles, including:
- The supraspinatus
- The Infraspinatus
- The subscapularis
- The teres minor

These deeper muscles originate from the scapula and/or the clavicle and insert into the humerus. While these muscles are quite small, they play a major role in the dynamic stabilisation of the shoulder.
You can see by the direction that the muscle fibres run in that the rotator cuff primarily exerts a compressive and downward shear force at the glenohumeral joint. This compressive force is vital to keep the head of the humerus centred within the glenoid fossa. The downward shear force is vital in preventing the head of the humerus from migrating upwards. It is essential that the rotator cuff muscles activate in synergy with the deltoid during overhead activities to pull the humeral head inferiorly (downwards) to combat the upward drift of the humerus.
THE LONG HEAD OF THE BICEP BRACHII
While we usually think of the brachii as an elbow flexor, the tendon of the long head of the biceps plays an important role in the dynamic stability of the shoulder. In the following image, you can see how this tendon runs directly over the head of the humerus. This means it acts as a minor humeral head depressor, thereby contributing to stability by countering the upward pull of the deltoid.

Other muscles acting on the shoulder
It is also important to note that other muscles can also exert force on the shoulder and disrupt the equilibrium of force required for dynamic (and static) stability. Some examples of these include:
- The pectorals (major and minor) - which exert an anterior and inferior force on the humerus
- The latissimus dorsi – which exerts an inferior and posterior force on the humerus
- The trapezius (superior fibres) - which exert a superior force on the scapula
- The trapezius (middle fibres) and rhomboids – which exert a posterior force on the scapula
Although you may already be familiar with the muscles mentioned earlier, it's worth knowing about some additional muscles that also play a role in shoulder movement. Learn more about the following muscles that might not be as commonly known or well-recognised, but understanding their functions is valuable as we progress.
Located in the anterior part of the upper arm. Acts on the humerus.
A thick, flat muscle that runs from the posterior scapula to the upper humerus. Acts on the humerus.
Run from the medial border of the scapula to the thoracic spine. These muscles act on the scapula and play a supporting role in stability.
A fan-shaped muscle that runs from the lateral surfaces of the first 8 ribs runs along the anterior surface of the scapula (attaching to the medial border).
Runs from the transverse processes of the first four cervical vertebrae to the highest point of the scapula (superior angle).
The shoulder complex relies on the coordinated effort of numerous muscles for optimal functioning and stability. It's evident that maintaining a proper balance among these muscles is crucial.
Movements of the shoulder
Remember, the shoulder is one of the most mobile joints in the body. It allows us to interact with our environment like no other joint by allowing our arms and hands to manipulate objects in a multitude of ways, from brushing your hair, driving your car, and of course the movements required to participate successfully in sports and exercise pursuits.
TRY IT OUT
Can you remember the key movement of each joint? Test your knowledge by writing your answer to identify which of the following movement is shown in each image.
Note: Use the correct spelling shown in the following list.
Abduction
Extension
Horizontal abduction and adduction
Flexion
Adduction
Prime movers of the shoulders
| Movement | Prime Movers | Synergists (helpers) |
|---|---|---|
| Shoulder Flexion |
Deltoid (Anterior fibres) |
Coracobrachialis Biceps Brachii |
| Shoulder Extension | Deltoid (Posterior fibres) Latissimus Dorsi |
Triceps Brachii (long head) Pectoralis Major (lower fibres) Teres Major |
| Shoulder Abduction |
Deltoid (Middle fibres) |
Biceps Brachii (long head) Teres Major |
| Shoulder Adduction | Latissimus Dorsi Pectoralis Major (lower fibres) Teres Major |
Deltoid (Posterior) Teres Minor Coracobrachialis Triceps Brachii (long head) Biceps Brachii (short head) |
| Shoulder Horizontal Adduction | Pectoralis Major Deltoid (Anterior fibres) |
|
| Shoulder Horizontal Abduction | Deltoid (posterior fibres) Middle Trapezius Rhomboids |
Infraspinatus Teres Minor |
| Shoulder External Rotation | Infraspinatus Teres Minor |
Deltoid (posterior fibres) |
| Shoulder Internal Rotation | Subscapularis Teres Major |
Deltoid (Anterior fibres) Pectoralis Major Latissimus Dorsi |
| Scapular Elevation | Trapezius (upper fibres) Levator Scapulae |
Serratus Anterior Rhomboids |
| Scapular Retraction | Rhomboids Trapezius (middle fibres) |
Trapezius (lower fibres) |
(Schenkman and De Cartaya, 1987)
TRY IT OUT: Prime movers
Can you think of tasks either in the gym or within an everyday activity or sport where we use the prime movers of the shoulders?
Use the following list and pick a primal movement that piques your interest. Make your way to the forum to post a specific task, activity, or sport that you feel targets the muscles related to your chosen primal movement. Be sure to comment and like your peer’s posts too!
- Shoulder Flexion
- Shoulder Extension
- Shoulder Abduction
- Shoulder Adduction
- Shoulder Horizontal Adduction
- Shoulder Horizontal Abduction
- Shoulder External Rotation
- Shoulder Internal Rotation
- Scapular Elevation
- Scapular Retraction
The shoulder is a complex joint that enables a wide range of motion and plays a vital role in the movement and functionality of the upper body. However, it is also prone to various issues and injuries that can cause discomfort and limit its function.
Issues relating to the shoulder joint
Due to the mobility of the shoulder and the inherent stability issues that it creates, it should be no surprise to anyone that the shoulder is one of the most commonly injured joints in the body. Lucas et al (2022) suggest that after lower back and knee pain, shoulder pain is the third most common musculoskeletal issue presented to primary care providers. ACC NZ statistics (reported by Statistics NZ, 2023) indicate that claims for shoulder-related injuries in NZ have amounted to approximately 30,000 yearly for the last 20 years. This data makes it highly likely that you will work with clients with some form of shoulder issue during your career as a personal trainer.
Shoulder problems can be broadly classified into three categories:
- Injuries
- Degenerative changes
- Muscular imbalances.
While diagnosing and treating acute injuries may be beyond the scope of a personal trainer's practice, it's crucial to recognise the significance of various shoulder issues our clients may encounter. These concerns could stem from previous injuries, repetitive behaviours, or a lack of postural awareness. As dedicated trainers, we have the opportunity to make a positive impact by helping our clients improve or navigate around these challenges. By being well-informed about these conditions and actively working towards addressing them effectively, we can play a vital role in enhancing our clients' well-being and achieving their fitness goals.
Common injuries of the shoulder and their residual effects
Due to the complexities of the shoulder and its anatomical positioning on the body, it can be subjected to a variety of forces that can course a multitude of injuries and issues rarely seen in other joints. While we can’t cover all of these issues, a sample of these injuries and issues include:
- Dislocations & separations.
- Rotator cuff tear.
- Impingement syndrome.
Let’s take a look at these and learn about some of the residual, ongoing effects of these injuries.
Dislocations, Subluxations and Separations

DISLOCATIONS AND SUBLUXATIONS
With these injuries, a fall or blow causes the head of your humerus to pop out of the shoulder socket (glenoid cavity). With a dislocation, the unnatural state of the joint is maintained until the joint is manipulated by a qualified health professional. With a subluxation, the humeral head only partially leaves the socket. These unnatural movements of the joint will cause damage to the ligaments, muscles or tendons whose job is to maintain the stability of the shoulder. The specific structures damaged will depend on the direction of the dislocation. For example, an anterior dislocation will cause damage to the glenohumeral ligaments. This will likely leave the ligaments elongated and make the shoulder more likely to dislocate again. To compensate, the muscles that support the glenoid ligaments in their function will be called upon to do more stabilisation work which could lead to a muscular imbalance.
SEPARATION
This injury usually affects the acromioclavicular or AC joint. This is where the clavicle meets the scapula. If the injury is severe, part of the shoulder blade may separate from the collarbone. This separation will cause damage to the ligaments that support the AC joint (the acromioclavicular and coracoclavicular ligaments). Persistent complications of a shoulder separation commonly include ongoing pain and the potential development of muscle imbalance due to adopting a protective posture. Additionally, the joint may be susceptible to arthritis.

Rotator Cuff Tears
According to Physiopedia (n.d.), rotator cuff tears are the leading cause of shoulder pain and shoulder-related disability. Rotator cuff tears can be the result of a number of causes, including:
- Degenerative changes: Thought to arise with age. People over the age of 40 are most at risk.
- Repetitive micro-trauma: Due to poor technique in shoulder movements (e.g. throwing), repetitive overuse of the shoulder, or muscle imbalances leading to instability
- Acute injury: Falling on an outstretched hand, a shoulder dislocation, or unexpected force while pushing or pulling
- Other shoulder disfunction: Tears of rotator cuff tendons can be brought on by other shoulder dysfunction issues such as frozen shoulder or impingement syndrome
Rotator cuff tears can be either partial or complete. Complete tears will often require surgery, whereas partial tears can be rehabilitated.
Not all rotator cuff tears result in pain! According to Jain et al (2018) asymptomatic rotator cuff tears (i.e. with no pain) are documented on imaging and are prevalent in approximately:
- 40% of people aged over 50-60 years
- 54% of those aged 60-65 years
- 65% of those aged over 70 years.
Ongoing issues resulting from rotator cuff tears can manifest in several ways. These include weakness of the shoulder, specifically in overhead tasks, and persistent pain. To compensate for the weakened rotator cuff, other muscle groups, such as the trapezius, may be overused, potentially leading to muscle imbalance. These imbalances can contribute to additional dysfunction in the shoulder.

Impingement Syndrome
To grasp impingement syndrome, it's crucial to familiarise yourself with the concept of the sub-acromial space. As the name implies, this space is located beneath the acromion of the scapula.
![[ADD IMAGE'S ALT TEXT]](/sites/default/files/Picture%202_0.png)
While only 10mm wide, the maintenance of this space as we move our shoulder through its range of motion is critical to a well-functioning and pain-free shoulder joint. In this small space lie some very important structures, including the supraspinatus tendon, biceps (long head) tendon, subacromial bursa, and superior labrum. The maintenance of the sub-acromial space relies on multiple muscles but primarily the rotator cuff.
When the rotator cuff is weak, injured, inadequately recruited, or fatigued, it becomes challenging to sustain the sub-acromial space. Consequently, the stability of the shoulder joint diminishes over time, leading to a decrease in the subacromial space. Muscle compensations often accompany this reduction.
This can lead to the structures situated in the space being trapped (impinged) between the acromion and the head of the humerus as the arm is lifted. Impingement of soft tissue leads to inflammation, pain, and ultimately an injury if left untreated.
Take a look at the following image that illustrates a shoulder impingement. Take note of how the reduced space at certain angles can pinch the supraspinatus tendon.

Weakness of the rotator cuff is very commonly associated with a host of shoulder pathologies, such as shoulder impingement, rotator cuff tendinitis, sub-acromial bursitis, biceps tendonitis, and rotator cuff tears. Risk factors for shoulder impingement include:
- Age: very common in those over 50. Older people tend to develop bone spurs (calcium deposits) which narrow the sub-acromial space.
- Repetitive stress: The overuse of the rotator cuff.
- Shoulder instability: Caused by previous injury (e.g. dislocation, torn labrum etc).
- Poor posture: Overactive superior trapezius is often present with impingement syndrome. If the superior fibres of the trapezius are tight, they can pull the humeral head up as movement occurs, grinding it into the acromion above.
- Genetics: The shape of the acromion can differ between people placing some at increased risk of impingement.
Watch the following video that explains the causes and development of subacromial impingement of the shoulder.
Common symptoms of impingement syndrome include shoulder pain in the front or back of the shoulder, pain when performing overhead activities, and pain when lifting your arm to shoulder height (with or without associated weakness). This pain is often described as a “sharp, pinching feeling”. Where the pain is felt (and radiates to) depends on the structure being impinged. Commonly, impingement affects the supraspinatus tendon, the sub-acromial bursa, or even the biceps tendon (causing pain to radiate down the arm).
Bursitis
Bursitis means inflammation of the bursae. It is one of the leading causes of shoulder pain. The symptoms of bursitis vary by type and severity but often present as swelling, a burning sensation and acute tenderness and pain over the site of the bursa. Clients will often report pain when lifting the arm or performing overhead tasks.
There are a number of bursae in the shoulder covering most bony prominences. The most common site for bursitis is the sub-acromial bursa, which lies in the sub-acromial space. The mechanism for this inflammation can usually be explained by the same process that leads to shoulder impingement.

There are several ways of developing bursitis, but most commonly, bursitis is caused by repeated stress on the bursa. According to Physiopedia (n.d.), bursitis is also more common in those with conditions such as gout, diabetes, rheumatoid arthritis, uremia and other inflammatory issues. The mechanism of bursa irritation can be divided into three groups of pathology:
- Chronic bursitis: Develops over time due to repeated irritation of the bursa.
- Infected bursitis: Where the bursa becomes infected with bacteria.
- Traumatic bursitis: Due to a direct impact through accident or injury.

Have a look at the following video that summarises the anatomy of the shoulder.
The following tests help you ascertain muscle imbalances acting on the shoulder complex. Muscle imbalances can come about through repeated actions with less-than-optimal mechanics, ongoing effects of previous injury, or compensatory muscle activation to make up for muscle weakness or poor recruitment. These tests can help you formulate a targeted exercise programme to relieve discomfort and strengthen/stabilise the shoulder joint.
TRY IT OUT: Functional Test to the Shoulder
It is highly recommended that you stop at intervals during this lesson and practise these assessments on a client, family member or friend. It will help to have a willing participant to act as a client through this part of your learning.
Note: Your client does not have to be affected by any of the issues we have covered for you to practise these assessment techniques.
At the end of learning how to conduct these tests, pick one of the tests you conducted and head to the forum to discuss the following:
- Name one (1) test that you conducted.
- Did the client perform the functional test with ease, or did they struggle or experience any discomfort?
- Did the client exhibit any limitations or restrictions in their range of motion during the test?
- Were there any compensatory movements or muscle imbalances observed during the test?
- Did the client demonstrate proper form and technique while performing the functional test?
- Did the test accurately assess the specific functional movement or task that was intended?
- Were there any unexpected findings or discrepancies between the functional test results and the client's reported symptoms or complaints?
- Did the client's performance on the functional test align with their overall shoulder strength and stability?
- How confident do you feel in the validity and reliability of the functional test used?
- Are there any modifications or additional tests that could provide further insights into the client's shoulder condition?
- Based on the functional test results, what are the potential implications for the client's exercise programme or rehabilitation plan?
Muscle length tests
The “T” and “Y” test for pectoral length: This test will help you determine whether the pectoral muscles are tight and could be pulling the shoulder complex anteriorly.
The “I” test for the length of Latissimus Dorsi, Rhomboids and Teres major: This test will help you determine if these muscles are tight and producing an inferior pull on the shoulder complex.
Active range of motion test
This broad test takes a client through a series of movements that will allow you to see if the range of motion is impaired during any normal shoulder movement pattern. You should look for obvious differences between limbs, lack of complete range, and pain or discomfort signs. You should make a note of any abnormal movement patterns. If any are indicated, you can then move on to more specific tests to see if you can isolate the muscle imbalance causing the issues. The following video will also cover a basic assessment for shoulder impingement, named the "The Painful Arc" Test.
The painful arc test
This is a simple test to determine if impingement is present. It is also known as the Shoulder Active Range of Motion test. Locating where the impingement occurs can give you more certainty over where the impingement originates from.
Shoulder recruitment tests
The shoulder abduction (recruitment) test
This test is designed to allow you to assess the recruitment pattern at the shoulder during abduction. By monitoring the smoothness of the movement, along with the involvement of the upper trapezius, you can tell whether a client is at risk of a functional shoulder issue like impingement. If the upper trapezius is over-involved in the movement, clients often feel discomfort in the upper/middle trapezius when palpated firmly. If a client is unable to lift their arm with proper mechanics, then they should not be loaded with weight at this point.
Scapula control test
This test allows you to assess the degree of control a client has over their scapulae. It indicates whether dynamic stability is present in the area and whether the brain can recruit muscles that act on the scapula in a coordinated fashion. If a client is unable to stabilise their scapula, it puts them at higher risk of developing an injury or discomfort during weighted activity.
Rhomboid recruitment test
A test to find out if rhomboids are inactive or have weak recruitment:
Middle trapezius strength test
This test is positive if a client is unable to retract the scapula against resistance (note: resistance is applied to the scapula, not the arm, during this test).
Rotator cuff recruitment/strength tests
The following tests will determine if a client has a rotator cuff weakness or recruitment issue. They might also indicate if a client has a potential rotator cuff tear (or age-related rotator cuff syndrome). Remember, the rotator cuff is critical to maintaining the sub-acromial space and for ensuring the humeral head remains securely attached to the glenoid cavity ( the socket). If the rotator cuff muscles are weak or injured, this can result in the compensatory activity of other muscles, leading to shoulder dysfunction and impingement syndrome. Both the External and Internal Shoulder Rotaion tests allow you to isolate which rotator cuff muscle may be weak, damaged, or poorly recruited, allowing you to form a targeted strengthening programme.
Note: With strength tests, it is important to have a reference point for what “good strength” feels like. During the assessments, you are looking for obvious differences between sides while being aware that weakness could exist in both sides to the same degree. For this reason, you should perform the tests on clients with well-functioning, pain-free shoulders first, to give you a comparative marker for what weakness feels like.
The “empty can” test
A slightly more aggressive and specific test that is designed to assess impingement of the supraspinatus tendon (most common impingement). Please note that if a client feels pain simply adopting the starting position of a test, then don’t perform the test!
If, through testing, you suspect an acute or chronic injury is present, you should remove any exercises from a programme that may exacerbate the issue and refer your client to an appropriate health provider for diagnosis and a treatment plan.
The purpose of learning these functional tests is to determine if minor disfunction is present in the shoulder and form a targeted plan to rectify any muscular imbalances to improve shoulder function and safety while exercising.
Before we go onto corrective strategies for shoulder issues, let's take a look at a corrective strategy process we can apply for all issues we discuss going forward.
Corrective exercises are all about helping people move and feel better while living their everyday life and also making the process of exercising pain-free and safe. When deciding on a corrective approach, it is important to follow a consistent process.
To do this, you can use the National Academy of Sports Medicine (NASM) “Corrective Exercise Continuum”.

This continuum suggests that all corrective approaches need to follow four distinct phases:
- Inhibit – address the tight or overactive muscles
- Lengthen – the tight or overactive muscles
- Activate – the weak, elongated or poorly recruited muscles
- Integrate – improve the neuromuscular pathways by establishing new and better ways of moving
The Corrective Exercise Continuum is a simple yet highly effective four-step process that fitness professionals can use with their clients and athletes to improve and correct common movement compensations.
Let’s look at each stage as it applies to the shoulder.
Phase 1: Inhibit
This first phase is about reducing muscle activity that functional assessments have identified as “over-active” or “tight”. There are several corrective approaches that can help inhibit overactive muscles. These include foam rolling, percussion devices such as massage guns, and manual techniques like massage. Unless you are certified, referring to a specialist to apply manual techniques is best.
Here is an example of this phase in action that we can apply to our learnings on the shoulder. We will take this scenario through all phases so you can see how it is applied.
SCENARIO: CORRECTIVE EXERCISE CONTINUUM
Your client presents with restricted movement or mentions right shoulder discomfort when performing overhead movements in the gym. You conduct a couple of functional tests on your client.
The shoulder abduction recruitment test is positive for over-active upper trapezius on the right side and the painful arc test confirms that your client has some impingement at around 70-80 degrees of abduction on that side. A quick length test also indicates a tightness through the pectorals. You also perform the rotator cuff strength tests and find that your client is fine with internal rotation (strong on both sides) but is weaker with external rotation on the right side.
So, what can we deduct from this? The client has an over-active trapezius and tight pectorals that need to be inhibited. It is difficult to foam roller these areas of the body. With some instruction, the client may be able to use a massage gun to target these muscles, but the obvious solution would be to seek a shoulder massage (including pec insertion) to release some of the over-activation. Depending on the severity of the issue, this may require multiple sessions to achieve a noticeable difference.
At this point, it would also be useful to see if anything in their life is actively contributing to the issue. Do they perform a job that contributes to the issue? (e.g. builders using a hammer all day or poor ergonomics at their work desk while using a mouse). If an external source of repetitive stress is placed on the right shoulder daily, we may be fighting a losing battle!
Once we have worked on inhibiting the tight muscle, it is time to move on to Phase 2: Lengthen of the corrective continuum.
Phase 2: Lengthen
The obvious way to lengthen a tight muscle is to stretch it. Contrary to popular belief, stretching does not simply stretch out muscle fibres. Stretching is the elongation of mechanically shortened muscles and connective tissue via a nervous system response (Behm, 2018).
Remember, stretching increases mobility at a joint by getting muscle spindles (stretch receptors) to inhibit (switch off), which decreases muscle activity and motor neuron excitability. In other words, by applying static stretching principles, the muscle and connective tissues become more willing to elongate, thus improving the range of motion. In essence, stretching will calm a muscle down, improving length-tension relationships and allowing for enhanced movement function (Behm, 2018).
In the case of our client, the upper trapezius and pectorals need lengthening. You add some passive stretches to your client’s workout session and give them a couple they can do at home.
Click on the arrows below the following images for some examples.
Phase 3: Activate
This phase includes isolated strengthening of the weak or poorly recruited muscles established during functional testing. Isolated strengthening is choosing a series of corrective exercises to isolate specific muscle weaknesses that will improve the stability, recruitment and strength of a particular joint. Simply put, this phase aims to single out specific muscles (or muscle fibres) for strengthening in isolation before integrating them back into moving in co-ordination with other muscles.
The functional tests we completed on our client indicated that they have some rotator cuff weakness. The client specifically struggled with internal rotation strength. This indicates a weakness of the infraspinatus, supraspinatus and teres minor. The common-sense approach to strengthening these muscles would be to start with minimal resistance (as the muscle is weak), focusing on improving endurance (reps). Then you can apply the progressive overload principle over time to increase strength. In this instance, we add some external rotation exercises to the client’s workout and send them home with a light resistance band to continue working on these at home.
Click on the arrows below the following images for some examples.
Phase 4: Integrate
With multi-joint movements, these exercises are designed to re-teach the muscles you have targeted in phases 1-3 to work in a co-ordinated fashion with other muscles. These exercises should be movements that are important to the client, for instance, tasks that they need to do daily. These exercises should be done slowly, in a controlled fashion, with optimal form and control. Once again, the progressive overload principle should be used to continue to develop these movements. In the case of our client, this could start by using an exercise like the “Ball combo 1 and 2”, then progressing onto more difficult multi-joint exercises like the “squat to row” and “single leg deadlift to PNF pattern 1”. You can find suitable integration exercises online to address the most common issues in clients. These exercises are specifically designed to help establish ideal movement patterns. Once the client has improved movement patterns and functional abilities, they can gradually transition back to more traditional forms of training. See the video that demonstrates the following exercises.
- Ball combo 1 exercise
- Ball combo 2 exercise
- Squat to row
- Single leg deadlift to PNF pattern 1
The exact approach and length of time you apply to each of these phases is dependent on the level of disfunction present in the client and the goal of the client. The above examples may be best to use on someone who wants a better functioning shoulder for general life, however, if the goal of the client is to resume (or start) lifting in the gym, then the integration phase may be starting to get back in traditional lifting exercises with a focus on building endurance (light weight, high reps, optimal form) before moving into a strength focus.
Upper Crossed Syndrome is a sign of our modern times. The upper crossed syndrome is a comprehensive condition encompassing various aspects of the neck, shoulder, and thoracic spine.
The upper crossed syndrome is a term used to describe an increasingly common postural dysfunctional pattern affecting the musculoskeletal structures of the neck, shoulder, and thoracic spine. Clients with this condition present with rounded shoulders, a curved upper back and a forward head/neck position.
This condition is given its name because an “X” (or cross) can be drawn across the upper body, indicating muscles that are typically tight or over-active and those that are typically weak or poorly recruited. These muscle imbalances change the curvature of the thoracic and cervical spine, leading to the rounded shoulders and forward neck position typical of this condition.
Upper crossed syndrome may be the leading cause of many neck and shoulder complaints your clients present with.
Muscolino (2015) believes the primary cause of upper crossed syndrome is chronic postural stress to the upper body. This author suggests that most tasks that we perform in daily life require us to work down and in front of ourselves, causing us to flex the upper spine, protract the head, and protract the shoulder girdles while medially rotating the arms. Examples of these actions include working at a keyboard, using a smartphone, reading a book in our lap, or caring for a baby. Maintaining this posture necessitates the contraction and shortening of certain muscles and the inhibition and lengthening of others (Muscolino, 2015).
Musculature acting on upper cross syndrome

In upper crossed syndrome, certain muscles become tight and overactive, while others become weak and underactive.
| Tight and overactive muscles: Due to this chronic postural positioning researchers have found that the following muscles are most likely tight: |
Weak and underactive muscles: Due to this chronic postural positioning researchers have found that the following muscles may be found to be lengthened (and taut): |
|---|---|
|
|
Upper crossed syndrome can cause a variety of issues and symptoms due to the muscle imbalances and postural changes it creates. Here are some key signs and symptoms of upper crossed syndrome in seated or standing posture:
- Protracted scapulae: This means scapulae sit more laterally and distant from the thoracic spine than they should. This results in rounded shoulders that sit further forward than they should.
- Medially rotated humerus: It is common to observe the backs of the hands facing forward when in stance.
- Overly flexed thoracic spine: The upper back takes on a rounded appearance
- Excessive flexion of the cervical spine: This leads to anterior translation of the head (the head sits forward where it should).
The following describes some common issues associated with upper crossed syndrome.
Forward head posture
The muscles at the front of the neck become tight and shortened, causing the head to protrude forward. This can lead to neck pain, headaches, and increased stress on the cervical spine.
Rounded shoulders
The tightness of the chest muscles, such as the pectoralis major and minor, pulls the shoulders forward and inward, resulting in a rounded shoulder posture. This can lead to shoulder pain and decreased range of motion in the shoulder joint.
Shoulder impingement
The combination of tight chest muscles and weak rotator cuff muscles can contribute to shoulder impingement syndrome, where the tendons of the rotator cuff get pinched between the bones of the shoulder joint. This can cause pain, weakness, and restricted shoulder movement.
Upper back pain
Weakness in the deep neck flexors, lower trapezius, and rhomboids can lead to muscle imbalances in the upper back. This can result in pain and stiffness in the upper back region.
Breathing difficulties
The rounded shoulder posture and decreased chest expansion can affect proper breathing mechanics, leading to shallow breathing and decreased lung capacity.
Postural imbalances
Upper crossed syndrome can contribute to overall postural imbalances, including an exaggerated curve in the cervical spine (forward head posture), increased thoracic kyphosis (rounded upper back), and decreased lumbar lordosis (flattening of the lower back curve). Physiopedia contributors (2022).
Functional movement restrictions
Due to the adaptive shortening and weakening of the muscles listed above, clients presenting with upper crossed syndrome will often feel restricted when performing certain movements, including retraction of the scapula, lateral rotation of the arm, an extension of the thoracic and cervical spine and retraction of the head. In the gym, this is often noticed when a client cannot adopt desired technique or complete a movement with full range of motion. An example of this is a client who can’t adopt a neutral thoracic spine during a deadlift or a client unable to pull their elbows back past their torso during a seated row.
In severe cases, normal breathing function may also be compromised as anterior postural collapse makes it more difficult to expand the lungs.
As we now know, muscles that become chronically short often end up over-active and tight, while the muscles that are placed in a chronically lengthened state become under-active and weak. Interestingly, according to Muscolino (2015) even the lengthened weakened muscles can gradually become tight as they attempt to oppose the shortened facilitated muscles (and even the shortened tight muscles can become weak due to the altered length-tension relationship).
The first step in testing upper crossed syndrome is a static postural assessment. This involves observation of the client’s posture in a stance position.
In terms of functional testing, we now know the muscles that are commonly affected by upper crossed syndrome, so can systematically check the function of each of these to see if they indeed are contributing factors.
Tight/overactive muscles are best tested with length, range of motion, or recruitment tests. Tests that you have already been introduced to will be useful here, including:
The neck range of motion tests
Remember, this test consists of flexion, extension, rotation and lateral flexion. A limited range of motion in the following movements indicates specific tight or weak muscles.
RECAP: RANGE OF MOTION TEST OF THE NECK (CERVICAL SPINE)
Corrective strategies for Upper Crossed Syndrome need to be a multi-faceted approach and may require the assistance of another allied health professional.
When we apply the corrective exercise continuum to this issue, Phases 1 and 2 (inhibit and lengthen the tight muscles) may best be left to therapists specialising in these areas.
Muscolino (2015) suggests therapies such as soft tissue manipulation may be needed to break up long-standing fascial adhesions. This may include massage techniques, including cross-fibre work on tendons, and specialised stretching approaches such as contract-relax-agonist contract or the pin and stretch technique which have been found to be effective in the corrective treatment of this issue. These approaches may be best left to someone who specialises in these forms of treatment, or of course, a personal trainer could always upskill in these areas.
Phases 3 and 4 (isolated and integrated strengthening) are where we, as trainers, can have the most impact. Sometimes a broad exercise approach is all you need in minor cases. This would involve exercises that include the following:
- Exercises targeting retractors of the head that strengthen the deep neck flexors instead of the sternocleidomastoid muscle.
- Exercises targeting retractors of the shoulders and shoulder blades (rhomboids and middle trapezius)
- Exercises that strengthen the serratus anterior and train it to act as a shoulder protractor (instead of the pecs).
- Exercises that strengthen the lateral rotators of the shoulder joint
- Exercises that strengthen the thoracic spine extensors.
While all of the exercises can be performed during programmed sessions with your client, teaching your clients versions of these exercises that can be done at home daily is even more beneficial. The focus should be building endurance with light resistance, optimal form, and many repetitions.
Phase 3: Activate
Let’s look at some common examples of activating specific muscles for upper crossed syndrome.
Exercises targeting the deep neck flexors
A simple exercise for strengthening the deep neck flexors. Let’s take a look at two exercises.
- Deep neck flexor strengthening exercise
- Chin tuck an extension exercise.
As with all correction exercises, the aim should always be progressively building endurance. Given that these are postural muscles we are targeting, progression usually affects the number of repetitions you perform and the time you hold each repetition.
Watch the following demonstration of these exercises.
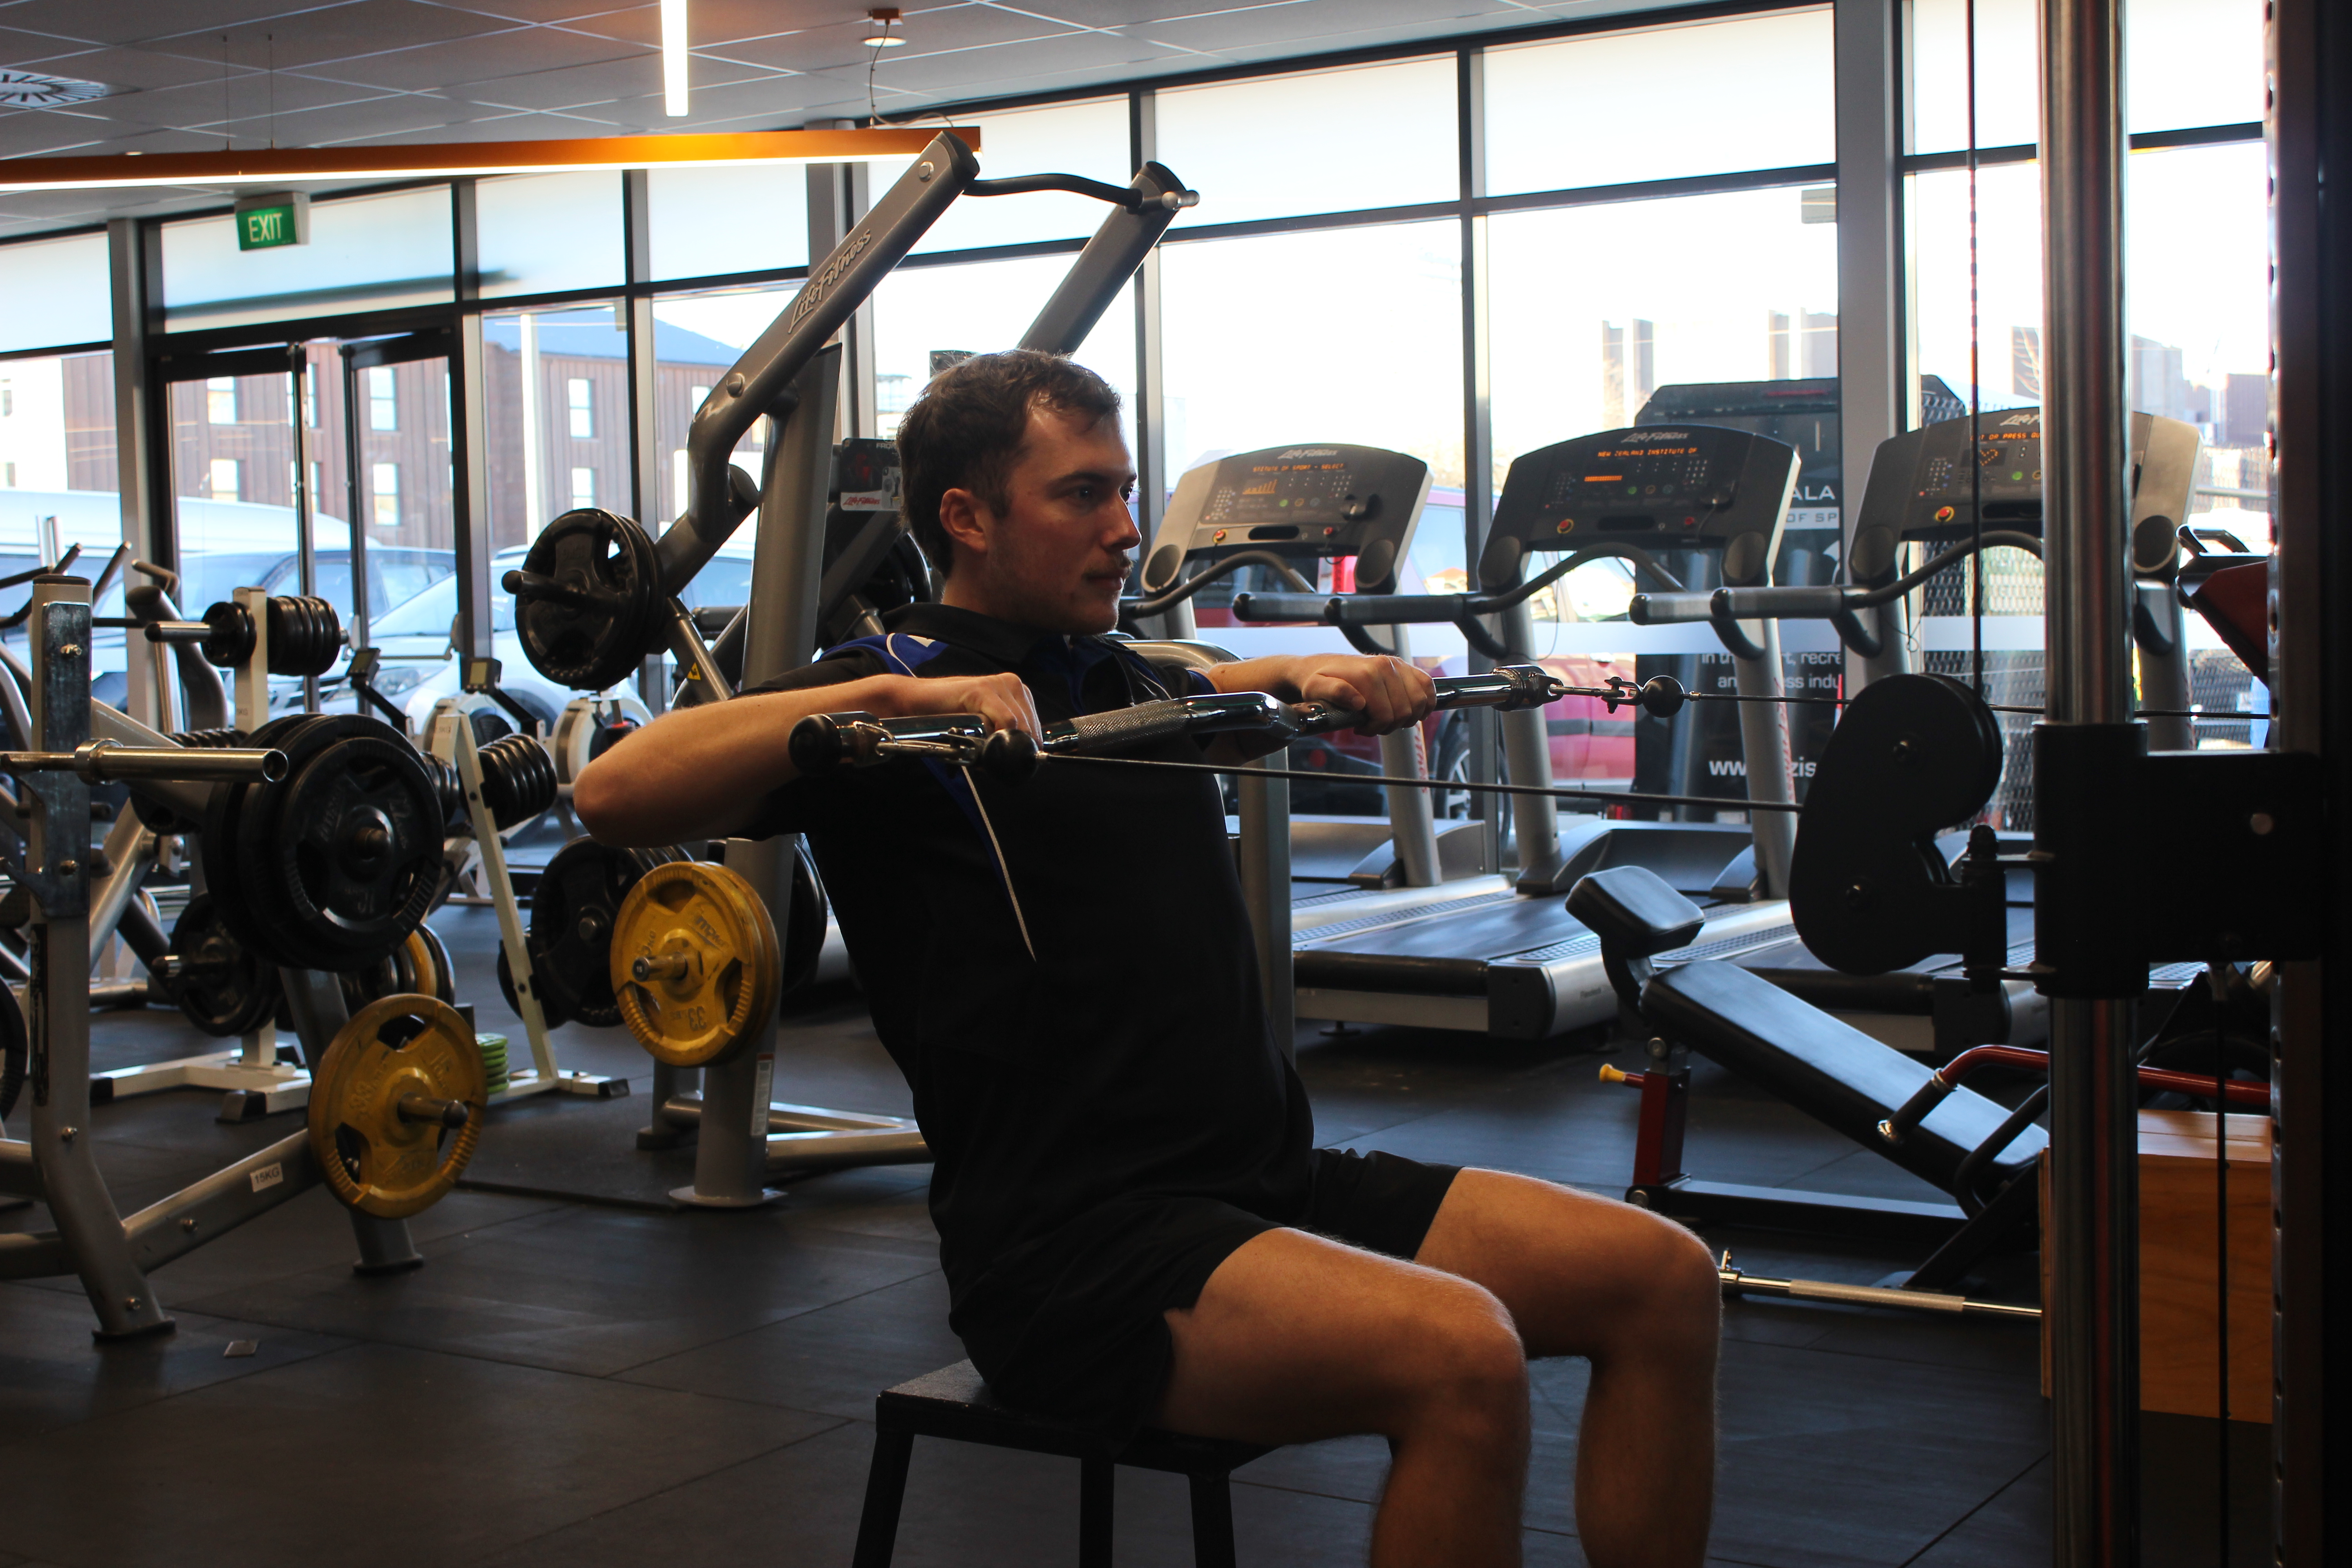
Exercises targeting the rhomboids and middle trapezius
The following list of exercises target the rhomboids and middle trapezius:
- Cable or Resistance Band Rows (high position)
- Cable or resistance band face pulls
- Banded “pull-aparts” or reverse cable fly/cable rear delt fly
CABLE ROWS (HIGH POSITION)
A high position with a wider grip targets more rhomboid and middle trapezius muscles. Whereas a low position targets more latissimus dorsi, biceps, and posterior deltoid.
Your client should have a prone or neutral grip, pulling to the base of the sternum with the elbows held high. The movement is more horizontal abduction of the shoulder than an extension of the shoulder.
CABLE FACE PULLS
BANDED “PULL-APARTS” AND REVERSE CABLE FLY/CABLE REAR DELT FLY
Click on the arrows below the following images for some examples.
Exercises for strengthening the serratus anterior
Check out these three great exercises for targeting serratus anterior:
- Push up plus
- Banded punch
- Wall slides (with pillowcase)
Exercises for strengthening the external shoulder rotators (infraspinatus and Teres Minor)
See the following images:
- Standing shoulder external rotation (limiting torso rotation and keeps elbows close to the side of body)
- Lying external shoulder rotation (limiting torso rotation and keeps elbows close to the side of body)
- Banded shoulder external rotations (this is a variation of the above two exercises)
- Standing abducted shoulder external rotations (this is a progression).
Phase 4 – Integrated exercises
After targeting the inactive muscles in isolation, time to integrate them with other muscles. The following exercises are a great way to get these muscles working in some whole-body movements. Remember, the key is still in optimal form (alignment of the upper spine and neck), and emphasis should be placed on scapula retraction.
The prone cobra hold
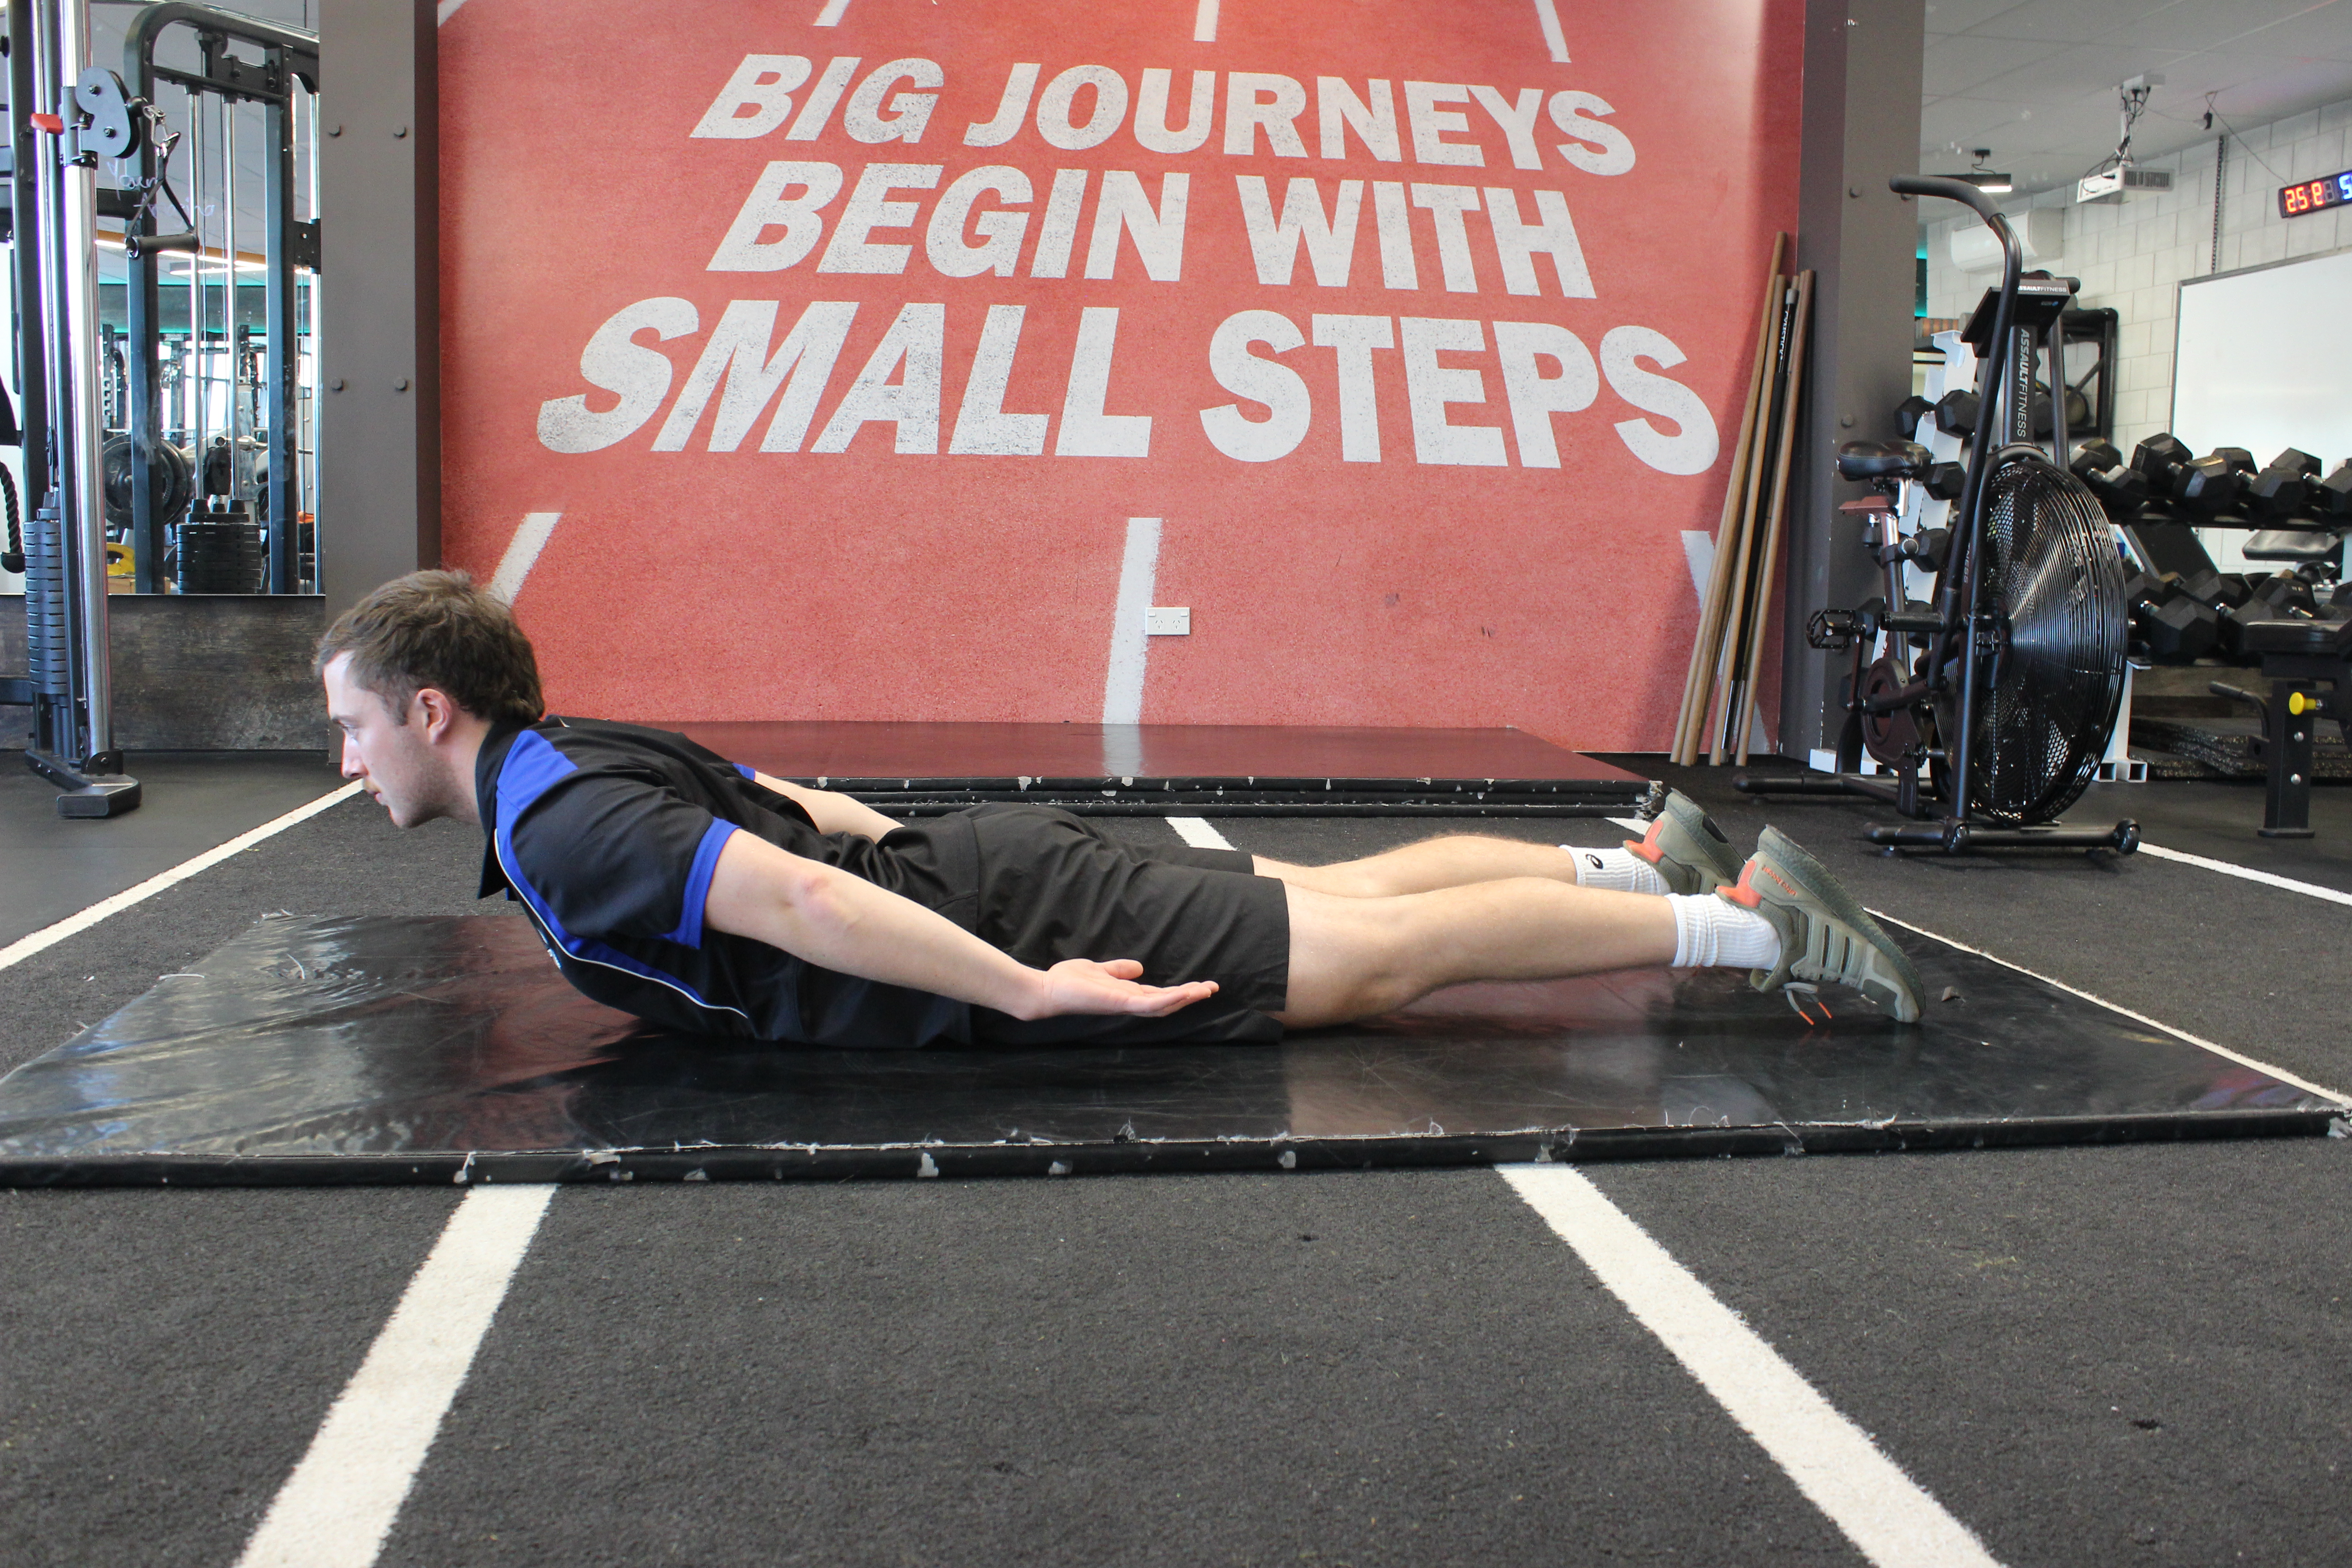
When having your client perform the prone cobra hold, the goal should be to work your clients up to 3-minute holds eventually. But to start, hold each rep for as long as the client can maintain the correct form (head and neck alignment and shoulder retraction). Rest and repeat. Try to aim for 15-second reps, then rest for 15 seconds, and continue in this manner until the client cannot hold for a full 15 seconds.
Squat to row
This is a great exercise to coordinate movement between the upper and lower extremities. Use a slow tempo to begin with, and ensure the form is optimal. A slow and steady eccentric squat, followed by a concentric squat and row (held for 2 secs at the top of the rep). Aim for three sets of 15 to 20 reps (initially, stop reps when the form is compromised).
Right, time to apply what you have learned. Head to your assessment for an assessment guide video and instructions on submitting your assessments.
The assessment guide video explains your assessment task, which requires you to use the information you have learned on this topic to help a case study client.
This assessment will require you to apply the knowledge you have learned and practised by completing the following tasks:
- Identify the musculoskeletal issue the client is likely exhibiting
- Identify and explain the likely muscle imbalances contributing to the issue
- Select and justify your selection of functional tests to perform on the client to confirm whether the muscle imbalances exist.
- Exhibit proficiency in conducting the functional tests you have chosen (on a willing client)
- Suggest appropriate corrective strategies that should lead to improvement of the issue.