Welcome to the final topic of the Diploma in Animation course, Final Project Sequence. In this topic, you'll use all the skills, tools, and workflow processes you've learned throughout your Diploma in Animation journey to develop and produce a short, final animated sequence of four to six shots. This topic will help you showcase your animation skills and knowledge by creating a compelling narrative through animation.
Subtopics that you can explore
In this Final Project Sequence topic, you’ll explore five subtopics, each designed to deepen your understanding and enhance your proficiency in animation techniques. These subtopics are:
- Getting Ready for Your Final Project Sequence
- Pre-production
- Production
- Post-production
- Reflecting on Your Final Project Sequence
Learning tasks that will help you develop and practise animation skills
Practice
Use your skills and build your knowledge
This topic is the culmination of your animation journey throughout this course! Dive into this topic’s learning tasks confidently – they're designed to help you integrate and apply all the skills and knowledge you’ve gained. Completing these tasks will guide you through the project stages of your animation sequence, ensuring it’s polished and ready for presentation.
Look out for this PRACTICE box throughout this topic to identify learning tasks and resources, providing clear guidance on what to do next. The learning tasks are carefully aligned with each stage and step of your project, helping you stay on track and manage your time effectively. The following information outlines what learning tasks to expect in this Final Project Sequence topic and how much time you should allocate to each one.
Feedback and support are woven through the learning tasks as you complete them. Reach out if you have any questions about what to do!
| # | Learning Task Name | Duration (Hours) | |
|---|---|---|---|
| 1 | Create a production schedule | 2 |  |
| 2 | Find and gather references for your key story elements | 3 | |
| 3 | Develop the visual look for the sequence | 3 | |
| 4 | Design and develop concepts for interior scenes and props | 4 | |
| 5 | Create layout pages for each main story element | 4 | |
| 6 | Create an animatic of your story sequence | 8 | |
| 7 | Track your production assets | 1 | |
| 8 | Create Maya scene files and proxy geometry | 8 | |
| 9 | Model and UV your project assets | See your production schedule you create in Learning Task 1 |
|
| 10 | Create textures for your project assets | ||
| 11 | Complete any animation required for your project | ||
| 12 | Light your project’s shots | ||
| 13 | Render your project’s shots | ||
| 14 | Composite your project’s shots | ||
| 15 | Edit your sequence | ||
| 16 | Add music and sound to your sequence | ||
| 17 | Produce a written reflection for assessment |
Feedback and support are woven through the learning tasks as you complete them. Reach out if you have any questions about what to do!
In this Getting Ready for your Final Project Sequence subtopic, you’ll find essential information and tips for managing your final project sequence, inspiration from previous students' work, and an introduction to a case study sequence, all designed to help you create a compelling and effective animated sequence within the given timeframe.
Important
Gearing up for your assessment
Your final assessment for this course involves you:
- producing a final project sequence of four to six completed shots edited in sequence and based on the concept and storyboard you’ve developed in the previous Visual Storytelling topic
- submitting a written reflection about your sequence describing each shot you have designed and produced and explaining your choices in terms of narrative techniques.
If you haven’t already, visit this module’s Assessment 2: Final Project Sequence and read through the assessment tasks and requirements to help you understand what is expected of you throughout this module.
Project overview and objectives
Your project for this Final Project Sequence topic is to develop a short sequence of four to six shots that effectively communicates a narrative. Your time allocation to produce your sequence is six weeks. You need to carefully consider your sequence’s subject matter, as its level of complexity will influence whether you can complete your sequence within the six-week timeframe. Your objective is to produce the sequence within the six-week timeframe, evoking a distinct mood and atmosphere and incorporating storytelling elements that convey your narrative concept simply but effectively.
How can you manage your project within the timeframe?
Read these four tips to help you keep your ideas contained and achievable within the given timeframe.
Create a narrative within a single environment
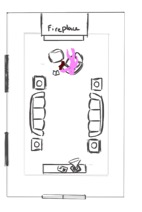
Focus your narrative on a single, contained space to focus your time and effort on one area for modelling and texturing. This approach will enhance the quality and visual detail of your final project sequence. For example, consider settings like an alleyway, a tavern common room, or a shop.
Limit complex animations
Extensive character animation can be time-consuming and may detract from the overall narrative of your project. Simplify movements where possible. For instance, a shadow cast on a wall or simple animated effects elements like a fire cycle, dripping water, or rain can add significant value to a shot sequence without requiring excessive time.
Think in terms of establishing shots
Think of your sequence as a series of establishing shots. Tell your story through camera staging of the elements in your environment, using camera movement, lighting, and shadows. Establishing shots can visually convey a lot of information about your narrative very effectively.
Sound design
Although adding sound to your sequence is not required for the assessment, sound plays a major role in storytelling. The right backing track and sound effects can create a specific mood, such as making a sequence feel apprehensive and eerie. Plan to leave some time in post-production for audio if you include it.
What do final project sequences look like?
Explore
Unlock inspiration and insights from previous students’ final project sequences
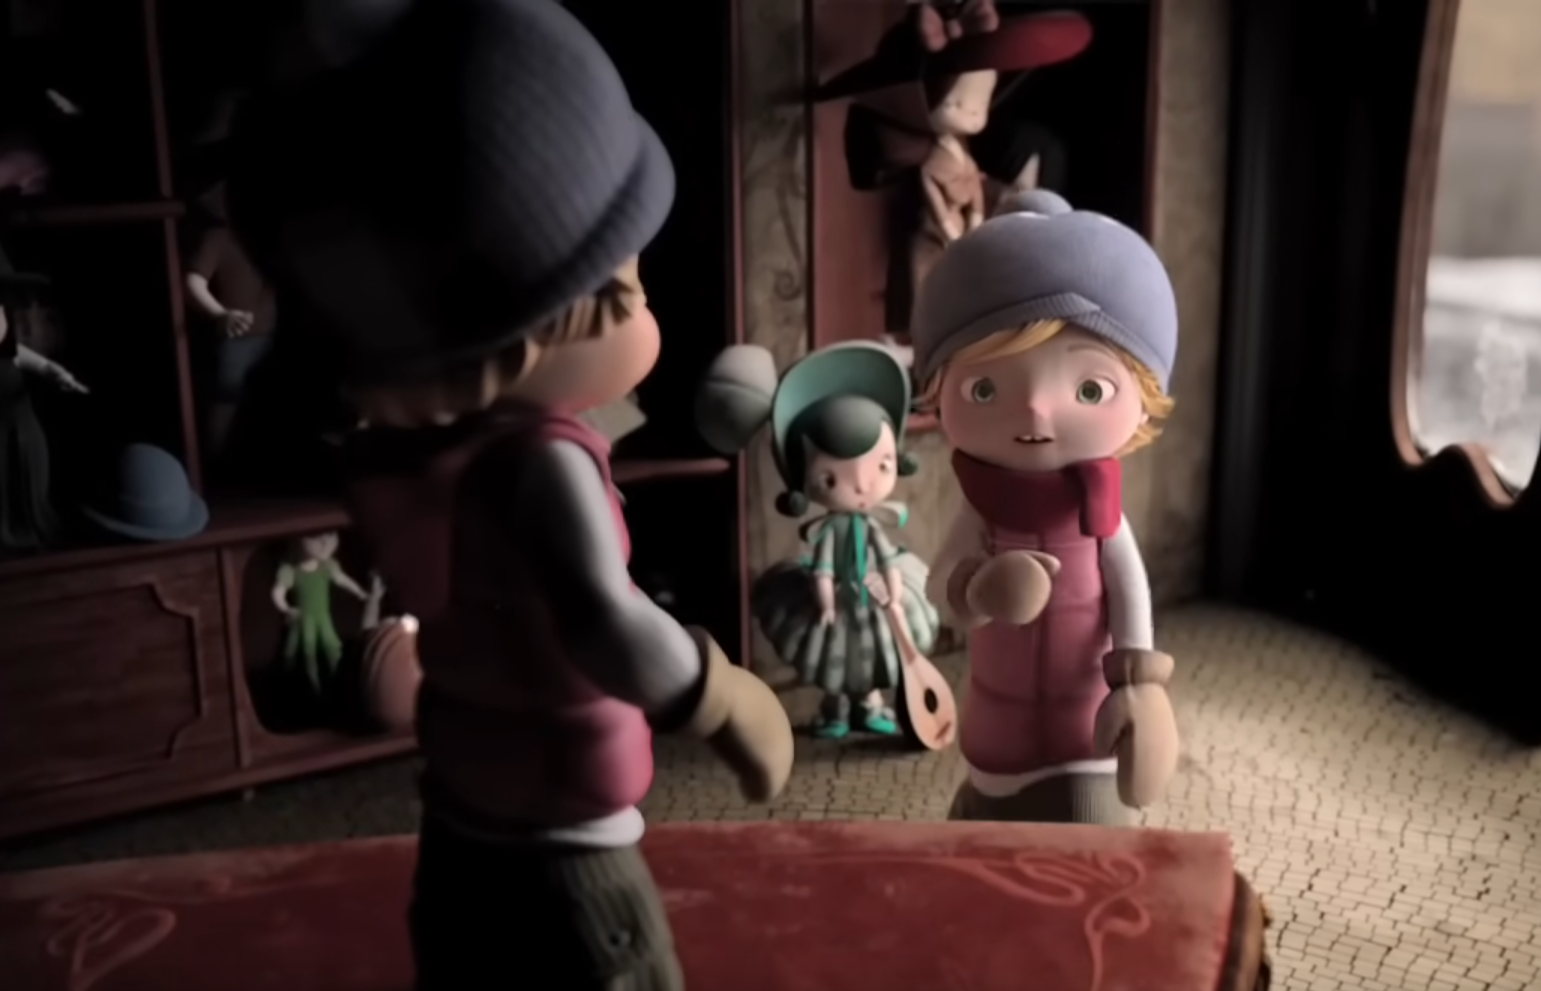
Watch four final project sequences from previous students of the Diploma in Animation, showcasing their storytelling approaches, 2D and 3D animation techniques, and creative 2D and 3D productions that successfully communicated compelling narratives.
By watching these four examples, you can draw inspiration, observe the application of course concepts in practice, and set benchmarks for your own project. Use this opportunity to observe other students’ work to enhance your sequence, allowing you to reflect on how you can creatively meet and exceed the course objectives.
What insights can you gain from watching these final project sequence productions? How can these insights inform your understanding of the possibilities and expectations for your own final project sequence?
Guidance and support for your final project sequence journey
To help guide you through creating your final project sequence, a case study sequence - The Body in the Library - will be developed from scratch and described throughout this topic. It’s designed to provide you with a clear understanding of the workflow and decision-making involved in bringing a short narrative to life through animation.
Frame from The Body in the Library
Use The Body in the Library case study to guide your process. Along the way, you can watch step-by-step video demonstrations and complete milestone learning tasks to help you progress your final project sequence and keep on track with your deadline. This project culminates all your hard work and effort over the previous months. Work hard, but above all, have fun with the creation process!
Check what you know about getting ready for your final project sequence
Use the quiz below to test your knowledge of getting ready for your final project sequence to help ensure you’re on the right track and identify areas where you may need to revisit information.
Practice
Check your knowledge – Getting Ready for Your Final Project Sequence
Get ready to test your knowledge about how this Final Project Sequence topic works. This quiz is designed to help reinforce your understanding of what’s involved in the topic and is not part of the formal assessment process. So treat it as a valuable tool to identify areas for review.
You'll encounter six questions, made up of a variety of question formats, including multiple choice, true or false, and fill in the blanks. It’s just a learning check and not a formal assessment – so relax and enjoy the challenge!
After completing the quiz, move to the next subtopic – Pre-production – and learn how to create your production schedule to launch your final project sequence journey.

Explore the pre-production phase, a vital step in shaping your final project sequence. This subtopic will guide you through preparatory tasks crucial for organising your work effectively and setting the stage for a smooth and successful execution when you move into production.
Dive into the process of designing the visual look for your sequence, including interior and props concepts, producing detailed environment layout drawings and creating an animatic with basic sound and camera movements to visualise your sequence.
Creating a production schedule
You must create a production schedule to start producing your final project sequence. Keeping to your production schedule will help you stay on track and allocate the appropriate time to each task or process.
What are the main project stages?
You have six weeks to complete the project and prepare it for submission as part of this module's assessment.
In that time, you need to progress through each of the three main project stages:

You also need to allow for time to complete a written reflection about your sequence.
Within each of the three main project stages, you must complete several project tasks that progressively build upon one another, leading to a completed sequence.
What are the main project tasks within each stage?
Your main project tasks for each stage (including your written reflection) are included in the table below.
Read this information to understand how project tasks fit into each project stage and contribute to your final project sequence.
Note: You completed the first two pre-production tasks—story concept development and storyboarding—in the previous Visual Storytelling topic. Use your storyboard to continue completing the remaining project tasks in table below, starting with the third project task, 'Create a production schedule'.
| Project stage | Project tasks | |
|---|---|---|
| 1. Pre-production | Develop a story concept for the sequence (completed in Visual Storytelling topic). | |
| Draw a storyboard of the sequence (completed in Visual Storytelling topic). | ||
| Create a production schedule. | ||
| Find and gather references for key elements of the sequence. | ||
| Develop the visual look for the sequence. | ||
| Design and develop interior and props concepts. | ||
| Develop detailed environment layout drawings of key elements. | ||
| Create an animatic with basic sound and camera movements. | ||
| 2. Production | Create a production asset checklist. | |
| Organise and layout your main environment using proxy geometry. | ||
| Asset creation | Model each element in the sequence. | |
| UV create each element in the sequence that needs painted textures. | ||
| Texture each element in the sequence. | ||
| Finalise camera layout and animation of elements. | ||
| Create lighting for each shot in the sequence. | ||
| Set up and render each shot in the sequence. | ||
| 3. Post-production | Composite each shot in the sequence | |
| Edit the sequence together | ||
| Add titles for the sequence | ||
| Add sound to the sequence | ||
| 4. Written reflection | Write and prepare a reflection about your sequence. | |
Each learning task in this final topic is carefully aligned with the project tasks above, ensuring you are well-prepared to submit a compelling and effective animated final project sequence.
Case Study
Managing your time: A case study in effective project scheduling
The production schedule for the case study sequence has a tighter time frame than your six-week allocation, as shown in the case study production schedule below. For a clearer view, you can also download the full-size image here: Production Schedule: The Body in the Library.

In this case study production schedule, each of the three main project stages is split into sections, providing a clear understanding of how long each stage and task should take to stay on schedule and deliver the project on time.
In more complicated production schedules, each task can be further broken down by scene or shot or even by the individual tasks that you must complete to finish each scene.
At the end of this topic, you'll discover whether the case study project schedule was adhered to or if the time management estimate was wildly optimistic!
| Project stage | Project tasks | |
|---|---|---|
| 1. Pre-production | Develop a story concept for the sequence (completed in Visual Storytelling topic). | |
| Draw a storyboard of the sequence (completed in Visual Storytelling topic). | ||
| CREATE A PRODUCTION SCHEDULE. | ||
| Find and gather references for key elements of the sequence. | ||
| Develop the visual look for the sequence. | ||
| Design and develop interior and props concepts. | ||
| Develop detailed environment layout drawings of key elements. | ||
| Create an animatic with basic sound and camera movements. | ||
Practice
Task 1: Create a production schedule
Developing a detailed production schedule is crucial for managing your time effectively and ensuring the successful completion of your final project sequence. By breaking down the main stages—pre-production, production, and post-production—into specific tasks, you’ll clearly understand how to allocate your time and resources, keeping you on track and meeting deadlines.
What tools or resources do you need for this task?
Make sure you have access to:
- a spreadsheet tool (e.g., Google Sheets, Microsoft Excel) or project software (e.g., Trello)
- a calendar or planner
- this example of a production schedule, used for The Body in the Library.
What steps should you take to complete this task?
2 Hours

Set aside two hours to complete steps 2-7 below. Remember to save your work as you go when using any software.
- Review Project Guidance: If you need to, go through the following sources of information to understand the requirements and deadlines for your final project sequence:
- Getting Ready for your Final Project Sequence subtopic
- What are the main project tasks within each stage? section above
- Final Image Assessment 2: Final Project Sequence assessment guidance.
- Outline the Main Stages: Divide your project into the three main stages: pre-production, production, and post-production.
- Break Down Each Stage into Tasks: List the specific tasks you need to complete for each stage. For example:
- Pre-production: Find and gather references; Design visual look; Draw environment layouts; Create animatic.
- Production: Model elements; Texture elements; Finalise camera layout; Animate elements; Set up lighting; Render shots.
- Post-production: Composite shots, Edit sequence, Add titles, Add sound (optional).
- Estimate Time for Each Task: Assign a time estimate for each task. Be realistic about how long each task will take, considering your other commitments and the complexity of the tasks.
- Create a Timeline: Use a project management tool or a spreadsheet to create a timeline for your schedule. Plot out each task along the timeline, ensuring sufficient time is allocated for each task.
- Include Milestones: Identify key milestones in your schedule, such as the completion of pre-production, the first render of a shot, or the final edit of the sequence. These milestones will help you track your progress.
- Review and Adjust: Look over your schedule to ensure it is realistic and comprehensive. Make any necessary adjustments to balance your workload and meet deadlines.
What should you do after completing this task?
- Are the allocated times for each task realistic and manageable? Does the schedule provide a clear path for meeting your final sequence project deadlines?
- Share your production schedule to Forum:
- Select your forum thread in Forum: Final Project Sequence.
- Select Reply to your first Forum post.
- Enter the words ‘Task 1: Schedule’ in your reply.
- Select the Post your response button, then select Edit in your new reply when it shows up.
- Upload your schedule using the Attachment field.
- Select Save changes to share your coursework to your forum thread.
- Get feedback on this and other learning tasks at the next Live Session – check the Live Session calendar for dates and times.
With your production schedule in place, you’re ready to move on to the first milestone: Gathering references for key elements of your sequence. This will involve collecting visual and conceptual references to guide the design and development of your final project sequence. Your well-organised schedule will help you stay on track as you begin this first milestone.
Reference board
You have already established your story's setting and outline in your story concept and storyboard in the previous Visual Storytelling topic.
Now, start gathering some references for the setting and any objects that will be important for your story.
| Project stage | Project tasks | |
|---|---|---|
| 1. Pre-production | Develop a story concept for the sequence (completed in Visual Storytelling topic). | |
| Draw a storyboard of the sequence (completed in Visual Storytelling topic). | ||
| Create a production schedule. | ||
| FIND AND GATHER REFERENCES FOR KEY ELEMENTS OF THE SEQUENCE. | ||
| Develop the visual look for the sequence. | ||
| Design and develop interior and props concepts. | ||
| Develop detailed environment layout drawings of key elements. | ||
| Create an animatic with basic sound and camera movements. | ||
How do you use these references in developing your sequence?
You will use these references as a starting point when drawing and developing concepts for each of the main elements of the story sequence.
Case Study
Gathering references for The Body in the Library
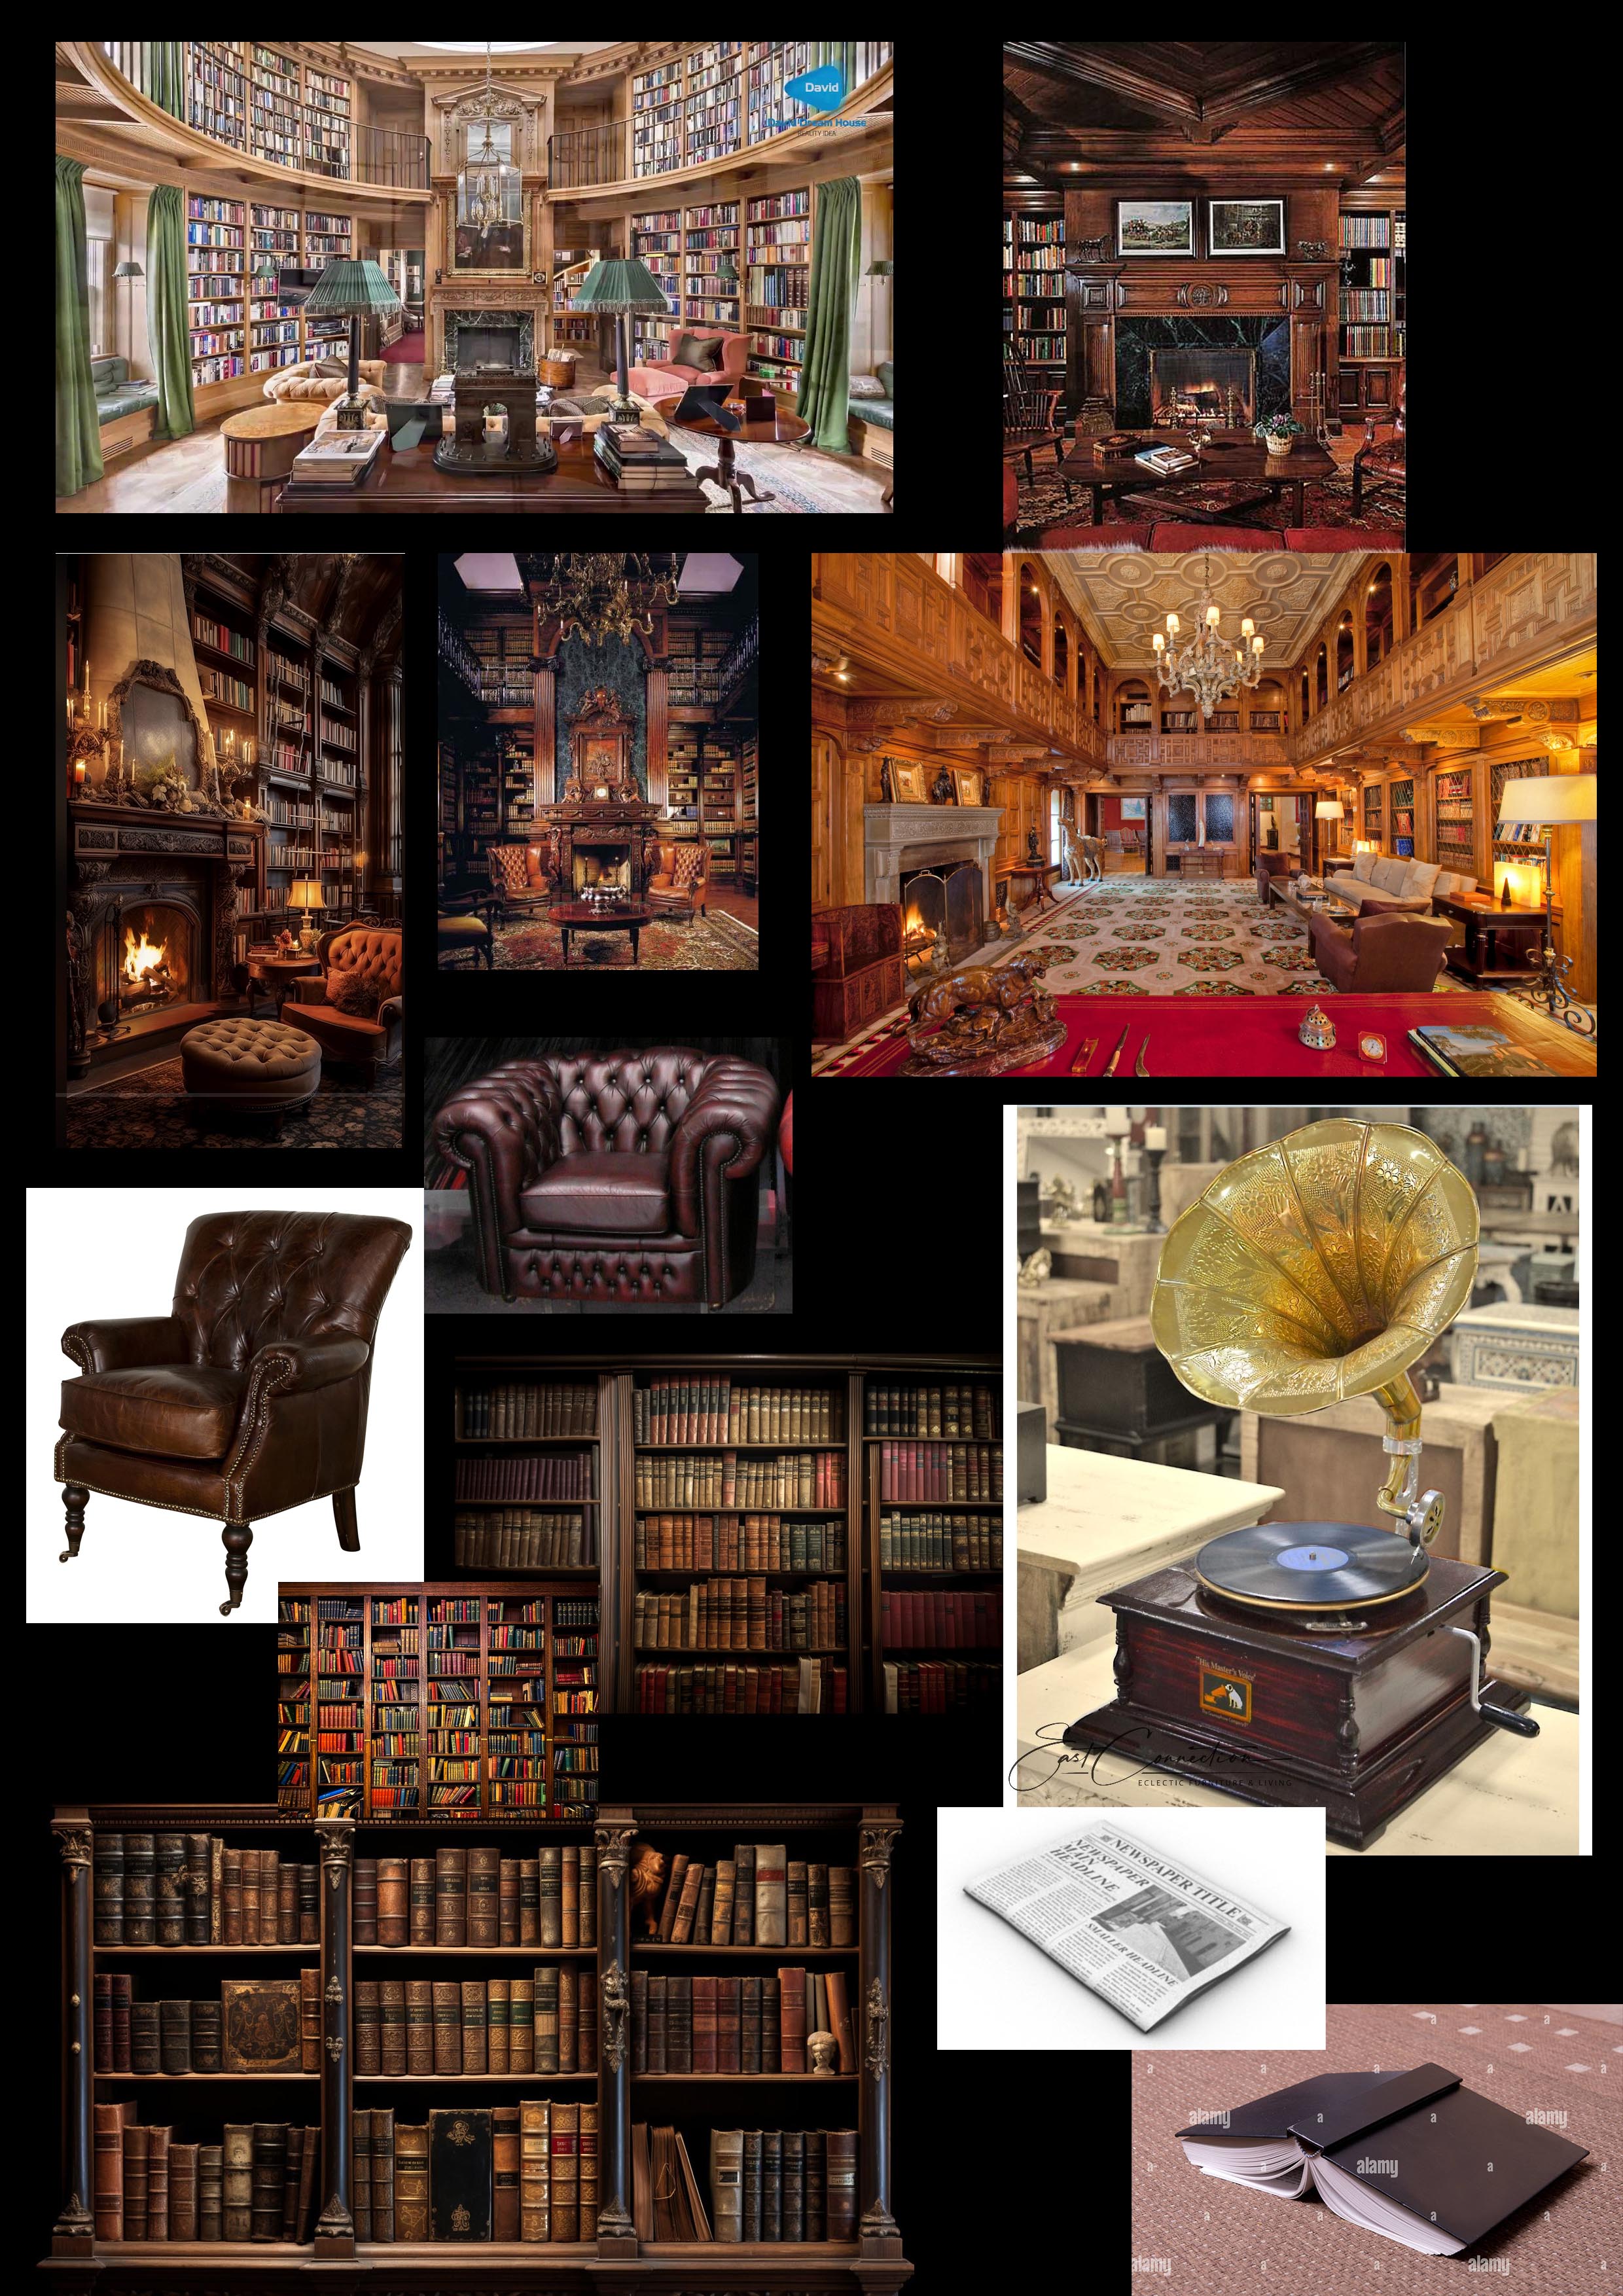
Specific references were gathered as part of the pre-production stage for The Body in the Library. The following outlines the main elements and objects crucial for the animation sequence, ensuring that the setting is sufficiently detailed and period-appropriate.
Main references for the project
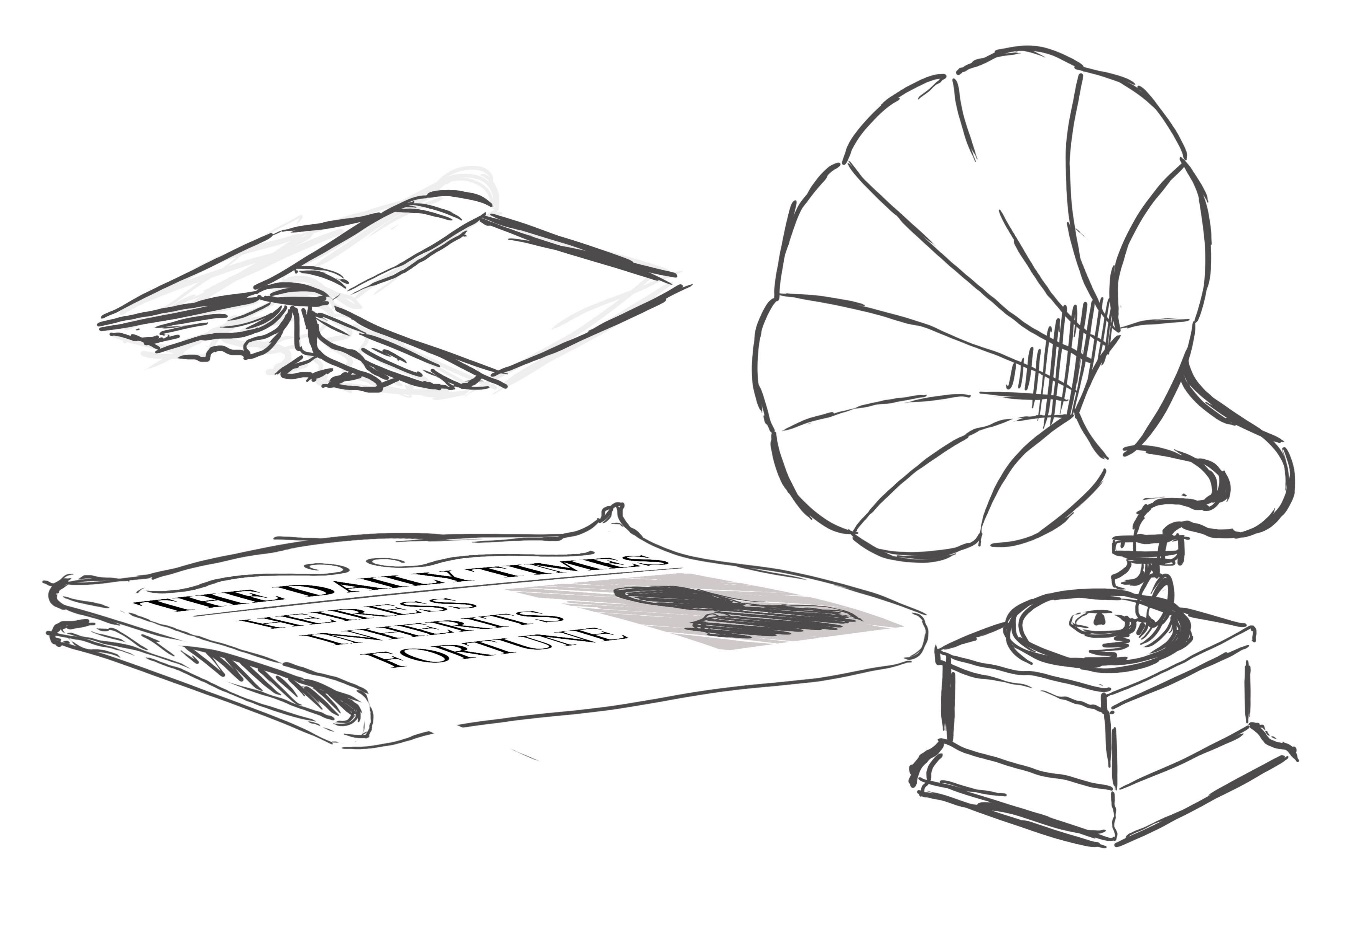
These main elements require the most time and effort to produce. These include:
- A private library
- Examples of libraries from old manor houses or similar settings, emphasising wood panelling.
- Ideas for objects that will fill the library, making it appear lived-in and avoiding an empty look.
- Gramophone: This object will serve as a key historical anchor for grounding the sequence in a particular timeframe.
- Main chair: A chair, positioned next to the fireplace at the end of the room, acts as a focal point in the sequence.
- Fireplaces: Examples of fireplaces that seamlessly fit within the library setting are necessary to maintain visual consistency.
- Books and Bookcases: These objects will be integral to the library's ambiance, requiring attention to design and placement.
Additional references for enhancing the library
To further enrich the library's environment, the following elements are also considered:
- Objet d’art: Small ornaments or knickknacks scattered around shelves and tables, adding character and depth to the setting.
- Vases: Decorative vases to complement the overall aesthetic of the library.
- Lamps: Period-appropriate lamps that will contribute to the room’s lighting and atmosphere.
- Rugs and rug patterns: Examples of rugs that align with the historical period and style of the library.
- Paintings: Artworks to adorn the walls, enhancing the visual appeal and historical context of the room.
Select + to view a reference board for some of the main elements as described in the case study.
There's no need to be exhaustive when gathering references. Instead, focus on obtaining essential story elements for the project e.g. a few key examples of the main environment.
Some other things that you may need reference for later in the production process include:
- more detailed examples of textures for each element in your sequence
- lighting references for the time of day
- the specific setting within which your sequence take place (as in the case study example above).
Practice
Task 2: Find and gather references for your key story elements
Creating reference boards is essential for gathering visual and conceptual inspiration for your main story elements. These boards will serve as a foundational resource when developing and drawing the settings and objects crucial to your story, ensuring that your designs are both accurate and visually compelling.
What tools or resources do you need for this task?
Make sure you have access to:
- Digital tools (e.g., Pinterest, Behance, Instagram) or physical materials (e.g., poster board, printouts)
- Your story concept and storyboard
- Internet access for research
- Your project schedule.
What steps should you take to complete this task?
3 Hours
Set aside three hours to complete steps 1-7 below. Remember to save your work as you go when using any software.
- Refer to your project schedule to allocate sufficient time for finding and gathering references. Ensure this task is included in your schedule.
- Review Your Story Concept and Storyboard: Revisit the story concept and storyboard to identify key settings, objects, and any specific visual details that are central to your narrative.
- Identify Key Elements: List the main story elements that need reference, such as locations, props, or items that are important to the sequence.
- Collect References: Start gathering visual references for each identified element, e.g. images from the internet, photographs, art pieces, or sketches. Focus on capturing a range of styles and details that could inform your design.
- Organise Your References: Create separate boards for each key element. If using digital tools, set up boards or folders for each category. For physical boards, arrange printouts and images neatly.
- Annotate Your Boards : Add notes to your reference boards to highlight important features, colour schemes, textures, or design details that you want to incorporate into your final designs.
- Review and Refine: Assess your reference boards to ensure they cover all necessary elements and provide a comprehensive visual guide. Refine your boards as needed to ensure they are useful for your ongoing design process.
What should you do after completing this task?
- Have you included a diverse range of references that cover all key story elements? Are the annotations on your boards clear and helpful for guiding your design process?
- Share your reference boards to Forum:
- Select your forum thread in Forum: Final Project Sequence.
- Select Reply to your first Forum post.
- Enter the words ‘Task 2: References’ in your reply.
- Select the Post your response button, then select Edit in your new reply when it shows up.
- Upload your files using the Attachment field.
- Select Save changes to share your coursework to your forum thread.
- Get feedback on this and other learning tasks at the next Live Session – check the Live Session calendar for dates and times.
- Schedule a project check-in with your facilitator to review your progress, get valuable guidance, and plan next steps. Depending on your progress and the complexity of the tasks, this project check-in can cover a single task or a group of related tasks. Use this opportunity to discuss any challenges and ensure you’re on track with your project.
With your reference boards prepared, you are ready to move on to developing the visual look for your sequence. Use the insights and details from your boards to inform the visual look development of your settings and objects, creating a cohesive and engaging visual style for your project.
Look development
Look development is about creating a final visual style you want to achieve for your sequence. It involves:
- researching films that visually appeal to you
- identifying the visual elements of these films.
What’s involved in researching a look?
Start by looking at films or other animated projects you feel inspired by and identify visual elements that define their visual style.
Case Study
Researching a look for The Body in the Library
Four short films have been identified as each having a particularly appealing look.
The short films are embedded below for you to view. While watching each film, try to identify and describe (note down) some of the visual elements that help define their look. Ask yourself:
- What do you notice about the visual style of each film?
- Are there stylistic similarities between the films?
Alma short film (youtube.com)
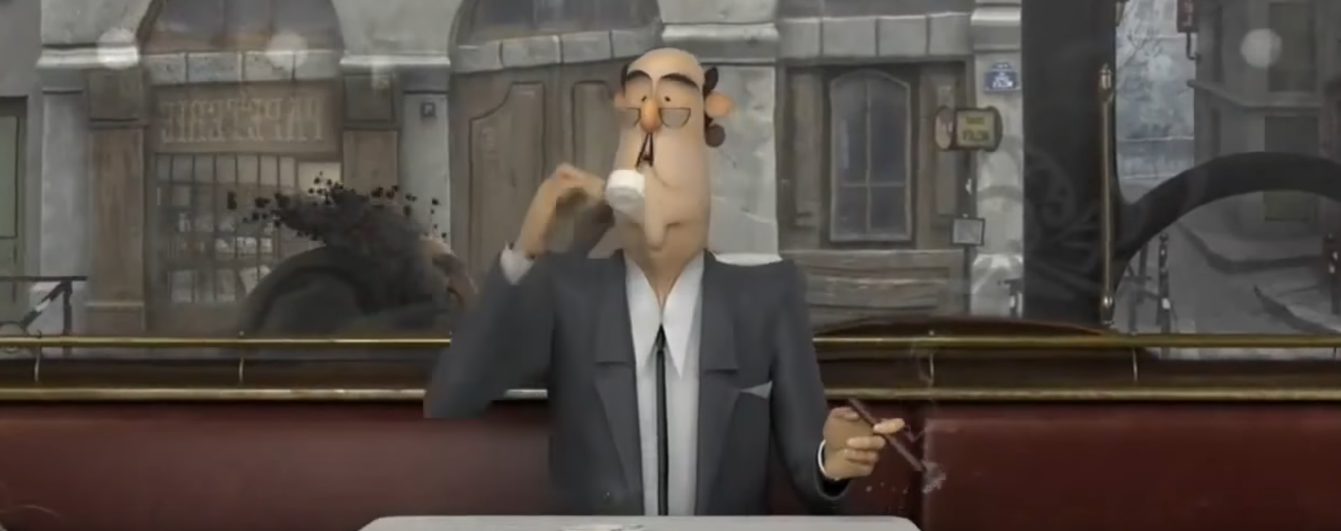
Oscar-nominated comedy about not trusting appearances | CGI Short film ‘French Roast’ (youtube.com)
Dreamhouse | AD (youtube.com)
Now streaming (youtube.com)
Which visual styles were identified?
The table below summarises two visual styles the four short films were identified as fitting into, and the features of each visual style.
| Project stage | Project tasks | |
|---|---|---|
| 1. Pre-production | Develop a story concept for the sequence (completed in Visual Storytelling topic). | |
| Draw a storyboard of the sequence (completed in Visual Storytelling topic). | ||
| Create a production schedule. | ||
| Find and gather references for key elements of the sequence. | ||
| DEVELOP THE VISUAL LOOK FOR THE SEQUENCE. | ||
| Design and develop interior and props concepts. | ||
| Develop detailed environment layout drawings of key elements. | ||
| Create an animatic with basic sound and camera movements. | ||
| Film examples | Visual style | Visual style features |
|---|---|---|
| Alma, French Roast | Naturalistic |
|
| Salesman Pete, Meet Buck | Cartoon |
|
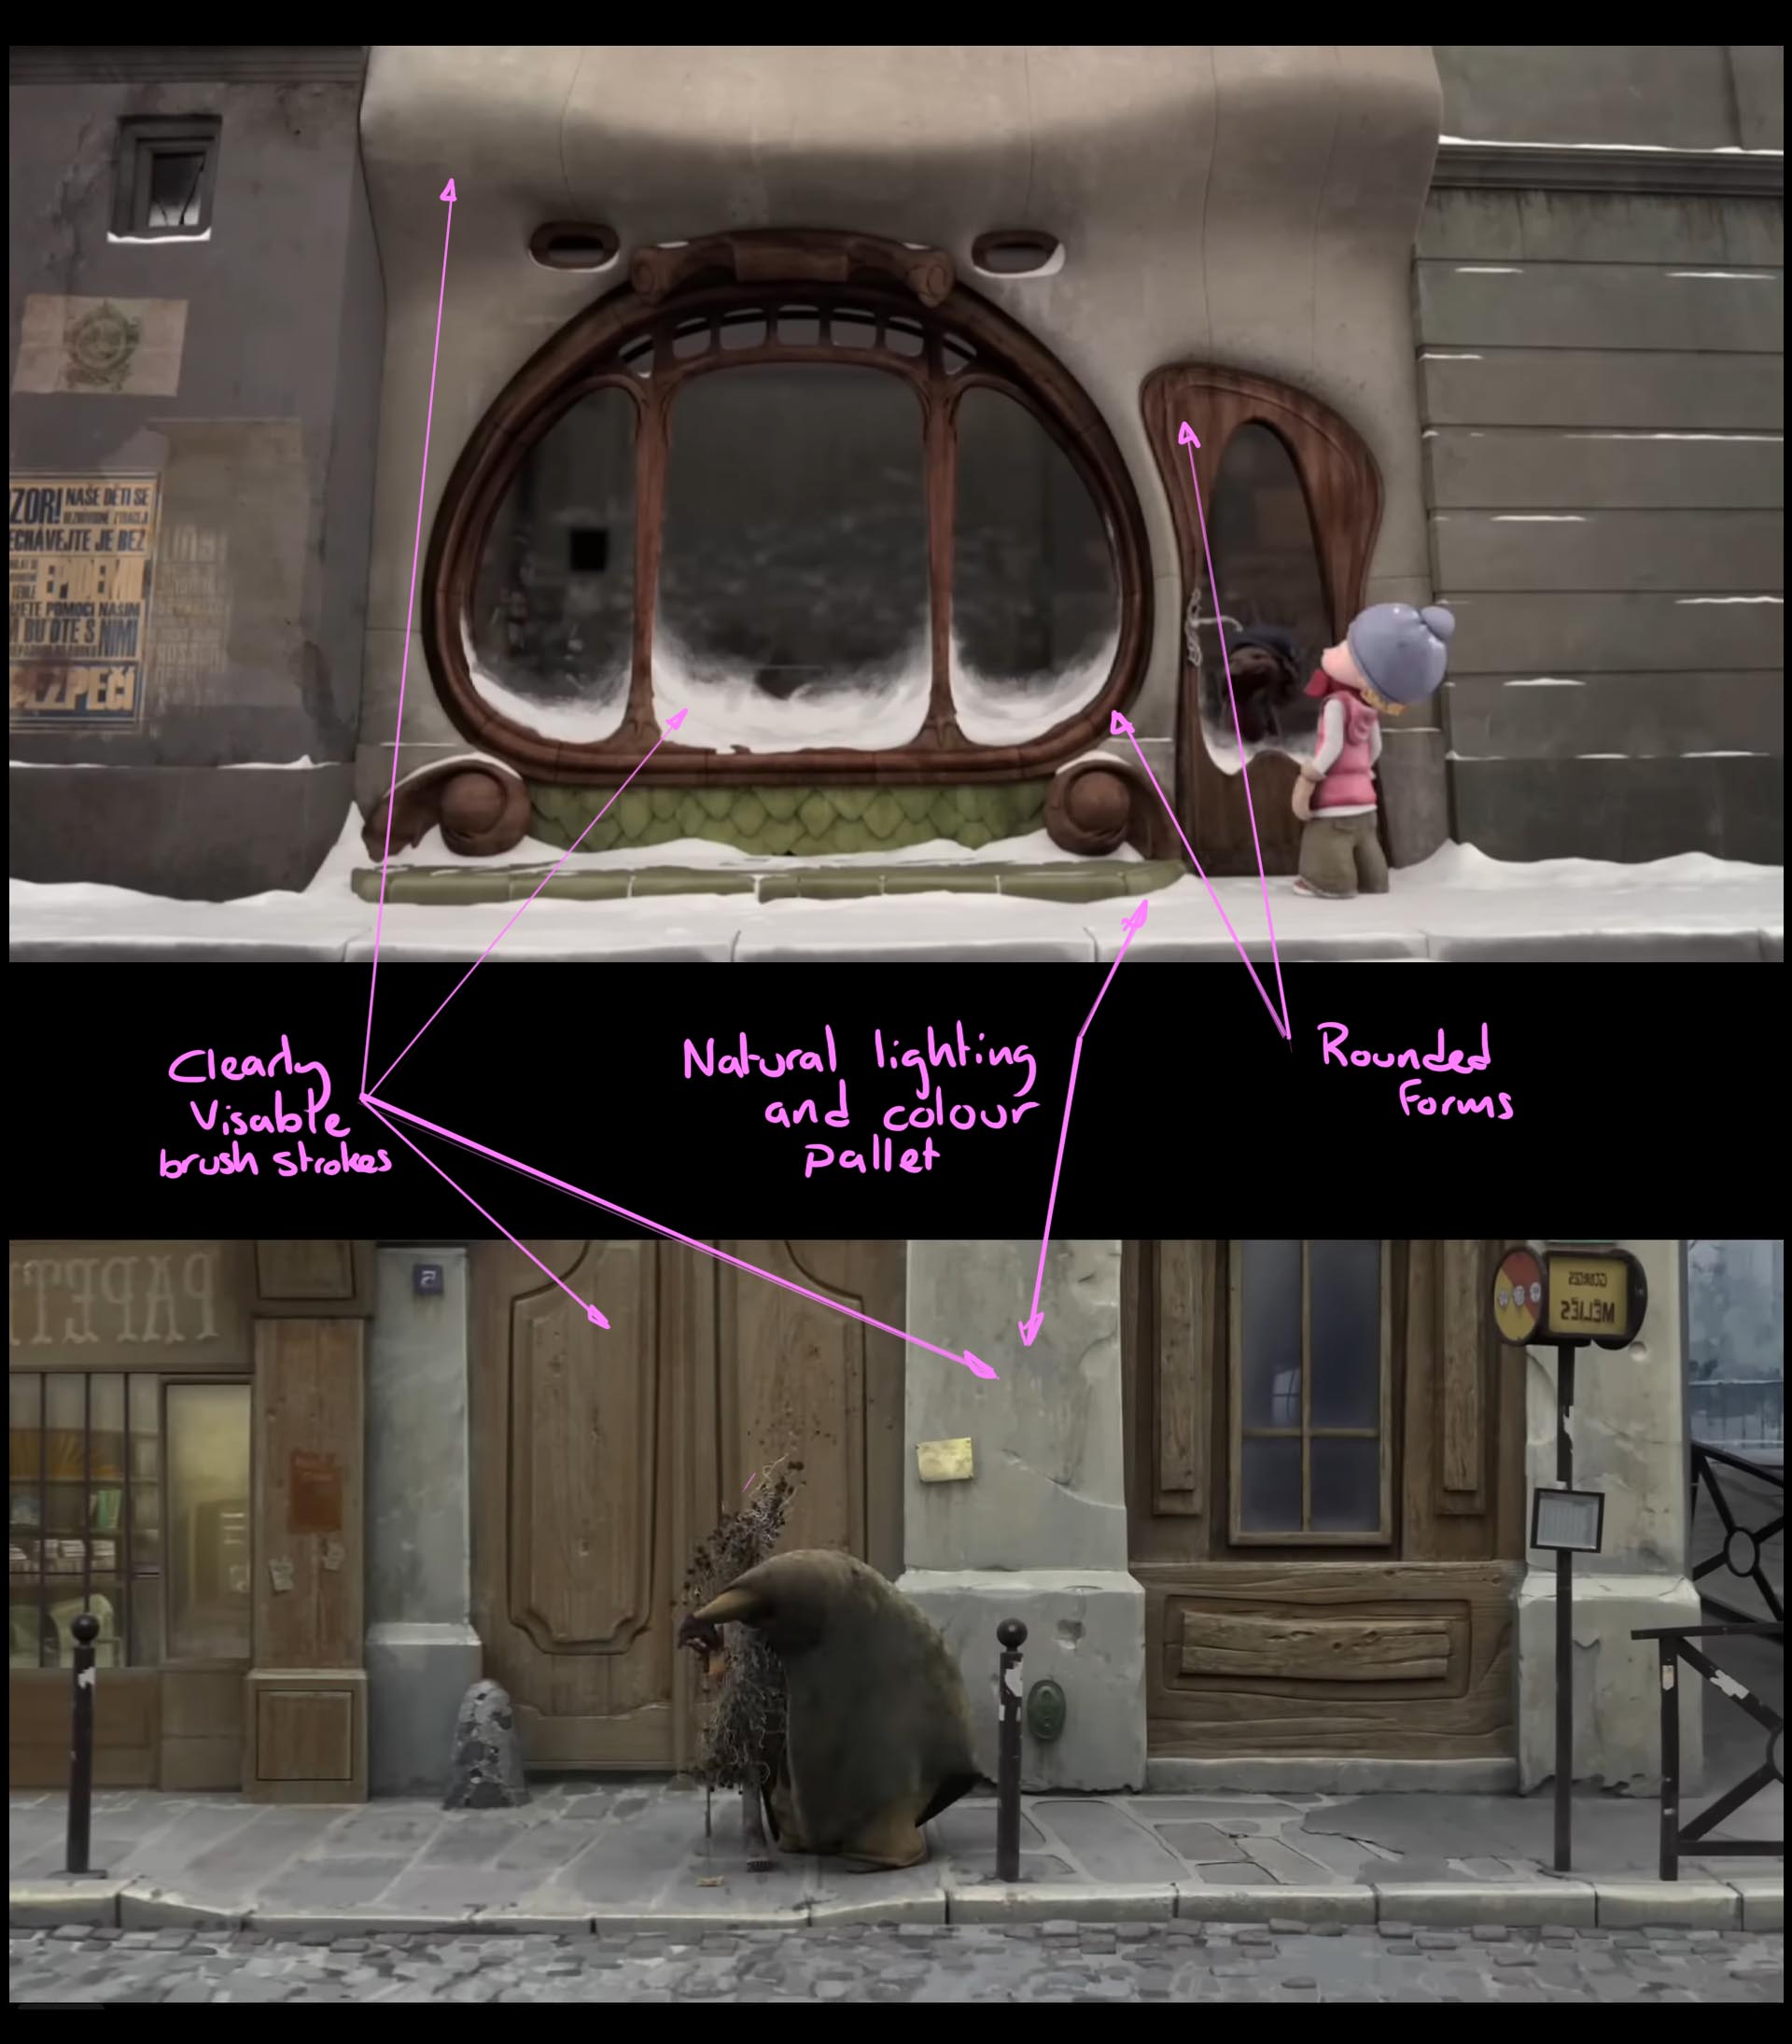
Naturalistic style features shared by Alma and French Roast.
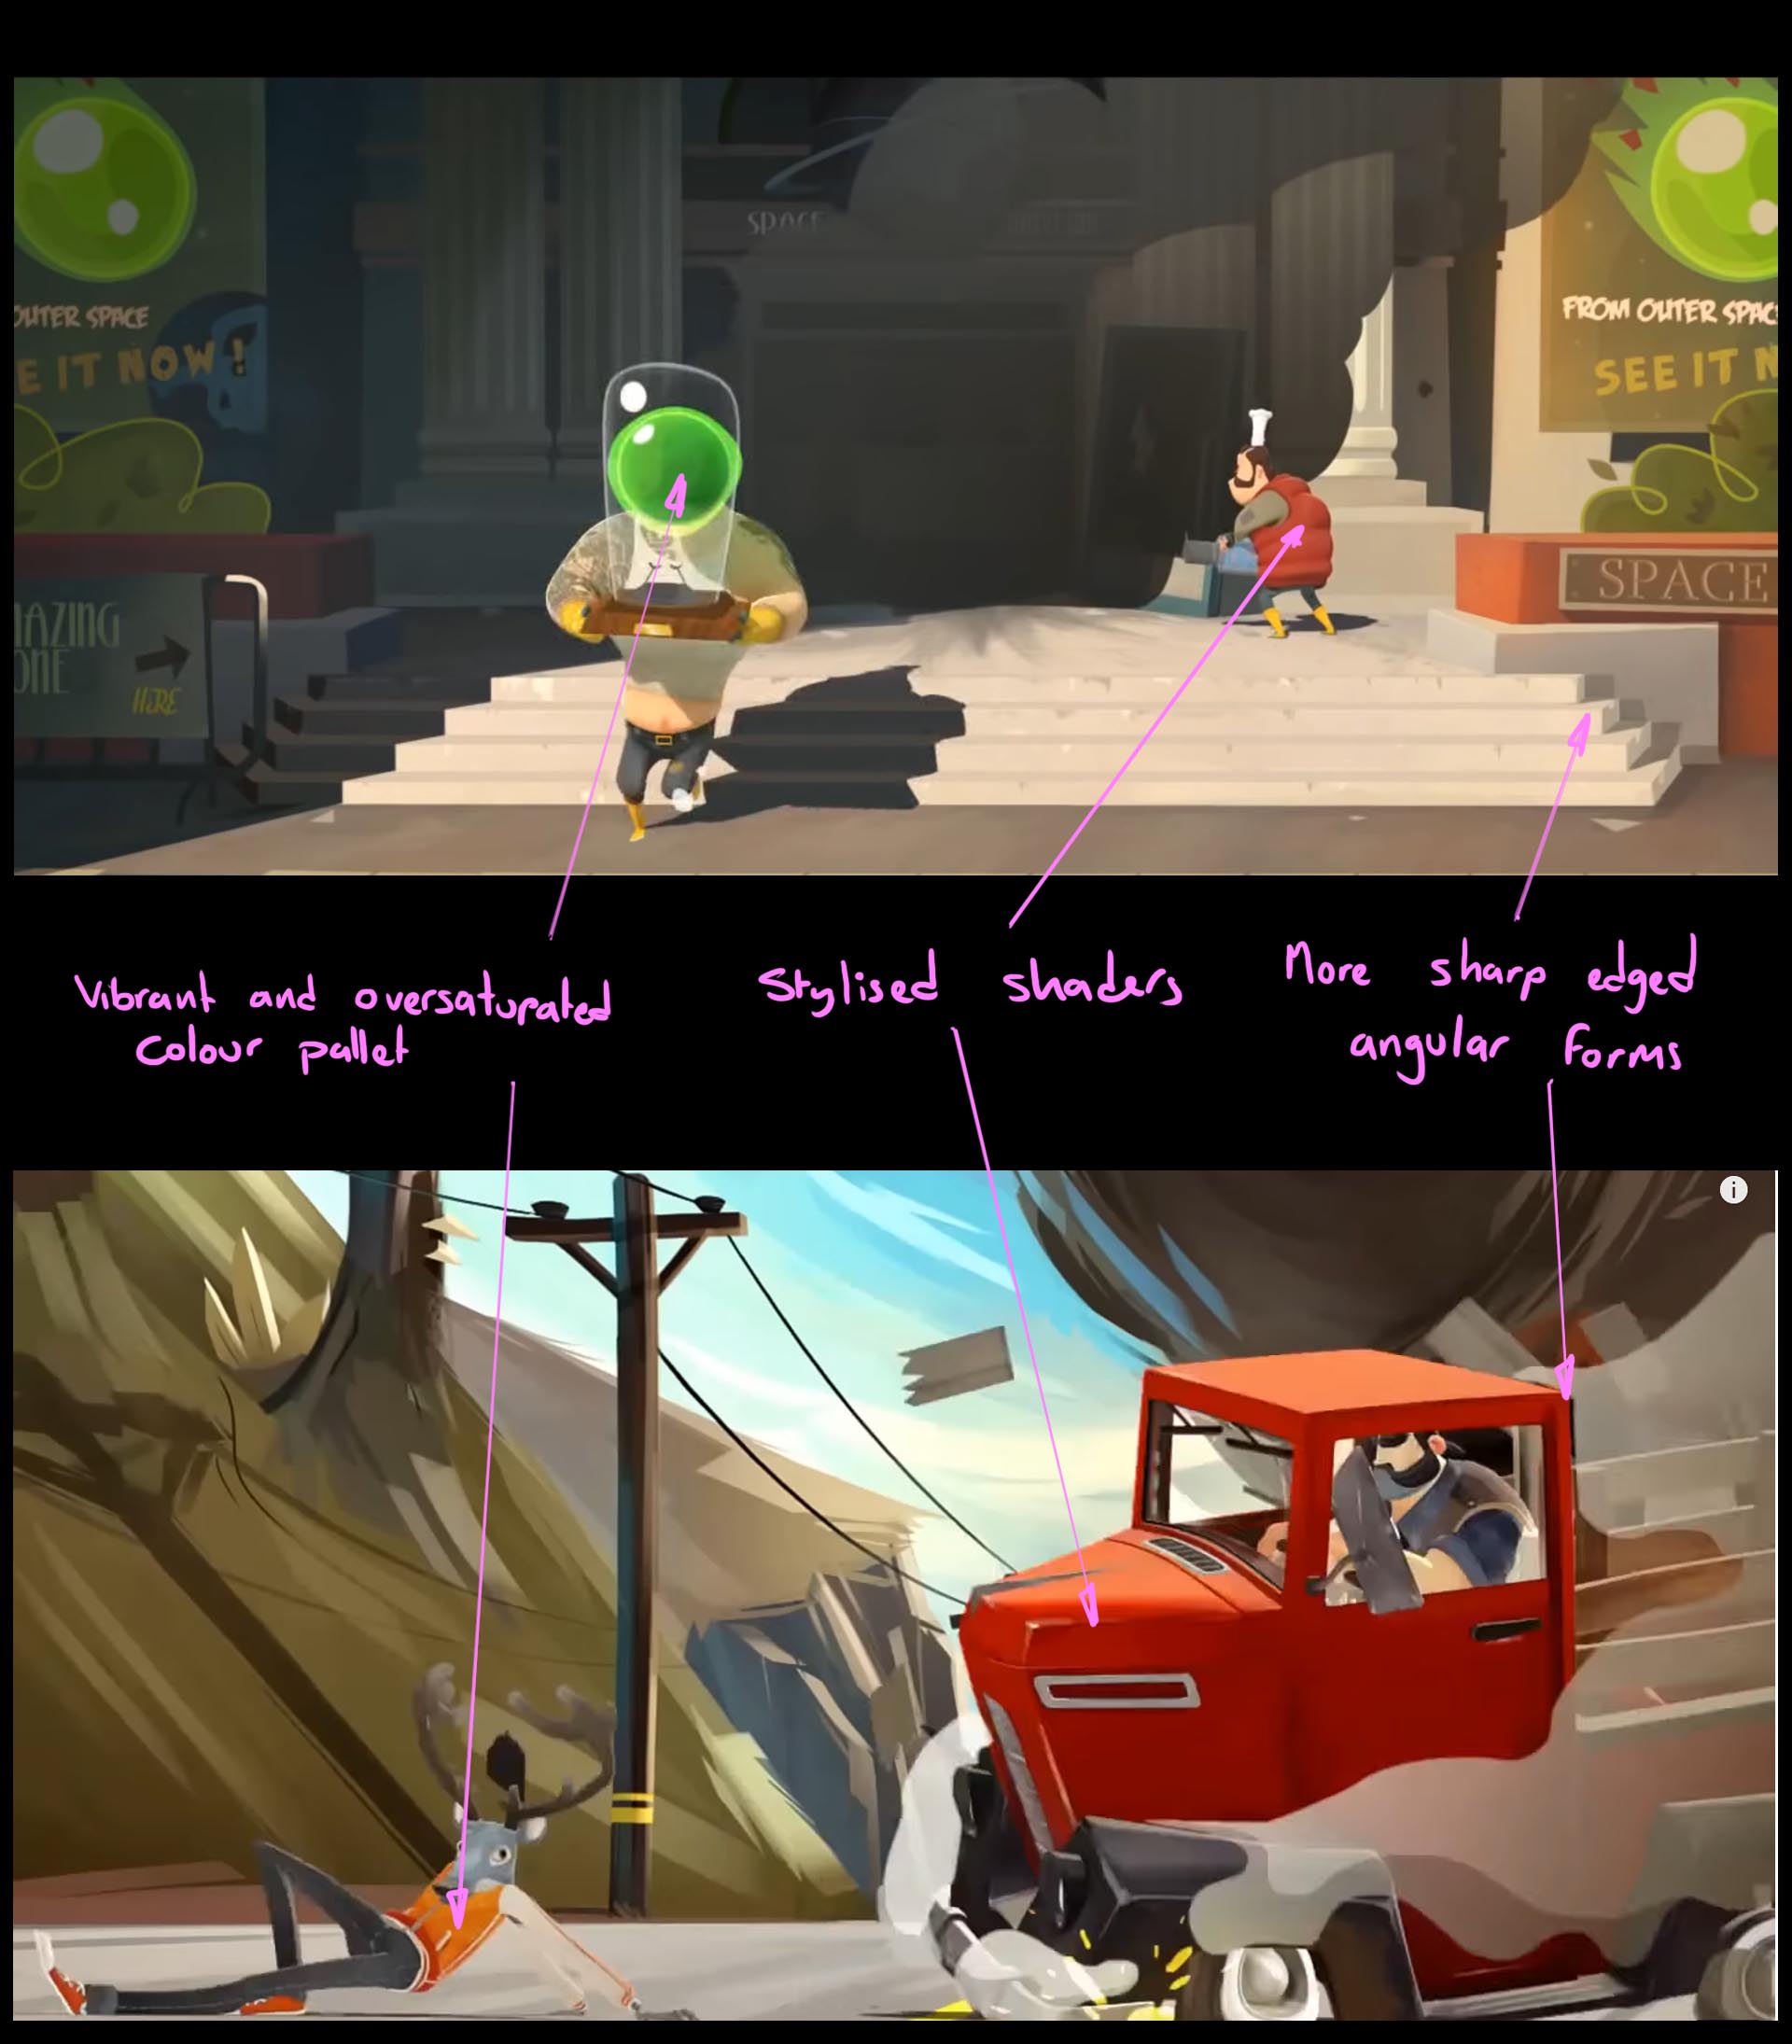
Cartoon style features shared by Salesman Pete and Meet Buck.
Case Study
Identifying a look for The Body in the Library
Among the visual styles of the four films, Alma and French Roast best fit with the narrative of The Body in the Library project. The two films share similarities in their visuals and direction, with slower-paced and more traditional visual styles.
In contrast, the visual styles of the other two films, Salesman Pete and Meet Buck, would better suit a more vibrant and fast-paced sequence.
With the key visual elements of the two naturalistic films identified, these main points are kept in mind in the next Pre-production task – designing and developing interior and props concepts – and throughout the early Production stage, aiming to refine the project’s visual style and workflow.
Practice
Task 3: Develop the visual look for the sequence
Start developing the visual look for your own sequence by examining and analysing visual styles in animated films that inspire you. By identifying key elements of their visual styles, you'll understand how visual elements contribute to a film's overall look, which will help you create and apply your own visual style during the look development stage of your project.
What tools or resources do you need for this task?
Make sure you have access to:
- Two animated films of your choice (streaming services, DVDs, or online sources)
- A digital document for notes
- Optional: Screenshot tool
- Your project schedule.
What steps should you take to complete this task?
3 Hours
Set aside three hours to complete steps 1-8 below. Remember to save your work as you go when using any software.
- Refer to your project schedule to allocate sufficient time for developing the visual look for your sequence. Ensure this task is included in your schedule.
- Select Films: Choose two animated films that you like the look of and feel are relevant to your project's style.
- Watch and Observe: Watch the selected films, paying close attention to the visual styles. Take notes on elements that stand out, such as colour schemes, backgrounds, lighting, and any unique stylistic choices.
- Capture Key Moments: Capture images or take screenshots of key moments that best represent the visual style of each film.
- Analyze Elements: Identify and describe the key visual elements in each film. Focus on aspects like:
- Colour palette and use of colour
- Backgrounds and environments
- Lighting and mood
- Animation techniques and effects
- Compare and Contrast: Compare the visual styles of the two films. Note any similarities or differences and consider how each style supports the story and mood of the film.
- Document Findings: Compile your notes, analyses, and captured images into a visual style reference document (e.g. a collection). This will serve as a valuable resource for developing your own visual style.
- Reflect and Review: Review your findings and consider how the visual elements identified can inspire and influence your own project.
What should you do after completing this task?
- How do the visual styles of the selected films differ and what common elements do they share? Which visual elements stood out to you the most, and how can they be incorporated into your own project?
- Share your visual look reference document to Forum:
- Select your forum thread in Forum: Final Project Sequence.
- Select Reply to your first Forum post.
- Enter the words ‘Task 3: Visual styles’ in your reply.
- Select the Post your response button, then select Edit in your new reply when it shows up.
- Upload your images or files using the Attachment field.
- Select Save changes to share your coursework to your forum thread.
- Get feedback on this and other learning tasks at the next Live Session – check the Live Session calendar for dates and times.
- Schedule a project check-in with your facilitator to review your progress, get valuable guidance, and plan the next steps. Depending on your progress and the complexity of the tasks, this project check-in can cover a single task or a group of related tasks. Use this opportunity to discuss any challenges and ensure you’re on track with your project.
Use your visual style reference document to guide you in the next section, designing and developing interior and props concepts. This will help ensure your sequence's visual style is cohesive and well-defined.
Interior and Props Concepts
| Project stage | Project tasks | |
|---|---|---|
| 1. Pre-production | Develop a story concept for the sequence (completed in Visual Storytelling topic). | |
| Draw a storyboard of the sequence (completed in Visual Storytelling topic). | ||
| Create a production schedule. | ||
| Find and gather references for key elements of the sequence. | ||
| Develop the visual look for the sequence. | ||
| DESIGN AND DEVELOP INTERIOR AND PROPS CONCEPTS. | ||
| Develop detailed environment layout drawings of key elements. | ||
| Create an animatic with basic sound and camera movements. | ||
Using the references you gathered as a starting point, dedicate time to design and develop a range of concepts for each main element of your story.
Experiment and explore
During this project task, it's crucial to experiment with various ideas for each story element.
Explore different silhouettes for each element, considering how each part contributes to and enhances the overarching story.
For example, consider whether an object should appear:
- imposing and immense to evoke audience apprehension and unease, or
- soft and rounded to cultivate a sense of safety and comfort.
Case Study
Designing the interior and props for The Body in the Library
For this case study, due to a very limited timeframe to complete the sequence, there was a departure from the usual extensive experimentation and exploration during this concept development step.
Concept and design focus
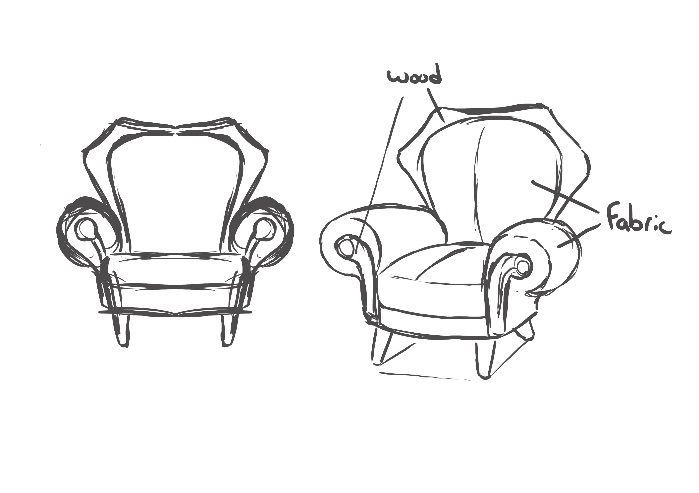
As you may notice when you look at the concept drawings below, only a few variations were designed, with minimal exploration of colour.
The focus instead was on designing the main story-driven elements of the production, leveraging extensive prior experience to arrive at finalised concepts without the customary exploration and development of a visual narrative.
Exploration was briefly undertaken with different chair styles, which will serve as the main hero chair in front of the fireplace. Modified versions of this chair are planned for the other chairs in the library.
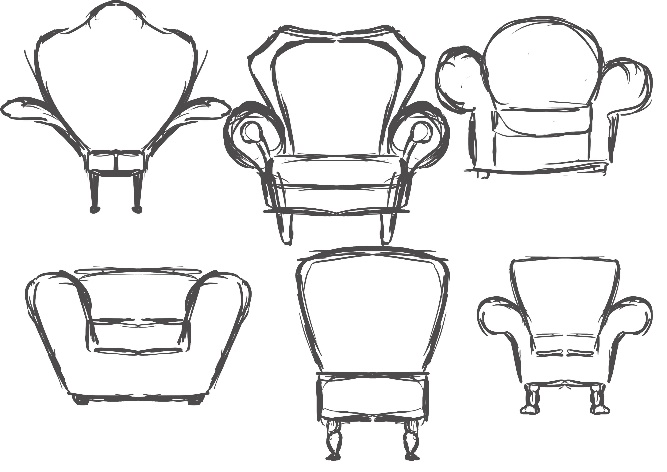
Exploring different chair styles.
As for the other primary story elements of the project, only one drawing was completed for each, loosely indicating the intended appearance. Once again, prior experience is relied upon to achieve a reasonably professional product in both this early design stage and the upcoming Production phase.
Concept development for other primary props.
Why is extensive development and exploration important?
To emphasise once more, it is typically standard for a project to dedicate a substantial amount of time to concept development of interiors and props.
During this step, various approaches to both story and visuals are thoroughly explored. Numerous ideas are discussed, examined, and refined, with less effective concepts being discarded in favor of those that best serve the story.
Practice
Task 4: Design and develop concepts for interior scenes and props
Enhance your concept design skills through experimentation with different shapes and ideas for key elements within an interior scene. By exploring diverse visual inspirations and creating multiple concept variations, you'll better understand how to craft impactful and narrative-driven interior scenes and props.
What tools or resources do you need for this task?
Make sure you have access to:
- Your reference boards for your main story elements
- Your visual style reference document
- Sketchbook or digital drawing tools (e.g., Adobe Photoshop, Illustrator, or similar)
- Presentation software (e.g., PowerPoint, Google Slides, or similar)
- Your project schedule.
What steps should you take to complete this task?
4 Hours
Set aside four hours to complete steps 1-6 below. Remember to save your work as you go when using any software.
- Refer to your project schedule to allocate sufficient time for designing and developing concepts for interior scenes and props. Ensure this task is included in your schedule.
- Refer to your reference boards for the main story elements to gather inspiration and visual information pertinent to the selected scene.
- Create multiple concept variations for each main element, exploring different shapes, styles, and initial ideas. Refer to your visual style reference document when doing this.
- Use silhouette sketches to assess the emotional impact and narrative suitability of each design variation.
- Identify and refine a central ‘hero’ element in the scene, emphasizing exploration over final polish.
- Review and select the most effective concept designs, supported by a concise explanation of design choices.
- Compile sketches, variations, and written explanations into a presentation document (e.g. a collection of design sketches) suitable for sharing (e.g. a .JPG image file) and upload it to the Forum for feedback.
What should you do after completing this task?
- How do the selected concepts enhance the narrative and emotional tone of the scene? What elements worked well, and what could be improved in future designs?
- Share your presentation document to Forum:
- Select your forum thread in Forum: Final Project Sequence.
- Select Reply to your first Forum post.
- Enter the words ‘Task 4: Interior concepts’ in your reply.
- Select the Post your response button, then select Edit in your new reply when it shows up.
- Upload your images(s) or files using the Attachment field.
- Select Save changes to share your coursework to your forum thread.
- Get feedback on this and other learning tasks at the next Live Session – check the Live Session calendar for dates and times.
- Schedule a project check-in with your facilitator to review your progress, get valuable guidance, and plan the next steps. Depending on your progress and the complexity of the tasks, this project check-in can cover a single task or a group of related tasks. Use this opportunity to discuss any challenges and ensure you’re on track with your project.
As you transition to the next section, focus on developing detailed environment layout drawings of the key elements you've designed. You’ll translate your concepts into scaled drawings that define spatial relationships and composition, and then use these layouts to guide the construction of your environment in the upcoming production phase.
Environment layout
| Project stage | Project tasks | |
|---|---|---|
| 1. Pre-production | Develop a story concept for the sequence (completed in Visual Storytelling topic). | |
| Draw a storyboard of the sequence (completed in Visual Storytelling topic). | ||
| Create a production schedule. | ||
| Find and gather references for key elements of the sequence. | ||
| Develop the visual look for the sequence. | ||
| Design and develop interior and props concepts. | ||
| DEVELOP DETAILED ENVIRONMENT LAYOUT DRAWINGS OF KEY ELEMENTS. | ||
| Create an animatic with basic sound and camera movements. | ||
An essential aspect of the pre-production stage involves designing and planning the layout of your main environment.
Where do you start?
To help you with this process, develop a series of layout drawings.
These drawings should depict the exact spatial arrangement of various elements within your sequence, providing a clear preview of your environment before you start building it in Maya during the production stage.
Case Study
Planning the environment layout for The Body in the Library
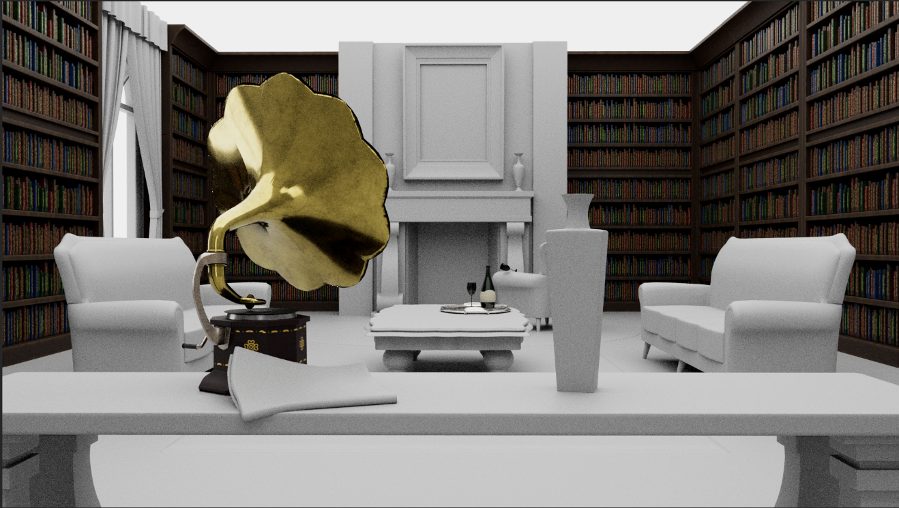
For this case study, the basic structure of the room (i.e. the library) was sketched to indicate the first floor of the environment, including the upper gallery and skylight location (i.e. the sequence’s main light source).
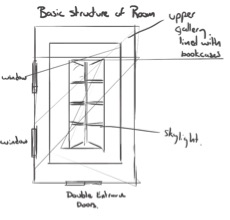
Layout of first floor of library, looking down.
In a separate sketch, the room’s main elements have been loosely planned out, including the placement of the fireplace, main hero chair, gramophone, and newspaper.
Layout of ground floor of library.
Upon creating the layout and comparing it to the storyboard, areas requiring additional dressing became apparent. Incidental objects (for example, sofas, end tables, lamps) were added to fill those spaces.
Another advantage of creating a series of layout drawings is that they will help you to:
- plan your camera angles
- see what the camera will see from different positions
- decide where compositional changes in the environment layout need to be made.
Practice
Task 5: Create layout pages for each main story element
Develop a series of layout drawings to depict the exact spatial arrangement of various elements within your sequence. These drawings provide a clear preview of your environment before starting the building process in Maya. Additionally, they help you plan camera angles, visualise camera perspectives, and identify necessary compositional changes.
What tools or resources do you need for this task?
Make sure you have access to:
- Your reference boards and concept designs for interior scenes and props
- Sketchbook or digital drawing tools
- Optional: Adobe Photoshop or other digital art software
- Your project schedule.
What steps should you take to complete this task?
4 Hours
Set aside four hours to complete steps 1-7 below. Remember to save your work as you go when using any software.
- Refer to your project schedule to allocate sufficient time for creating the layout pages. Ensure this task is included in your schedule.
- Review your reference boards and initial concept designs for the main story elements.
- Create initial layout sketches for each main element, focusing on their spatial arrangement within the environment.
- Develop detailed layout drawings that depict the exact positioning of each element. Ensure these drawings provide a clear sense of scale and spatial relationships.
- Plan your camera angles and positions, incorporating these into your layout drawings. Consider how the camera will move through the space and what it will capture.
- Adjust your layouts based on the planned camera angles, making any necessary compositional changes to enhance the visual storytelling.
- Compile your layout drawings into a presentation document (e.g. a collection of layout sketches) suitable for sharing (e.g. a JPG image file), clearly labelling each drawing and providing brief annotations explaining your design choices and camera plans.
What should you do after completing this task?
- How well do your layout drawings communicate the spatial arrangement and scale of the environment? Are the planned camera angles effective in capturing the desired visual narrative?
- Share your presentation document to Forum:
- Select your forum thread in Forum: Final Project Sequence.
- Select Reply to your first Forum post.
- Enter the words ‘Task 5: Layout’ in your reply.
- Select the Post your response button, then select Edit in your new reply when it shows up.
- Upload your images(s) or files using the Attachment field.
- Select Save changes to share your coursework to your forum thread.
- Get feedback on this and other learning tasks at the next Live Session – check the Live Session calendar for dates and times.
- Schedule a project check-in with your facilitator to review your progress, get valuable guidance, and plan the next steps. Depending on your progress and the complexity of the tasks, this project check-in can cover a single task or a group of related tasks. Use this opportunity to discuss any challenges and ensure you’re on track with your project.
When you’re ready, prepare to create an animatic that incorporates basic sound (optional) and camera movements. Use your layout drawings as a foundation to build a rough animated sequence, allowing you to visualise the timing, pacing, and overall flow of your story. This step will further refine your project and set the stage for production!
Animatic
| Project stage | Project tasks | |
|---|---|---|
| 1. Pre-production | Develop a story concept for the sequence (completed in Visual Storytelling topic). | |
| Draw a storyboard of the sequence (completed in Visual Storytelling topic). | ||
| Create a production schedule. | ||
| Find and gather references for key elements of the sequence. | ||
| Develop the visual look for the sequence. | ||
| Design and develop interior and props concepts. | ||
| Develop detailed environment layout drawings of key elements. | ||
| CREATE AN ANIMATIC WITH BASIC SOUND AND CAMERA MOVEMENTS. | ||
An animatic is a rough version of your animation project, typically using storyboard panels to show the visual narrative progression.
At times, an animatic incorporates minimal temporary audio to help convey the story's main points.
How does an animatic help you visualise flow and timing?
Creating an animatic helps you nail down:
- how long each scene should last
- how fast the camera movements are
- (if you have character action in a sequence) the pacing of any action or dialogue.
Select each link below and view three animatics (comparing original storyboard panels to the finished sequences), giving you an idea of how creating animatics can give you a better feeling of each scene’s pace.
- Missing Link / Meet Nessie sequence
- Coraline / Mouse Circus sequence
- Disney / Mickey Mouse and Minnie Mouse sequence
How do you create an animatic?
Creating an animatic is a straightforward process. Use these seven steps as a guide in the upcoming learning task, where you can practise creating an animatic of your sequence:
| Step | Action |
|---|---|
| 1. Import storyboard panels |
Use an editing programme of your choice, such as Adobe After Effects. Import all the panels created for your storyboard. |
| 2. Arrange storyboard panels | Arrange the imported storyboard panels in order on the timeline. |
| 3. Adjust length | Adjust the length of each image on the timeline to match the desired timing for your scenes. |
| 4. Add basic movements | Create keyframes on the scale or position attributes to simulate the planned camera movements from your storyboard sheets. |
| 5. Iterative adjustments | Modify the timing of each image, watch the result, make further adjustments, and rewatch the changes until satisfied. |
| 6. Add sound or music |
Incorporate any necessary sound or music to help convey the main narrative idea. Ensure to use only royalty-free sounds or self-recorded audio. |
| 7. Save and publish |
Save your animatic in the desired format. Publish or export the final animatic for further use in the production stage. |
Case Study
Animatic for The Body in the Library
Watch the completed animatic for The Body in the Library case study, combining basic simulated camera movements with rudimentary temporary sound.
Practice
Task 6: Create an animatic of your story sequence
Creating an animatic is a key step in the animation production process. It helps you visualise your story’s timing, pacing, and overall flow before moving on to full production. This task is designed to give you hands-on experience in animatic creation, allowing you to refine your sequence and ensure that your final project has a strong narrative foundation.
What tools or resources do you need for this task?
Make sure you have access to:
- Your completed storyboard panels in a digital format, ready for importing into editing software
- Editing software, such as Adobe After Effects
- Sound effects or music (optional)
- Your project schedule.
What steps should you take to complete this task?
8 Hours
Set aside up to eight hours to complete steps 1-8 below. Remember to save your work as you go when using Adobe After Effects or other editing software.
- Review Your Project Schedule: Refer to your project schedule to allocate sufficient time for creating the animatic. Ensure this task is included in your schedule.
- Import Your Storyboard Panels: Use an editing programme of your choice, such as Adobe After Effects, and import all the panels created for your storyboard.
- Arrange Storyboard Panels: Place the imported storyboard panels in the correct order on the timeline to maintain the flow of your story.
- Adjust Timing: Modify the duration of each image on the timeline to match the desired timing for your scenes. This will help establish the rhythm and pacing of your narrative.
- Add Basic Camera Movements: Create keyframes on the scale or position attributes of your panels to simulate planned camera movements, such as zooms or pans, that you outlined in your storyboard.
- Iterate and Refine: Continuously adjust the timing and movements of each panel. Watch the animatic, make necessary tweaks, and review the changes until you're satisfied with the flow and timing.
- Incorporate Sound (Optional): If you choose, add sound effects or music to enhance your animatic. Ensure to use only royalty-free sounds or self-recorded audio.
- Save and Publish: Once you’re happy with your animatic, save it in your desired format. Export the final animatic, ensuring it’s ready for the next stage in your production process.
What should you do after completing this task?
- Does the timing effectively convey the intended emotion? Are the camera movements adding to the storytelling? Reflect on these aspects and consider any adjustments needed before moving forward.
- Share your animatic to the Forum:
- Select your forum thread in Forum: Final Project Sequence.
- Select Reply to your first Forum post.
- Enter the words ‘Task 6: Animatic’ in your reply.
- Select the Post your response button, then select Edit in your new reply when it shows up.
- Upload your animatic using the Attachment field.
- Select Save changes to share your coursework to your forum thread.
- Get feedback on this and other learning tasks at the next Live Session – check the Live Session calendar for dates and times.
- Schedule a project check-in with your facilitator to review your progress, get valuable guidance, and plan the next steps. Depending on your progress and the complexity of the tasks, this project check-in can cover a single task or a group of related tasks. Use this opportunity to discuss any challenges and ensure you’re on track with your project.
Once you’ve completed your animatic, it’s time to move forward to the next phase of your project: Production. Prepare to bring your story to life by creating your assets, animating your elements, and managing any challenges that arise while executing your creative vision. This stage is where your sequence will fully take shape!

Dive into Production, where your sequence comes to life, and manage challenges to achieve a high-quality result. This subtopic will support your learning as you execute your creative vision and meet your project’s objective.
Start the subtopic by creating an asset checklist and organising your environment. Then, model and texture each element, finalise the camera layout and animation, and set up lighting and rendering for each shot to ensure a cohesive animated sequence ready for post-production.
Production asset checklist
| Project stage | Project tasks | |
|---|---|---|
| 2. Production | CREATE A PRODUCTION CHECKLIST. | |
| Organise and layout your main environment using proxy geometry. | ||
| Asset creation | Model each element in the sequence. | |
| UV create each element in the sequence that needs painted textures. | ||
| Texture each element in the sequence. | ||
| Finalise camera layout and animation of elements. | ||
| Create lighting for each shot in the sequence. | ||
| Set up and render each shot in the sequence. | ||
An essential part of making animation is ensuring that all production assets, shot elements, and progress are checked and tracked throughout all the tasks in the production stage.
Who tracks and checks production?
Keeping track of these assets, elements, and progress is usually the job of the production manager and the production assistants, who create and use several forms, spreadsheets, or checklists that help track each scene, shot, or sequence as it advances through the different stages of production – and as you can imagine, a shot's required number of elements can exponentially increase as a shot or production advances.
What does a production asset checklist look like?
Case Study
Production asset checklist for The Body in the Library
Look at this production asset checklist for The Body in the Library. It includes several different areas to store information and keep track of assets and production tasks.
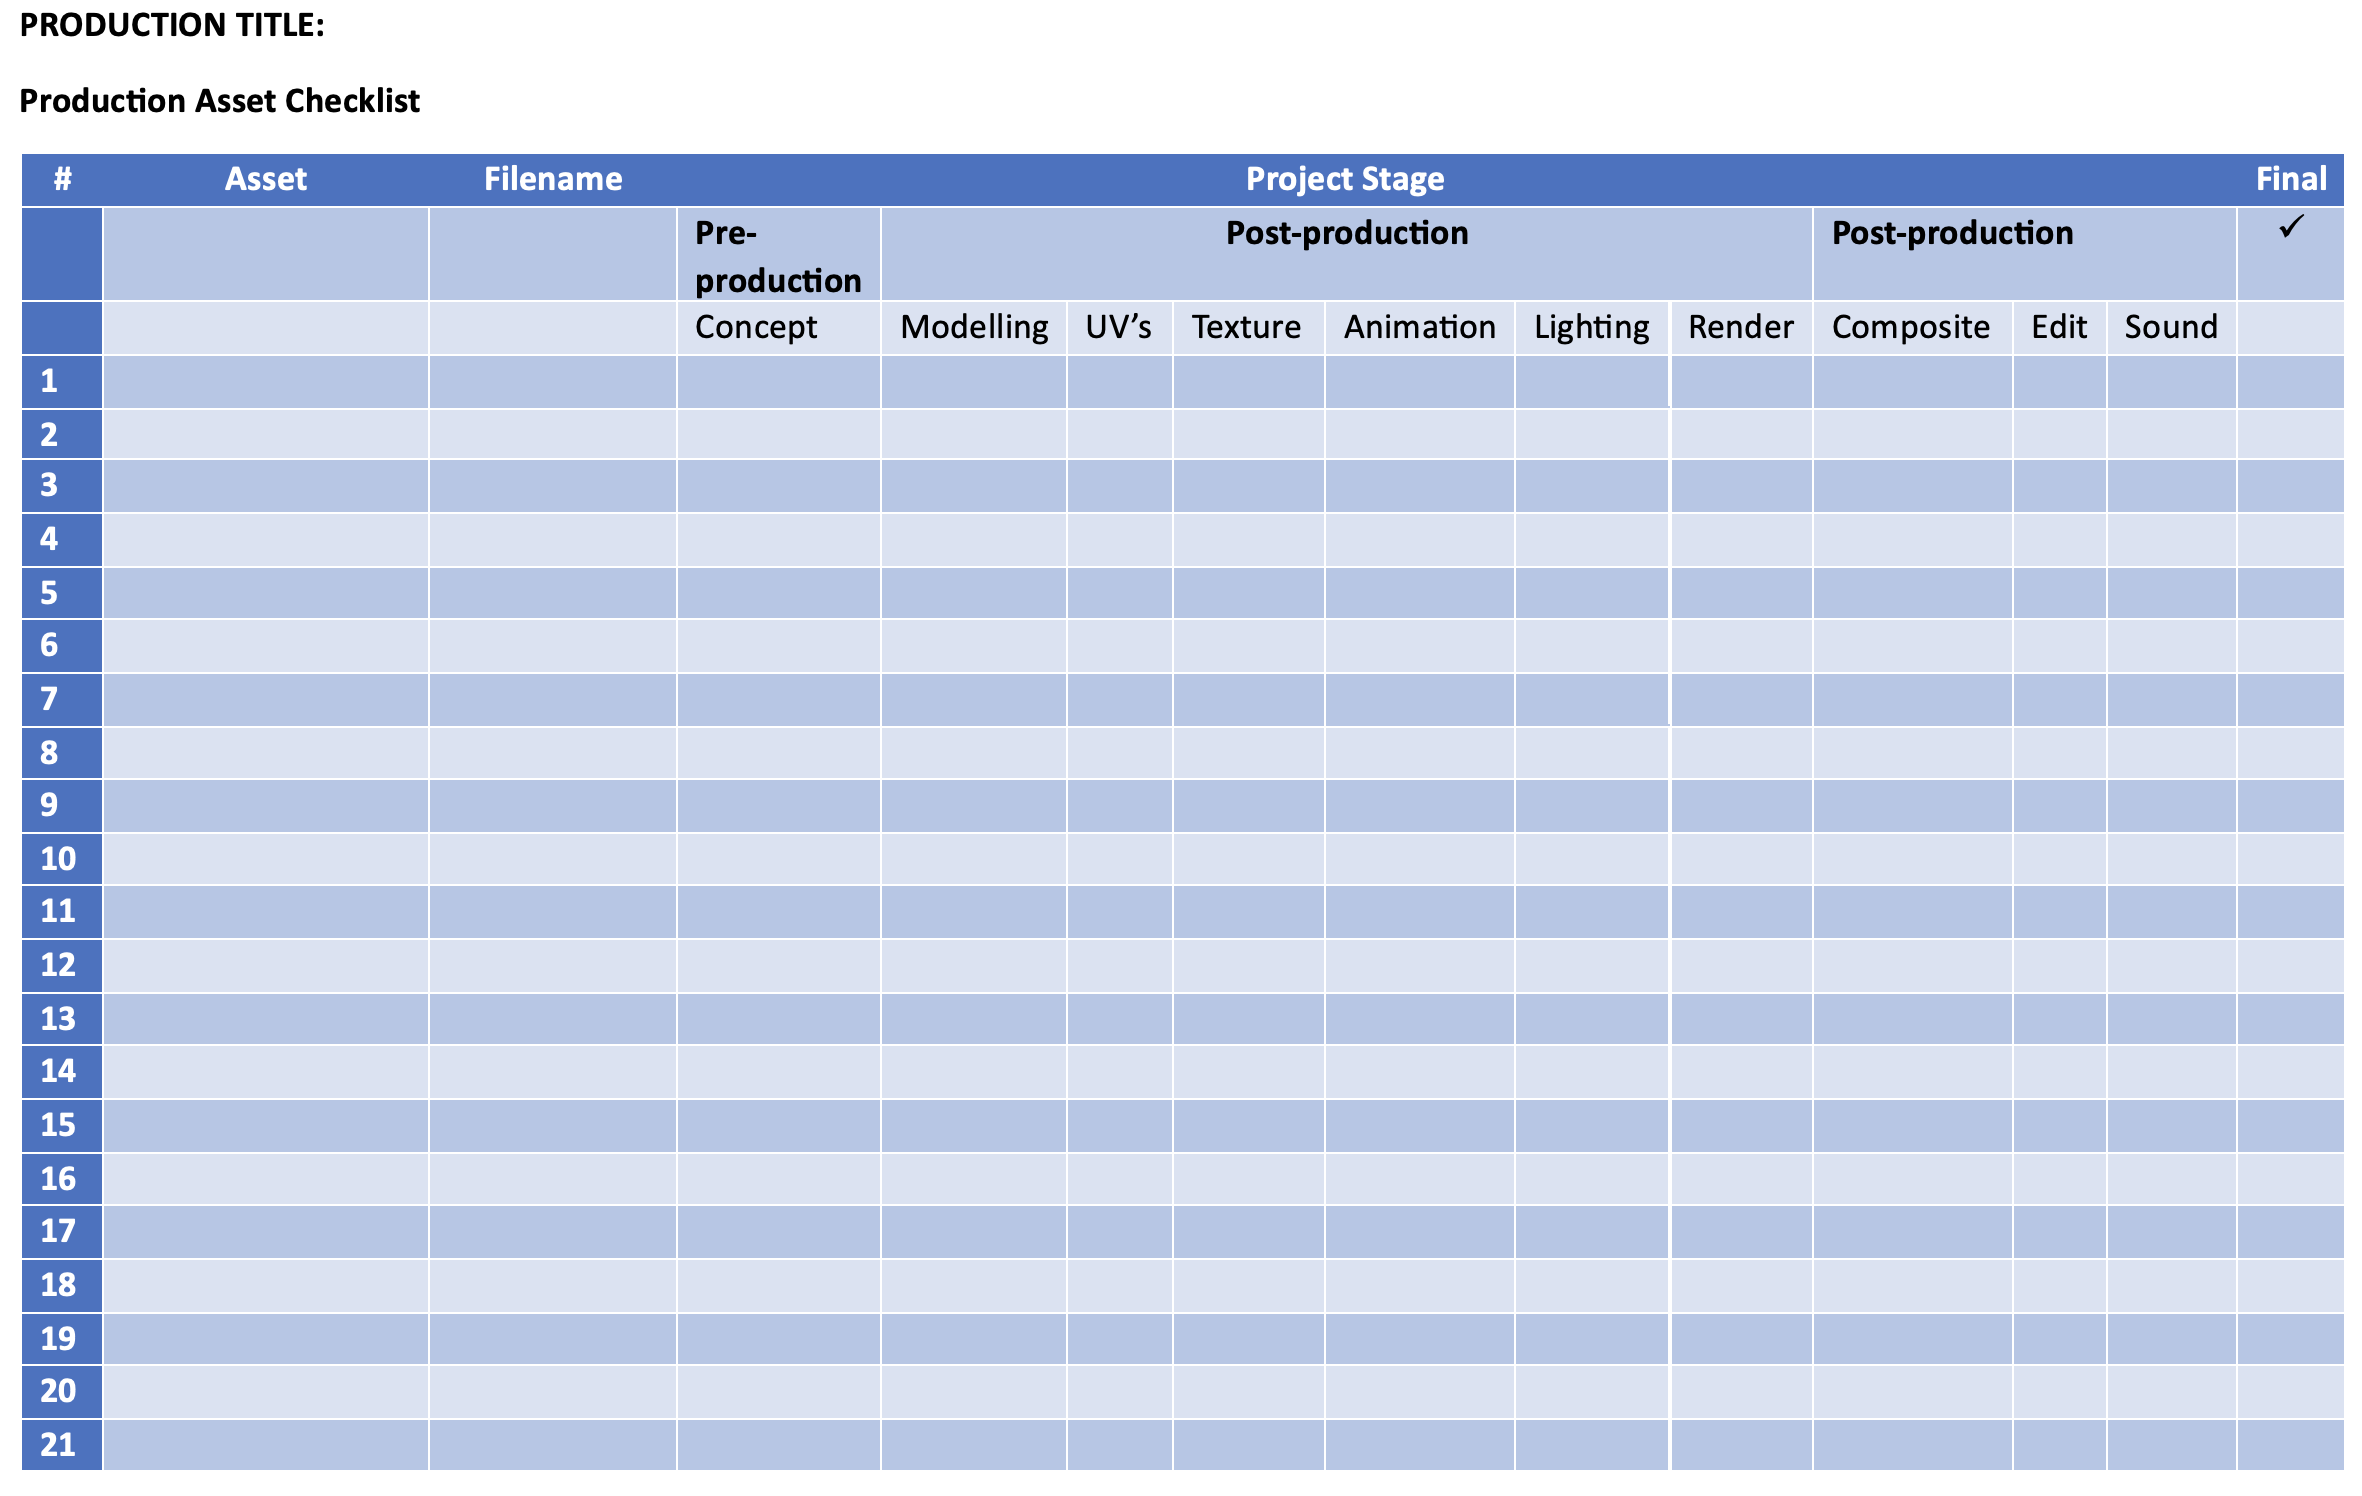
How do you create a production asset checklist?
Use this template to help you build your production asset checklist or create your own template that will help you keep track of:
- the assets required for each shot
- which step of the production stage each asset is currently at (e.g. modelling, or rendering etc.).
Remember to create a row for each shot and then note important information about each shot, such as camera name and frame count.
Then, create an asset list for each shot using your finalised storyboards and layout as a guide; include a list of all the required assets you need to complete each shot.
Practice
Task 7: Track your production assets
Creating a production asset checklist is a crucial step in managing and tracking the progress of your final project sequence. This checklist will help you stay organised by keeping tabs on all the assets needed for each shot, ensuring that each element is accounted for and completed on time. By establishing a clear overview of your production assets, you can effectively manage your workflow, avoid missing critical details, and ensure a smoother production process.
What tools or resources do you need for this task?
Make sure you have access to:
- The Checklist template to start building your production asset checklist
- Your storyboard and layout drawings to identify the assets required for each shot
- Your production schedule to align your asset creation with the overall timeline.
What steps should you take to complete this task?
1 Hour
Set aside one hour to complete steps 1-5 below. Remember to save your work as you go when using the checklist template.
- Download the Checklist Template: Use the provided template to build your production asset checklist. Alternatively, you can create your own template that best suits your project needs.
- List Shots and Key Information: Create a row for each asset in your sequence. For each row, include essential information such as the camera name, frame count, and other relevant details.
- Identify Required Assets: Refer to your finalised storyboards and layout drawings to identify the assets required for each shot. These may include characters, props, environments, and other elements that must be created or animated.
- Track Production Stages: For each asset listed, note down the current stage of production (e.g. concept, modelling, texturing, lighting, or rendering). This will help you keep track of your progress and identify areas that may need more attention.
- Review and Finalise: Once your checklist is complete, review it to ensure you have accurately represented all assets and production tasks. Make adjustments as needed to reflect the most up-to-date information.
What should you do after completing this task?
- Review your production asset checklist to assess how well your assets are aligned with your storyboard and layout drawings. Are there any assets missing? Are all assets accounted for at each stage of production?
- Share your production asset checklist to Forum:
- Select your forum thread in Forum: Final Project Sequence.
- Select Reply to your first Forum post.
- Enter the words ‘Task 7: Asset Checklist’ in your reply.
- Select the Post your response button, then select Edit in your new reply when it shows up.
- Upload your checklist using the Attachment field.
- Select Save changes to share your coursework to your forum thread.
- Get feedback on this and other learning tasks at the next Live Session – check the Live Session calendar for dates and times.
- Schedule a project check-in with your facilitator to review your progress, get valuable guidance, and plan the next steps. Depending on your progress and the complexity of the tasks, this project check-in can cover a single task or a group of related tasks. Use this opportunity to discuss any challenges and ensure you’re on track with your project.
With your production assets organised and tracked, you're now ready to move on to the next stage: Layout. In this section, you’ll focus on organising and laying out your main environment using proxy geometry, setting the foundation for the final animation.
Layout
| Project stage | Project tasks | |
|---|---|---|
| 2. Production | Create a production asset checklist. | |
| ORGANISE AND LAYOUT YOUR MAIN ENVIRONMENT USING PROXY GEOMETRY. | ||
| Asset creation | Model each element in the sequence. | |
| UV create each element in the sequence that needs painted textures. | ||
| Texture each element in the sequence. | ||
| Finalise camera layout and animation of elements. | ||
| Create lighting for each shot in the sequence. | ||
| Set up and render each shot in the sequence. | ||
Begin laying out your main environment. Make sure you have created some basic proxy geometry for each of your scene's elements. At this early stage, use only very rough shapes as stand-ins for the final models.
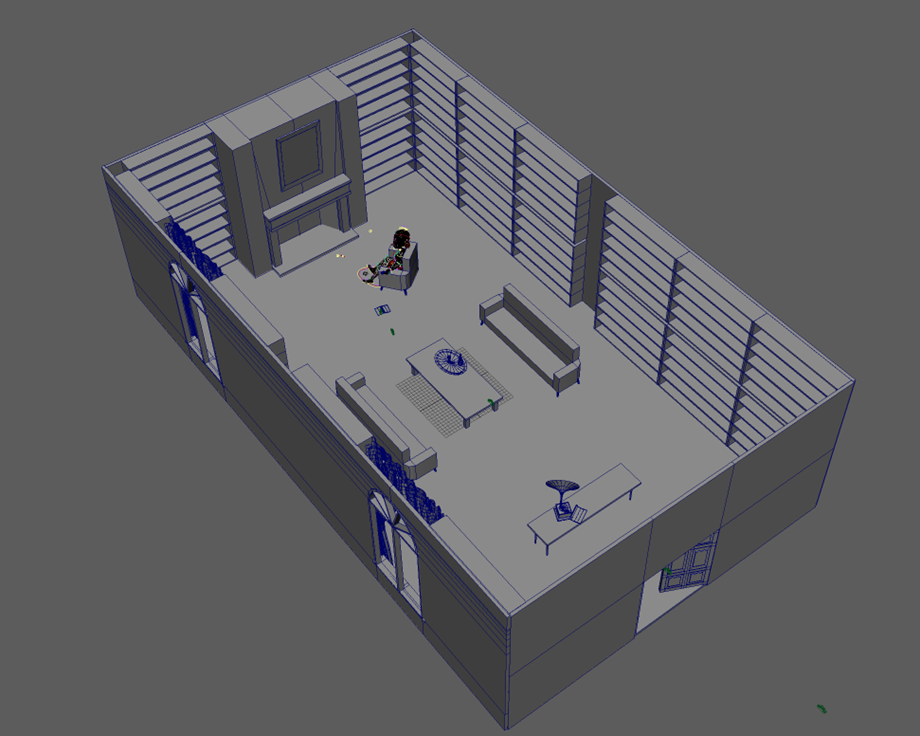
During layout, rough shapes can act as stand-ins for your final models.
Setting up shot cameras
With the proxy geometry laid out according to your storyboards, you can now create and set up a shot camera for each scene in your sequence; ensure that you name everything meaningfully so that your file remains as organised as possible.
You will find it helpful to turn on the resolution gate for the camera so that you can see the size of the image frame superimposed over the cameras field of view.
Swipe through these two images to see two examples of shot cameras set up for two scenes in The Body in the Library.
Creating camera movements
With the shot cameras and proxy geometry made and in place, you can now start creating any camera movement that may be required for each shot, which, in turn, allows you to make any slight adjustments if the resulting shot is not working as intended in the storyboard and animatic.
Tip
Refine your timing: Start with your animatic’s frame count
Refer to your animatic, for which you should have established roughly how long each of the shots in your sequence are. Use this frame count as a starting point for your shots and tweak them as you need to once you have them in Maya.
Exporting elements into separate files
Once you are happy with the environment and shot camera placement, it is time to start exporting each of the elements of your project into their own separate files. Having each element in a separate clean file will make the modelling and texturing process far less taxing on your computer system and make it less likely to crash and cause irreparable corruption of your main layout file.
Case Study
Scene elements for The Body in the Library
For The Body in the Library project, as many elements as possible will be saved in separate files:
Bookcases – Likely two or three slightly different bookcases will be created to duplicate around the room, creating the illusion of many different books and book arrangements.
- Gramophone
- Newspaper
- Hero Chair – This chair will likely be used to create the two large sofas in the room.
Painting - Long Table and Small Table
- Rug – Possibly two different rugs will be needed.
- Several smaller objet d'art that will need to be created as they are thought of.
Once the modelling and texturing process for each element is completed, elements can then be referenced back into the main environment. This will help keep the file size down and prevent crashing.
Important
Save frequently to protect your progress!
From this point on, you will need to form the habit of saving often and creating incremental versions of each of your environment elements, which will help to cut down on the amount of lost work in the event of a system crash!
Watch Geoff demonstrate his rough layout of the environment for The Body in the Library and the export process to prepare for modelling later in the production phase.
This video (10.11m) helps you complete Task 8: Create Maya scene files and proxy geometry below.
Practice
Task 8: Create Maya scene files and proxy geometry
Creating a well-organised Maya scene with proxy geometry is crucial in establishing the foundation for your project. By laying out your main environment with basic stand-ins for your final models, you ensure that the scene composition and camera setups align with your storyboard and animatic. This early stage of rough layout allows you to visualise and plan each shot effectively, helping to avoid potential issues later in the production process.
What tools or resources do you need for this task?
Make sure you have access to:
- Autodesk Maya
- Your storyboards and animatic to guide the layout of your scene and the positioning of your cameras
- Your production schedule.
What steps should you take to complete this task?
8 Hours
Set aside up to eight hours to complete steps 3-9 below. Remember to save your work as you go when using Autodesk Maya.
- Revisit the 3.7.3 Create Asset – Isometric Room subtopic in the previous Digital Production module if you need to a refresher on creating and working with referenced assets in an environment project file.
- Watch Geoff’s video above, carefully observing his rough environment layout for The Body in the Library and the export process to prepare for modelling later.
- Review Your Project Schedule: Refer to your project schedule to allocate sufficient time for creating the Maya scene files using proxy geometry. Ensure this task is included in your schedule.
- Create a New Maya Scene: Create a new Maya scene file for each shot in your sequence. Save these files with clear and descriptive names related to the shot or scene.
- Lay Out the Main Environment: Start laying out the main environment for each scene by placing proxy geometry. These are basic, rough shapes that act as placeholders for the final models. Focus on positioning these elements according to your storyboard and animatic.
- Create and Set Up Shot Cameras: With the proxy geometry in place, create and set up a shot camera for each scene. Ensure the camera is positioned to match the composition outlined in your storyboard. Turn on the Resolution Gate for the camera to see the size of the image frame superimposed over the camera's field of view.
- Organise Your Scene: As you add elements and cameras, make sure to name everything meaningfully. This organization will keep your file clean and make it easier to manage as your project progresses.
- Animate Camera Movements (if required): If any camera movements are required, create the animation now. Test the movements by scrubbing through the timeline to ensure the shot works as intended. Adjust the proxy geometry or camera placement as needed to ensure the shot aligns with your storyboard.
- Export Elements: Once satisfied with the environment layout and camera setup, export each element into its own separate Maya (.mb) file . This step ensures that the modelling, UV mapping, texturing, and other processes are handled in individual files, making your workflow more efficient.
What should you do after completing this task?
- Do the camera placements and rough layouts align with your storyboard and animatic? Did any adjustments improve the shot? How will this preparation help with the next steps in production?
- Share screenshots (.jpg) of your project i.e. each camera or shot in your sequence to Forum:
- Select your forum thread in Forum: Final Project Sequence.
- Select Reply to your first Forum post.
- Enter the words ‘Task 8: Scene files’ in your reply.
- Select the Post your response button, then select Edit in your new reply when it shows up.
- Upload your files using the Attachment field.
- Select Save changes to share your coursework to your forum thread.
- Get feedback on this and other learning tasks at the next Live Session – check the Live Session calendar for dates and times.
- Schedule a project check-in with your facilitator to review your progress, get valuable guidance, and plan the next steps. Depending on your progress and the complexity of the tasks, this project check-in can cover a single task or a group of related tasks. Use this opportunity to discuss any challenges and ensure you’re on track with your project.
With the foundation of your scene established, you are now ready to move on to the next major production phase: Asset Creation. This phase involves detailed processes such as modelling, UV mapping, texturing, animating, and lighting each element required for your final project sequence. The organisation and preparation you’ve done in this task will support a smooth transition into this largest component of the production stage.
Asset creation
Asset creation is the largest component of the production stage, involving detailed processes such as modelling, UV mapping, texturing, animating, and lighting each element required for your final project sequence.
This comprehensive phase ensures that you can craft and integrate every asset to achieve a cohesive and polished sequence.
| Project stage | Project tasks | |
|---|---|---|
| 2. Production | Create a production asset checklist. | |
| Organise and layout your main environment using proxy geometry. | ||
| ASSET CREATION | MODEL EACH ELEMENT IN THE SEQUENCE. | |
| UV CREATE EACH ELEMENT IN THE SEQUENCE THAT NEEDS PAINTED TEXTURES. | ||
| Texture each element in the sequence. | ||
| Finalise camera layout and animation of elements. | ||
| Create lighting for each shot in the sequence. | ||
| Set up and render each shot in the sequence. | ||
Modelling and UV Creation
Modelling involves creating detailed 3D models of each element, while UV Creation prepares these models for texturing by unwrapping their UVs. These processes are essential for ensuring assets are accurate and visually consistent.
First steps: Model each element
Start modelling each element required in your sequence, using the proxy geometry as a starting point.
Spend time on the key pieces of geometry that are the most important for your story sequence or are closer to the camera's perspective. The pieces of geometry that are further away from the camera can have less detail modelled into their geometry.
Explore
Modelling guidelines
Remember the basic guidelines of modelling:
- Try using the fewest vertices possible to create the object’s shape.
- Evenly space your edge loops.
- Isolate any detail in your model so that the loops do not run all the way around your model's geometry.
- Use multiple camera angles to check your model’s edge flow and curvature. Looking for any non-planar faces, etc.
To refresh your knowledge on these modelling guidelines, refer to the Modelling subtopic in the previous Digital Production module:
3. Digital Production > 3.3 Modelling > 3.3.2 Hard Surface Modelling > Guidelines
Remember that your proxy geometry is only a placeholder, so don't feel you need to stick to the exact shape and form of your proxy geometry.
Case Study
Adding value and interest to modelling elements for The Body in the Library
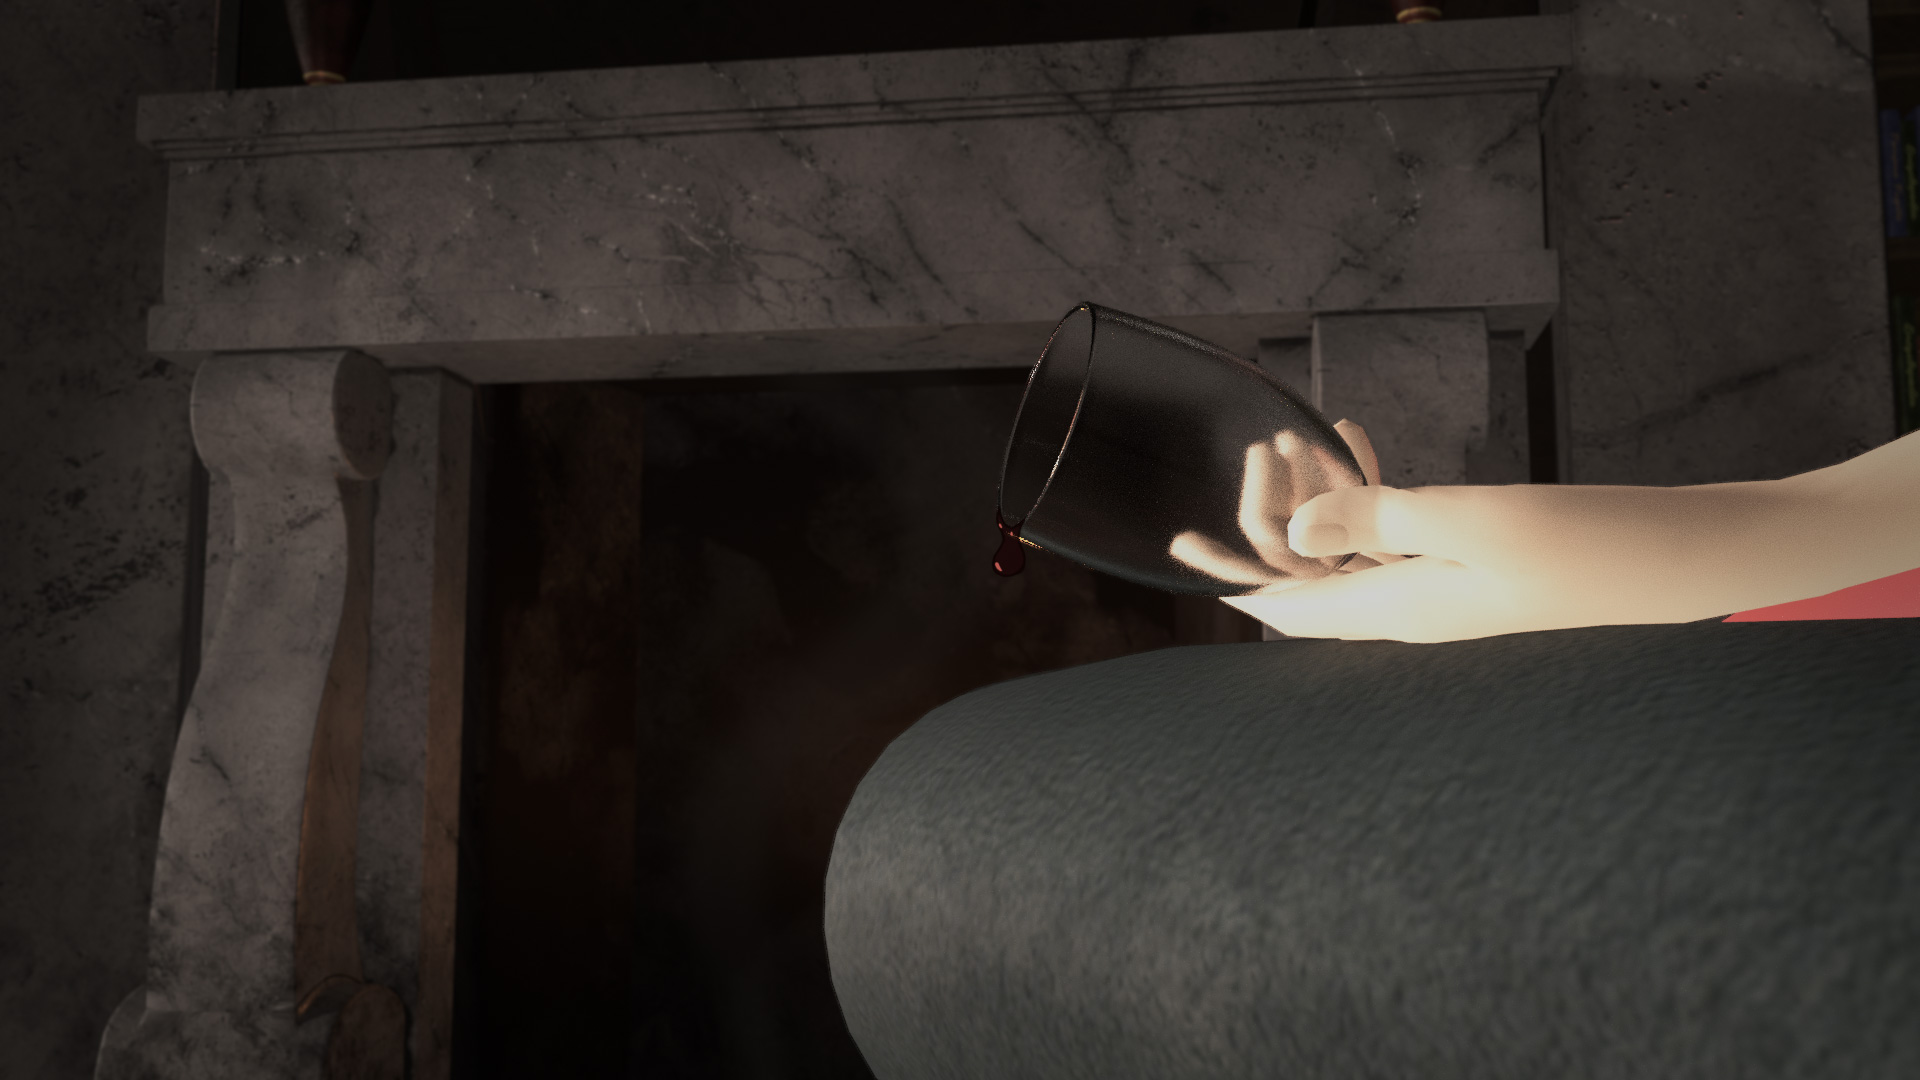
In this first image below, you can see the proxy geometry for the low table on which the tray, wine bottle, wine glass and some other objet d’art will be placed.
The table appears ordinary and dull, but it doesn't have to be that way after a bit of research into different furniture styles that might fit the setting of The Body in the Library,
Swipe to the next image to see what the low table will look like after the modelling process is complete.
The table's function is the same as before, and the table itself is roughly the same size, but the overall form and interest value of the table have improved substantially.
Try to add more value and interest to models wherever you can!
Next steps: UV creation
After modelling, create new UV layouts for the models so that it can be taken through the next production phase step: texturing.
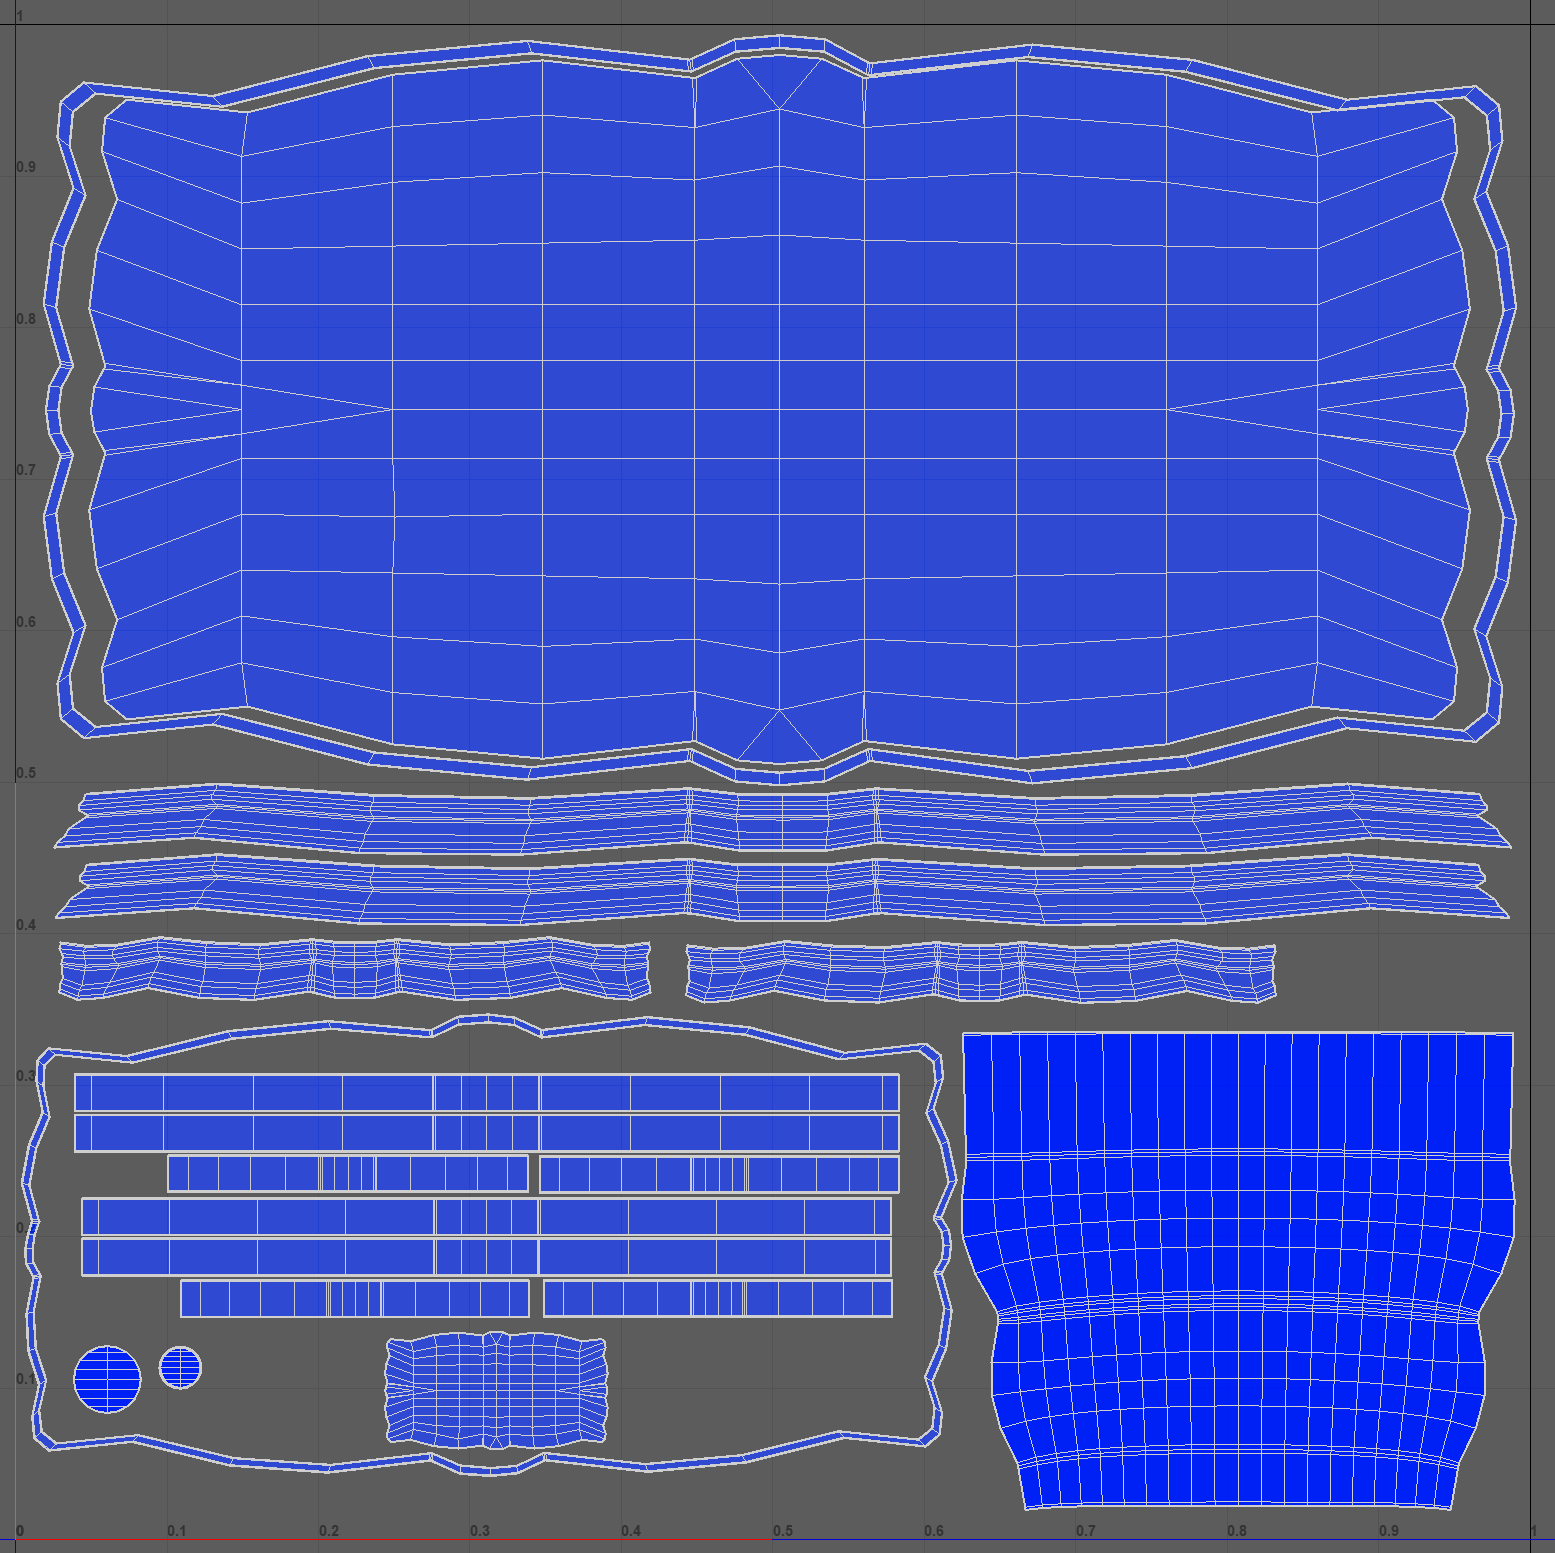
UV layout for the low table (The Body in the Library).
Explore
Creating new UVs
To refresh your knowledge on how to create a new UV layout for a model, refer again to the Modelling subtopic in the Digital Production module:
3. Digital Production > 3.3 Modelling > 3.3.8 Creating New UVs Process > Steps for creating a new UV
Tip
Master Your workflow: Finish modelling before texturing for smoother progress
It is a good idea to complete modelling for all your required models before starting any texturing work. This enables getting into a rhythm and flow, which can help make the process easier.
Watch Geoff demonstrate modelling of the environment for The Body in the Library.
This video (7.23m) helps you complete Task 9: Model and UV your project assets below.
Practice
Task 9: Model and UV your project assets
As you know, modelling and UV mapping are critical steps to bringing your project assets to life. By carefully creating detailed models and accurate UV layouts, you set the foundation for your project’s texturing and rendering stages. This task allows you to transform your rough proxy geometry into polished assets that align with the artistic vision of your sequence, ensuring that key elements stand out and contribute to the overall narrative.
What tools or resources do you need for this task?
Make sure you have access to:
- Autodesk Maya
- Maya project files and folders to save and manage your models and UV layouts
- Your proxy geometry files to serve as the starting point for detailed modelling
- Your visual look reference document to help ensure consistency with the desired aesthetic of your project
- Your production schedule
- Your production asset checklist.
What steps should you take to complete this task?
Use the time allocated in your project schedule for this task. Remember to save your work as you go when using Autodesk Maya.
- Revisit the 3.3 Modelling topic in the previous Digital Production module if you need to review how to model and create UV layouts.
- Watch Geoff’s video above, carefully observing his modelling of the environment for The Body in the Library.
- Review Your Project Schedule: Refer to your project schedule to allocate sufficient time for modelling and UV mapping your assets. Ensure this task is included in your schedule.
- Review Your Production Asset Checklist: Identify the models required for each shot in your sequence.
- Start Modelling from Proxy Geometry:
- Using your existing proxy geometry as a references, begin modelling each asset. Focus on the key elements that are most important to your story or are prominently featured in the camera's perspective. For assets closer to the camera, invest more time in adding detail to the geometry. For those further away, less detail may be necessary.
- As you model, refer back to the visual look reference document you created during the style activity. Incorporate any relevant stylistic observations into your modeling to ensure consistency with the overall visual direction of your project. This will help maintain the desired aesthetic and thematic cohesion in your sequence.
- Refine Your Models: As you model, remember that the proxy geometry serves only as a rough guide. Feel free to adjust shapes and forms to better suit the needs of your scene and story.
- Update Your Production Asset Checklist: As you work on your modelling and UV mapping, regularly update your production asset checklist. Note the assets you’ve completed, any modifications made, and any additional assets that may be needed.
- Optimise for Efficiency: Be mindful of polygon count and overall scene complexity, especially for assets that will not be prominently displayed. Efficient modelling will help maintain system performance and reduce render times.
- Create UV Layouts: Once the modelling is complete, proceed to create UV layouts for each asset. Ensure that the UVs are laid out cleanly and logically to facilitate the texturing process in the next phase. Pay special attention to avoiding stretching or overlapping UVs, as this will impact the quality of your textures.
- Organise and Save Your Work: Save your completed models and UV layouts in their respective Maya files. Maintain an organised file structure to keep your workflow efficient and manageable.
What should you do after completing this task?
- Take a moment to review your models and UV layouts. Are the key elements detailed enough to support your story? Do the UVs adequately prepare the assets for texturing?
- Select the models and UV layout files that you are most proud of or would like further feedback on and share screenshots of them to Forum:
- Select your forum thread in Forum: Final Project Sequence.
- Select Reply to your first Forum post.
- Enter the words ‘Task 9: Model/UV’ in your reply.
- Select the Post your response button, then select Edit in your new reply when it shows up.
- Upload your files using the Attachment field.
- Select Save changes to share your coursework to your forum thread.
- Adjust your project schedule based on the time taken for this task and any new insights gained. Ensure future tasks are scheduled realistically.
- Revisit your production asset checklist to ensure it accurately reflects the current state of your assets and identify any gaps or additional needs.
- Get feedback on this and other learning tasks at the next Live Session – check the Live Session calendar for dates and times.
- Schedule a project check-in with your facilitator to review your progress, get valuable guidance, and plan the next steps. Depending on your progress and the complexity of the tasks, this project check-in can cover a single task or a group of related tasks. Use this opportunity to discuss any challenges and ensure you’re on track with your project.
With your models and UVs complete, you’re ready to move on to the Texturing phase. In this next step, you will apply materials and textures to your models, bringing them to life with colour, surface details, and realism. Your well-prepared UV layouts will ensure that this process is smooth and effective, leading to visually cohesive assets in your final project sequence.
Texturing
| Project stage | Project tasks | |
|---|---|---|
| 2. Production | Create a production asset checklist. | |
| Organise and layout your main environment using proxy geometry. | ||
| ASSET CREATION | Model each element in the sequence. | |
| UV create each element in the sequence that needs painted textures. | ||
| TEXTURE EACH ELEMENT IN THE SEQUENCE. | ||
| Finalise camera layout and animation of elements. | ||
| Create lighting for each shot in the sequence. | ||
| Set up and render each shot in the sequence. | ||
With all your models completed and UVs laid out, the next step of the production stage is to create textures for each element in your sequence.
Explore
Bringing life to your models with texturing
During this step, use any of the texturing processes you learned during the Digital Production module when you practised creating textures for your models, including Maya materials, Arnold materials, and Fresnel materials.
To revisit that information, follow these breadcrumbs:
3. Digital Production > 3.4 Texturing
Ensuring texture consistency
Analysing look development
At this stage of production, it’s important to ensure that any textures you create align with the overall look you’ve established when you analysed examples from other animated projects and developed your own look development framework.
In the Look Development section (see the previous Pre-production topic) you looked at the two short films, French Roast and Alma.
View these two images to see the films’ naturalistic colour palette and simplified textures. Both short films include some areas of visible paint strokes resulting from the digital painting process:
Maintaining guiding style points
Keeping your guiding style points in mind while creating the textures for your project is important as it will help to ensure that your project stays consistent and doesn't fall into the trap of starting to look a little disjointed and all over the place in terms of its visual style.
Case Study
Achieving consistency: Iterating textures to align with visual style of The Body in the Library
1. Identifying the problem: Discrepancies in texture integration
After starting to work on the textures for the project, a common issue was encountered where props appeared visually appealing in isolation but differed significantly from the animator’s project vision when integrated into the main environment:
Props (e.g. the Gramophone) appear too realistic in the first render.
This problem highlighted the challenge of maintaining consistency with the overall project vision and ensuring all elements work together cohesively within the same frame. It’s always easy to forget about a sequence’s ‘big picture’ – how will everything look together in the same frame?
2. Identifying the issue behind the problem: Realism vs. Stylisation
The primary issue identified was that the elements began to look too realistic, diverging from the intended stylised and painterly look. This experience illustrates that even completed work needs to be subject to testing and iteration before the final look is established and locked down.
3. Learning from iteration: Testing and refining textures
The key lesson from this case study stage is the importance of examining test renders and adjusting them to align with the original vision for the project. Specifically, it was noted that the highly reflective and shiny surfaces on props such as the Gramophone, Wine Bottle, Glass, and Tray were too clean and looked overly CG. It was also observed that simplifying textures and adopting a more painterly approach was necessary, while textures for the bookcases and books, which were simpler, were more appropriate.
4. Adjusting the approach: Simplifying and styling materials
Moving forward, the plan involves revisiting and adjusting all highly polished and reflective models to tone down their surfaces. Additionally, painting over the colour maps to achieve a more stylised look, especially for prominent objects like the Gramophone, is crucial. Regularly checking the consistency between individual pieces and the environment will help maintain the overall style choice.
5. Implementing solutions: Revisiting and reworking textures
After reworking the materials and textures, the render should align better with the rest of the environment. Continuous adjustments and reviews are essential to ensure the entire frame remains consistent with the chosen visual style.
Refining textures in Photoshop
After you apply all textures, refining each colour map in Photoshop is useful. This involves adding extra details to enhance the visual quality before you animate and light your sequence.
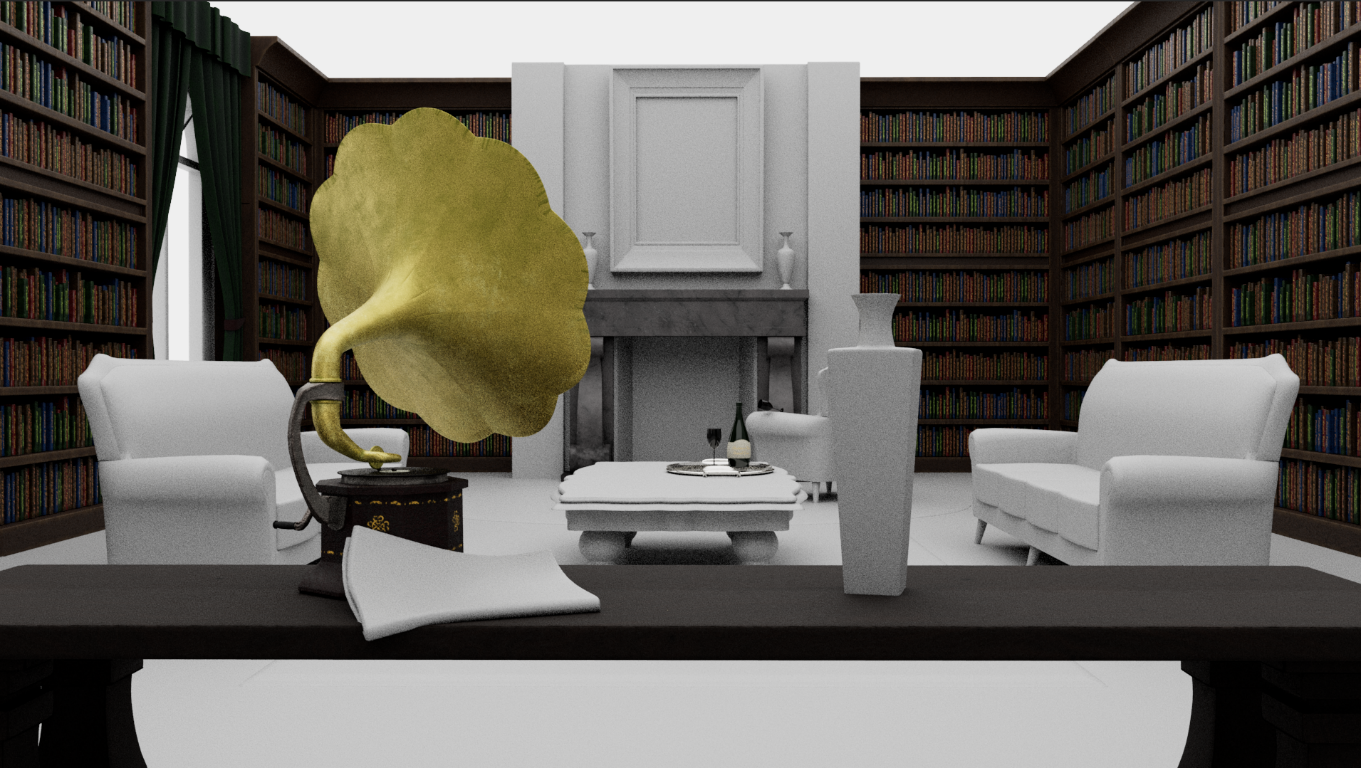
Painterly strokes added to props to increase alignment with sequence’s overall look.
Reviewing frame composition
Once you complete all textures, reviewing the entire frame and assessing the overall composition is crucial. Your review should include identifying any elements that stand out and do not integrate well within the frame.

Props (e.g. the painting in the background and the light blue vase on the table) might appear too bright and need to be toned down to achieve visual harmony.
After ensuring that all elements fit together cohesively and making necessary adjustments, your project can transition to the next project task: Animation!
Watch Geoff demonstrate textures used in The Body in the Library, and some of the problems he identified and solved.
This video (10.11m) helps you complete Task 10: Create textures for your project assets below.
Practice
Task 10: Create textures for your project assets
Texturing adds depth and realism to your 3D models, enhancing the overall visual quality of your project. By developing textures that align with the visual look framework you established during pre-production, you ensure consistency and cohesion throughout your sequence. This task is crucial for creating assets that not only fit well within your scenes but also contribute effectively to the storytelling and visual impact of your project.
What tools or resources do you need for this task?
Make sure you have access to:
- Autodesk Maya
- Maya project files and folders to save and manage your textures
- Your visual look reference document
- Your production schedule
- Your production asset checklist.
What steps should you take to complete this task?
Use the time allocated in your project schedule for this task. Remember to save your work as you go when using Autodesk Maya.
- Revisit the 3.4 Texturing topic in the previous Digital Production module if you need to review how to texture your models.
- Watch Geoff’s video above, observing the textures he used in The Body in the Library and some of the texturing problems he identified and solved.
- Review Your Project Schedule: Refer to your project schedule to allocate sufficient time for modelling and UV mapping your assets. Ensure this task is included in your schedule.
- Review Your Visual Look Reference Document: Revisit the visual look framework you established earlier. Ensure your texturing aligns with the visual style and mood you’ve defined based on observation and examples from other animated projects.
- Prepare Your UV Maps: Verify that your UV maps are clean and properly laid out. Ensure there are no overlapping or stretched areas, as this will impact the quality of your textures.
- Create Base Textures: Begin by creating base colour maps for each asset. Use texturing software like Photoshop, Substance Painter, or Mari to design these textures. Focus on maintaining the consistency of colour schemes and surface details as outlined in your look development framework.
- Refine Textures in Photoshop: After applying base textures, refine them using Photoshop or similar tools. Add additional details such as dirt, wear, or texture variations to enhance realism and visual interest.
- Apply and Adjust Textures in Maya: Import and apply the textures to your models in Maya. Adjust material and shader settings as needed to achieve the desired look. Experiment with different texture maps, such as bump or normal maps, to add depth and detail to your surfaces.
- Update Your Production Asset Checklist: As you work on texturing, update your production asset checklist to reflect the status of each asset. Document the textures you’ve created, note any issues or additional textures needed, and track your progress.
- Review the Entire Frame: Once textures are applied, review the model and texture in your main project file to assess how well the textures integrate with the scene. Look for any elements that stand out or do not fit cohesively and make necessary adjustments to ensure visual harmony.
- Organise and Save Your Work: Save your texture files and maintain an organised folder structure. Maintain an organised file structure to keep your workflow efficient and manageable.
What should you do after completing this task?
- How well do your textures align with the visual look development framework you established? Are there any areas where the textures could be refined further to enhance the overall visual quality? Do the textures integrate seamlessly with the rest of the scene, or are there any elements that look out of place?
- Select the texturing files that you are most proud of or would like further feedback on and share screenshots of them to Forum:
- Select your forum thread in Forum: Final Project Sequence.
- Select Reply to your first Forum post.
- Enter the words ‘Task 10: Textures’ in your reply.
- Select the Post your response button, then select Edit in your new reply when it shows up.
- Upload your files using the Attachment field.
- Select Save changes to share your coursework to your forum thread.
- Adjust your project schedule based on the time taken for this task and any new insights gained. Ensure future tasks are scheduled realistically.
- Revisit your production asset checklist to ensure it accurately reflects the current state of your assets and identify any gaps or additional needs.
- Get feedback on this and other learning tasks at the next Live Session – check the Live Session calendar for dates and times.
- Schedule a project check-in with your facilitator to review your progress, get valuable guidance, and plan the next steps. Depending on your progress and the complexity of the tasks, this project check-in can cover a single task or a group of related tasks. Use this opportunity to discuss any challenges and ensure you’re on track with your project.
With your textures now in place, it's time to dive into the Animation stage, where you'll infuse your models with dynamic movement and energy, making your sequence truly captivating. Get ready to see your hard work take shape and transform into an engaging, animated sequence!
Animation
| Project stage | Project tasks | |
|---|---|---|
| 2. Production | Create a production asset checklist. | |
| Organise and layout your main environment using proxy geometry. | ||
| ASSET CREATION | Model each element in the sequence. | |
| UV create each element in the sequence that needs painted textures. | ||
| Texture each element in the sequence. | ||
| FINALISE CAMERA LAYOUT AND ANIMATION OF ELEMENTS. | ||
| Create lighting for each shot in the sequence. | ||
| Set up and render each shot in the sequence. | ||
Learn about the specific animation elements essential to The Body in the Library case study sequence in this section, which covers the animation techniques and workflows used to create three critical elements using Toon Boom.
Establishing camera animation
During the storyboarding, layout, and animatic stages of The Body in the Library sequence, the camera animation was established to determine shot composition, shot duration, and pace.
Tip
Streamline your workflow: Prioritise, Lock, and Simplify
Prioritise: If you have not yet completed your camera movement animation, it is advisable to complete this task first.
Lock: Once you finalise your camera animation, lock the cameras to prevent accidental changes- you can then add any additional animation as required for your sequence.
Simplify: To avoid consuming all your remaining production time, it is advisable to keep animation movements simple. Remember, you still have lighting, rendering, and the post-production stage to complete before the submission due date for your final project sequence!
Animating specific elements
Three animated elements are included in the The Body in the Library:
| Element | Description |
|---|---|
| Gramophone record | An animated rotation cycle. |
| Liquid drop and splash | A drop of liquid falls into the frame and splashes in the pool near the chair in shot 5, created in Toon Boom. |
| Smoke trails | Animated smoke trail curling up from the dying fire, also created in Toon Boom with an animation cycle for reuse in each shot. |
1. Animating the gramophone record
How was the gramophone record animated?
The animation for the rotating record on the gramophone was the simplest of the three different elements to complete.
Animating the gramophone record involved creating a slight wobble by rotating the record slightly on the X-axis. This sells the rotation by making it more visible to the audience and not appearing completely flat.
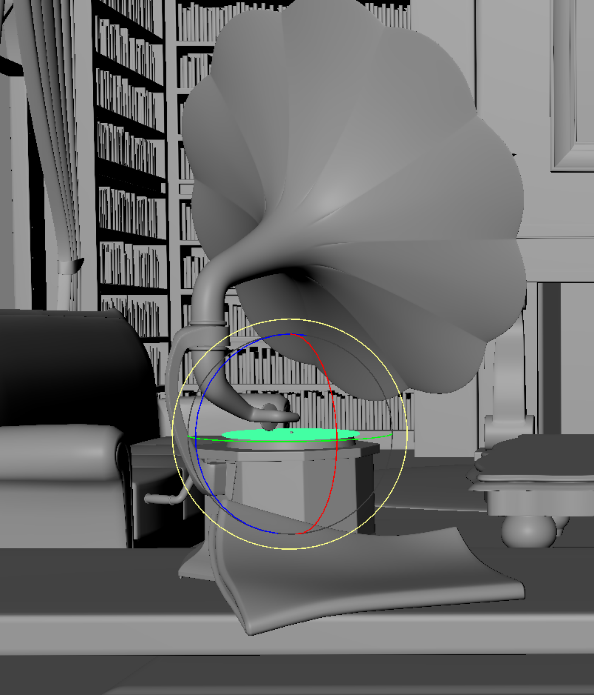
Creating a slight wobble as the record rotates.
How fast should the record spin?
Quick calculations were needed!
A Google search reveals that a standard turntable spins at 33 rotations per minute. Since one complete rotation equals 360 degrees, 33 rotations are equivalent to 11,880 degrees (33 x 360).
To find the degrees of movement per frame for a one-minute animation at 25 frames per second (i.e. 1,500 frames): 11,800 degrees ÷1,500 frames = 7.92 degrees per frame.
Rounding 7.92 degrees to 8 degrees per frame results in one complete revolution every 45 frames (360 ÷ 8).
How were key frames for the record created?
Two key frames for the rotation animation could then be created.
- First key frame at frame 1 (0 degrees rotation in Y)
- Second key frame at frame 45 (360 degrees rotation in Y).
Linear interpolation was set in the Graph Editor so that there was no ease in movement, and the infinite cycle function was enabled to maintain continuous spinning.
![]()
Infinite Cycle buttons in Toon Boom.
2. Animating the Liquid Drop and Splash
The next piece of animation which was important for the sequence’s narrative were the drops of liquid that fall into frame in shot 5.
What were the three parts of the liquid drop animation?
Three separate pieces of animation were created for the liquid drop and splash sequence.
1. A drop that falls into frame and splashes into the pool of liquid next to the chair.
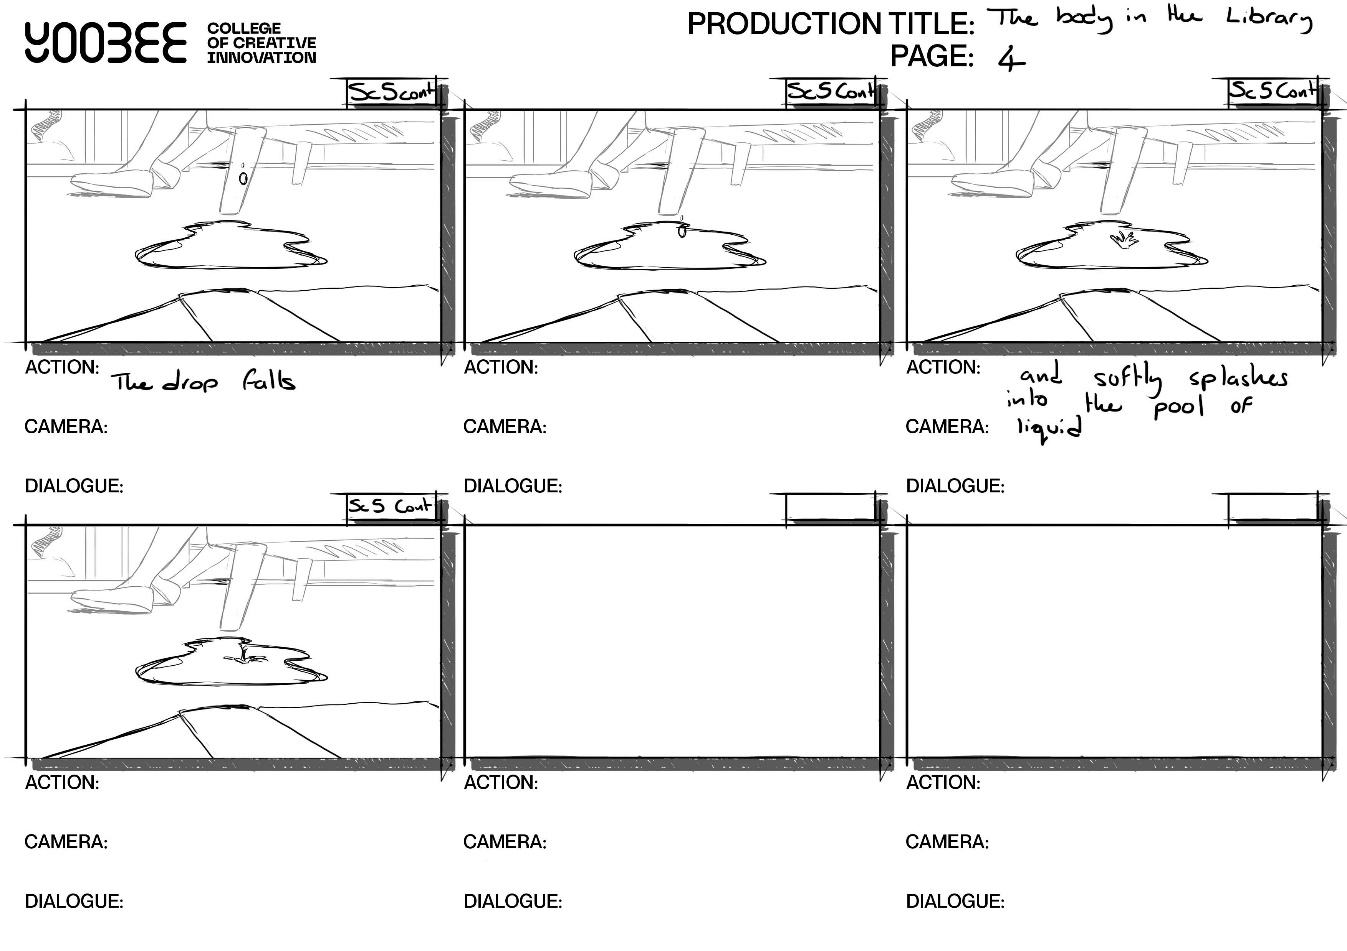
2. A drop that falls past the camera as it moves up the side of the chair.
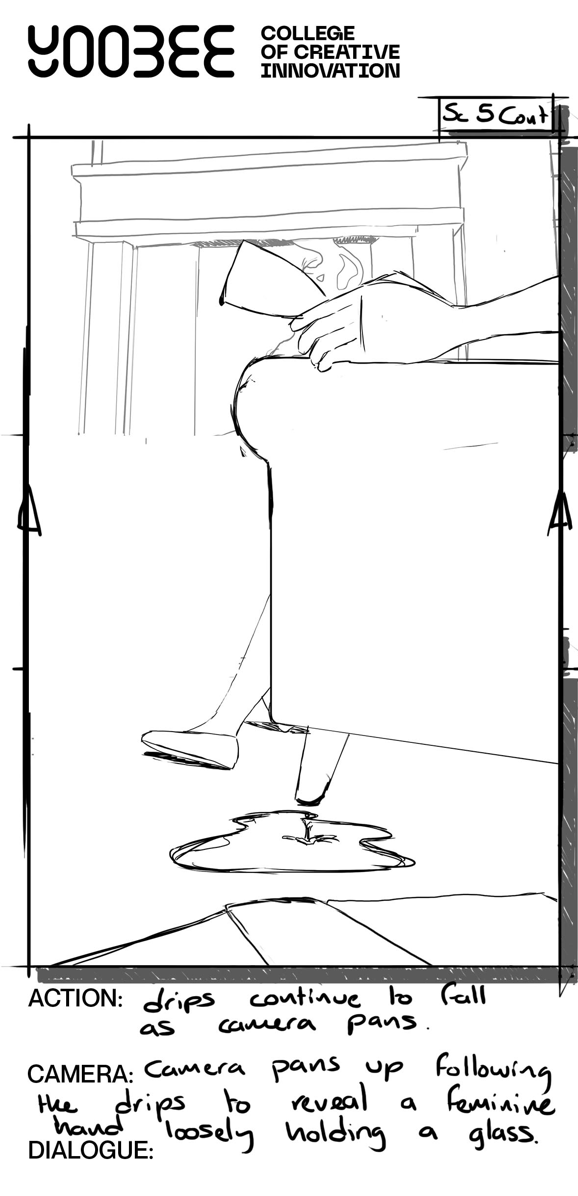
3. A drop that forms on the side of the glass and then drops off screen at the end of the scene.
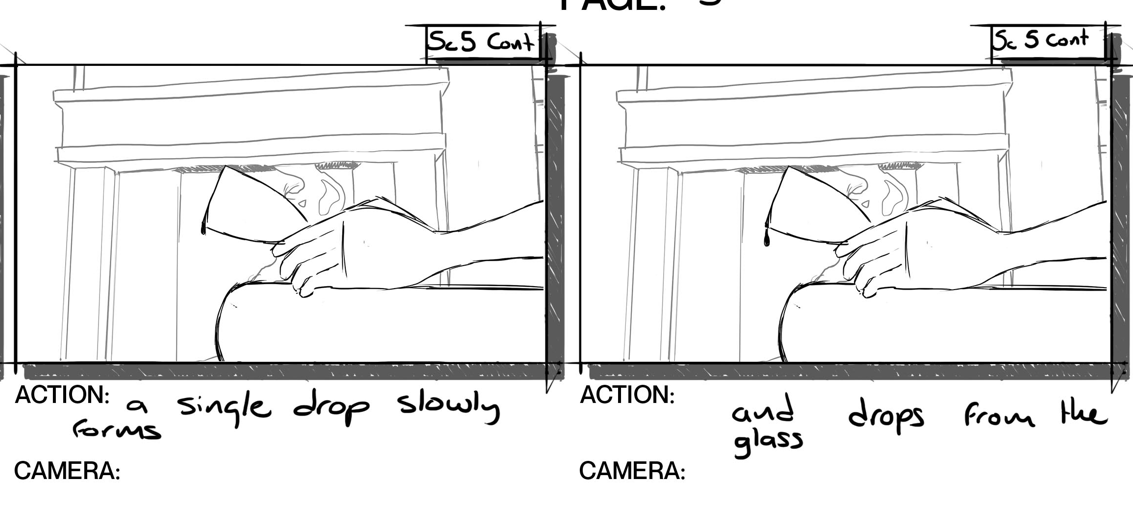
How was each part planned?
At first glance, the liquid drop and splash sequence may seem complicated, but it was straightforward to produce.
To complete it, the shot was broken into three separate parts and each part animated.
Liquid Drip: Part One
How was the first liquid drop and splash created?
Three steps were taken to create the first liquid drop and splash:
| Step | Description of what the animator did |
|---|---|
| 1 | Rendered frame 1 of the environment to position the falling drop and its splash and to assist in creating a colour palette and visual style for the hand drawn animation. |
| 2 | Imported the rendered frame into Toon Boom as a Bitmap image layer to use as a background guide. |
| 3 | Created rough animation (see Next Steps below) in Toon Boom based on the background guide to ensure consistency with the 3D environment. |
How was the rough animation created and cleaned up?
Four steps were taken to create and clean up the rough animation of the first liquid drop and splash:
| Step | Description of what the animator did |
|---|---|
| 1 | Created rough animation using a lighter colour to ensure the drop was visible against the background. |
| 2 |
Developed rough keys and added in-betweens to smooth out the movement and refine the timing of the splash.
|
| 3 | When rough animation completed, created a new layer to clean up the animation and paint each frame. |
| 4 | Sampled colours from the background to create a colour palette and imported this palette for consistent colouring across all of the shot’s three parts. |
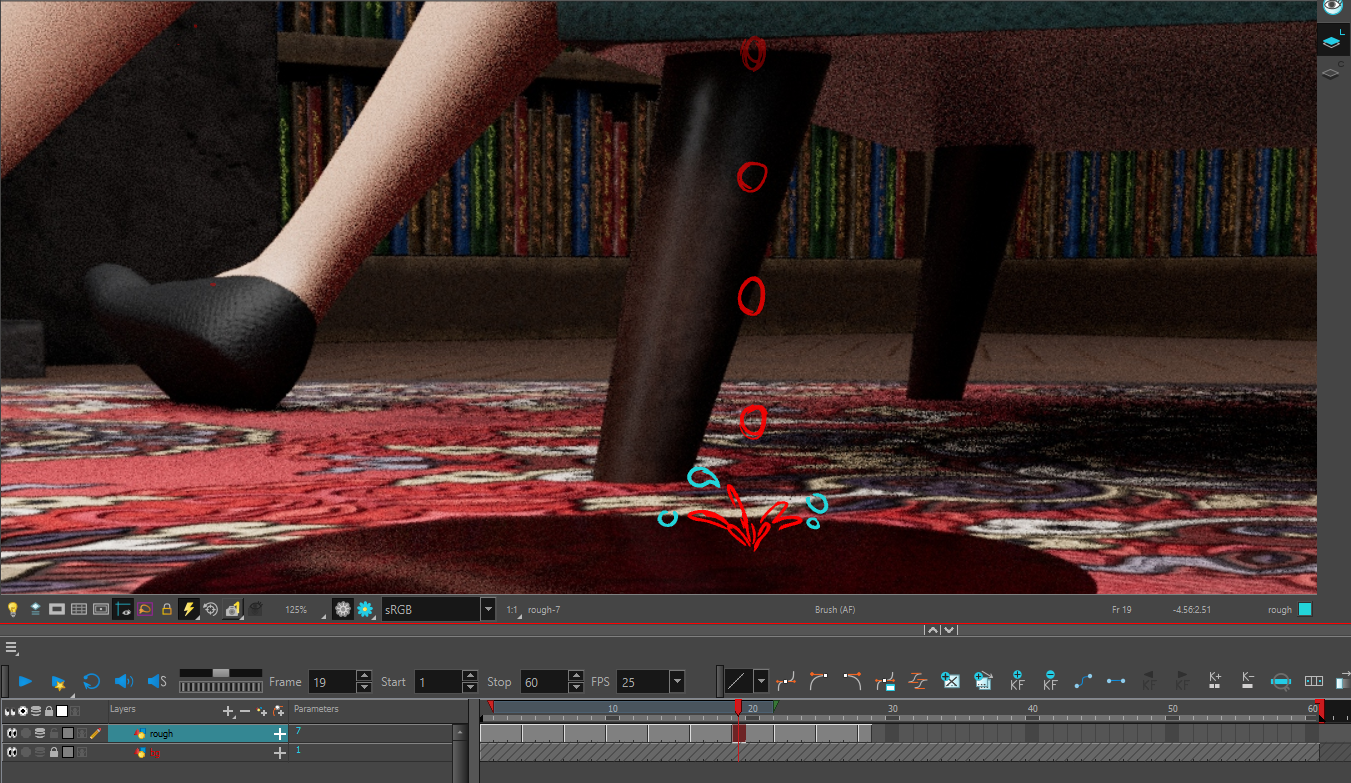
Liquid Drip: Part Two
How was the second liquid drop animated?
For the second part of the sequence, while the camera moves and a drop falls through the frame, no background was necessary as the falling drip can be positioned in post-production. The primary requirement is a drop that wiggles and giggles, which can then be moved through the frame from top to bottom.
A major consideration for this part of the sequence is that the animation needs to be created on ones (with a new image on every frame) due to the camera movement. Animating the drop on twos (where each image is held for two frames) would cause the animation to visually stutter or judder across the shot, distracting and looking strange to the audience.
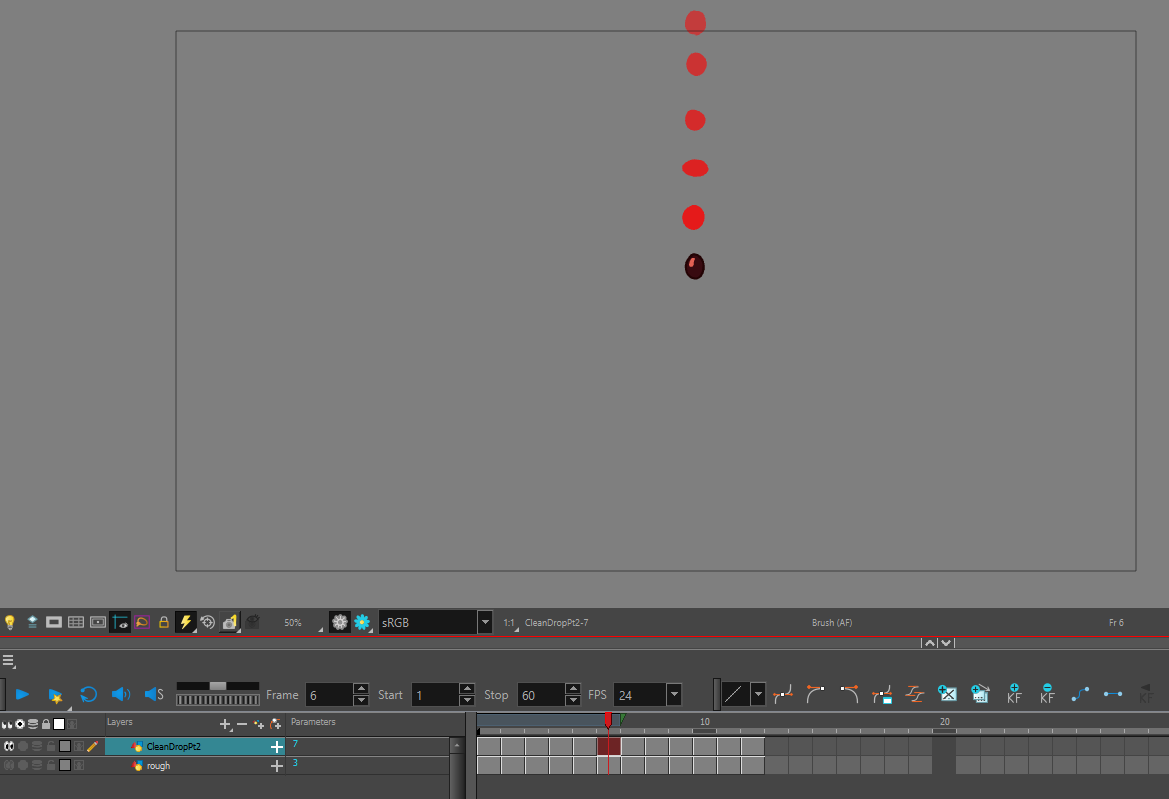
The second drop is animated falling through the frame without a background, to be positioned in post-production.
Liquid Drip: Part Three
How was the third liquid drop animated?
Where a drop forms on the rim of the glass in this final part, it was necessary to render the last frame of shot 5 to use for registering or aligning the animation.
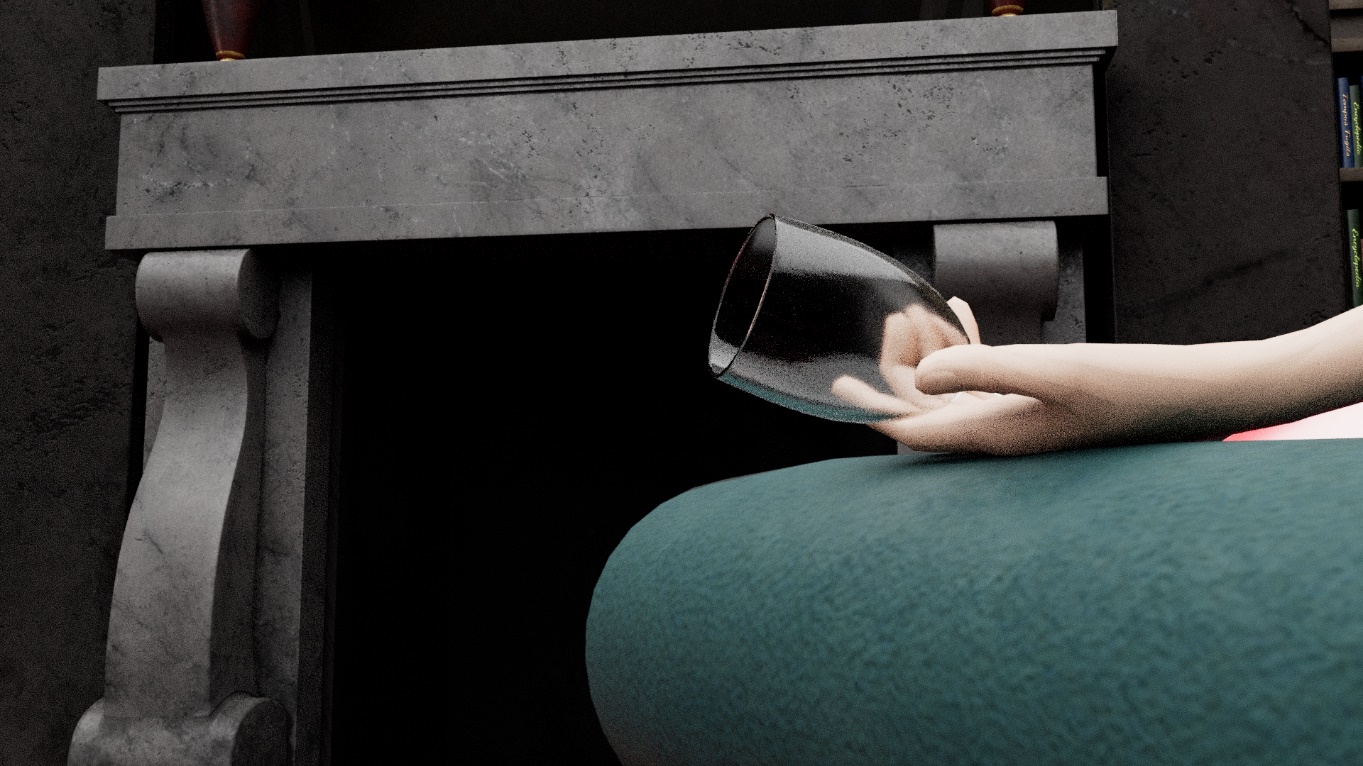
The final drop.
This third and final drop was the most demanding of the three parts of this shot. First, the drop must form on the glass and then build up before tearing off and falling off screen
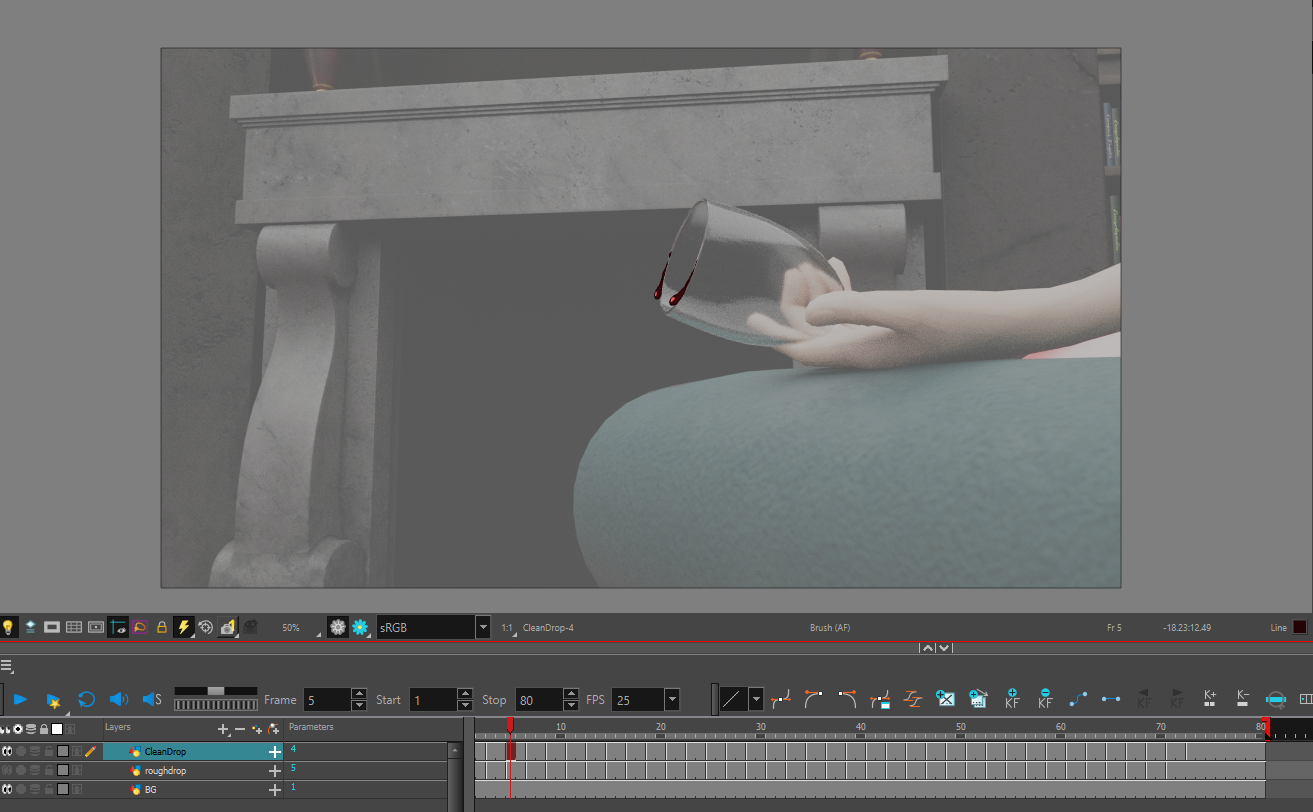
A drop forms on the rim of the glass.
The same workflow was used for each of these droplet pieces of animation: first, animating roughly and then cleaning up the animation. Rendering each part was postponed until after completing the lighting for the environment to allow for adjustments to the colours of the clean and coloured animation to better fit with the finalised lighting.
Animating the smoke trails
How were the Smoke Trails animated?
For the smoke trail in the fireplace – the last piece of animation indicated in the storyboard - an animated smoke trail cycle was created on ones due to camera movement in all the sequence’s shots.
Initially, it was thought that a cycle of the smoke trail lazily winding and curling from a fixed point would be animated first. Then, an image sequence applied to a plane in Maya placed in the fireplace could be rendered.
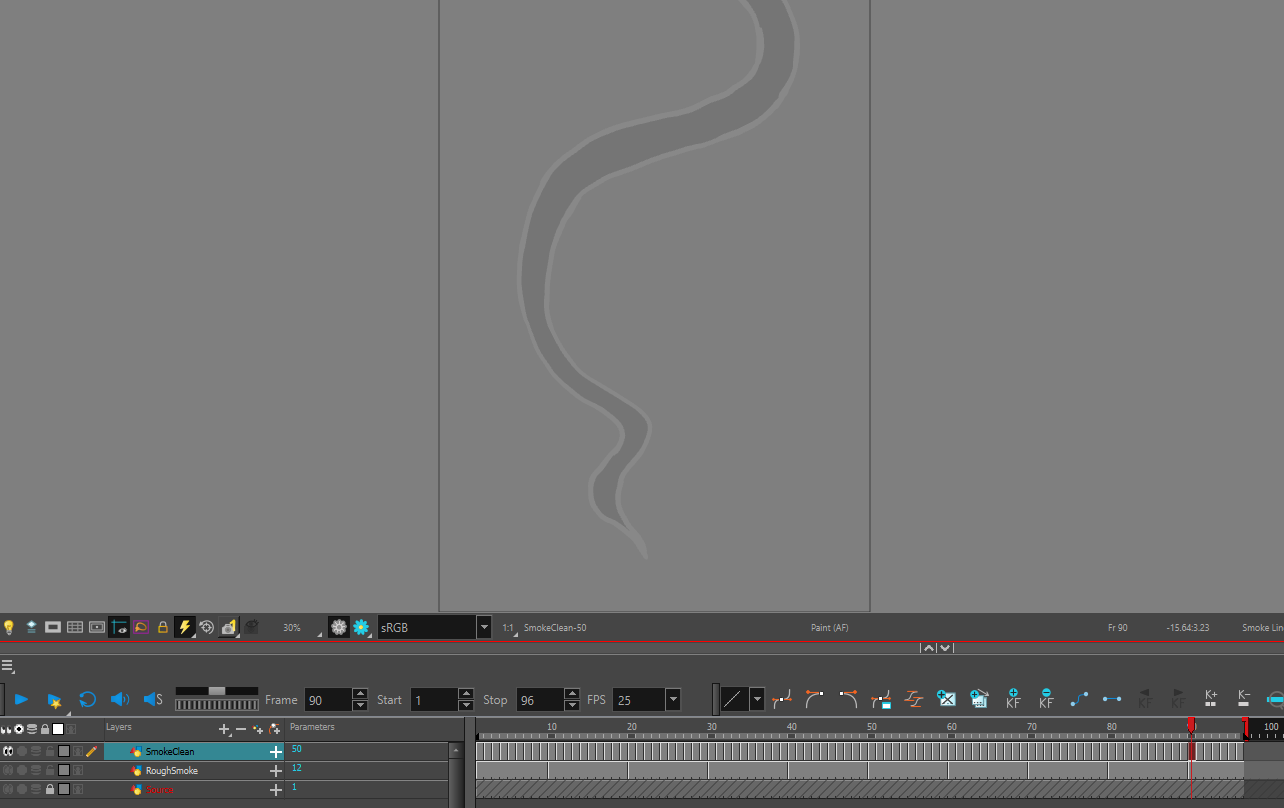
Smoke trail cycle.
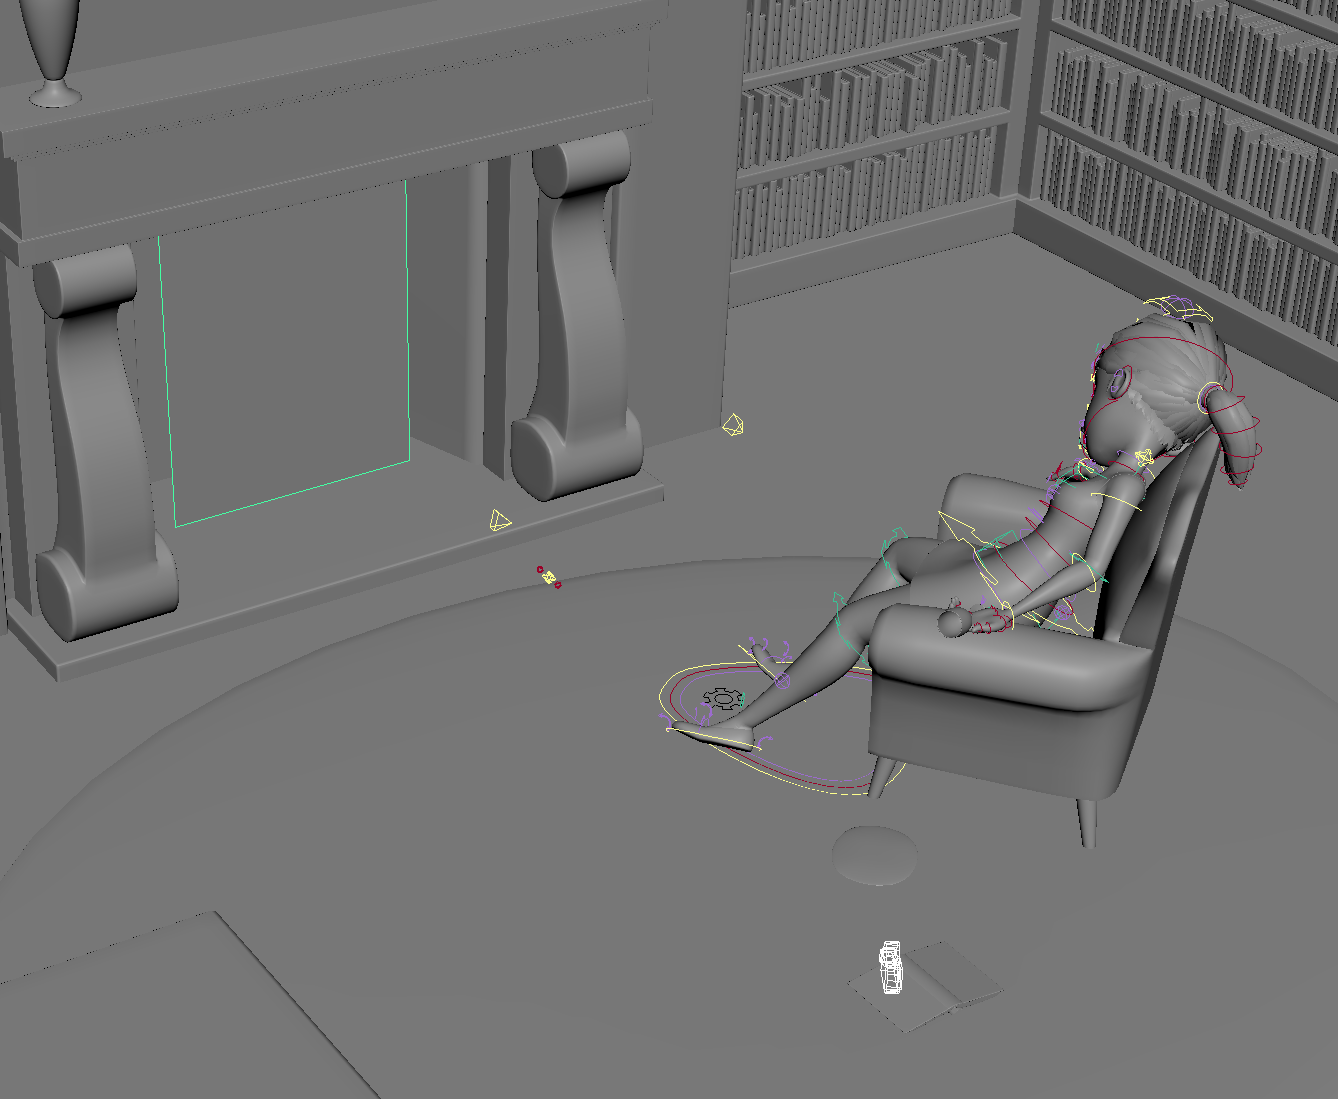
Plane in Maya for the fireplace’s smoke trail sequence.
What happened when the animation didn’t work?
This approach encountered issues where the image sequence did not display correctly on the plane in the render. Additionally, odd clipping effects appeared around the edges of the drawn animation in the viewport, making it look unsatisfactory.
After some time was spent trying to figure out why things were not working as hoped, the decision was made to fix it in post-production: a cliché but likely a solution to the animator’s problem!
If this smoke trail element cannot be fixed in post-production, it will not significantly impact the overall sequence if it is cut from the project.
Animation techniques in Toon Boom
Watch Geoff animate, clean up, and fine-tune elements for The Body in the Library.
This playlist helps you complete Task 11: Complete any animation required for your project below.
Practice
Task 11: Complete any animation required for your project
Animation breathes life into your static models, allowing them to move and interact in ways that tell your story effectively. Completing the animation for your project involves fine-tuning camera movements and actions, ensuring that your sequence flows seamlessly and aligns with your vision. This task is crucial for creating a dynamic and engaging final product that captivates your audience.
What tools or resources do you need for this task?
Make sure you have access to:
- Autodesk Maya
- Maya project files and folders to save and manage your textures
- Your storyboard and animatic to ensure that animations align with the planned sequence and timing.
- Your production schedule
- Your production asset checklist.
What steps should you take to complete this task?
Use the time allocated in your project schedule for this task. Remember to save your work as you go when using Autodesk Maya.
- Revisit the Key Animation module if you need to review how to create animation sequences, applying principles of movement, timing, design, and presentation .
- Watch Geoff’s videos above, observing how he animates, cleans up, and fine tunes elements in The Body in the Library
- Review Your Project Schedule: Refer to your project schedule to allocate sufficient time for animating your assets. Ensure this task is included in your schedule.
- Establish Camera Animation: Begin by animating the camera to determine the shot composition, duration, and pace. This step is essential for setting up the visual narrative and ensuring that each shot captures the desired elements effectively.
- Prioritise Camera Animation: If you have not yet completed your camera animation, focus on this task first. The camera movements are foundational and will guide the overall timing and framing of your sequence.
- Lock the Cameras: Once the camera animation is finalised, lock the cameras to prevent any accidental changes. This will allow you to focus on animating other elements without worrying about unintended modifications to the camera angles.
- Simplify Your Animation: To optimise your remaining production time, keep your animation movements simple. Complex animations can be time-consuming and may not always add significant value. Prioritise clear and effective animation over intricate details.
- Create and Clean Up Rough Animation: Start by creating rough animation for all required elements in your sequence. Once the rough animation is in place, refine and clean up the animation to ensure smooth and polished movements.
- Update Your Production Asset Checklist: As you complete each animation task, update your production asset checklist. Document the progress, note any remaining animation requirements, and track your overall progress.
- Review the Entire Sequence: After completing and refining your animation, review the entire sequence to ensure that all elements work together harmoniously. Make any final adjustments needed to enhance the flow and coherence of your animation.
- Save and Organise Your Files: Save your animation files and maintain an organised folder structure. Maintain an organised file structure to keep your workflow efficient and manageable.
What should you do after completing this task?
- How well does your camera animation support the overall composition and pacing of your shots? Are the movements in your animation clear and effective, or are there areas that need further refinement? Does the animation fit seamlessly within the sequence, and does it contribute to the narrative flow?
- Select the animation files that you are most proud of or would like further feedback on and share screenshots of them to Forum:
- Select your forum thread in Forum: Final Project Sequence.
- Select Reply to your first Forum post.
- Enter the words ‘Task 11: Animation’ in your reply.
- Select the Post your response button, then select Edit in your new reply when it shows up.
- Upload your files using the Attachment field.
- Select Save changes to share your coursework to your forum thread.
- Adjust your project schedule based on the time taken for this task and any new insights gained. Ensure future tasks are scheduled realistically.
- Revisit your production asset checklist to ensure it accurately reflects the current state of your assets and identify any gaps or additional needs.
- Get feedback on this and other learning tasks at the next Live Session – check the Live Session calendar for dates and times.
- Schedule a project check-in with your facilitator to review your progress, get valuable guidance, and plan the next steps. Depending on your progress and the complexity of the tasks, this project check-in can cover a single task or a group of related tasks. Use this opportunity to discuss any challenges and ensure you’re on track with your project.
Once your animation is complete, prepare to set the mood and refine the look of your sequence through strategic lighting! This next stage will add depth and atmosphere to your scenes, highlighting your work and enhancing the visual impact of your project.
Lighting
| Project stage | Project tasks | |
|---|---|---|
| 2. Production | Create a production asset checklist. | |
| Organise and layout your main environment using proxy geometry. | ||
| ASSET CREATION | Model each element in the sequence. | |
| UV create each element in the sequence that needs painted textures. | ||
| Texture each element in the sequence. | ||
| Finalise camera layout and animation of elements. | ||
| CREATE LIGHTING FOR EACH SHOT IN THE SEQUENCE. | ||
| Set up and render each shot in the sequence. | ||
With your animation nearly complete, learn about the lighting workflow, considerations, and types of lighting used in The Body in the Library case study sequence
Tip
Advantages of a single environment
Having one environment provides you with significant benefits when creating lighting for a sequence:
- You only need to light the environment once.
- It also allows the reuse of the same lighting setup for each shot, with minor adjustments where needed.
- It makes it easier to maintain consistent lighting from shot to shot.
Initial lighting workflow
Initially, an indirect lighting workflow was used on the case study sequence, consisting of a single Skydome light and HDRI for quick previews and feedback while completing texturing and animation for The Body in the Library.
However, a switch to a Direct Lighting workflow was made to achieve a more stylised and narrative-based look for the final render.
Key considerations for lighting
The case study’s story is set in the early morning, necessitating low early morning light coming through the two windows on the left of the frame.
Achieving the stylised look: lighting characteristics
Key considerations for lighting the case study scene included:
- Early morning lighting with low, long shadows.
- Crisp lighting color with little warmth.
- A clear view of the room while retaining areas of shadow and variation.
Starting the Lighting Process
Using reference examples
The process began with reviewing lighting examples and references, primarily from the animator’s Pinterest board, a collection of various lighting references for various situations.
For this case study, a clear idea of the desired outcome guided the initial setup, with references revisited as needed.
Render setting adjustments
Before beginning the lighting, render settings for Arnold were set to a low value, i.e. 1 or 2, to speed up rendering and ease the computer's load.
Visibility of heavy objects, such as bookcases, was turned off to lighten the load further.
Direct lighting workflow
Explore
Light your way
For more information about lighting and if you need to refresh your knowledge on direct lighting workflow, refer back to the Lighting and Rendering topic in the Digital Production module, including the video playlist on using the direct lighting workflow using Maya lights. This will help you reinforce your understanding and ensure consistency in your work.
3. Digital Production > 3.5 Lighting and Rendering > 3.5.6 Direct Lighting > Light Room
Breaking down lighting tasks
In the Direct Lighting workflow, the lighting was broken into separate tasks, each carefully created, set, and placed within the environment to achieve the desired effect. The lighting types were:
- Key Light
- Fill or Ambient Light
- Bounce Light
- Bleed Light
- Rim Lighting and other specific lighting effects
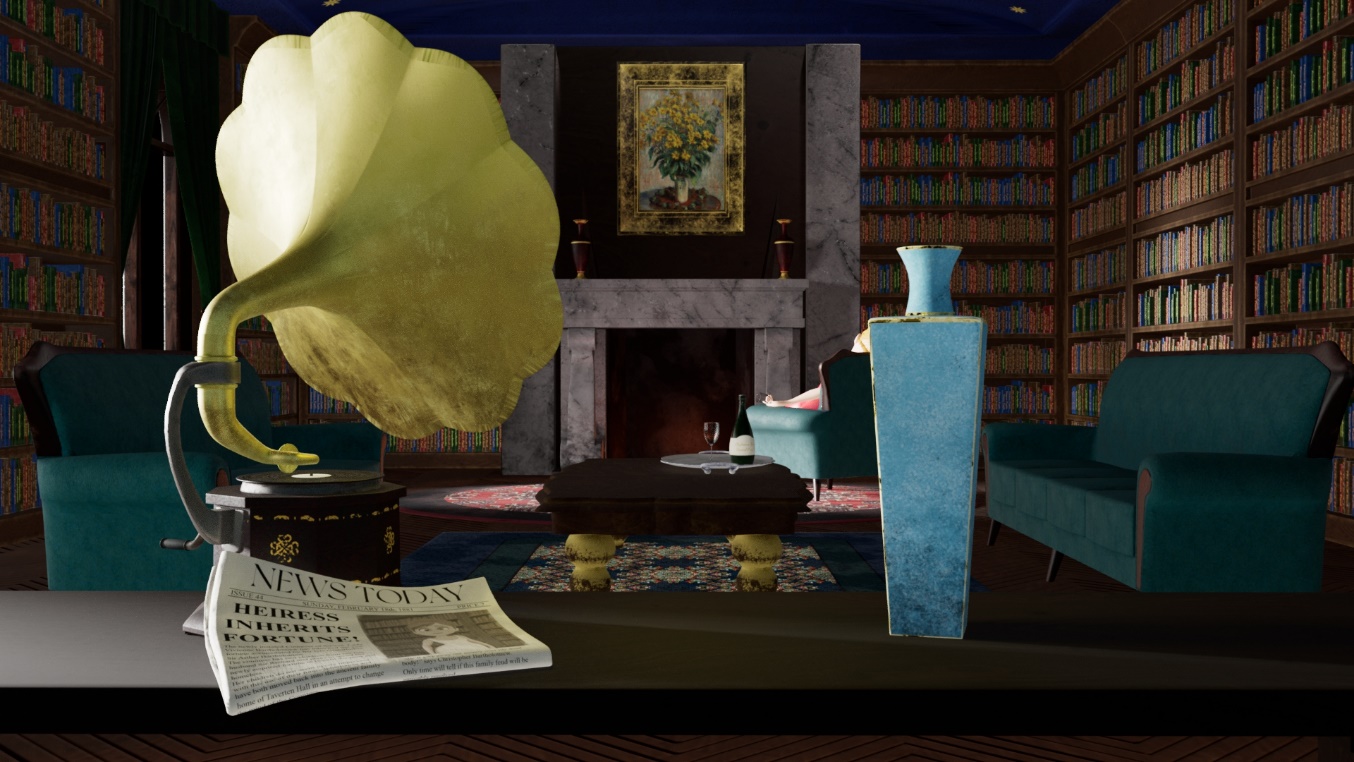
Achieving a stylised look with lighting types.
Duration and complexity
The final lighting setup for The Body in the Library environment took 5-6 hours and included 21 different lights.
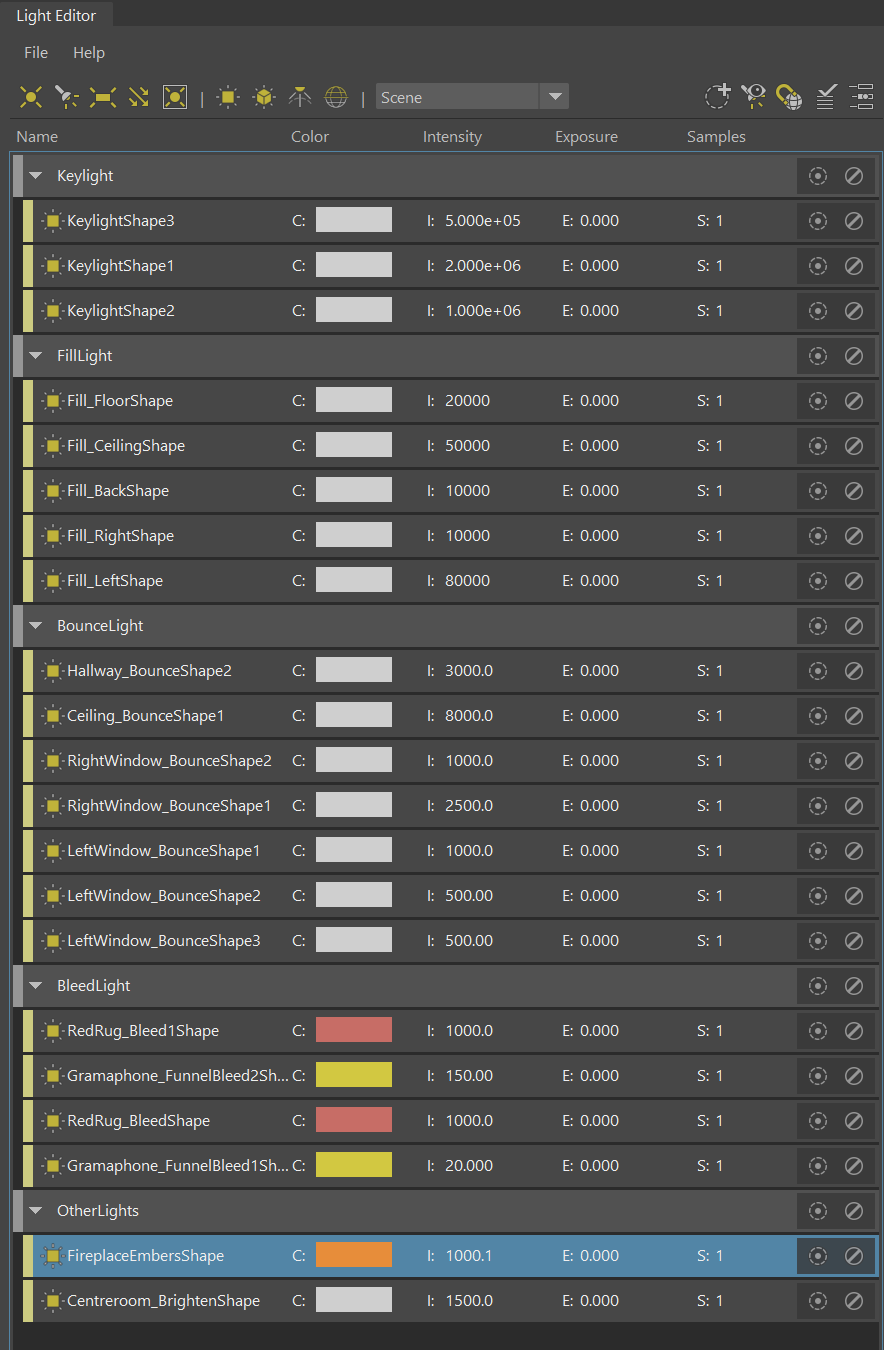
Maya’s Light Editor managing 21 different lights for The Body in the Library.
Practice
Task 12: Light your project’s shots
Lighting plays a pivotal role in conveying the mood and atmosphere of your project. Thoughtful lighting design enhances the visual storytelling by emphasising key elements and creating depth and contrast. By effectively lighting your project’s shots, you ensure that the visuals align with your narrative intent and maintain consistency with the established look of your project sequence.
What tools or resources do you need for this task?
Make sure you have access to:
- Autodesk Maya
- Maya project files and folders to save and manage your work
- Lighting references to ensure that lighting aligns with your visual look
- Your production schedule
- Your production asset checklist.
What steps should you take to complete this task?
Use the time allocated in your project schedule for this task. Remember to save your work as you go when using Autodesk Maya.
- Revisit the 3.5 Lighting and Rendering topic in the previous Digital Production module if you need to review how to work with lighting to make your scenes appear more realistic by simulating natural light sources, shadows, and reflections.
- Review Your Project Schedule: Refer to your project schedule to allocate sufficient time for lighting your assets. Ensure this task is included in your schedule.
- Review Lighting References: Begin by reviewing the lighting references and examples you’ve collected. Use these references to guide your decisions and ensure your lighting is consistent with the overall visual style of your project.
- Select a Lighting Approach: Decide on a lighting approach that best fits the mood and aesthetic of your shot. Choose either
- a more controlled method (i.e. direct lighting, in which Individually placed lights simulate a lighting scheme allowing greater control over the overall composition and lighting scheme – see 3.5.6 Direct Lighting Workflow subtopic), or
- a softer, diffused method (i.e. indirect lighting, using a HDRI image to generate light captured from real-world sources – see 3.5.3 Create and Set Up an Image-Based Light subtopic).
- Set Up Lighting: Begin setting up your lighting within the scene. Consider how each light source will contribute to the overall mood and clarity of your sequence.
- Adjust Render Settings: Optimise your render settings to achieve a balance between quality and efficiency. This includes adjusting resolution, sampling, and shadows to suit your chosen lighting method.
- Fine-Tune Lighting: Refine the intensity, color, and placement of your lights to enhance the scene. Focus on how the lighting interacts with textures and contributes to the narrative and visual style.
- Test Render: Perform test renders to evaluate the lighting. Check for any inconsistencies or areas where the lighting needs improvement. Make necessary adjustments to achieve the desired effect.
- Break Down Lighting Tasks: Break down the lighting process into manageable tasks. Focus on one element or area at a time, ensuring each is lit effectively before moving on.
- Update Your Production Asset Checklist: As you complete the lighting for each shot, update your production asset checklist. Note which shots have been fully lit and any additional lighting tasks that may be needed.
- Final Lighting Review: Once satisfied with your lighting setup, conduct a final review. Ensure that the lighting across all shots is cohesive and consistent with your project’s overall look.
What should you do after completing this task?
- Have you achieved the desired mood and atmosphere in each shot? Are there any areas where the lighting could be improved for better visual impact? Did the lighting align with your visual look development framework?
- Select the lighting renders that you are most proud of or would like further feedback on and share screenshots of them to Forum:
- Select your forum thread in Forum: Final Project Sequence.
- Select Reply to your first Forum post.
- Enter the words ‘Task 12: Lighting’ in your reply.
- Select the Post your response button, then select Edit in your new reply when it shows up.
- Upload your files using the Attachment field.
- Select Save changes to share your coursework to your forum thread.
- Adjust your project schedule based on the time taken for this task and any new insights gained. Ensure future tasks are scheduled realistically.
- Revisit your production asset checklist to ensure it accurately reflects the current state of your assets and identify any gaps or additional needs.
- Get feedback on this and other learning tasks at the next Live Session – check the Live Session calendar for dates and times.
- Schedule a project check-in with your facilitator to review your progress, get valuable guidance, and plan the next steps. Depending on your progress and the complexity of the tasks, this project check-in can cover a single task or a group of related tasks. Use this opportunity to discuss any challenges and ensure you’re on track with your project.
With the lighting perfected, you're ready to move on to Rendering. This stage will involve bringing together all elements of your project into the final frames, ensuring that everything from textures to animation looks polished and professional. Dive into rendering and bring your project closer to completion!
Rendering
| Project stage | Project tasks | |
|---|---|---|
| 2. Production | Create a production asset checklist. | |
| Organise and layout your main environment using proxy geometry. | ||
| ASSET CREATION | Model each element in the sequence. | |
| UV create each element in the sequence that needs painted textures. | ||
| Texture each element in the sequence. | ||
| Finalise camera layout and animation of elements. | ||
| Create lighting for each shot in the sequence. | ||
| SET UP AND RENDER EACH SHOT IN THE SEQUENCE. | ||
The final asset creation step of the production stage is to set up render layers and passes for each shot and send them to render. In this section, find out how this step was applied to The Body in the Library.
Important
Avoid costly rendering delays
When rendering a shot, it is important to check the setup thoroughly before sending the shot to render. Your renders will likely take from a few hours to as long as a few days to complete, so make sure that you check the following:
- The render camera is correct for each shot.
- The correct number of frames is set for each shot.
- The correct geometry and lights are included in your render passes.
- All your textures are present and correct.
- You have set up all the render passes you need for post-production.
Render File Types
When choosing a file type to render your shots you need to select one that supports an alpha channel to layer the passes over each other in the compositing stage.
Industry standard
The current industry standard for rendering is the .EXR file type.
.EXR is a high-resolution image file format designed specifically for visual effects by the artists at ILM. The file type supports multiple information channels so you can have several passes in a single file.
Considerations
One thing to remember is that .EXR files are in a 32-bit image format (standard images are 8-bit) and can take up a large amount of space on your computer and consume a lot of memory. It would be worthwhile testing to see if your computer can handle this format first before committing to using it full-time.
Alternative image formats
If you would like an alternative image format that is not as demanding on system resources, then any of the following image formats would also work for compositing:
- .PNG
- .TIFF
- (.IFF)
Render quality
Another area to test before you send your shot to render is the quality settings of the render itself. For the Arnold render engine (also used in the case study), you control the render quality using samples both in the render settings window and for each light.
Testing settings
Before deciding on which settings to use, test out several different combinations, noting down what the settings are and how long each render took. Then observe the results and compare the images.
Render settings
For The Body in the Library, a final choice of settings that balance render time and image quality was determined. The settings selected were as follows:
| Sample type | Value |
|---|---|
| Camera samples | 5 |
| Diffuse samples | 5 |
| Specular samples | 5 |
| Transmission samples | 5 |
| SSS samples | 0 |
| Volume Indirect samples | 0 |
Render time
The render time for each frame at these settings on the animator’s machine was 34 seconds. Given more time, a more optimal combination could have been found. However, these settings seemed to be a good compromise between image quality and speed of render.
Still, using these settings to render each shot would take several hours, so renders were run over the weekend and at night if required.
Tip
Stay present during renders
When running renders, it is a good idea to be present and available while they are running. The rendering process can sometimes go wrong and crash or lock up your computer system, especially after a machine has been rendering for a long time.
Basic Render Pass Setup
The basic render pass setup for The Body in the Library included three different passes for compositing in post-production:
- Main Colour or Beauty pass
- Z Depth pass
- Ambient Occlusion pass
A Masking pass can also be rendered to isolate specific pieces of geometry in each shot.
Swipe these four images to see the four different passes mentioned above as rendered out of Maya:
Note: Some image adjustments were made on the Z Depth pass and the Masking pass to highlight the data contained in the image file. The raw files do not look like the adjusted examples.
The raw Depth pass without any image adjustments would appear as a flat white image, and the Masking pass contains all the image information within the image’s alpha channel.
Uses of render passes
- Depth pass: The Depth pass is used mainly to create depth of field for lens effects and colour grading; it can also be used to simulate dense fog or mist.
- Ambient Occlusion: Ambient occlusion refers to the areas of darkness where light cannot illuminate between surfaces as they come closer together.
Explore
A rendering refresher
For more information about rendering and to refresh your knowledge on setting up render passes, refer back to the Lighting and Rendering topic in the Digital Production module. This will help keep your work on point.
3. Digital Production > 3.5 Lighting and Rendering > 3.5.3 Create and set up an image-based light > How to set up render layers
Watch Geoff demonstrate the batch rendering process for Maya and refer to some important updates on the render process.
This video (3.11m) helps you complete Task 13: Render your project’s shots at the end of this section.
Production issues
Allocate time in the rendering schedule to fix any problems during the render.
For example, an unexpected problem was encountered with the last shot of The Body in the Library sequence. One of the lights was placed too close to the geometry, causing a hot spot to appear on the ground in the Colour pass.
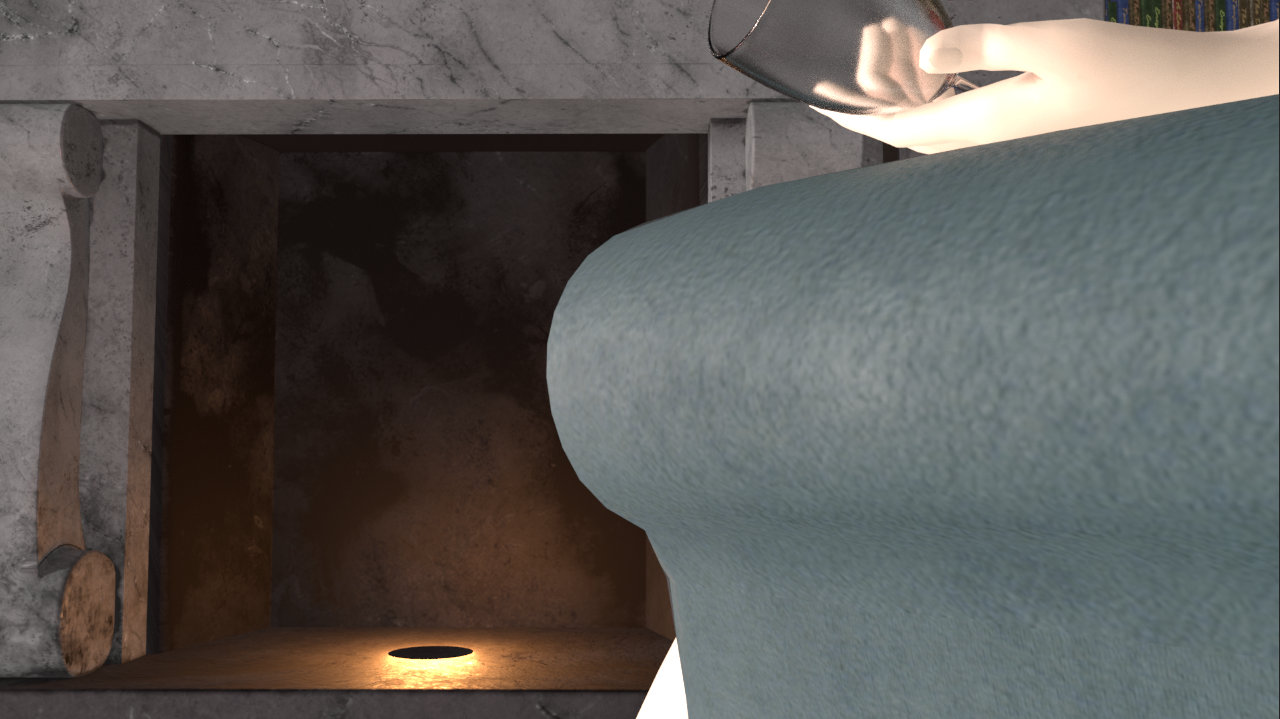
Leaving this issue in the finished project was not satisfactory, so unfortunately, the lighting in the scene had to be adjusted to fix the problem, and the last shot’s Colour pass had to be rendered again.
Duration
The total render time for all the shots in The Body in the Library and their respective passes – including fixes – took approximately 56 hours.
Practice
Task 13: Render your project’s shots
Rendering is the final production step in creating the visual elements of your project, where all your work in modelling, texturing, lighting, and animation comes together. This task is crucial because the quality of your renders will directly impact the final look and feel of your project sequence. Taking the time to carefully set up and check each render ensures that your efforts in the production stage are reflected accurately in the final output.
What tools or resources do you need for this task?
Make sure you have access to:
- Autodesk Maya
- Maya project files and folders to save and manage your renders
- Sufficient storage: Rendering produces large files, especially with formats like .EXR. Ensure you have enough storage space to accommodate these files.
- Your production schedule
- Your production asset checklist.
What steps should you take to complete this task?
Use the time allocated in your project schedule for this task. Remember to save your work as you go when using Autodesk Maya and to check back regularly with your render.
- Revisit the Lighting and Rendering subtopic in the previous Digital Production module if you need to review how to produce high quality and realistic renders.
- Review Your Project Schedule: Refer to your project schedule to allocate sufficient time for rendering your shots. Ensure this task is included in your schedule.
- Prepare Your Render Setup:
- Ensure that your render camera is correctly assigned for each shot.
- Double-check the frame range for each shot to ensure the correct number of frames are set to render.
- Confirm that the appropriate geometry and lights are included in your render passes.
- Verify that all textures are present and applied correctly to your assets.
- Set up all necessary render passes, such as diffuse, occlusion, and masking passes, for post-production compositing.
- Choose the Correct File Type: Select a file format that supports an alpha channel, such as .iff, .png , or .EXR, which is the industry standard for visual effects and compositing and allows you to store multiple information channels in a single file, making it ideal for complex projects.
- Test Your Render Settings:
- Test different render settings before committing to a final render. Focus on the quality settings in the render engine (such as Arnold) by adjusting samples in both the render settings and for each light source.
- Note down the settings used and the time taken for each test render. Compare the results to find the optimal balance between quality and render time.
- Monitor Your Renders:
- Begin rendering your shots and stay present as much as possible during the process. Rendering can be resource-intensive, and it is essential to be available to troubleshoot any issues, such as crashes or slowdowns.
- Be prepared to allocate extra time in your schedule to fix any problems that arise during the rendering process.
- Update Your Production Asset Checklist: As you progress with rendering each shot, update your production asset checklist to reflect the completion of renders. Note any issues encountered and how they were resolved to inform future projects.
What should you do after completing this task?
- Have all the renders met the visual quality you aimed for? Were there any challenges during the rendering process that could have been mitigated with better preparation? What could be improved next time to streamline the process?
- Adjust your project schedule based on the time taken for this task and any new insights gained. Ensure future tasks are scheduled realistically.
- Revisit your production asset checklist to ensure it accurately reflects the current state of your assets and identify any gaps or additional needs.
- Get feedback on this and other learning tasks at the next Live Session – check the Live Session calendar for dates and times.
- Schedule a project check-in with your facilitator to review your progress, get valuable guidance, and plan the next steps. Depending on your progress and the complexity of the tasks, this project check-in can cover a single task or a group of related tasks. Use this opportunity to discuss any challenges and ensure you’re on track with your project.
With your shots fully rendered, you're now just a step away from seeing your project come together in all its glory. Get ready to move into Post-production, where you'll add the final touches and polish your work to perfection!

Step into post-production, where you apply the finishing touches to your final project sequence. This subtopic will guide you through refining and polishing your work to ensure a professional and cohesive final sequence.
Engage with compositing, editing, adding titles, and incorporating sound. Learn how to seamlessly integrate visual and audio elements, troubleshoot any remaining issues, and prepare your animation for its final cut. This phase is crucial for bringing all your hard work together and delivering a polished, impactful project.
Compositing
| Project stage | Project tasks | |
|---|---|---|
| 3. Post-production | COMPOSITE EACH SHOT IN THE SEQUENCE. | |
| Edit the sequence together. | ||
| Add titles for the sequence. | ||
| Add sound to the sequence. | ||
In this composite task, you take all the raw files for each shot and combine them into a single cohesive shot.
You were introduced to compositing in the Foundations module. In this section, explore compositing in more depth and find out how to use all the raw data from the rendering you completed at the end of the production stage.
Case Study
Following the compositing workflow used with The Body in the Library
When compositing, stages are worked through slowly, building up the shot. This method helps keep things organised and prevents confusion. The steps followed to composite The Body in the Library shots were:
- Importing media
- Arranging the passes on the timeline
- Revealing and using the depth information
- Creating any keyframes required for the shot
- Masking
- Colour grading
- Final check and adjustments/fixes
- Export setup and render.
Each step is detailed in this topic, with video demonstrations at the end of each corresponding section for your reference and to help you composite your shots. You can also come back here at any point to access the videos within this Compositing workflow playlist for easy reference:
You can also view and download the case study’s Adobe After Effects project file to explore the compositing techniques and settings used for The Body in the Library.
1. Importing media
1.1 Creating a new composition
| Case Study Step | Description | |
|---|---|---|
| 1.1.1 | Create a New Composition | In After Effects, create a ‘New Composition’. |
| 1.1.2 | Open Composition Settings Window | Set the frame rate and frame size to match the animation. This information can be entered manually or selected from the preset dropdown menu. |
 |
||
| 1.1.3 | Name the Composition | Give the composition a meaningful name and select OK. |
1.2 Importing rendered media
| Case Study Step | Description | |
|---|---|---|
| 1.2.1 | Open Import Media Player | Use one of the following three methods. |
| Method 1 | Go to File > Import > Multiple Files (Ctrl+Alt+I). | |
|
Method 1. |
||
| Method 2 | Right-click in the project area, select Import, and choose from the options. | |
|
Method 2. |
||
| Method 3 | Double-click on the project area. | |
| 1.2.2 | Select Image Sequence | Navigate to where the image sequence is saved and select the sequence’s first image. |
| 1.2.3 | Ensure PNG Sequence Option is Checked | Before clicking ‘Import’, ensure the correct image (e.g. PNG, JPG etc.) sequence option is checked. |
|
Ensure relevant Sequence Option is checked. |
||
| 1.2.4 | Import Media | Select ‘Import’. The first sequence will appear in the project window along with the composition. |
|
First sequence appears in the project window along with the composition. |
||
| 1.2.5 | Import Remaining Media | Import the rest of your media into the shot. |
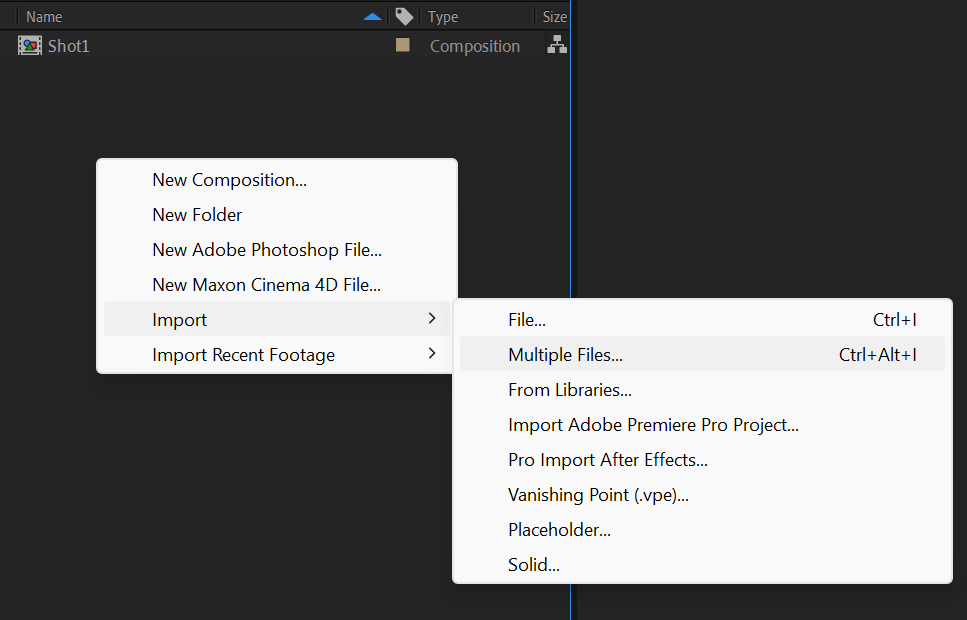
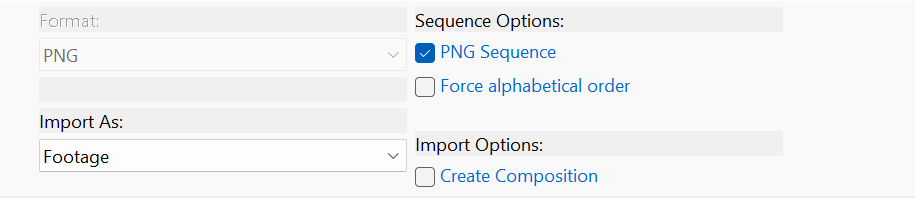
Frame rate issue identified in The Body in the Library composite
Four passes rendered by Maya and a sequence of animated effects rendered by Toon Boom Harmony were used for the case study’s shot.
Before the footage was arranged on the timeline, it was noted (by selecting one of the image sequences - the information appears in the Project information area at the top left of the screen) that the media was imported at the wrong frame rate (30fps):
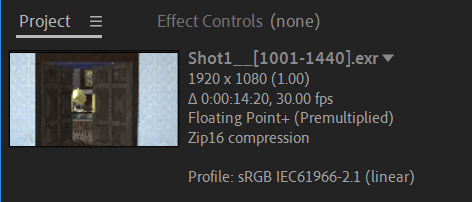
That is because the default import settings were set to 30fps.
1.3 Checking and adjusting the frame rate
| Case Study Step | Description | |
|---|---|---|
| 1.3.1 | Check Frame Rate |
Select one of the image sequences and note the frame rate (information appears in the Project Information area at the top left of the screen). If the media was imported at the wrong frame rate (30fps), adjust it (next step). |
| 1.3.2 | Open Interpret Footage Options | Select the image sequence, right-mouse click and select Interpret Footage>Main (Ctrl+Alt+G) from the menu: |
|
Open Interpret Footage options. |
||
| 1.3.3 | Adjust and Set Frame Rate | In the Interpret Footage window, adjust the frame rate back to 25 fps and select OK. |
|
Interpret Footage window. |
||
| 1.3.4 | Set Looping Options | You can also set looping options for the sequence, useful for creating the loop for the smoke effect. |
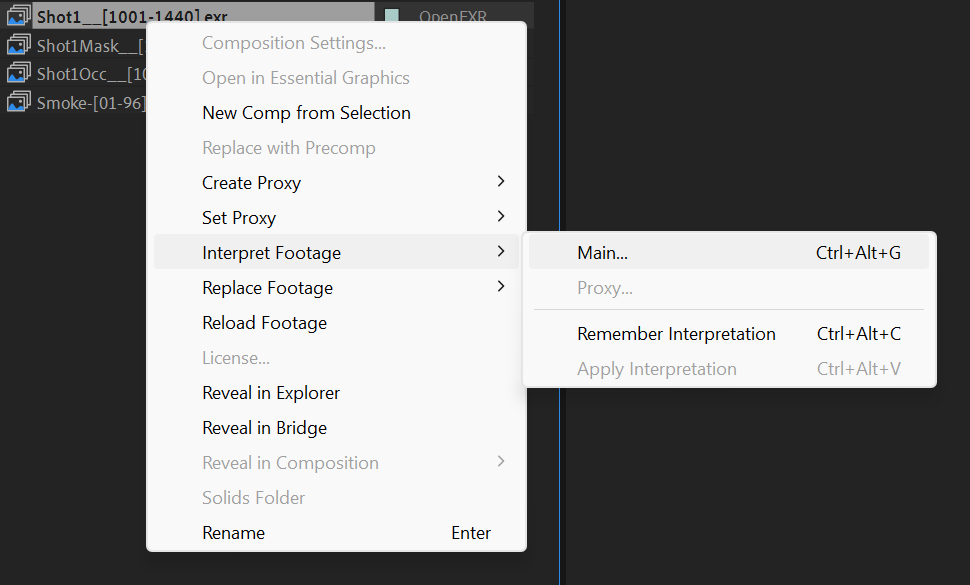
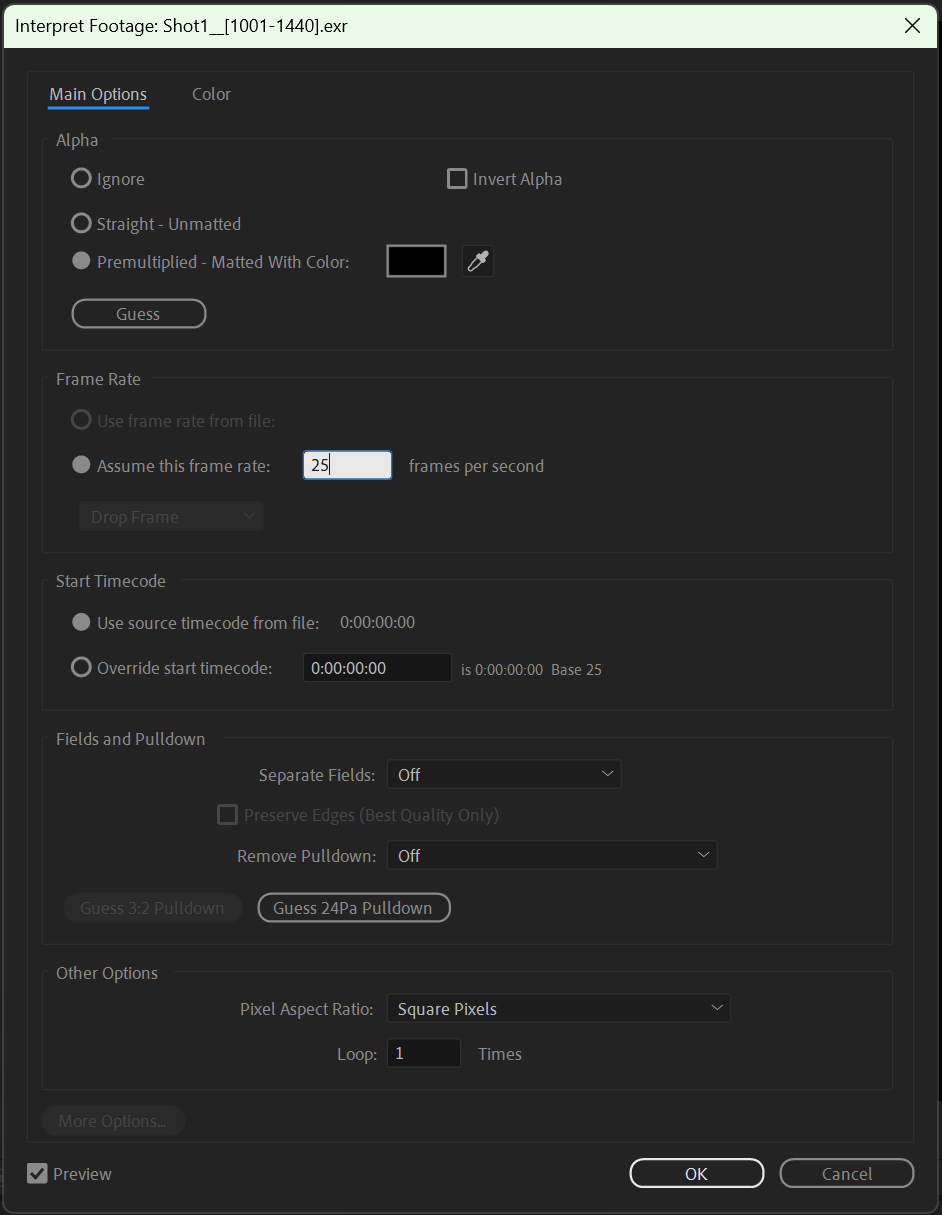
Important
Ensure consistent timing and avoid speed errors
Check the frame rate for each image sequence and ensure that they are all set to 25 fps.
Suppose the sequences remain at 30 fps? In that case, the animation will look faster than you originally intended, and the shot will be shorter in duration.
With all the image sequences imported and frame rates corrected, drag and drop all media onto the timeline.
Watch Geoff (6:04m) use Adobe After Effects to create a new composite and import media.
2. Arranging the passes on the timeline
| Case Study Step | Description | |
|---|---|---|
| 2.1.1 | Arrange the Footage | Drop the footage on the timeline and arrange according to its order in the project window. |
|
Arrange the footage on the timeline. |
||
| 2.1.2 | Order the Layers |
|
|
Order the layers. |
||
| Adjust the occlusion effect strength using the Transparency (T) attribute of the Occlusion layer. | ||
|
Adjusting the occlusion effect strength. |
||
| 2.1.3 | Manage Visibility | Temporarily turn off the visibility for the Smoke and Mask sequences. |
| 2.1.4 | Position the Depth Layer | Place the Depth layer at the top-most position of the composite. |
|
Position the Depth layer. |
||


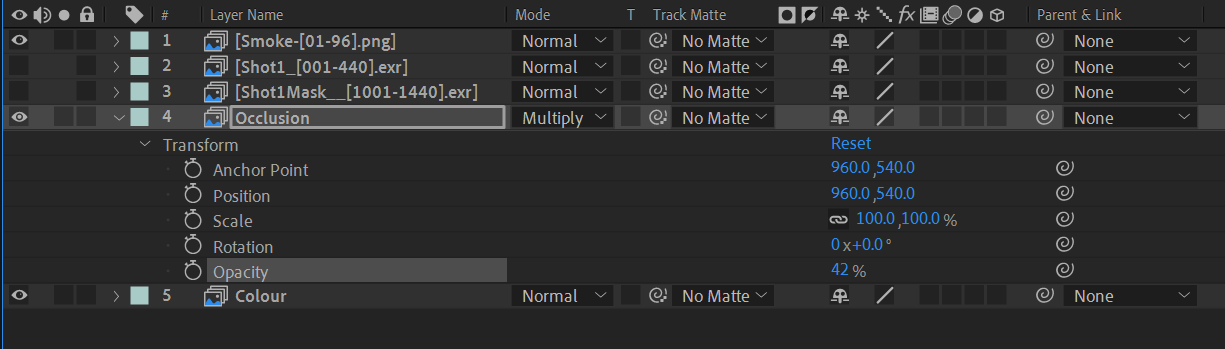

Watch Geoff (5:18m) use Adobe After Effects to arrange the render passes on the timeline.
3. Revealing and using the Depth information
The Depth layer was worked on next in the case study’s composite. The image in the layer looked pure white, and no depth information in the image could be seen.
3.1. Revealing the Depth information
To bring out the depth information, the following steps were executed:
| Case Study Step | Description | |
|---|---|---|
| 3.1.1 | Add Levels Effect | Select the Depth layer and go to Effect > Colour Correction > Levels to add the Levels effect. |
|
Add the Levels effect. |
||
| 3.1.2 | Adjust Input Values | Set the forward and back range using the input black and input white values. Adjust these values on a scene-by-scene basis to match the depth of the shot. |
| 3.1.3 | Aim for Full Range | Adjust the values to achieve as much range in the image’s greyscale as possible from front (white) to back (black). |
|
Adjust the values. |
||
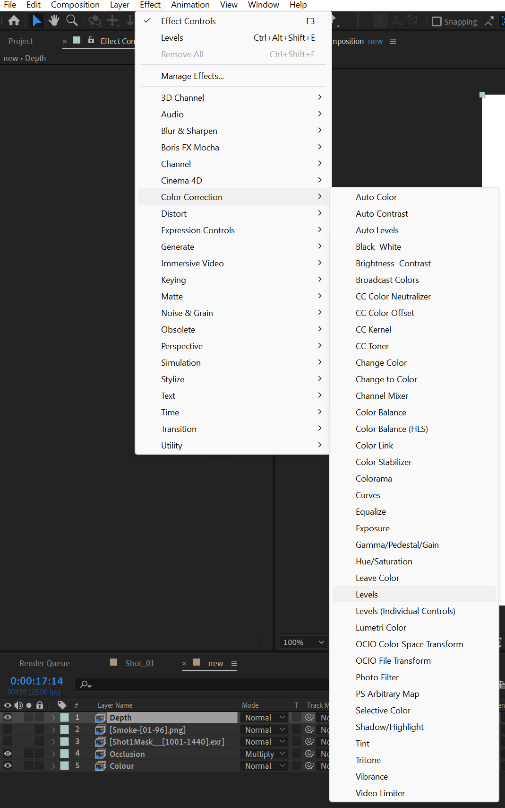
3.2. Using the Depth information
As the Depth information became visible, it was used to drive a Lens Blur effect in the scene. To create the effect, the following steps were executed:
| Case Study Step | Description | |
|---|---|---|
| 3.2.1 | Add Adjustment Layer | Right-click in the grey area below all layers, choose New > Adjustment Layer to add an adjustment layer. |
| 3.2.2 | Position Adjustment Layer | Move the Adjustment layer to appear underneath the Depth layer. |
|
Move the Adjustment layer. |
||
| 3.2.3 | Set Track Matte | Use the track matte options to select the Depth pass as the Matte layer. |
|
Use the track matte options. |
||
| 3.2.4 | Add Lens Blur Effect | Go to Effect > Blur & Sharpen > Camera Lens Blur to add the Lens Blur effect to the Adjustment layer. |
| 3.2.5 | Configure Blur Map Options | In the Camera Lens Blur effect, set the Blur Map to the Depth layer and enable Effects and Masks. |
|
Configure Blur Map options. |
||
| 3.2.6 | Adjust Lens Blur Effect | Adjust the Blur Focal Distance to move the focus point of the blur through the scene and use Blur Radius to adjust the strength of the blur. |

Watch Geoff (7:23m) use Adobe After Effects to reveal and use the Depth information.
4. Creating any keyframes required for the shot
This next step involved working on the smoke effect.
4.1 Footage and animation adjustments
The footage of the smoke animation was lengthened by adding loops to the Smoke layer and adjustments made to the animation.
| Case Study Step | Description | |
|---|---|---|
| 4.1.1 | Add Loops | Use the Interpret Footage options to add loops to the Smoke layer. |
|
Adding loops with Interpret Footage options. |
||
| 4.1.2 | Scale and Position | Scale down the smoke and position it into the fireplace. |
| 4.1.3 | Create Keyframes |
Due to camera movement, animation keyframes needed to be created to match that camera movement as much as possible. Open the Transform attributes of the layer by selecting the small arrow next to the layer. |
|
Open the layer’s Transform attributes. |
||
| 4.1.4 | Reveal Transform Channels | Click the arrow next to the Transform header to reveal individual Transform channels. |
|
Reveal individual Transform channels. |
||
| 4.1.5 | Add Keyframes | Select the stopwatch next to the desired attribute to add animation keyframes (see next table). |
|
Add keyframes with stopwatch icon. |
||
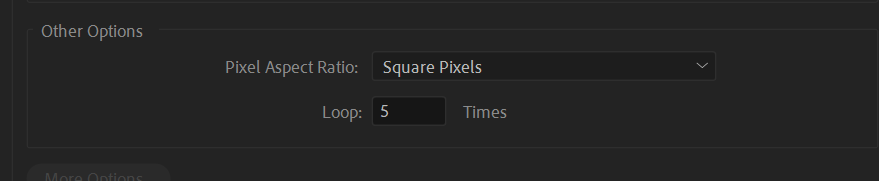

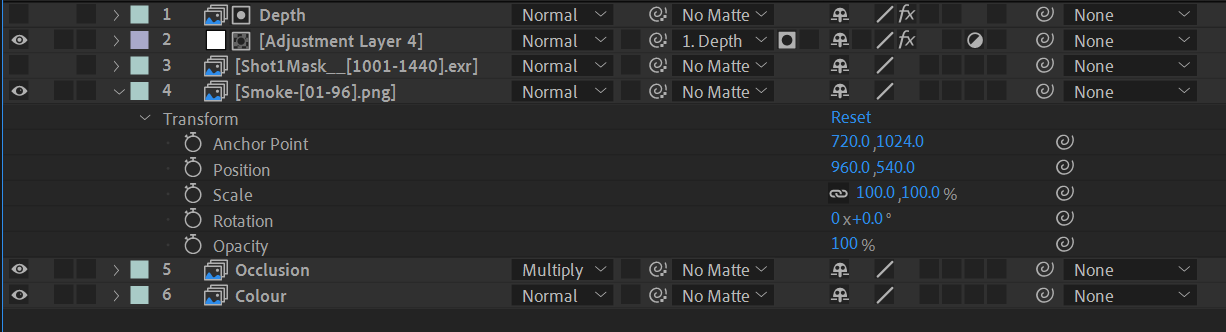
4.2 Adding and managing keyframes
| Case Study Step | Description | |
|---|---|---|
| 4.2.1 | Add Initial Keyframes | Select the stopwatch to automatically create a keyframe on the timeline, marked by a diamond shape. |
| 4.2.2 | Add More Keyframes | Select the diamond-shaped button to the left of the layer attribute to add more keyframes. |
| 4.2.3 | Navigate keyframes | Use the triangular buttons on either side of the Add a Keyframe button to jump forwards and backwards between keyframes. |
4.3 Integrating Smoke Animation into The Body in the Library composite
To match the animation of the smoke to the camera movement, it was necessary to animate the position and scale of the layer so that the smoke gets slightly larger and drops in the frame as the camera moves closer into the room.
While creating these keys, the animation was adjusted several times and areas where the animation appeared to slide over the ground surface were identified:
| Case Study Step | Description | |
|---|---|---|
| 4.3.1 | Adjust Animation | Adjust the animation to correct areas where the smoke appeared to slide over the ground. |
| 4.3.2 | Add Ease to Keyframes |
Select the keyframes in the timeline, then choose Keyframe Assistant > Easy Ease Out to add an ease at the beginning of the shot. This created an ease at the beginning of the shot and helped the movement of the smoke element match the camera better. |
|
Add Ease to Keyframes. |
||
| 4.3.3 | Apply Blur Effect | Add a Blur effect to the smoke to soften sharp edges. |
| 4.3.4 | Adjust Transparency | Use the Transparency attribute of the layer to make the smoke appear more transparent. This and the Blur effect (previous step) further integrated the smoke element into the shot. |

Watch Geoff use Adobe After Effects to work on the smoke effect and create keyframes.
5. Masking
At this point, the smoke appears as if it is positioned on top of the shot and not inside it. So, a way needs to be found to mask both the:
- top part of the shot, where the smoke should be disappearing up the chimney
- bottom part of the shot, where the smoke overlaps the table, tray, and wine bottle.
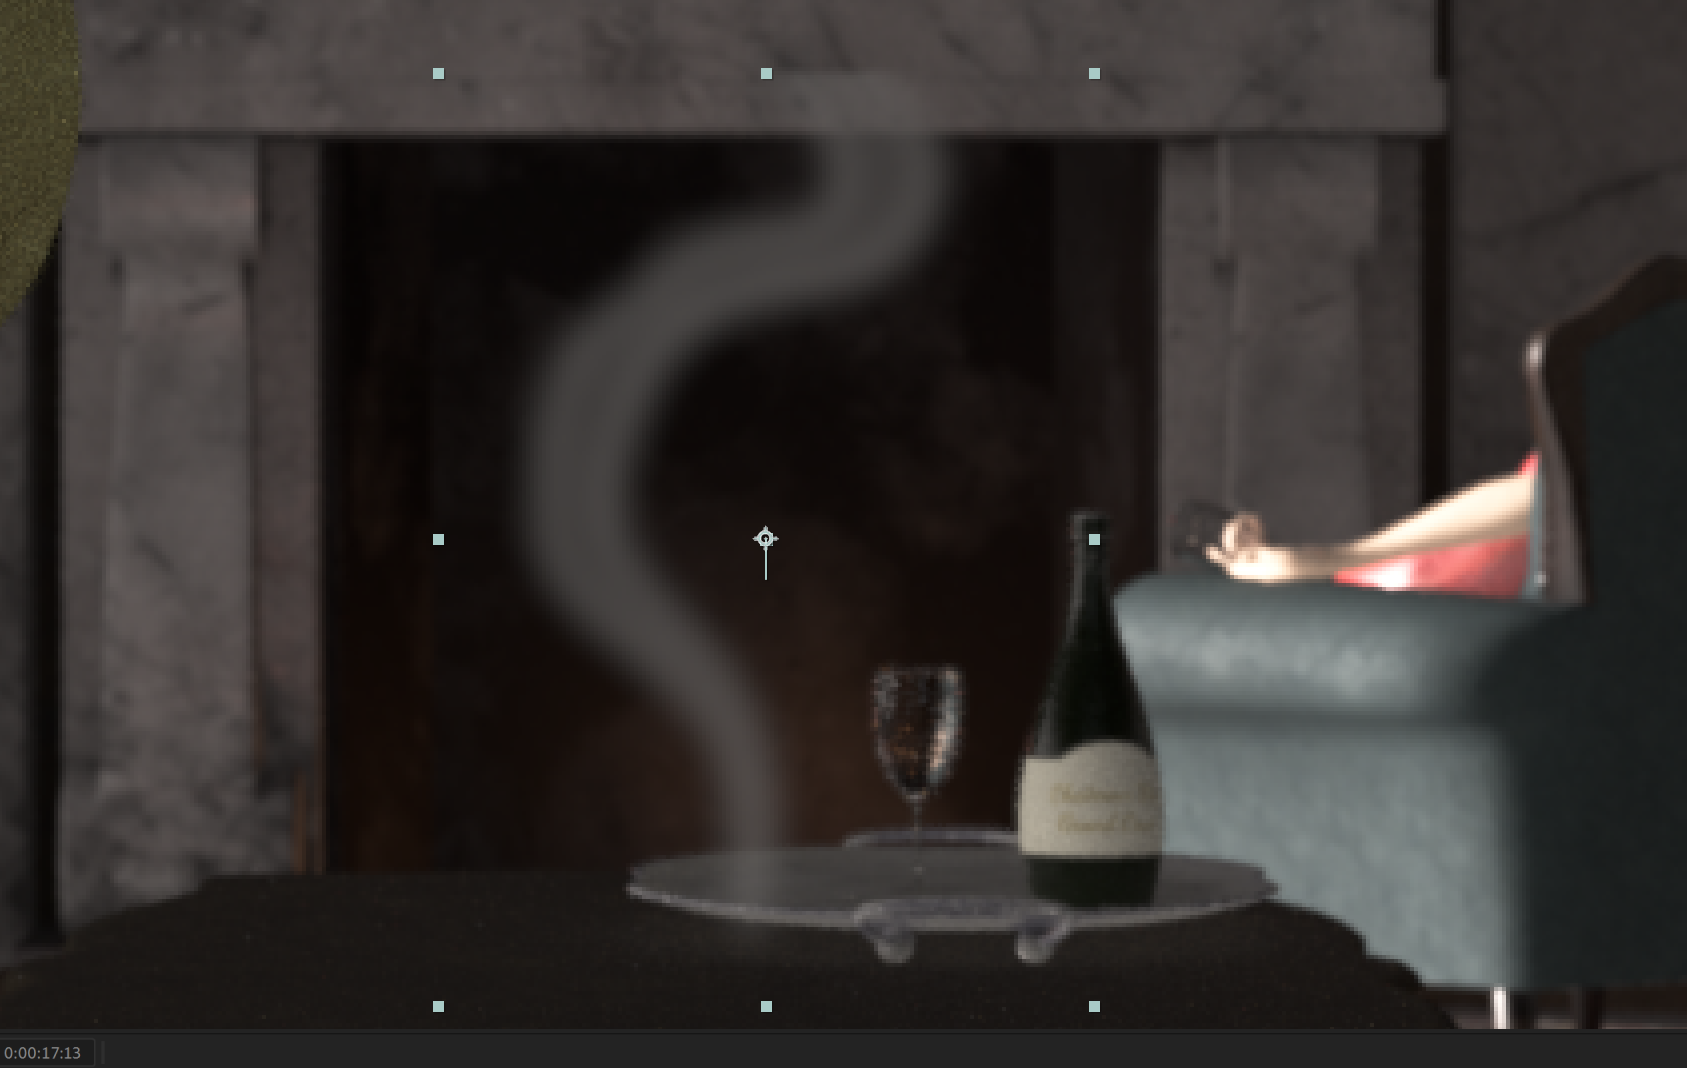
Smoke before masking.
This process was made easier by including a Mask render pass in the render layers:
| Case Study Step | Description | |
|---|---|---|
| 5.1 | Use Mask Render Pass | Use the Mask render pass which includes the shot’s table, tray, wine bottle, wine glass, and mantle. |
| 5.2 | Import Mask Layer | Import the Mask layer into After Effects to mask out the relevant parts of the shot. |
| 5.3 | Position Mask Layer | Move the Mask layer above the Smoke layer in the timeline: |
 |
||
| 5.4 | Apply Track Matte | Use the track matte options to set the Mask layer as the track matte for the Smoke layer: |
 |
||
| 5.5 | Invert Mask | Select the Invert mask button if the Mask is cutting out the wrong part of the Smoke layer: |
 |
||
Watch Geoff (7:21) use Adobe After Effects to create a Mask.
6. Colour grading
The next step in the case study’s composite was to perform a final colour grade over the entire shot to make everything appear more cohesive.
An Adjustment layer to grade shots is often used as it is easy to use and affects everything it in the layer stack. Only effects must be added to the adjustment layer and not to all the shot’s individual layers.
Many different effects and effects combinations that can be used to grade shots. Commonly used effects include:
| Effect category | Effect |
|---|---|
| Colour correction | Hue and Saturation |
| Colour correction | Curves |
| Colour correction | Photo Filter |
| Colour correction | Tint |
| Colour correction | Levels |
| Colour correction | Exposure |
| Stylize | Glow |
Practice
Unleash your creativity: Experiment with effects to craft unique colour grading looks
Experiment with different effects and effect combinations to create your own colour grading effects. Tailor your approach to achieve a great look for your sequence!
Watch Geoff (14:45m) use Adobe After Effects to create a colour grade.
7. Final check through and make adjustments/fixes
Check through your shot, looking for any obvious errors. Things to look out for are:
- Animation sliding around in the composite.
- Animation not appearing as if it was shot using the same camera.
- Effects disappearing or appearing suddenly.
- Anything that seems out of place.
8. Export setup and render
Once you are happy with the shot, export the composite as a new image sequence, which you will use to edit your sequence together:
| Case Study Step | Description | |
|---|---|---|
| 8.1 | Prepare for Export | Ensure that the main composition is selected in the timeline. |
| 8.2 | Add to Render Queue | Go to Composition > Add to Render Queue (Ctrl+M) to create a render job. A render job will be created in the Render Queue area at the bottom of the screen: |
|
Render Queue area. |
||
| 8.3 | Configure Output Module | In the Render Queue, select the blue text next to Output Module to adjust settings. |
| 8.4 | Set Render Settings | In the pop-up window, configure the format, video output, and audio options. |
| 8.5 | Choose Destination Folder | Click the blue text next to Output To to select a destination folder. |
| 8.6 | Finalise Export | Review the settings and click the Render button to start exporting. |
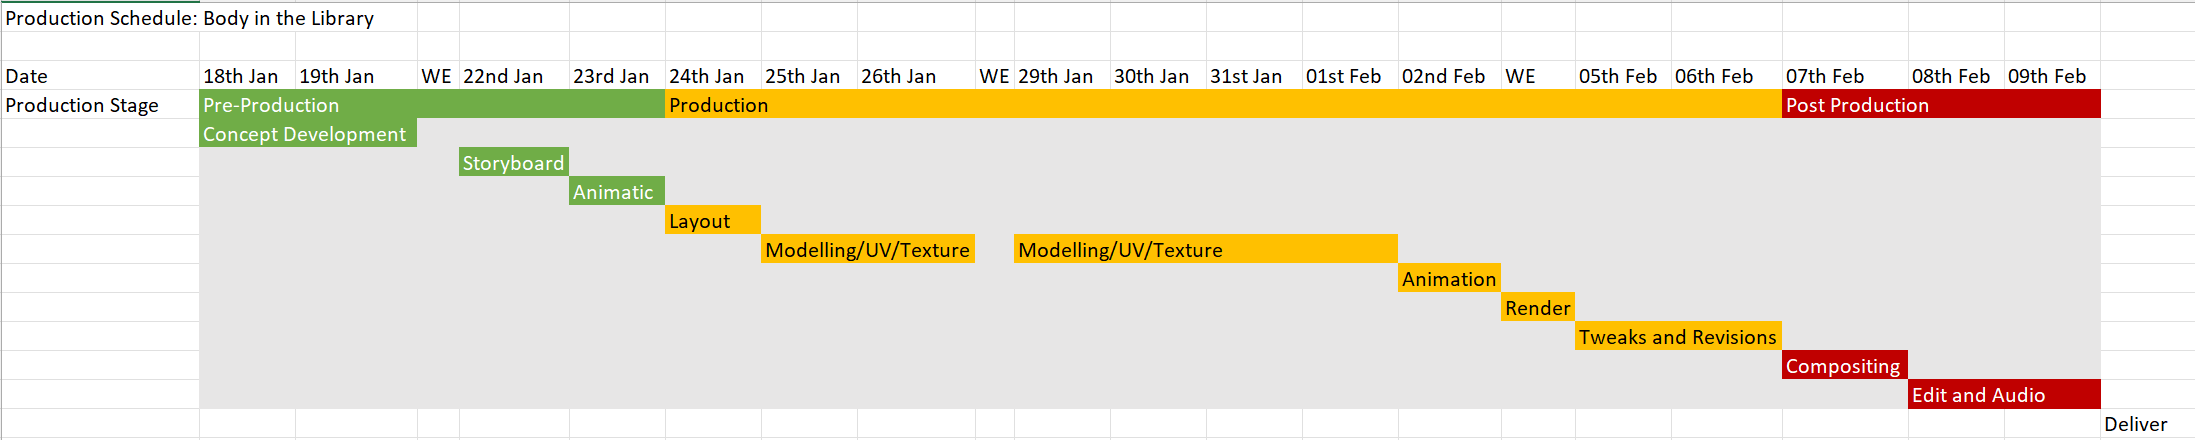
Watch Geoff (4:13m) use Adobe After Effects to export the case study’s composite.
Composite your project’s shots
Practice
Task 14: Composite your project’s shots
Compositing marks the beginning of the post-production stage and is where all the raw data from your rendering work comes to life. This step involves using Adobe After Effects to combine and refine your rendered passes, enhancing your shots’ visual quality and coherence. By expertly layering and blending these elements, you can create a polished, professional final product that aligns with your project's vision.
What tools or resources do you need for this task?
Make sure you have access to:
- Adobe After Effects
- All rendered passes from previous production stage.
- Reference materials: Any visual look development references that guide the style of your project
- Your production schedule
- Your production asset checklist.
What steps should you take to complete this task?
Use the time allocated in your project schedule for this task. Remember to save your work as you go when using Adobe After Effects.
- Revisit the Foundations module’s Compositing topic if you need to review how to combine your rendered passes.
- Watch Geoff’s playlist at the start of the Compositing section, carefully observing how he uses Adobe After Effects to progress through the compositing workflow.
- Review Your Project Schedule: Refer to your project schedule to allocate sufficient time for compositing your rendered passes . Ensure this task is included in your schedule.
- Import Media: Begin by importing all your rendered passes into Adobe After Effects. Verify that each file is correctly linked and that no passes are missing.
- Arrange Passes on the Timeline: Organise your passes on the timeline in the correct order to achieve the desired visual effect. Proper layering is essential for a seamless and professional look.
- Use Depth Information: If depth passes are available, reveal and use them to add depth-of-field effects or enhance the three-dimensionality of your shots.
- Create Keyframes: Set up keyframes as needed to animate elements within your shots. Adjust layer properties or effects over time to achieve the desired motion and transitions.
- Apply Masking: Use masking to isolate or highlight specific areas of your shot. This technique is useful for blending elements smoothly or concealing unwanted details.
- Colour Grading: Apply colour grading to unify the look of your shots. Ensure consistency in colour tones and achieve a cohesive aesthetic throughout your project.
- Final Check and Adjustments: Perform a thorough review of your composition. Make final adjustments to ensure that all elements integrate well and that the final output meets your quality standards.
- Export Setup and Render: Configure your export settings, selecting the appropriate file format and resolution. Render your composite to produce the final version of your project.
What should you do after completing this task?
- How effectively did compositing integrate the different render passes? Were there any challenges in achieving a unified look across all shots? Did the final composition align with your project's aesthetic goals?
- Select the composites that you are most proud of or would like further feedback on and share screenshots or exported sequences (.mp4) of it to Forum:
- Select your forum thread in Forum: Final Project Sequence.
- Select Reply to your first Forum post.
- Enter the words ‘Task 14: Composite’ in your reply.
- Select the Post your response button, then select Edit in your new reply when it shows up.
- Upload your files using the Attachment field.
- Select Save changes to share your coursework to your forum thread.
- Adjust your project schedule based on the time taken for this task and any new insights gained. Ensure future tasks are scheduled realistically.
- Revisit your production asset checklist to ensure it accurately reflects the current state of your assets and identify any gaps or additional needs.
- Get feedback on this and other learning tasks at the next Live Session – check the Live Session calendar for dates and times.
- Schedule a project check-in with your facilitator to review your progress, get valuable guidance, and plan the next steps. Depending on your progress and the complexity of the tasks, this project check-in can cover a single task or a group of related tasks. Use this opportunity to discuss any challenges and ensure you’re on track with your project.
With your shots composited and refined, you’re ready to move on to the editing phase. Prepare to bring your project sequence closer to its stunning final form!
Editing
| Project stage | Project tasks | |
|---|---|---|
| 3. Post-production | Composite each shot in the sequence. | |
| EDIT THE SEQUENCE TOGETHER. | ||
| ADD TITLES FOR THE SEQUENCE. | ||
| Add sound to the sequence. | ||
Editing is where you combine all the composited shots and create all the packaging to turn the individual shots into a completed sequence.
Overview of edit stage
During the Edit stage, you can add to your sequence:
- transitions between shots
- onscreen text
- titles.
Case Study
Creating a cinematic feel: The Body in the Library
The animator’s goal was to achieve the feeling of a title sequence or trailer for a longer film or show. Transitions between shots, several pieces of onscreen text, and a final title at the end of the sequence were added to the The Body in the Library during the edit stage.
Adobe After Effects or Da Vinci Resolve are typically used for sequence editing purposes:
- After Effects is preferred for projects with a few short shots due to its keyframing system.
- Da Vinci Resolve is more suitable for longer projects with extensive footage due to its superior handling and organization capabilities.
The Body in the Library was edited with Adobe After Effects, using the recommended methods outlined below.
Starting the project
To begin editing any new project, create a composition for all your footage. Remember to set the frame rate for the project to 25 fps and ensure that each imported footage is set to 25 fps.
With all the footage imported, perform a rough arrangement on the timeline and view the result using the preview buttons in the top right corner of the screen.
Preview buttons in After Effects
Transitions between shots
With all the footage roughly arranged, start adding transitions to your project.
Basic transitions
The most basic transition is the cut, where an edit cuts from one shot to the next with no special transition:
Shots with no transition.
Fade-in transitions
The next type of transition you may want to include is a Fade-in, where the shot fades from transparent to visible over a time you specify.
To create a fade-in, create keyframes on the opacity channel of a layer that goes from 0% to 100%:
Shot with a fade-in from transparent to visible.
Fade-out transitions
A Fade-out is created similarly but in reverse, with your opacity going from 100% to 0%:
Shot with a fade-out from visible to transparent.
Cross-dissolve transitions
The last type of transition used is the cross-dissolve, where the end of a clip fades out while the beginning of the next clip fades in.
To achieve the cross-dissolve effect, overlap the clips during the section with the keyframes applied:

Two shots with a cross-dissolve transition.
Onscreen text
Case Study
Creating text layers: The Body in the Library
Three sections were created where onscreen text appears in between shots.
You can use the Text tool in After Effects to create text layers in your project. You can find the Text tool on the toolbar at the top of the screen:
![]()
Adjusting text layers
Text appears on the timeline as a red layer. Adjust the start and end points of the layer by clicking and dragging on either end.
Refine the text using the Text Properties area on the right of the screen, where you can choose your font, text size, colour, etc.
Adding backgrounds and effects
When using text, create a solid background if you want a colour other than black.
Solid background with text.
You can also add effects to the solid – such as a gradient – to create a more interesting look.

Gradient applied to a solid background with text.
Titles
Case Study
Creating a title sequence: The Body in the Library
The final addition to the edit was a title sequence. Photoshop was used to create custom text layers with two different fonts from dafont. Each word was saved as a separate .png file with an alpha channel.
The word images were then arranged on the timeline with their beginnings offset so that the words did not appear simultaneously, creating a more interesting sequence.
Additional effects
A quick animation of drips from the word "Body" was also created. These were made in Toon Boom in the same way as the other animated effects in the project.
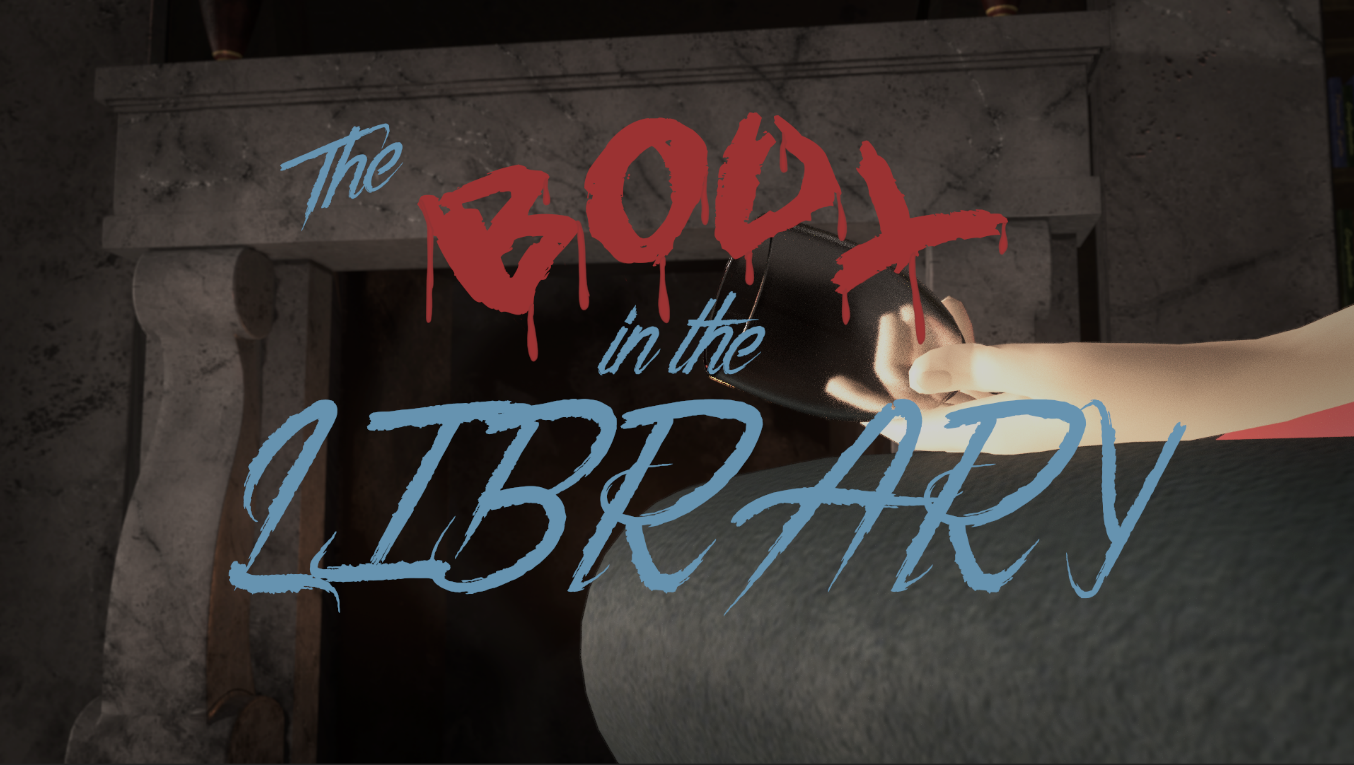
The title word “Body” with animated drips.
Final adjustments
With the main edit completed, the transitions' timing and the titles' appearance and disappearance were adjusted and refined, and the results were viewed using the preview buttons.
Watch the final cut of The Body in the Library (1:30m), without sound.
Practice
Task 15: Edit your sequence
Editing is where your animated sequence takes its final form before the optional final post-production step of adding sound. Editing allows you to arrange your shots, create smooth transitions, and add titles or text elements that enhance your storytelling. By meticulously fine-tuning each element, you craft a sequence that's not only seamless but also visually captivating, ensuring your project sequence stands out with a polished, professional finish.
What tools or resources do you need for this task?
Make sure you have access to:
- Adobe After Effects
- Your:
- composited rendered footage
- storyboard and animatic
- production schedule
- production asset checklist.
- Reference materials: Any visual references or visual look development materials that guide the style of your project
What steps should you take to complete this task?
Use the time allocated in your project schedule for this task. Remember to save your work as you go when using Adobe After Effects.
- Review Your Project Schedule: Refer to your project schedule to allocate sufficient time for editing your sequence. Ensure this task is included in your schedule.
- Create a New Composition: Start by creating a new composition in Adobe After Effects for your entire sequence. Set the frame rate to 25 fps to maintain consistency across all your footage.
- Import and Arrange Footage: Import all your rendered and composited shots into the composition and perform a rough arrangement on the timeline. Use the preview buttons to play through your rough cut and assess the overall flow of your sequence.
- Add Transitions:
- Basic Cuts: Begin by making basic cuts between shots to establish the sequence flow.
- Fade-in and Fade-out Transitions: Apply fade-in and fade-out transitions by creating keyframes on the opacity channel for each layer, ensuring a smooth visual transition between shots.
- Cross-dissolve Transitions: For a seamless transition between two shots, overlap the clips on the timeline and use keyframes to create a cross-dissolve effect.
- Incorporate Titles and Onscreen Text:
- Creating Text Layers: Use the Text tool to add titles, credits, or other onscreen text that your project requires. Ensure these elements align with your sequence’s style and narrative.
- Adjusting Text Layers: Fine-tune the text layers by adjusting their position, duration, and appearance. Consider adding backgrounds or effects to make the text stand out and enhance readability.
- Final Review: Once your transitions and text elements are in place, conduct a final review of your sequence. Ensure that each transition is smooth, the timing is perfect, and the titles contribute positively to the overall presentation.
- Update Your Production Asset Checklist: As you finalize the editing process, update your production asset checklist to account for the added transitions, titles, and any other adjustments made during this stage.
What should you do after completing this task?
- How well do your transitions, titles, and text elements enhance your sequence? Are there opportunities to improve the pacing or visual impact?
- Select any work that you are most proud of or would like further feedback on and share screenshots or exported sequences (.mp4) of it to Forum:
- Select your forum thread in Forum: Final Project Sequence.
- Select Reply to your first Forum post.
- Enter the words ‘Task 15: Editing’ in your reply.
- Select the Post your response button, then select Edit in your new reply when it shows up.
- Upload your files using the Attachment field.
- Select Save changes to share your coursework to your forum thread.
- Adjust your project schedule based on the time taken for this task and any new insights gained. Ensure future tasks are scheduled realistically.
- Revisit your production asset checklist to ensure it accurately reflects the current state of your assets and identify any gaps or additional needs.
- Get feedback on this and other learning tasks at the next Live Session – check the Live Session calendar for dates and times.
- Schedule a project check-in with your facilitator to review your progress, get valuable guidance, and plan the next steps. Depending on your progress and the complexity of the tasks, this project check-in can cover a single task or a group of related tasks. Use this opportunity to discuss any challenges and ensure you’re on track with your project.
With the editing completed, your sequence is almost ready for its final presentation. The final post-production task involves adding sound design (optional) to bring your project sequence to life with audio elements, ensuring a more immersive experience.
Sound design
| Project stage | Project tasks | |
|---|---|---|
| 3. Post-production | Composite each shot in the sequence. | |
| Edit the sequence together. | ||
| Add titles for the sequence. | ||
| ADD SOUND TO THE SEQUENCE. | ||
Adding sound is the final post-production step and provides a huge emotional lift to your sequence, contributing significantly to its overall polish. Find out how to add sound to your animated sequence in this section.
Creating and adding sound effects
Creating your own sound
You can create your sound by:
- recording your own sound effects or music (if you have time in your schedule), or
- downloading music and sound effects from online resources.
Explore
Use online sound libraries to create your sound
You can access several libraries of sound online:
- Adobe Audition: With an Adobe subscription, access the Adobe Audition sound collections, which contain many high-quality sound effects arranged into several convenient topics. Access here.
- YouTube Creator Studio: If you have a YouTube channel, you can access both music and sound for your projects through the YouTube Creator Studio feature.
- FreeSound.org: A database with various sound effects, audio samples, and recordings, all free. Access here.
- Epidemic Sound: While not free, Epidemic Sound offers an enormous range of quality music and sound effects at a reasonable subscription price. Access here.
- Shutterstock: Another paid option, Shutterstock provides music and sound effect libraries, available for individual download or through a subscription-based option. To find out how to access the Shutterstock Music Library, use this access information sheet.
Sound design process
The process of adding sound to your project is called sound design.
Think of this process as creating a soundscape that matches the visuals of a project. Building a soundscape involves adding background environment sounds, story-based sounds, and music.
Breaking down the task into smaller chunks makes the job easier. Generally, work on sound in this order:
- Background Environment
- Story-Based Sounds
- Music
Background environment
The background environment is the basic sounds you might hear in the background of a space. For example, in a café, you might hear the babble of people talking, the click of cups, traffic outside, etc.
Synchronisation
Generally, background sounds do not have to be synced to what is happening on screen if the environment doesn't change during the sequence.
Case Study
A quiet prelude to chaos: The Body in the Library
Very few background sounds were used in The Body in the Library.
The whole idea of the sequence is that it takes place early in the morning before anyone knows what has occurred during the previous night – it’s the calm before the storm.
Just pops and crackles from the gramophone record turning were used to evoke this.
Story-based sounds
Story-based sounds are associated with what is happening in the shot. These sounds are synced to on-screen actions, for example, a character's footsteps, an explosion, or a car driving past.
Case Study
Crafting mood through minimalism: The Body in the Library
The intention was to create a specific mood without story-based sounds: these were omitted to maintain the desired feeling evoked by the sound design (i.e. the calm before the storm).
Music
You can use music to enhance the emotional impact of a sequence.
In some projects, custom music pieces are used to match specific moments within the sequence.
Case Study
Enhancing drama with disjointed notes and crescendos: The Body in the Library
Several customised pieces of music were performed specifically to fit the sequence.
One piece was played normally until a certain point where the music was intended to start sounding disjointed. Another section included a crescendo to build up the intensity for the sequence’s climax.
To integrate these recordings into the sequence:
- They were first brought into Da Vinci, and the Fairlight audio tools were used to change the music to sound like it was playing from a vintage gramophone.
- The processed audio in Adobe After Effects were used, and keyframes were added to the audio levels to control the volume dynamically (i.e. the music is quiet at the beginning and gets louder as the camera gets closer to the gramophone).
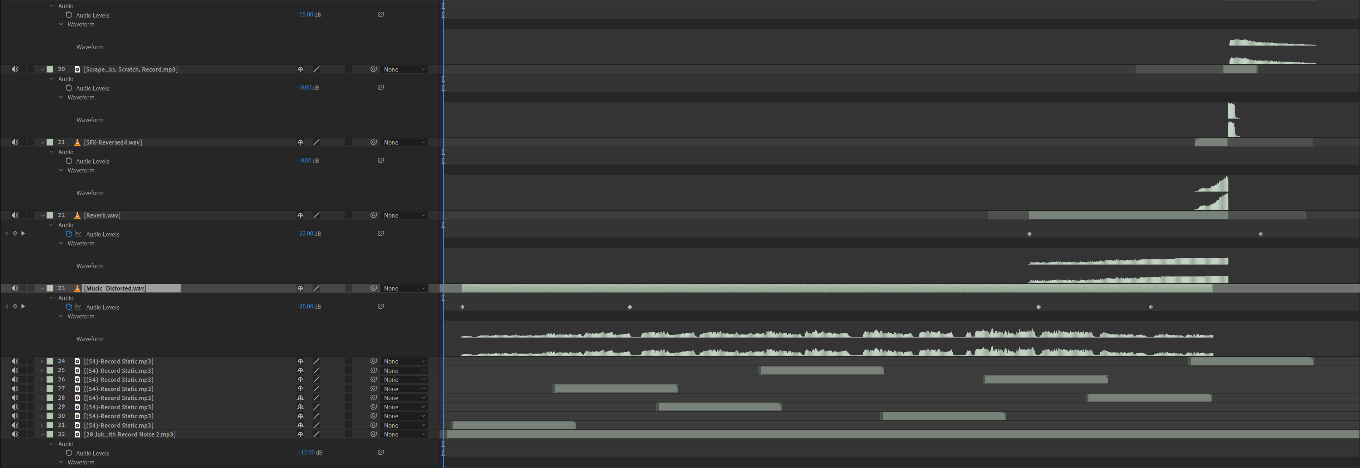
Processed audio in Adobe After Effects timeline.
Refining the sound
Preview the sequence and refine the sound so the sound levels work well together.
Go through the sequence several times, making adjustments and additions to bring the sound and story together into a completed soundscape.
Watch the final cut of The Body in the Library (1:36m), with its sound added.
Practice
Task 16: Add music and sound to your sequence
Enhancing the visual impact of your animation with a carefully crafted soundscape can elevate your project to a professional level. Sound design is more than just adding noise—it's about creating an atmosphere that complements the visuals and enhances the narrative. Whether it's background ambiance, story-driven sound effects, or music that heightens the emotional tone, integrating sound into your sequence can transform your work from good to exceptional.
What tools or resources do you need for this task?
Make sure you have access to:
- Adobe After Effects
- Online sound libraries (e.g., Freesound, Adobe Audition, or Shutterstock) - for sourcing pre-recorded sound effects and music
- Sound recording equipment (optional) - for creating custom sound effects or recording original music.
- Headphones or speakers - to accurately monitor and refine the sound levels and quality
- A quiet environment - if recording you own sounds to avoid background noise interference
- Your production schedule
- Your production asset checklist.
What steps should you take to complete this task?
Use the time allocated in your project schedule for this task. Remember to save your work as you go when using Adobe After Effects.
- Create or Source Sound Effects:
- Create Your Own Sounds: If time allows, consider recording your own sound effects or music to give your project a unique edge. Use a microphone and sound editing software to capture high-quality audio.
- Download Online Resources: Alternatively, explore online libraries for royalty-free sound effects and music that fit your project’s theme. Ensure the audio files are in a compatible format with Adobe After Effects.
- Add Background Environment Sounds:
- Import your chosen background sounds into Adobe After Effects.
- Layer these sounds in the timeline to create a continuous ambiance that fits the setting of your sequence.
- Adjust the volume levels so that these sounds provide subtle atmosphere without overpowering the main audio elements.
- Sync Story-Based Sounds:
- Identify key moments in your sequence that require synced sound effects, such as footsteps, doors closing, or vehicles moving.
- Place these sounds on the timeline and align them precisely with the corresponding visual actions.
- Fine-tune the timing and volume to ensure seamless integration with the visuals.
- Incorporate Music:
- Choose a music track that complements the mood and pacing of your sequence.
- Import the track into your project and position it on the timeline.
- Use keyframes to control the music's volume, fading in or out as necessary to match the flow of the sequence.
- Refine the Soundscape:
- Preview the entire sequence multiple times, listening for any elements that need adjustment.
- Balance the audio levels between background sounds, story-based effects, and music to create a cohesive soundscape.
- Make final tweaks to ensure that the sound enhances the visual storytelling without overwhelming it.
What should you do after completing this task?
- How effectively does the sound design enhance the mood and atmosphere of your sequence? What specific challenges did you face in synchronising sound with visual elements, and how did you address them?
- Select any work that you are most proud of or would like further feedback on and share audio (.mp3 or .wav) or exported sequences (.mp4) of it to Forum:
- Select your forum thread in Forum: Final Project Sequence.
- Select Reply to your first Forum post.
- Enter the words ‘Task 16: Sound’ in your reply.
- Select the Post your response button, then select Edit in your new reply when it shows up.
- Upload your files using the Attachment field.
- Select Save changes to share your coursework to your forum thread.
- Adjust your project schedule based on the time taken for this task and any new insights gained. Ensure future tasks are scheduled realistically.
- Revisit your production asset checklist to ensure it accurately reflects the current state of your assets and identify any gaps or additional needs.
- Get feedback on this and other learning tasks at the next Live Session – check the Live Session calendar for dates and times.
- Schedule a project check-in with your facilitator to review your progress, get valuable guidance, and plan the next steps. Depending on your progress and the complexity of the tasks, this project check-in can cover a single task or a group of related tasks. Use this opportunity to discuss any challenges and ensure you’re on track with your project.
With your soundscape finely tuned, your project is nearly complete. The final step in your journey is to step back and reflect on your final project sequence. Reflecting on your work allows you to evaluate your creative choices and technical execution, helping you grow as an animator and storyteller. So leap into the final topic: Reflecting on Your Final Project Sequence.

As your final project sequence wraps up during the post-production phase, it’s time to reflect on your work and the final result! This subtopic reminds you of important areas for your reflection, showcases the animator's reflection on The Body in the Library sequence and process, and guides you as you reflect on your final sequence to help you meet the requirements of this module’s final assessment.
Important
Gearing up for your assessment
As part of the final assessment for this module, you must produce a written reflection that examines your completed animation sequence and explains your process in creating the sequence.
To guide your reflection, consider the following points:
- Project narrative: Introduce and describe the narrative of your sequence. What is the story? How is it told in your sequence?
- Narrative techniques: What narrative techniques did you use when designing your sequence and why?
- Shot types and techniques: What types of shots did you use? What about angles, camera movements, and continuity? How did you pace the sequence?
- Composition: What aspects of composition theory did you aim to incorporate? Give examples.
How effective do you think the results were across these points? What would you do differently in future projects? Which aspects can be improved? How can they be improved? Why would they enhance the final outcome?
These prompts will help you during this course’s very last learning task – Reflect on your sequence – at the end of this topic.
Reflecting on The Body in the Library
The following reflection represents the animator's critique of his The Body in the Library sequence, demonstrating his reflective examination of the sequence and the process he used to create it. This reflection includes:
- Areas to improve
- Areas that worked well and succeeded
- Plans for future refinement.
Select + to view each section of the animator’s reflection.
The animator noted the need for additional time to refine key areas of the sequence. Rushed production processes led to less polished results in certain aspects of the project.
A significant area for improvement was the texture maps. Inconsistencies in the textures did not align with the final sequence. Specifically, the fallen book in front of the chair appeared less detailed than intended.
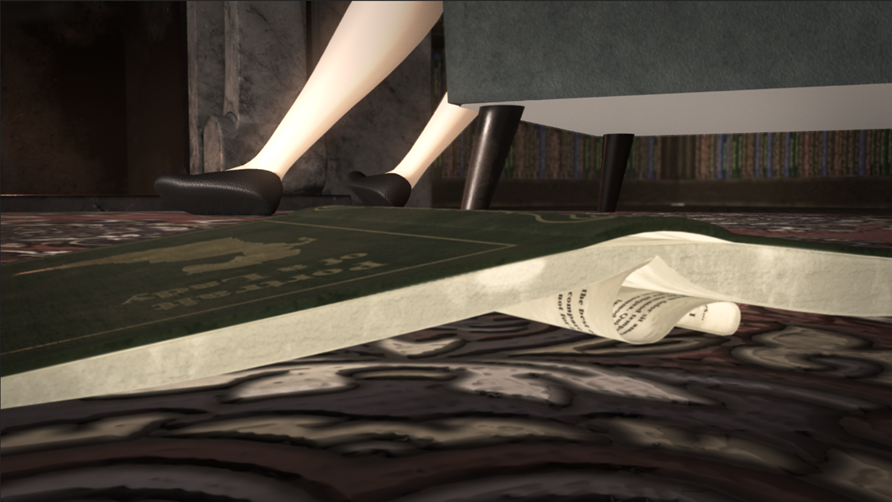
Fallen book and rug needs improvement.
The rug beneath the book could have benefited from being textured at a higher map size to enhance its appearance up close.
The floor texture failed to convincingly represent a wooden parquet floor, which was the intended effect. By the time this issue was identified, it was too late to re-model the floor using geometry to create a pattern instead of a texture, which would have been a better approach and looked better.
Despite these challenges, several aspects of the final sequence were successful. The overall narrative effectively conveyed the story, with the gradual reveal of the situation working well.
The composition of the shots, along with the modelling and texturing of key elements such as the gramophone, newspaper, and main chair with the title character slumped in it, exceeded expectations.

Shot composition and key elements’ models and textures exceeded expectations.
The integration of 2D hand-drawn effects with the 3D environment also proved to be more successful than anticipated, justifying the additional effort invested.
Plans include revisiting and refining areas and elements needing further attention to enhance their final look.
The project was evaluated as being a 95% success by the animator. What do you think? Let your facilitator know in the next Live Session!
Practice
Task 17: Reflect on your sequence and produce a written reflection for assessment
Practise your ability to explain and defend the narrative aspects of your animation sequence. This includes detailing the decisions you made, observations you gathered, and adjustments you applied throughout the planning, production, and refinement stages.
This learning task will help you with a crucial component of your final assessment, providing an opportunity for you to critically evaluate how well your final project sequence meets your initial expectations and to identify and articulate areas for improvement.
What tools or resources do you need for this task?
Make sure you have access to:
- Microsoft Word or other document creation software that can export files as PDF (for assessment submission).
- Your:
- Final project sequence files
- Storyboard and Animatic
- Any project notes, sketches, or documents that outline your planning, decisions, and adjustments made during the production process.
- Reference materials used for visual and narrative inspiration throughout the project.
- Production Asset Checklist: A checklist of all assets created and used in the sequence, including any updates made during production.
- Any feedback or critiques received during peer reviews or from instructors.
What steps should you take to complete this task?
Use the time allocated in your project schedule for this task. Remember to save your work as you go when using Microsoft Word or other document creation software.
- Introduction to the Narrative: Begin by introducing and describing the narrative of your sequence. Explain the story and how it is conveyed through your sequence.
- Analyse Narrative Techniques: Discuss the narrative techniques you employed in the design of your sequence. Explain why these techniques were chosen and how they contribute to the storytelling.
- Examine Shot Types and Techniques: Describe the types of shots used, including angles, camera movements, and continuity. Assess how these elements contribute to the pacing and overall effectiveness of the sequence.
- Evaluate Composition: Reflect on the principles of composition theory that were applied in your sequence. Provide specific examples of how these principles were implemented and their impact on the visual outcome.
- Assess Effectiveness and Improvements: Evaluate the effectiveness of your sequence in terms of the points mentioned above. Consider what worked well and what could be improved. Discuss how you would enhance these aspects in future projects and the rationale behind these improvements.
- Draft Your Written Reflection: Compile your insights into a well-structured written reflection, addressing all the points outlined above. Ensure that your reflection is clear, comprehensive, and provides a thoughtful analysis of your sequence.
What should you do after completing this task?
- As you complete your reflection, think about the journey you undertook from planning to producing and refining your sequence. How has this process informed your understanding of narrative and technical execution in animation? What new insights have you gained about your creative process and skills?
- Send a summary of your reflection to Forum. This could include highlights from your reflection, key learnings, or specific aspects where you seek feedback:
- Select your forum thread in Forum: Final Project Sequence.
- Select Reply to your first Forum post.
- Enter the words ‘Task 17: Reflection’ in your reply.
- Select the Post your response button, then select Edit in your new reply when it shows up.
- Upload your written reflection using the Attachment field.
- Select Save changes to share your coursework to your forum thread.
- Adjust your project schedule based on the time taken for this task and any new insights gained.
- Get feedback on this and other learning tasks at the next Live Session – check the Live Session calendar for dates and times.
- Schedule a project check-in with your facilitator to review your progress, get valuable guidance, and plan the next steps. Depending on your progress and the complexity of the tasks, this project check-in can cover a single task or a group of related tasks. Use this opportunity to discuss any challenges and ensure you’re on track with your project.
With your reflection underway, you’re poised to celebrate the culmination of your animation journey! In the next section – Summary – you’ll revisit the key learnings and outcomes of this module, tying together the skills and insights you’ve gained while crafting your final animation sequence. This is your moment to appreciate your progress and prepare for future creative projects where you can develop worlds and bring your imagination to animated life.
In this topic, you've combined all your acquired skills and knowledge to create a polished final project sequence, marking the culmination of your Diploma in Animation (Level 5) journey. You've:
- created your project sequence, using your creative and technical expertise to craft a compelling animated story.
- applied various modelling, texturing, camera, and animation tools and processes with precision and accuracy while developing your final shot sequences.
- executed post-production tasks, including compositing, editing, adding titles, and sound design, to achieve a professional final product.
- evaluated aesthetic qualities, making informed improvements to your final shots or animation sequences to ensure they meet the project's creative and technical standards.
Reflect on what you’ve learnt, practised, and achieved
As you complete your animation journey with this Final Project Sequence topic, take pride in your accomplishments and the growth you've experienced throughout the course. Remember to apply the insights and skills developed during this topic to future projects, continually honing your craft and storytelling abilities.
Your dedication to animation has culminated in a final sequence showcasing your talent and hard work. Congratulations on reaching this milestone, and best of luck in your future endeavours in the world of animation!
| # | Learning Task Name | Duration (Hours) | |
|---|---|---|---|
| 1 | Create a production schedule | 2 | |
| 2 | Find and gather references for your key story elements | 3 | |
| 3 | Develop the visual look for the sequence | 3 | |
| 4 | Design and develop concepts for interior scenes and props | 4 | |
| 5 | Create layout pages for each main story element | 4 | |
| 6 | Create an animatic of your story sequence | 8 | |
| 7 | Track your production assets | 1 | |
| 8 | Create Maya scene files and proxy geometry | 8 | |
| 9 | Model and UV your project assets | See your production schedule you create in Learning Task 1 |
|
| 10 | Create textures for your project assets | ||
| 11 | Complete any animation required for your project | ||
| 12 | Light your project’s shots | ||
| 13 | Render your project’s shots | ||
| 14 | Composite your project’s shots | ||
| 15 | Edit your sequence | ||
| 16 | Add music and sound to your sequence | ||
| 17 | Produce a written reflection for assessment |