Healthy soils produce healthy plants.
Before we look at how to dig test pits and take soil samples, we need to know about soil structure, drainage, and how to improve your soil.
Te Kura Horticulture describes soil structure as:
"The proportion of sand, silt and clay describes a soil’s texture. However, soil particles don’t always exist as separate tiny units. More often, they are found clumped together in crumbs.
The size of its crumbs gives soil its structure. Crumbs vary in size, but anything from 1 mm to 5 mm is regarded as a suitable soil structure."
In soil science, the word aggregates refers to soil, not gravel and other rocky materials.
There are more details about soil structure classification, but for now, it's only important that you know that for good plant growth, our soil should be friable.
Friable soil is where aggregates are big enough to form pore spaces that worms, other soil animals, and plant roots can push through. These large pore spaces let water drain out quickly after rain and draw air back in.

Source: fao.org
Natural soils (those that haven’t been turned over or modified by humans) have been formed by nature’s processes. These include:
- Breaking down rock (known as parent material)
- Wind blowing and water washing small particles onto the surface
- Organic matter falling on the surface and being broken down by worm and microorganisms.
Over many thousands of years, soil builds up, layer upon layer. Sometimes these processes change, for example a volcanic eruption covers the soil with a thick layer of ash. The soil formed before the eruption is different to the soil that formed as a result of of the eruption.
We can see these changes clearly when we dig down into the soil. Where there is a clear difference, we treat the two layers as different soil horizons. In the most simple form, we talk about the soil horizons being:
- Topsoil – the top layer of soil that is rich in nutrients. This may be anywhere from 15cm to perhaps 60cm deep. It is usually a dark colour because of the high organic matter and moisture content.
- Subsoil – the layer beneath the topsoil and above the bedrock. Generally, the subsoil does not contain much organic matter. However, it may be rich in nutrients, if it is mostly clay, as the nutrients from the topsoil will wash down (leach) into the subsoil and be held by the clay.

As we know, most plants need soil that drains freely. In other words, after heavy rain, most of the soil drips away deeper into the soil and air can move back into some of the pores.
As the water moves down into the soil, it gets to a place where all the pore spaces are filled with water. This is known as the water table.
A permanent water table is one where the depth it occurs at stays the same all year around. A temporary water table is one where the depth it occurs at changes depending on the season.
When you dig your test pit, you might find that as you dig down, you reach a point where the hole starts filling with water. You’ve reached the water table. Even if you scoop the water out, the hole will fill up to the same point again.
Once you’ve done your tests, you’ll have formed a picture of how good the soil is for growing what you’ve planned. But perhaps its not ideal. Then what?
Well, your main options are:
- Can I grow something else instead? For example, you wanted to grow fruit trees but you found a permanent water table only 30cm below the surface, you might decide to grow vegetables instead.
- Can I change the soil to suit?
- If you had a dense clay soil you could add gypsum to the soil to help break it into a better structure.
- If you had a sandy soil you could add organic matter and small amounts of clay to help the soil hold more water.
- Can I improve the drainage?
- For instance, you could build up the surface by adding free-draining soil on top.
- Or you could install a drainage system to help water move more quickly into deeper layers of the soil.

Activity – Soil support
Read the Auckland Botanic Gardens webpage about soils. There are a number of other webpages linked at the bottom of the page, which you may find interesting. When you are ready, close the new browser tabs to return here and do the following activity.
The test pit
The reason we are going to dig a test pit is to check the quality of the soil, at different depths. This will help us work out what will grow well here and what we might need to do to the soil to make it better for growing plants.
If your site is some distance from your whare (home), it's a good idea to do the soil tests at the same time as your site assessment. Read this topic and the next one before travelling to your site.
Planning your test pit
When we dig a test pit, we’ll dig down as far as we expect our plant roots to grow. We’ll look at the soil at different depths. Where we see obvious changes, we’ll test the soil for texture and structure. We’ll see if we come across the water table.
When to test
The best time to do a soil test is when the soil is slightly moist — not too dry and not too wet. Don’t dig after heavy rainfall. Give the soil a few days to dry out. Check the weather forecast and choose a good day.
- If the soil is too wet, digging it up will smear it, and it will loose its structure.
- If the soil is too dry, it will become dusty as it breaks up, and may be blown away by the wind.
Where to dig your test pit
Ideally you’ll dig your test pit in the middle of the area where you intend to plant your plants. If this isn’t possible, choose a spot as close as possible.
How deep to dig
When you dig a test pit to investigate the soil on your site, you need to dig as far down as most of your plant roots are likely to grow.
If you’re unsure how deep this is, use the following estimates:
- Vegetables: 30cm
- Fruit trees on dwarf rootstock, shrubs, or vines: To the depth of the water table or 60-90cm, whichever is deeper.
- Fruit trees on standard rootstock and other trees: To the depth of the water table or 90-120cm, whichever is deeper.
Tools and equipment
To dig your test pit and carry out soil tests, you’ll need:
- a strong spade
- two small (or one large one) tarpaulins (tarp)
- a piece of plywood about 1m x 1m
- a knife - a pocket knife or old kitchen knife
- a camera or phone with camera function.
Other tools you might need, depending on your site:
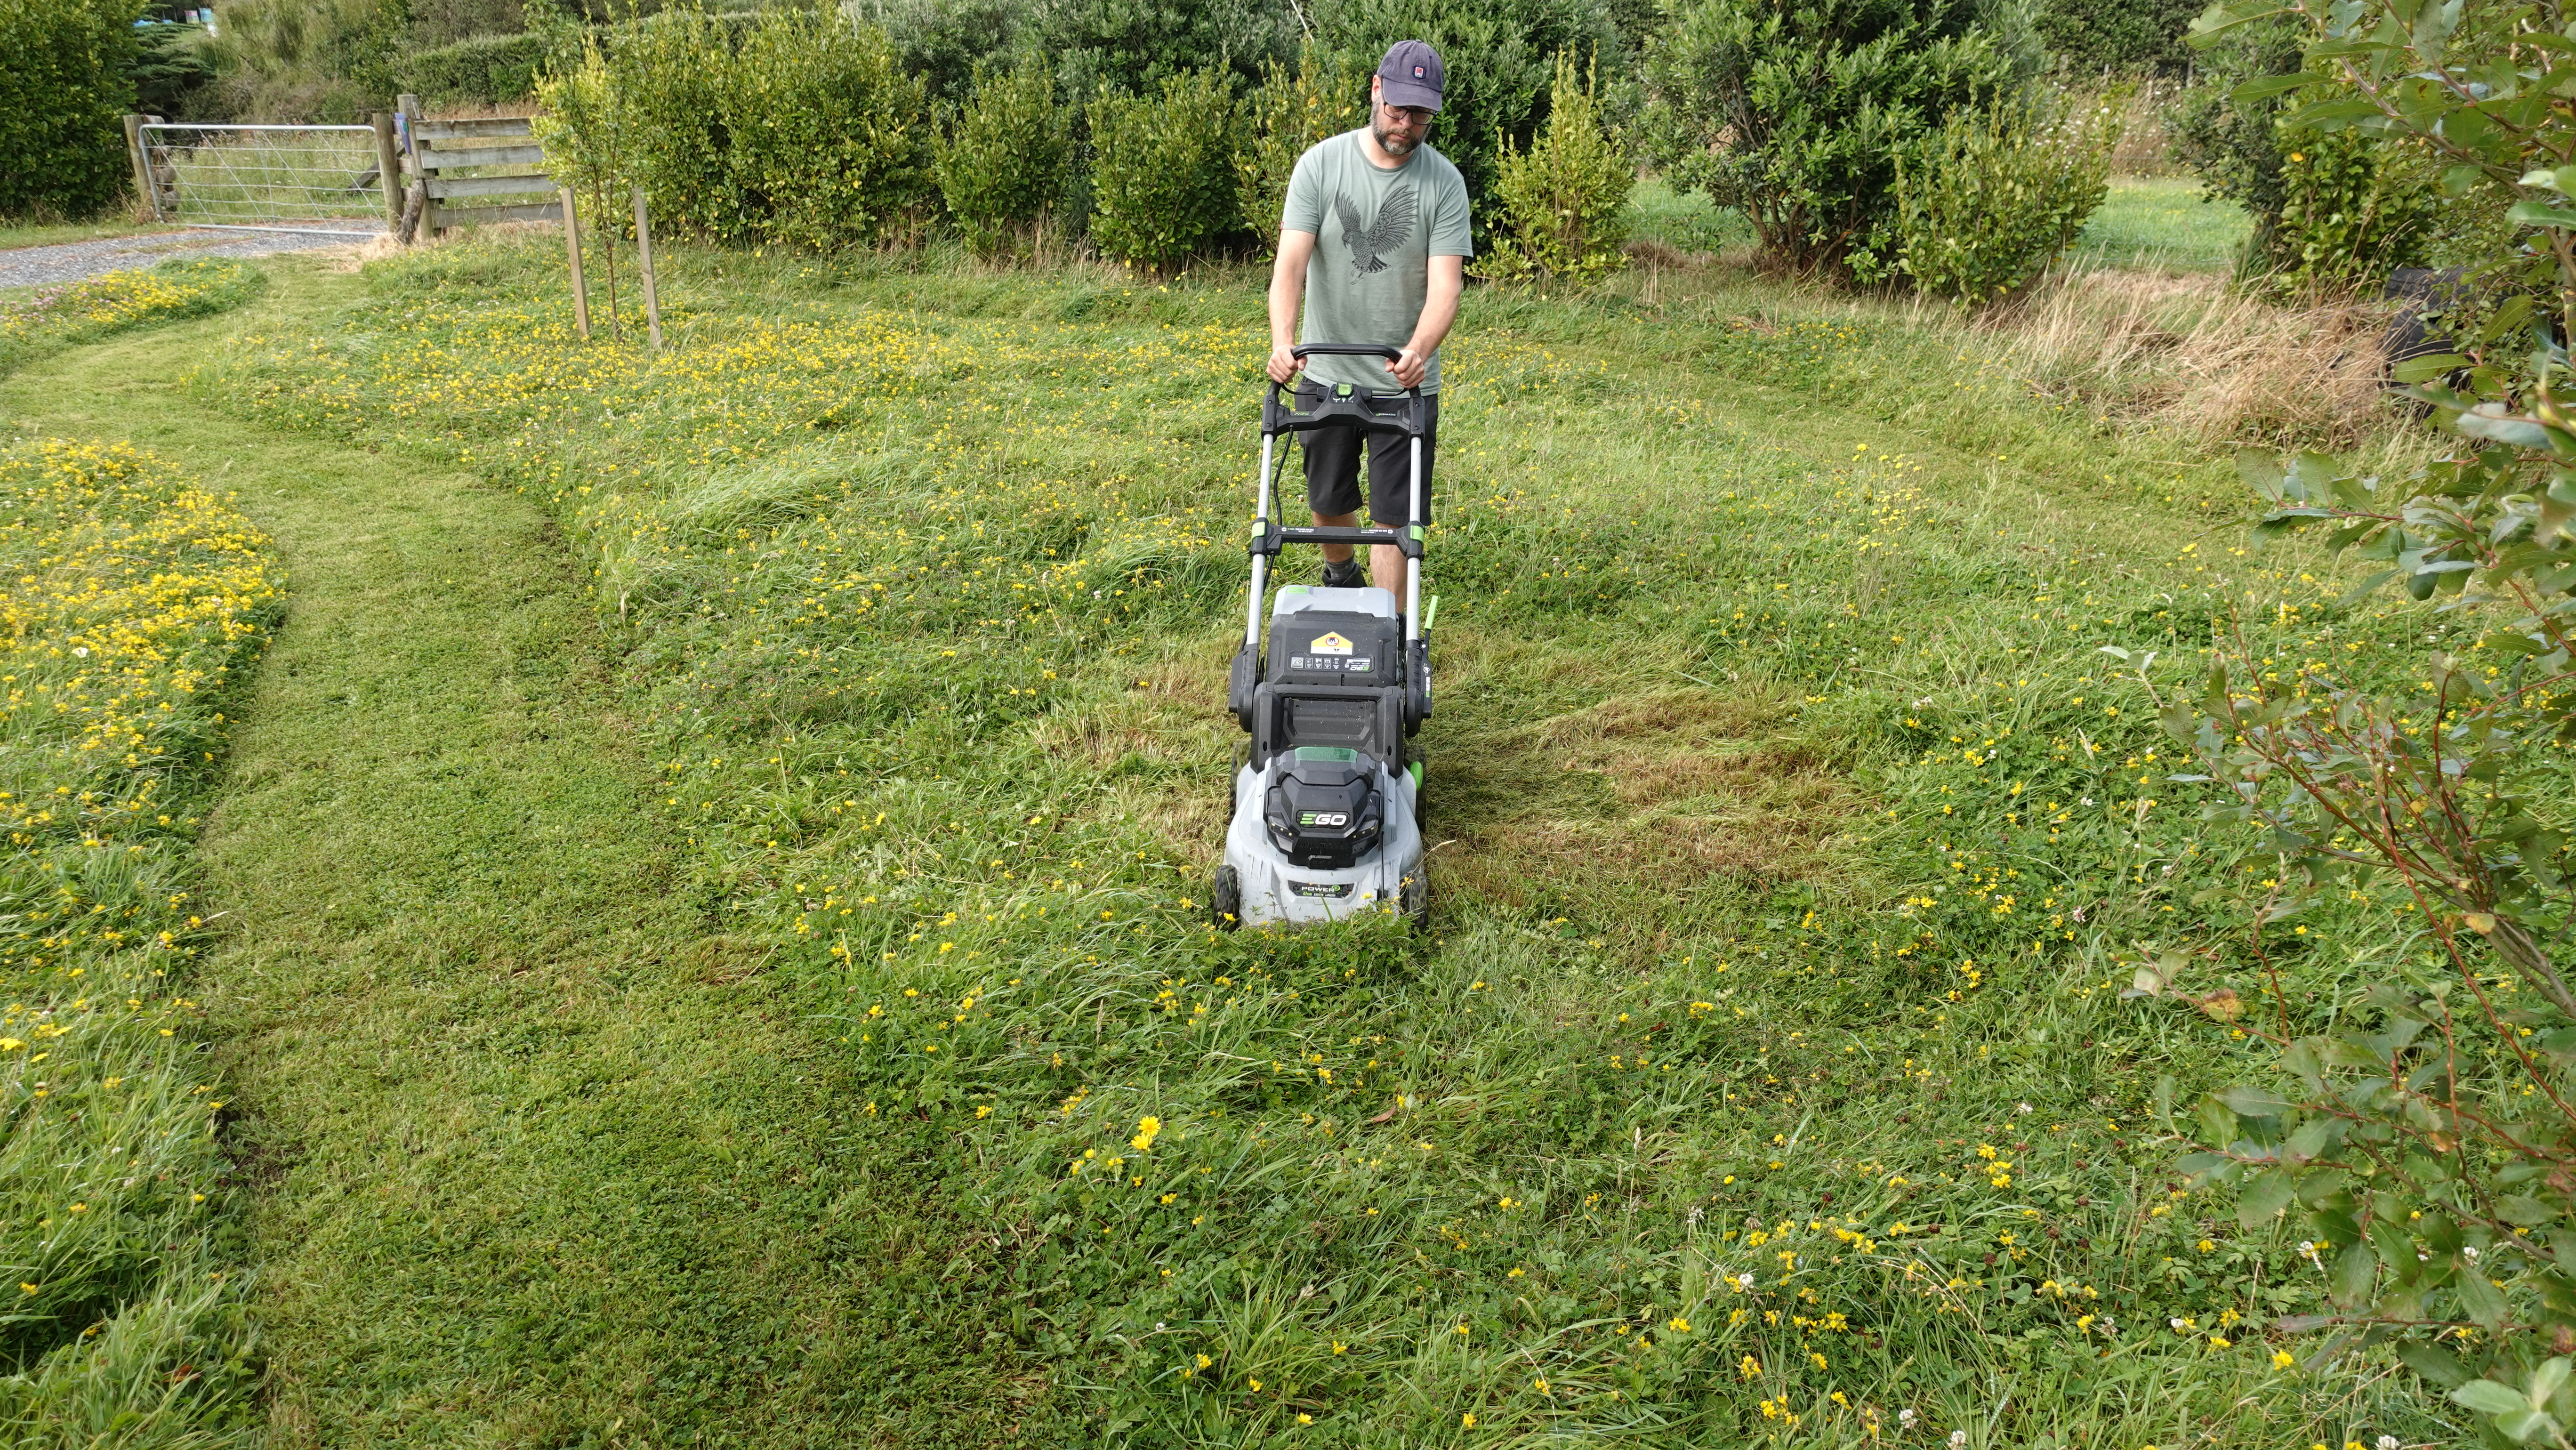
- If the location you will dig has long grass or weeds, use a mower, line trimmer or brushcutter to cut the grass or vegetation as low as possible before you dig.
- If you plan to dig a deep test pit, consider buying or borrowing a post-hole digger spade, such as this one from Mitre10.
Digging a test pit
In soil science, we describe the depth measurements of our soil profile using centimetres, rather than millimetres.
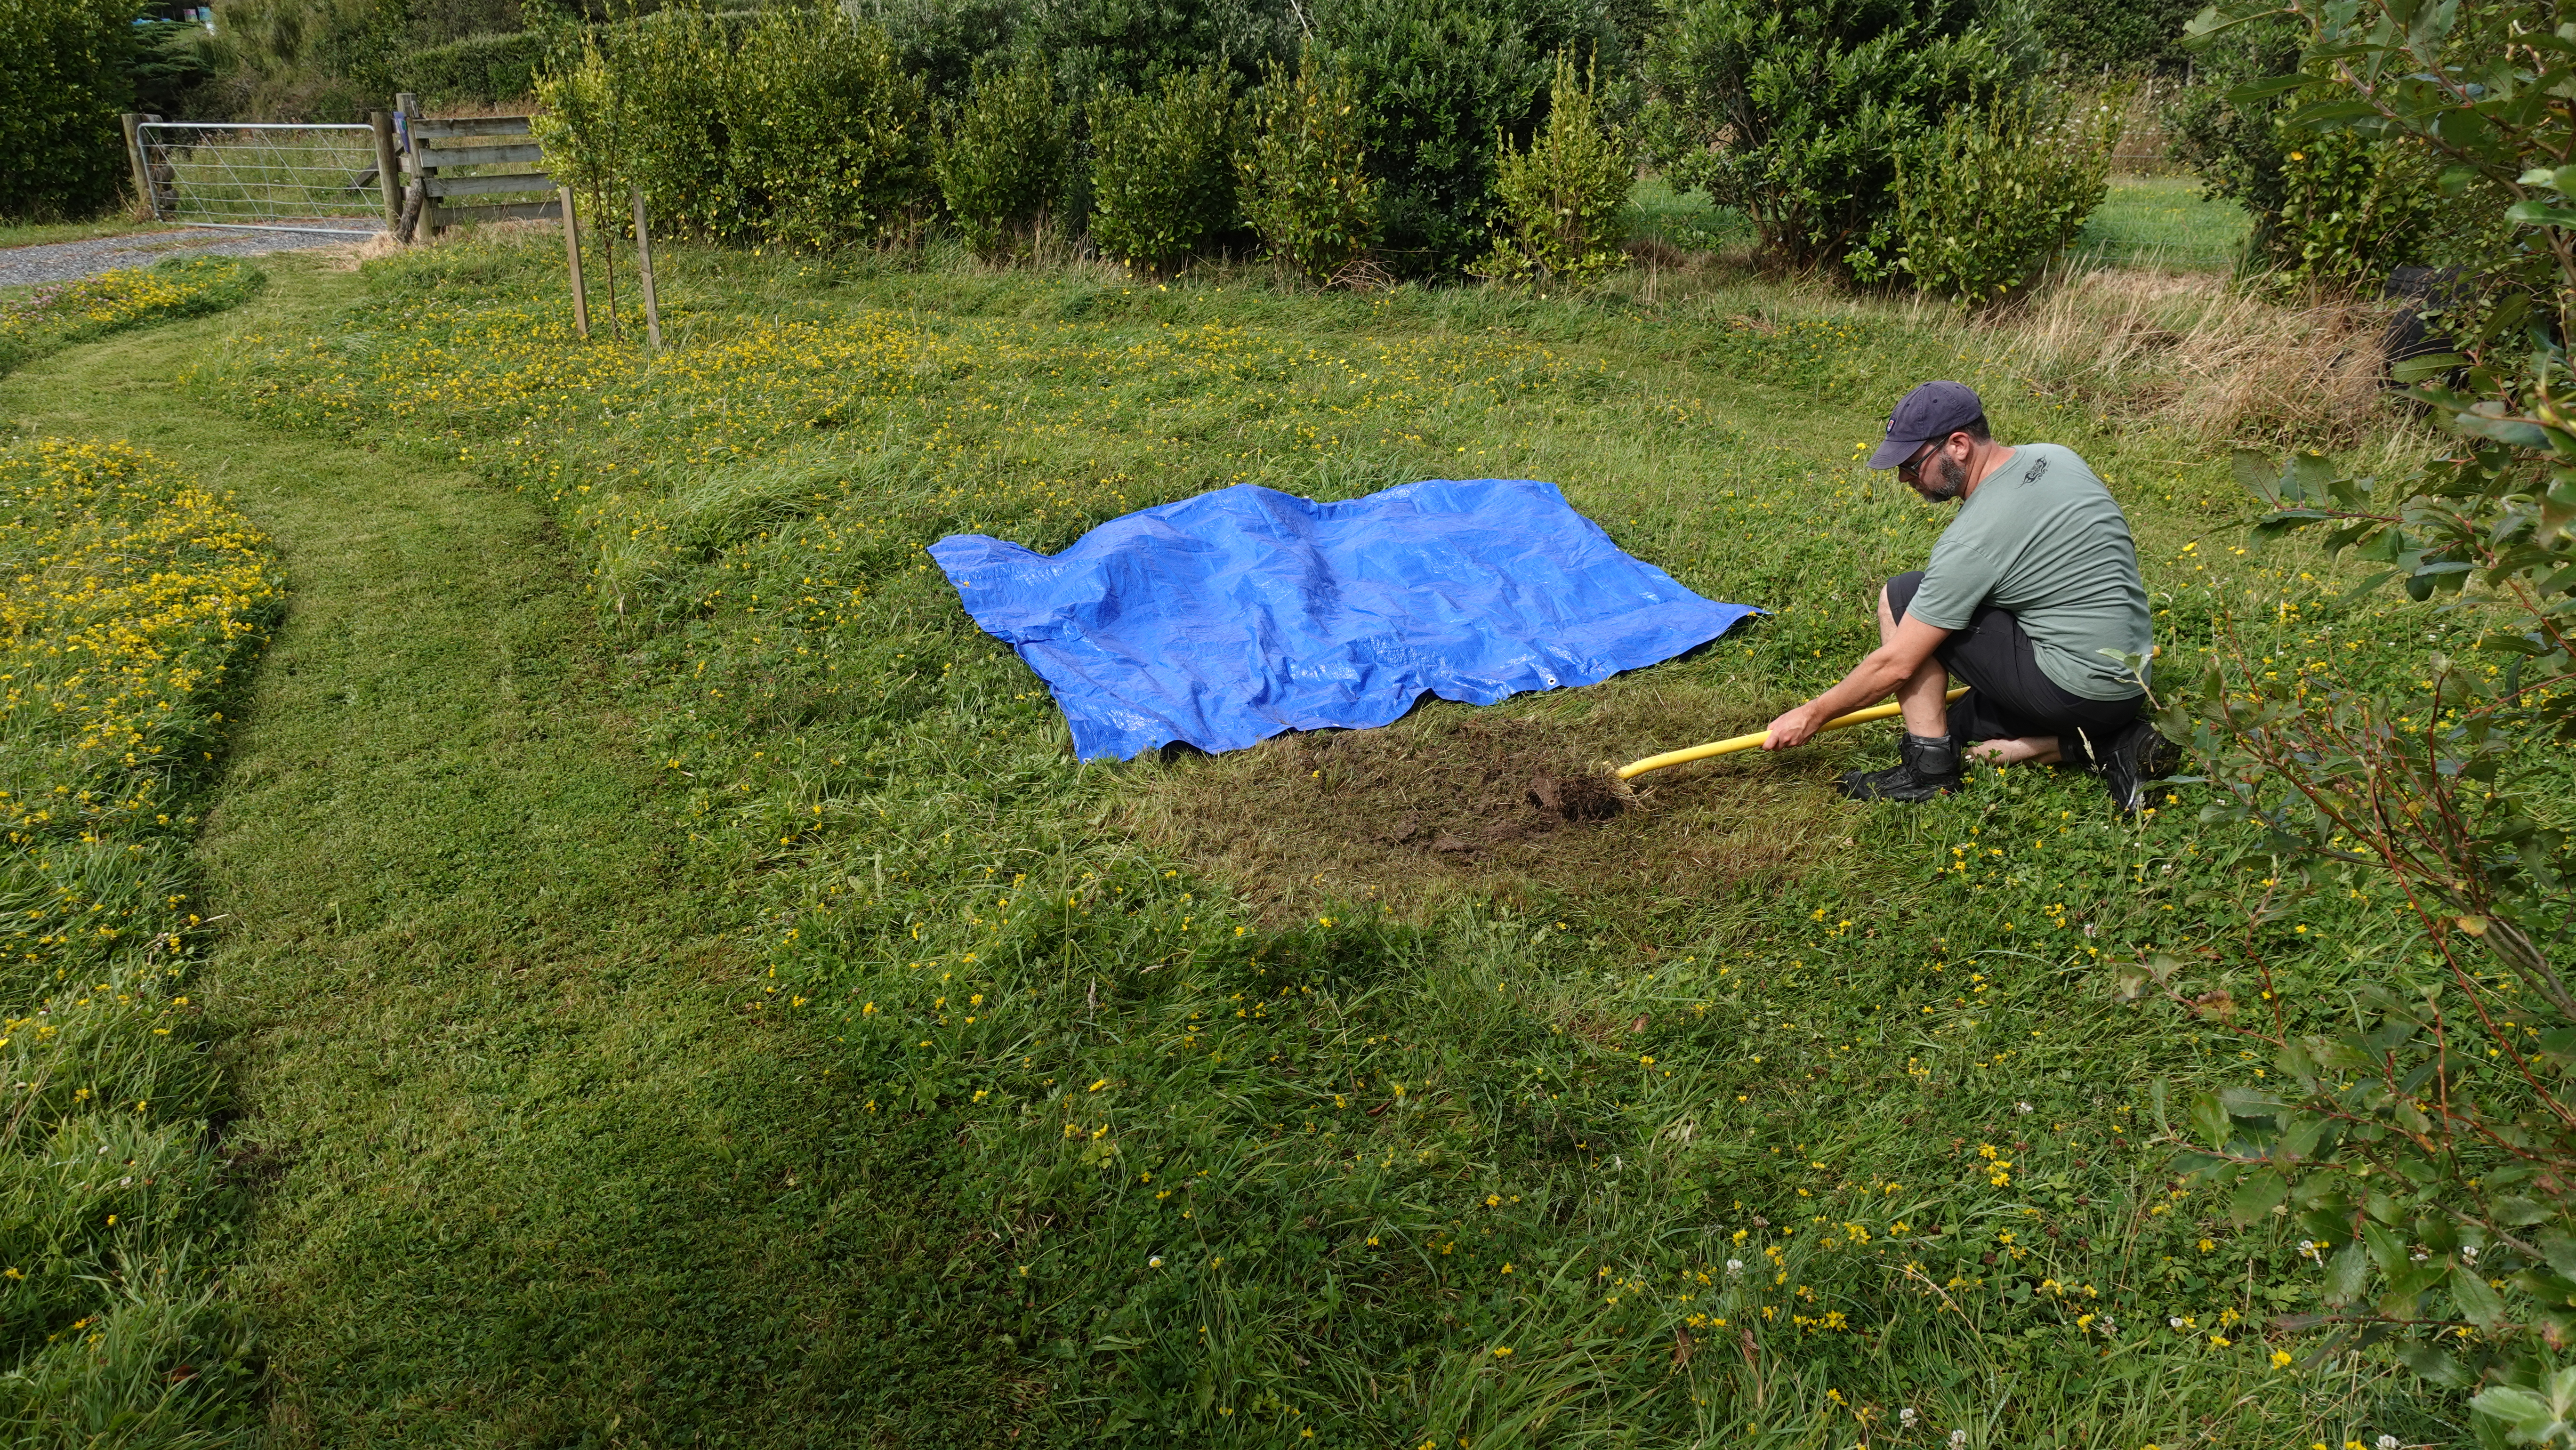
- Clear back any long grass, weeds or other vegetation from the test site, and around it to give you space to work.
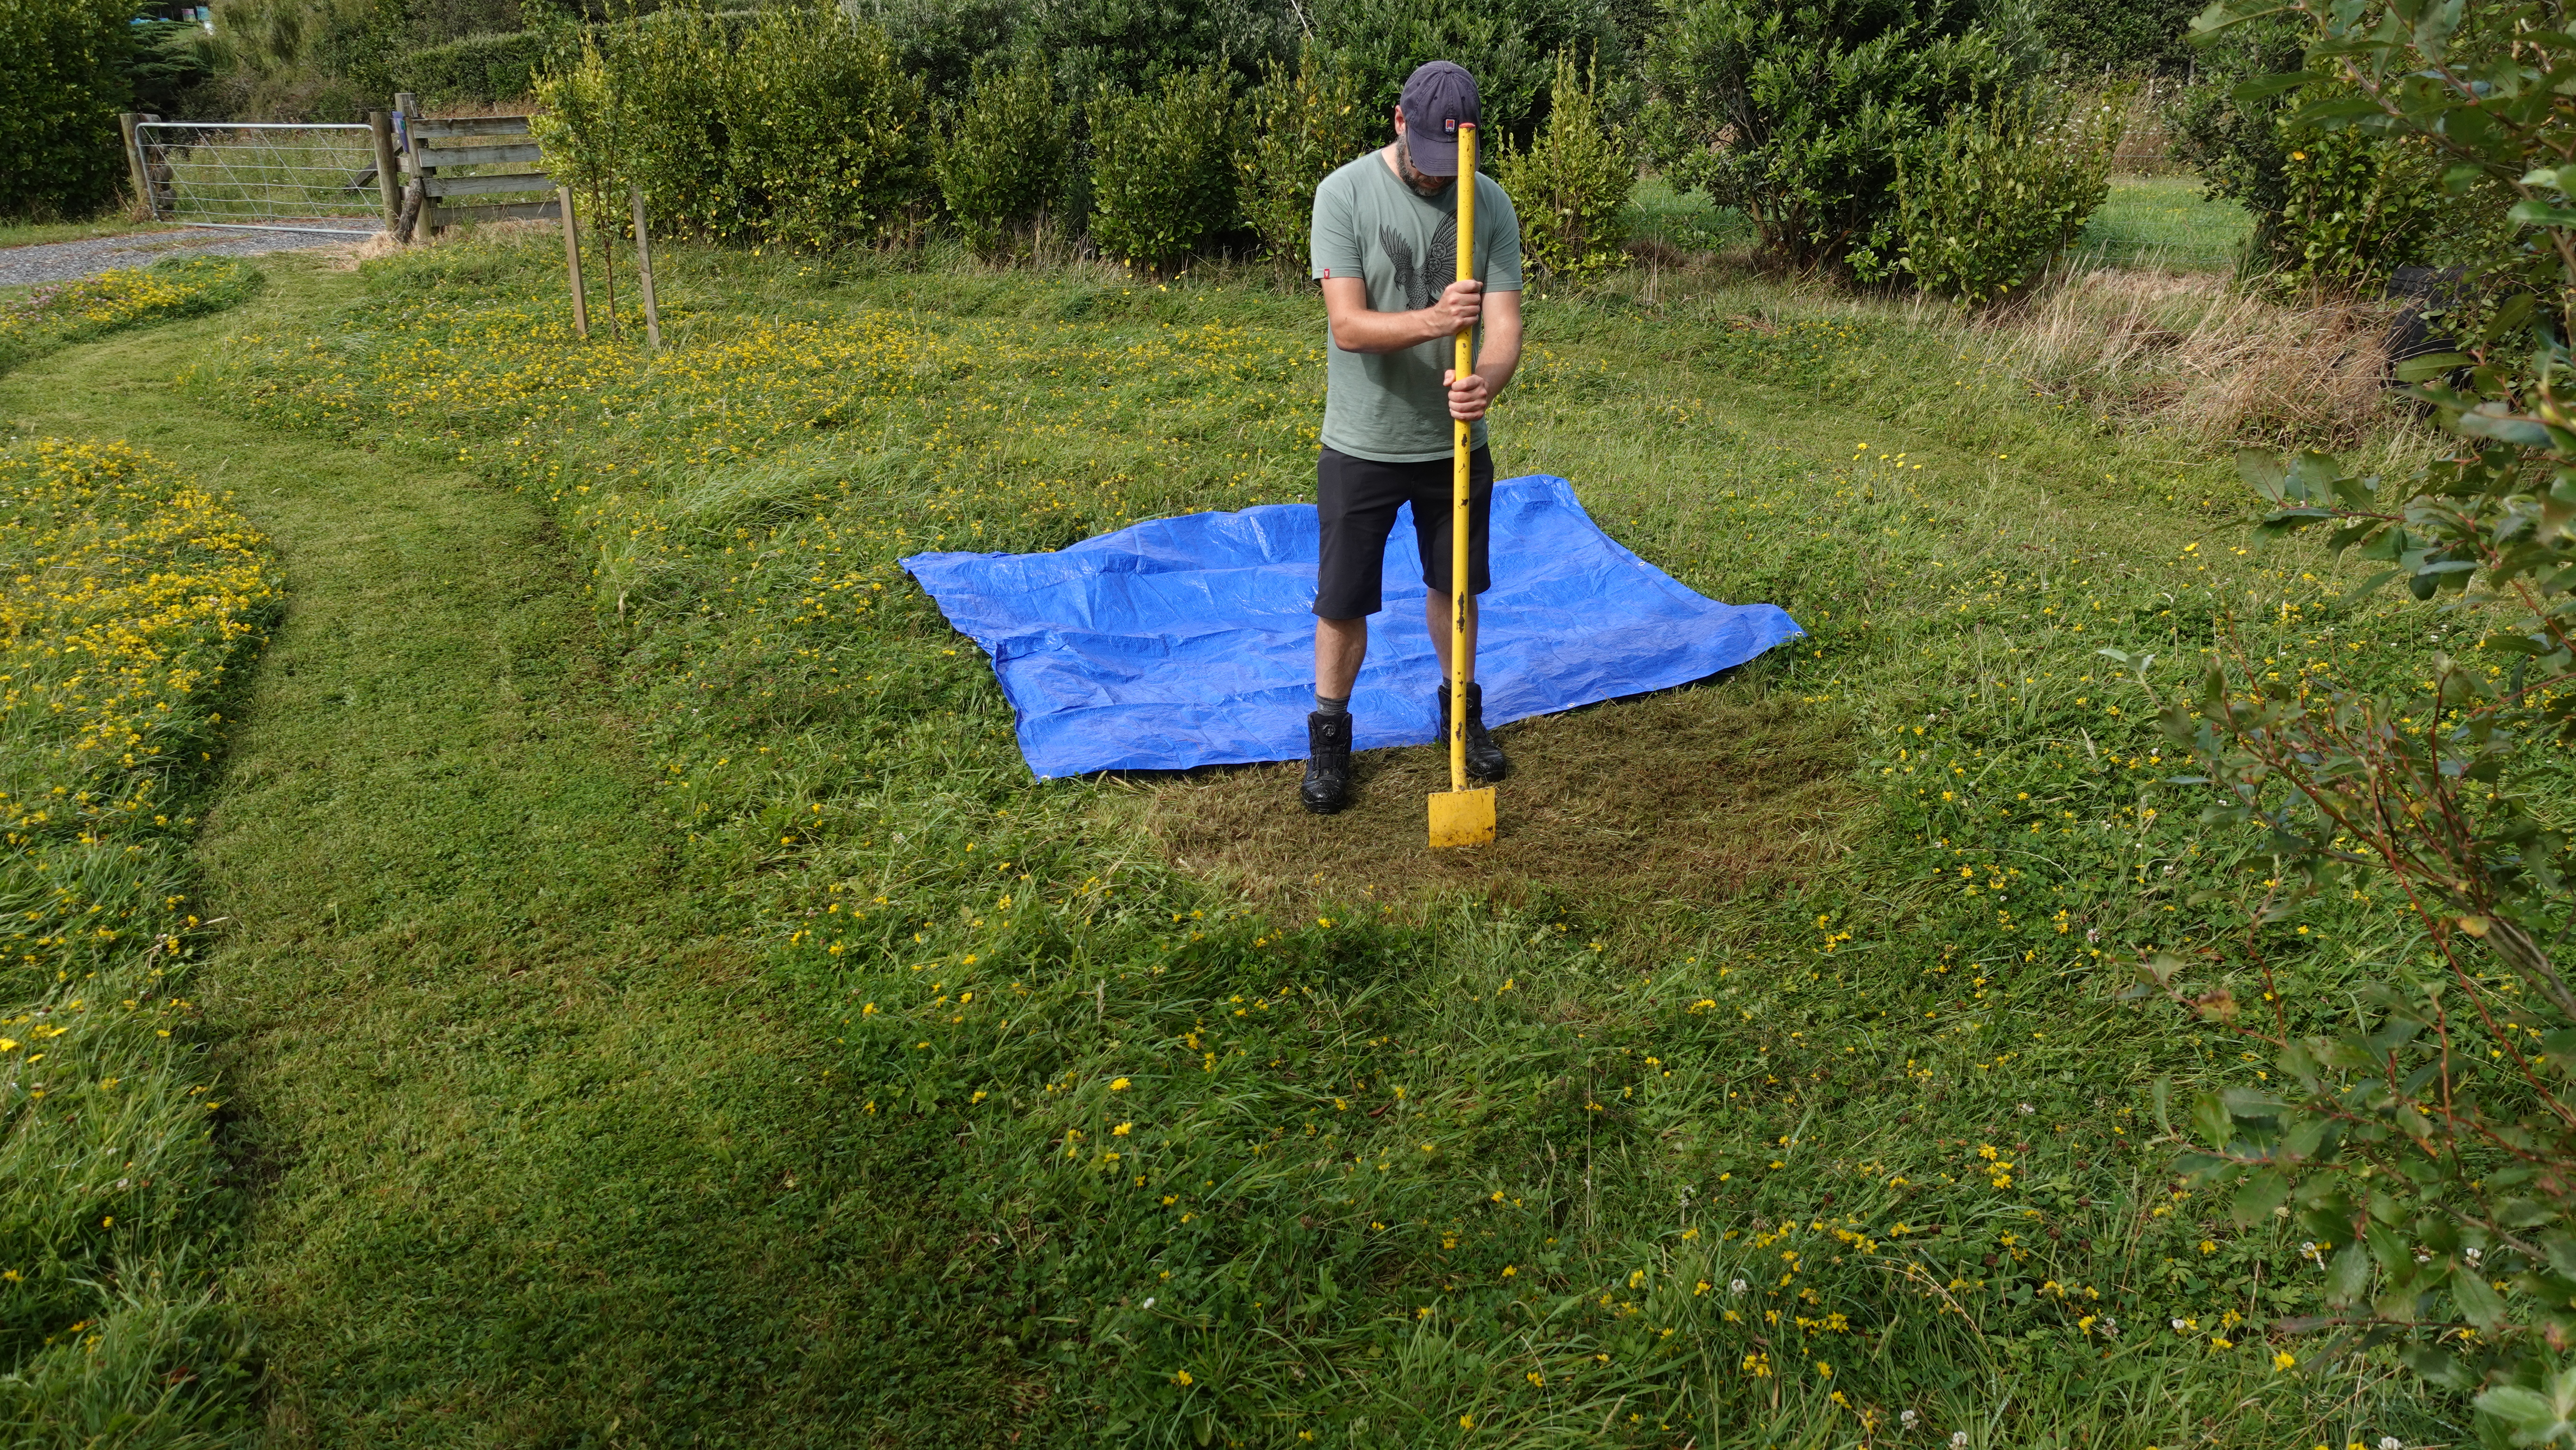
- Lay out a tarp next to the test pit location.
- Your test pit should be at least 30 x 30cm wide.
- If you plan to dig deeper than 30cm, you might need to dig a wider pit to allow you to take good observations and photos of the lower soil horizons. If you need to go deeper than 60cm, see the note on deep pits, below.
- The sides of the hole should be vertical (straight up and down).
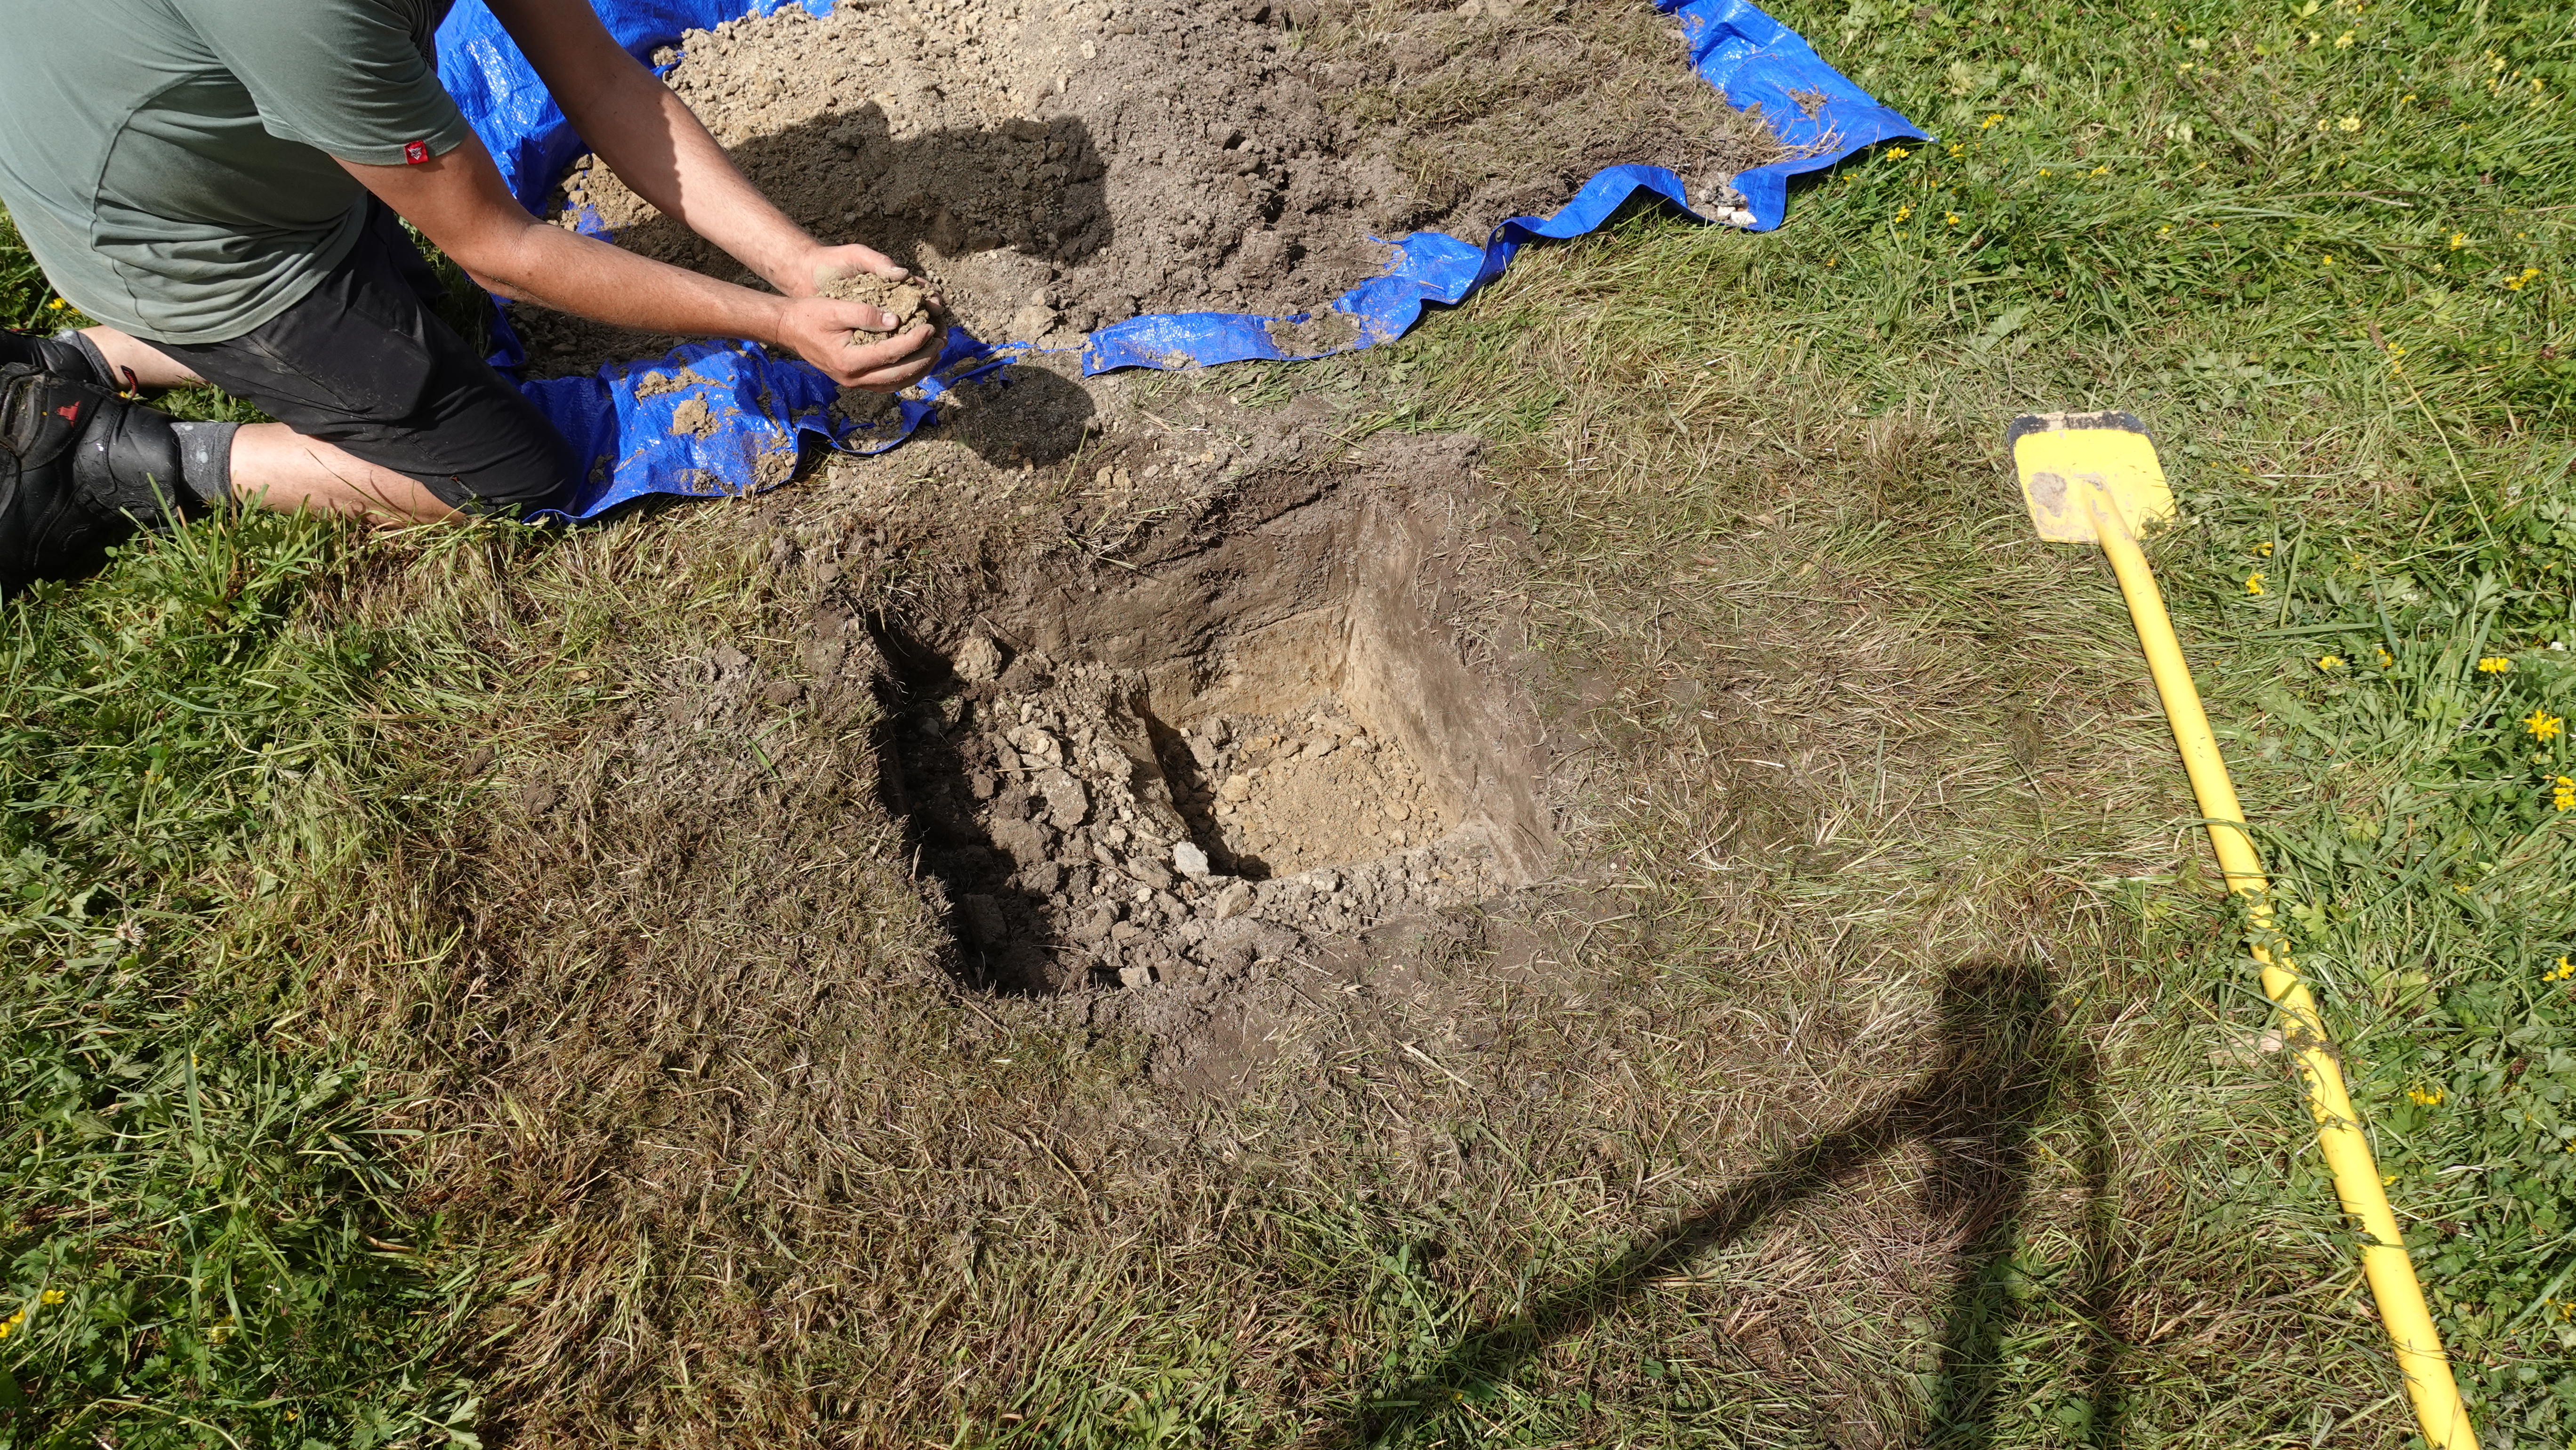
- Cut the turf (sod) off using the spade to cut a pattern of crosses across the area. Then cut in almost horizontally with the spade to skim the sod off and place it on the tarp.
- Place your pieces of sod on the tarp in the same order you dig them out, so you can put them back in the same places at the end.
- Dig the soil out of the hole and pile it onto the tarp.
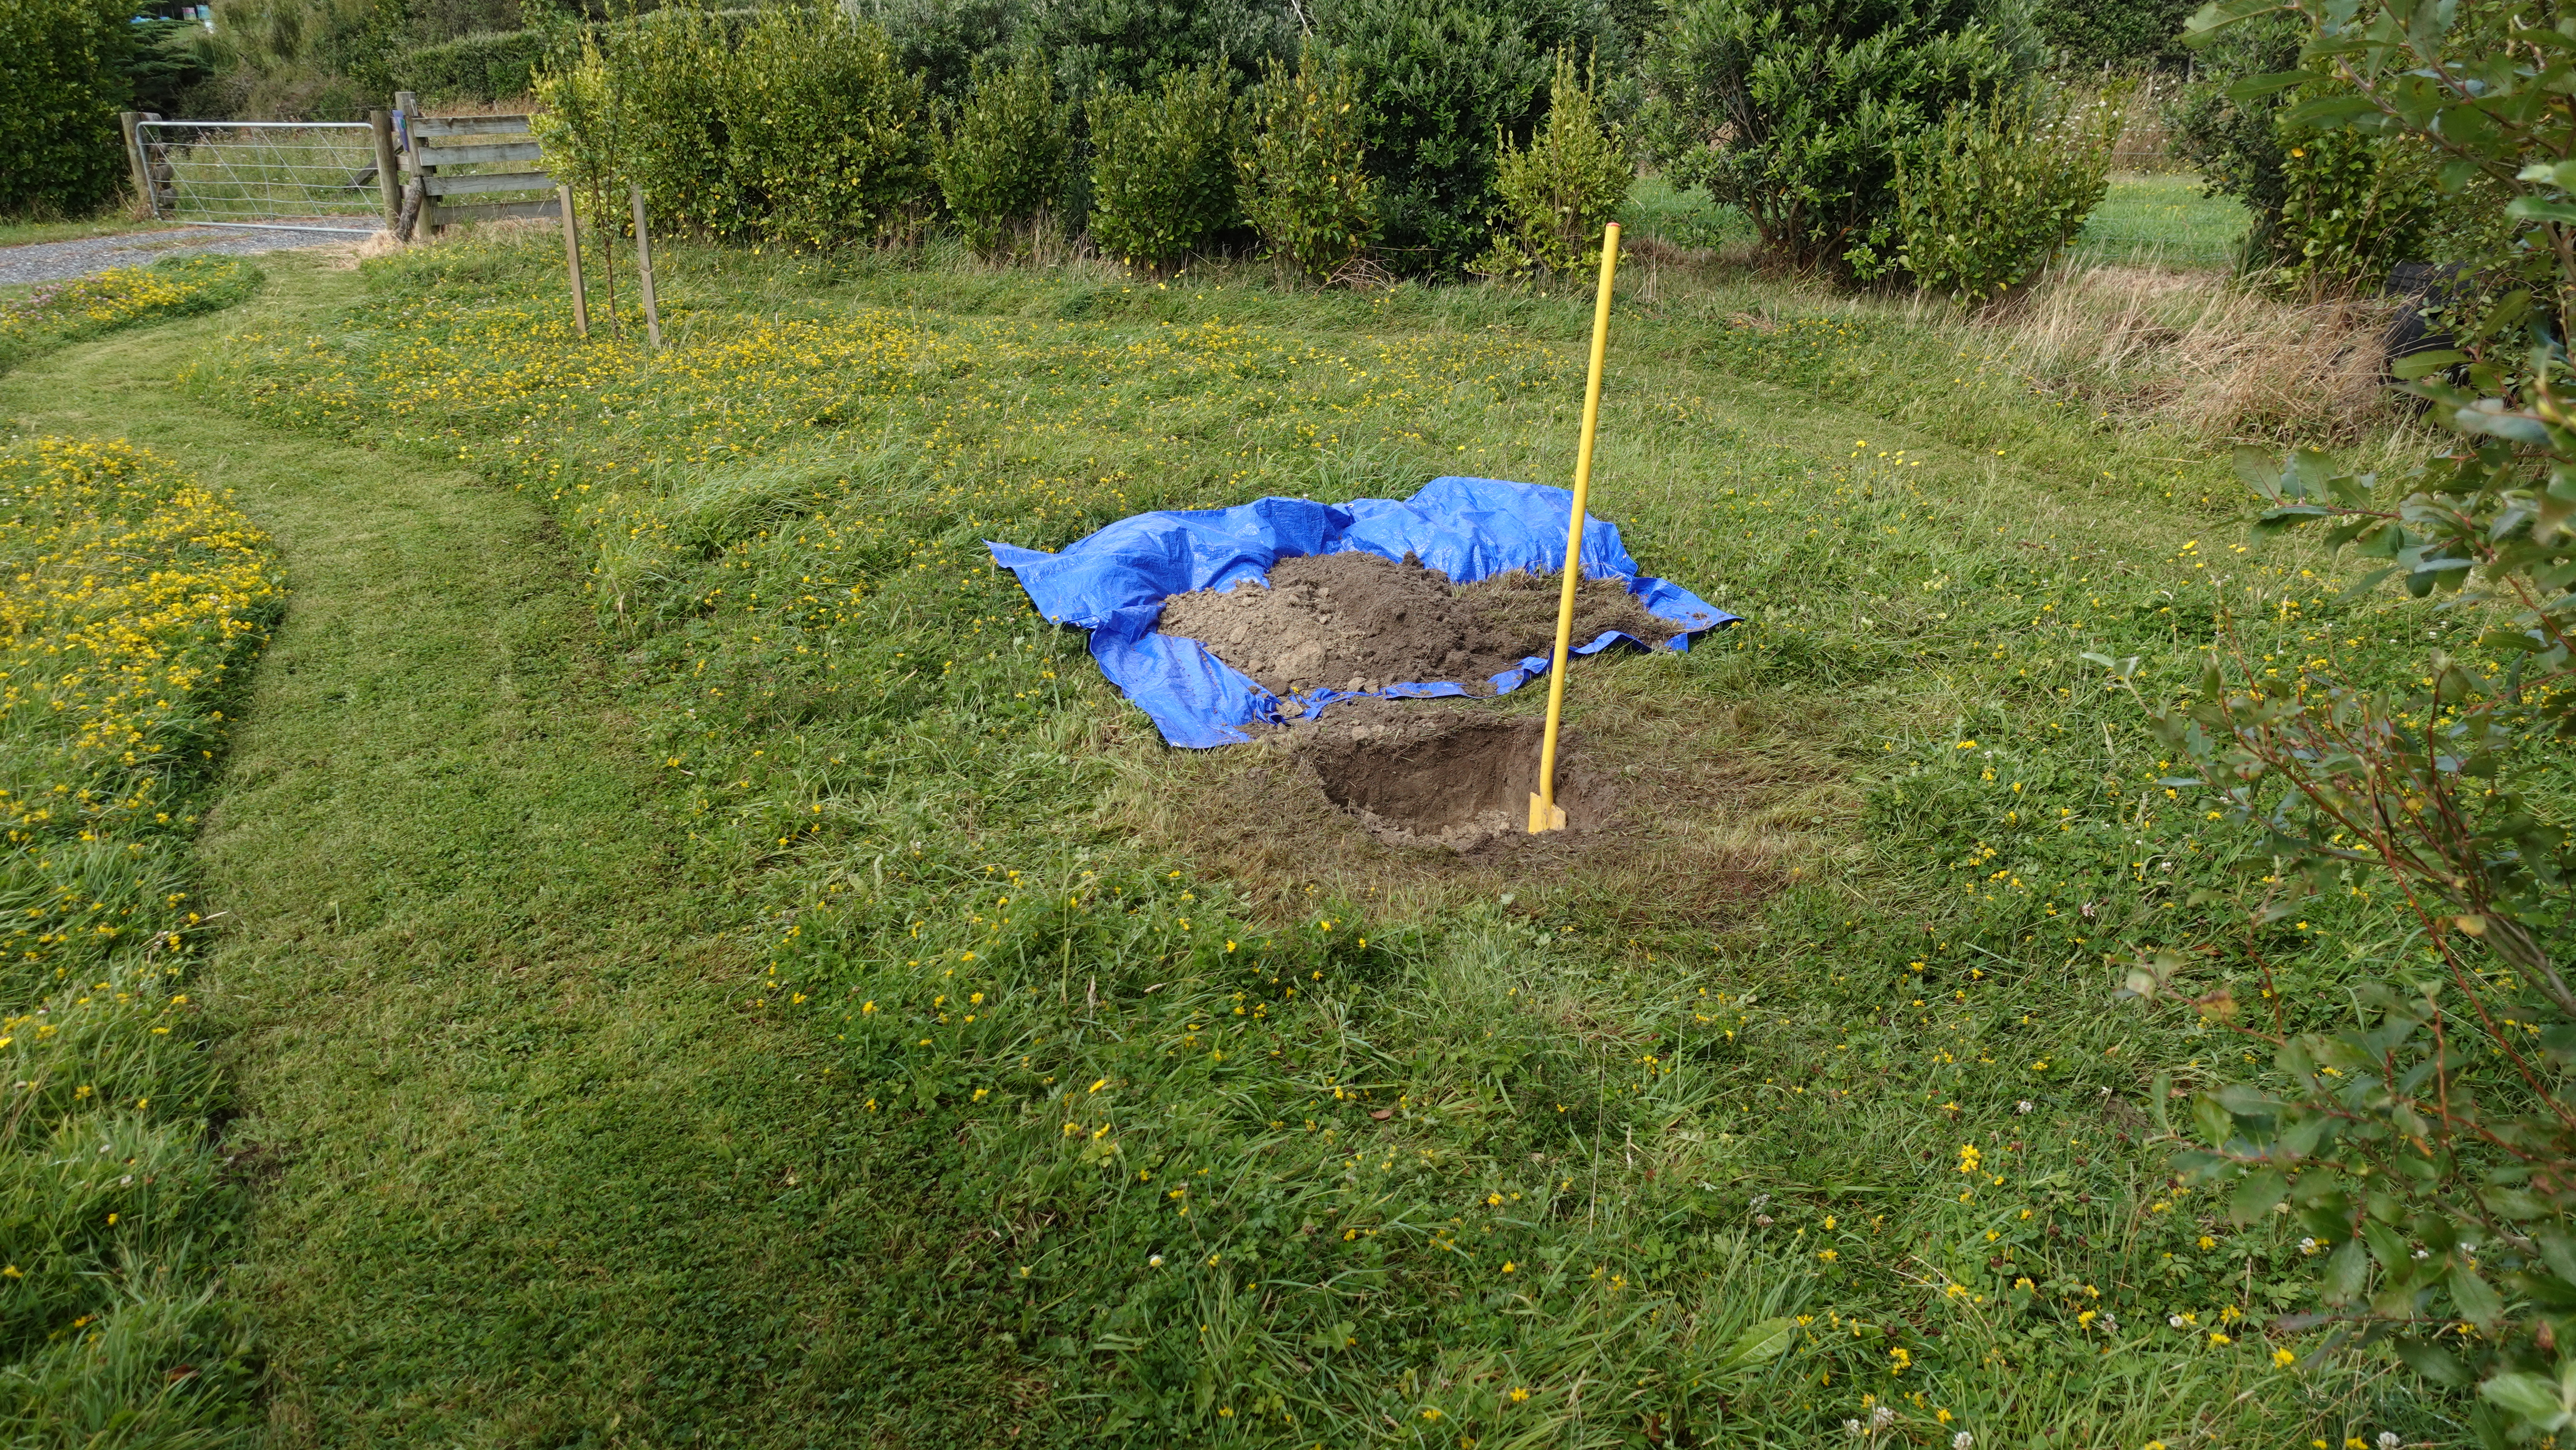
- Break up the soil with the spade and scoop it onto the tarp in layers of about 10-15cm at a time.
- If the soil changes colour or consistency, pile this in a different place on the tarp.
- Make sure your piles are in order, from top (closest to the sod) to bottom.
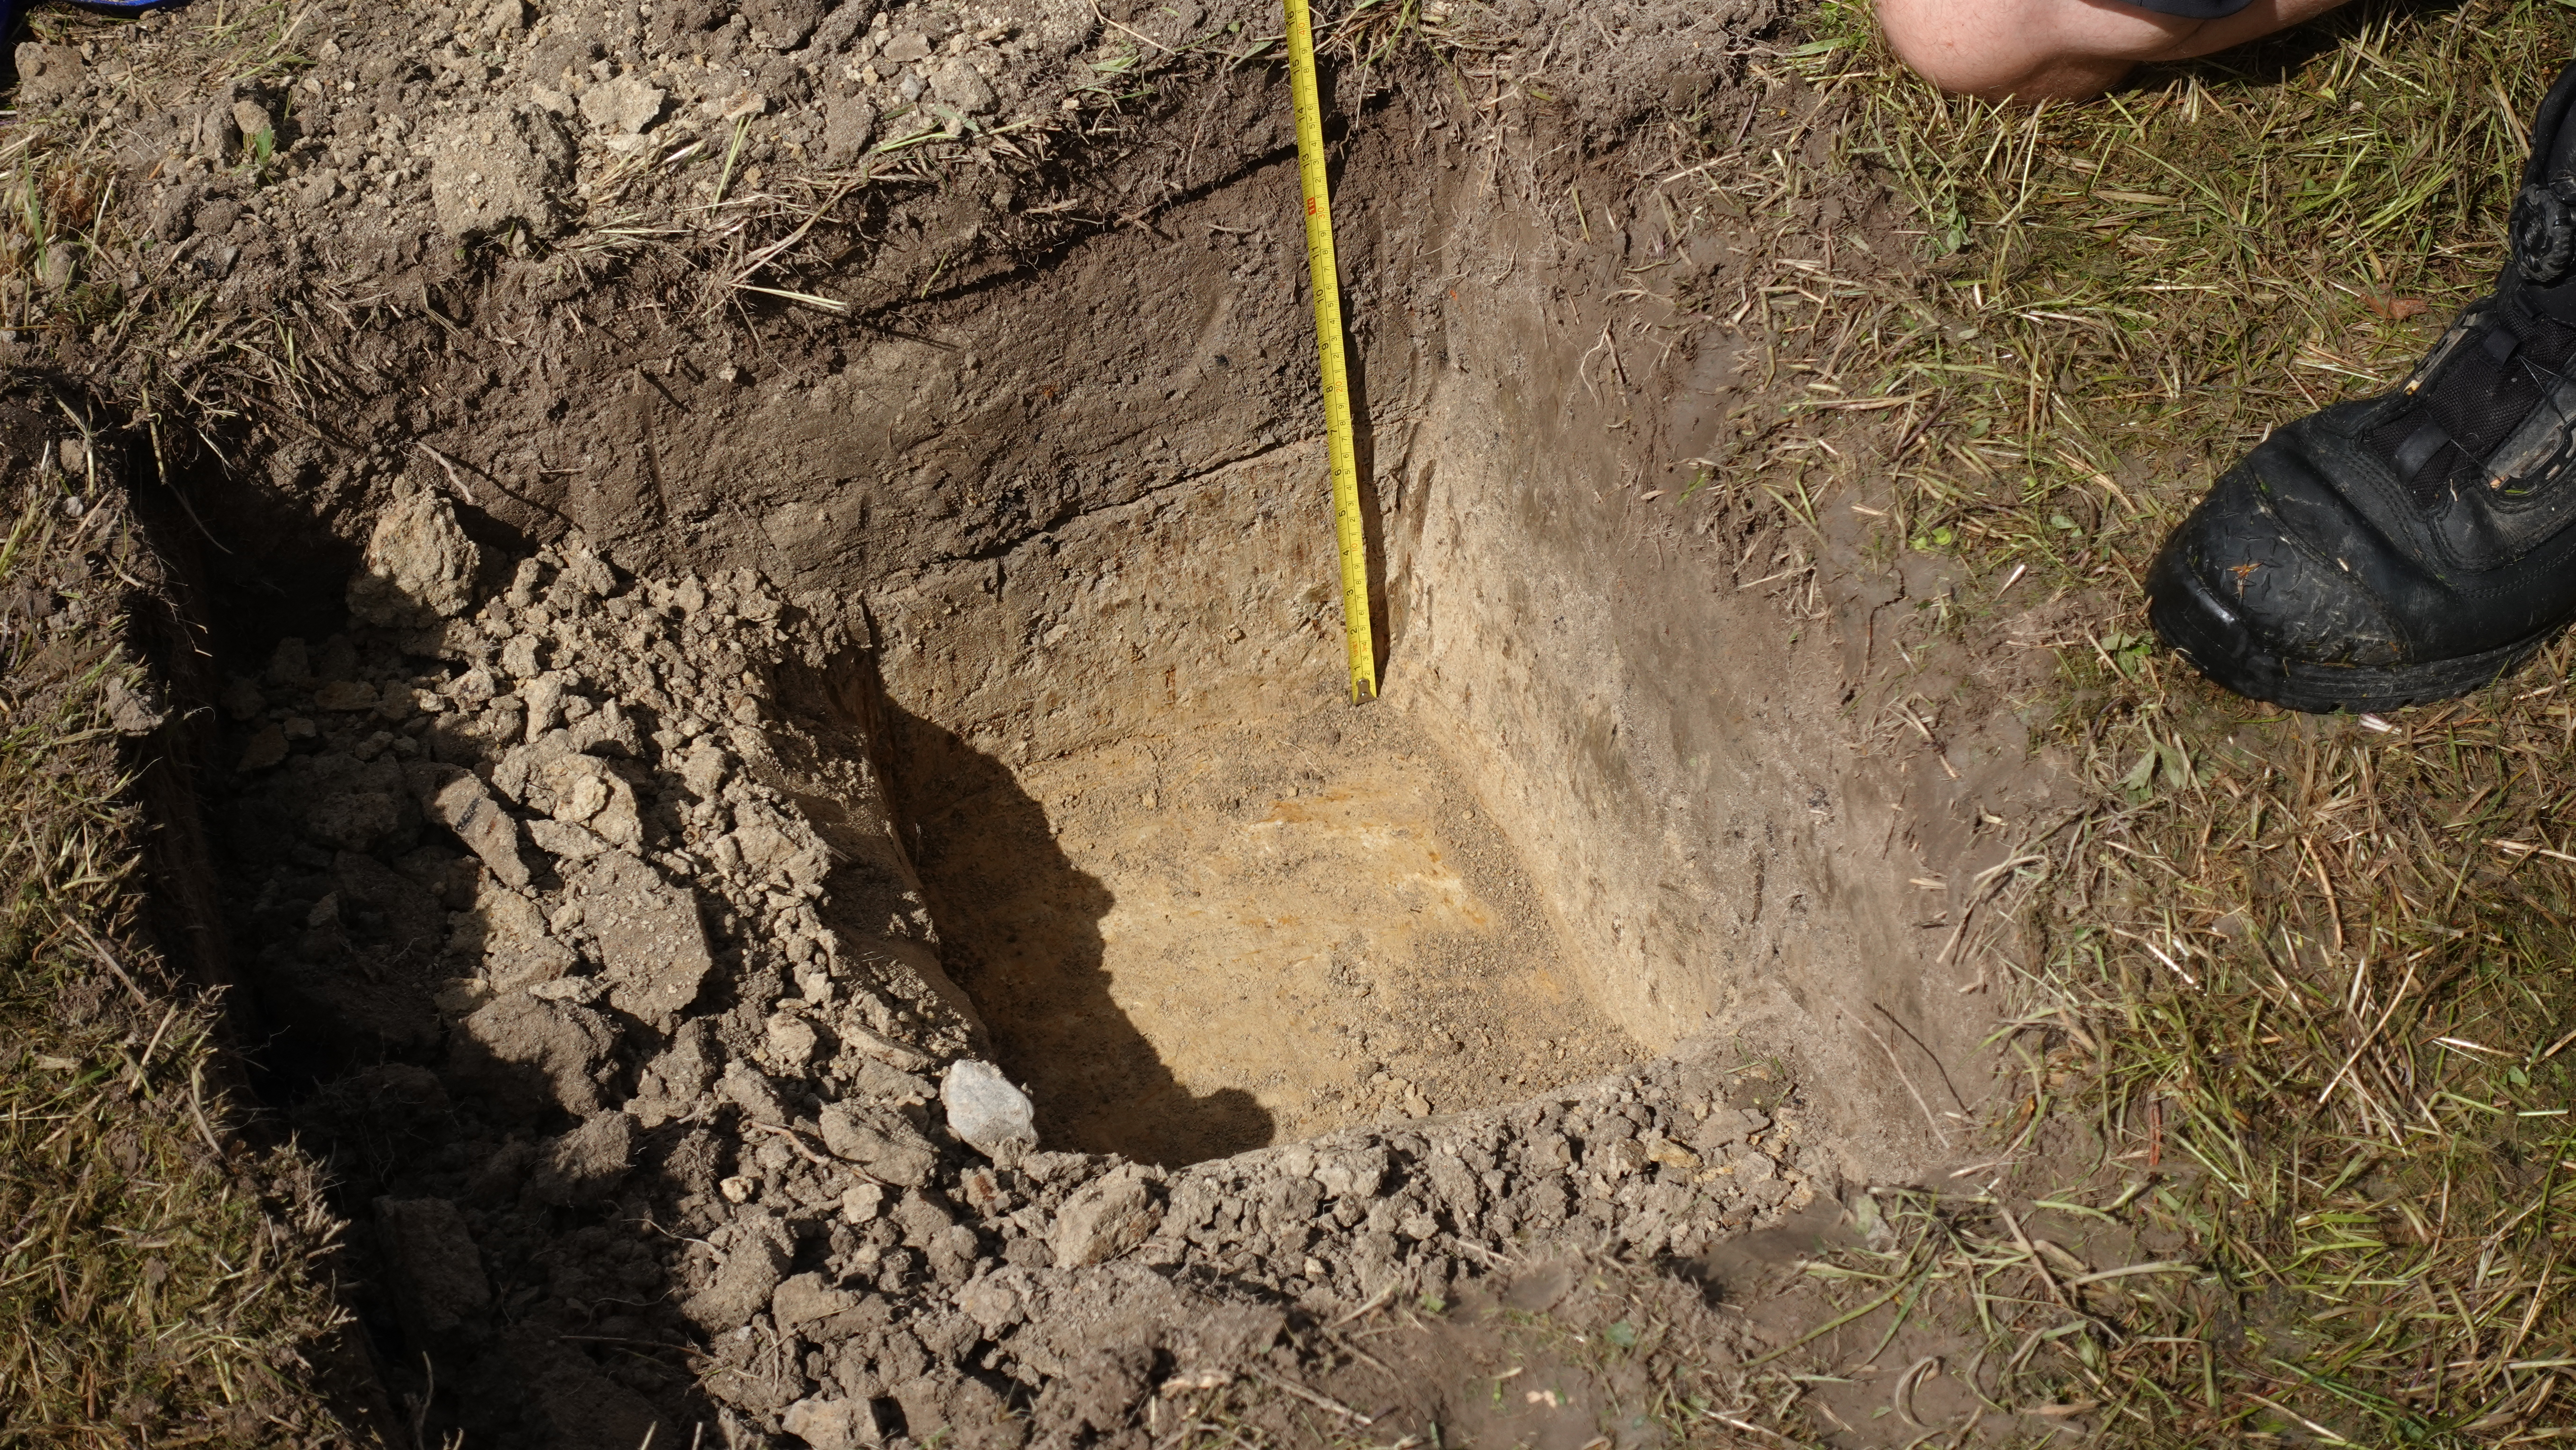
- Once you’ve reached your chosen depth, look at the walls of the hole. Choose one to be your soil profile. This should be the face that shows the soil horizons most clearly. It may be that two of the walls are in shade, and won’t show up well in photos, so choose one wall with sunlight on it.
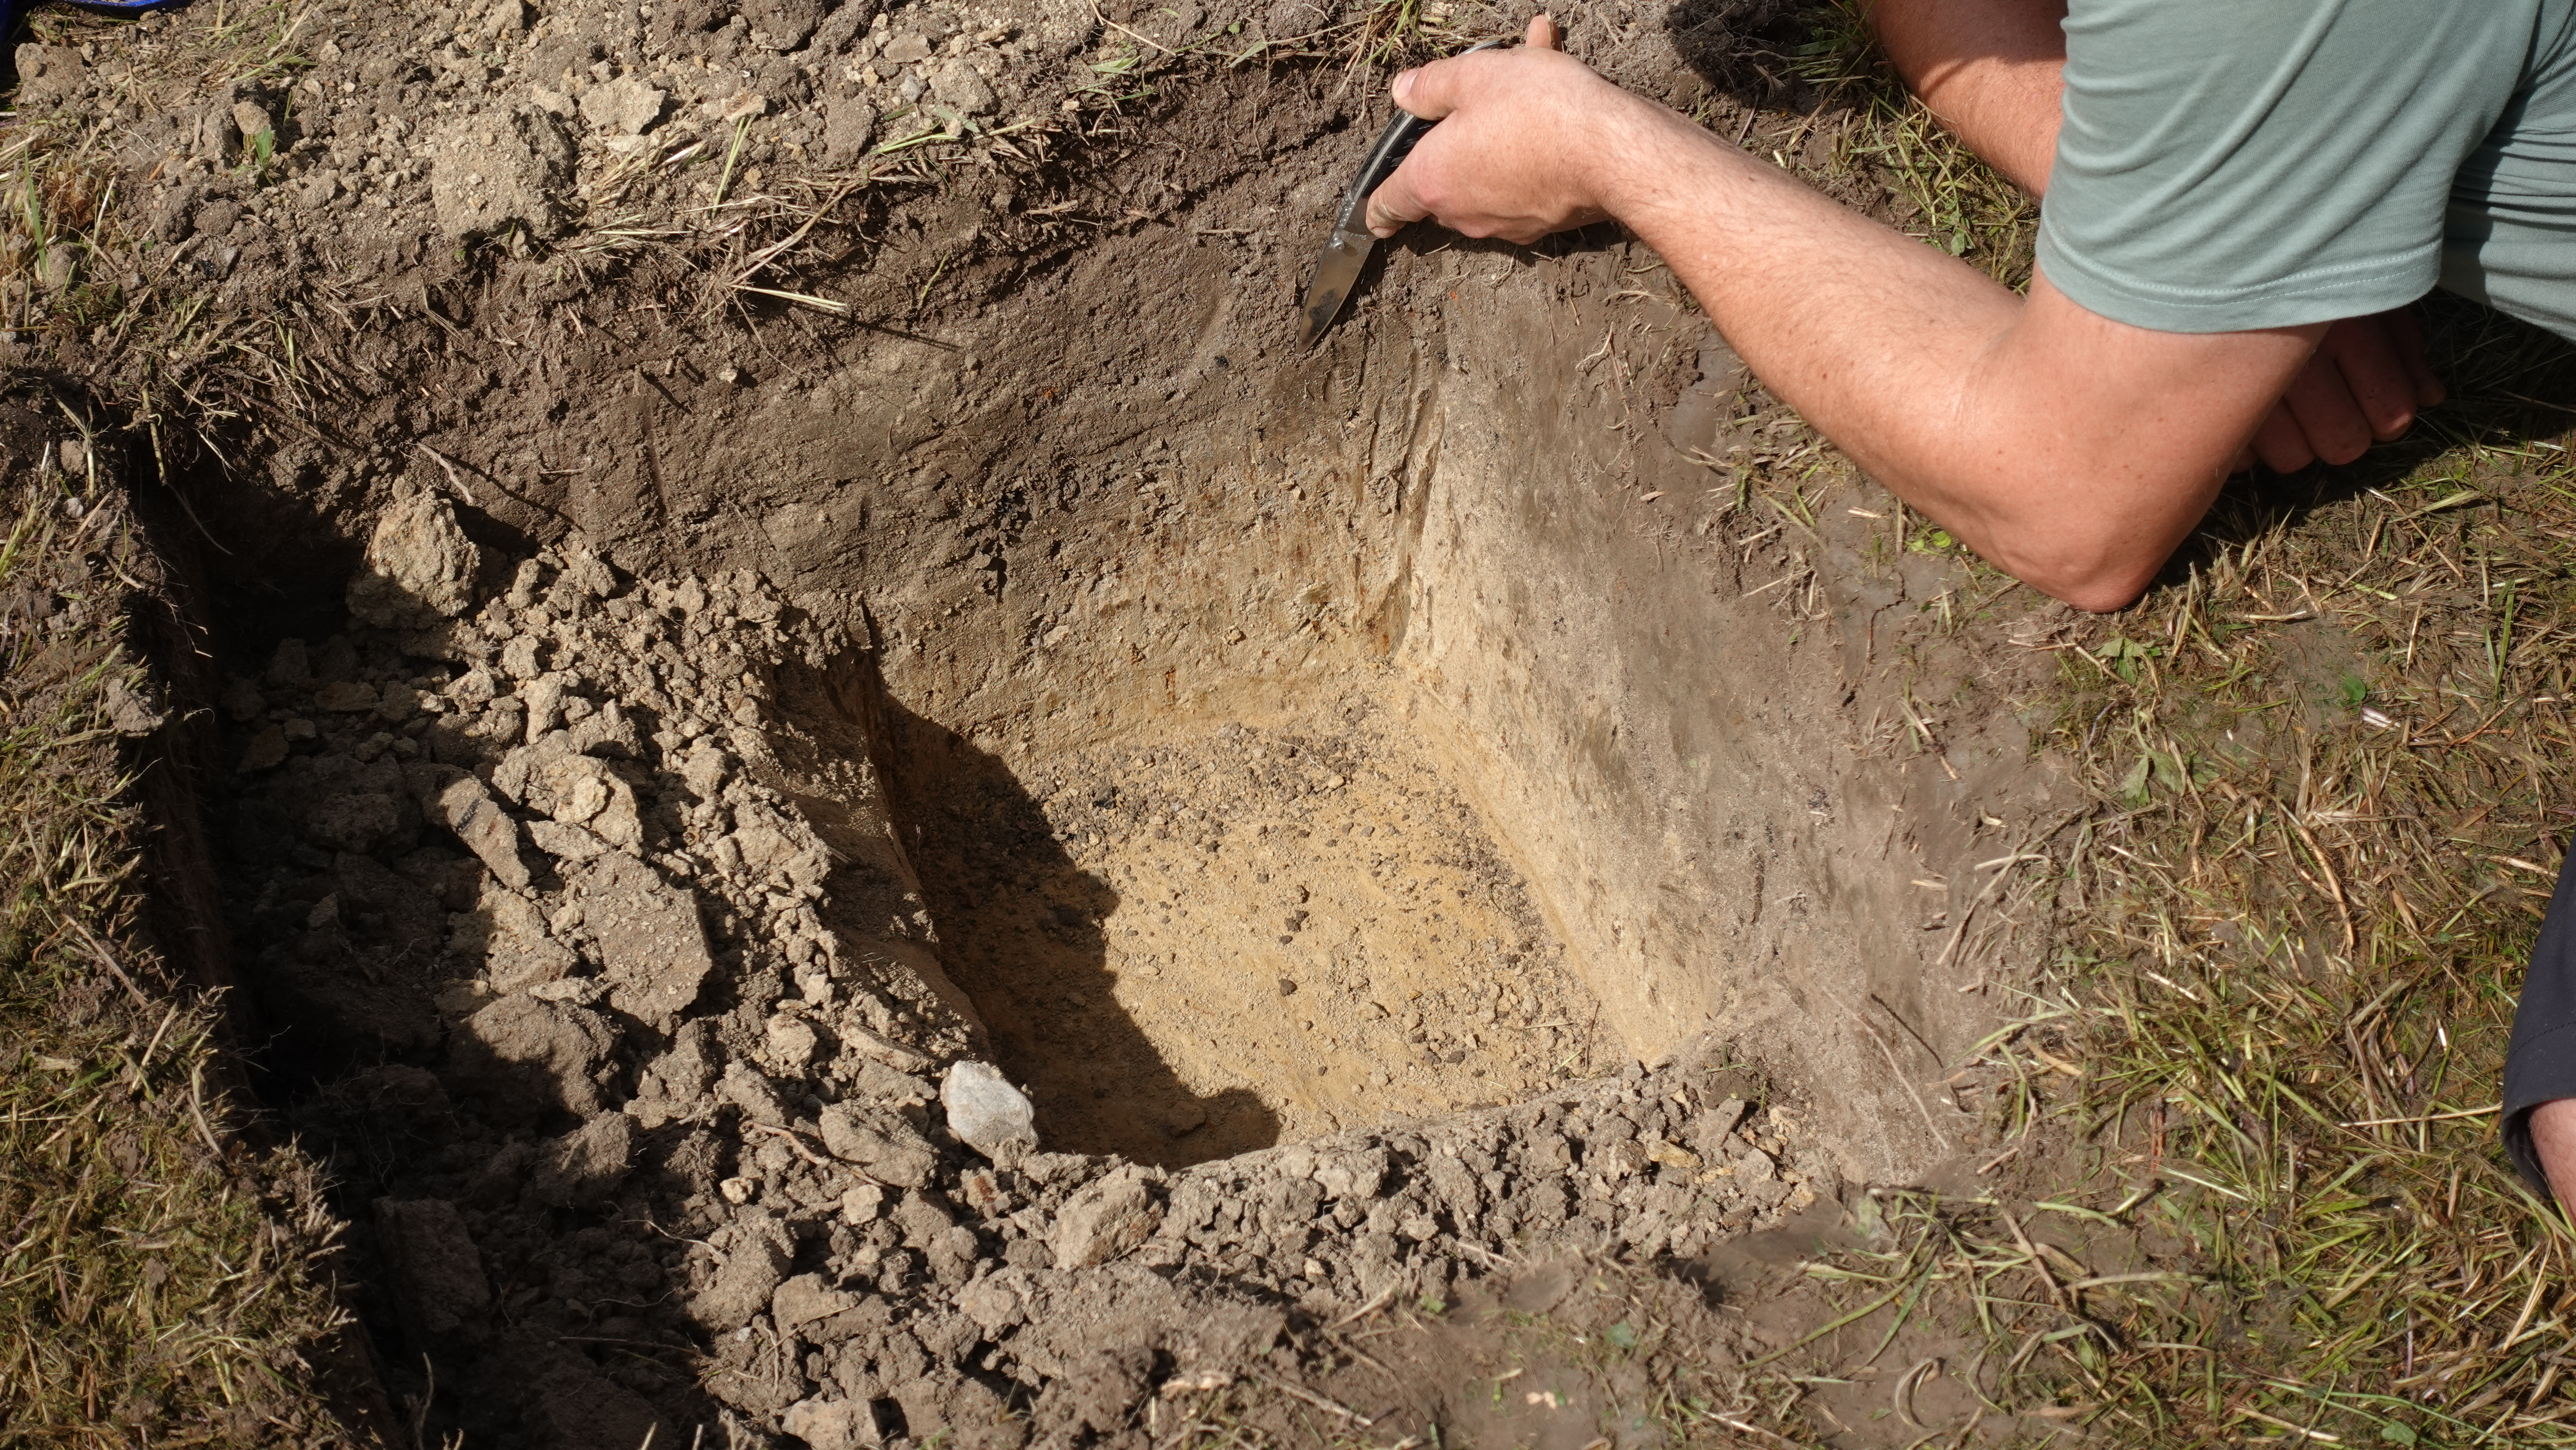
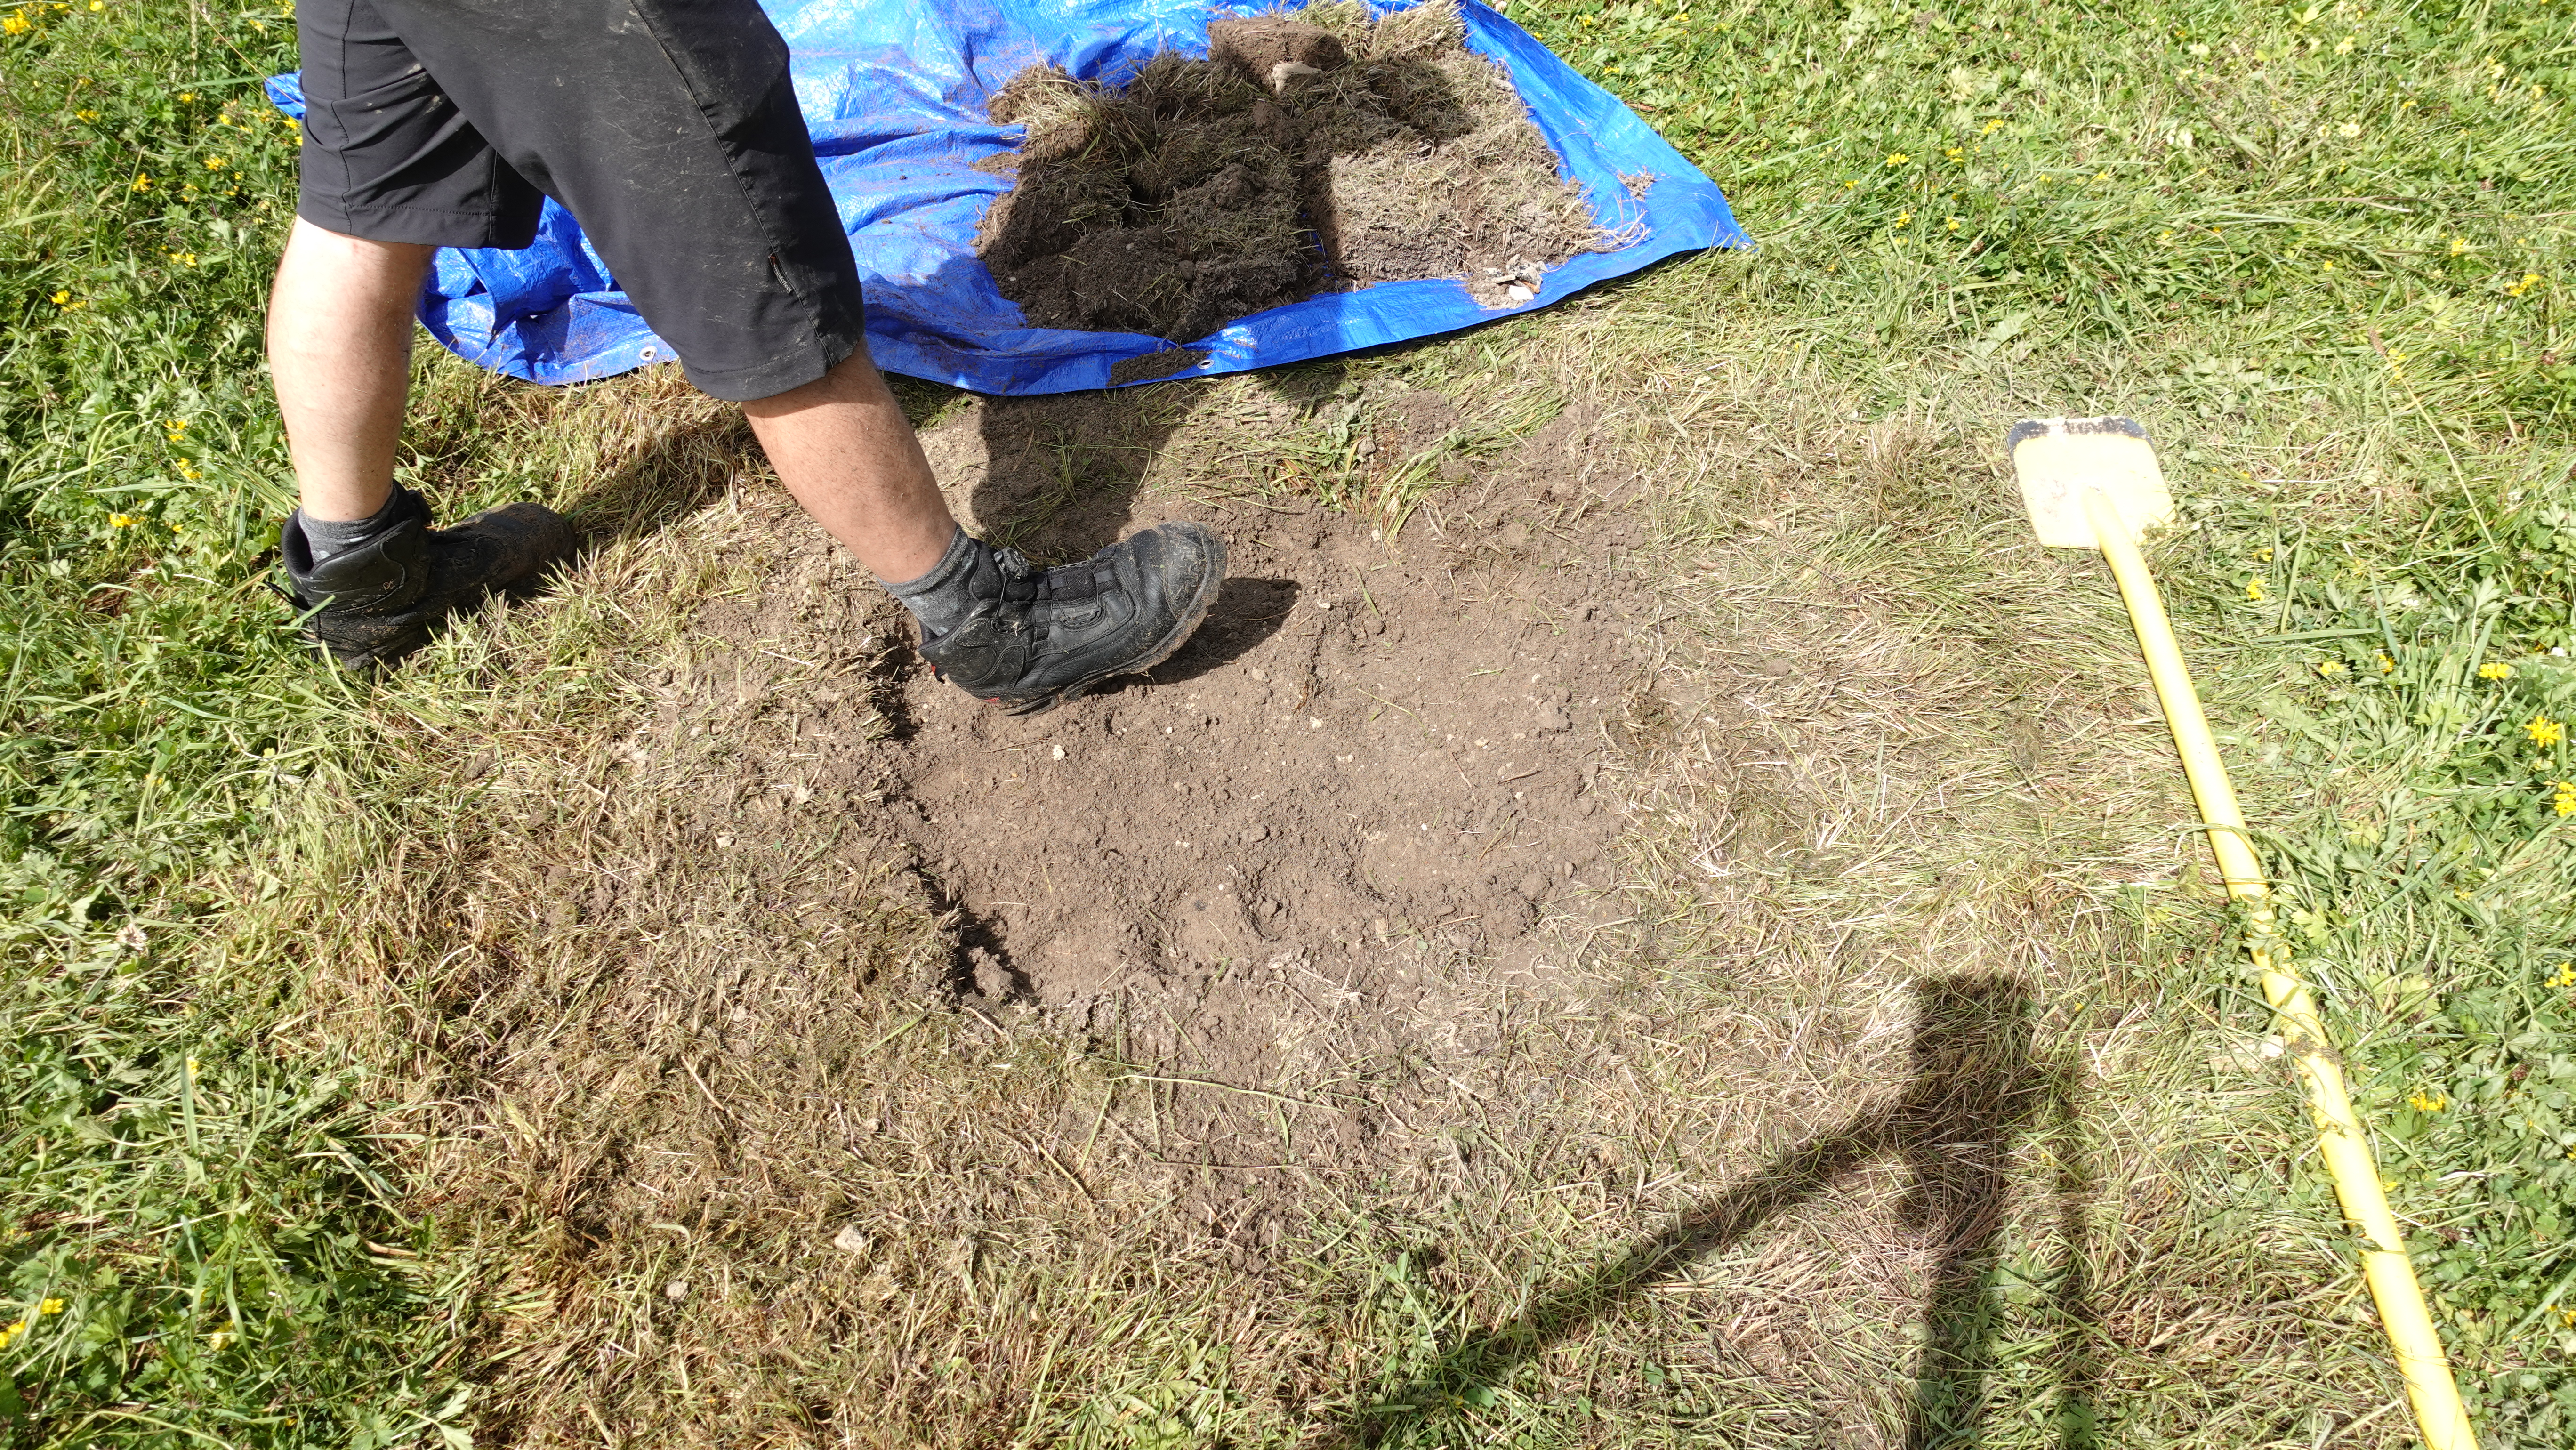
The grower is pointing to the point where smearing occurs. It also shows a 60cmx60cm pit but changed to a 30cmx30cm when the soil became very hard to dig. This way there is a good depth pit, that is easy to photograph but doesn’t take too much energy or time, or create too much soil that needs to be backfilled. - Clean up that face by digging out any areas where the soil has been smeared, using the knife.
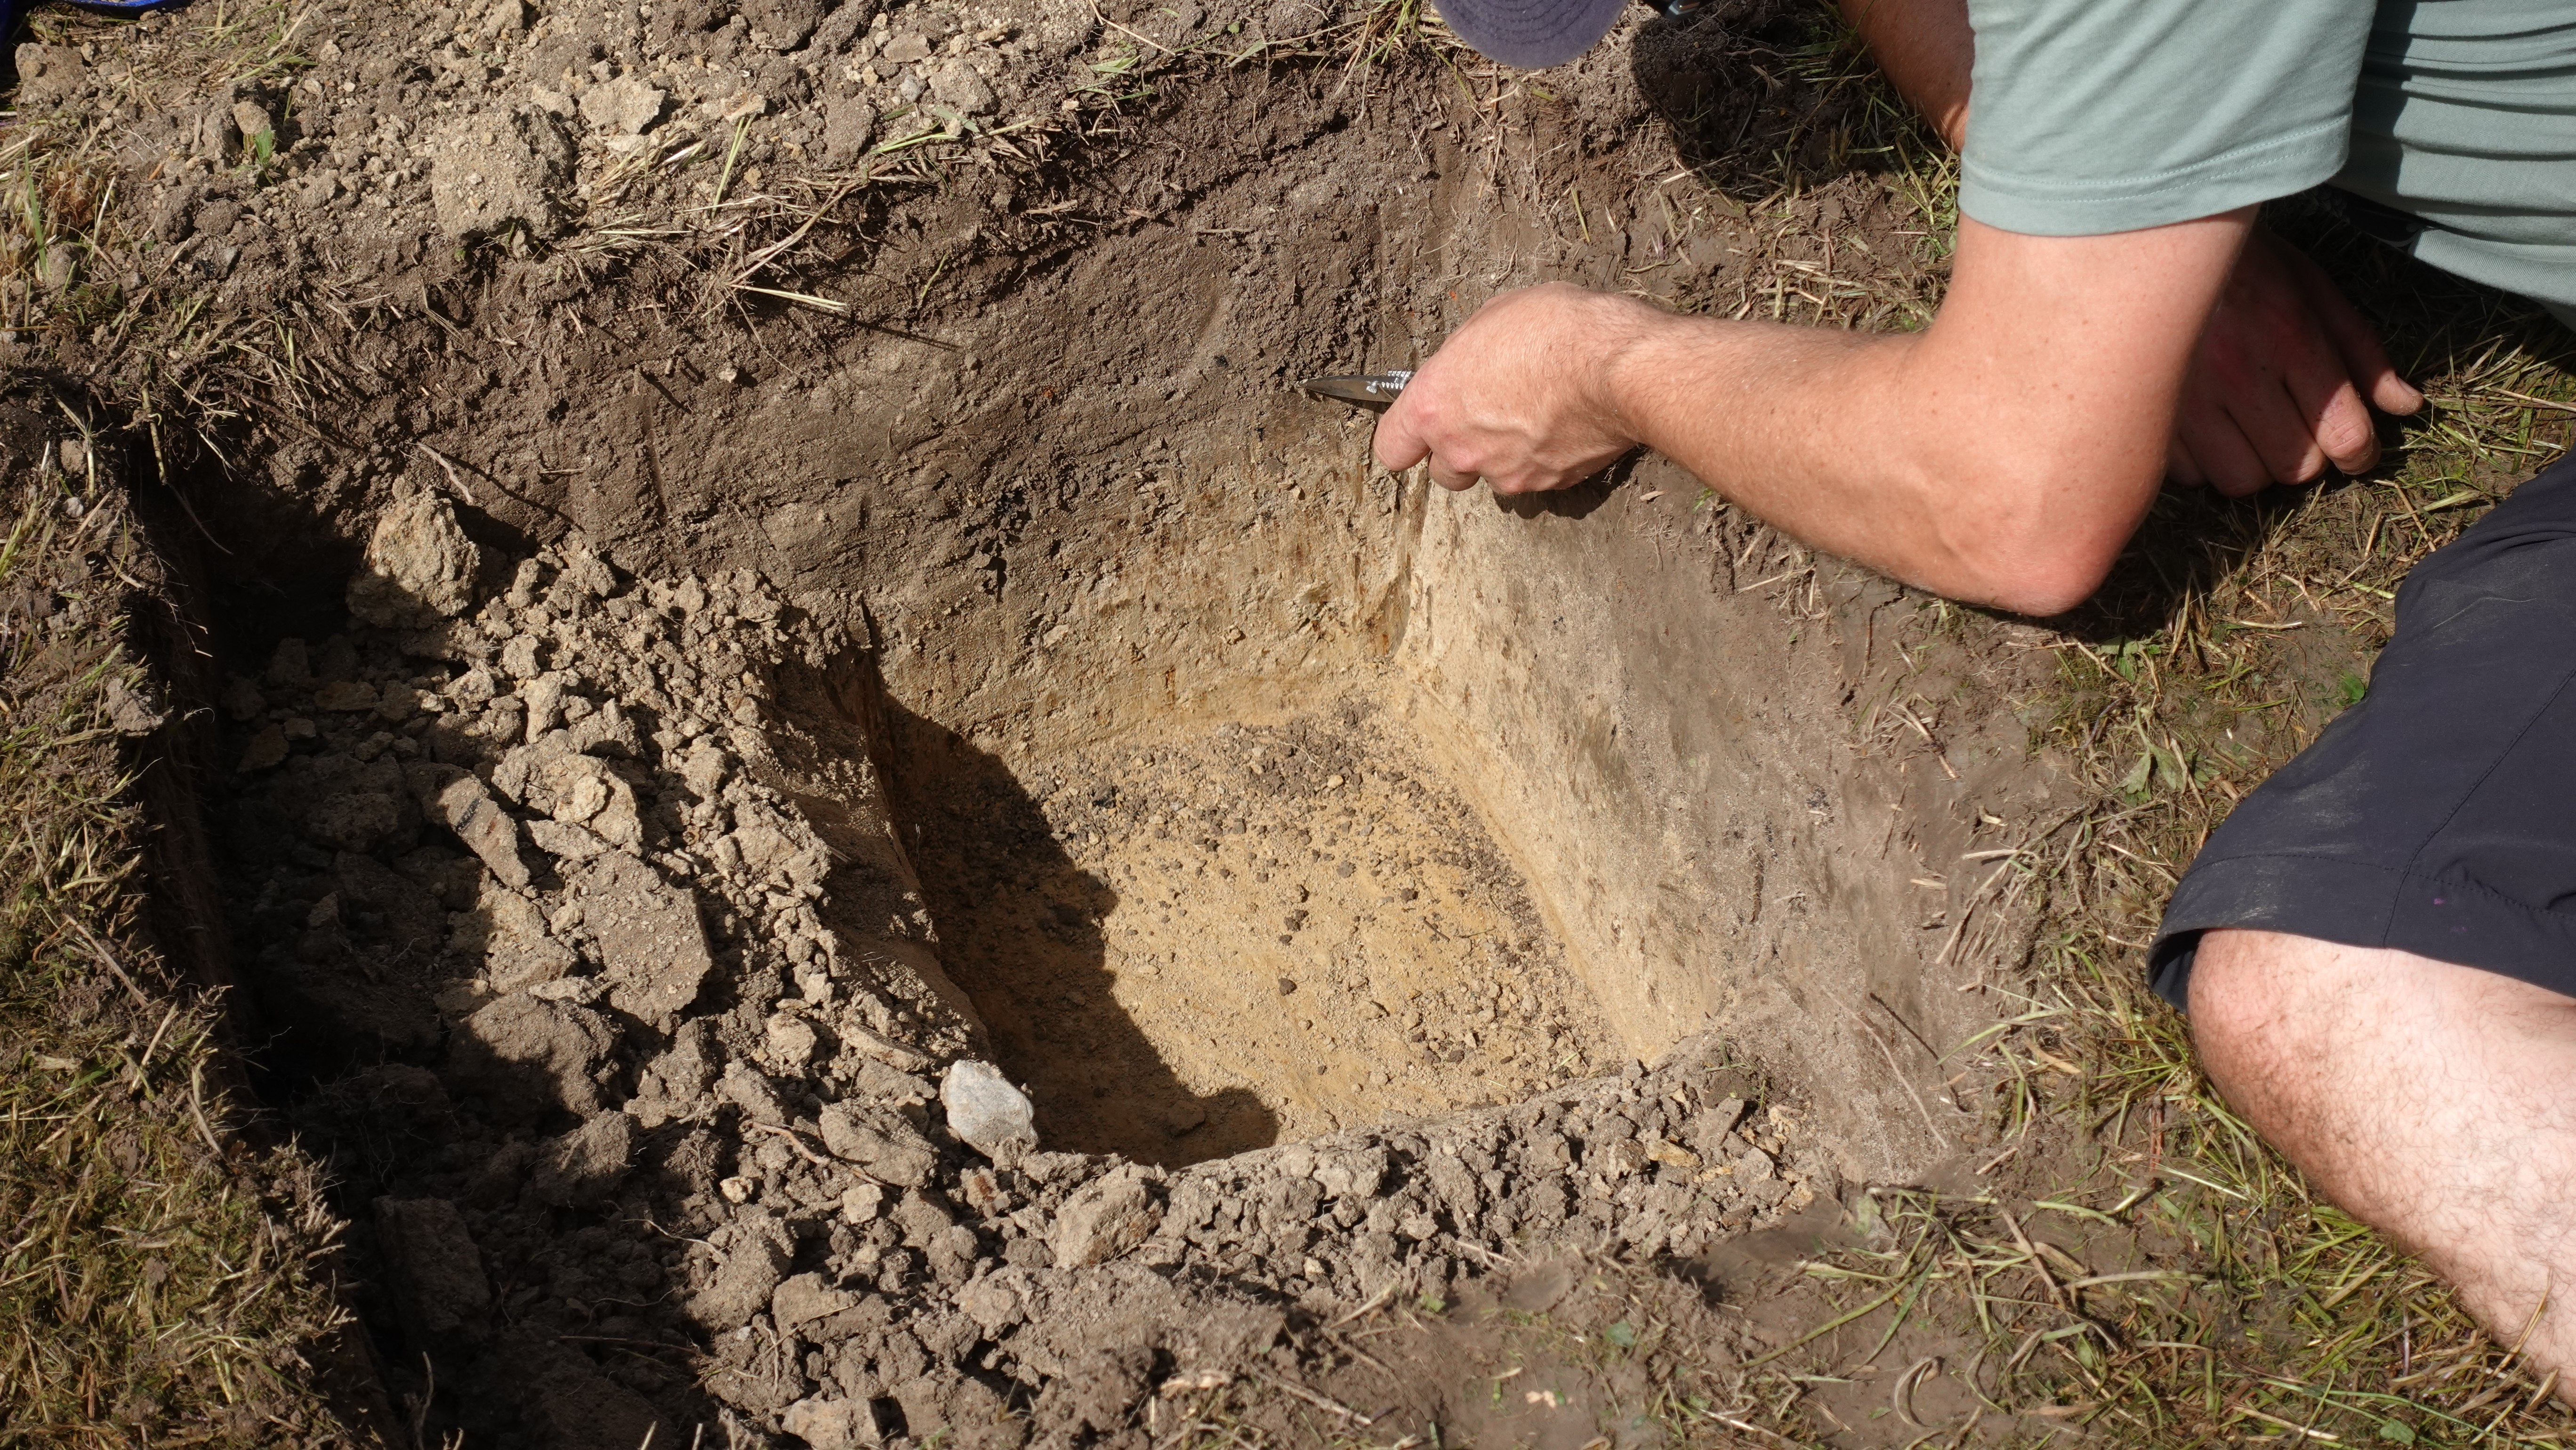
- You don’t need to remove much, just chip out little bits at a time until the face looks natural. The image shows the grower chipping away at the smearing.
Deep pits
If you need to look at the soil deeper than 60cm, dig a standard test pit first to a depth of 60cm, then use a post hole digger to form a smaller hole in the centre of the pit. Dig the soil out of this smaller pit and put it in a different pile on the tarp.
Looking at soil horizons
Take a close look at the face that you’ve just cleaned up. Can you see any obvious soil horizons?
Mark these with your knife, so they are obvious, then take a photo that shows the entire face, from top to bottom. Measure the total depth and record the measurement at each point where the soil type changes. In our example, the measurements were:
- Top topsoil layer had a top measurement of 42cm and a bottom of 34cm. If we take 34 away from 42 it gives us 8cm. So, our top layer is 8cm deep.
- Lower topsoil layer: 34-17cm = 17cm deep, starting 8cm below the surface.
- Subsoil layer: we don’t know how deep this goes so we can just say the subsoil starts at the bottom of the lower topsoil layer, which is 25cm (8 + 17 = 25).
Record these on your soil test sheet (we’ll get to this later in this section).
Take a close-up photo of each layer (soil horizons). Do them in order, so you know which photo belongs to each soil horizon.
Take a close look at each layer:
- Can you see any:
- plant roots
- worms or other insects
- stones or rocks
- human-made objects?
- What colour is the soil?
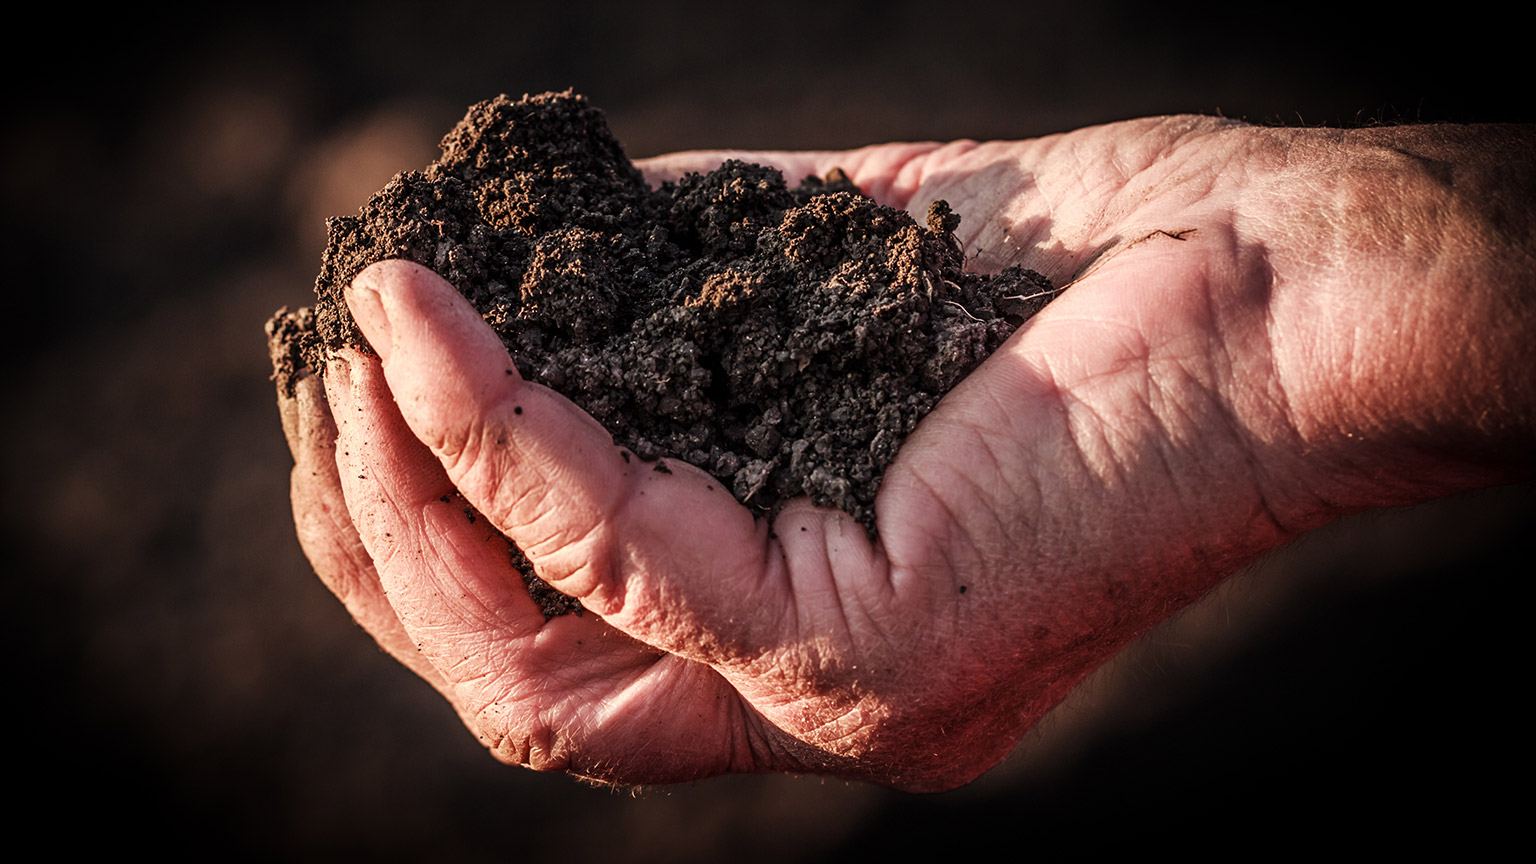
- Chip some soil off the face into your hand. What does it feel like?
- Does it break up freely, or clump together?
- Does it give off a smell?
A visual look at each layer
Top layer:

These images show the top layer of topsoil. Medium brown. Lots of large roots and organic matter. Soil feels light and spongy.
Lower layer:

These images show the lower layer of topsoil. Medium-light brown. Easy to dig. Good structure, feels smooth when worked into a ball with a little mosture.
Subsoil layer:
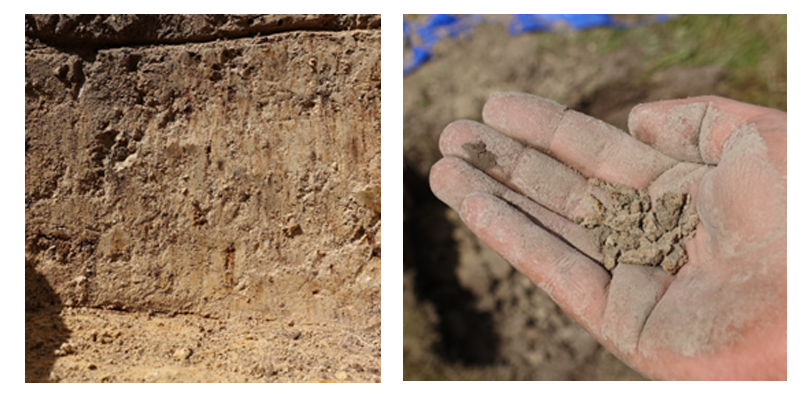
These images show the subsoil layer. Very light brown with orange spots, which may be a sign of a temporary water table. Soil feels sticky when worked into a ball with a little moisture.
Looking for the water table
Did you reach the permanent water table? In other words, is there a puddle of water sitting in your test pit?
If so, this about as deep as plant roots will grow. Don’t grow plants that need their roots to go deeper than this.
Testing the soil texture
As explained earlier in this course, soil texture describes the majority of mineral particles in the soil: sand, silt or clay.
Watch the following video by the New South Wales Government, which shows how to test soil texture in the field.
In summary:
- Take a handful of soil (remove anything larger than 2mm), and if dry, add water until soil comes together to form a ball.
- Knead the soil between your thumb and your forefinger ensuring that the soil is completely mixed and no large lumps are present, this should take 1-3min.
- Let the feeling of the soil indicate the the soil texture:
- If it feels gritty and hard to the touch, and/or sounds raspy when held held to your ear, it is sand.
- If it feels smooth, silky, even soapy but with little stickiness, it is silt.
- If it feels smooth and sticky, it is clay.
- Alternatively, by pushing the soil between the thumb and forefinger you should be able to form a ribbon of soil which will allow you to use a ribboning chart to determine the soil texture. This is a more accurate approach, as there are more classifications.
Activity – The ribboning technique
- Download the NSW Department of Primary Industries Fact Sheet called Determining soil texture using the ribboning technique.
- Refer to the ribboning chart on Table 1.
- Work through the process for each different soil horizon.
In our photo examples above, the middle layer is a fine silt and, the bottom layer is clay.
Testing the soil structure
As explained earlier in this course, soil structure talks about how the individual particles in the soil group together.
Watch the following video by the New South Wales Government, which shows how to test soil structure in the field.
For our purposes, it’s enough to look at the soil after you have laid it out to determine the size of the aggregates and particulates.
| Poor structure | Mostly big chunks, or mostly very fine aggregates |
|---|---|
| Good structure | Most of the soil has broken into medium sized aggregates |
In summary:
- Lay out a tarp and place a wooden board on top.
- With your spade, scoop a spadeful of soil from your tarp which has the soil from the test pit. Make sure you’re only scooping soil from one pile (one soil horizon).
- Drop the soil from the spade onto the board from about waist height.
- If there a large clods left after you drop it, pick them up and drop them individually onto the board one time each.
- Move any soil that’s fallen on the tarp back onto the board.
- Sort the soil so all of the big clumps are together at one end, the medium-sized ones in the middle, and the fine ones at the other end. Determine which type there is most of.
Repeat for each soil horizon.
Activity – Completing the soil test record
Reinstating the soil
When you’ve finished:
- Fill the hole by putting the piles of soil back in in the correct order.
- When most of the soil is in, press the soil down with the heel of your boot to press out any large air pockets.
- Place the sod back, piece-by-piece, in the correct locations.
- Tip any remaining soil off the tarp onto the sod, and brush it into the gaps with your hands.
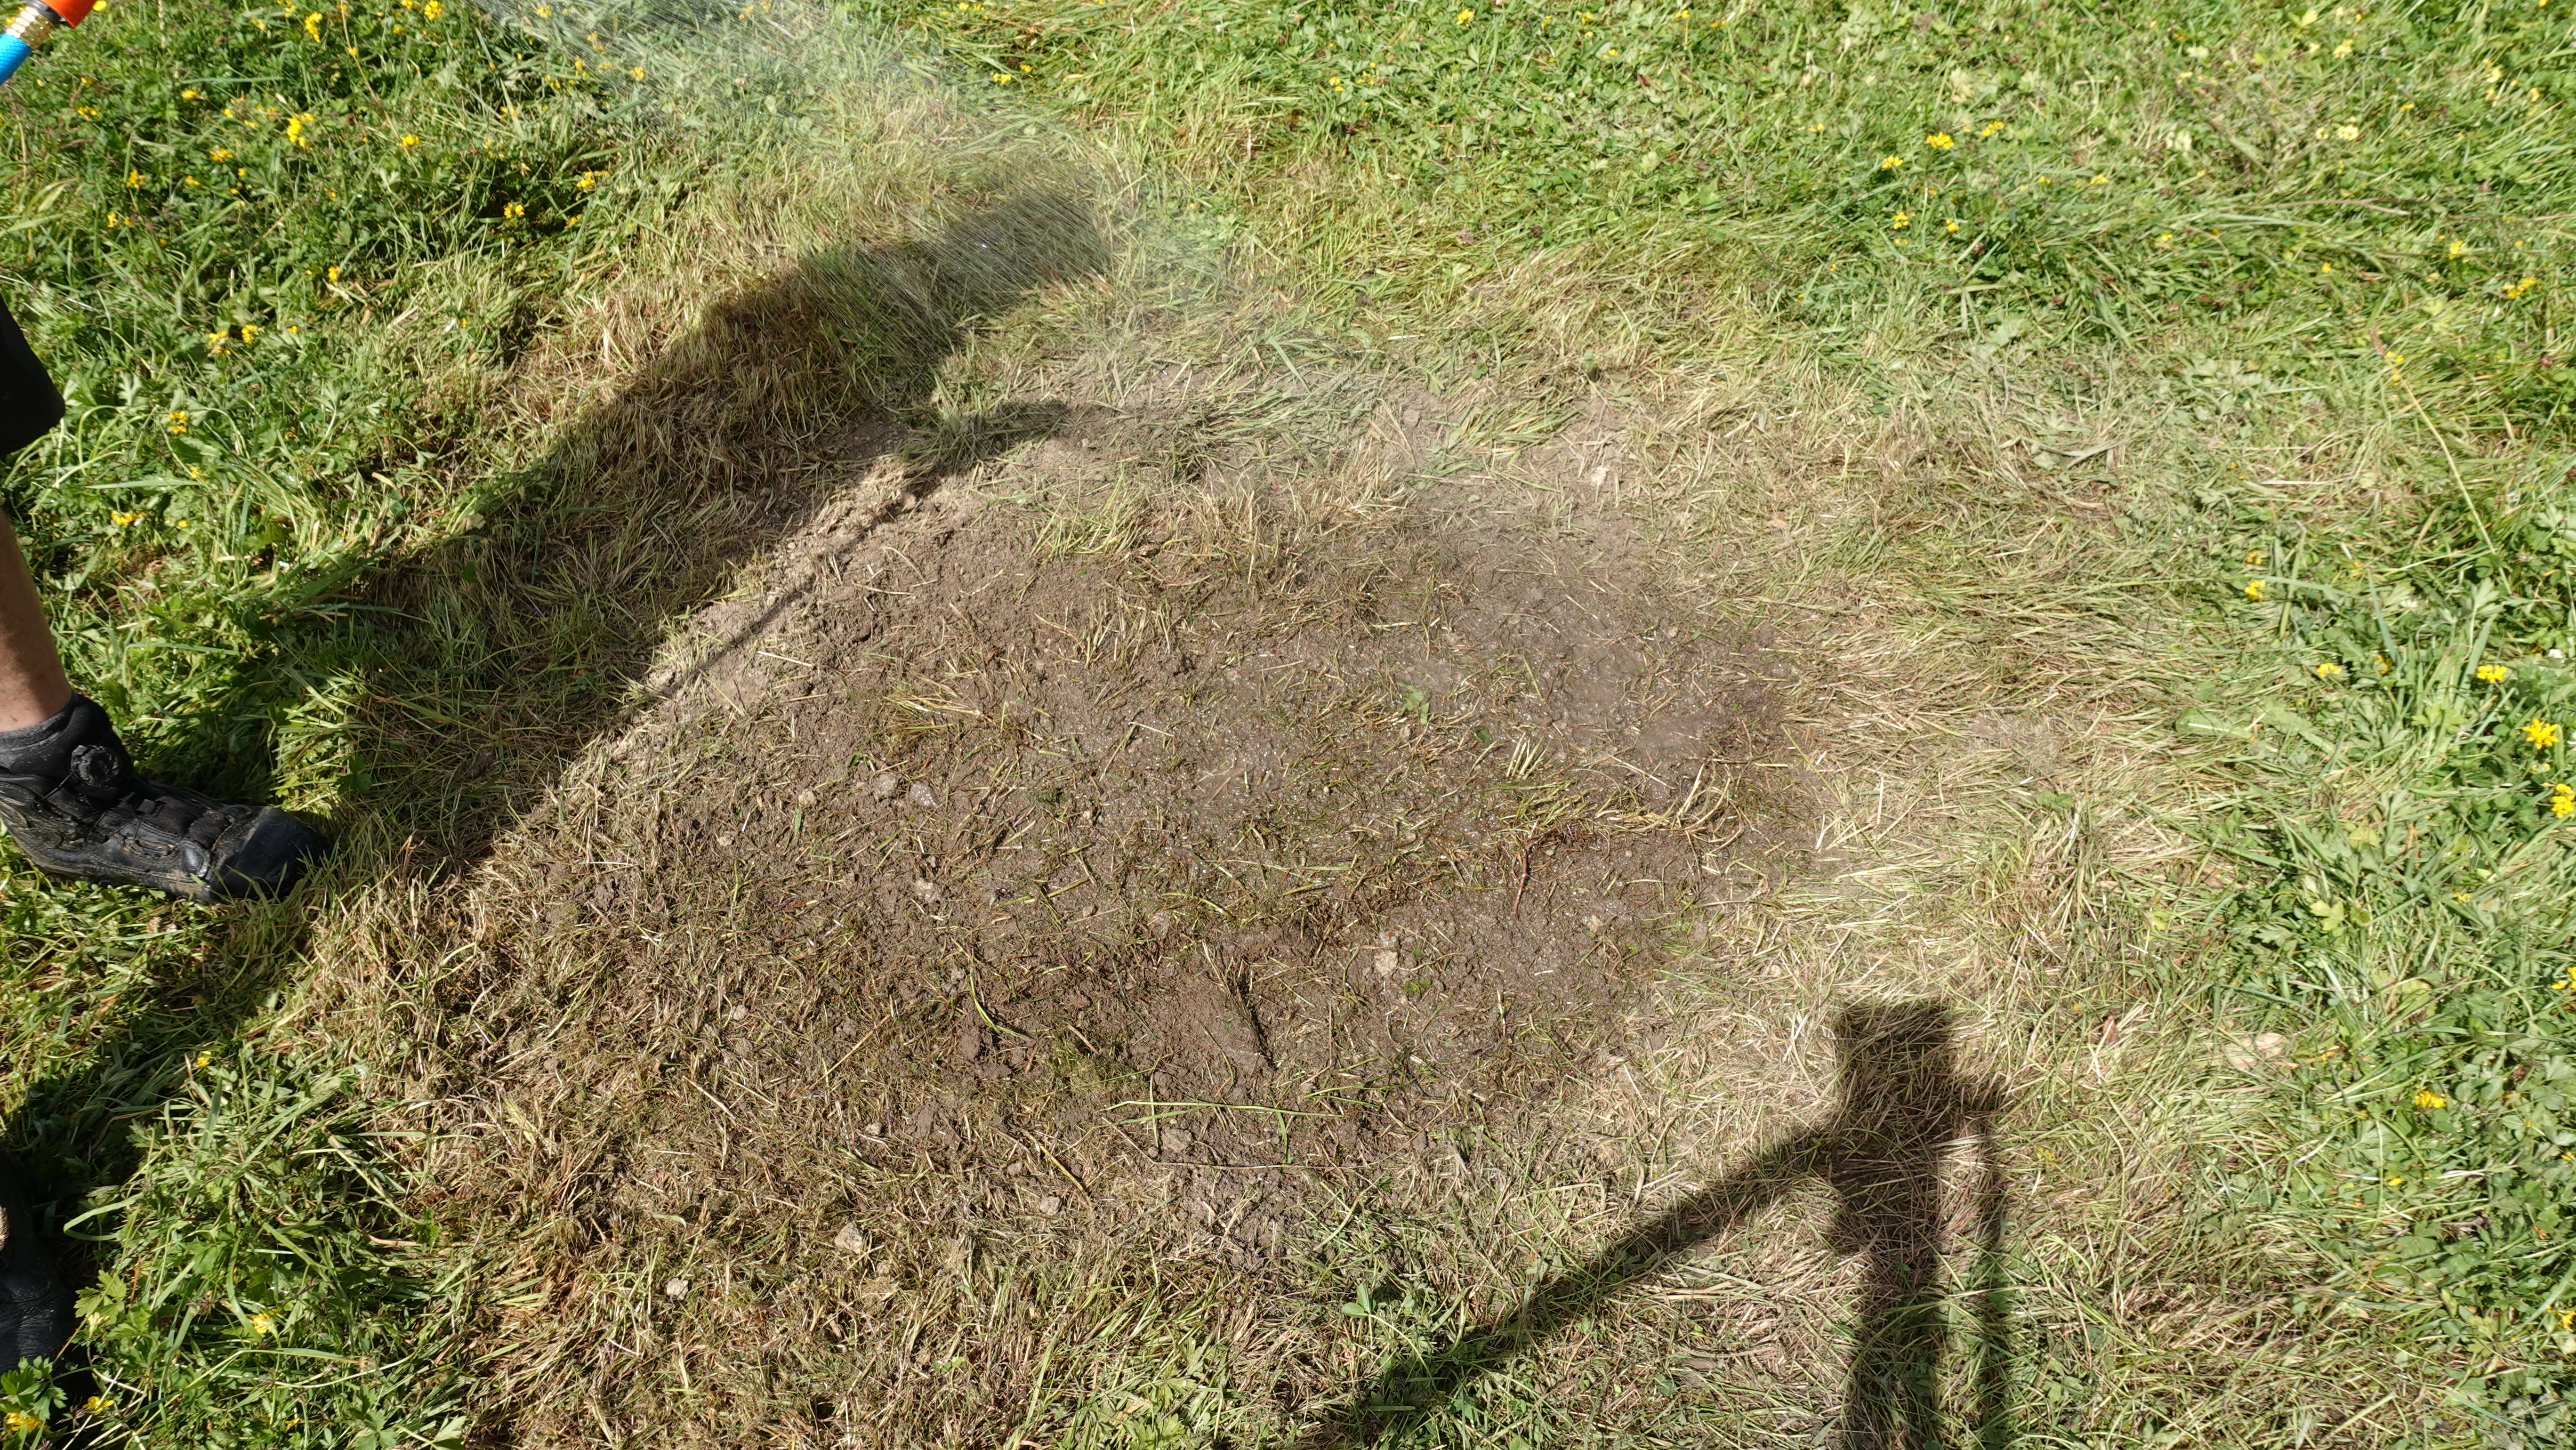
- Water the sod to help the soil settle, and help the turf recover from the disruption.